fog light SUBARU LEGACY 2007 Owners Manual
[x] Cancel search | Manufacturer: SUBARU, Model Year: 2007, Model line: LEGACY, Model: SUBARU LEGACY 2007Pages: 442, PDF Size: 6.32 MB
Page 6 of 442
Black plate (5,1)
北米Model "A2420BE-B" EDITED: 2006/ 7/ 28
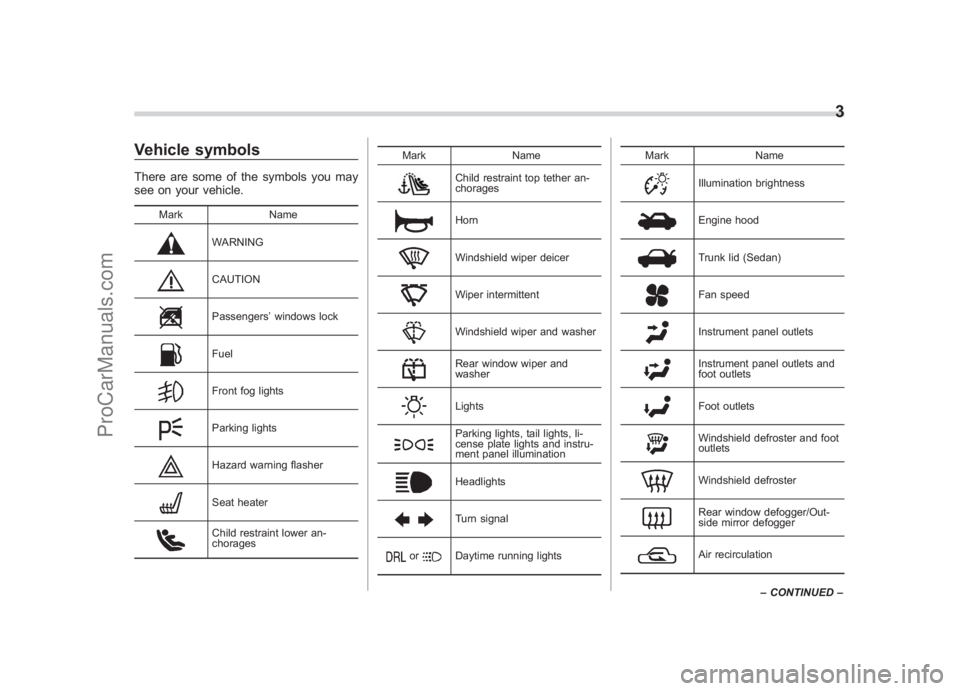
Vehicle symbolsThere are some of the symbols you may
see on your vehicle.
Mark Name
WARNINGCAUTIONPassengers’windows lockFuelFront fog lightsParking lightsHazard warning flasherSeat heaterChild restraint lower an-
chorages Mark Name
Child restraint top tether an-
choragesHornWindshield wiper deicerWiper intermittentWindshield wiper and washerRear window wiper and
washerLightsParking lights, tail lights, li-
cense plate lights and instru-
ment panel illuminationHeadlightsTurn signal
or
Daytime running lightsMark Name
Illumination brightnessEngine hoodTrunk lid (Sedan)Fan speedInstrument panel outletsInstrument panel outlets and
foot outletsFoot outletsWindshield defroster and foot
outletsWindshield defrosterRear window defogger/Out-
side mirror defoggerAir recirculation
3
–
CONTINUED –
0
ProCarManuals.com
Page 13 of 442
Black plate (12,1)
北米Model "A2420BE-B" EDITED: 2006/ 7/ 26
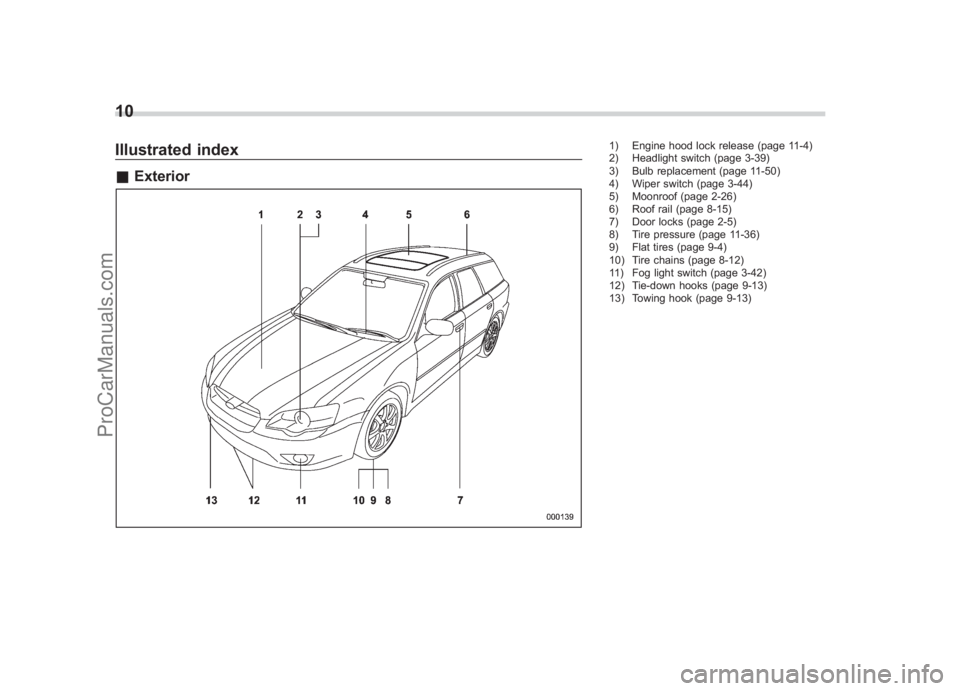
10Illustrated index& Exterior
1) Engine hood lock release (page 11-4)
2) Headlight switch (page 3-39)
3) Bulb replacement (page 11-50)
4) Wiper switch (page 3-44)
5) Moonroof (page 2-26)
6) Roof rail (page 8-15)
7) Door locks (page 2-5)
8) Tire pressure (page 11-36)
9) Flat tires (page 9-4)
10) Tire chains (page 8-12)
11) Fog light switch (page 3-42)
12) Tie-down hooks (page 9-13)
13) Towing hook (page 9-13)
ProCarManuals.com
Page 19 of 442
Black plate (18,1)
北米Model "A2420BE-B" EDITED: 2006/ 7/ 26
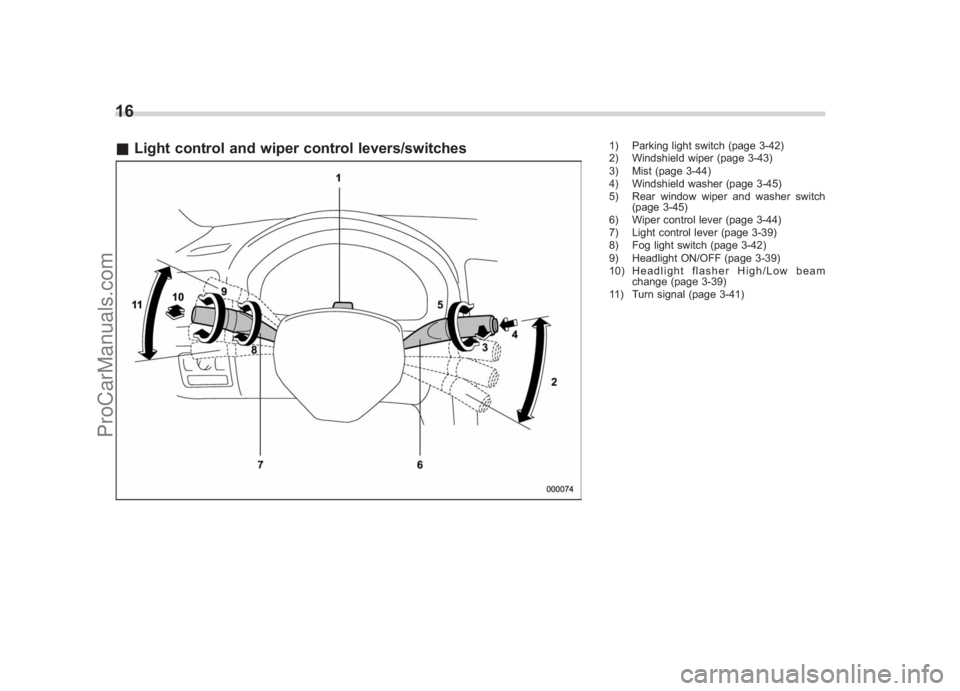
16& Light control and wiper control levers/switches
1) Parking light switch (page 3-42)
2) Windshield wiper (page 3-43)
3) Mist (page 3-44)
4) Windshield washer (page 3-45)
5) Rear window wiper and washer switch
(page 3-45)
6) Wiper control lever (page 3-44)
7) Light control lever (page 3-39)
8) Fog light switch (page 3-42)
9) Headlight ON/OFF (page 3-39)
10) Headlight flasher High/Low beam change (page 3-39)
11) Turn signal (page 3-41)
ProCarManuals.com
Page 26 of 442
Black plate (25,1)
北米Model "A2420BE-B" EDITED: 2006/ 7/ 26
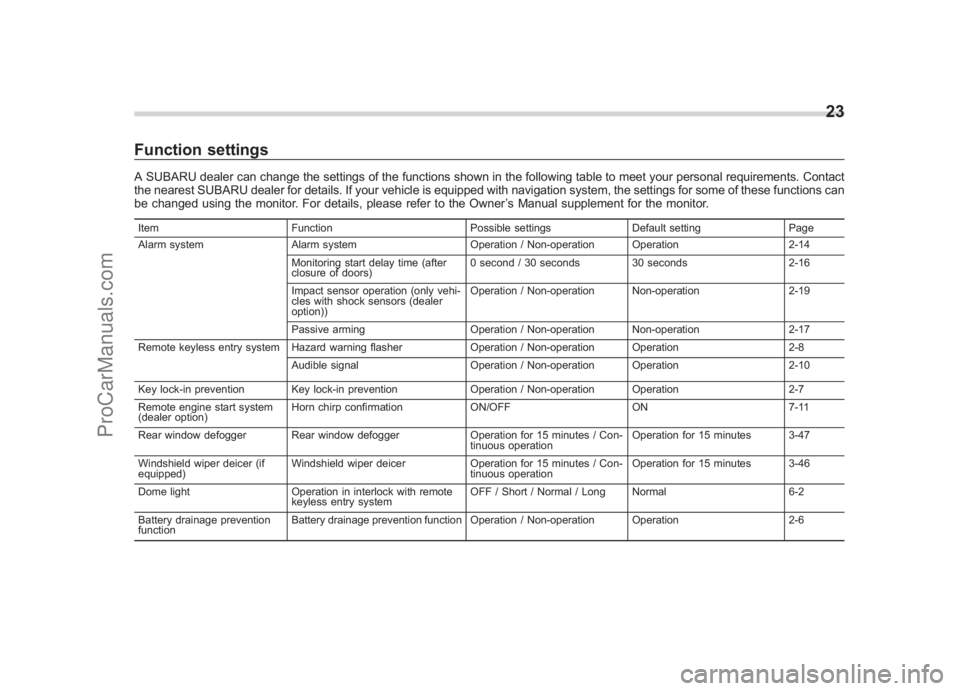
Function settingsA SUBARU dealer can change the settings of the functions shown in the following table to meet your personal requirements. Contact
the nearest SUBARU dealer for details. If your vehicle is equipped with navigation system, the settings for some of these functions can
be changed using the monitor. For details, please refer to the Owner ’s Manual supplement for the monitor.Item Function Possible settingsDefault settingPage
Alarm system Alarm system Operation / Non-operation Operation 2-14
Monitoring start delay time (after
closure of doors) 0 second / 30 seconds 30 seconds
2-16
Impact sensor operation (only vehi-
cles with shock sensors (dealer
option)) Operation / Non-operation Non-operation
2-19
Passive arming Operation / Non-operation Non-operation 2-17
Remote keyless entry system Hazard warning flasher Operation / Non-operation Operation2-8
Audible signal Operation / Non-operation Operation 2-10
Key lock-in prevention Key lock-in prevention Operation / Non-operation Operation2-7
Remote engine start system
(dealer option) Horn chirp confirmation
ON/OFFON7-11
Rear window defogger Rear window defogger Operation for 15 minutes / Con-
tinuous operation Operation for 15 minutes 3-47
Windshield wiper deicer (if
equipped) Windshield wiper deicer
Operation for 15 minutes / Con-
tinuous operation Operation for 15 minutes 3-46
Dome light Operation in interlock with remote
keyless entry system OFF / Short / Normal / Long Normal
6-2
Battery drainage prevention
function Battery drainage prevention function Operation / Non-operation Operation
2-6
23
0
ProCarManuals.com
Page 123 of 442
Black plate (6,1)
北米Model "A2420BE-B" EDITED: 2006/ 7/ 31
Instruments and controls
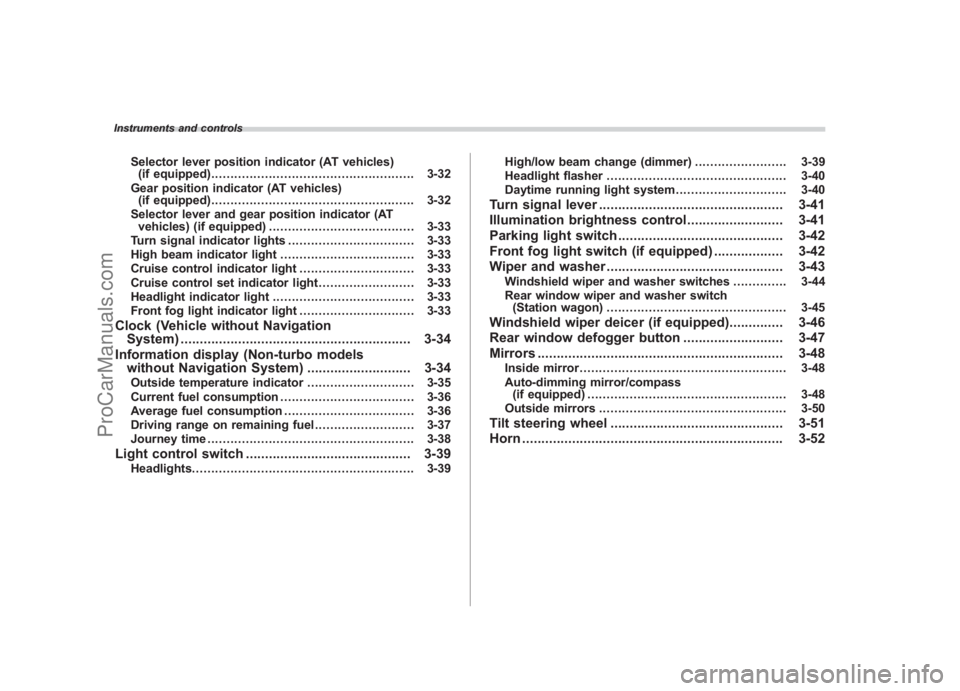
Selector lever position indicator (AT vehicles)
(if equipped) ..................................................... 3-32
Gear position indicator (AT vehicles) (if equipped) ..................................................... 3-32
Selector lever and gear position indicator (AT vehicles) (if equipped) ...................................... 3-33
Turn signal indicator lights ................................. 3-33
High beam indicator light ................................... 3-33
Cruise control indicator light .............................. 3-33
Cruise control set indicator light ......................... 3-33
Headlight indicator light ..................................... 3-33
Front fog light indicator light .............................. 3-33
Clock (Vehicle without Navigation
System) ............................................................ 3-34
Information display (Non-turbo models without Navigation System) ........................... 3-34
Outside temperature indicator ............................ 3-35
Current fuel consumption ................................... 3-36
Average fuel consumption .................................. 3-36
Driving range on remaining fuel .......................... 3-37
Journey time ...................................................... 3-38
Light control switch ........................................... 3-39
Headlights.......................................................... 3-39 High/low beam change (dimmer) ...
..................... 3-39
Headlight flasher ............................................... 3-40
Daytime running light system ............................. 3-40
Turn signal lever................................................ 3-41
Illumination brightness control ......................... 3-41
Parking light switch ........................................... 3-42
Front fog light switch (if equipped) .................. 3-42
Wiper and washer .............................................. 3-43
Windshield wiper and washer switches .............. 3-44
Rear window wiper and washer switch (Station wagon) ............................................... 3-45
Windshield wiper deicer (if equipped) .............. 3-46
Rear window defogger button .......................... 3-47
Mirrors ................................................................ 3-48
Inside mirror ...................................................... 3-48
Auto-dimming mirror/compass (if equipped) .................................................... 3-48
Outside mirrors ................................................. 3-50
Tilt steering wheel ............................................. 3-51
Horn .................................................................... 3-52
ProCarManuals.com
Page 154 of 442
Black plate (155,1)
北米Model "A2420BE-B" EDITED: 2006/ 7/ 26
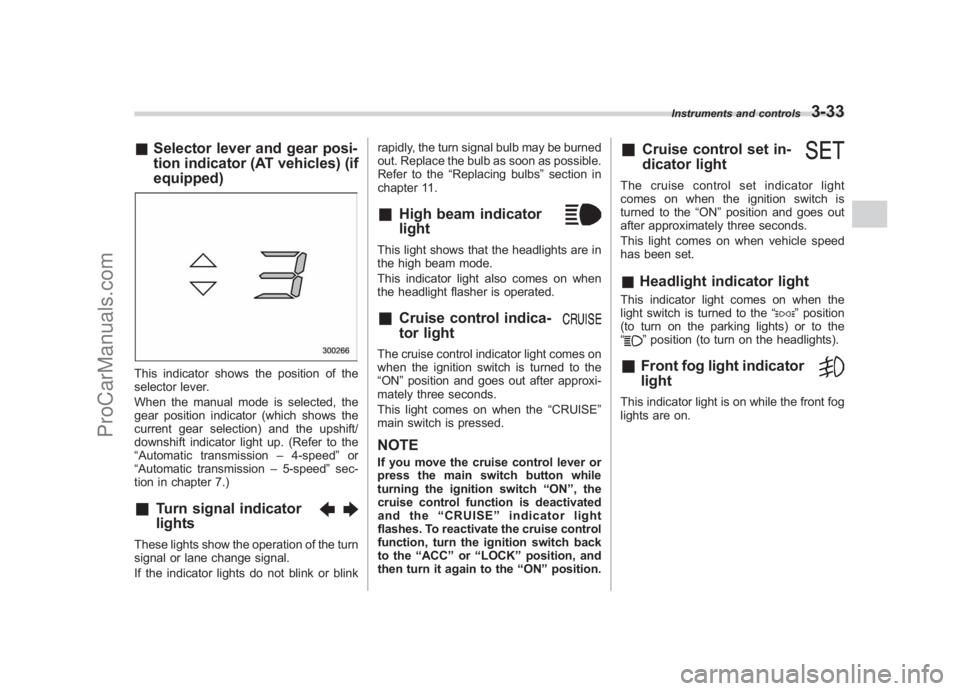
& Selector lever and gear posi-
tion indicator (AT vehicles) (if
equipped)This indicator shows the position of the
selector lever.
When the manual mode is selected, the
gear position indicator (which shows the
current gear selection) and the upshift/
downshift indicator light up. (Refer to the
“Automatic transmission –4-speed ”or
“Automatic transmission –5-speed ”sec-
tion in chapter 7.)&
Turn signal indicator
lights
These lights show the operation of the turn
signal or lane change signal.
If the indicator lights do not blink or blink rapidly, the turn signal bulb may be burned
out. Replace the bulb as soon as possible.
Refer to the
“Replacing bulbs ”section in
chapter 11.
&
High beam indicator
light
This light shows that the headlights are in
the high beam mode.
This indicator light also comes on when
the headlight flasher is operated.&
Cruise control indica-
tor light
The cruise control indicator light comes on
when the ignition switch is turned to the
“ON ”position and goes out after approxi-
mately three seconds.
This light comes on when the “CRUISE”
main switch is pressed.NOTEIf you move the cruise control lever or
press the main switch button while
turning the ignition switch “ON ”, the
cruise control function is deactivated
and the “CRUISE ”indicator light
flashes. To reactivate the cruise control
function, turn the ignition switch back
to the “ACC ”or “LOCK ”position, and
then turn it again to the “ON ”position.
&
Cruise control set in-
dicator light
The cruise control set indicator light
comes on when the ignition switch is
turned to the “ON”position and goes out
after approximately three seconds.
This light comes on when vehicle speed
has been set.& Headlight indicator lightThis indicator light comes on when the
light switch is turned to the “
”position
(to turn on the parking lights) or to the
“
” position (to turn on the headlights).
&
Front fog light indicator
light
This indicator light is on while the front fog
lights are on.
Instruments and controls
3-33
3
ProCarManuals.com
Page 163 of 442
Black plate (164,1)
北米Model "A2420BE-B" EDITED: 2006/ 7/ 26
3-42
Instruments and controls
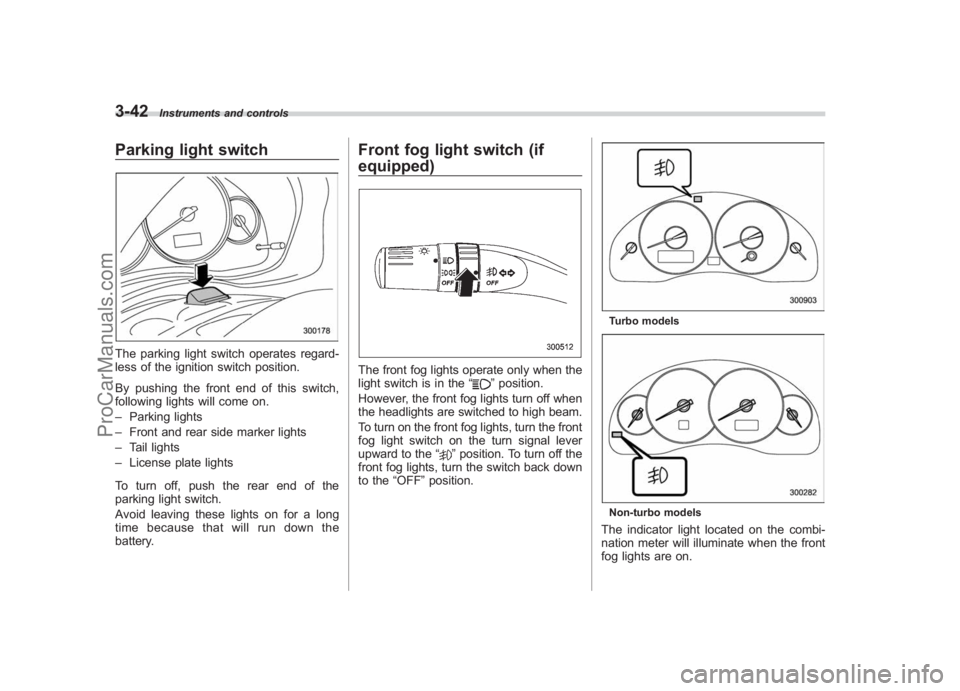
Parking light switchThe parking light switch operates regard-
less of the ignition switch position.
By pushing the front end of this switch,
following lights will come on.
– Parking lights
– Front and rear side marker lights
– Tail lights
– License plate lights
To turn off, push the rear end of the
parking light switch.
Avoid leaving these lights on for a long
time because that will run down the
battery.
Front fog light switch (if
equipped)The front fog lights operate only when the
light switch is in the “
”position.
However, the front fog lights turn off when
the headlights are switched to high beam.
To turn on the front fog lights, turn the front
fog light switch on the turn signal lever
upward to the “
”position. To turn off the
front fog lights, turn the switch back down
to the “OFF”position.
Turbo modelsNon-turbo modelsThe indicator light located on the combi-
nation meter will illuminate when the front
fog lights are on.
ProCarManuals.com
Page 168 of 442
Black plate (169,1)
北米Model "A2420BE-B" EDITED: 2006/ 7/ 26
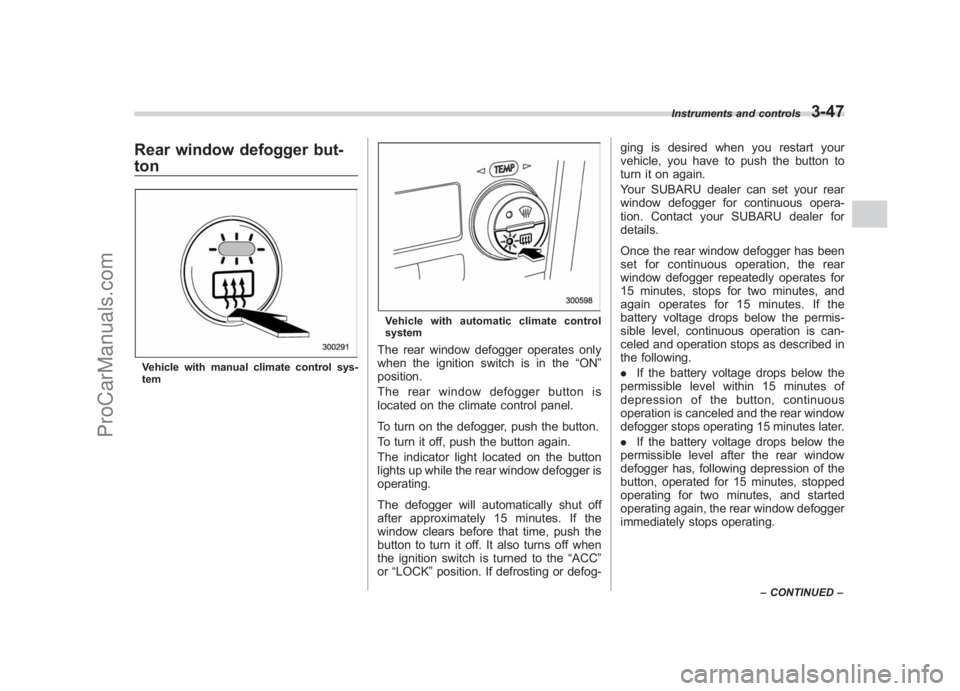
Rear window defogger but-
tonVehicle with manual climate control sys-
tem
Vehicle with automatic climate control
systemThe rear window defogger operates only
when the ignition switch is in the “ON”
position.
The rear window defogger button is
located on the climate control panel.
To turn on the defogger, push the button.
To turn it off, push the button again.
The indicator light located on the button
lights up while the rear window defogger is
operating.
The defogger will automatically shut off
after approximately 15 minutes. If the
window clears before that time, push the
button to turn it off. It also turns off when
the ignition switch is turned to the “ACC ”
or “LOCK” position. If defrosting or defog- ging is desired when you restart your
vehicle, you have to push the button to
turn it on again.
Your SUBARU dealer can set your rear
window defogger for continuous opera-
tion. Contact your SUBARU dealer for
details.
Once the rear window defogger has been
set for continuous operation, the rear
window defogger repeatedly operates for
15 minutes, stops for two minutes, and
again operates for 15 minutes. If the
battery voltage drops below the permis-
sible level, continuous operation is can-
celed and operation stops as described in
the following.
.
If the battery voltage drops below the
permissible level within 15 minutes of
depression of the button, continuous
operation is canceled and the rear window
defogger stops operating 15 minutes later.
. If the battery voltage drops below the
permissible level after the rear window
defogger has, following depression of the
button, operated for 15 minutes, stopped
operating for two minutes, and started
operating again, the rear window defogger
immediately stops operating.
Instruments and controls
3-47
– CONTINUED –
3
ProCarManuals.com
Page 169 of 442
Black plate (170,1)
北米Model "A2420BE-B" EDITED: 2006/ 7/ 26
3-48
Instruments and controls
CAUTION
. Do not use sharp instruments or
window cleaner containing abra-
sives to clean the inner surface
of the rear window. They may
damage the conductors printed
on the window.
. To prevent the battery from being
discharged, do not operate the
defogger continuously for any
longer than necessary.NOTEIf your vehicle is equipped with the
outside mirror defogger, the outside
mirror defogger operates while the rear
window defogger is operating.
MirrorsAlways check that the inside and outside
mirrors are properly adjusted before you
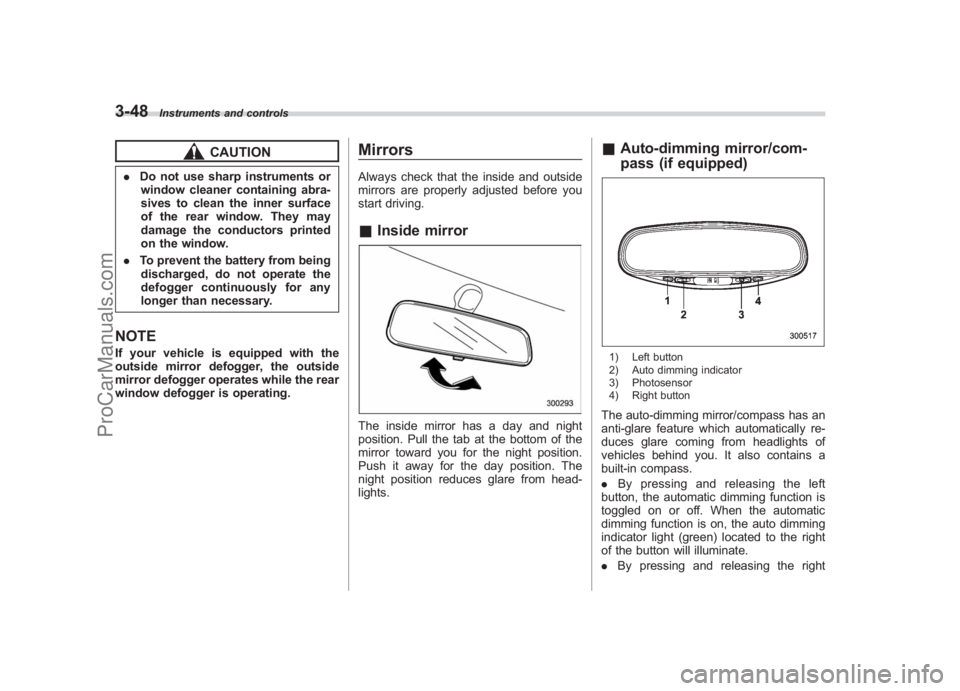
start driving.& Inside mirrorThe inside mirror has a day and night
position. Pull the tab at the bottom of the
mirror toward you for the night position.
Push it away for the day position. The
night position reduces glare from head-
lights.
&Auto-dimming mirror/com-
pass (if equipped)1) Left button
2) Auto dimming indicator
3) Photosensor
4) Right buttonThe auto-dimming mirror/compass has an
anti-glare feature which automatically re-
duces glare coming from headlights of
vehicles behind you. It also contains a
built-in compass.
. By pressing and releasing the left
button, the automatic dimming function is
toggled on or off. When the automatic
dimming function is on, the auto dimming
indicator light (green) located to the right
of the button will illuminate.
. By pressing and releasing the right
ProCarManuals.com
Page 170 of 442
Black plate (171,1)
北米Model "A2420BE-B" EDITED: 2006/ 7/ 26
button, the compass display is toggled on
or off. When the compass is on, an
illuminated compass reading will appear
in the lower part of the mirror.
Even with the mirror in anti-glare mode,
the mirror surface turns bright if the
transmission is shifted into reverse. This
is to ensure good rearward visibility during
reversing.
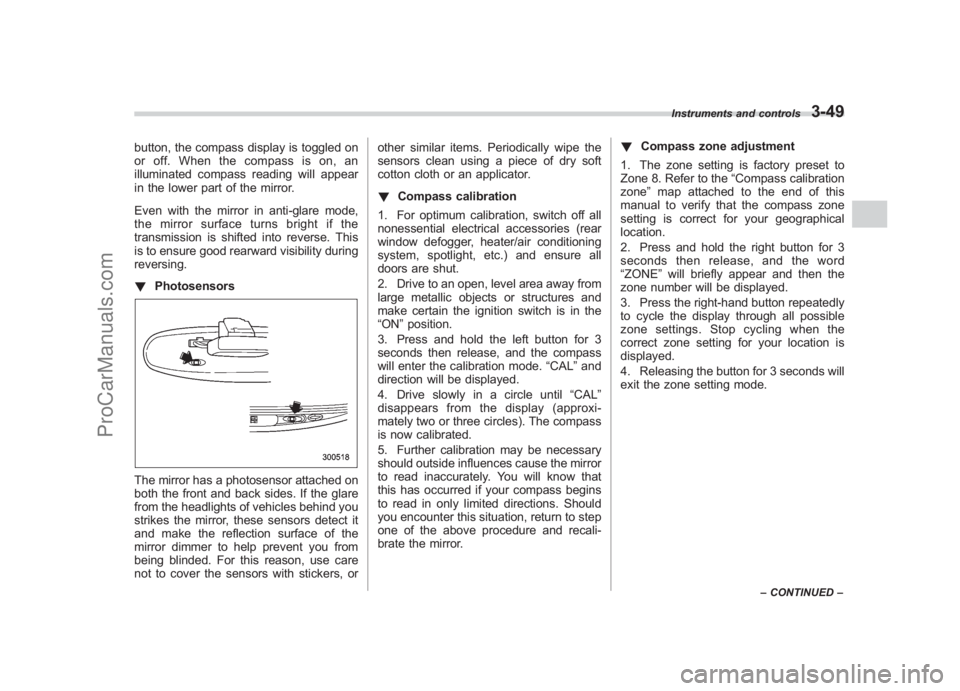
! PhotosensorsThe mirror has a photosensor attached on
both the front and back sides. If the glare
from the headlights of vehicles behind you
strikes the mirror, these sensors detect it
and make the reflection surface of the
mirror dimmer to help prevent you from
being blinded. For this reason, use care
not to cover the sensors with stickers, or other similar items. Periodically wipe the
sensors clean using a piece of dry soft
cotton cloth or an applicator.
!
Compass calibration
1. For optimum calibration, switch off all
nonessential electrical accessories (rear
window defogger, heater/air conditioning
system, spotlight, etc.) and ensure all
doors are shut.
2. Drive to an open, level area away from
large metallic objects or structures and
make certain the ignition switch is in the
“ON ”position.
3. Press and hold the left button for 3
seconds then release, and the compass
will enter the calibration mode. “CAL”and
direction will be displayed.
4. Drive slowly in a circle until “CAL”
disappears from the display (approxi-
mately two or three circles). The compass
is now calibrated.
5. Further calibration may be necessary
should outside influences cause the mirror
to read inaccurately. You will know that
this has occurred if your compass begins
to read in only limited directions. Should
you encounter this situation, return to step
one of the above procedure and recali-
brate the mirror. !
Compass zone adjustment
1. The zone setting is factory preset to
Zone 8. Refer to the “Compass calibration
zone” map attached to the end of this
manual to verify that the compass zone
setting is correct for your geographical
location.
2. Press and hold the right button for 3
seconds then release, and the word
“ZONE ”will briefly appear and then the
zone number will be displayed.
3. Press the right-hand button repeatedly
to cycle the display through all possible
zone settings. Stop cycling when the
correct zone setting for your location is
displayed.
4. Releasing the button for 3 seconds will
exit the zone setting mode.
Instruments and controls
3-49
– CONTINUED –
3
ProCarManuals.com