tire size SUBARU LEGACY 2009 5.G User Guide
[x] Cancel search | Manufacturer: SUBARU, Model Year: 2009, Model line: LEGACY, Model: SUBARU LEGACY 2009 5.GPages: 447, PDF Size: 14.26 MB
Page 308 of 447
8-12Driving tips
.Do not use a combination of
radial, belted bias or bias tires
since it may cause dangerous
handling characteristics and lead
to an accident.
Your vehicle is equipped with “all season
tires ”which are designed to provide an
adequate measure of traction, handling
and braking performance in year-round
driving. In winter, it may be possible to
enhance performance through use of tires
designed specifically for winter drivingconditions.
If you choose to install winter tires on your
vehicle, be sure to use the correct tire size
and type. You must install four winter tires
that are of the same size, construction,
brand and load range and you should
never mix radial, belted bias or bias tires
since this may result in dangerous hand-
ling characteristics. When you choose a
tire, make sure that there is enough
clearance between the tire and vehicle
body.
Remember to drive with care at all times
regardless of the type of tires on yourvehicle.
Your OUTBACK comes with
P225/60R16 or P225/55R17 “all season
tires ”as original equipment. You should be aware that some winter tires
with that same size designation may
actually be too large for the vehicle and
may cause rubbing on sharp turns.
Listed below is the winter tire size that
we recommend.
Recommended winter (snow) tire size Original equipped tires = P225/60 R16:
Winter (snow) tires = P225/60 R16 or
P215/60 R16 Studless
Original equipped tires = P225/55 R17:
Winter (snow) tires = P215/55 R17,
P225/60 R16 or P215/60 R16 Studless
! 2.5GT spec.B
WARNING
. When replacing original tires with
winter (snow) tires, make sure
you use only the same size,
construction and load range as
the original tires listed on the tire
placard. Using other sizes and
construction may affect speed-
ometer/odometer calibration and
clearance between the body and
tires. It also may be dangerous
and lead to loss of vehicle con-trol.
. You must install four winter tires that are of the same size, con-
struction, brand, and load range.
Mixing other sizes or construc-
tions may result in severe me-
chanical damage to the drive
train of your vehicle and may
affect ride, handling, braking and
speedometer/odometer calibra-
tion. It also may be dangerous
and lead to loss of vehicle con-trol.
. Do not use a combination of
radial, belted bias or bias tires
since it may cause dangerous
handling characteristics and lead
to an accident.
Your vehicle is equipped with “summer
tires ”as original equipment, which are
inadequate for driving on slippery roads
such as on snow-covered or icy roads.
Compared with winter and all-season
tires, summer tires give significantly less
grip on snowy and icy road surfaces.
Therefore, use of winter tires is strongly
recommended when driving with such
road conditions.
When you choose to install winter tires on
your vehicle, be sure to use the correct tire
size and type. You must install four winter
tires that are of the same size, construc-
tion, brand and load range and you should
Page 309 of 447
never mix radial, belted bias or bias tires
since this may result in dangerous hand-
ling characteristics. When you choose a
tire, make sure that there is enough
clearance between the tire and vehicle
body.
Remember to drive with care at all times
regardless of the type of tires on yourvehicle. &Tire chains
CAUTION
Tire chains cannot be used on any
tires for your Legacy and Outback
because of lack of clearance be-
tween the tires and vehicle body.
Driving on snowy grades or icy roads may
require the use of tire chains, in which
case put the chains on the front wheels
only. Use only SAE class S type chains
that are of the correct size for your tires so
as not to damage the vehicle body orsuspension.
When driving with tire chains, drive at
speeds below 19 mph (30 km/h). When a
temporary spare tire is on a front wheel,
replace the temporary spare tire with the
rear tire on the same side of the vehicle,
and then fit chains on the front tires. Always use the utmost care when driving
with tire chains
–overconfidence because
you are driving with tire chains could
easily lead to a serious accident.
& Rocking the vehicle
If you must rock the vehicle to free it from
snow, sand, or mud, depress the accel-
erator pedal slightly and move the selector
lever back and forth between “D ”and “R ”
repeatedly. Do not race the engine. For
the best possible traction, avoid spinning
the wheels when trying to free the vehicle.
When the road surface is extremely
slippery, you can obtain better traction by
starting the vehicle with the transmission
in 2nd than 1st (both for MT and AT).
Refer to the “Automatic transmission –4-
speed ”and “Automatic transmission –5-
speed ”section in chapter 7 for information
on holding the transmission in 2nd posi- tion. Loading your vehicle
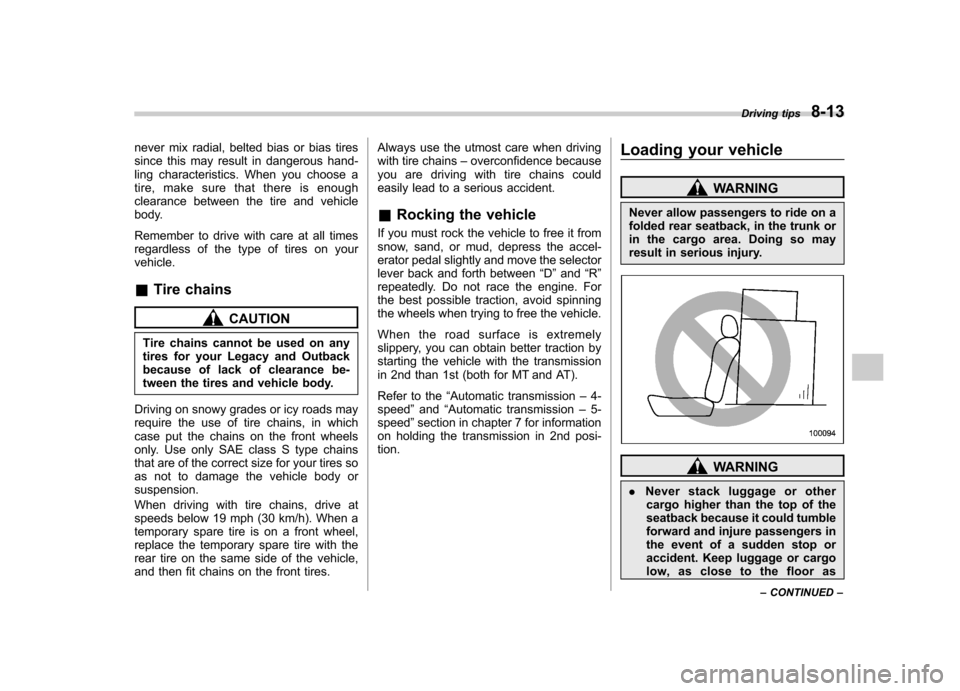
WARNING
Never allow passengers to ride on a
folded rear seatback, in the trunk or
in the cargo area. Doing so may
result in serious injury.
WARNING
. Never stack luggage or other
cargo higher than the top of the
seatback because it could tumble
forward and injure passengers in
the event of a sudden stop or
accident. Keep luggage or cargo
low, as close to the floor as Driving tips
8-13
– CONTINUED –
Page 323 of 447
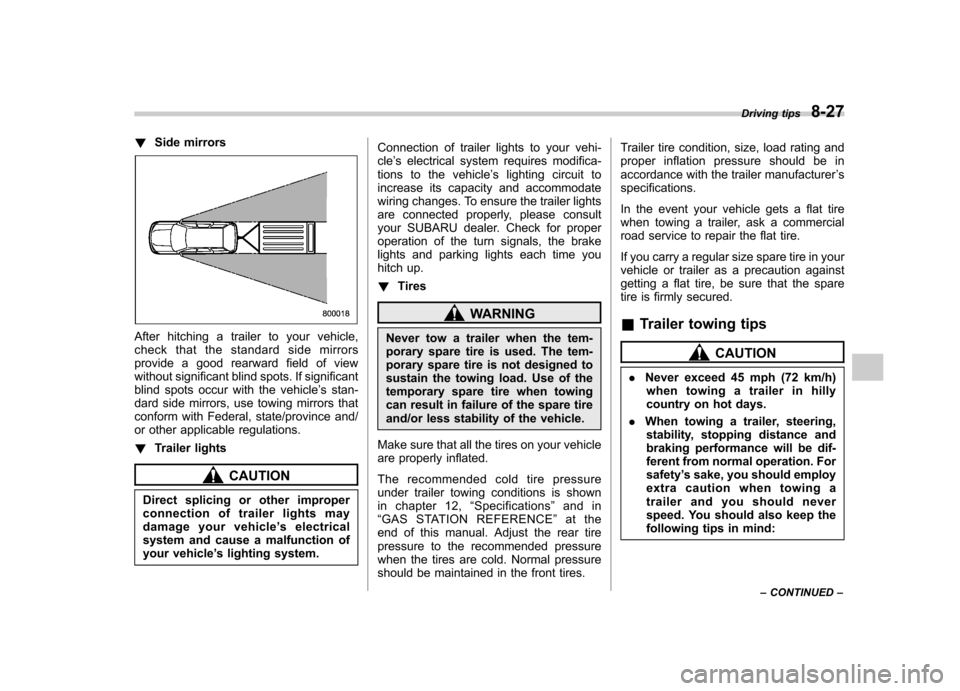
!Side mirrors
After hitching a trailer to your vehicle,
check that the standard side mirrors
provide a good rearward field of view
without significant blind spots. If significant
blind spots occur with the vehicle ’s stan-
dard side mirrors, use towing mirrors that
conform with Federal, state/province and/
or other applicable regulations. ! Trailer lights
CAUTION
Direct splicing or other improper
connection of trailer lights may
damage your vehicle ’s electrical
system and cause a malfunction of
your vehicle ’s lighting system. Connection of trailer lights to your vehi-cle
’s electrical system requires modifica-
tions to the vehicle ’s lighting circuit to
increase its capacity and accommodate
wiring changes. To ensure the trailer lights
are connected properly, please consult
your SUBARU dealer. Check for proper
operation of the turn signals, the brake
lights and parking lights each time you
hitch up. ! Tires
WARNING
Never tow a trailer when the tem-
porary spare tire is used. The tem-
porary spare tire is not designed to
sustain the towing load. Use of the
temporary spare tire when towing
can result in failure of the spare tire
and/or less stability of the vehicle.
Make sure that all the tires on your vehicle
are properly inflated.
The recommended cold tire pressure
under trailer towing conditions is shown
in chapter 12, “Specifications ”and in
“ GAS STATION REFERENCE ”at the
end of this manual. Adjust the rear tire
pressure to the recommended pressure
when the tires are cold. Normal pressure
should be maintained in the front tires. Trailer tire condition, size, load rating and
proper inflation pressure should be in
accordance with the trailer manufacturer
’s
specifications.
In the event your vehicle gets a flat tire
when towing a trailer, ask a commercial
road service to repair the flat tire.
If you carry a regular size spare tire in your
vehicle or trailer as a precaution against
getting a flat tire, be sure that the spare
tire is firmly secured.
& Trailer towing tips
CAUTION
. Never exceed 45 mph (72 km/h)
when towing a trailer in hilly
country on hot days.
. When towing a trailer, steering,
stability, stopping distance and
braking performance will be dif-
ferent from normal operation. Forsafety ’s sake, you should employ
extra caution when towing a
trailer and you should never
speed. You should also keep the
following tips in mind: Driving tips
8-27
– CONTINUED –
Page 328 of 447
CAUTION
Never use any temporary spare tire
other than the original. Using other
sizes may result in severe mechan-
ical damage to the drive train of yourvehicle.
The temporary spare tire is smaller and
lighter than a conventional tire and is
designed for emergency use only. Re-
move the temporary spare tire and re-
install the conventional tire as soon as
possible because the spare tire is de-
signed only for temporary use.
Check the inflation pressure of the tem-
porary spare tire periodically to keep the
tire ready for use. The correct pressure is
60 psi (420 kPa, 4.2 kgf/cm
2) .
When using the temporary spare tire, note
the following precautions. . Do not exceed 50 mph (80 km/h).
. Do not put a tire chain on the temporary
spare tire. Because of the smaller tire size,
a tire chain will not fit properly. . Do not use two or more temporary
spare tires at the same time.. Do not drive over obstacles. This tire
has a smaller diameter, so road clearance
is reduced.
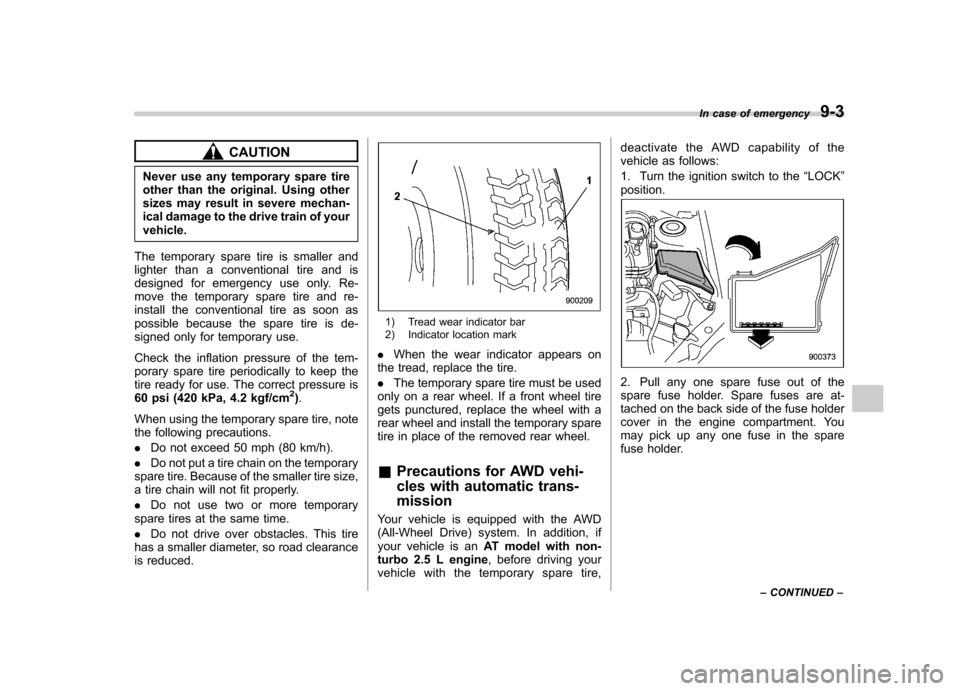
1) Tread wear indicator bar
2) Indicator location mark
. When the wear indicator appears on
the tread, replace the tire. . The temporary spare tire must be used
only on a rear wheel. If a front wheel tire
gets punctured, replace the wheel with a
rear wheel and install the temporary spare
tire in place of the removed rear wheel. & Precautions for AWD vehi-
cles with automatic trans- mission
Your vehicle is equipped with the AWD
(All-Wheel Drive) system. In addition, if
your vehicle is an AT model with non-
turbo 2.5 L engine , before driving your
vehicle with the temporary spare tire, deactivate the AWD capability of the
vehicle as follows:
1. Turn the ignition switch to the
“LOCK ”
position.
2. Pull any one spare fuse out of the
spare fuse holder. Spare fuses are at-
tached on the back side of the fuse holder
cover in the engine compartment. You
may pick up any one fuse in the spare
fuse holder. In case of emergency
9-3
– CONTINUED –
Page 384 of 447
11-34Maintenance and service
or icy roads, we strongly recommend the
use of winter (snow) tires.
When installing winter tires, be sure to
replace all four tires. !Winter (snow) tires
Winter tires are best suited for driving on
snow-covered and icy roads. However
winter tires do not perform as well as
summer tires and all season tires on roads
other than snow-covered and icy roads. & Tire pressure monitoring
system (TPMS) (if equipped)
The tire pressure monitoring system pro-
vides the driver with a warning message
by sending a signal from a sensor that is
installed in each wheel when tire pressure
is severely low. The tire pressure monitor-
ing system will activate only when the
vehicle is driven. Also, this system may
not react immediately to a sudden drop in
tire pressure (for example, a blow-out
caused by running over a sharp object).
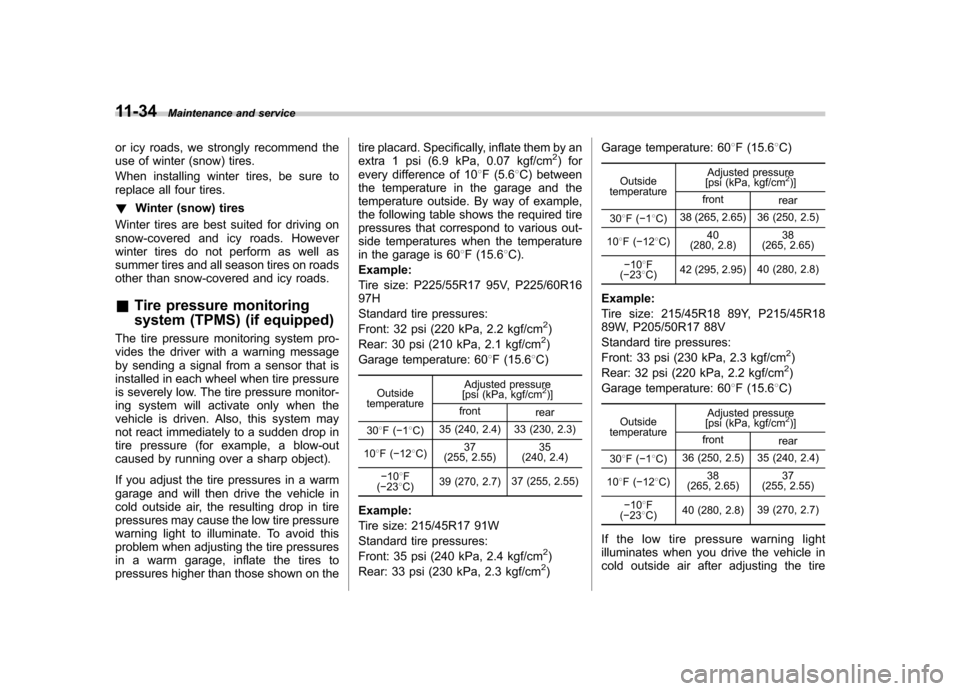
If you adjust the tire pressures in a warm
garage and will then drive the vehicle in
cold outside air, the resulting drop in tire
pressures may cause the low tire pressure
warning light to illuminate. To avoid this
problem when adjusting the tire pressures
in a warm garage, inflate the tires to
pressures higher than those shown on the tire placard. Specifically, inflate them by an
extra 1 psi (6.9 kPa, 0.07 kgf/cm2) for
every difference of 10 8F (5.6 8C) between
the temperature in the garage and the
temperature outside. By way of example,
the following table shows the required tire
pressures that correspond to various out-
side temperatures when the temperature
in the garage is 60 8F (15.6 8C).
Example:
Tire size: P225/55R17 95V, P225/60R16 97H
Standard tire pressures:
Front: 32 psi (220 kPa, 2.2 kgf/cm
2)
Rear: 30 psi (210 kPa, 2.1 kgf/cm2)
Garage temperature: 60 8F (15.6 8C)
Outside
temperature Adjusted pressure
[psi (kPa, kgf/cm
2)]
front rear
30 8F( �18C) 35 (240, 2.4) 33 (230, 2.3)
10 8F( �12 8C) 37
(255, 2.55) 35
(240, 2.4)
� 10 8F
( � 23 8C) 39 (270, 2.7)
37 (255, 2.55)
Example:
Tire size: 215/45R17 91W
Standard tire pressures:
Front: 35 psi (240 kPa, 2.4 kgf/cm
2)
Rear: 33 psi (230 kPa, 2.3 kgf/cm2) Garage temperature: 60
8F (15.6 8C)
Outside
temperature Adjusted pressure
[psi (kPa, kgf/cm
2)]
front rear
30 8F( �18C) 38 (265, 2.65) 36 (250, 2.5)
10 8F( �12 8C) 40
(280, 2.8) 38
(265, 2.65)
� 10 8F
( � 23 8C) 42 (295, 2.95)
40 (280, 2.8)
Example:
Tire size: 215/45R18 89Y, P215/45R18
89W, P205/50R17 88V
Standard tire pressures:
Front: 33 psi (230 kPa, 2.3 kgf/cm
2)
Rear: 32 psi (220 kPa, 2.2 kgf/cm2)
Garage temperature: 60 8F (15.6 8C)
Outside
temperature Adjusted pressure
[psi (kPa, kgf/cm
2)]
front rear
30 8F( �18C) 36 (250, 2.5) 35 (240, 2.4)
10 8F( �12 8C) 38
(265, 2.65) 37
(255, 2.55)
� 10 8F
( � 23 8C) 40 (280, 2.8)
39 (270, 2.7)
If the low tire pressure warning light
illuminates when you drive the vehicle in
cold outside air after adjusting the tire
Page 389 of 447
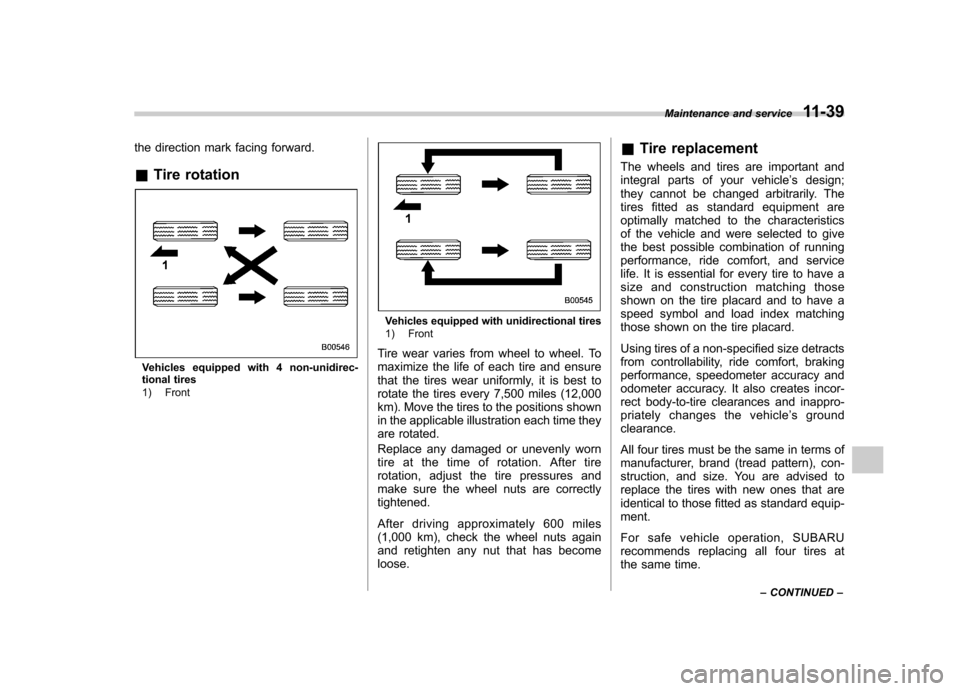
the direction mark facing forward. &Tire rotation
Vehicles equipped with 4 non-unidirec-
tional tires
1) Front
Vehicles equipped with unidirectional tires
1) Front
Tire wear varies from wheel to wheel. To
maximize the life of each tire and ensure
that the tires wear uniformly, it is best to
rotate the tires every 7,500 miles (12,000
km). Move the tires to the positions shown
in the applicable illustration each time they
are rotated.
Replace any damaged or unevenly worn
tire at the time of rotation. After tire
rotation, adjust the tire pressures and
make sure the wheel nuts are correctlytightened.
After driving approximately 600 miles
(1,000 km), check the wheel nuts again
and retighten any nut that has become loose. &
Tire replacement
The wheels and tires are important and
integral parts of your vehicle ’s design;
they cannot be changed arbitrarily. The
tires fitted as standard equipment are
optimally matched to the characteristics
of the vehicle and were selected to give
the best possible combination of running
performance, ride comfort, and service
life. It is essential for every tire to have a
size and construction matching those
shown on the tire placard and to have a
speed symbol and load index matching
those shown on the tire placard.
Using tires of a non-specified size detracts
from controllability, ride comfort, braking
performance, speedometer accuracy and
odometer accuracy. It also creates incor-
rect body-to-tire clearances and inappro-
priately changes the vehicle ’s ground
clearance.
All four tires must be the same in terms of
manufacturer, brand (tread pattern), con-
struction, and size. You are advised to
replace the tires with new ones that are
identical to those fitted as standard equip-ment.
For safe vehicle operation, SUBARU
recommends replacing all four tires at
the same time. Maintenance and service
11-39
– CONTINUED –
Page 390 of 447
11-40Maintenance and service
WARNING
. All four tires must be the same in
terms of manufacturer, brand
(tread pattern), construction, de-
gree of wear, speed symbol, load
index and size. Mixing tires of
different types, sizes or degrees
of wear can result in damage to
the vehicle ’s power train. Use of
different types or sizes of tires
can also dangerously reduce
controllability and braking per-
formance and can lead to anaccident.
. Use only radial tires. Do not use
radial tires together with belted
bias tires and/or bias-ply tires.
Doing so can dangerously re-
duce controllability, resulting in
an accident. &
Wheel replacement
When replacing wheels due, for example,
to damage, make sure the replacement
wheels match the specifications of the
wheels that are fitted as standard equip-
ment. Replacement wheels are available
from SUBARU dealers.
WARNING
Use only those wheels that are
specified for your vehicle. Wheels
not meeting specifications could
interfere with brake caliper opera-
tion and may cause the tires to rub
against the wheel well housing dur-
ing turns. The resulting loss of
vehicle control could lead to anaccident. Aluminum wheels
Aluminum wheels can be scratched and
damaged easily. Handle them carefully to
maintain their appearance, performance,
and safety. .
When any of the wheels is removed
and replaced for tire rotation or to change
a flat, always check the tightness of the
wheel nuts after driving approximately 600
miles (1,000 km). If any nut is loose,
tighten it to the specified torque. . Never apply oil to the threaded parts,
wheel nuts, or tapered surface of the wheel. . Never let the wheel rub against sharp
protrusions or curbs.. Be sure to fit tire chains on uniformly
and completely around the tire, otherwise
the chains may scratch the wheel. . When wheel nuts, balance weights, or
the center cap is replaced, be sure to
replace them with genuine SUBARU parts
designed for aluminum wheels.
Page 414 of 447

&Tires
Tire size P205/55R16
89H P225/60R16
97H P205/50R17
88V 215/45R17
91W P225/55R17
95V 215/45R18
89Y P215/45R18
89W
Wheel size 16 66.5JJ 17 67JJ 18 67JJ
Pressure Front 32 psi
(220 kPa,
2.2 kgf/cm
2) 32 psi
(220 kPa,
2.2 kgf/cm2) 33 psi
(230 kPa,
2.3 kgf/cm2) 35 psi
(240 kPa,
2.4 kgf/cm2) 32 psi
(220 kPa,
2.2 kgf/cm2) 33 psi
(230 kPa,
2.3 kgf/cm2)
Rear 30 psi
(210 kPa,
2.1 kgf/cm
2) 30 psi
(210 kPa,
2.1 kgf/cm2) 32 psi
(220 kPa,
2.2 kgf/cm2) 33 psi
(230 kPa,
2.3 kgf/cm2) 30 psi
(210 kPa,
2.1 kgf/cm2) 32 psi
(220 kPa,
2.2 kgf/cm2)
Rear at
trailer tow- ing –32 psi
(220 kPa,
2.2 kgf/cm
2) – 32 psi
(220 kPa,
2.2 kgf/cm2) –
Temporary
spare tire Size T135/80R16 T155/70D17 T135/80R16 T135/70D17*1
T135/80R16*2T155/70D17 T155/70D17
Pressure 60 psi (420 kPa, 4.2 kgf/cm
2)
*1: 2.5 GT Limited model
*2: 3.0 R model & Wheel alignment
Item Legacy OUTBACK
Sedan Station wagon Station wagon
Toe Front 0 in (0 mm)
Rear 0 in (0 mm)
Camber Front �0815 ’ 0840 ’
Rear �0840 ’ �0830 ’ �
0810 ’Specifications
12-5
Page 422 of 447
13-2Consumer information and Reporting safety defects
For U.S.A.
The following information has been
compiled according to Code of
Federal Regulations “Title 49, Part
575 ”. Tire information &
Tire labeling
Many markings (e.g. Tire size, Tire
Identification Number or TIN) are
placed on the sidewall of a tire by
tire manufacturers. These marking
can provide you with useful infor-
mation on the tire. ! Tire size
Your vehicle comes equipped with
P-Metric tire size. It is important to
understand the sizing system in
selecting the proper tire for your
vehicles. Here is a brief review of
the tire sizing system with a break-
down of its individual elements. ! P Metric
With the P-Metric system, Section
Width is measured in millimeters.
To convert millimeters into inches,
divide by 25.4. The Aspect Ratio
(Section Height divided by Section
Width) helps provide more dimen-
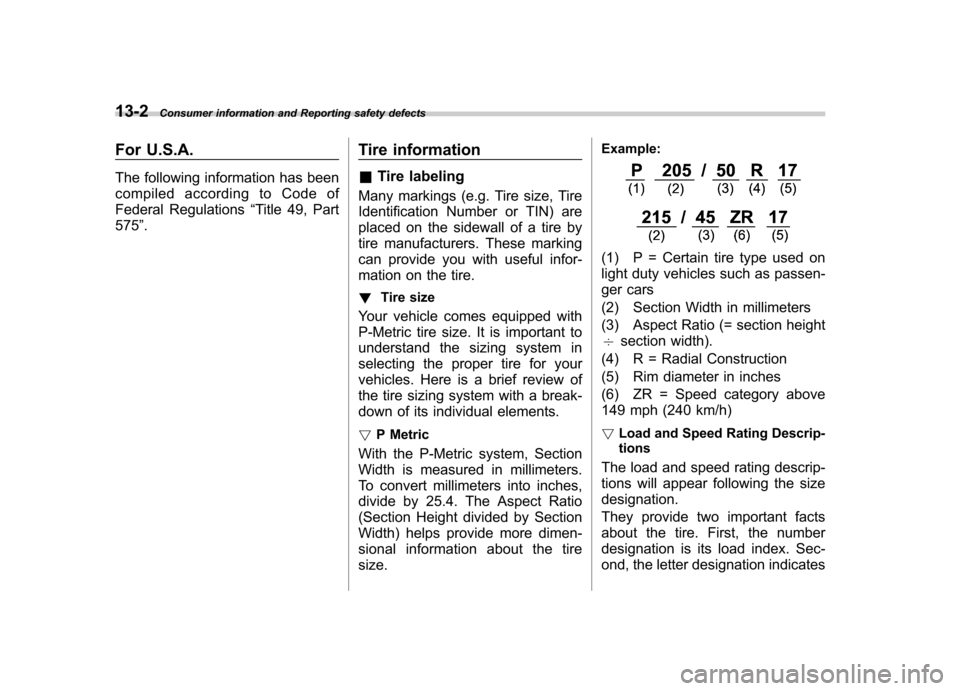
sional information about the tiresize. Example:
(1) P = Certain tire type used on
light duty vehicles such as passen-
ger cars
(2) Section Width in millimeters
(3) Aspect Ratio (= section height 7
section width).
(4) R = Radial Construction
(5) Rim diameter in inches
(6) ZR = Speed category above
149 mph (240 km/h) ! Load and Speed Rating Descrip- tions
The load and speed rating descrip-
tions will appear following the sizedesignation.
They provide two important facts
about the tire. First, the number
designation is its load index. Sec-
ond, the letter designation indicates
Page 423 of 447
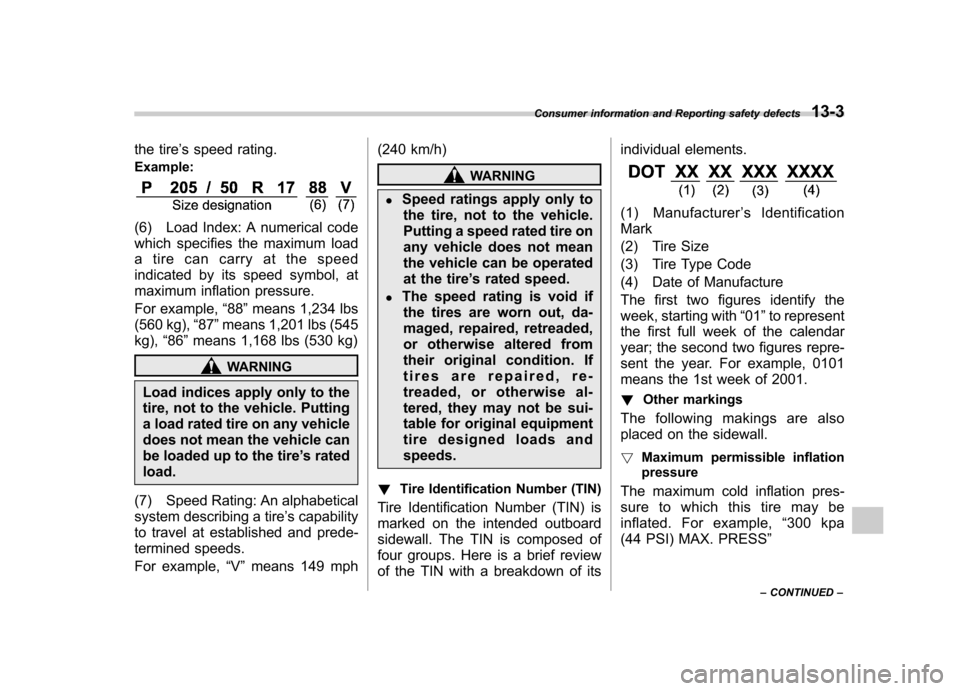
the tire’s speed rating.
Example:
(6) Load Index: A numerical code
which specifies the maximum load
a tire can carry at the speed
indicated by its speed symbol, at
maximum inflation pressure.
For example, “88 ”means 1,234 lbs
(560 kg), “87 ”means 1,201 lbs (545
kg), “86 ”means 1,168 lbs (530 kg)
WARNING
Load indices apply only to the
tire, not to the vehicle. Putting
a load rated tire on any vehicle
does not mean the vehicle can
be loaded up to the tire ’s rated
load.
(7) Speed Rating: An alphabetical
system describing a tire ’s capability
to travel at established and prede-
termined speeds.
For example, “V ” means 149 mph (240 km/h)
WARNING
. Speed ratings apply only to
the tire, not to the vehicle.
Putting a speed rated tire on
any vehicle does not mean
the vehicle can be operated
at the tire ’s rated speed.
. The speed rating is void if
the tires are worn out, da-
maged, repaired, retreaded,
or otherwise altered from
their original condition. If
tires are repaired, re-
treaded, or otherwise al-
tered, they may not be sui-
table for original equipment
tire designed loads andspeeds.
! Tire Identification Number (TIN)
Tire Identification Number (TIN) is
marked on the intended outboard
sidewall. The TIN is composed of
four groups. Here is a brief review
of the TIN with a breakdown of its individual elements.
(1) Manufacturer
’s Identification
Mark
(2) Tire Size
(3) Tire Type Code
(4) Date of Manufacture
The first two figures identify the
week, starting with “01 ”to represent
the first full week of the calendar
year; the second two figures repre-
sent the year. For example, 0101
means the 1st week of 2001.
! Other markings
The following makings are also
placed on the sidewall. ! Maximum permissible inflation
pressure
The maximum cold inflation pres-
sure to which this tire may be
inflated. For example, “300 kpa
(44 PSI) MAX. PRESS ”
Consumer information and Reporting safety defects
13-3
– CONTINUED –