buttons SUBARU LEGACY 2013 5.G Navigation Manual
[x] Cancel search | Manufacturer: SUBARU, Model Year: 2013, Model line: LEGACY, Model: SUBARU LEGACY 2013 5.GPages: 112, PDF Size: 9.2 MB
Page 2 of 112
80 Navigation
Before Using the Navigation System
WA R N I N G
Read this manual first
Read this manual carefully before using the navigation
system. We are not liable for accidents or other problems
resulting from failure to follow the instructions in this
manual.
Follow all road signs and traffic rules
When driving using guidance from the navigation system,
be sure to follow the actual road signs and traffic
regulations. If road signs and traffic regulations are
changed, the data on the SD card may be out of date. Also,
the data on the map SD card does not take into account
factors such as weather, time zones, and occurrences such as
differences in congestion situations and temporary road
closures due to construction work. Always give precedence
to road signs and traffic rules over instructions from the
navigation system.
Not following the road signs and traffic rules could lead to
injury or traffic violations.
Drive safely
• Before following instructions from the navigation system
(changing lanes and so on), ch eck that you can carry out the
maneuver safely given the current traffic conditions. Always
put safety first before following any instructions.
• Do not watch the navigation screen while driving.
Ignoring surrounding traffic could lead to an accident. If you
need to look at the screen whil e driving, make sure you only
glance at the screen.
• You should stop the vehicle in a safe place before operating
the navigation system. For safety's sake, some of the
navigation system's buttons and functions cannot be used
unless the vehicle is stationary.
• When you need to look at the navigation screen, do so for
the shortest time possible. Looking away from the road for
too long could lead to an accident.
• Make sure this system is installed in a position legally
allowed in the country where you intend to use it. Some
countries and regions do not allow video screens to be
installed within the driver's line of sight.
Page 3 of 112
Navigation 81
Before Using the Navigation System
NOTEIn the interest of safety, the use of some functions may be unavailable while
driving. Buttons on the touch screen that cannot be used have their colors toned
down.
•If you stare at the display too much or operate the buttons of
the system while driving, th e navigation system could
distract your attention from the current traffic conditions. Be
sure to enter as much information as possible into the
system before departing. Also, be sure to stop your vehicle
in a safe place if you need to enter information.
• Buttons on the touch screen that cannot be used have their
colors toned down.
Operating the navigation syst em while driving could cause
your attention to be distracted from the current traffic
conditions. This could result in a severe or fatal accident. Be
sure to follow all the operation descriptions and safety
instructions given in this manual.
Volume
• Keep the system's volume level low enough for you to be
able to hear outside sounds while driving. Otherwise, you
may not be able to react appropriately to traffic conditions,
resulting in an accident.
CAUTION
Foreign objects
Do not place foreign objects, such as fingers, into the disc
insertion slot.
If foreign objects enter the system's main unit, it could lead
to electric shock or fire. If the system emits smoke or an
unusual smell, stop using it immediately and contact the
nearest SUBARU dealer.
Never disassemble or modify the system
Never disassemble or modify any parts of the system. Doing
so may lead to a fire, an electric shock, or some other type of
accident.
Do not continue using the navigation system if it malfunctions
If the system shows any sign of malfunctioning (for example,
the monitor displays no pictur e), stop using it immediately
and contact the nearest SUBARU dealer.
Continuing to use the system could lead to a fire, an electric
shock, or some other type of accident.
If the navigation system gets contaminated, or emits smoke or
an odd smell, stop using it
If a foreign object gets inside the system, liquid is spilled
onto the system, or the system emits smoke or an unusual
smell, stop using it immediately and contact the nearest
SUBARU dealer. Continuing to use the system could lead to a
fire, an electric shock, or some other type of accident.
Page 5 of 112
Navigation 83
Read First
This software is designed for optimum performance when
used for car navigation. It does not need a stylus for
operation. You can easily use buttons and maps on the screen
by touching them with the tip of your finger.
When you start the navigation software for the first time, the
initial settings screen is automatically displayed. Follow the
steps below to use the initial settings screen.
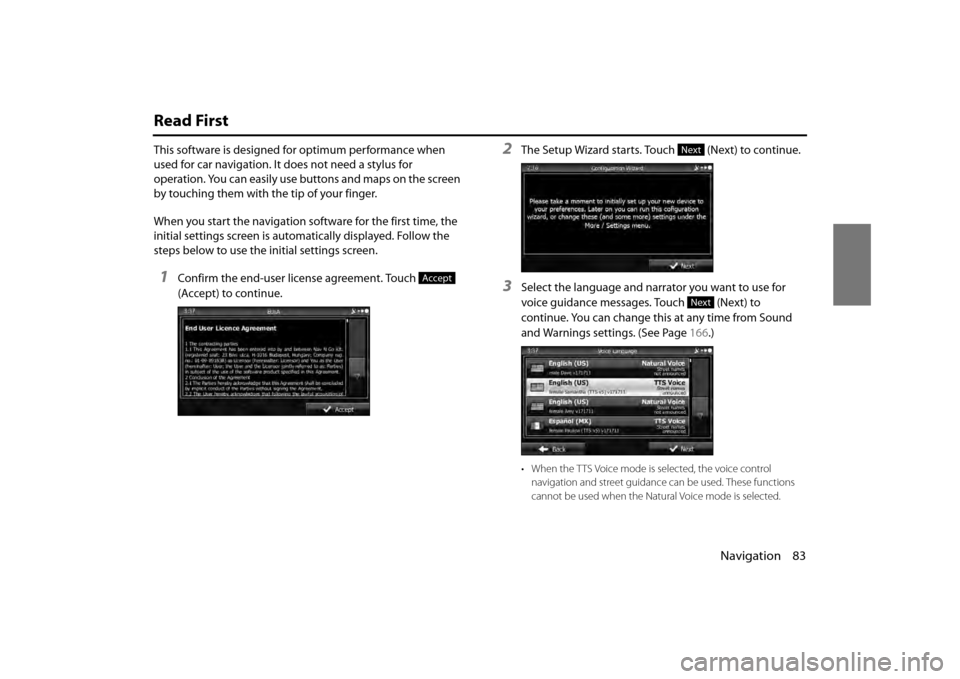
1Confirm the end-user license agreement. Touch
(Accept) to continue.
2The Setup Wizard starts. Touch (Next) to continue.
3Select the language and narrator you want to use for
voice guidance messages. Touch (Next) to
continue. You can change this at any time from Sound
and Warnings settings. (See Page 166.)
• When the TTS Voice mode is selected, the voice control
navigation and street guidance can be used. These functions
cannot be used when the Natural Voice mode is selected.
Accept
Next
Next
Page 8 of 112
86 Navigation
Read First
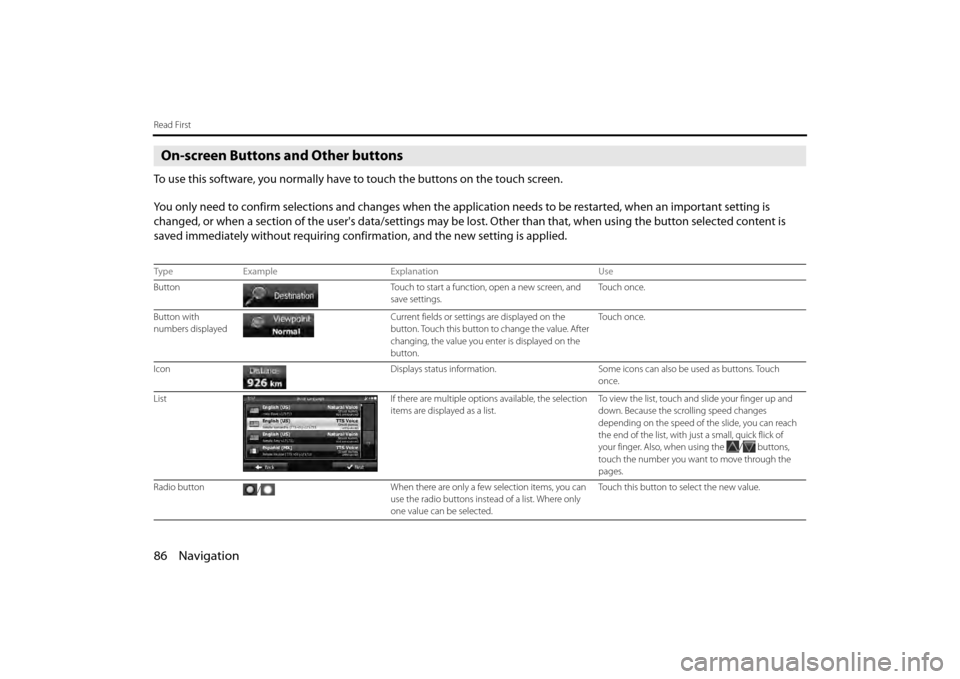
On-screen Buttons and Other buttons
To use this software, you normally have to touch the buttons on the touch screen.
You only need to confirm selections and changes when the application needs to be restarted, when an important setting is
changed, or when a section of the user's data/settings may be lost. Other than that, when using the button selected content is
saved immediately without requiring confirmation, and the new setting is applied.
Type Example Explanation Use
Button Touch to start a function, open a new screen, and
save settings. To u c h o n c e .
Button with
numbers displayed Current fields or setting
s are displayed on the
button. Touch this button to change the value. After
changing, the value you enter is displayed on the
button. To u c h o n c e .
Icon Displays status information.Some icons can also be used as buttons. Touch
once.
List If there are multiple options available, the selection
items are displayed as a list. To v i e w t h e l i s t , t o u c h a n d
slide your finger up and
down. Because the scrolling speed changes
depending on the speed of the slide, you can reach
the end of the list, with ju st a small, quick flick of
your finger. Also, when using the
/ buttons,
touch the number you want to move through the
pages.
Radio button / When there are only a few selection items, you can
use the radio buttons instea
d of a list. Where only
one value can be selected. Touch this button to select the new value.
Page 11 of 112
Navigation 89
Read First
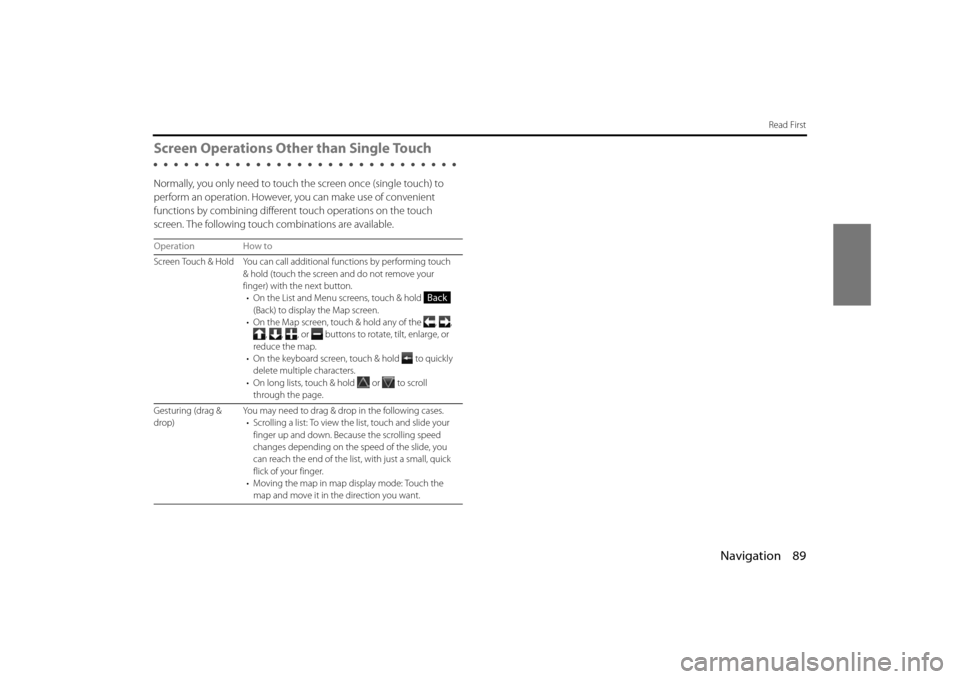
Screen Operations Other than Single Touch
Normally, you only need to touch the screen once (single touch) to
perform an operation. However, you can make use of convenient
functions by combining different touch operations on the touch
screen. The following touch combinations are available.
Operation How to
Screen Touch & Hold You can call additi onal functions by performing touch
& hold (touch the screen and do not remove your
finger) with the next button. • On the List and Menu sc reens, touch & hold
(Back) to display the Map screen.
• On the Map screen, touch & hold any of the , ,
, , , or buttons to rotate, tilt, enlarge, or
reduce the map.
• On the keyboard screen, touch & hold
to quickly
delete multiple characters.
• On long lists, touch & hold
or to scroll
through the page.
Gesturing (drag &
drop) You may need to drag & drop
in the following cases.
• Scrolling a list: To view th e list, touch and slide your
finger up and down. Because the scrolling speed
changes depending on the speed of the slide, you
can reach the end of the list , with just a small, quick
flick of your finger.
• Moving the map in map display mode: Touch the
map and move it in the direction you want.
Back
Page 13 of 112
Navigation 91
Read First
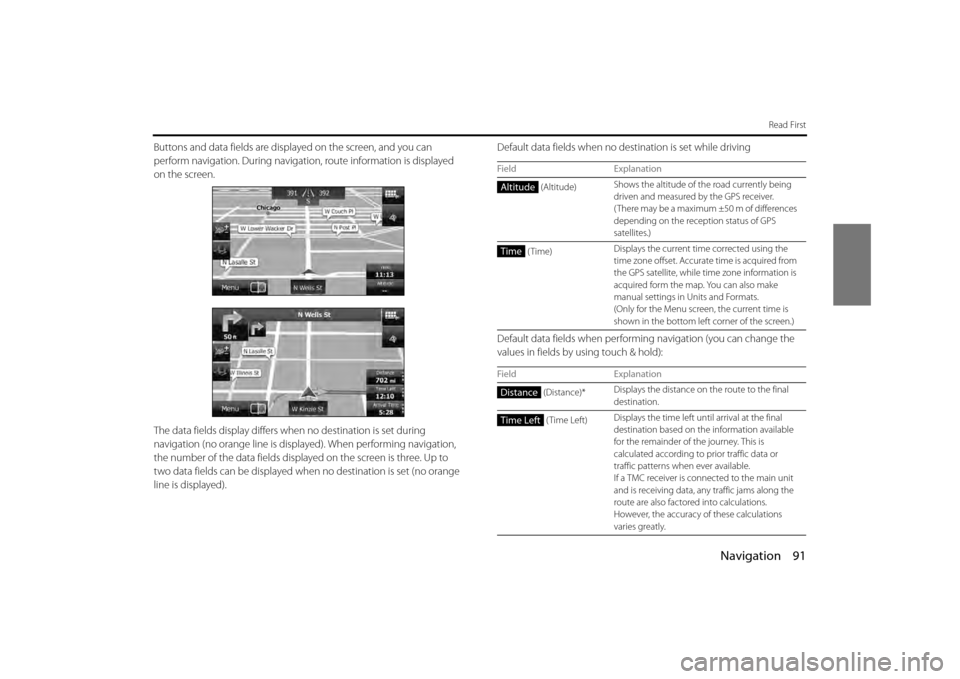
Buttons and data fields are displayed on the screen, and you can
perform navigation. During navigati on, route information is displayed
on the screen.
The data fields display differs wh en no destination is set during
navigation (no orange line is displayed). When performing navigation,
the number of the data fields displa yed on the screen is three. Up to
two data fields can be displayed when no destination is set (no orange
line is displayed). Default data fields when no de
stination is set while driving
Default data fields when performing navigation (you can change the
values in fields by using touch & hold):
Field Explanation
(Altitude) Shows the altitude of the road currently being
driven and measured by the GPS receiver.
( There may be a maximum ±50 m of differences
depending on the rece
ption status of GPS
satellites.)
(Time) Displays the current time corrected using the
time zone offset. Accurate
time is acquired from
the GPS satellite, while ti me zone information is
acquired form the map. You can also make
manual settings in Units and Formats.
(Only for the Menu screen, the current time is
shown in the bottom left corner of the screen.)
Field Explanation
(Distance)* Displays the distance on
the route to the final
destination.
(Time Left) Displays the time left un
til arrival at the final
destination based on th e information available
for the remainder of the journey. This is
calculated according to prior traffic data or
traffic patterns when ever available.
If a TMC receiver is connected to the main unit
and is receiving data, an y traffic jams along the
route are also factored into calculations.
However, the accuracy of these calculations
varies greatly.
Altitude
Time
Distance
Time Left
Page 21 of 112
Navigation 99
Read First
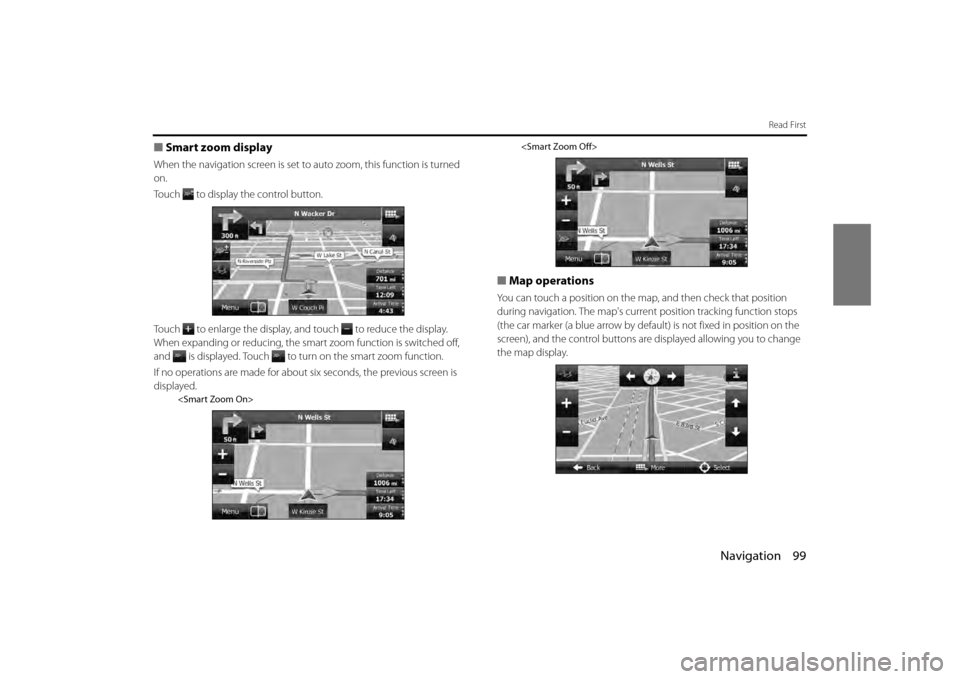
■Smart zoom display
When the navigation screen is set to auto zoom, this function is turned
on.
Touch to display the control button.
Touch to enlarge the display, and touch to reduce the display.
When expanding or reducing, the smart zoom function is switched off,
and is displayed. Touch to turn on the smart zoom function.
If no operations are made for about six seconds, the previous screen is
displayed.
■
Map operations
You can touch a position on the ma p, and then check that position
during navigation. The map's current position tracking function stops
(the car marker (a blue arrow by defa ult) is not fixed in position on the
screen), and the control buttons are displayed allowing you to change
the map display.
Page 22 of 112
100 Navigation
Read First
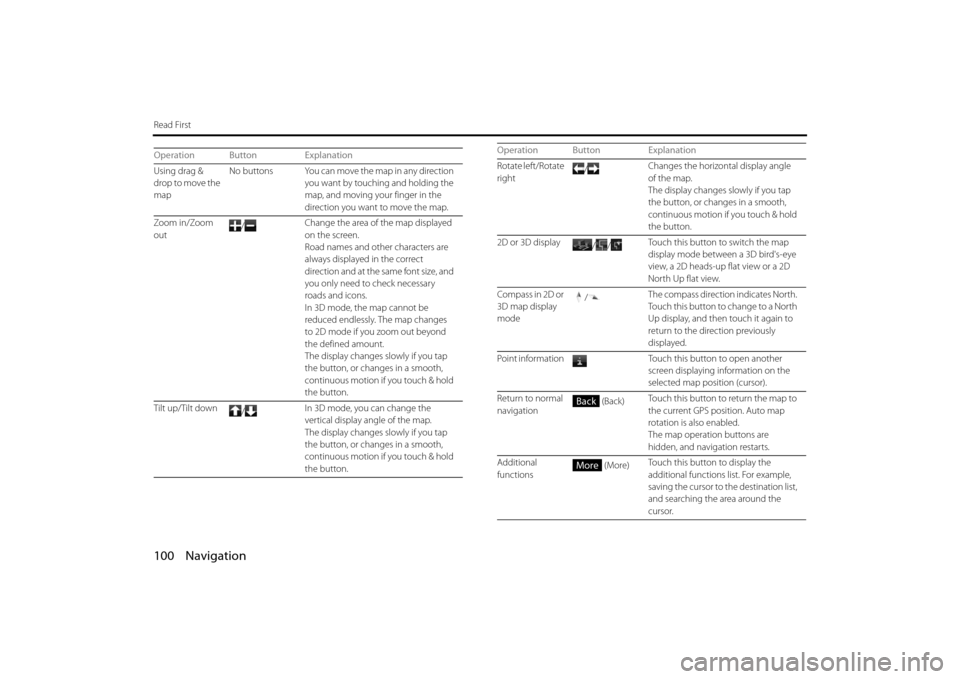
Operation Button Explanation
Using drag &
drop to move the
mapNo buttons You can move the map in any direction
you want by touching and holding the
map, and moving yo ur finger in the
direction you want to move the map.
Zoom in/Zoom
out /
Change the area of the map displayed
on the screen.
Road names and other characters are
always displayed in the correct
direction and at the same font size, and
you only need to check necessary
roads and icons.
In 3D mode, the
map cannot be
reduced endlessly. The map changes
to 2D mode if you zoom out beyond
the defined amount.
The display changes slowly if you tap
the button, or changes in a smooth,
continuous motion if you touch & hold
the button.
Tilt up/Tilt down /In 3D mode, you can change the
vertical display angle of the map.
The display changes slowly if you tap
the button, or changes in a smooth,
continuous motion if
you touch & hold
the button.Rotate left/Rotate
right /
Changes the horizontal display angle
of the map.
The display changes slowly if you tap
the button, or changes in a smooth,
continuous motion if you touch & hold
the button.
2D or 3D display //Touch this button to switch the map
display mode between a 3D bird's-eye
view, a 2D heads-up flat view or a 2D
North Up flat view.
Compass in 2D or
3D map display
mode /
The compass direction indicates North.
Touch this button to change to a North
Up display, and then touch it again to
return to the direction previously
displayed.
Point information Touch this button to open another screen displaying information on the
selected map position (cursor).
Return to normal
navigation (Back)
Touch this button to return the map to
the current GPS position. Auto map
rotation is also enabled.
The map operation buttons are
hidden, and navigation restarts.
Additional
functions (More)
Touch this button to display the
additional functions list. For example,
saving the cursor to the destination list,
and searching the area around the
cursor.
Operation Button Explanation
Back
More
Page 23 of 112
Navigation 101
Read First
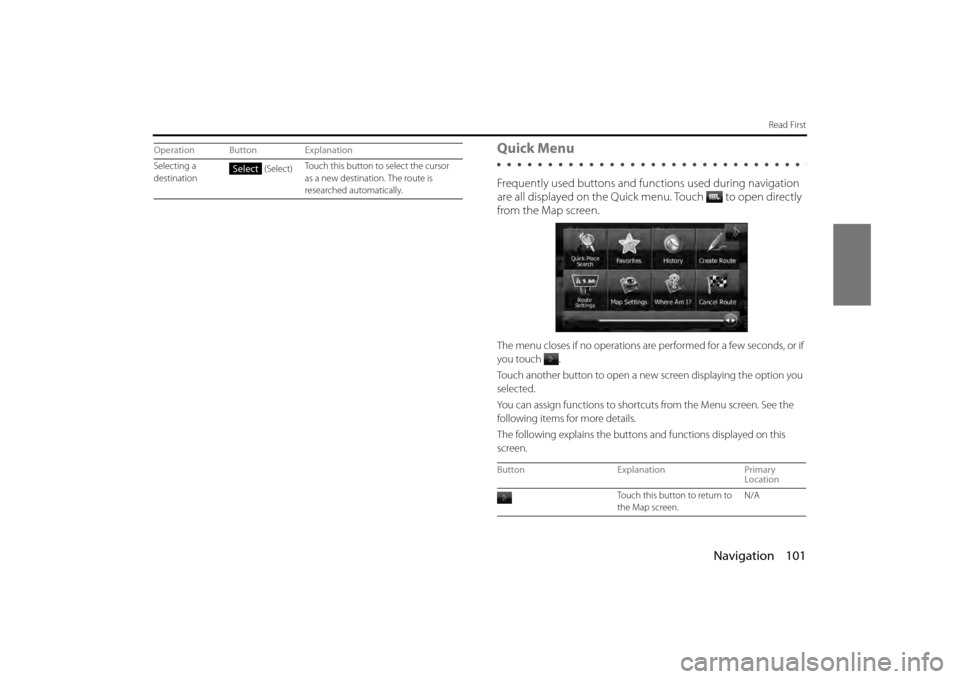
Quick Menu
Frequently used buttons and functions used during navigation
are all displayed on the Quick menu.
Touch to open directly
from the Map screen.
The menu closes if no operations are performed for a few seconds, or if
you touch
.
Touch another button to open a new screen displaying the option you
selected.
You can assign functions to shortcu ts from the Menu screen. See the
following items for more details.
The following explains the buttons and functions displayed on this
screen.
Selecting a
destination (Select)
Touch this button to select the cursor
as a new destination. The route is
researched automatically.
Operation Button ExplanationSelect
Button
Explanation Primary
Location
Touch this button to return to
the Map screen. N/A
Page 24 of 112
102 Navigation
Read First
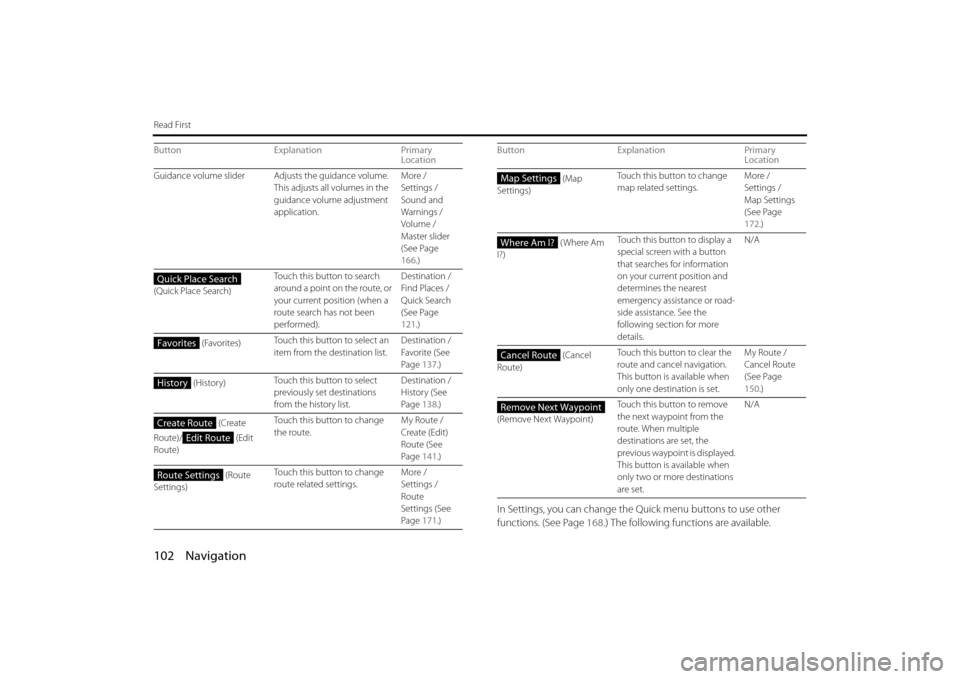
In Settings, you can change the Quick menu buttons to use other
functions. (See Page 168.) The following functions are available.
Guidance volume slider Adjusts the guidance volume.
This adjusts all volumes in the
guidance volume adjustment
application. More /
Settings /
Sound and
Warnings /
Volume /
Master slider
(See Page
166
.)
(Quick Place Search) Touch this button to search
around a point on the route, or
your current position (when a
route search has not been
performed). Destination /
Find Places /
Quick Search
(See Page
121
.)
(Favorites) Touch this button to select an
item from the destination list. Destination /
Favorite (See
Page
137.)
(History) Touch this button to select
previously set destinations
from the history list. Destination /
History (See
Page
138.)
(Create
Route)/ (Edit
Route) Touch this button to change
the route.
My Route /
Create (Edit)
Route (See
Page
141.)
(Route
Settings) Touch this button to change
route related settings.
More /
Settings /
Route
Settings (See
Page
171.)
Button
Explanation Primary
Location
Quick Place Search
Favorites
History
Create Route
Edit Route
Route Settings
(Map
Settings) Touch this button to change
map related settings.
More /
Settings /
Map Settings
(See Page
172
.)
( Where Am
I?) Touch this button to display a
special screen with a button
that searches for information
on your current position and
determines the nearest
emergency assistance or road-
side assistance. See the
following section for more
details. N/A
(Cancel
Route) Touch this button to clear the
route and cancel navigation.
This button is available when
only one destination is set. My Route /
Cancel Route
(See Page
150
.)
(Remove Next Waypoint) Touch this button to remove
the next waypoint from the
route. When multiple
destinations are set, the
previous waypoint is displayed.
This button is available when
only two or more destinations
are set. N/A
Button Explanation Primary
LocationMap Settings
Where Am I?
Cancel Route
Remove Next Waypoint