display SUBARU LEGACY 2017 6.G Owner's Manual
[x] Cancel search | Manufacturer: SUBARU, Model Year: 2017, Model line: LEGACY, Model: SUBARU LEGACY 2017 6.GPages: 610
Page 194 of 610
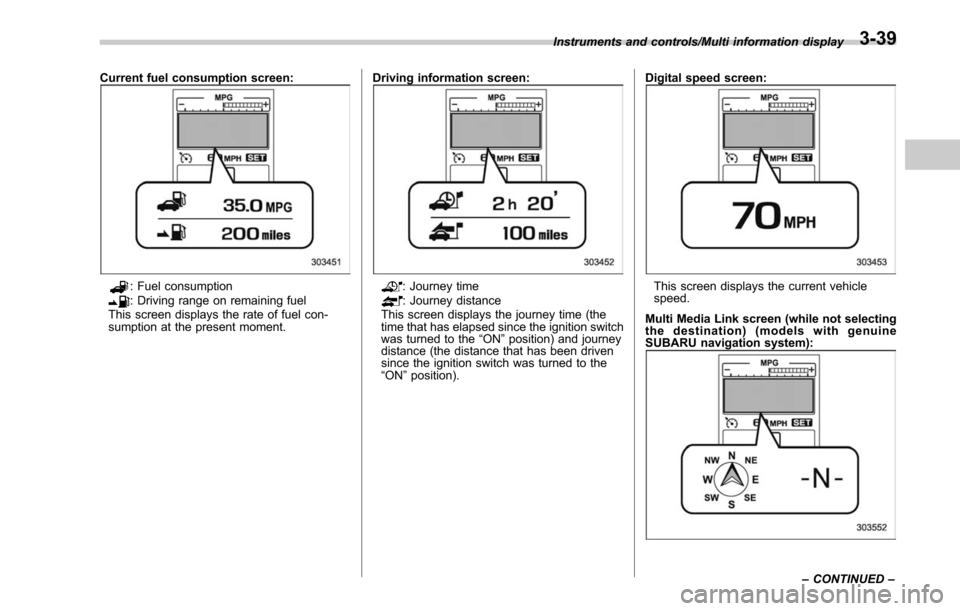
Current fuel consumption screen:
: Fuel consumption: Driving range on remaining fuel
This screen displays the rate of fuel con-
sumption at the present moment. Driving information screen:: Journey time: Journey distance
This screen displays the journey time (the
time that has elapsed since the ignition switch
was turned to the “ON ”position) and journey
distance (the distance that has been driven
since the ignition switch was turned to the
“ ON ”position). Digital speed screen:This screen displays the current vehicle
speed.
Multi Media Link screen (while not selecting
the destination) (models with genuine
SUBARU navigation system):
Instruments and controls/Multi information display
–CONTINUED –3-39
Page 195 of 610
Instruments and controls/Multi information display
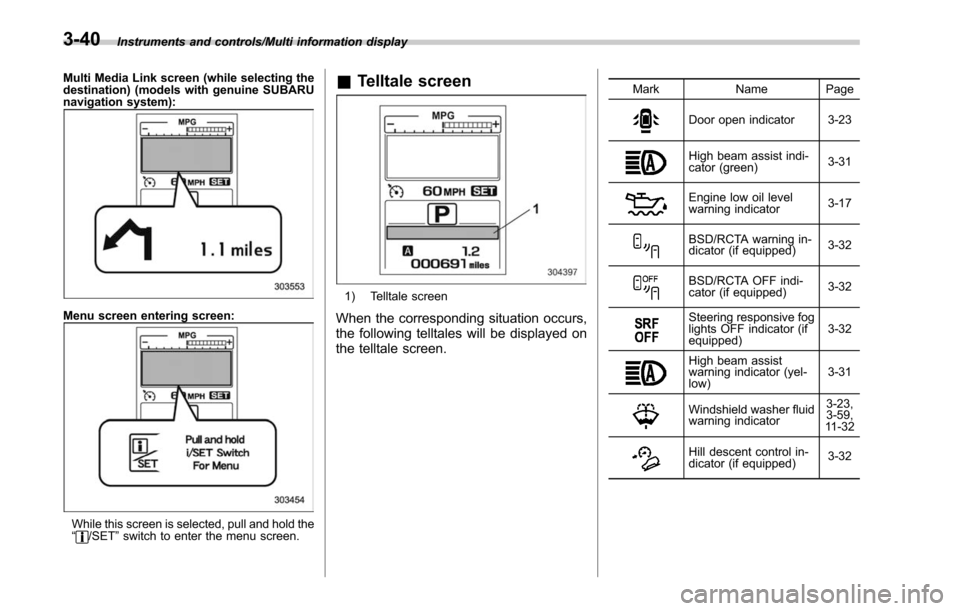
Multi Media Link screen (while selecting the
destination) (models with genuine SUBARU
navigation system):
Menu screen entering screen:
While this screen is selected, pull and hold the
“/SET”switch to enter the menu screen.
& Telltale screen
1) Telltale screen
When the corresponding situation occurs,
the following telltales will be displayed on
the telltale screen.
Mark Name Page
Door open indicator 3-23
High beam assist indi-
cator (green) 3-31
Engine low oil level
warning indicator
3-17
BSD/RCTA warning in-
dicator (if equipped)3-32
BSD/RCTA OFF indi-
cator (if equipped)
3-32
Steering responsive fog
lights OFF indicator (if
equipped)3-32
High beam assist
warning indicator (yel-
low)3-31
Windshield washer fluid
warning indicator3-23,
3-59,
11 - 3 2
Hill descent control in-
dicator (if equipped) 3-32
3-40
Page 196 of 610
MarkName Page
Icy road surface warn-
ing indicator 3-32
Access key warning in-
dicator (if equipped)3-25
RAB warning indicator
(if equipped)
3-33
RAB OFF indicator (if
equipped)3-33
Sonar audible alarm
OFF indicator (if
equipped)3-33
&
Menu screens
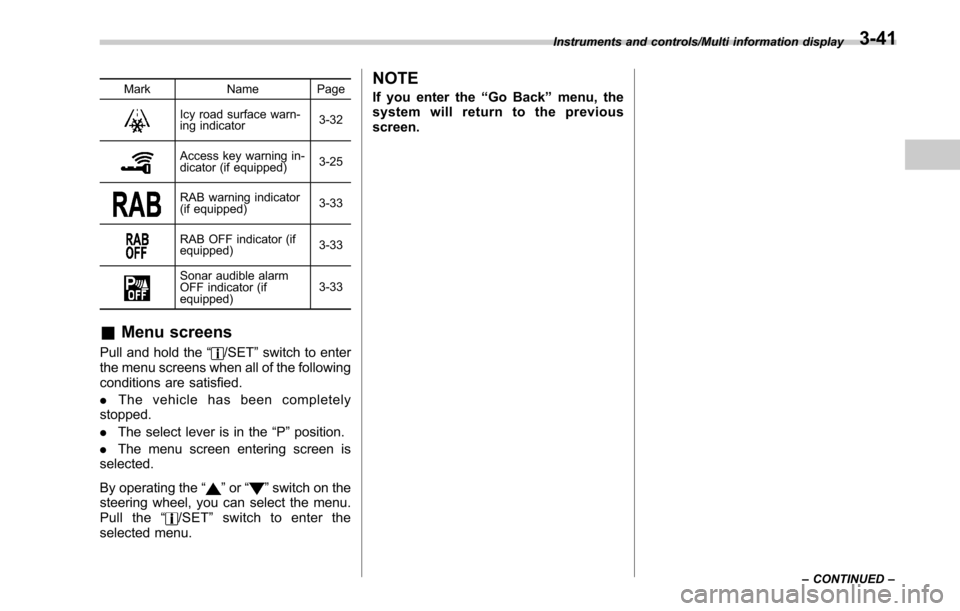
Pull and hold the “/SET”switch to enter
the menu screens when all of the following
conditions are satisfied.
. The vehicle has been completely
stopped.
. The select lever is in the “P”position.
. The menu screen entering screen is
selected.
By operating the “
”or “”switch on the
steering wheel, you can select the menu.
Pull the “
/SET”switch to enter the
selected menu.
NOTE
If you enter the “Go Back ”menu, the
system will return to the previous
screen.
Instruments and controls/Multi information display
–CONTINUED –3-41
Page 197 of 610
Instruments and controls/Multi information display
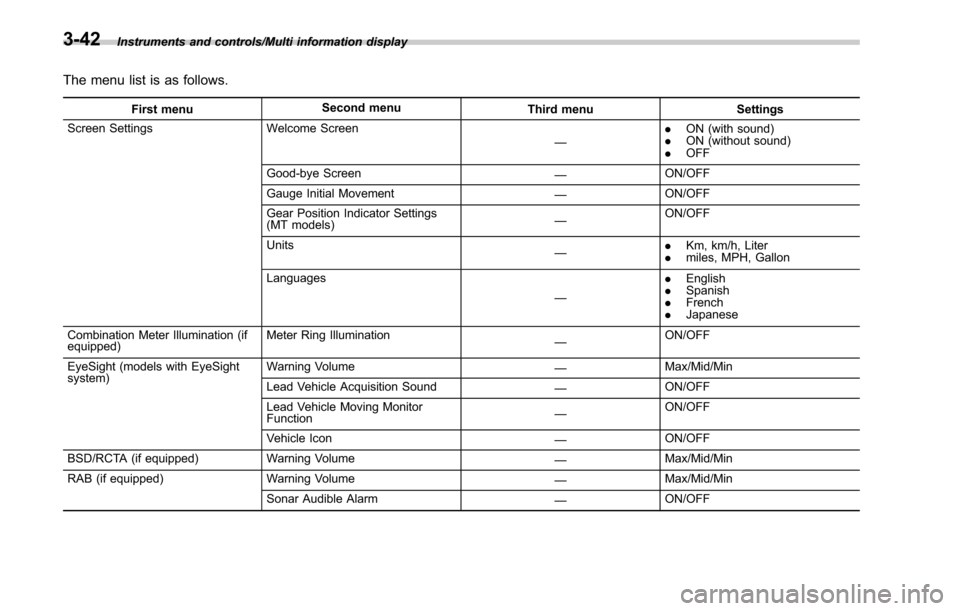
The menu list is as follows.
First menuSecond menu
Third menu Settings
Screen Settings Welcome Screen
—.
ON (with sound)
. ON (without sound)
. OFF
Good-bye Screen —ON/OFF
Gauge Initial Movement —ON/OFF
Gear Position Indicator Settings
(MT models) —ON/OFF
Units —.
Km, km/h, Liter
. miles, MPH, Gallon
Languages —.
English
. Spanish
. French
. Japanese
Combination Meter Illumination (if
equipped) Meter Ring Illumination
—ON/OFF
EyeSight (models with EyeSight
system) Warning Volume
—Max/Mid/Min
Lead Vehicle Acquisition Sound —ON/OFF
Lead Vehicle Moving Monitor
Function —ON/OFF
Vehicle Icon —ON/OFF
BSD/RCTA (if equipped) Warning Volume
—Max/Mid/Min
RAB (if equipped) Warning Volume
—Max/Mid/Min
Sonar Audible Alarm —ON/OFF
3-42
Page 198 of 610
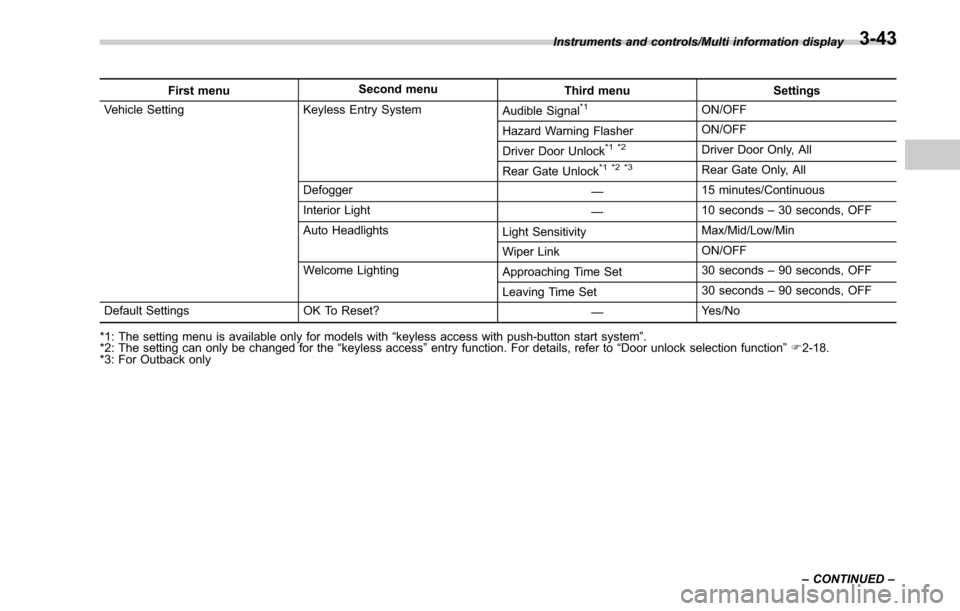
First menuSecond menu
Third menu Settings
Vehicle Setting Keyless Entry System Audible Signal*1ON/OFF
Hazard Warning Flasher ON/OFF
Driver Door Unlock
*1 *2Driver Door Only, All
Rear Gate Unlock
*1 *2 *3Rear Gate Only, All
Defogger —15 minutes/Continuous
Interior Light —10 seconds
–30 seconds, OFF
Auto Headlights Light SensitivityMax/Mid/Low/Min
Wiper Link ON/OFF
Welcome Lighting Approaching Time Set30 seconds
–90 seconds, OFF
Leaving Time Set 30 seconds
–90 seconds, OFF
Default Settings OK To Reset? —Yes/No
*1: The setting menu is available only for models with “keyless access with push-button start system ”.
*2: The setting can only be changed for the “keyless access ”entry function. For details, refer to “Door unlock selection function ”F 2-18.
*3: For Outback only Instruments and controls/Multi information display
–CONTINUED –
3-43
Page 199 of 610
Instruments and controls/Multi information display
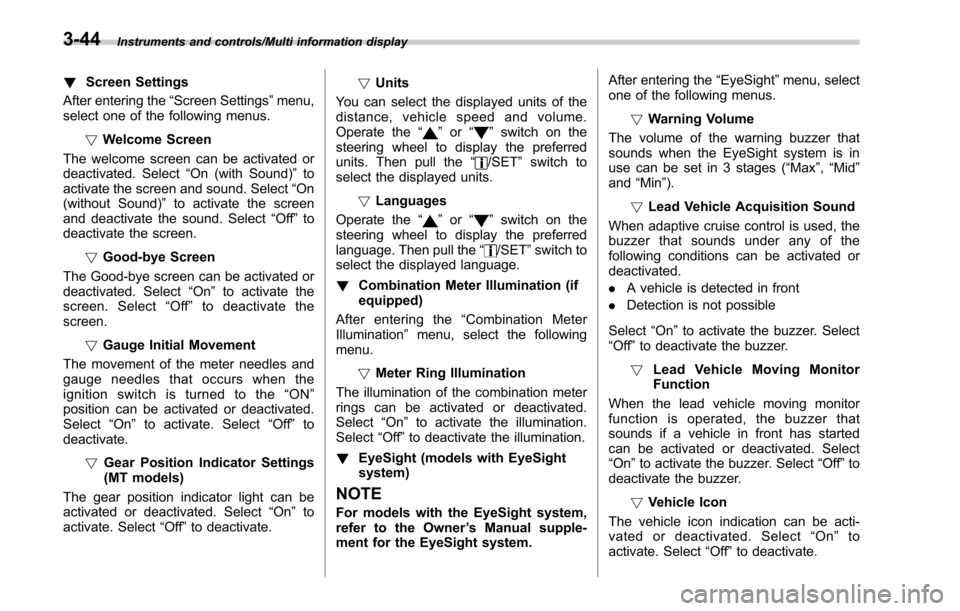
!Screen Settings
After entering the “Screen Settings”menu,
select one of the following menus.
!Welcome Screen
The welcome screen can be activated or
deactivated. Select “On (with Sound)”to
activate the screen and sound. Select “On
(without Sound) ”to activate the screen
and deactivate the sound. Select “Off”to
deactivate the screen.
!Good-bye Screen
The Good-bye screen can be activated or
deactivated. Select “On”to activate the
screen. Select “Off ”to deactivate the
screen.
!Gauge Initial Movement
The movement of the meter needles and
gauge needles that occurs when the
ignition switch is turned to the “ON ”
position can be activated or deactivated.
Select “On”to activate. Select “Off”to
deactivate.
!Gear Position Indicator Settings
(MT models)
The gear position indicator light can be
activated or deactivated. Select “On”to
activate. Select “Off”to deactivate. !
Units
You can select the displayed units of the
distance, vehicle speed and volume.
Operate the “
”or “”switch on the
steering wheel to display the preferred
units. Then pull the “
/SET”switch to
select the displayed units.
!Languages
Operate the “
”or “”switch on the
steering wheel to display the preferred
language. Then pull the “
/SET”switch to
select the displayed language.
! Combination Meter Illumination (if
equipped)
After entering the “Combination Meter
Illumination ”menu, select the following
menu.
!Meter Ring Illumination
The illumination of the combination meter
rings can be activated or deactivated.
Select “On ”to activate the illumination.
Select “Off”to deactivate the illumination.
! EyeSight (models with EyeSight
system)
NOTE
For models with the EyeSight system,
refer to the Owner ’s Manual supple-
ment for the EyeSight system. After entering the
“EyeSight ”menu, select
one of the following menus.
!Warning Volume
The volume of the warning buzzer that
sounds when the EyeSight system is in
use can be set in 3 stages (“Max ”,“Mid ”
and “Min”).
! Lead Vehicle Acquisition Sound
When adaptive cruise control is used, the
buzzer that sounds under any of the
following conditions can be activated or
deactivated.
. A vehicle is detected in front
. Detection is not possible
Select “On”to activate the buzzer. Select
“Off ”to deactivate the buzzer.
! Lead Vehicle Moving Monitor
Function
When the lead vehicle moving monitor
function is operated, the buzzer that
sounds if a vehicle in front has started
can be activated or deactivated. Select
“On ”to activate the buzzer. Select “Off”to
deactivate the buzzer.
!Vehicle Icon
The vehicle icon indication can be acti-
vated or deactivated. Select “On ”to
activate. Select “Off”to deactivate.
3-44
Page 200 of 610
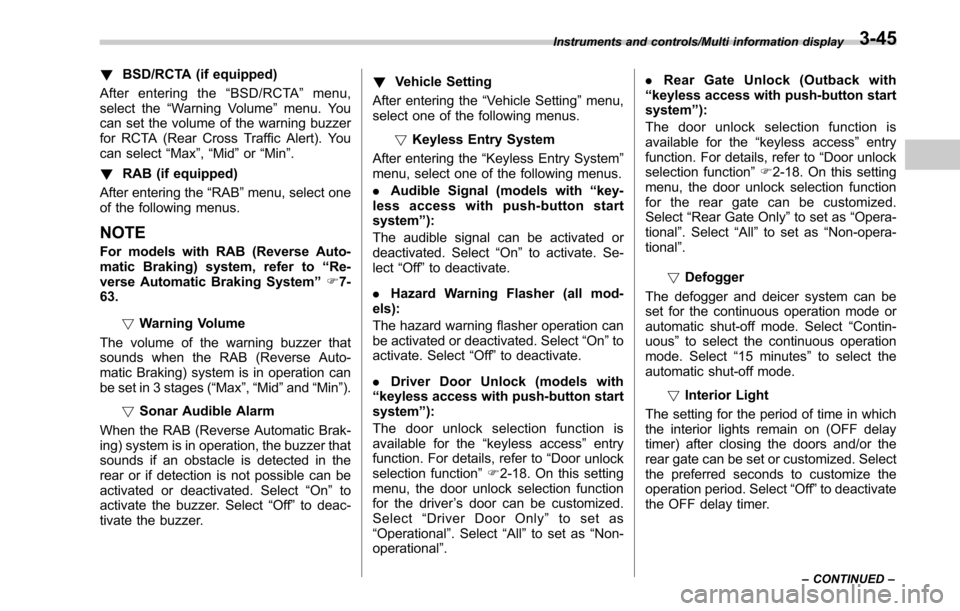
!BSD/RCTA (if equipped)
After entering the “BSD/RCTA ”menu,
select the “Warning Volume ”menu. You
can set the volume of the warning buzzer
for RCTA (Rear Cross Traffic Alert). You
can select “Max”,“Mid ”or “Min ”.
! RAB (if equipped)
After entering the “RAB”menu, select one
of the following menus.
NOTE
For models with RAB (Reverse Auto-
matic Braking) system, refer to “Re-
verse Automatic Braking System ”F 7-
63.
!Warning Volume
The volume of the warning buzzer that
sounds when the RAB (Reverse Auto-
matic Braking) system is in operation can
be set in 3 stages (“Max ”,“Mid ”and “Min ”).
! Sonar Audible Alarm
When the RAB (Reverse Automatic Brak-
ing) system is in operation, the buzzer that
sounds if an obstacle is detected in the
rear or if detection is not possible can be
activated or deactivated. Select “On”to
activate the buzzer. Select “Off”to deac-
tivate the buzzer. !
Vehicle Setting
After entering the “Vehicle Setting”menu,
select one of the following menus.
!Keyless Entry System
After entering the “Keyless Entry System ”
menu, select one of the following menus.
. Audible Signal (models with “key-
less access with push-button start
system ”):
The audible signal can be activated or
deactivated. Select “On”to activate. Se-
lect “Off”to deactivate.
. Hazard Warning Flasher (all mod-
els):
The hazard warning flasher operation can
be activated or deactivated. Select “On”to
activate. Select “Off ”to deactivate.
. Driver Door Unlock (models with
“ keyless access with push-button start
system ”):
The door unlock selection function is
available for the “keyless access”entry
function. For details, refer to “Door
unlock
selection function ”F 2-18. On this setting
menu, the door unlock selection function
for the driver ’s door can be customized.
Select “Driver Door Only ”to set as
“Operational ”. Select “All”to set as “Non-
operational ”. .
Rear Gate Unlock (Outback with
“ keyless access with push-button start
system ”):
The door unlock selection function is
available for the “keyless access”entry
function. For details, refer to “Door unlock
selection function ”F 2-18. On this setting
menu, the door unlock selection function
for the rear gate can be customized.
Select “Rear Gate Only ”to set as “Opera-
tional ”. Select “All”to set as “Non-opera-
tional ”.
! Defogger
The defogger and deicer system can be
set for the continuous operation mode or
automatic shut-off mode. Select “Contin-
uous” to select the continuous operation
mode. Select “15 minutes”to select the
automatic shut-off mode.
!Interior Light
The setting for the period of time in which
the interior lights remain on (OFF delay
timer) after closing the doors and/or the
rear gate can be set or customized. Select
the preferred seconds to customize the
operation period. Select “Off”to deactivate
the OFF delay timer.
Instruments and controls/Multi information display
–CONTINUED –3-45
Page 202 of 610
Regardless of the position of the light
control switch, the illuminated lights are
turned off when the key is removed from
the ignition switch.
NOTE
The light control switch can be oper-
ated (except auto on/off headlights),
even under the following conditions.
.when the push-button ignition
switch is turned off (models with “key-
less access with push-button start
system ”)
. when the key is not inserted into the
ignition switch (models without “key-
less access with push-button start
system ”)
If the driver ’s door is opened while the
headlights are illuminated under such
conditions, a chirp sound will inform
the driver that the lights are illumi-
nated.
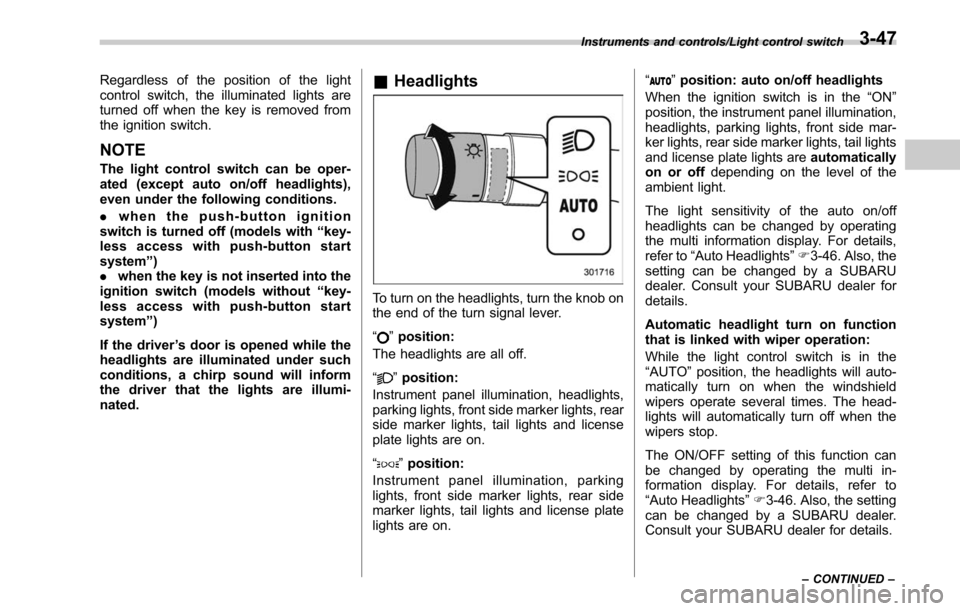
& Headlights
To turn on the headlights, turn the knob on
the end of the turn signal lever.
“
”position:
The headlights are all off.
“
” position:
Instrument panel illumination, headlights,
parking lights, front side marker lights, rear
side marker lights, tail lights and license
plate lights are on.
“
” position:
Instrument panel illumination, parking
lights, front side marker lights, rear side
marker lights, tail lights and license plate
lights are on. “
”
position: auto on/off headlights
When the ignition switch is in the “ON”
position, the instrument panel illumination,
headlights, parking lights, front side mar-
ker lights, rear side marker lights, tail lights
and license plate lights are automatically
on or off depending on the level of the
ambient light.
The light sensitivity of the auto on/off
headlights can be changed by operating
the multi information display. For details,
refer to “Auto Headlights ”F 3-46. Also, the
setting can be changed by a SUBARU
dealer. Consult your SUBARU dealer for
details.
Automatic headlight turn on function
that is linked with wiper operation:
While the light control switch is in the
“AUTO ”position, the headlights will auto-
matically turn on when the windshield
wipers operate several times. The head-
lights will automatically turn off when the
wipers stop.
The ON/OFF setting of this function can
be changed by operating the multi in-
formation display. For details, refer to
“Auto Headlights ”F 3-46. Also, the setting
can be changed by a SUBARU dealer.
Consult your SUBARU dealer for details.
Instruments and controls/Light control switch
–CONTINUED –3-47
Page 203 of 610
Instruments and controls/Light control switch
!Welcome lighting function
The welcome lighting function turns on the
low beam headlight for smooth approach-
ing to or exiting from the vehicle at night or
in a dark place.
The function is activated while all of the
following conditions are met.
. The light control switch is in the
“AUTO ”position
. It is dark enough to turn on the auto on/
off headlights
When approaching:
While the welcome lighting function is
activated, the low beam headlights will
automatically illuminate when unlocking
the doors (for Outback, including the rear
gate) by using the remote keyless entry
system.
The low beam headlights will remain
illuminated for 30 seconds
*1and then turn
off. However, if any of the following
operations is done, the low beam head-
lights will turn off.
. The doors are locked.
. The light control switch is turned to a
position other than “AUTO”.
. The ignition switch is turned to the “ON”
position. When exiting:
While the welcome lighting function is
activated, the low beam headlights will
remain illuminated even when either of the
following operation is done.
.
Thepush-buttonignitionswitchis
turned to the “OFF”status (models with
“ keyless access with push-button start
system ”)
. The key is pulled out from the ignition
switch (models without “keyless access
with push-button start system ”)
The low beam headlights will turn off
under any of the following conditions.
. 3 minutes have passed since the low
beam headlights were illuminated by the
welcome lighting function.
. 30 seconds have passed since the
door is opened and closed.
*1
. The light control switch is turned to a
position other than “AUTO”.
. The locking procedure is performed
twice. When performing the unlocking
procedure after performing the locking
procedure, perform the locking procedure
twice again.
*1: The setting for the period of time in which
the low beam headlights remain on by the
welcome lighting function can be changed by a
SUBARU dealer. Contact your SUBARU dealer for details. Also, you can change the setting by
operating the multi information display. For
details, refer to
“Welcome Lighting ”F3-46.
For models with the genuine SUBARU naviga-
tion system, you can change the setting by
using the navigation system. For details, refer to
the Owner ’s Manual supplement for the naviga-
tion system.
3-48
Page 217 of 610
Instruments and controls/Defogger and deicer
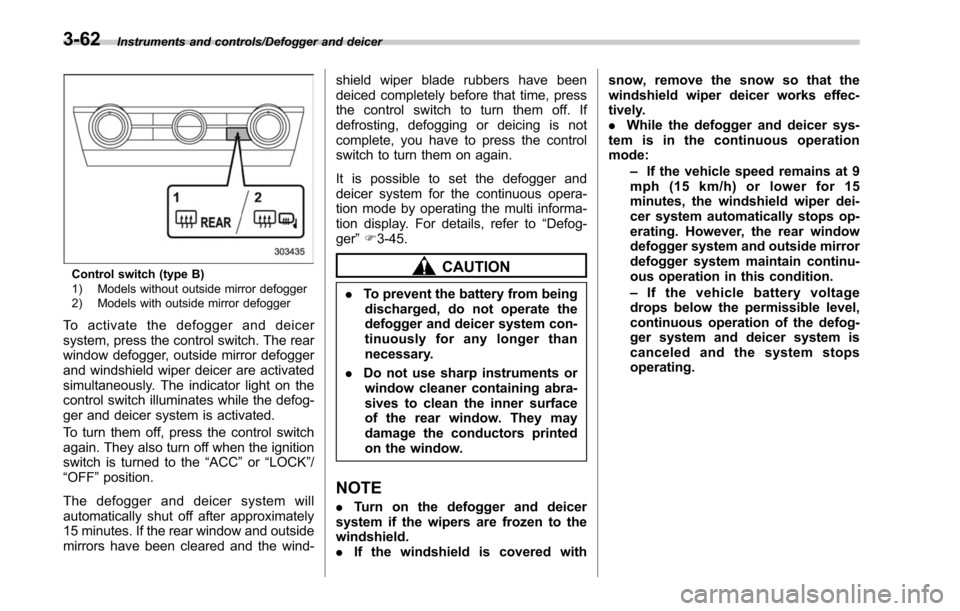
Control switch (type B)
1) Models without outside mirror defogger
2) Models with outside mirror defogger
To activate the defogger and deicer
system, press the control switch. The rear
window defogger, outside mirror defogger
and windshield wiper deicer are activated
simultaneously. The indicator light on the
control switch illuminates while the defog-
ger and deicer system is activated.
To turn them off, press the control switch
again. They also turn off when the ignition
switch is turned to the“ACC”or “LOCK”/
“OFF ”position.
The defogger and deicer system will
automatically shut off after approximately
15 minutes. If the rear window and outside
mirrors have been cleared and the wind- shield wiper blade rubbers have been
deiced completely before that time, press
the control switch to turn them off. If
defrosting, defogging or deicing is not
complete, you have to press the control
switch to turn them on again.
It is possible to set the defogger and
deicer system for the continuous opera-
tion mode by operating the multi informa-
tion display. For details, refer to
“Defog-
ger ”F 3-45.
CAUTION
. To prevent the battery from being
discharged, do not operate the
defogger and deicer system con-
tinuously for any longer than
necessary.
. Do not use sharp instruments or
window cleaner containing abra-
sives to clean the inner surface
of the rear window. They may
damage the conductors printed
on the window.
NOTE
. Turn on the defogger and deicer
system if the wipers are frozen to the
windshield.
. If the windshield is covered with snow, remove the snow so that the
windshield wiper deicer works effec-
tively.
.
While the defogger and deicer sys-
tem is in the continuous operation
mode:
–If the vehicle speed remains at 9
mph (15 km/h) or lower for 15
minutes, the windshield wiper dei-
cer system automatically stops op-
erating. However, the rear window
defogger system and outside mirror
defogger system maintain continu-
ous operation in this condition.
– If the vehicle battery voltage
drops below the permissible level,
continuous operation of the defog-
ger system and deicer system is
canceled and the system stops
operating.
3-62