glove box SUBARU LEGACY 2022 Getting Started Guide
[x] Cancel search | Manufacturer: SUBARU, Model Year: 2022, Model line: LEGACY, Model: SUBARU LEGACY 2022Pages: 164, PDF Size: 51.03 MB
Page 6 of 164

WELCOME
Congratulations on choosing a Subaru Legacy and welcome to the Subaru family!
Subaru is more than a car company™. We are committed to making the world a better
place, and the Subaru Love Promise is our vision to show love and respect to all people at
every interaction with Subaru. We believe in building lifelong relationships with our
customers, earning your trust and exceeding your expectations by providing customer
service with integrity and compassion.
This Getting Started Guide will introduce you to your new Subaru Legacy by providing
information on the basic operation and key features of your Subaru as well as the
STARLINK
®and EyeSight®systems in your vehicle.
IMPORTANT SAFETY INFORMATION
The Getting Started Guide is not intended as a substitute for your Owner’s Manuals. We
strongly encourage you to review your Vehicle, STARLINK®, and EyeSight®Owner’s
Manuals to ensure complete understanding.
As part of routine maintenance and continuous improvement, Subaru releases updates to
the firmware and software in your vehicle. Following the installation of these updates, the
screens and menus in your vehicle may differ from what appears in this guide.
For the most current information on firmware and software updates, please refer to
the “Owner’s Resources” in the following section or contact your Subaru Retailer.
OWNER’S RESOURCES
If you’re having difficulty using any of the functions outlined in this guide, or want to learn
more, you can get additional information from the
following sources:
Your Subaru Owner’s Manuals:
Located in the glovebox
Online Subaru Owner’s Resources:
www.subaru.com/owners
Subaru Customer Support:
www.subaru.com/customer-support
1-800-782-2783 (1-800-SUBARU3 )
PURPOSE OF THIS GUIDE
4
Page 31 of 164

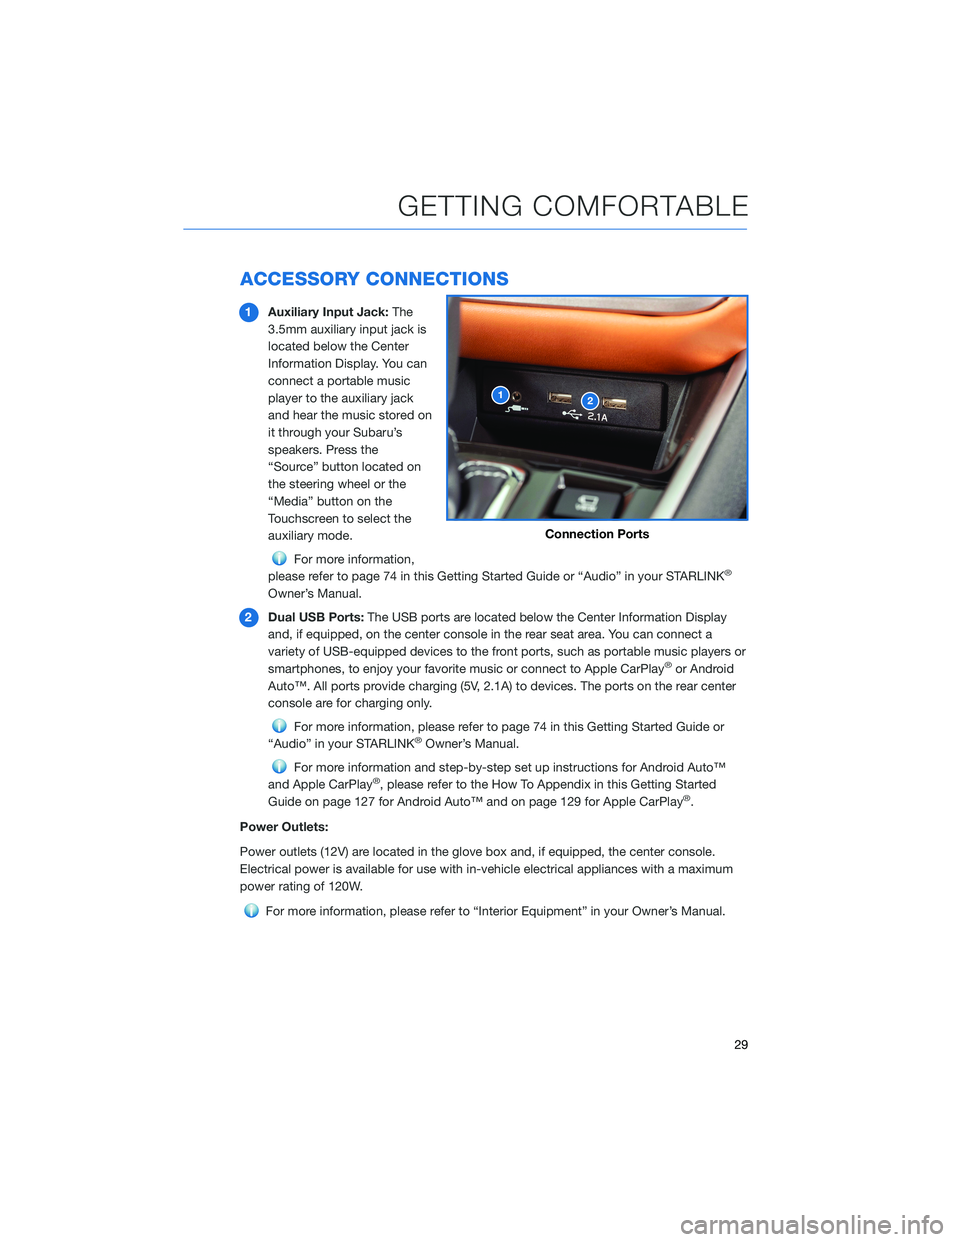
ACCESSORY CONNECTIONS
1Auxiliary Input Jack:The
3.5mm auxiliary input jack is
located below the Center
Information Display. You can
connect a portable music
player to the auxiliary jack
and hear the music stored on
it through your Subaru’s
speakers. Press the
“Source” button located on
the steering wheel or the
“Media” button on the
Touchscreen to select the
auxiliary mode.
For more information,
please refer to page 74 in this Getting Started Guide or “Audio” in your STARLINK®
Owner’s Manual.
2Dual USB Ports:The USB ports are located below the Center Information Display
and, if equipped, on the center console in the rear seat area. You can connect a
variety of USB-equipped devices to the front ports, such as portable music players or
smartphones, to enjoy your favorite music or connect to Apple CarPlay
®or Android
Auto™. All ports provide charging (5V, 2.1A) to devices. The ports on the rear center
console are for charging only.
For more information, please refer to page 74 in this Getting Started Guide or
“Audio” in your STARLINK®Owner’s Manual.
For more information and step-by-step set up instructions for Android Auto™
and Apple CarPlay®, please refer to the How To Appendix in this Getting Started
Guide on page 127 for Android Auto™ and on page 129 for Apple CarPlay®.
Power Outlets:
Power outlets (12V) are located in the glove box and, if equipped, the center console.
Electrical power is available for use with in-vehicle electrical appliances with a maximum
power rating of 120W.
For more information, please refer to “Interior Equipment” in your Owner’s Manual.
12
Connection Ports
GETTING COMFORTABLE
29
Page 117 of 164

HOW TO OVERVIEW
This “How To” appendix provides detailed, step-by-step instructions to easily connect with
features of your Legacy.
If you need some help with these features or want to
learn more, we are here to assist you:
Your Subaru Owner’s Manuals:
Located in the glovebox
Online Subaru Owner’s Resources:
www.subaru.com/owners
Subaru Customer Support:
www.subaru.com/customer-support
1-800-782-2783 (1-800-SUBARU3 )
SETTING THE CLOCK
Clock settings can be adjusted when the ignition is in the “ON” position. You can adjust
the clock manually or set the clock to adjust automatically in the clock setting screen. To
directly access the clock setting screen, you can select the clock on the status bar at the
top of the Center Information Display. Full directions for accessing the clock settings and
adjusting the clock manually or automatically are given below.
For more information, please refer to “Quick Guide” in your STARLINK®Owner’s
Manual.
HOW TO APPENDIX
115