ignition SUBARU OUTBACK 2007 4.G Owner's Manual
[x] Cancel search | Manufacturer: SUBARU, Model Year: 2007, Model line: OUTBACK, Model: SUBARU OUTBACK 2007 4.GPages: 442, PDF Size: 13.39 MB
Page 106 of 442

.Opening a door, the rear gate or trunk
lid . Physical impact to the vehicle, such as
forced entry (only vehicles with shock
sensors (dealer option)) & Activating and deactivating
the alarm system
To change the setting of your vehicle ’s
alarm system for activation or deactiva-
tion, do the following.
1. Disarm the alarm system (see “Dis-
arming the system ”in this section).
2. Sit in the driver ’s seat and shut all
doors (and the rear gate if your vehicle is a
Station wagon).
3. Turn the ignition switch to the “ON ”
position.
4. Hold down the UNLOCK side of the driver ’s power door locking switch, open
the driver ’s door within the following 1
second, and wait 10 seconds without
releasing the switch. The setting will then
be changed as follows:
If the system was previously activated:
For non-turbo models, the odometer/trip
meter screen displays “AL oF ”, and for
turbo models, the multi-information displayshows “Security alarm: OFF ”and the horn
sounds twice, indicating that the system is
now deactivated. If the system was previously deactivated:
For non-turbo models, the odometer/trip
meter screen displays
“AL on ”, and for
turbo models, the multi-information displayshows “Security alarm: ON ”and the horn
sounds once, indicating that the system is
now deactivated.
NOTE
You may have the above setting
change done by your SUBARU dealer. & If you have accidentally trig-
gered the alarm system
! To stop the alarm
Do any of the following operations: . Insert the key in the door lock of the
driver ’s door and turn it to the unlock
position.. Press any button on the remote trans-
mitter.. Turn the ignition switch to the “ON ”
position.
& Arming the system
! To arm the system using remote transmitter
1. Close all windows and the moonroof (if
so equipped). 2. Remove the key from the ignitionswitch.
3. Open the doors and get out of the vehicle.
4. Make sure that the engine hood (and
the trunk lid on the Sedan) are locked.
5. Close all doors (and the rear gate on
the Station wagon).
: Press to Arm the system.: Press to Disarm the system.
Keys and doors
2-15
– CONTINUED –
Page 107 of 442
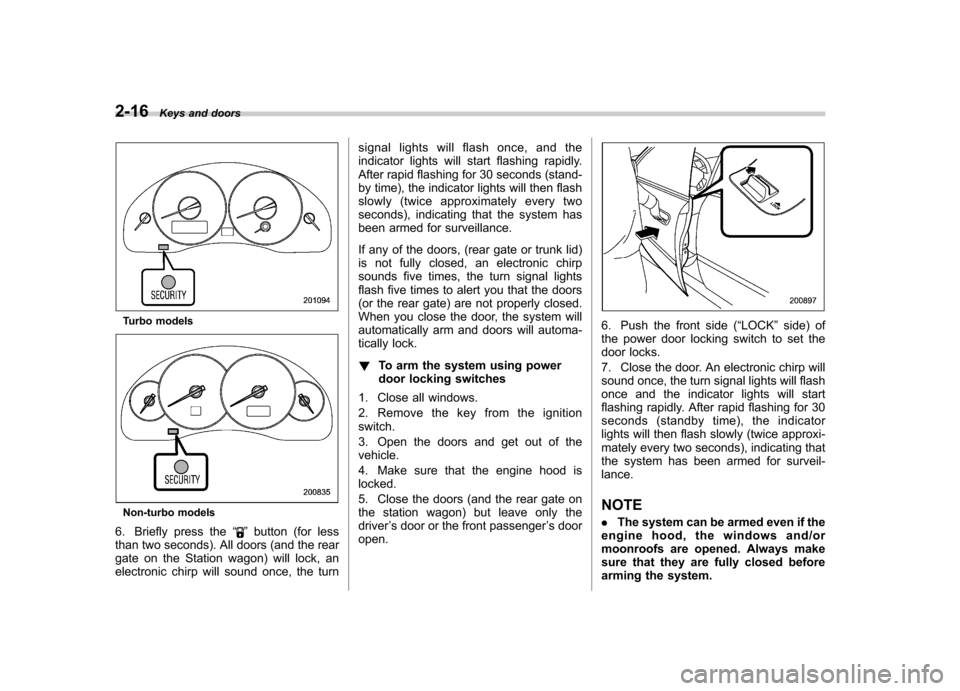
2-16Keys and doors
Turbo models
Non-turbo models
6. Briefly press the “
”button (for less
than two seconds). All doors (and the rear
gate on the Station wagon) will lock, an
electronic chirp will sound once, the turn signal lights will flash once, and the
indicator lights will start flashing rapidly.
After rapid flashing for 30 seconds (stand-
by time), the indicator lights will then flash
slowly (twice approximately every two
seconds), indicating that the system has
been armed for surveillance.
If any of the doors, (rear gate or trunk lid)
is not fully closed, an electronic chirp
sounds five times, the turn signal lights
flash five times to alert you that the doors
(or the rear gate) are not properly closed.
When you close the door, the system will
automatically arm and doors will automa-
tically lock. !
To arm the system using power
door locking switches
1. Close all windows.
2. Remove the key from the ignition switch.
3. Open the doors and get out of the vehicle.
4. Make sure that the engine hood is locked.
5. Close the doors (and the rear gate on
the station wagon) but leave only thedriver ’s door or the front passenger ’s door
open.
6. Push the front side ( “LOCK ”side) of
the power door locking switch to set the
door locks.
7. Close the door. An electronic chirp will
sound once, the turn signal lights will flash
once and the indicator lights will start
flashing rapidly. After rapid flashing for 30
seconds (standby time), the indicator
lights will then flash slowly (twice approxi-
mately every two seconds), indicating that
the system has been armed for surveil-lance. NOTE . The system can be armed even if the
engine hood, the windows and/or
moonroofs are opened. Always make
sure that they are fully closed before
arming the system.
Page 108 of 442

.The 30-second standby time can be
eliminated if you prefer. Have it per-
formed by your SUBARU dealer.. If your vehicle is a Sedan and you
unlock the trunk using the remotetransmitter ’s “
”button with the
alarm system armed, the system will
be temporarily placed in a standby
state. The system will go back to the
surveillance state upon locking thetrunk.. The system is in the standby mode
for a 30-second period after locking the
doors with the remote transmitter. The
security indicator light will flash at
short intervals during this period. . If any of the following actions is
done during the standby period, the
system will not switch to the surveil-
lance state.
.Doors are unlocked using the
remote transmitter. . Any door (including the rear gate
of a Station wagon or the trunk of a
Sedan) is opened. . Ignition switch is turned to the
“ ON ”position. &
Disarming the system
Briefly press the “
”button (for less than
two seconds) on the remote transmitter.
The driver ’s door will unlock, an electronic
chirp will sound twice, the turn signal lights
will flash twice and the indicator light will
go off.
To unlock all other doors and the rear gate
(Station wagon), briefly press the “
”
button a second time within 5 seconds. NOTE
If the interval between the first and
second presses of the “
”button (for
unlocking of all of the doors and the
rear gate) is extremely short, the sys-
tem may not respond.
Or the system can be disarmed by the
following method, too. . Insert the key in the door lock of the
driver ’s door and turn it to the unlock
position. ! Emergency disarming
If you cannot disarm the system using the
transmitter (i.e. the transmitter is lost,
broken or the transmitter battery is too
weak), you can disarm the system without
using the transmitter.
The system can be disarmed if you turn
the ignition switch from the “LOCK ”to the “
ON ”position with a registered key.
Insert the key in the door lock of thedriver ’s door and turn it to the unlock
position.
& Valet mode
When you choose the valet mode, the
alarm system does not operate. In valet
mode, the remote transmitter is used only
for locking and unlocking the doors and
rear gate (Station wagon) and panicactivation.
To enter the valet mode, change the
setting of your vehicle ’s alarm system for
deactivation mode. (Refer to “Activating
and deactivating the alarm system ”in this
section.) The security indicator light will
continue to flash once every three sec-
onds indicating that the system is in the
valet mode.
To exit valet mode, change the setting of
your vehicle ’s alarm system for activation
mode. (Refer to “Activating and deactivat-
ing the alarm system ”in this section.)
& Passive arming
When passive arming mode has been
programmed by the dealer, arming of the
system is automatically accomplished
without using the remote transmitter. Note Keys and doors
2-17
– CONTINUED –
Page 109 of 442
2-18Keys and doors
that in this mode, DOORS MUST BE
MANUALLY LOCKED. !To enter the passive mode
If you wish to program the passive arming
mode, have it done by your SUBARU
dealer. ! Arming the system
CAUTION
In passive mode, the system will
automatically activate the alarm but
WILL NOT automatically lock the
doors. In order to lock the doors
you must either lock them as in-
dicated in step 4 below or with the
key once they have been closed.
Failure to lock the doors manually
will result in a higher security risk.
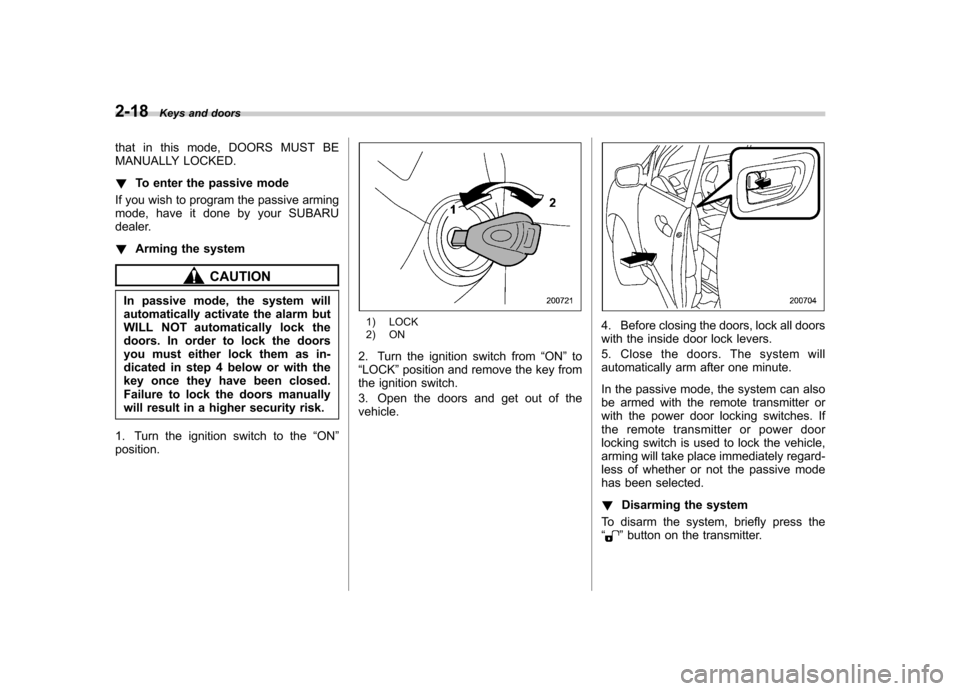
1. Turn the ignition switch to the “ON ”
position.
1) LOCK
2) ON
2. Turn the ignition switch from “ON ”to
“ LOCK ”position and remove the key from
the ignition switch.
3. Open the doors and get out of the vehicle.4. Before closing the doors, lock all doors
with the inside door lock levers.
5. Close the doors. The system will
automatically arm after one minute.
In the passive mode, the system can also
be armed with the remote transmitter or
with the power door locking switches. If
the remote transmitter or power door
locking switch is used to lock the vehicle,
arming will take place immediately regard-
less of whether or not the passive mode
has been selected. ! Disarming the system
To disarm the system, briefly press the “
” button on the transmitter.
Page 110 of 442
&Tripped sensor identification
The security indicator light flashes when
the alarm system has been triggered.
Also, the number of flashes indicates the
location of unauthorized intrusion or the
severity of impact on the vehicle. . When the ignition switch is turned to
the “ON ”position, the indicator light will
light for 1 second and then flash as follows:
When a door or rear gate (Station
wagon) was opened: 5 times
When the trunk (Sedan) was opened:
4 times
When a strong impact or multiple
impacts were sensed: twice (only
vehicles with shock sensors (dealeroption))
When a light impact was sensed: once
(only vehicles with shock sensors
(dealer option))
& Shock sensors (dealer op- tion)
The shock sensors trigger the alarm
system when they sense impacts applied
to the vehicle and when any of their
electric wires is cut. The alarm system
causes the horn to sound and the turn
signal lights to flash for a short time when
the sensed impact is weak, but it warns of a strong impact or multiple impacts by
sounding the horn and flashing the turn
signal lights, both lasting approximately 30seconds.
If you desire, your SUBARU dealer can
connect them and set them for activation
or deactivation.
NOTE . The shock sensors are not always
able to sense impacts caused by break-
ing in, and cannot sense an impact that
does not cause vibration (such as
breaking the glass using a rescuehammer).. The shock sensors may sense vi-
bration like those shown in the follow-
ing and trigger the alarm system.
Select the settings of the alarm system
and shock sensors appropriately de-
pending on where you usually park
your vehicle.Example:
Vibration from construction site
Vibration in multistory car park
Vibration from trains
. You can have the sensitivity of the
shock sensors adjusted to your pre-
ference by your SUBARU dealer. Child safety locks
WARNING
Always use the child safety lock
whenever a child rides in the rear
seat. Serious injury could result if a
child accidentally opened the door
and fell out.
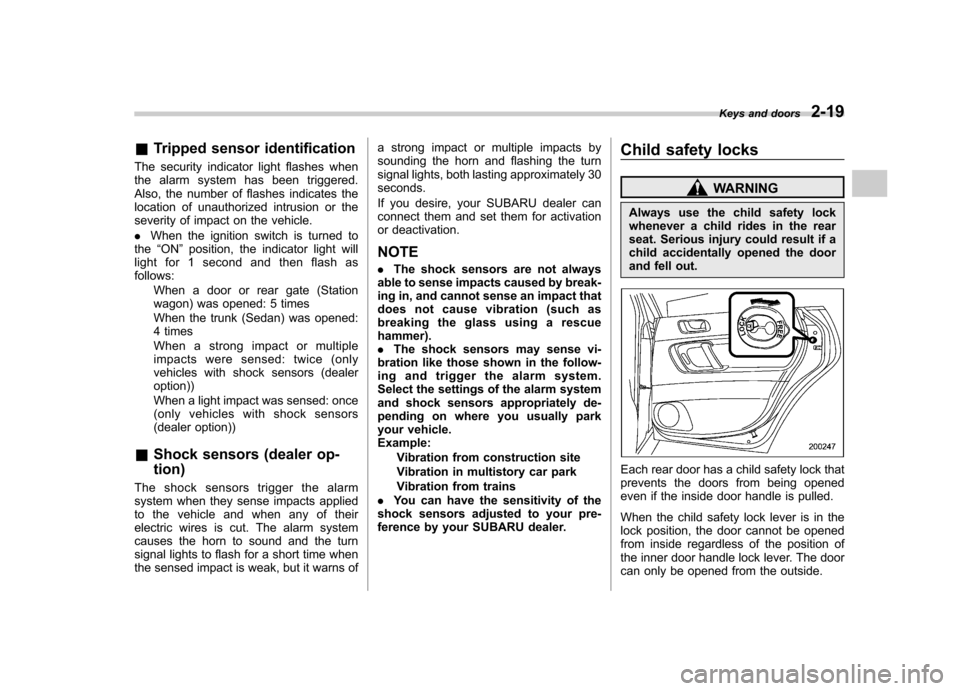
Each rear door has a child safety lock that
prevents the doors from being opened
even if the inside door handle is pulled.
When the child safety lock lever is in the
lock position, the door cannot be opened
from inside regardless of the position of
the inner door handle lock lever. The door
can only be opened from the outside. Keys and doors
2-19
Page 111 of 442
2-20Keys and doors
Windows &Power windows
WARNING
To avoid serious personal injury
caused by entrapment, you must
do the following. . When operating the power win-
dows, be extremely careful to
prevent anyone ’s fingers, arms,
neck or head from being caught
in the window.
. Always lock the passengers ’win-
dows using the lock switch when
children are riding in the vehicle.
. Before leaving the vehicle, al-
ways remove the key from the
ignition switch for safety and
never allow an unattended child
to remain in the vehicle. Failure
to follow this procedure could
result in injury to a child operat-
ing the power window.
The power windows operate only when
the ignition switch is in the “ON ”position. !
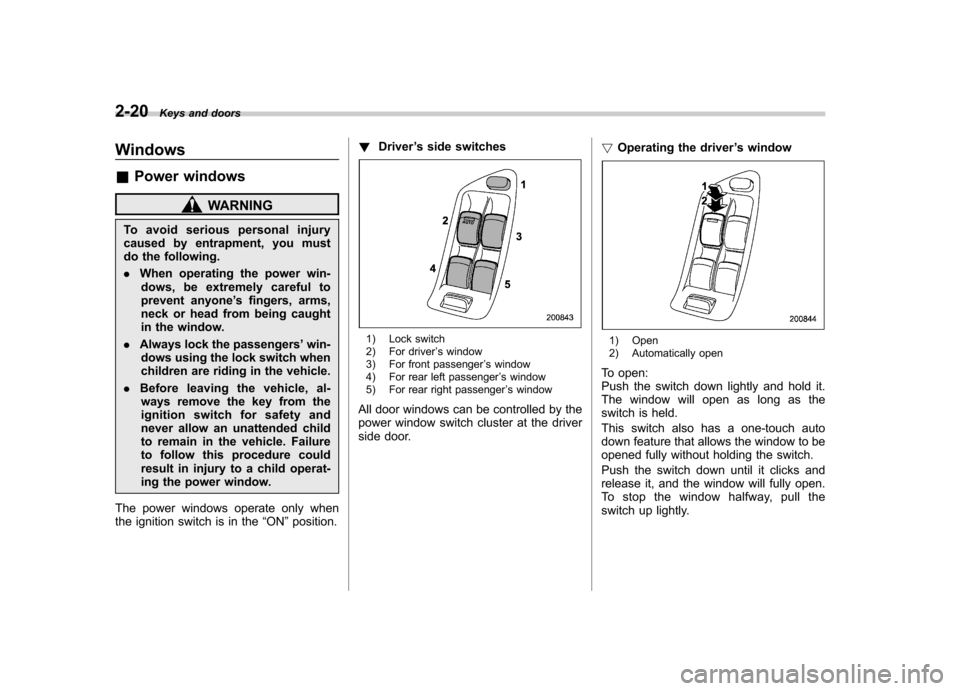
Driver ’s side switches
1) Lock switch
2) For driver ’s window
3) For front passenger ’s window
4) For rear left passenger ’s window
5) For rear right passenger ’s window
All door windows can be controlled by the
power window switch cluster at the driver
side door. !
Operating the driver ’s window1) Open
2) Automatically open
To open:
Push the switch down lightly and hold it.
The window will open as long as the
switch is held.
This switch also has a one-touch auto
down feature that allows the window to be
opened fully without holding the switch.
Push the switch down until it clicks and
release it, and the window will fully open.
To stop the window halfway, pull the
switch up lightly.
Page 117 of 442
2-26Keys and doors
CAUTION
. Do not jam a plastic bag in or
place cellophane tape on the rear
gate stays or scratch the stays
while loading or unloading cargo.
That could cause leakage of gas
from the stays, which may result
in their inability to hold the rear
gate open.
. Be careful not to hit your head or
face on the rear gate when open-
ing or closing the rear gate and
when loading or unloading car-go.
NOTE
Should the rear gate be unable to be
unlocked due to a discharged battery, a
fault in the door locking/unlocking
system or other causes, you can
unlock it by manually operating the
rear gate lock release lever.
For the procedure, refer to “Rear gate
(Station wagon) –if the rear gate
cannot be unlocked ”section in chapter
9. Moonroof (if equipped)
WARNING
. Never let anyone ’s hands, arms,
head or any objects protrude
from the moonroof. A person
could be seriously injured if the
vehicle stops suddenly or turns
sharply or if the vehicle is in-
volved in an accident.
To avoid serious personal injury
caused by entrapment, you must
do the following.
. Before closing the moonroof,
make sure that no one ’s hands,
arms, head or other objects will
be accidentally caught in themoonroof.
. Before leaving the vehicle, al-
ways remove the key from the
ignition switch for safety and
never allow an unattended child
to remain in the vehicle. Failure
to follow this procedure could
result in injury to a child operat-
ing the moonroof. .
Never try to check the anti-en-
trapment function by deliberately
placing part of your body in themoonroof.
CAUTION
. Do not sit on the edge of the open
moonroof.
. Do not operate the moonroof if
falling snow or extremely cold
conditions have caused it to
freeze shut.
. The anti-entrapment function
does not operate when the moon-
roof is being tilted down. Be sure
to confirm that it is safe to do so
before tilting the moonroof down.
The moonroof has both tilting and slidingfunctions.
The moonroofs operate only when the
ignition switch is in the “ON ”position.
Page 119 of 442
2-28Keys and doors
NOTE
For the sake of safety, it is recom-
mended that you avoid driving with the
moonroof fully opened. ! Sun shade
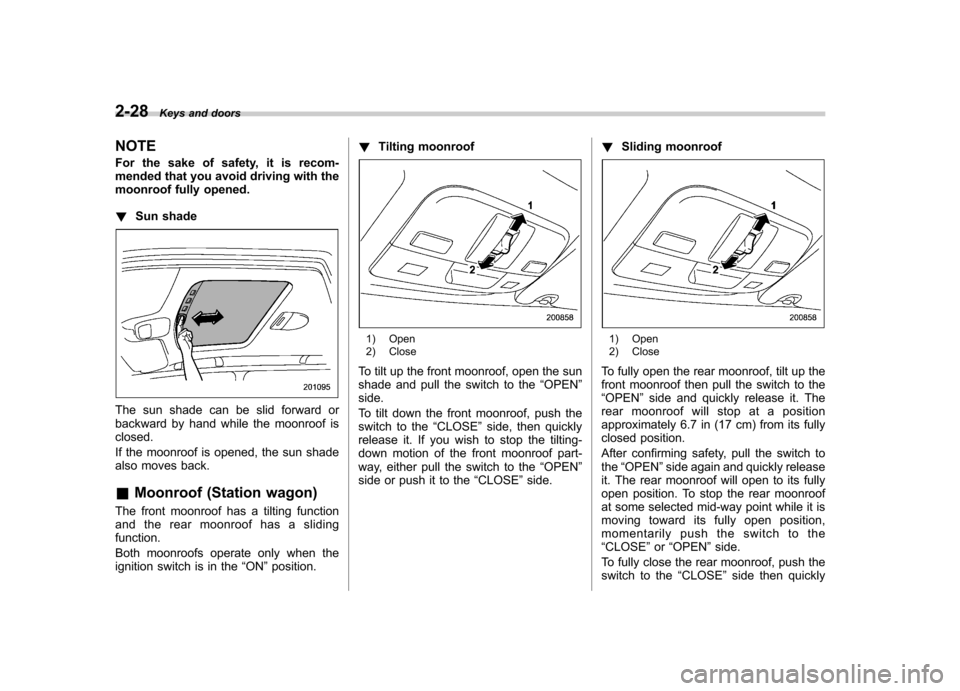
The sun shade can be slid forward or
backward by hand while the moonroof isclosed.
If the moonroof is opened, the sun shade
also moves back. &Moonroof (Station wagon)
The front moonroof has a tilting function
and the rear moonroof has a slidingfunction.
Both moonroofs operate only when the
ignition switch is in the “ON ”position. !
Tilting moonroof
1) Open
2) Close
To tilt up the front moonroof, open the sun
shade and pull the switch to the “OPEN ”
side.
To tilt down the front moonroof, push the
switch to the “CLOSE ”side, then quickly
release it. If you wish to stop the tilting-
down motion of the front moonroof part-
way, either pull the switch to the “OPEN ”
side or push it to the “CLOSE ”side. !
Sliding moonroof1) Open
2) Close
To fully open the rear moonroof, tilt up the
front moonroof then pull the switch to the“ OPEN ”side and quickly release it. The
rear moonroof will stop at a position
approximately 6.7 in (17 cm) from its fully
closed position.
After confirming safety, pull the switch to the “OPEN ”side again and quickly release
it. The rear moonroof will open to its fully
open position. To stop the rear moonroof
at some selected mid-way point while it is
moving toward its fully open position,
momentarily push the switch to the“ CLOSE ”or “OPEN ”side.
To fully close the rear moonroof, push the
switch to the “CLOSE ”side then quickly
Page 122 of 442

Ignition switch..................................................... 3-3
LOCK .................................................................. 3-3
ACC.................................................................... 3-4
ON...................................................................... 3-4
START ................................................................ 3-4
Key reminder chime ............................................ 3-5
Ignition switch light ............................................. 3-5
Hazard warning flasher ....................................... 3-5
Meters and gauges (Turbo models) ................... 3-5
Combination meter illumination ........................... 3-5
Speedometer ....................................................... 3-6
Tachometer ......................................................... 3-6
Fuel gauge .......................................................... 3-6
Temperature gauge ............................................. 3-7
ECO gauge ......................................................... 3-8
Multi-information display (Turbo models) .......... 3-8
Odometer and trip meter ..................................... 3-9
Current and average fuel consumption ............... 3-10
Outside temperature and journey time ................ 3-11
Driving range on remaining fuel .......................... 3-13
Clock (Vehicle with Navigation System) ............... 3-14
SI-DRIVE display ................................................ 3-14
Warning messages and driver ’s
information ...................................................... 3-15
Meters and gauges (Non-turbo models) ........... 3-18
Combination meter illumination .......................... 3-18
Canceling the function for meter/gauge needle movement upon turning on the ignition switch .............................................................. 3-18
Speedometer ...................................................... 3-18
Odometer ........................................................... 3-19 Double trip meter
............................................... 3-19
Tachometer ....................................................... 3-20
Fuel gauge ........................................................ 3-20
Temperature gauge ............................................ 3-21
Warning and indicator lights ............................. 3-22
Seatbelt warning light and chime ....................... 3-22
SRS airbag system warning light ........................ 3-24
Front passenger ’s frontal airbag ON and OFF
indicators ........................................................ 3-25
CHECK ENGINE warning light/Malfunction indicator lamp ................................................. 3-25
Charge warning light .......................................... 3-26
Oil pressure warning light .................................. 3-26
AT OIL TEMPerature warning light (AT vehicles) .................................................... 3-26
Low tire pressure warning light (if equipped) .................................................... 3-26
ABS warning light .............................................. 3-28
Brake system warning light ................................ 3-28
Low fuel warning light ....................................... 3-29
Door open warning light .................................... 3-29
All-Wheel Drive warning light (AT vehicles) .................................................... 3-30
Vehicle Dynamics Control operation indicator light (if equipped). ............................................ 3-30
Vehicle Dynamics Control warning light (if equipped)/Vehicle Dynamics Control OFF
indicator light (if equipped) .............................. 3-30
Security indicator light ....................................... 3-31
SPORT mode indicator light (if equipped) ........... 3-32
Shift-up indicator light (MT vehicles) (if equipped) .................................................... 3-32
Instruments and controls
3
Page 124 of 442
Ignition switch
WARNING
. Never turn the ignition switch to
“ LOCK ”while the vehicle is
being driven or towed because
that will lock the steering wheel,
preventing steering control. And
when the engine is turned off, it
takes a much greater effort than
usual to steer.
. Before leaving the vehicle, al-
ways remove the key from the
ignition switch for safety and
never allow an unattended child
to remain in the vehicle. Failure
to follow this procedure could
result in injury to a child or
others. Children could operate
the power windows, the sunroof
or other controls or even make
the vehicle move.
CAUTION
Do not attach a large key holder or
key case to either key. If it banged
against your knees or hands while
you were driving, it could turn the
ignition switch from the “ON ”posi- tion to the
“Acc ”or “LOCK ”posi-
tion, thereby stopping the engine.
Also, if the key is attached to a
keyholder or to a large bunch of
other keys, centrifugal force may act
on it as the vehicle moves, resulting
in unwanted turning of the ignitionswitch.
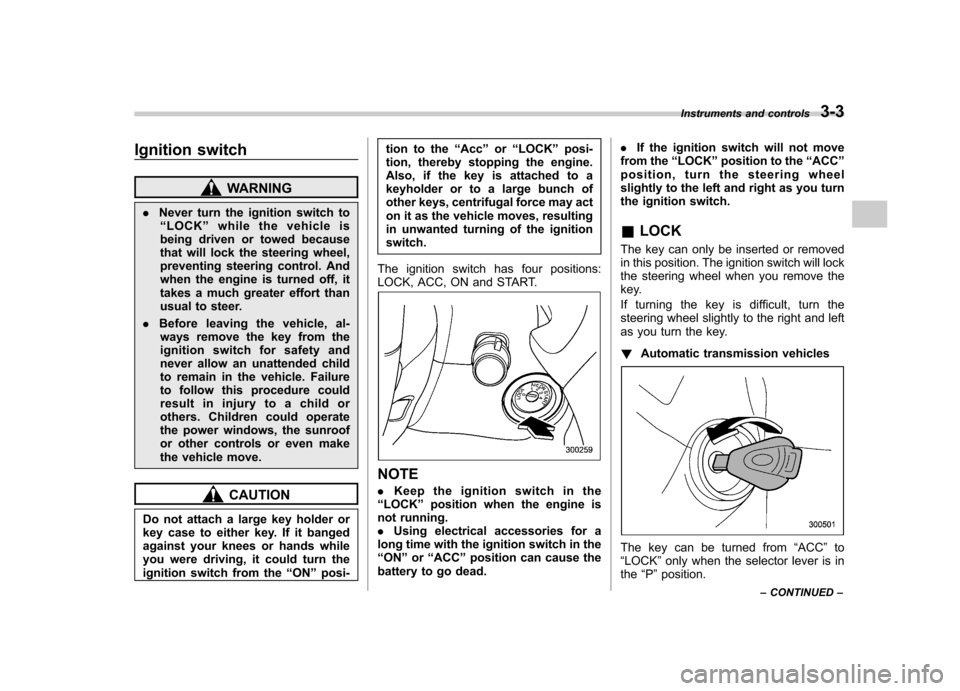
The ignition switch has four positions:
LOCK, ACC, ON and START.
NOTE . Keep the ignition switch in the
“ LOCK ”position when the engine is
not running. . Using electrical accessories for a
long time with the ignition switch in the“ ON ”or “ACC ”position can cause the
battery to go dead. .
If the ignition switch will not move
from the “LOCK ”position to the “ACC ”
position, turn the steering wheel
slightly to the left and right as you turn
the ignition switch.
& LOCK
The key can only be inserted or removed
in this position. The ignition switch will lock
the steering wheel when you remove the
key.
If turning the key is difficult, turn the
steering wheel slightly to the right and left
as you turn the key. ! Automatic transmission vehicles
The key can be turned from “ACC ”to
“ LOCK ”only when the selector lever is in
the “P ”position. Instruments and controls
3-3
– CONTINUED –