fuel cap SUBARU OUTBACK 2008 4.G Owners Manual
[x] Cancel search | Manufacturer: SUBARU, Model Year: 2008, Model line: OUTBACK, Model: SUBARU OUTBACK 2008 4.GPages: 444, PDF Size: 14.1 MB
Page 13 of 444
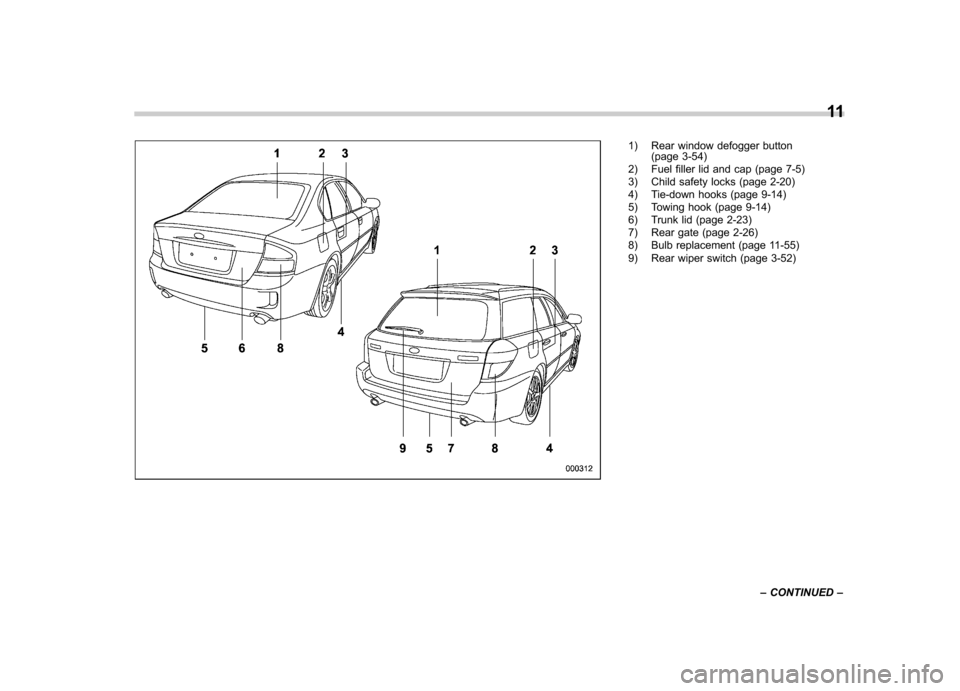
1) Rear window defogger button(page 3-54)
2) Fuel filler lid and cap (page 7-5)
3) Child safety locks (page 2-20)
4) Tie-down hooks (page 9-14)
5) Towing hook (page 9-14)
6) Trunk lid (page 2-23)
7) Rear gate (page 2-26)
8) Bulb replacement (page 11-55)
9) Rear wiper switch (page 3-52) 11
– CONTINUED –
Page 150 of 444
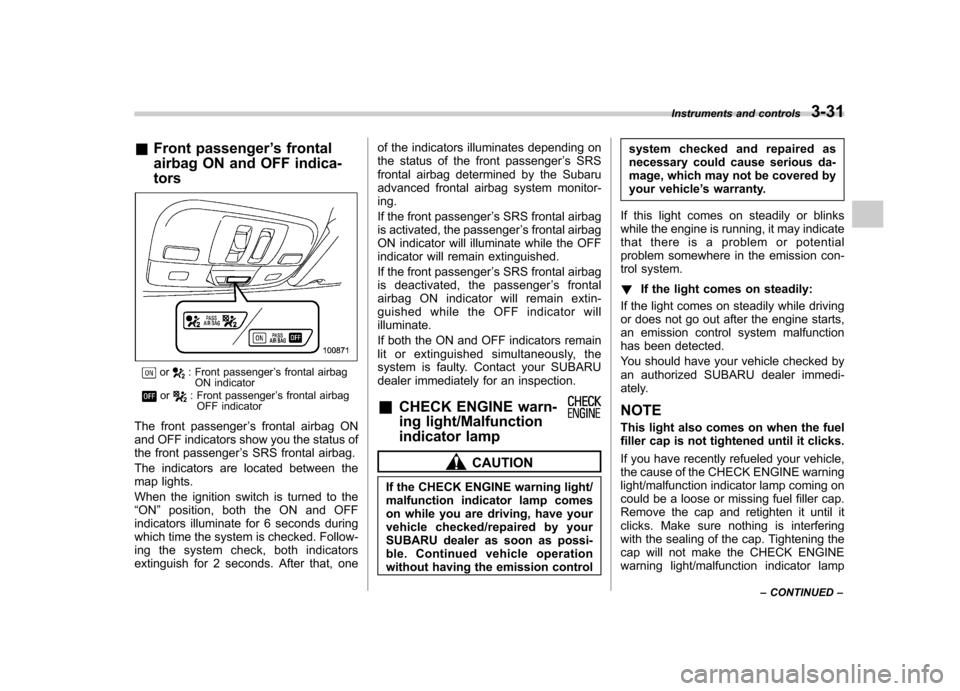
&Front passenger ’s frontal
airbag ON and OFF indica- tors
or: Front passenger ’s frontal airbag
ON indicator
or: Front passenger ’s frontal airbag
OFF indicator
The front passenger ’s frontal airbag ON
and OFF indicators show you the status of
the front passenger ’s SRS frontal airbag.
The indicators are located between the
map lights.
When the ignition switch is turned to the “ ON ”position, both the ON and OFF
indicators illuminate for 6 seconds during
which time the system is checked. Follow-
ing the system check, both indicators
extinguish for 2 seconds. After that, one of the indicators illuminates depending on
the status of the front passenger
’s SRS
frontal airbag determined by the Subaru
advanced frontal airbag system monitor-ing.
If the front passenger ’s SRS frontal airbag
is activated, the passenger ’s frontal airbag
ON indicator will illuminate while the OFF
indicator will remain extinguished.
If the front passenger ’s SRS frontal airbag
is deactivated, the passenger ’sfrontal
airbag ON indicator will remain extin-
guished while the OFF indicator willilluminate.
If both the ON and OFF indicators remain
lit or extinguished simultaneously, the
system is faulty. Contact your SUBARU
dealer immediately for an inspection.
& CHECK ENGINE warn-
ing light/Malfunction
indicator lamp
CAUTION
If the CHECK ENGINE warning light/
malfunction indicator lamp comes
on while you are driving, have your
vehicle checked/repaired by your
SUBARU dealer as soon as possi-
ble. Continued vehicle operation
without having the emission control system checked and repaired as
necessary could cause serious da-
mage, which may not be covered by
your vehicle
’s warranty.
If this light comes on steadily or blinks
while the engine is running, it may indicate
that there is a problem or potential
problem somewhere in the emission con-
trol system. ! If the light comes on steadily:
If the light comes on steadily while driving
or does not go out after the engine starts,
an emission control system malfunction
has been detected.
You should have your vehicle checked by
an authorized SUBARU dealer immedi-
ately.
NOTE
This light also comes on when the fuel
filler cap is not tightened until it clicks.
If you have recently refueled your vehicle,
the cause of the CHECK ENGINE warning
light/malfunction indicator lamp coming on
could be a loose or missing fuel filler cap.
Remove the cap and retighten it until it
clicks. Make sure nothing is interfering
with the sealing of the cap. Tightening the
cap will not make the CHECK ENGINE
warning light/malfunction indicator lamp Instruments and controls
3-31
– CONTINUED –
Page 242 of 444
Fuel...................................................................... 7-3
Fuel requirements ............................................... 7-3
Fuel filler lid and cap ........................................... 7-5
State emission testing (U.S. only) ...................... 7-7
Preparing to drive ............................................... 7-8
Starting the engine .............................................. 7-9
Manual transmission vehicle ................................ 7-9
Automatic transmission vehicle ........................... 7-9
Stopping the engine ........................................... 7-10
Remote engine start system (dealer option) ................................................. 7-11
Starting your vehicle .......................................... 7-11
Remote start safety features ............................... 7-11
Entering the vehicle while it is running via remote start ................................................................. 7-12
Entering the vehicle following remote engine start shutdown ......................................................... 7-12
Pre-heating or pre-cooling the interior of the vehicle ............................................................. 7-12
Service mode ..................................................... 7-12
Remote transmitter programming and programmable feature option ............................ 7-12
System maintenance .......................................... 7-13
Manual transmission –5 speeds ...................... 7-14
Shifting speeds .................................................. 7-15
Driving tips ........................................................ 7-15
Manual transmission –6 speeds (2.5GT
spec.B) ............................................................. 7-16
Selecting reverse gear ........................................ 7-16
Shifting speeds .................................................. 7-17
Driving tips ........................................................ 7-17 Automatic transmission
–4-speed ................... 7-18
Selector lever .................................................... 7-18
Selector lever reverse inhibiting function ............ 7-20
Selection of manual mode .................................. 7-21
Maximum speeds ............................................... 7-22
Driving tips ........................................................ 7-22
SPORT mode ..................................................... 7-23
Shift lock release ............................................... 7-23
Automatic transmission –5-speed ................... 7-24
Selector lever .................................................... 7-25
Selector lever reverse inhibiting function ............ 7-26
Selection of manual mode .................................. 7-27
Maximum speeds ............................................... 7-29
Driving tips ........................................................ 7-29
Shift lock release ............................................... 7-29
SI-DRIVE (Except 2.5-liter non-Turbo models) ............................................................ 7-30
Intelligent (I) mode ............................................. 7-31
Sport (S) mode .................................................. 7-31
Sport Sharp (S#) mode. ...................................... 7-32
SI-DRIVE selector .............................................. 7-32
SI-DRIVE Sport Sharp (S#) switch ...................... 7-32
Rear viscous limited slip differential (LSD) (if equipped) .................................................... 7-33
Power steering ................................................... 7-33
Braking ............................................................... 7-34
Braking tips ....................................................... 7-34
Brake system .................................................... 7-34
Disc brake pad wear warning indicators ............. 7-34
ABS (Anti-lock Brake System) .......................... 7-35
Starting and operating
7
Page 246 of 444
.Fuel system damage or driveability
problems which result from the use of
improper fuel are not covered under the
SUBARU Limited Warranty. & Fuel filler lid and cap
CAUTION
Always use a genuine SUBARU fuel
filler cap. If you use the wrong cap, it
may not fit or have proper venting,
and your fuel tank and emission
control system might be damaged.
! Refueling
WARNING
Gasoline vapor is highly flammable.
Before refueling, always first stop
the engine and make sure that there
are no lighted cigarettes, open
flames or electrical sparks in the
adjacent area.
CAUTION
. Never add any cleaning agents to
the fuel tank. The addition of a
cleaning agent may cause da-
mage to the fuel system. .
Do not let fuel spill on the exterior
surfaces of the vehicle. Fuels
may cause paint damage, which
is not covered under the
SUBARU Limited Warranty.
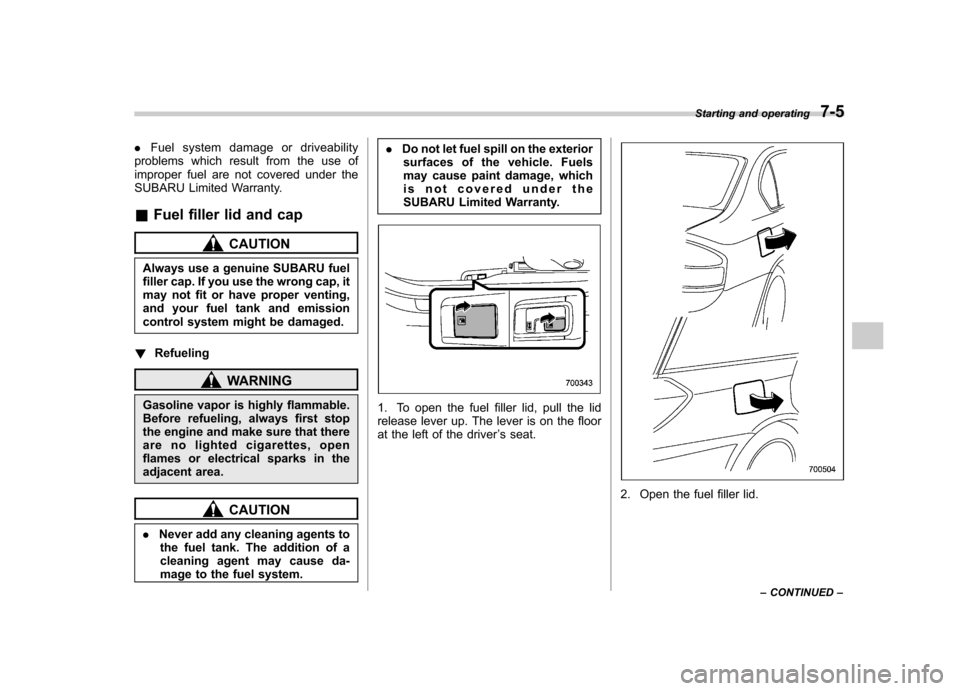
1. To open the fuel filler lid, pull the lid
release lever up. The lever is on the floor
at the left of the driver ’s seat.
2. Open the fuel filler lid. Starting and operating
7-5
– CONTINUED –
Page 247 of 444
7-6Starting and operating
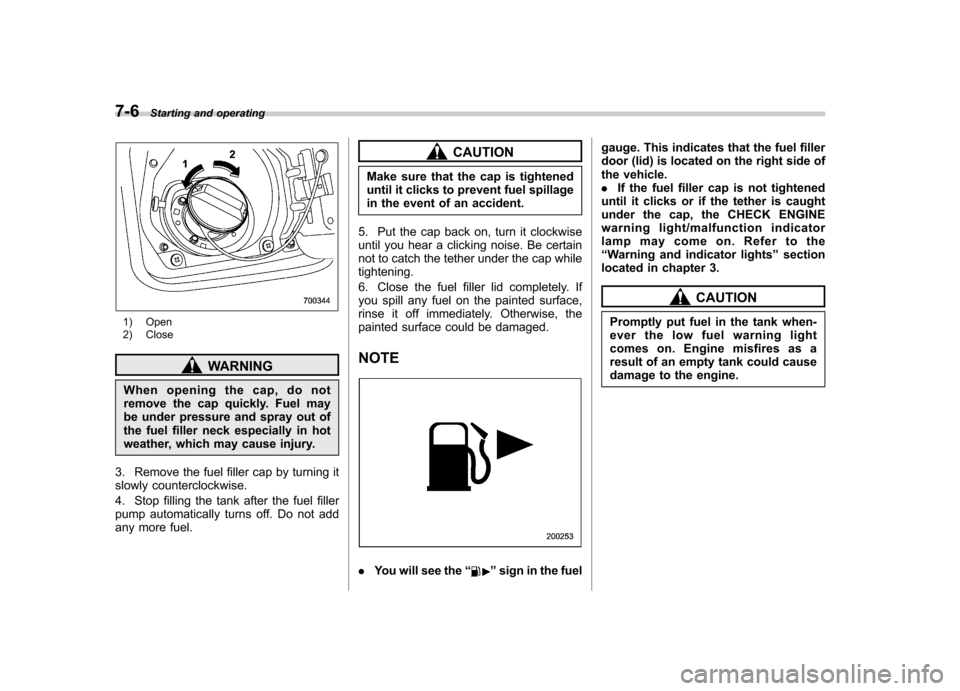
1) Open
2) Close
WARNING
When opening the cap, do not
remove the cap quickly. Fuel may
be under pressure and spray out of
the fuel filler neck especially in hot
weather, which may cause injury.
3. Remove the fuel filler cap by turning it
slowly counterclockwise.
4. Stop filling the tank after the fuel filler
pump automatically turns off. Do not add
any more fuel.
CAUTION
Make sure that the cap is tightened
until it clicks to prevent fuel spillage
in the event of an accident.
5. Put the cap back on, turn it clockwise
until you hear a clicking noise. Be certain
not to catch the tether under the cap whiletightening.
6. Close the fuel filler lid completely. If
you spill any fuel on the painted surface,
rinse it off immediately. Otherwise, the
painted surface could be damaged. NOTE
. You will see the “”sign in the fuel gauge. This indicates that the fuel filler
door (lid) is located on the right side of
the vehicle..
If the fuel filler cap is not tightened
until it clicks or if the tether is caught
under the cap, the CHECK ENGINE
warning light/malfunction indicator
lamp may come on. Refer to the“ Warning and indicator lights ”section
located in chapter 3.
CAUTION
Promptly put fuel in the tank when-
ever the low fuel warning light
comes on. Engine misfires as a
result of an empty tank could cause
damage to the engine.
Page 292 of 444
New vehicle break-in driving–the first
1,000 miles (1,600 km) ..................................... 8-2
Fuel economy hints ............................................ 8-2
Engine exhaust gas (Carbon monoxide) ........... 8-3
Catalytic converter .............................................. 8-3
Periodic inspections ........................................... 8-4
Driving in foreign countries ............................... 8-5
Driving tips for AWD vehicles ............................ 8-5
Off road driving ................................................... 8-6
All AWD models except OUTBACK ...................... 8-6
OUTBACK ........................................................... 8-6
Winter driving ...................................................... 8-8
Operation during cold weather ............................. 8-8
Driving on snowy and icy roads .......................... 8-9
Corrosion protection .......................................... 8-10
Snow tires ......................................................... 8-11 Tire chains
........................................................ 8-13
Rocking the vehicle ........................................... 8-13
Loading your vehicle ......................................... 8-13
Vehicle capacity weight ...................................... 8-14
GVWR and GAWR (Gross Vehicle Weight Rating and Gross Axle Weight Rating) ........................ 8-15
Roof rail and crossbar (if equipped) ................... 8-15
Trailer hitch (if equipped) .................................. 8-19
Connecting a trailer ........................................... 8-20
When you do not tow a trailer .. .......................... 8-21
Trailer towing ..................................................... 8-21
Warranties and maintenance .............................. 8-21
Maximum load limits .......................................... 8-22
Trailer hitches .................................................... 8-25
Connecting a trailer ........................................... 8-26
Trailer towing tips .............................................. 8-27Driving tips
8
Page 300 of 444
used previously, purge the old fluid from
the piping between the reservoir tank and
washer nozzles by operating the washer
for a certain period of time. Otherwise, if
the concentration of the fluid remaining in
thepipingistoolowfortheoutside
temperature, it may freeze and block thenozzles.
CAUTION
Adjust the washer fluid concentra-
tion appropriately for the outside
temperature. If the concentration is
inappropriate, sprayed washer fluid
may freeze on the windshield and
obstruct your view, and the fluid
may freeze in the reservoir tank.
! Before driving your vehicle
Before entering the vehicle, remove any
snow or ice from your shoes because that
could make the pedals slippery anddangerous.
While warming up the vehicle before
driving, check that the accelerator pedal,
brake pedal, and all other controls operate
smoothly.
Clear away ice and snow that has
accumulated under the fenders to avoid
making steering difficult. During severe winter driving, stop when and where it is
safe to do so and check under the fenders
periodically. !
Parking in cold weather
WARNING
Snow can trap dangerous exhaust
gases under your vehicle. Keep
snow clear of the exhaust pipe and
from around your vehicle if you park
the vehicle in snow with the enginerunning.
Do not use the parking brake when
parking for long periods in cold weather
since it could freeze in that position.
Instead, observe the following.
1. Place the shift lever in “1 ” or “R ” for
manual transmission vehicles, and in “P ”
for automatic transmission vehicles.
2. Use tire stops under the tires to
prevent the vehicle from moving.
When the vehicle is parked in snow or
when it snows, raise the wiper blades off
the glass to prevent damage to them.
When the vehicle has been left parked
after use on roads heavily covered with
snow, or has been left parked during a
snowstorm, icing may develop on the
brake system, which could cause poor braking action. Check for snow or ice
buildup on the suspension, disc brakes
and brake hoses underneath the vehicle.
If there is caked snow or ice, remove it,
being careful not to damage the disc
brakes and brake hoses and ABS har-ness. !
Refueling in cold weather
To help prevent moisture from forming in
the fuel system and the risk of its freezing,
use of an antifreeze additive in the fuel
tank is recommended during cold weather.
Use only additives that are specifically
designed for this purpose. When an
antifreeze additive is used, its effect lasts
longer if the tank is refilled whenever the
fuel level reaches half empty.
If your SUBARU is not going to be used
for an extended period, it is best to have
the fuel tank filled to capacity. & Driving on snowy and icy roads
WARNING
Do not use the cruise control on
slippery roads such as snowy or icy
roads. This may cause loss of
vehicle control. Driving tips
8-9
– CONTINUED –
Page 305 of 444
8-14Driving tips
possible.
. When you carry something inside
the vehicle, secure it whenever
you can to prevent it from being
thrown around inside the vehicle
during sudden stops, sharp turns
or in an accident.
. Do not pile heavy loads on the
roof. These loads raise the vehi-cle ’s center of gravity and make it
more prone to tip over.
. Secure lengthy items properly to
prevent them from shooting for-
ward and causing serious injury
during a sudden stop.
. Never exceed the maximum load
limit. If you do, some parts on
your vehicle can break, or it can
change the way your vehicle
handles. This could result in loss
of control and cause personal
injury. Also, overloading can
shorten the life of your vehicle. .
Do not place anything on the rear
shelf behind the rear seatback
(for Sedan) or the extended lug-
gage cover (for Station wagon).
Such items could tumble forward
in the event of a sudden stop or a
collision. This could cause ser-
ious injury.
CAUTION
Do not carry spray cans, containers
with flammable or corrosive liquids
or any other dangerous items inside
the vehicle.
NOTE
For better fuel economy, do not carry
unneeded cargo. &
Vehicle capacity weight
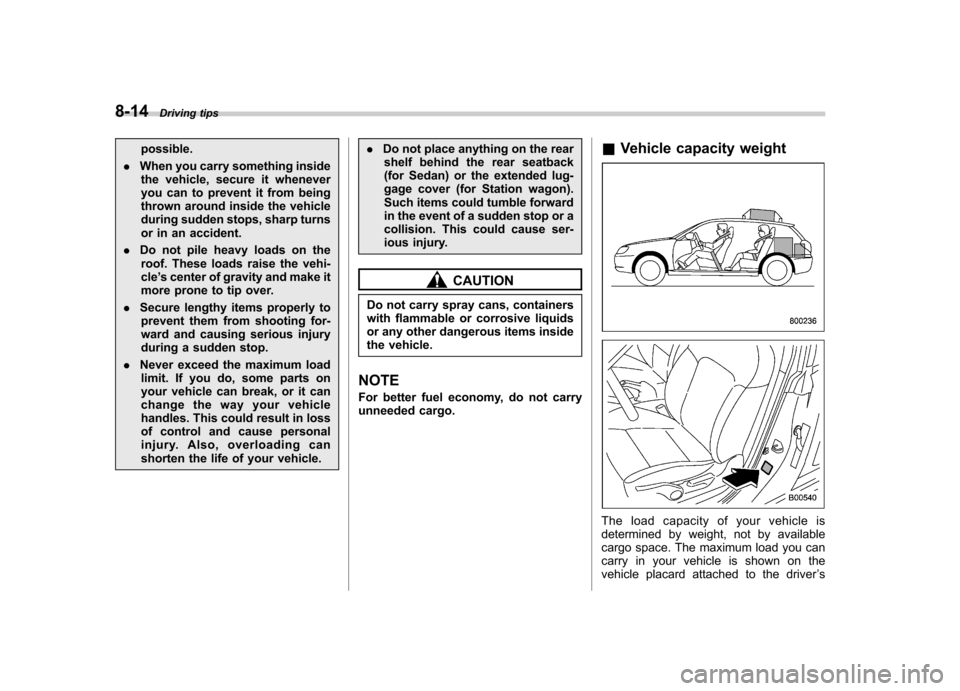
The load capacity of your vehicle is
determined by weight, not by available
cargo space. The maximum load you can
carry in your vehicle is shown on the
vehicle placard attached to the driver ’s
Page 306 of 444
side door pillar. It includes the total weight
of the driver and all passengers and their
belongings, any optional equipment such
as a trailer hitch, roof rack or bike carrier,
etc., and the tongue load of a trailer. &GVWR and GAWR (Gross
Vehicle Weight Rating and
Gross Axle Weight Rating)
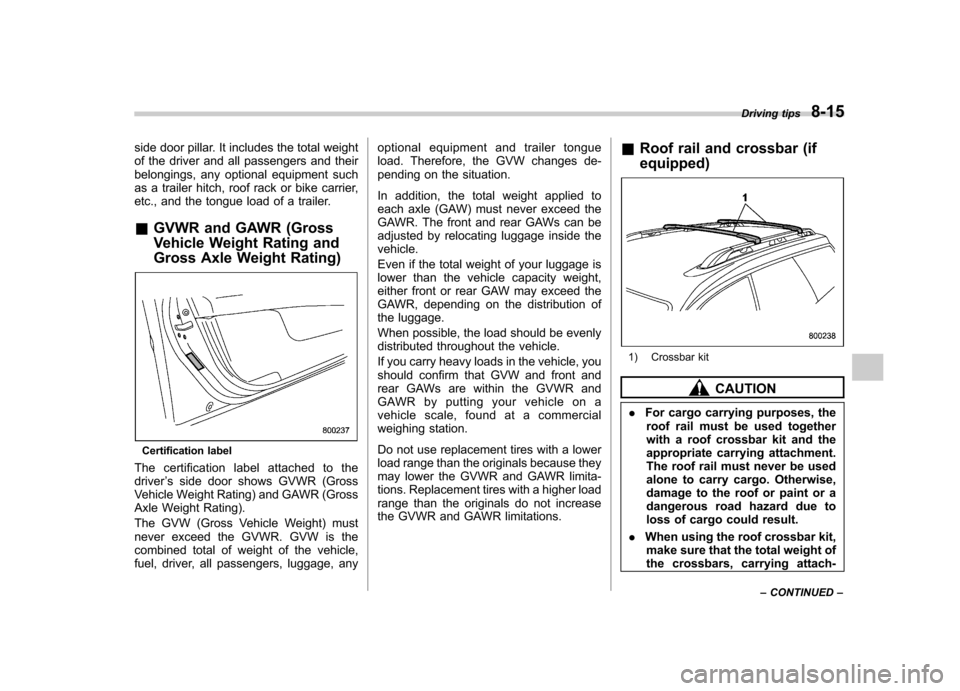
Certification label
The certification label attached to the driver ’s side door shows GVWR (Gross
Vehicle Weight Rating) and GAWR (Gross
Axle Weight Rating).
The GVW (Gross Vehicle Weight) must
never exceed the GVWR. GVW is the
combined total of weight of the vehicle,
fuel, driver, all passengers, luggage, any optional equipment and trailer tongue
load. Therefore, the GVW changes de-
pending on the situation.
In addition, the total weight applied to
each axle (GAW) must never exceed the
GAWR. The front and rear GAWs can be
adjusted by relocating luggage inside thevehicle.
Even if the total weight of your luggage is
lower than the vehicle capacity weight,
either front or rear GAW may exceed the
GAWR, depending on the distribution of
the luggage.
When possible, the load should be evenly
distributed throughout the vehicle.
If you carry heavy loads in the vehicle, you
should confirm that GVW and front and
rear GAWs are within the GVWR and
GAWR by putting your vehicle on a
vehicle scale, found at a commercial
weighing station.
Do not use replacement tires with a lower
load range than the originals because they
may lower the GVWR and GAWR limita-
tions. Replacement tires with a higher load
range than the originals do not increase
the GVWR and GAWR limitations.
&
Roof rail and crossbar (if equipped)
1) Crossbar kit
CAUTION
. For cargo carrying purposes, the
roof rail must be used together
with a roof crossbar kit and the
appropriate carrying attachment.
The roof rail must never be used
alone to carry cargo. Otherwise,
damage to the roof or paint or a
dangerous road hazard due to
loss of cargo could result.
. When using the roof crossbar kit,
make sure that the total weight of
the crossbars, carrying attach- Driving tips
8-15
– CONTINUED –
Page 312 of 444
WARNING
Do not connect safety chains to part
of the vehicle other than the safety
chain hooks.
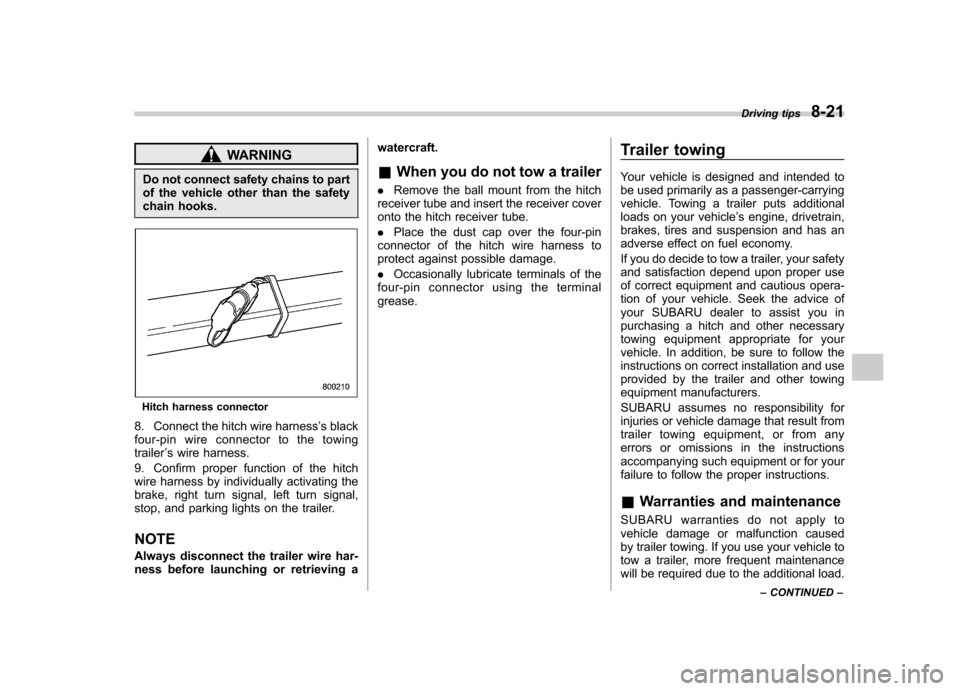
Hitch harness connector
8. Connect the hitch wire harness ’s black
four-pin wire connector to the towing trailer ’s wire harness.
9. Confirm proper function of the hitch
wire harness by individually activating the
brake, right turn signal, left turn signal,
stop, and parking lights on the trailer. NOTE
Always disconnect the trailer wire har-
ness before launching or retrieving a watercraft.
& When you do not tow a trailer
. Remove the ball mount from the hitch
receiver tube and insert the receiver cover
onto the hitch receiver tube. . Place the dust cap over the four-pin
connector of the hitch wire harness to
protect against possible damage. . Occasionally lubricate terminals of the
four-pin connector using the terminal grease. Trailer towing
Your vehicle is designed and intended to
be used primarily as a passenger-carrying
vehicle. Towing a trailer puts additional
loads on your vehicle
’s engine, drivetrain,
brakes, tires and suspension and has an
adverse effect on fuel economy.
If you do decide to tow a trailer, your safety
and satisfaction depend upon proper use
of correct equipment and cautious opera-
tion of your vehicle. Seek the advice of
your SUBARU dealer to assist you in
purchasing a hitch and other necessary
towing equipment appropriate for your
vehicle. In addition, be sure to follow the
instructions on correct installation and use
provided by the trailer and other towing
equipment manufacturers.
SUBARU assumes no responsibility for
injuries or vehicle damage that result from
trailer towing equipment, or from any
errors or omissions in the instructions
accompanying such equipment or for your
failure to follow the proper instructions.
& Warranties and maintenance
SUBARU warranties do not apply to
vehicle damage or malfunction caused
by trailer towing. If you use your vehicle to
tow a trailer, more frequent maintenance
will be required due to the additional load. Driving tips
8-21
– CONTINUED –