start stop button SUBARU OUTBACK 2012 5.G Owners Manual
[x] Cancel search | Manufacturer: SUBARU, Model Year: 2012, Model line: OUTBACK, Model: SUBARU OUTBACK 2012 5.GPages: 474, PDF Size: 17.45 MB
Page 105 of 474
2-16Keys and doors
1 second, and wait 10 seconds without
releasing the switch. The setting will then
be changed as follows:
If the system was previously activated:
The trip meter screen displays “AL oF ”
and the horn sounds twice, indicating that
the system is now deactivated.
If the system was previously deacti- vated:
The trip meter screen displays “AL on ”and
the horn sounds once, indicating that the
system is now activated.
NOTE
You may have the above setting
change done by your SUBARU dealer. & If you have accidentally trig-
gered the alarm system
! To stop the alarm
Perform any of the following operations. . Press any button on the remote trans-
mitter.. Turn the ignition switch to the “ON ”
position. &
Arming the system
! To arm the system using remote transmitter
1. Close all windows and the moonroof (ifequipped).
2. Remove the key from the ignition switch.
3. Open the doors and get out of the vehicle.
4. Make sure that the engine hood (and
the trunk lid (Legacy)) are locked.
5. Close all doors (and the rear gate (Outback)).
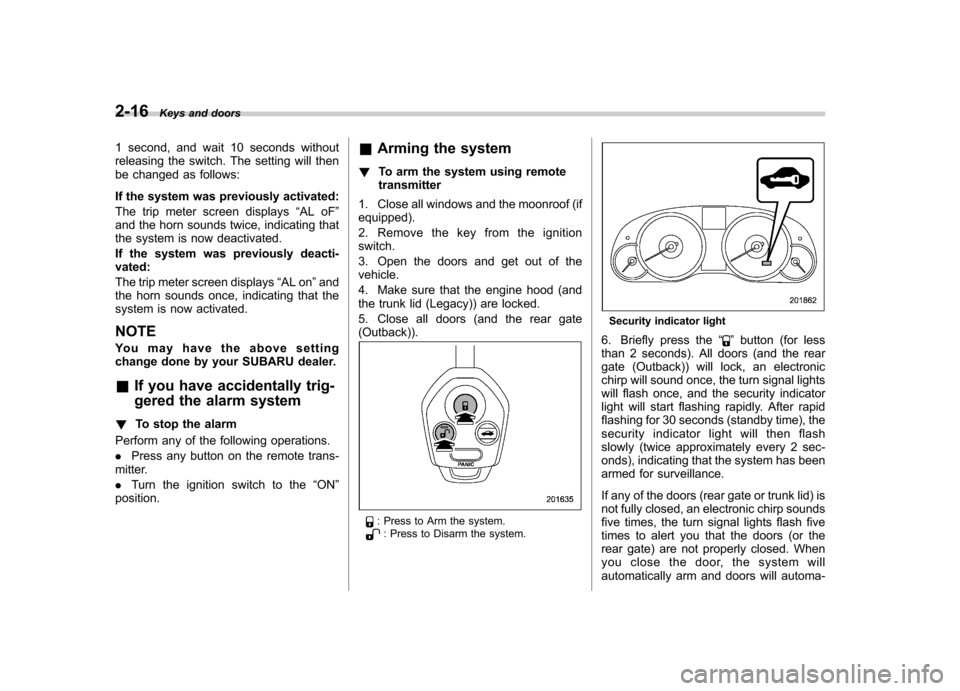
: Press to Arm the system.: Press to Disarm the system.
Security indicator light
6. Briefly press the “
”button (for less
than 2 seconds). All doors (and the rear
gate (Outback)) will lock, an electronic
chirp will sound once, the turn signal lights
will flash once, and the security indicator
light will start flashing rapidly. After rapid
flashing for 30 seconds (standby time), the
security indicator l ight will then flash
slowly (twice approximately every 2 sec-
onds), indicating that the system has been
armed for surveillance.
If any of the doors (rear gate or trunk lid) is
not fully closed, an electronic chirp sounds
five times, the turn signal lights flash five
times to alert you that the doors (or the
rear gate) are not properly closed. When
you close the door, the system will
automatically arm and doors will automa-
Page 209 of 474

5-26Audio
Type C audio:
Fast-forwarding
Rewinding
Press and hold the “”button to fast-
forward the track/file. Release the button
to stop fast-forwarding.
Press and hold the “
”button to rewind
the track/file. Release the button to stop rewinding.
NOTE . If you fast-forward to the end of the
last track/file, fast-forwarding will stop
and the player will start playback
beginning with the first track/file. For
an MP3, WMA or AAC folder, the player
will start playback beginning with the
first track/file of the next folder.. If you rewind to the beginning of the
first track/file, rewinding will stop and
the player will start playback. For an
MP3, WMA or AAC folder, the player
will start playback beginning with the
first track/file of the current folder. &
Repeating
Repeat button:
Type A audio
Type B audio
Type C audio
To repeat a track/file, briefly press the
repeat button while the track/file is playing.
Each time you briefly press the repeat
button, the mode changes in the followingsequences.
Type A and B audio:
Type C audio:
NOTE . The “TRACK RPT ”(type A and B
audio)/ “ONE ”(type C audio) indication
refers to the repeat playback of a single
track. It repeats the track that is play-ing.. The “FOLDER RPT ”(type A and B
audio)/ “FOLDER ”(type C audio) indi-
cation refers to the repeat playback of a
folder. It repeats the all of the tracks in
the folder. It is possible to select the
function when the MP3/WMA/AAC for-
mat track is playing.
To cancel the track/file repeat-play mode,
briefly press the repeat button and select
CANCEL. The “RPT ”indication will turn
off, and the normal playback mode will beresumed.
NOTE
The repeat-play mode will be cancelled
if you perform any of the followingsteps: . Press the “
”button.
. Press the “SCAN ”button.
. Turn the “TUNE ”dial during repeat
playback of a single track (type C audio).
Page 287 of 474
7-10Starting and operating
Stopping the engine
WARNING
Do not stop the engine when the
vehicle is moving. This will cause
loss of power to the power steering
and the brake booster, making steer-
ing and braking more difficult. It
could also result in accidental acti-
vation of the “LOCK ”position on the
ignition switch, causing the steering
wheel to lock.
The ignition switch should be turned off
only when the vehicle is stopped and the
engine is idling. Remote engine start system
(dealer option)
WARNING
. Do not remote start a vehicle in
an enclosed environment (e.g.
closed garage). Prolonged opera-
tion of a motor vehicle in an
enclosed environment can cause
a harmful build-up of Carbon
Monoxide. Carbon Monoxide is
harmful to your health. Exposure
to high levels of Carbon Monox-
ide can cause headaches, dizzi-
ness or in extreme cases uncon-
sciousness and/or death.
. Before performing any servicing
of the vehicle, temporarily place
the remote engine start system in
service mode to prevent the
system from unexpectedly start-
ing the engine.
& Starting your vehicle
NOTE
All vehicle doors, the engine hood and
trunk / rear gate must be closed prior to
activating the remote engine start sys-
tem. Any open entry point will prevent
starting or cause the system to shutdown.
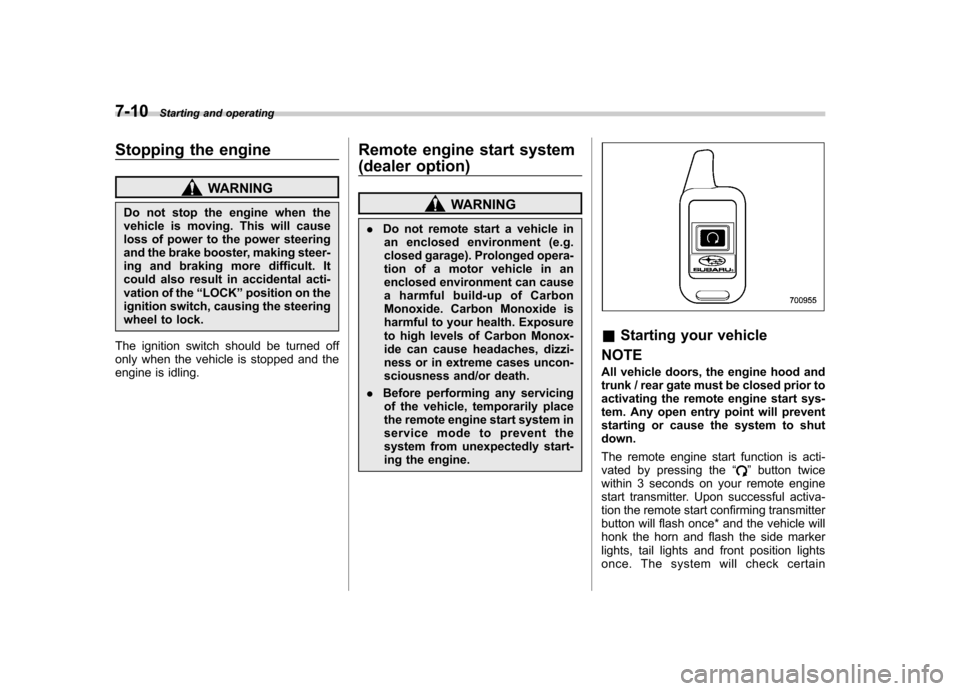
The remote engine start function is acti-
vated by pressing the “
”button twice
within 3 seconds on your remote engine
start transmitter. Upon successful activa-
tion the remote start confirming transmitter
button will flash once* and the vehicle will
honk the horn and flash the side marker
lights, tail lights and front position lights
once. The system will check certain
Page 295 of 474
7-18Starting and operating
than 5 seconds in any position
except the “N ” or “P ” position
when the brake is applied or
when chocks are used in the
wheels. This may cause the
transmission fluid to overheat.
. Avoid shifting from one of the
forward driving positions into the“ R ” position or vice versa until
the vehicle has completely
stopped. Such shifting may
cause damage to the transmis-sion.
. When parking the vehicle, first
securely apply the parking brake
and then place the select lever inthe “P ” position. Avoid parking
for a long time with the select
lever in any other position as
doing so could result in a dead
battery.
NOTE . For AT models, when the engine
coolant temperature is still low, the
transmission will upshift to higher
engine speeds than when the coolant
temperature is sufficiently high in order
to shorten the warm-up time and
improve driveability. The gearshift tim-
ing will automatically shift to the nor- mal timing after the engine has warmedup..
Immediately after transmission fluid
is replaced, you may feel that the
transmission operation is somewhat
unusual. This results from invalidation
of data which the on-board computer
has collected and stored in memory to
allow the transmission to shift at the
most appropriate times for the current
condition of your vehicle. Optimized
shifting will be restored as the vehicle
continues to be driven for a while.. When driving a vehicle that is
equipped with CVT under continuous
heavy load conditions such as towing a
camper or climbing a long, steep hill,
the engine speed or the vehicle speed
may automatically be reduced. This is
not a malfunction. This phenomenon
results from the engine control func-
tion maintaining the cooling perfor-
mance of the vehicle. The engine and
vehicle speed will return to a normal
speed when the engine is able to
maintain the optimum cooling perfor-
mance after the heavy load decreases.
Driving under a heavy load must be
performed with extreme care. Do not
try to pass a vehicle in front when
driving on an uphill slope while towing.. The continuously variable transmis-
sion is a chain type system that provides superior transmission effi-
ciency for maximum fuel economy. At
times, depending on varying driving
conditions, a chain operating sound
may be heard that is characteristic of
this type of system.
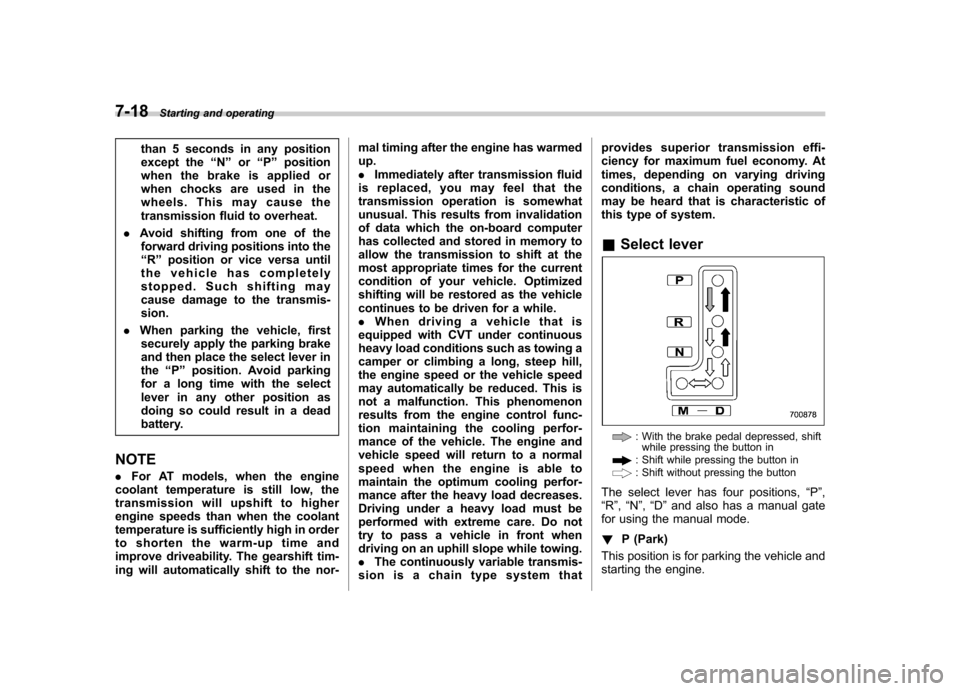
& Select lever
: With the brake pedal depressed, shift
while pressing the button in
: Shift while pressing the button in: Shift without pressing the button
The select lever has four positions, “P ”,
“ R ”, “N ”, “D ”and also has a manual gate
for using the manual mode. ! P (Park)
This position is for parking the vehicle and
starting the engine.
Page 297 of 474
7-20Starting and operating
NOTE
The transmission may downshift, de-
pending on the way the accelerator
pedal is depressed to accelerate the
vehicle again. & Shift lock function
The shift lock function helps prevent the
improper operation of the select lever. . The select lever cannot be operated
unless the ignition switch is turned to the “ ON ”position and the brake pedal is
depressed. . The select lever cannot be moved from
the “P ” position to any other position
before the brake pedal is depressed.
Depress the brake pedal first, and then
operate the select lever. . Only the “P ”position allows you to turn
the key from the “Acc ”position to the
“ LOCK ”position and remove the key from
the ignition key cylinder.. If the ignition switch is turned to the
“ LOCK ”position while the select lever is in
the “N ”position, the select lever may not
be moved to the “P ”position after a period
of time. Therefore, move the select lever
to the “P ” position with the brake pedal
depressed soon after the ignition switch is
turned to the “LOCK ”position. !
Shift lock release
If the select lever cannot be operated, turn
theignitionswitchbacktothe “ON ”
position then move the select lever to the“ P ” position with the select lever button
pressed and brake pedal depressed.
If the select lever does not move after
performing the above procedure, perform
the following steps. . When the select lever cannot be
shifted from “P ” to “N ”:
Refer to “Shift lock release using the shift
lock release button ”F 7-20.
. When the select lever cannot be
shifted from “N ” to “R ”, “P ”:
Within 60 seconds after placing the igni-
tion switch in the “Acc ”position, move the
select lever to the “P ” position with the
select lever button pressed and brake
pedal depressed.
If you must perform the above procedure,
the shift lock system (or the vehicle control
system) may be malfunctioning. Contact a
SUBARU dealer for an inspection as soon
as possible.
If the select lever does not move after
performing the above procedure, refer to“ Shift lock release using the shift lock
release button ”F 7-20. !
Shift lock release using the shift
lock release button
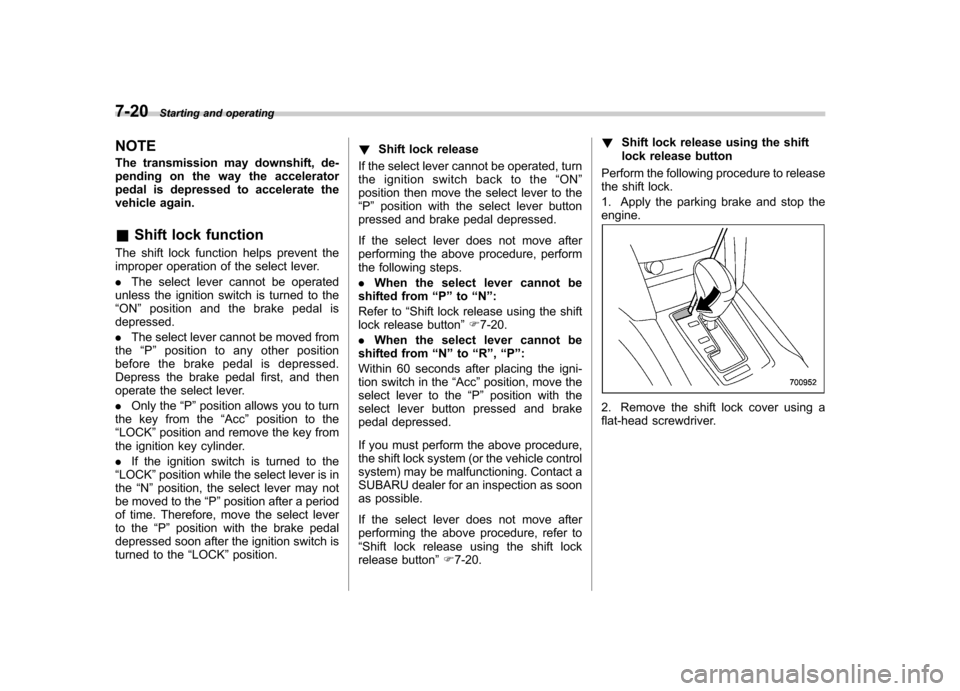
Perform the following procedure to release
the shift lock.
1. Apply the parking brake and stop the engine.
2. Remove the shift lock cover using a
flat-head screwdriver.
Page 298 of 474
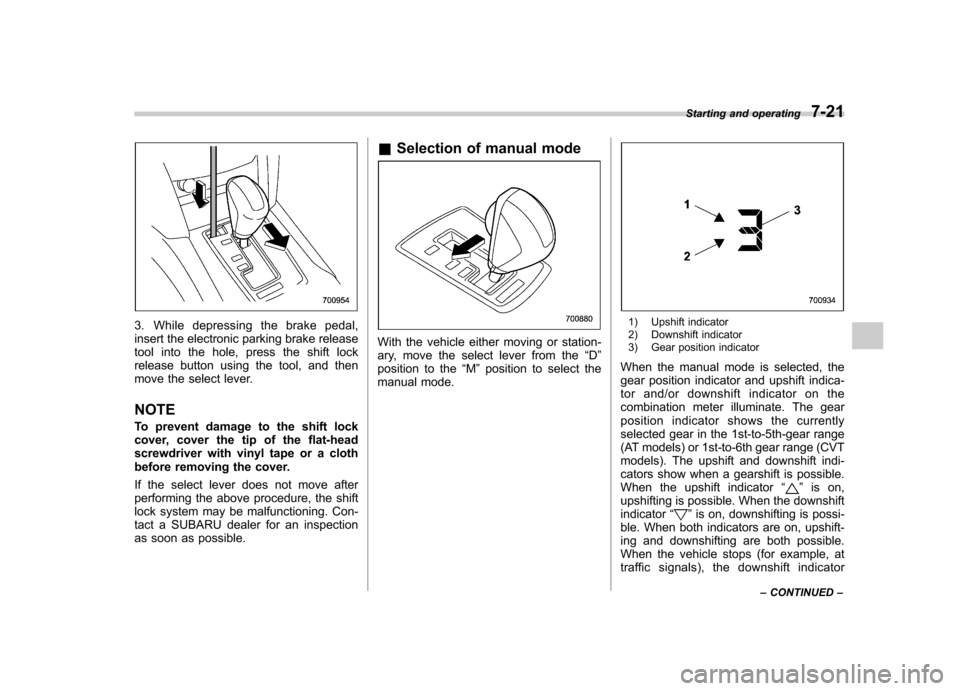
3. While depressing the brake pedal,
insert the electronic parking brake release
tool into the hole, press the shift lock
release button using the tool, and then
move the select lever. NOTE
To prevent damage to the shift lock
cover, cover the tip of the flat-head
screwdriver with vinyl tape or a cloth
before removing the cover.
If the select lever does not move after
performing the above procedure, the shift
lock system may be malfunctioning. Con-
tact a SUBARU dealer for an inspection
as soon as possible.&
Selection of manual mode
With the vehicle either moving or station-
ary, move the select lever from the “D ”
position to the “M ”position to select the
manual mode.
1) Upshift indicator
2) Downshift indicator
3) Gear position indicator
When the manual mode is selected, the
gear position indicator and upshift indica-
tor and/or downshift indicator on the
combination meter illuminate. The gear
position indicator shows the currently
selected gear in the 1st-to-5th-gear range
(AT models) or 1st-to-6th gear range (CVT
models). The upshift and downshift indi-
cators show when a gearshift is possible.
When the upshift indicator “
”is on,
upshifting is possible. When the downshift indicator “
”is on, downshifting is possi-
ble. When both indicators are on, upshift-
ing and downshifting are both possible.
When the vehicle stops (for example, at
traffic signals), the downshift indicator Starting and operating
7-21
– CONTINUED –
Page 313 of 474
7-36Starting and operating
the accelerator pedal.
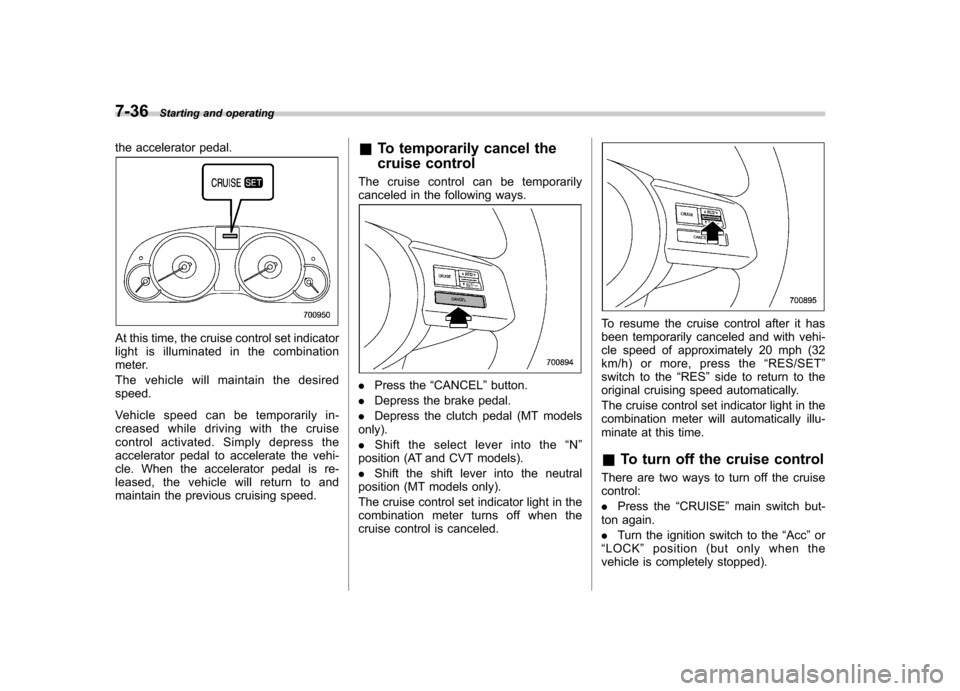
At this time, the cruise control set indicator
light is illuminated in the combination
meter.
The vehicle will maintain the desired speed.
Vehicle speed can be temporarily in-
creased while driving with the cruise
control activated. Simply depress the
accelerator pedal to accelerate the vehi-
cle. When the accelerator pedal is re-
leased, the vehicle will return to and
maintain the previous cruising speed. &
To temporarily cancel the
cruise control
The cruise control can be temporarily
canceled in the following ways.
. Press the “CANCEL ”button.
. Depress the brake pedal.
. Depress the clutch pedal (MT models
only). . Shift the select lever into the “N ”
position (AT and CVT models).. Shift the shift lever into the neutral
position (MT models only).
The cruise control set indicator light in the
combination meter turns off when the
cruise control is canceled.
To resume the cruise control after it has
been temporarily canceled and with vehi-
cle speed of approximately 20 mph (32
km/h) or more, press the “RES/SET ”
switch to the “RES ”side to return to the
original cruising speed automatically.
The cruise control set indicator light in the
combination meter will automatically illu-
minate at this time. & To turn off the cruise control
There are two ways to turn off the cruise control: . Press the “CRUISE ”main switch but-
ton again.. Turn the ignition switch to the “Acc ”or
“ LOCK ”position (but only when the
vehicle is completely stopped).