tow SUBARU OUTBACK 2020 Getting Started Guide
[x] Cancel search | Manufacturer: SUBARU, Model Year: 2020, Model line: OUTBACK, Model: SUBARU OUTBACK 2020Pages: 132, PDF Size: 5.99 MB
Page 5 of 132
IN CASE OF EMERGENCY
SUBARU STARLINK™ Safety and Security(subscription required)
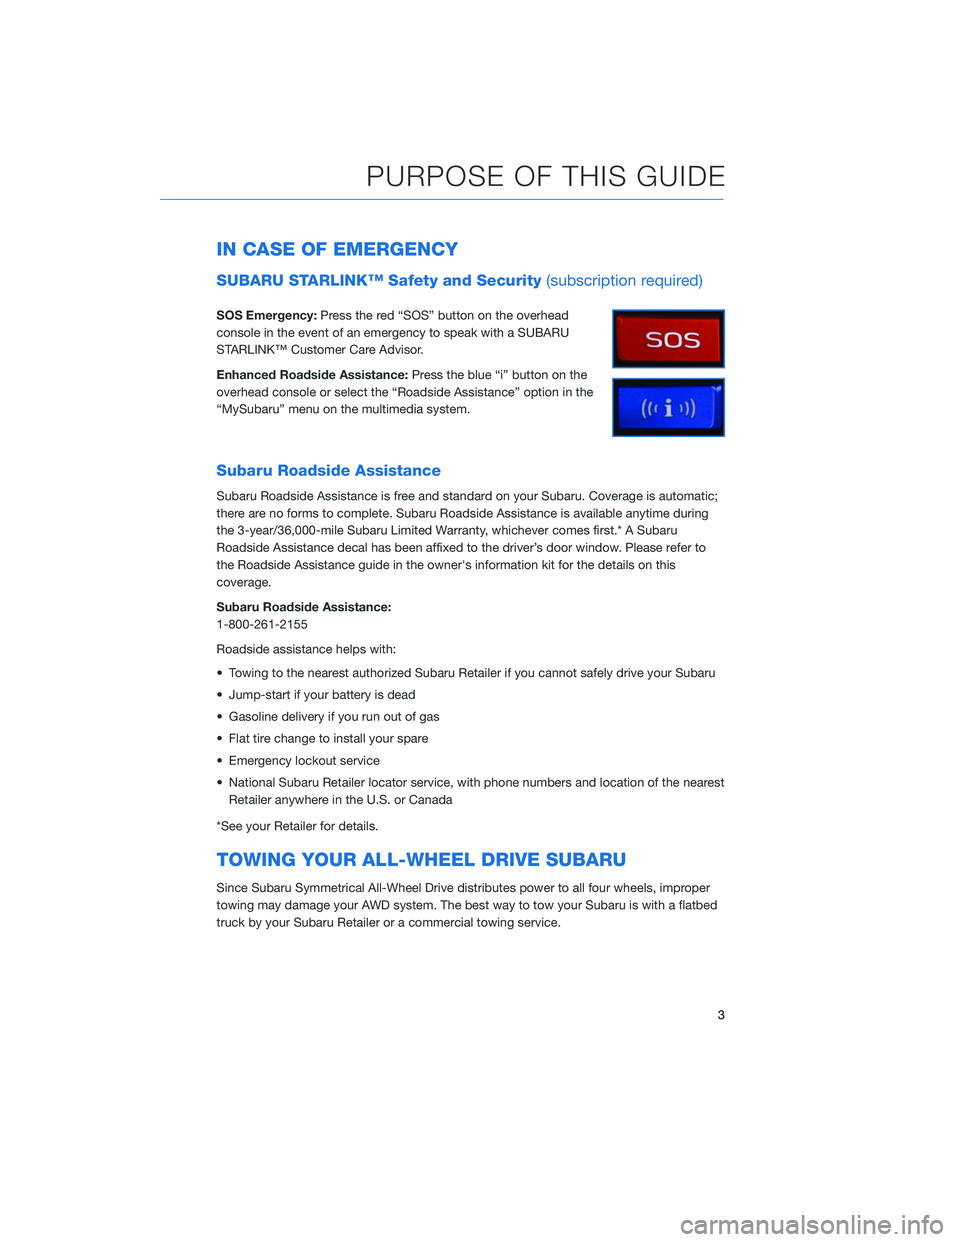
SOS Emergency:Press the red “SOS” button on the overhead
console in the event of an emergency to speak with a SUBARU
STARLINK™ Customer Care Advisor.
Enhanced Roadside Assistance: Press the blue “i” button on the
overhead console or select the “Roadside Assistance” option in the
“MySubaru” menu on the multimedia system.
Subaru Roadside Assistance
Subaru Roadside Assistance is free and standard on your Subaru. Coverage is automatic;
there are no forms to complete. Subaru Roadside Assistance is available anytime during
the 3-year/36,000-mile Subaru Limited Warranty, whichever comes first.* A Subaru
Roadside Assistance decal has been affixed to the driver’s door window. Please refer to
the Roadside Assistance guide in the owner's information kit for the details on this
coverage.
Subaru Roadside Assistance:
1-800-261-2155
Roadside assistance helps with:
• Towing to the nearest authorized Subaru Retailer if you cannot safely drive your Subaru
• Jump-start if your battery is dead
• Gasoline delivery if you run out of gas
• Flat tire change to install your spare
• Emergency lockout service
• National Subaru Retailer locator service, with phone numbers and location of the nearest Retailer anywhere in the U.S. or Canada
*See your Retailer for details.
TOWING YOUR ALL-WHEEL DRIVE SUBARU
Since Subaru Symmetrical All-Wheel Drive distributes power to all four wheels, improper
towing may damage your AWD system. The best way to tow your Subaru is with a flatbed
truck by your Subaru Retailer or a commercial towing service.
PURPOSE OF THIS GUIDE
3
Page 28 of 132
Daytime Running Lights
The daytime running lights automatically turn on when the engine has started, the parking
brake is fully released, the light switch is in the Off, “AUTO” (if equipped) or “
”
position, and the select lever is not in the “P” position. Always turn on the headlights when
it’s dark outside by rotating the dial to the “
” or “AUTO” position.
TURN SIGNALS
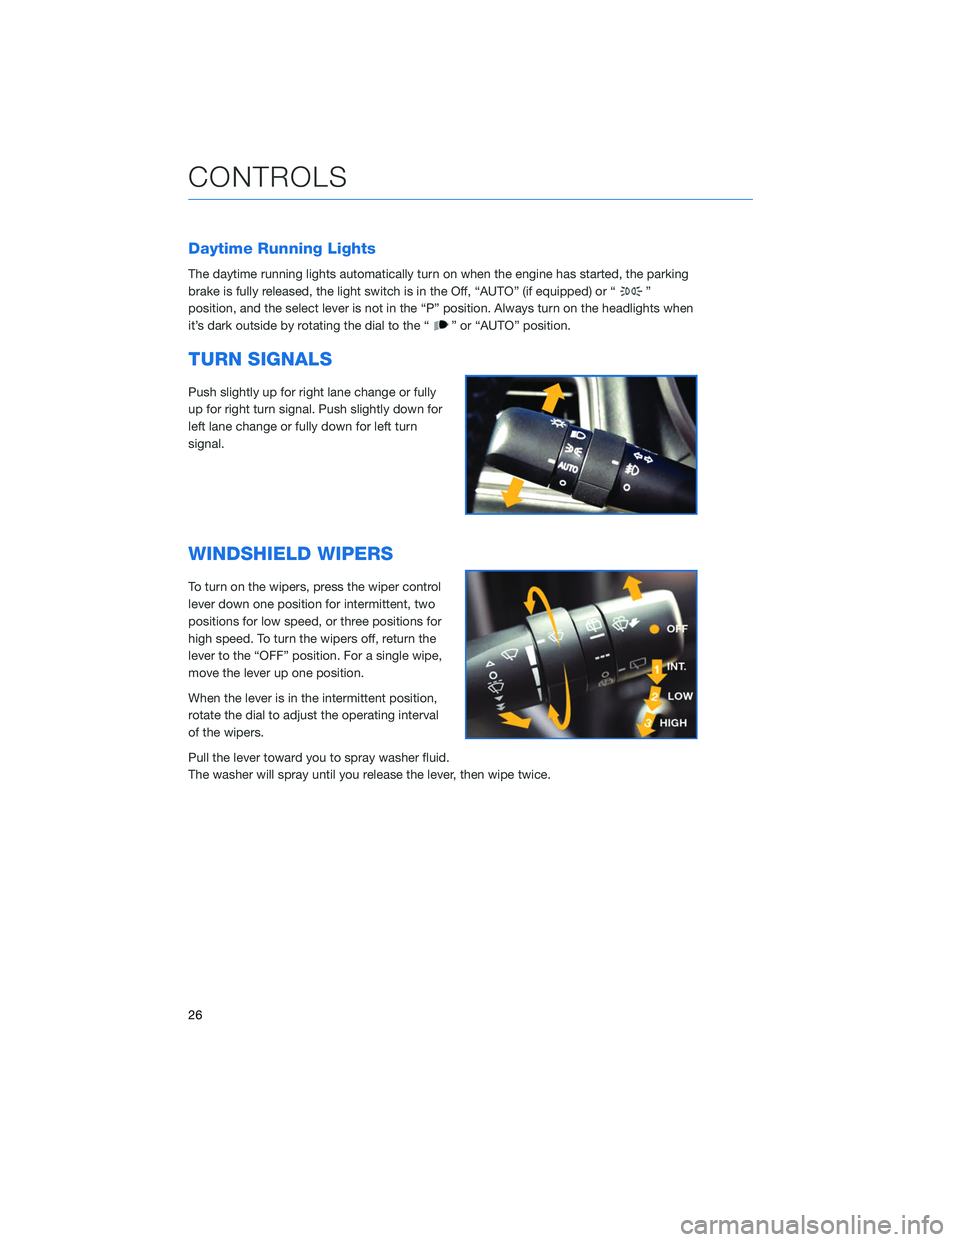
Push slightly up for right lane change or fully
up for right turn signal. Push slightly down for
left lane change or fully down for left turn
signal.
WINDSHIELD WIPERS
To turn on the wipers, press the wiper control
lever down one position for intermittent, two
positions for low speed, or three positions for
high speed. To turn the wipers off, return the
lever to the “OFF” position. For a single wipe,
move the lever up one position.
When the lever is in the intermittent position,
rotate the dial to adjust the operating interval
of the wipers.
Pull the lever toward you to spray washer fluid.
The washer will spray until you release the lever, then wipe twice.
CONTROLS
26
Page 33 of 132
DRIVING THE VEHICLE
Automatic Transmission Shift Mode
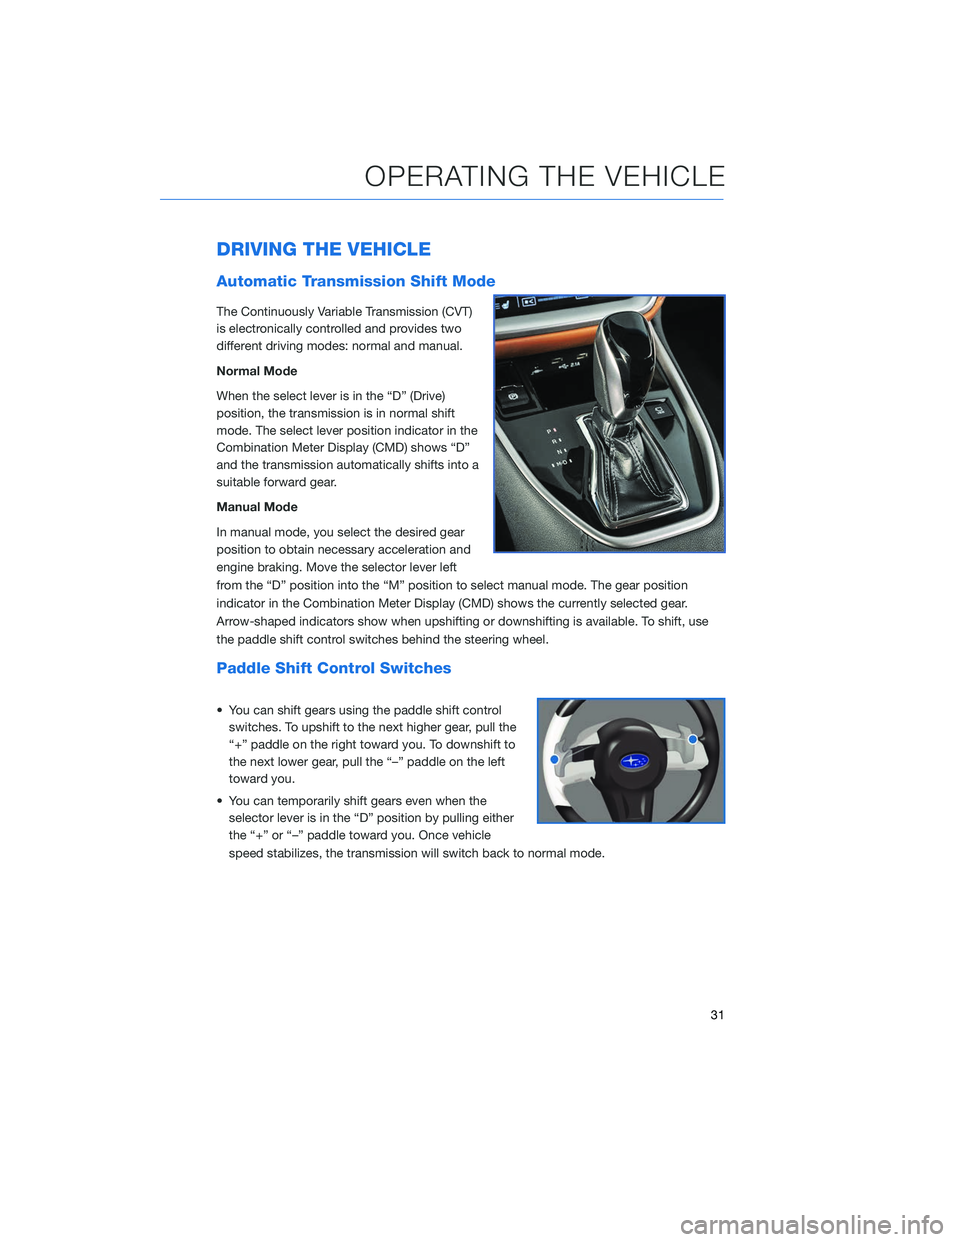
The Continuously Variable Transmission (CVT)
is electronically controlled and provides two
different driving modes: normal and manual.
Normal Mode
When the select lever is in the “D” (Drive)
position, the transmission is in normal shift
mode. The select lever position indicator in the
Combination Meter Display (CMD) shows “D”
and the transmission automatically shifts into a
suitable forward gear.
Manual Mode
In manual mode, you select the desired gear
position to obtain necessary acceleration and
engine braking. Move the selector lever left
from the “D” position into the “M” position to select manual mode. The gear position
indicator in the Combination Meter Display (CMD) shows the currently selected gear.
Arrow-shaped indicators show when upshifting or downshifting is available. To shift, use
the paddle shift control switches behind the steering wheel.
Paddle Shift Control Switches
• You can shift gears using the paddle shift controlswitches. To upshift to the next higher gear, pull the
“+” paddle on the right toward you. To downshift to
the next lower gear, pull the “–” paddle on the left
toward you.
• You can temporarily shift gears even when the selector lever is in the “D” position by pulling either
the “+” or “–” paddle toward you. Once vehicle
speed stabilizes, the transmission will switch back to normal mode.
OPERATING THE VEHICLE
31
Page 40 of 132
FUEL FILLER LID
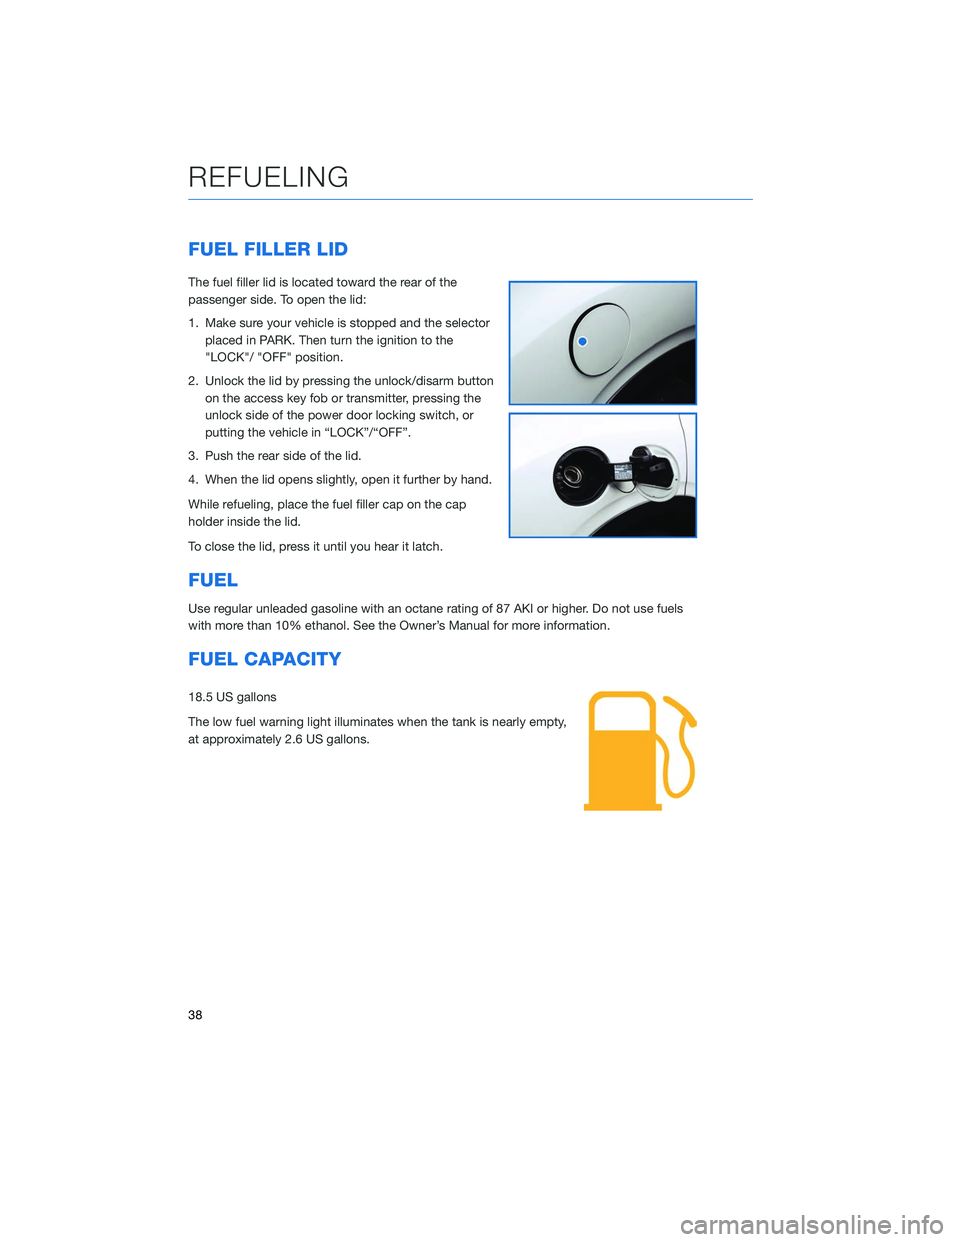
The fuel filler lid is located toward the rear of the
passenger side. To open the lid:
1. Make sure your vehicle is stopped and the selectorplaced in PARK. Then turn the ignition to the
"LOCK"/ "OFF" position.
2. Unlock the lid by pressing the unlock/disarm button on the access key fob or transmitter, pressing the
unlock side of the power door locking switch, or
putting the vehicle in “LOCK”/“OFF”.
3. Push the rear side of the lid.
4. When the lid opens slightly, open it further by hand.
While refueling, place the fuel filler cap on the cap
holder inside the lid.
To close the lid, press it until you hear it latch.
FUEL
Use regular unleaded gasoline with an octane rating of 87 AKI or higher. Do not use fuels
with more than 10% ethanol. See the Owner’s Manual for more information.
FUEL CAPACITY
18.5 US gallons
The low fuel warning light illuminates when the tank is nearly empty,
at approximately 2.6 US gallons.
REFUELING
38
Page 46 of 132
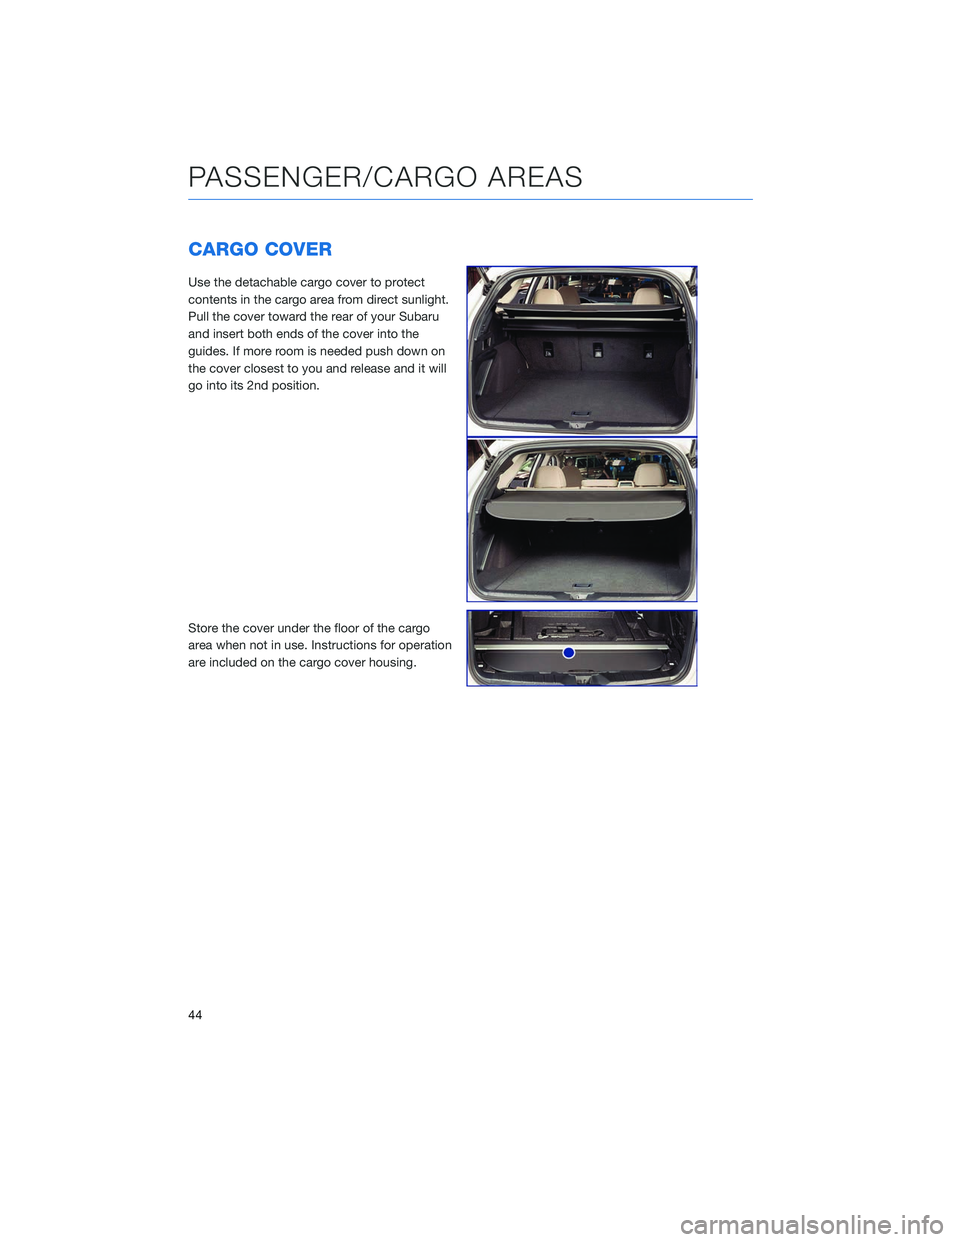
CARGO COVER
Use the detachable cargo cover to protect
contents in the cargo area from direct sunlight.
Pull the cover toward the rear of your Subaru
and insert both ends of the cover into the
guides. If more room is needed push down on
the cover closest to you and release and it will
go into its 2nd position.
Store the cover under the floor of the cargo
area when not in use. Instructions for operation
are included on the cargo cover housing.
PASSENGER/CARGO AREAS
44
Page 52 of 132
TRAILER TOWING CAPACITY
Maximum gross trailer weight:
• 2.4L models: 3,500 pounds
• 2.5L models: 2,700 pounds
• Ensure that the trailer tongue load is from 8 to 11% of the total trailer weight and doesnot exceed the maximum value of 350 pounds.
TIRE PRESSURE MONITORING SYSTEM (TPMS)
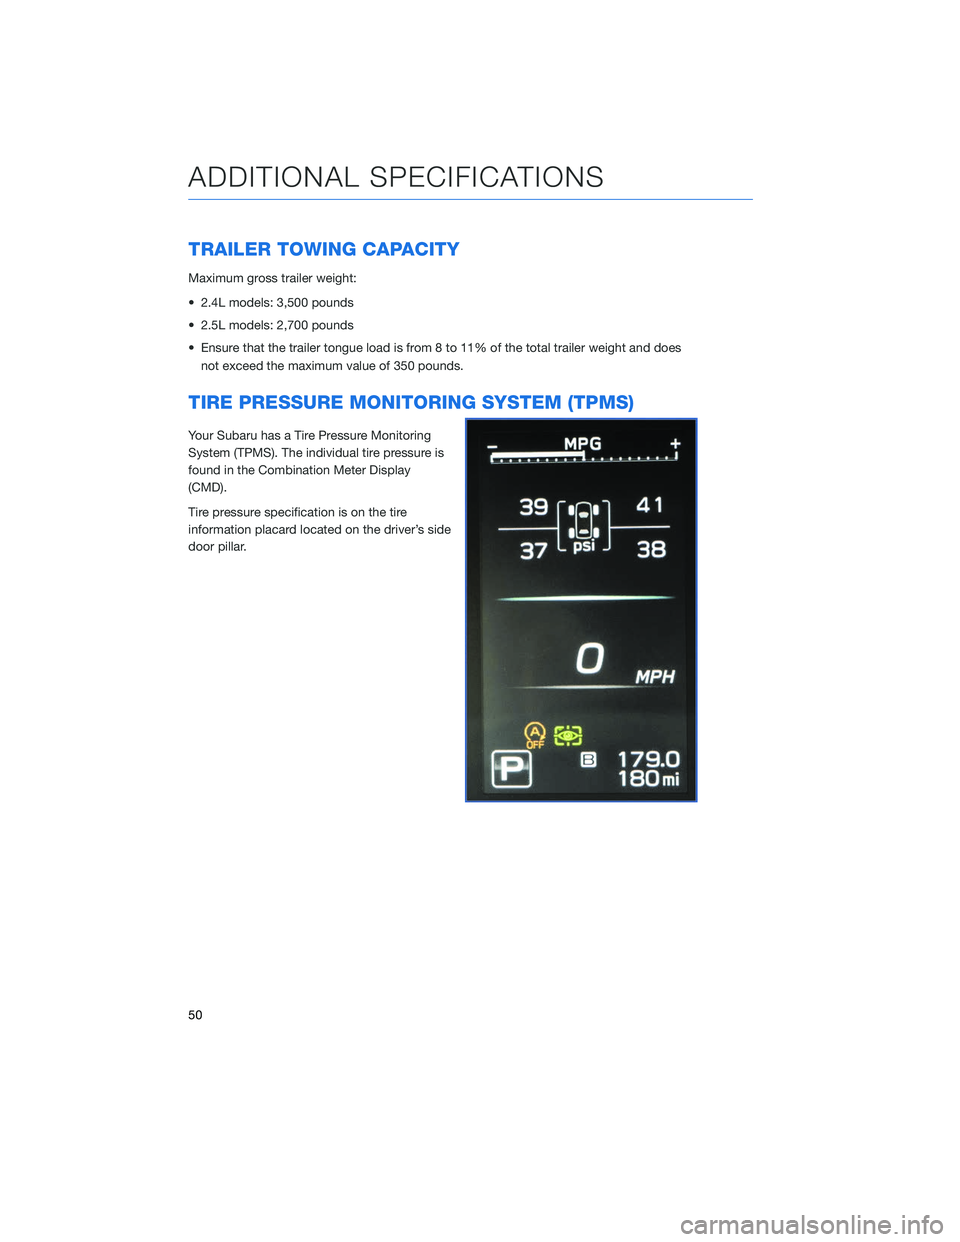
Your Subaru has a Tire Pressure Monitoring
System (TPMS). The individual tire pressure is
found in the Combination Meter Display
(CMD).
Tire pressure specification is on the tire
information placard located on the driver’s side
door pillar.
ADDITIONAL SPECIFICATIONS
50
Page 57 of 132
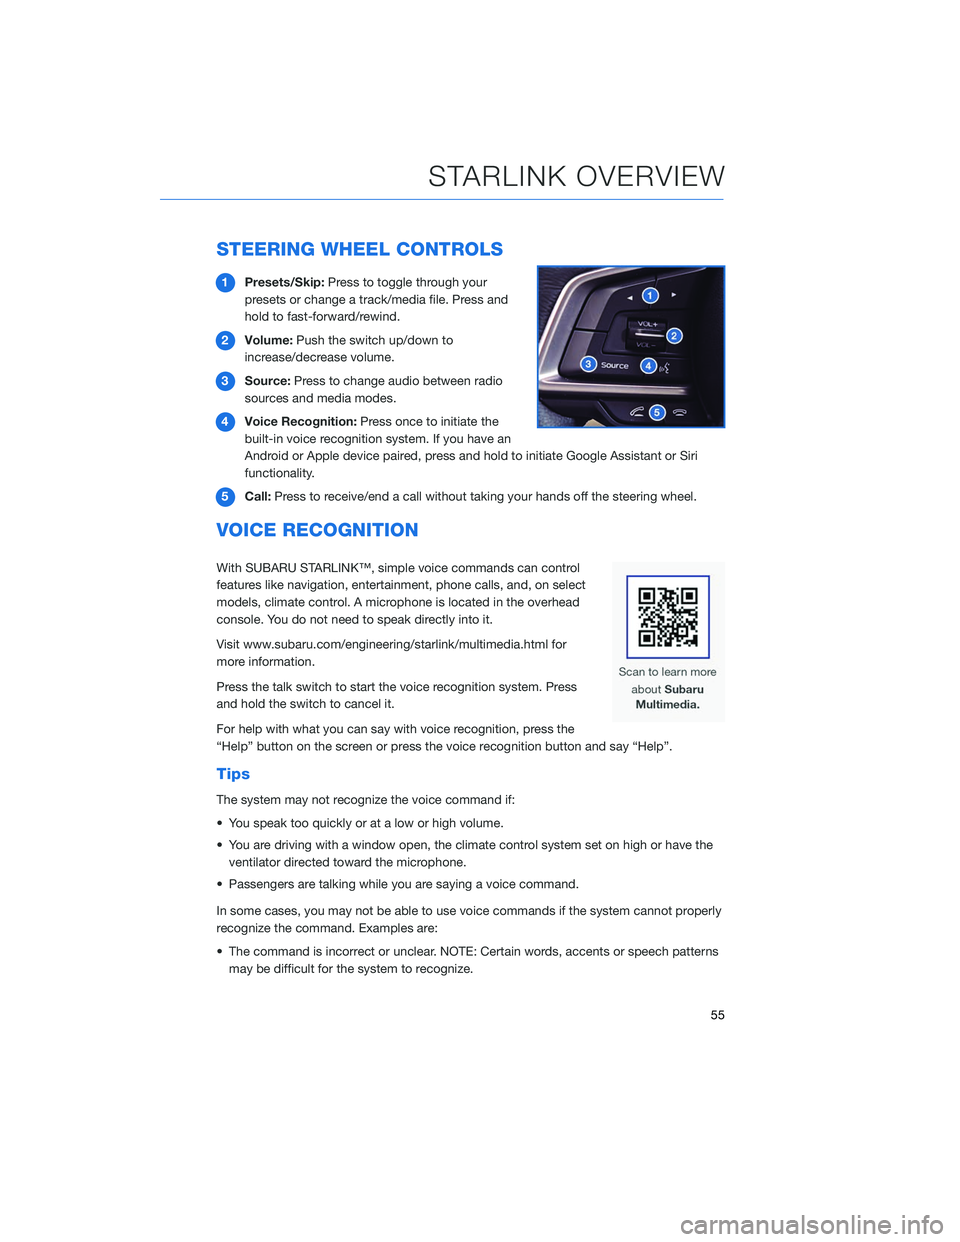
STEERING WHEEL CONTROLS
1Presets/Skip: Press to toggle through your
presets or change a track/media file. Press and
hold to fast-forward/rewind.
2 Volume: Push the switch up/down to
increase/decrease volume.
3 Source: Press to change audio between radio
sources and media modes.
4 Voice Recognition: Press once to initiate the
built-in voice recognition system. If you have an
Android or Apple device paired, press and hold to initiate Google Assistant or Siri
functionality.
5 Call: Press to receive/end a call without taking your hands off the steering wheel.
VOICE RECOGNITION
With SUBARU STARLINK™, simple voice commands can control
features like navigation, entertainment, phone calls, and, on select
models, climate control. A microphone is located in the overhead
console. You do not need to speak directly into it.
Visit www.subaru.com/engineering/starlink/multimedia.html for
more information.
Press the talk switch to start the voice recognition system. Press
and hold the switch to cancel it.
For help with what you can say with voice recognition, press the
“Help” button on the screen or press the voice recognition button and say “Help”.
Tips
The system may not recognize the voice command if:
• You speak too quickly or at a low or high volume.
• You are driving with a window open, the climate control system set on high or have the
ventilator directed toward the microphone.
• Passengers are talking while you are saying a voice command.
In some cases, you may not be able to use voice commands if the system cannot properly
recognize the command. Examples are:
• The command is incorrect or unclear. NOTE: Certain words, accents or speech patterns may be difficult for the system to recognize.
STARLINK OVERVIEW
55
Page 70 of 132
MEDIA
Bluetooth®
Your Subaru has Bluetooth®hands-free technology to manage your phone and audio
systems. Bluetooth-enabled mobile phones link directly through your Touchscreen
automatically, once connected. Receive and initiate calls or play music directly from your
device while keeping it stowed for safety.
To pair a Bluetooth
®device to the Touchscreen, see page 110 for Android devices or page
113 for Apple devices.
CD (if equipped)
The CD player holds a single disc only. To access the CD menu, put a CD in the player or
touch the CD icon on the Touchscreen. Depending on the CD format, it may show the CD
album art work on the Touchscreen.
USB / iPod
The USB connection is below the Center Information Display (CID) in front of the shifter.
You can plug in a USB memory storage device or iPod. This will bring up the media screen
with controls. If using an iPod, make sure to use an Apple certified cable or MFi certified
cable for proper operation.
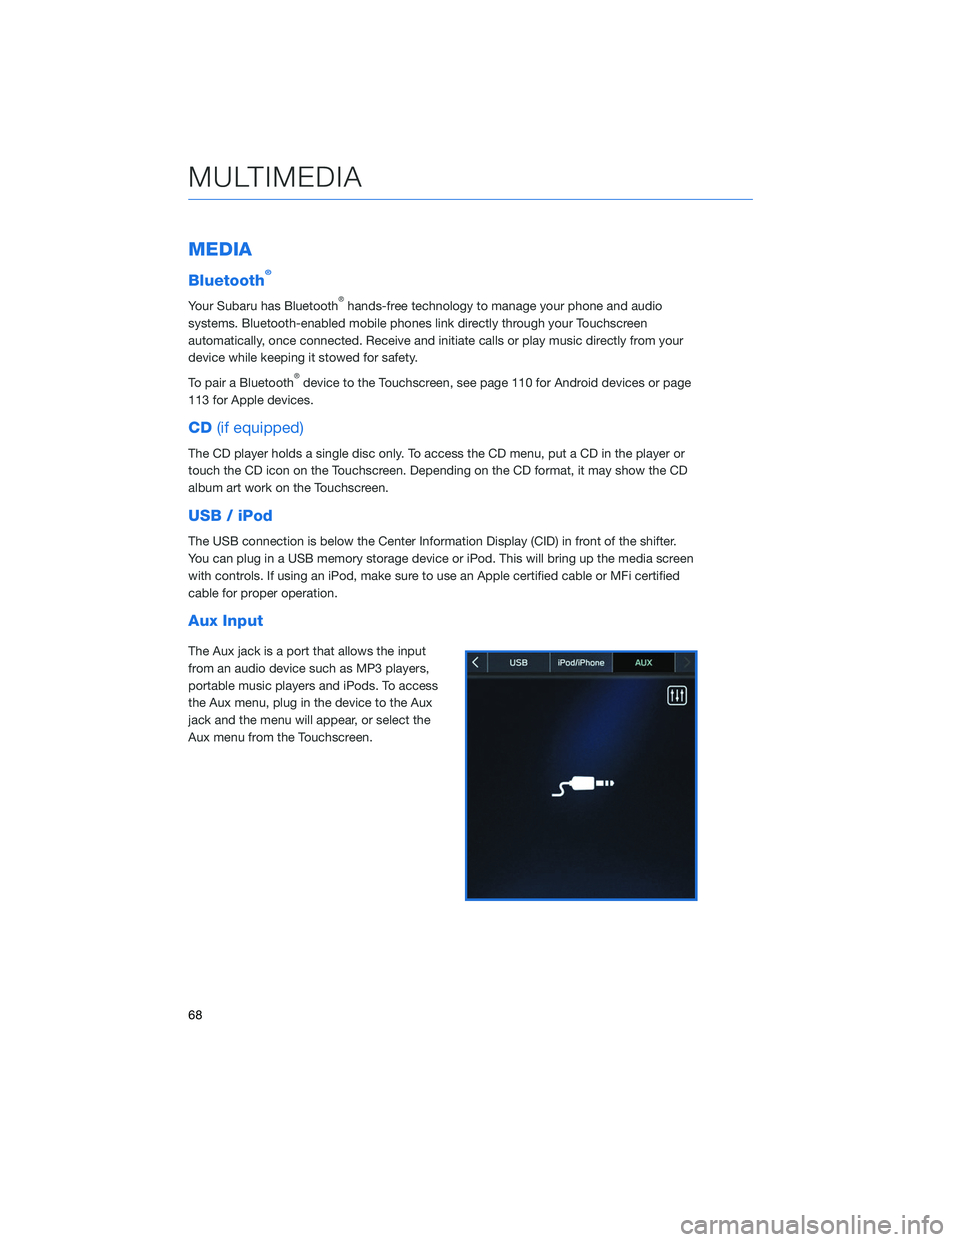
Aux Input
The Aux jack is a port that allows the input
from an audio device such as MP3 players,
portable music players and iPods. To access
the Aux menu, plug in the device to the Aux
jack and the menu will appear, or select the
Aux menu from the Touchscreen.
MULTIMEDIA
68
Page 128 of 132
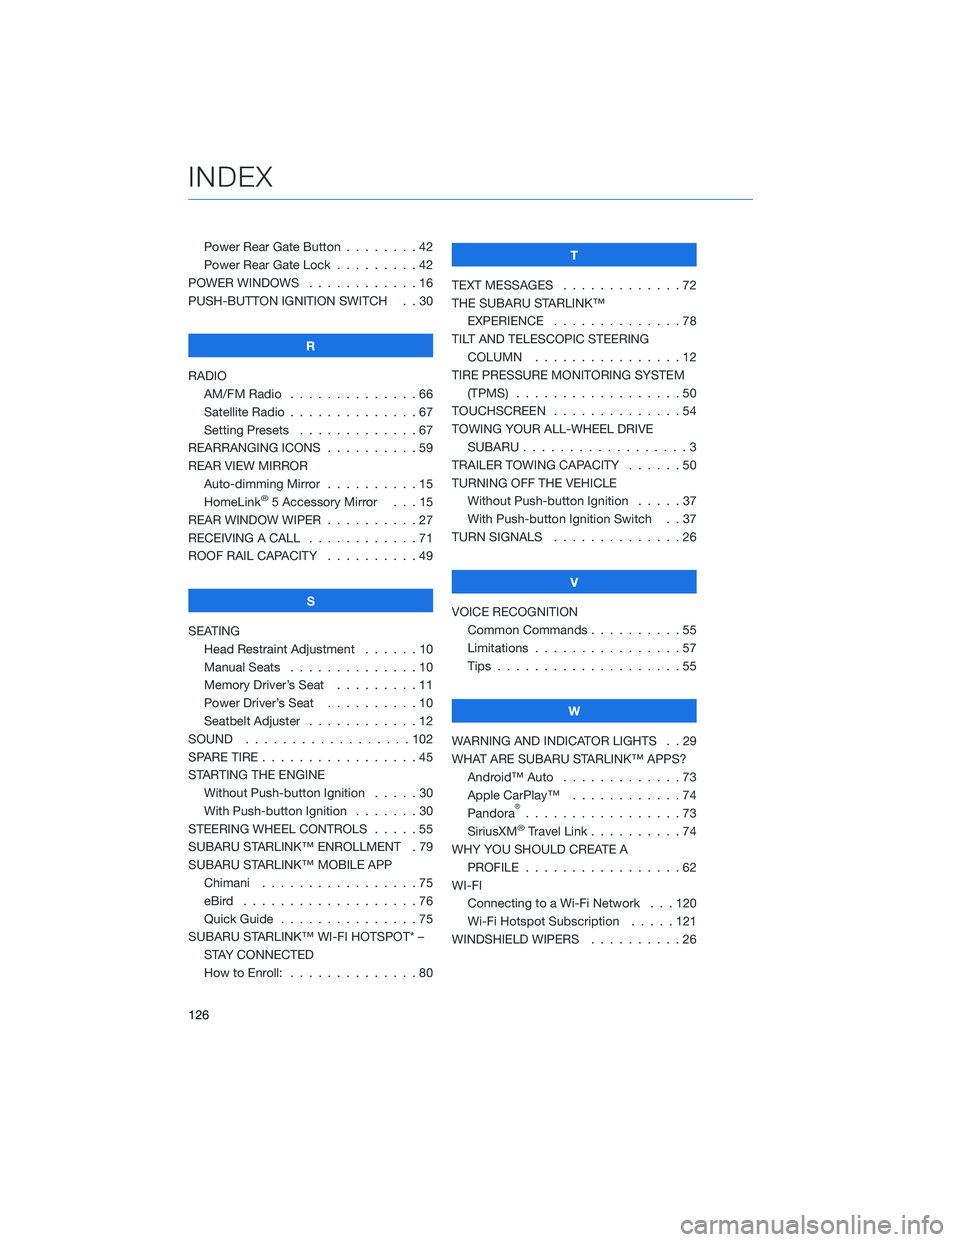
Power Rear Gate Button . . . . . . . . 42
Power Rear Gate Lock . . .......42
POWER WINDOWS . . . . . . ......16
PUSH-BUTTON IGNITION SWITCH . . 30
R
RADIO AM/FM Radio . . . . . . . . . . ....66
Satellite Radio . . . . . . . . . . . . . . 67
Setting Presets . . . . . . . ......67
REARRANGING ICONS . . . . . . ....59
REAR VIEW MIRROR Auto-dimming Mirror . . . . ......15
HomeLink
®5 Accessory Mirror . . . 15
REAR WINDOW WIPER . . . . . .....27
RECEIVING A CALL . . . . . . . .....71
ROOF RAIL CAPACITY . . . . . .....49
S
SEATING Head Restraint Adjustment . . . . . . 10
Manual Seats . . . . . . . . . .....10
Memory Driver’s Seat . . . . . . . . . 11
Power Driver’s Seat . . . . . .....10
Seatbelt Adjuster . . . . . .......12
SOUND ..................102
SPARE TIRE . . . . . . . . . . . . . . . . . 45
STARTING THE ENGINE Without Push-button Ignition .....30
With Push-button Ignition . . . ....30
STEERING WHEEL CONTROLS . . . . . 55
SUBARU STARLINK™ ENROLLMENT . 79
SUBARU STARLINK™ MOBILE APP Chimani .................75
eBird ...................76
Quick Guide ...............75
SUBARU STARLINK™ WI-FI HOTSPOT* – STAY CONNECTED
How to Enroll: . . . . . . . . . . . . . . 80 T
TEXT MESSAGES . . . . . . . . . . . . . 72
THE SUBARU STARLINK™ EXPERIENCE ..............78
TILT AND TELESCOPIC STEERING COLUMN . . . . . . . . . . . . . . . . 12
TIRE PRESSURE MONITORING SYSTEM (TPMS) . . . ...............50
TOUCHSCREEN ..............54
TOWING YOUR ALL-WHEEL DRIVE SUBARU . . . ...............3
TRAILER TOWING CAPACITY . . . . . . 50
TURNING OFF THE VEHICLE Without Push-button Ignition . . . . . 37
With Push-button Ignition Switch . . 37
TURN SIGNALS . . . . ..........26
V
VOICE RECOGNITION Common Commands . . . . . . . . . . 55
Limitations ................57
Tips . . . .................55
W
WARNING AND INDICATOR LIGHTS . . 29
WHAT ARE SUBARU STARLINK™ APPS? Android™ Auto .............73
Apple CarPlay™ . . . .........74
Pandora
®.................73
SiriusXM®Travel Link . . . . . .....74
WHY YOU SHOULD CREATE A PROFILE . . . . . ............62
WI-FI Connecting to a Wi-Fi Network . . . 120
Wi-Fi Hotspot Subscription . . . . . 121
WINDSHIELD WIPERS . . . . . . . . . . 26
INDEX
126