seats SUBARU SOLTERRA 2023 Owner's Manual
[x] Cancel search | Manufacturer: SUBARU, Model Year: 2023, Model line: SOLTERRA, Model: SUBARU SOLTERRA 2023Pages: 628, PDF Size: 11.91 MB
Page 193 of 628
1934-3. Adjusting the seats
Owners Manual_USA_M42C01_en
4
Before driving
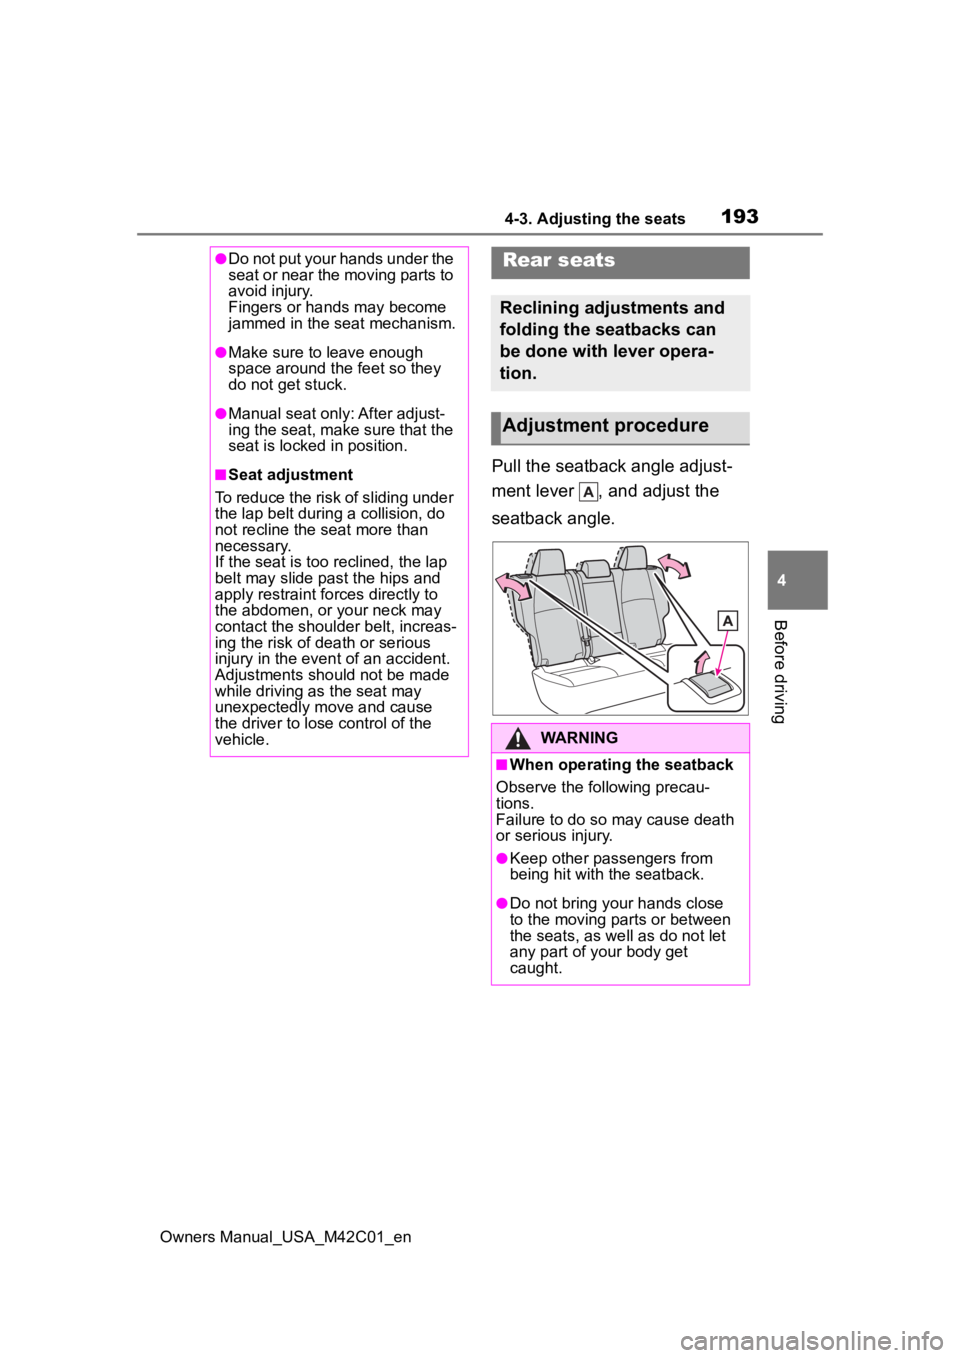
Pull the seatback angle adjust-
ment lever , and adjust the
seatback angle.
●Do not put your hands under the
seat or near the moving parts to
avoid injury.
Fingers or hands may become
jammed in the seat mechanism.
●Make sure to leave enough
space around the feet so they
do not get stuck.
●Manual seat only: After adjust-
ing the seat, make sure that the
seat is locked in position.
■Seat adjustment
To reduce the risk of sliding under
the lap belt during a collision, do
not recline the seat more than
necessary.
If the seat is too reclined, the lap
belt may slide past the hips and
apply restraint forces directly to
the abdomen, or your neck may
contact the shoulder belt, increas-
ing the risk of death or serious
injury in the event of an accident.
Adjustments should not be made
while driving as the seat may
unexpectedly move and cause
the driver to lose control of the
vehicle.
Rear seats
Reclining adjustments and
folding the seatbacks can
be done with lever opera-
tion.
Adjustment procedure
WARNING
■When operating the seatback
Observe the following precau-
tions.
Failure to do so may cause death
or serious injury.
●Keep other passengers from
being hit with the seatback.
●Do not bring your hands close
to the moving parts or between
the seats, as we ll as do not let
any part of your body get
caught.
Page 194 of 628
1944-3. Adjusting the seats
Owners Manual_USA_M42C01_en
■Before folding down the
seatbacks
1 Park the vehicle in a safe
place.
Apply the parking brake ( P.243)
and shift the shift position to P.
( P.237)
2 Adjust the position of the
front seat and the angle of
the seatback. ( P.192)
Depending on the position of the
front seat, if the seatback is folded
backward, it may interfere with the
operation of the rear seat.
3 Lower the head restraint of
the rear center seat.
( P.196)
4 Stow the armrest of the rear
seat if it is pulled out.
( P.437)
This step is not necessary when
operating the left side seat only.
■Folding down the rear seat-
backs
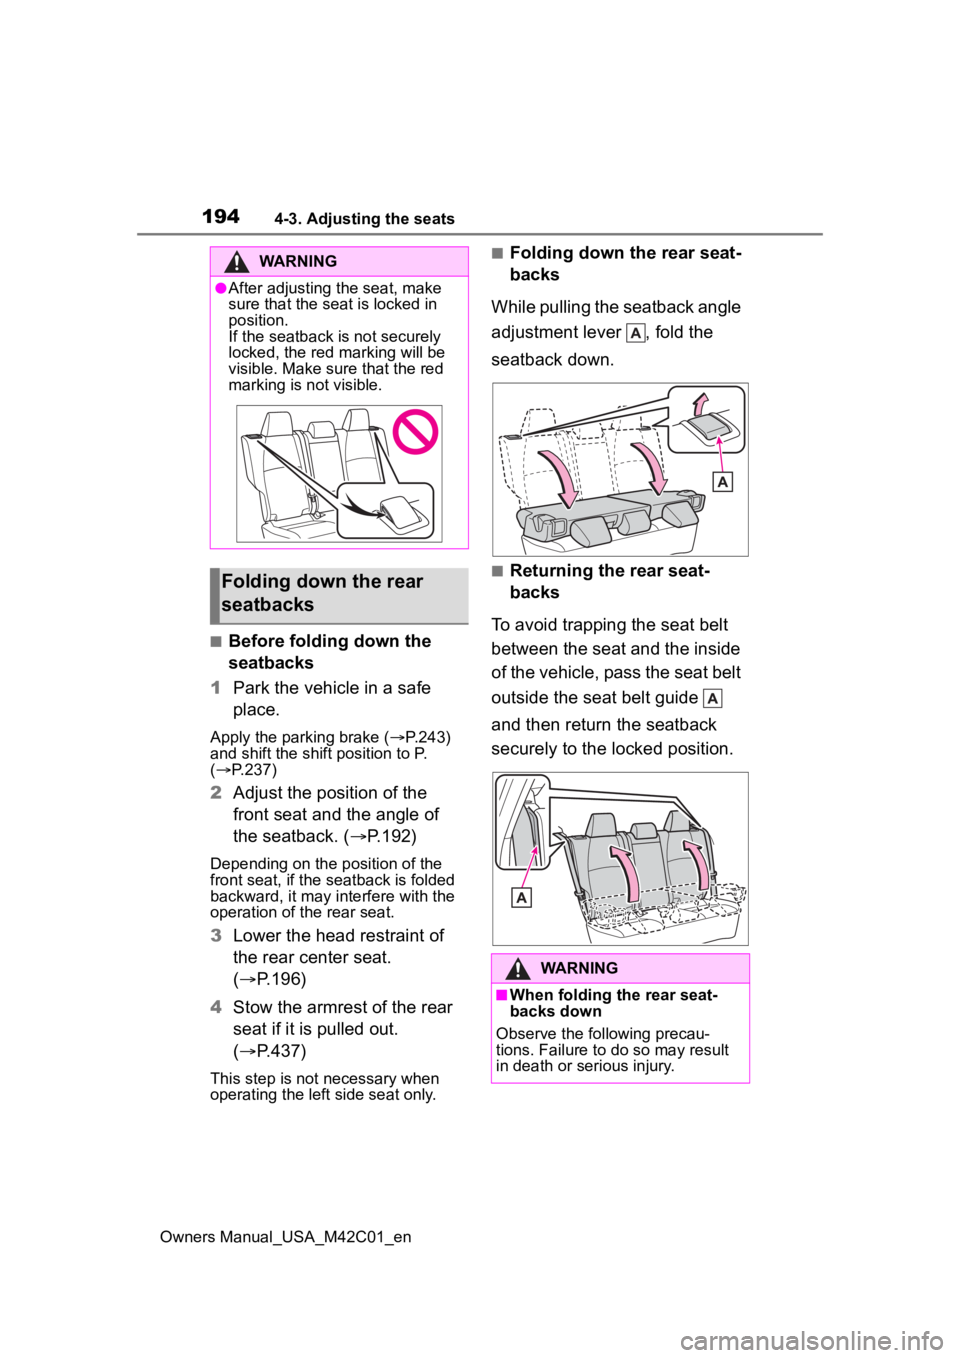
While pulling the seatback angle
adjustment lever , fold the
seatback down.
■Returning the rear seat-
backs
To avoid trapping the seat belt
between the seat and the inside
of the vehicle, pass the seat belt
outside the seat belt guide
and then return the seatback
securely to the locked position.
WARNING
●After adjusting the seat, make
sure that the seat is locked in
position.
If the seatback is not securely
locked, the red marking will be
visible. Make sure that the red
marking is not visible.
Folding down the rear
seatbacks
WARNING
■When folding the rear seat-
backs down
Observe the following precau-
tions. Failure to do so may result
in death or serious injury.
Page 195 of 628
1954-3. Adjusting the seats
Owners Manual_USA_M42C01_en
4
Before driving
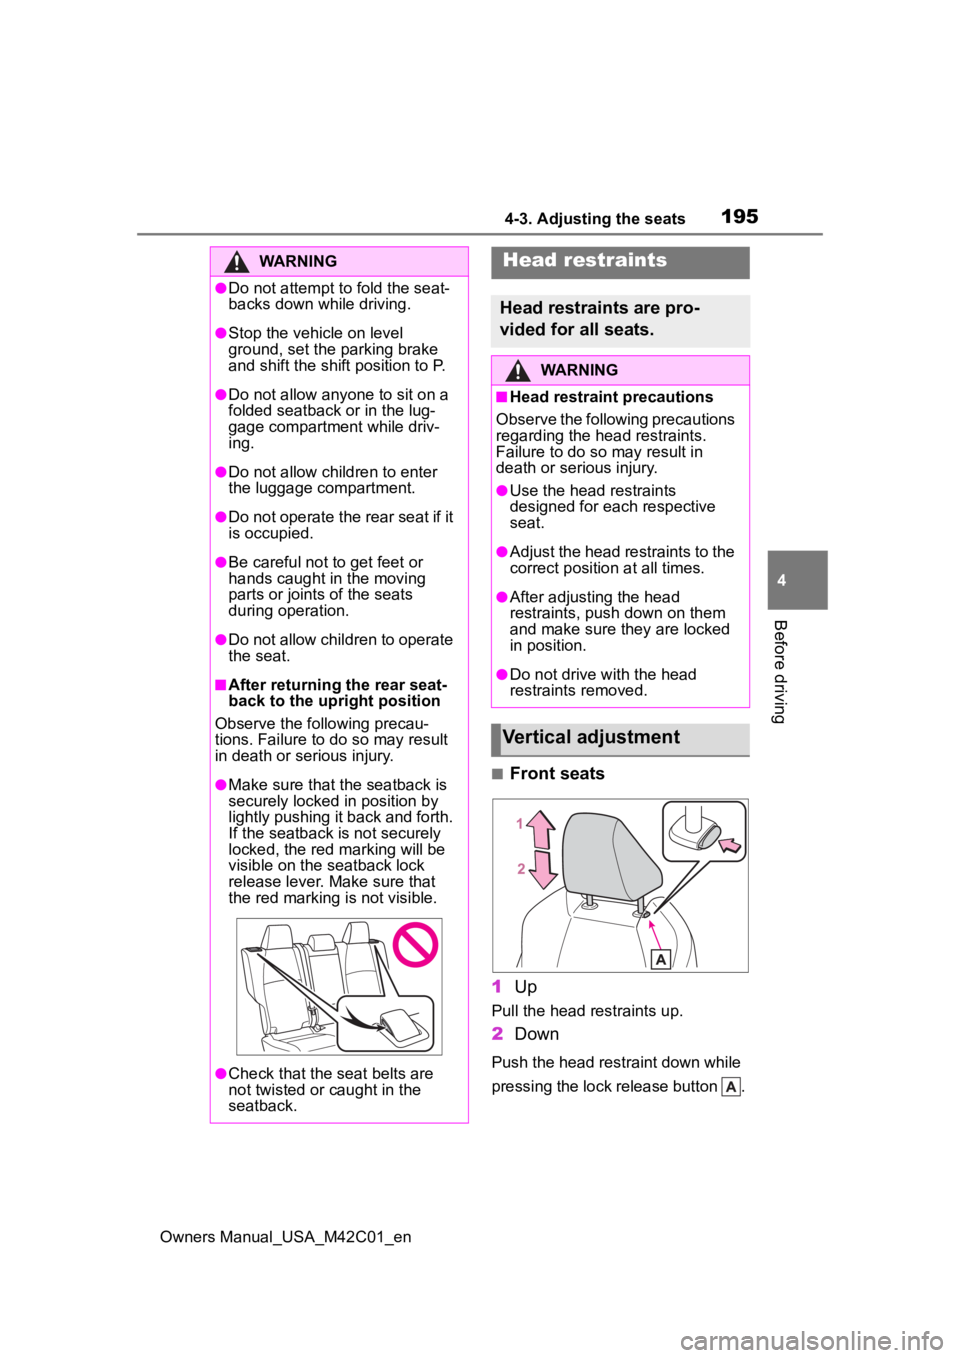
■Front seats
1 Up
Pull the head restraints up.
2Down
Push the head restraint down while
pressing the lock release button .
WARNING
●Do not attempt t o fold the seat-
backs down while driving.
●Stop the vehicle on level
ground, set the parking brake
and shift the shift position to P.
●Do not allow anyo ne to sit on a
folded seatback or in the lug-
gage compartment while driv-
ing.
●Do not allow child ren to enter
the luggage compartment.
●Do not operate the rear seat if it
is occupied.
●Be careful not to get feet or
hands caught in the moving
parts or joints of the seats
during operation.
●Do not allow children to operate
the seat.
■After returning the rear seat-
back to the upright position
Observe the following precau-
tions. Failure to do so may result
in death or serious injury.
●Make sure that the seatback is
securely locked in position by
lightly pushing it back and forth.
If the seatback is not securely
locked, the red marking will be
visible on the seatback lock
release lever. Make sure that
the red marking is not visible.
●Check that the seat belts are
not twisted or caught in the
seatback.
Head restraints
Head restraints are pro-
vided for all seats.
WARNING
■Head restraint precautions
Observe the following precautions
regarding the head restraints.
Failure to do so may result in
death or serious injury.
●Use the head restraints
designed for each respective
seat.
●Adjust the head restraints to the
correct position at all times.
●After adjusting the head
restraints, push down on them
and make sure they are locked
in position.
●Do not drive with the head
restraints removed.
Vertical adjustment
Page 196 of 628

1964-3. Adjusting the seats
Owners Manual_USA_M42C01_en
■Rear center seat
1 Up
Pull the head restraints up.
2Down
Push the head restraint down while
pressing the lock release button .
■Rear outer seats
Head restraints cannot be
adjusted.
■Adjusting the height of the head
restraints (front seats)
Make sure that the head restraints
are adjusted so that the center of
the head restraint is closest to the
top of your ears.
■Adjusting the rear center seat
head restraint
Always raise the head restraint one
level from the stowed position when
using.
■Front seats
Pull the head restraint up while
pressing the lock release button .
If the head restrai nt touches the
ceiling, making the removal difficult,
change the seat height or angle.
( P.192)
■Rear center seat
Pull the head restraint up while
pressing the lock release button .
■Rear outer seats
1 Pull the seatback lock
release lever and fold
down the seatback until it
reaches the position where
Removing the head
restraints
Page 197 of 628

1974-3. Adjusting the seats
Owners Manual_USA_M42C01_en
4
Before driving
the head restraints can be
removed.
2 Pull the head restraint up
while pressing the lock
release button .
■Front seats
Align the head restraint with the
installation holes and push it
down to the lock position.
Press and hold the lock release
button when lowering the head
restraint.
■Rear center seat
Align the head restraint with the
installation holes and push it
down to the lock position.
Press and hold the lock release
button when lowering the head
restraint.
■Rear outer seats
1 Pull the seatback lock
release lever and fold
down the seatback until it
reaches the position where
Installing the head
restraints
Page 198 of 628

1984-3. Adjusting the seats
Owners Manual_USA_M42C01_en
the head restraints can be
installed.
2 Align the head restraint with
installation holes and push it
down to the lock position.
Page 201 of 628
2014-4. Adjusting the steering wheel and mirrors
Owners Manual_USA_M42C01_en
4
Before driving
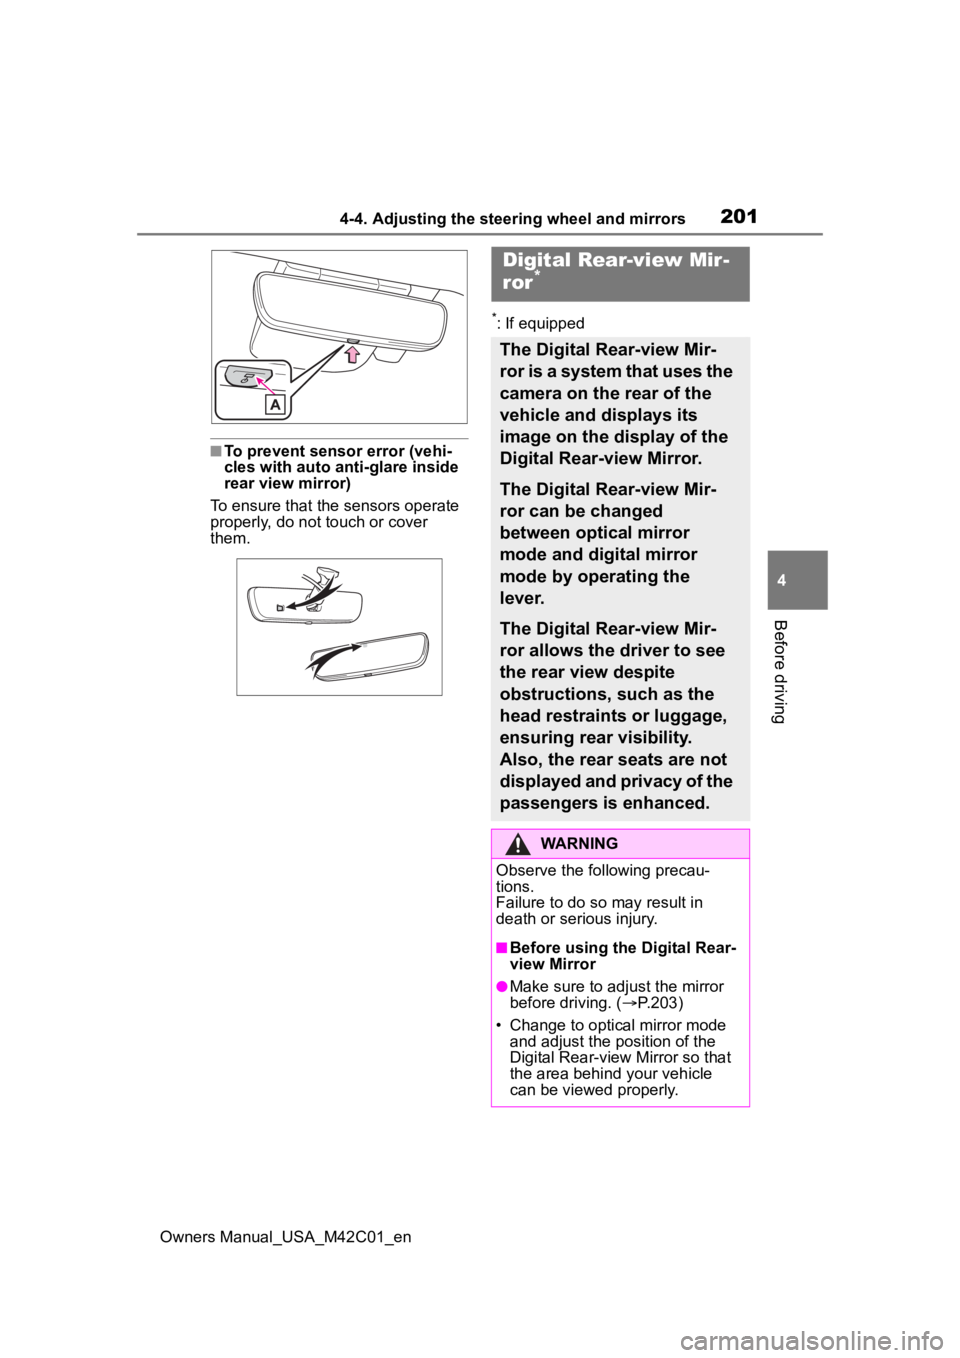
■To prevent sensor error (vehi-
cles with auto anti-glare inside
rear view mirror)
To ensure that the sensors operate
properly, do not touch or cover
them.
*: If equipped
Digital Rear-view Mir-
ror*
The Digital Rear-view Mir-
ror is a system that uses the
camera on the rear of the
vehicle and displays its
image on the display of the
Digital Rear-view Mirror.
The Digital Rear-view Mir-
ror can be changed
between optical mirror
mode and digital mirror
mode by operating the
lever.
The Digital Rear-view Mir-
ror allows the driver to see
the rear view despite
obstructions, such as the
head restraints or luggage,
ensuring rear visibility.
Also, the rear seats are not
displayed and privacy of the
passengers is enhanced.
WARNING
Observe the following precau-
tions.
Failure to do so may result in
death or serious injury.
■Before using the Digital Rear-
view Mirror
●Make sure to adjust the mirror
before driving. ( P.203)
• Change to optical mirror mode and adjust the position of the
Digital Rear-view Mirror so that
the area behind your vehicle
can be viewed properly.
Page 225 of 628

2255-1. Before driving
Owners Manual_USA_M42C01_en
5
Driving
operation is performed with the
accelerator pedal depressed,
the EV system output may be
restrained.
• When the shift position is shifted to R
*.
• When the shift position is
shifted from P or R to forward
drive shift position such as D
*.
When the system op erates, a mes-
sage appears on the multi-informa-
tion display. Read the message and
follow the instruction.
*: Depending on the situation, the shift position may not be
changed.
■Drive-Start Control (DSC)
●When the TRAC is turned off
( P.388), sudden start restraint
control also does not operate. If
your vehicle have trouble escap-
ing from the mud or fresh snow
due to sudden start restraint con-
trol operation, deactivate TRAC
( P.388) so that the vehicle may
become able to e scape from the
mud or fresh snow.
Also, sudden start restraint control
will not operate in the following con-
ditions:
• When “X-MODE” is selected (if equipped)
Cargo and luggage
Take notice of the following
information about storage
precautions, cargo capac-
ity and load.
WARNING
■Things that must not be car-
ried in the luggage compart-
ment
The following things may cause a
fire if loaded in the luggage com-
partment:
●Receptacles containing gaso-
line
●Aerosol cans
■Storage precautions
Observe the following precau-
tions.
Failure to do so may prevent the
pedals from being depressed
properly, may block the driver’s
vision, or may res ult in items hit-
ting the driver or passengers, pos-
sibly causing an accident.
●Stow cargo and luggage in the
luggage compartment when-
ever possible.
●Do not stack cargo and luggage
in the luggage compartment
higher than the seatbacks.
●Do not place cargo or luggage
in or on the follo wing locations.
• At the feet of the driver
• On the front passenger or rear seats (when stacking items)
• On the luggage cover (if equipped)
• On the instrument panel
• On the dashboard
Page 406 of 628
4066-1. Using the air conditioning system and defogger
Owners Manual_USA_M42C01_en
1Press the automatic mode
switch.
The dehumidification function begins to operate. Air outlets and
fan speed are automatically
adjusted according to the tempera-
ture setting and humidity.
2
Adjust the temperature set-
ting.
3 To stop the operation, press
the “OFF” switch.
If the fan speed setting or air
flow modes are operated, the
automatic mode indicator goes
off. However, automatic mode
for functions other than that
operated is maintained.
■Using automatic mode
Fan speed is adjusted automati-
cally according to the temperature
setting and the ambient conditions.
Therefore, the fan may stop for a
while until warm or cool air is ready
to flow immediately after the auto-
matic mode switch is pressed.
To turn on the “SYNC” mode,
perform any of the following pro-
cedures:
Press the “SYNC” mode
switch.
Adjust the front passenger’s
side temperature setting.
The indicator comes on when the
“SYNC” mode is on.
WARNING
■To prevent the windshield
from fogging up
Do not use the windshield defog-
ger switch during cool air opera-
tion in extremely humid weather.
The difference between the tem-
perature of the outside air and
that of the windshield can cause
the outer surface of the wind-
shield to fog up, blocking your
vision.
■To prevent burns
●Do not touch the rear view mir-
ror surfaces when the outside
rear view mirror defoggers are
on.
●Vehicles with windshield wiper
de-icer: Do not touch the glass
at lower part of the windshield
or to the side of the front pillars
when the windshield wiper de-
icer is on.
NOTICE
■To prevent 12-volt battery dis-
charge
Do not leave the air conditioning
system on longer than necessary
when the EV system is off.
■When repairing/replacing
parts of the air conditioning
system
Have repair/replacement per-
formed by your Toyota dealer.
When a part of the air conditioning
system, such as the evaporator, is
to be replaced, it must be
replaced with a new one.
Using automatic mode
Adjusting the temperature
for driver and front pas-
senger seats separately
(“SYNC” mode)
Page 408 of 628
4086-1. Using the air conditioning system and defogger
Owners Manual_USA_M42C01_en
This function automatically con-
trols the air conditioning airflow
so that priority is given to the
front seats. Unnecessary air
conditioning is suppressed, con-
tributing to increased electricity
consumption efficiency.
Front seat concentrated airflow
mode operates in the following
situations.
No passengers are detected
in the rear seats
The windshield defogger is
not operating
While operating, illuminates.
■Manually turning front seat
concentrated airflow mode
on/off
In front seat concentrated air-
flow mode, directing airflow to
the front seats only and to all
seats can be switched via switch
operation. When the mode has
been switched manually, auto-
matic airflow control stops oper-
ating.
Press on the air conditioning
operation panel and switch the
airflow.
Indicator illuminated: Airflow
to the front seats only
Indicator off: Airflow to all the
seats
■Operation of automatic airflow
control
●In order to maintain a comfortable
interior, airflow may be directed to
seats without passengers immedi-
ately after the EV system is
started and at other times depend-
ing on the outside temperature.
●After the EV system is started, if
passengers move around inside
or enter/exit the vehicle, the sys-
tem cannot accura tely detect the
presence of passengers and auto-
matic airflow control will not oper-
ate.
■Operation of manual airflow
control
Even if the function is manually
switched to directing airflow to only
the front seats, w hen a rear seat is
occupied, it may automatically direct
airflow to all seats.
WARNING
■To not interrupt the wind-
shield defogger from operat-
ing
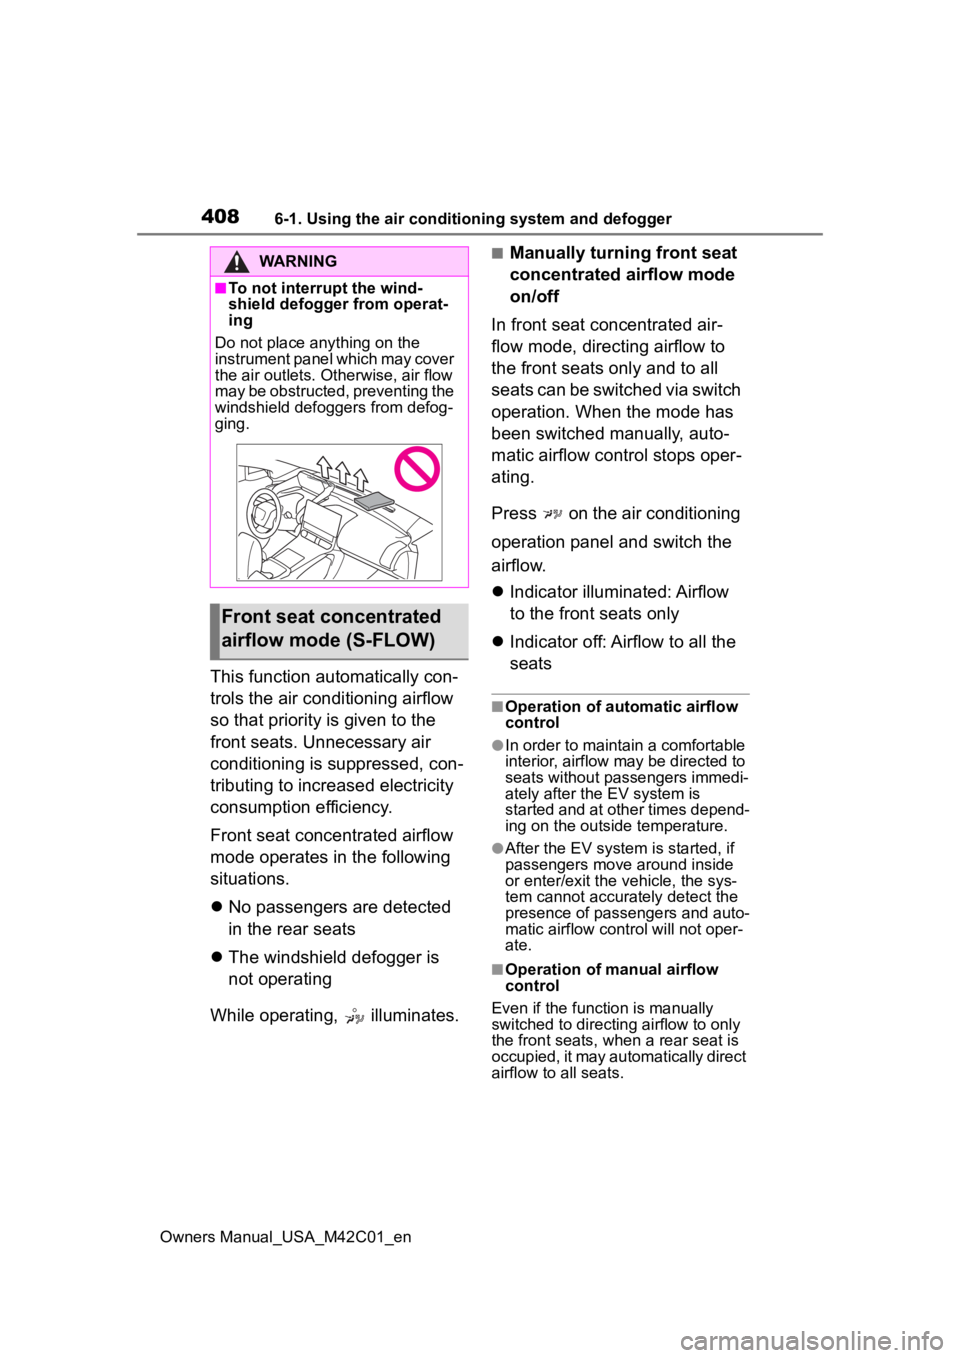
Do not place anything on the
instrument panel which may cover
the air outlets. Otherwise, air flow
may be obstructed, preventing the
windshield defoggers from defog-
ging.
Front seat concentrated
airflow mode (S-FLOW)