oil pressure SUBARU TRIBECA 2008 Owners Manual
[x] Cancel search | Manufacturer: SUBARU, Model Year: 2008, Model line: TRIBECA, Model: SUBARU TRIBECA 2008Pages: 409, PDF Size: 5.75 MB
Page 21 of 409
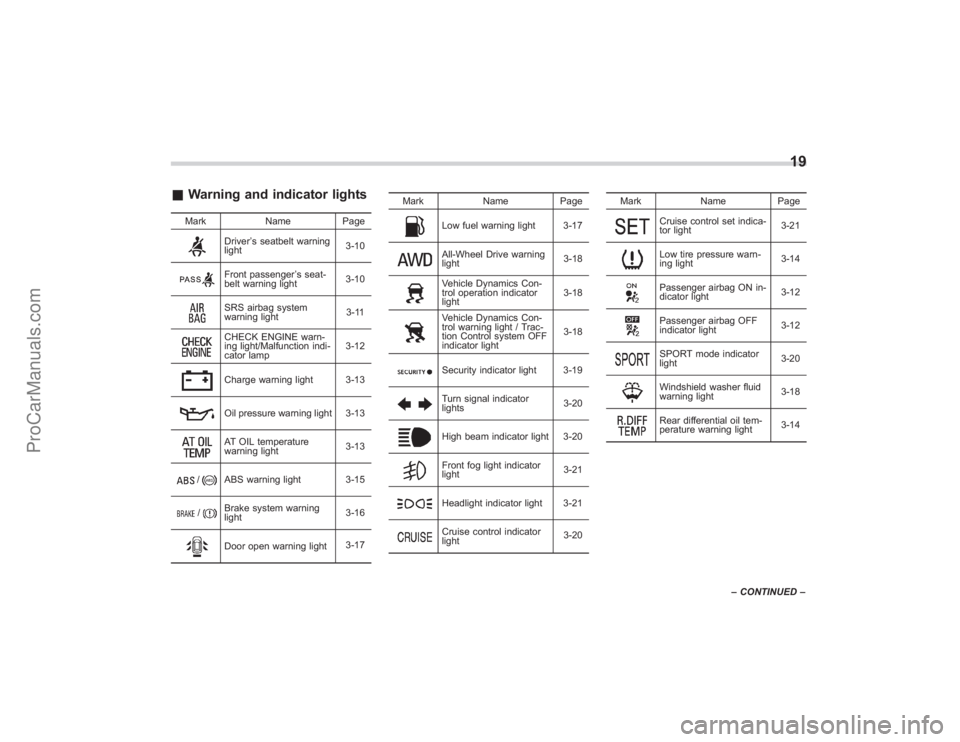
&Warning and indicator lights
Mark NamePage
Driver’s seatbelt warning
light 3-10Front passenger
’s seat-
belt warning light 3-10SRS airbag system
warning light 3-11CHECK ENGINE warn-
ing light/Malfunction indi-
cator lamp3-12Charge warning light 3-13Oil pressure warning light 3-13AT OIL temperature
warning light
3-13
/
ABS warning light 3-15
/
Brake system warning
light3-16Door open warning light
3-17Mark Name Page
Low fuel warning light 3-17All-Wheel Drive warning
light
3-18Vehicle Dynamics Con-
trol operation indicator
light3-18Vehicle Dynamics Con-
trol warning light / Trac-
tion Control system OFF
indicator light3-18Security indicator light 3-19Turn signal indicator
lights
3-20High beam indicator light 3-20Front fog light indicator
light3-21Headlight indicator light 3-21Cruise control indicator
light3-20Mark Name Page
Cruise control set indica-
tor light
3-21Low tire pressure warn-
ing light3-14Passenger airbag ON in-
dicator light
3-12Passenger airbag OFF
indicator light3-12SPORT mode indicator
light
3-20Windshield washer fluid
warning light3-18Rear differential oil tem-
perature warning light3-14
19
–
CONTINUED –
ProCarManuals.com
Page 121 of 409
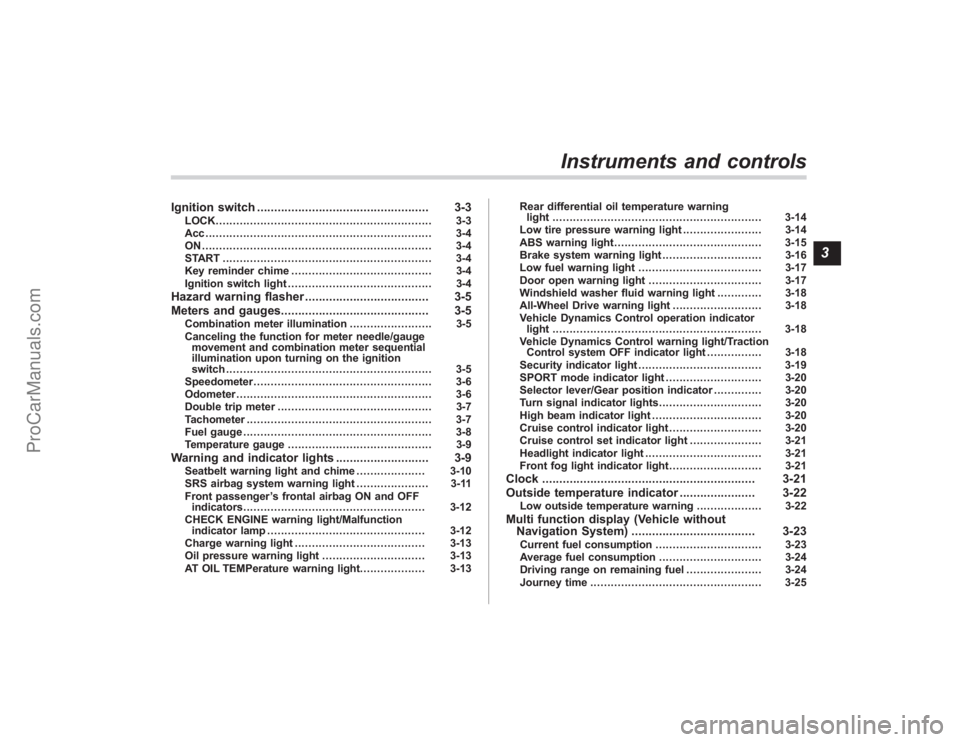
Ignition switch.................................................. 3-3
LOCK............................................................... 3-3
Acc.................................................................. 3-4
ON................................................................... 3-4
START ............................................................. 3-4
Key reminder chime ......................................... 3-4
Ignition switch light .......................................... 3-4
Hazard warning flasher .................................... 3-5
Meters and gauges. .......................................... 3-5
Combination meter illumination ........................ 3-5
Canceling the function for meter needle/gauge movement and combination meter sequential
illumination upon turning on the ignition
switch ............................................................ 3-5
Speedometer .................................................... 3-6
Odometer ......................................................... 3-6
Double trip meter ............................................. 3-7
Tachometer ...................................................... 3-7
Fuel gauge ....................................................... 3-8
Temperature gauge .......................................... 3-9
Warning and indicator lights ........................... 3-9
Seatbelt warning light and chime .................... 3-10
SRS airbag system warning light ..................... 3-11
Front passenger ’s frontal airbag ON and OFF
indicators ..................................................... 3-12
CHECK ENGINE warning light/Malfunction indicator lamp .............................................. 3-12
Charge warning light ...................................... 3-13
Oil pressure warning light .............................. 3-13
AT OIL TEMPerature warning light. .................. 3-13Rear differential oil temperature warning
light ............................................................. 3-14
Low tire pressure warning light ....................... 3-14
ABS warning light ........................................... 3-15
Brake system warning light ............................. 3-16
Low fuel warning light .................................... 3-17
Door open warning light ................................. 3-17
Windshield washer fluid warning light ............. 3-18
All-Wheel Drive warning light .......................... 3-18
Vehicle Dynamics Control operation indicator light ............................................................. 3-18
Vehicle Dynamics Control warning light/Traction Control system OFF indicator light ................ 3-18
Security indicator light .................................... 3-19
SPORT mode indicator light ............................ 3-20
Selector lever/Gear position indicator .............. 3-20
Turn signal indicator lights .............................. 3-20
High beam indicator light ................................ 3-20
Cruise control indicator light ........................... 3-20
Cruise control set indicator light ..................... 3-21
Headlight indicator light .................................. 3-21
Front fog light indicator light ........................... 3-21
Clock.............................................................. 3-21
Outside temperature indicator ...................... 3-22
Low outside temperature warning ................... 3-22
Multi function display (Vehicle without
Navigation System) .................................... 3-23
Current fuel consumption ............................... 3-23
Average fuel consumption .............................. 3-24
Driving range on remaining fuel ...................... 3-24
Journey time .................................................. 3-25
Instruments and controls
3
ProCarManuals.com
Page 129 of 409
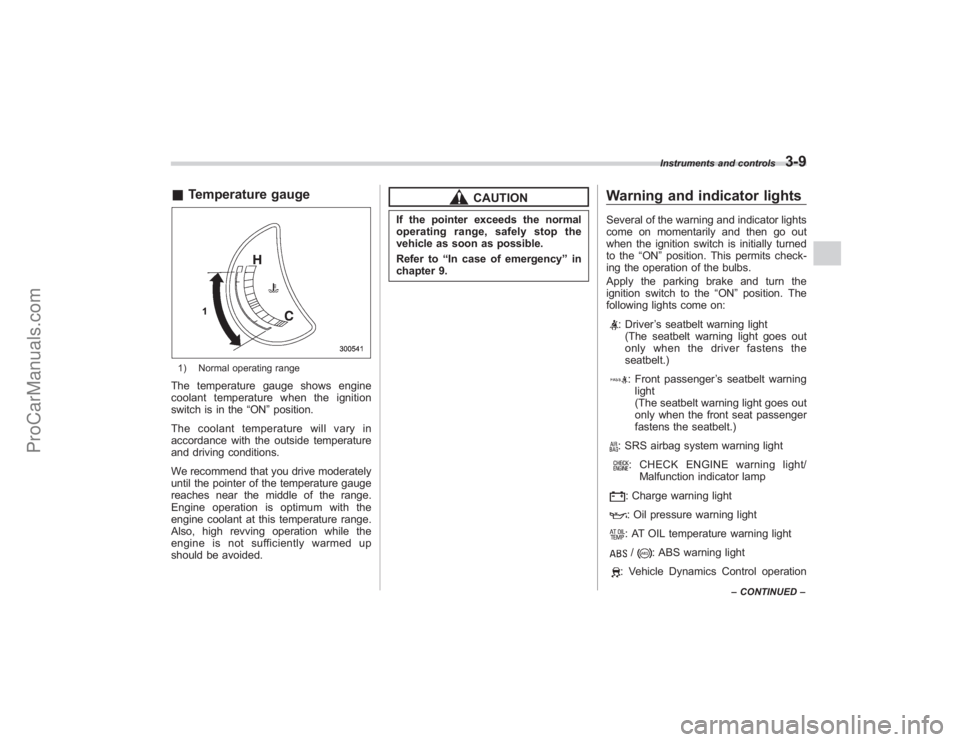
&Temperature gauge1) Normal operating rangeThe temperature gauge shows engine
coolant temperature when the ignition
switch is in the “ON”position.
The coolant temperature will vary in
accordance with the outside temperature
and driving conditions.
We recommend that you drive moderately
until the pointer of the temperature gauge
reaches near the middle of the range.
Engine operation is optimum with the
engine coolant at this temperature range.
Also, high revving operation while the
engine is not sufficiently warmed up
should be avoided.
CAUTION
If the pointer exceeds the normal
operating range, safely stop the
vehicle as soon as possible.
Refer to “In case of emergency ”in
chapter 9.
Warning and indicator lightsSeveral of the warning and indicator lights
come on momentarily and then go out
when the ignition switch is initially turned
to the “ON ”position. This permits check-
ing the operation of the bulbs.
Apply the parking brake and turn the
ignition switch to the “ON ”position. The
following lights come on:
: Driver ’s seatbelt warning light
(The seatbelt warning light goes out
only when the driver fastens the
seatbelt.): Front passenger ’s seatbelt warning
light
(The seatbelt warning light goes out
only when the front seat passenger
fastens the seatbelt.): SRS airbag system warning light: CHECK ENGINE warning light/ Malfunction indicator lamp: Charge warning light: Oil pressure warning light: AT OIL temperature warning light/
: ABS warning light
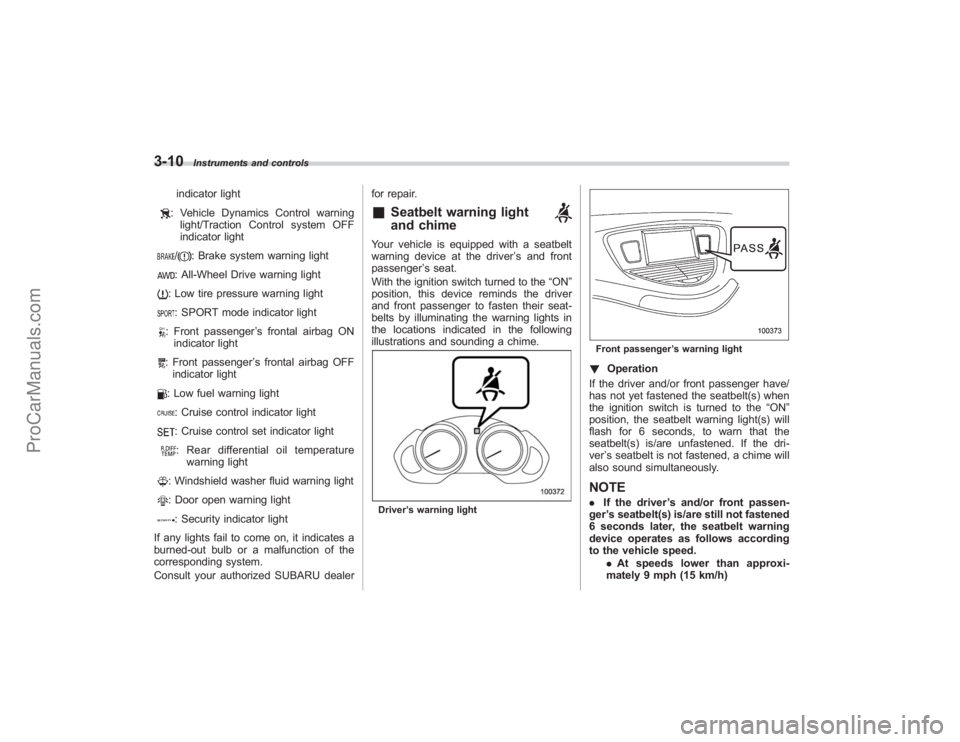
: Vehicle Dynamics Control operation
Instruments and controls
3-9
–CONTINUED –
ProCarManuals.com
Page 130 of 409
3-10
Instruments and controls
indicator light: Vehicle Dynamics Control warninglight/Traction Control system OFF
indicator light/
: Brake system warning light
: All-Wheel Drive warning light: Low tire pressure warning light: SPORT mode indicator light: Front passenger ’s frontal airbag ON
indicator light: Front passenger ’s frontal airbag OFF
indicator light: Low fuel warning light: Cruise control indicator light: Cruise control set indicator light: Rear differential oil temperature warning light: Windshield washer fluid warning light: Door open warning light: Security indicator light
If any lights fail to come on, it indicates a
burned-out bulb or a malfunction of the
corresponding system.
Consult your authorized SUBARU dealer for repair.
&
Seatbelt warning light
and chime
Your vehicle is equipped with a seatbelt
warning device at the driver
’s and front
passenger ’s seat.
With the ignition switch turned to the “ON”
position, this device reminds the driver
and front passenger to fasten their seat-
belts by illuminating the warning lights in
the locations indicated in the following
illustrations and sounding a chime.Driver ’s warning light
Front passenger ’s warning light! Operation
If the driver and/or front passenger have/
has not yet fastened the seatbelt(s) when
the ignition switch is turned to the “ON”
position, the seatbelt warning light(s) will
flash for 6 seconds, to warn that the
seatbelt(s) is/are unfastened. If the dri-
ver ’s seatbelt is not fastened, a chime will
also sound simultaneously.NOTE. If the driver ’s and/or front passen-
ger ’s seatbelt(s) is/are still not fastened
6 seconds later, the seatbelt warning
device operates as follows according
to the vehicle speed.
.At speeds lower than approxi-
mately 9 mph (15 km/h)
ProCarManuals.com
Page 133 of 409
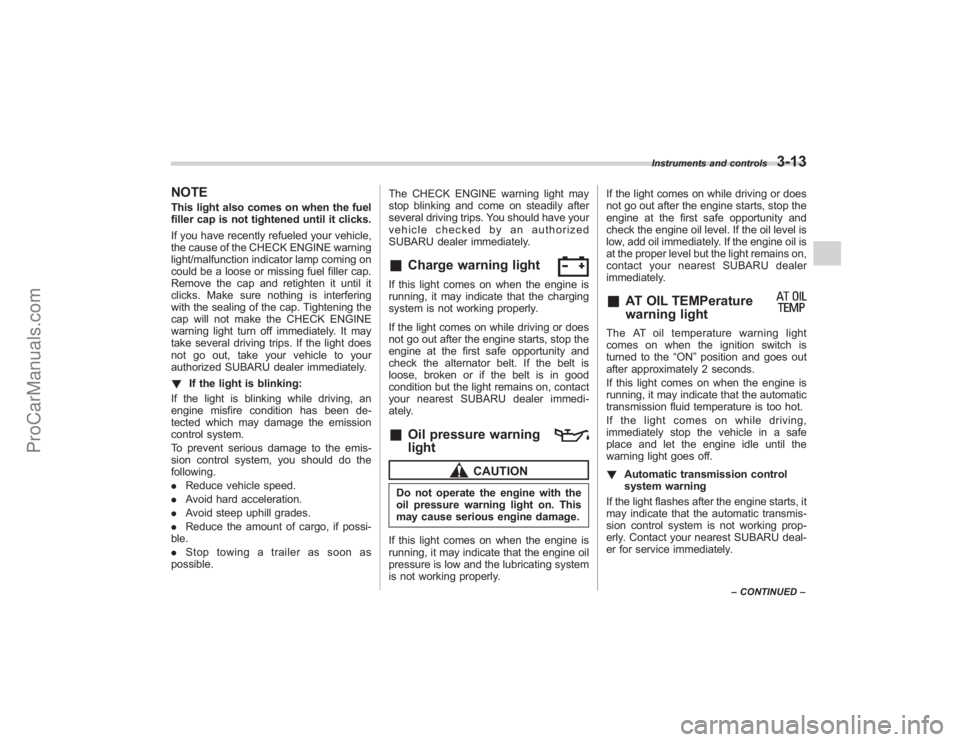
NOTEThis light also comes on when the fuel
filler cap is not tightened until it clicks.
If you have recently refueled your vehicle,
the cause of the CHECK ENGINE warning
light/malfunction indicator lamp coming on
could be a loose or missing fuel filler cap.
Remove the cap and retighten it until it
clicks. Make sure nothing is interfering
with the sealing of the cap. Tightening the
cap will not make the CHECK ENGINE
warning light turn off immediately. It may
take several driving trips. If the light does
not go out, take your vehicle to your
authorized SUBARU dealer immediately.
!If the light is blinking:
If the light is blinking while driving, an
engine misfire condition has been de-
tected which may damage the emission
control system.
To prevent serious damage to the emis-
sion control system, you should do the
following.
. Reduce vehicle speed.
. Avoid hard acceleration.
. Avoid steep uphill grades.
. Reduce the amount of cargo, if possi-
ble.
. Stop towing a trailer as soon as
possible. The CHECK ENGINE warning light may
stop blinking and come on steadily after
several driving trips. You should have your
vehicle checked by an authorized
SUBARU dealer immediately.
&
Charge warning light
If this light comes on when the engine is
running, it may indicate that the charging
system is not working properly.
If the light comes on while driving or does
not go out after the engine starts, stop the
engine at the first safe opportunity and
check the alternator belt. If the belt is
loose, broken or if the belt is in good
condition but the light remains on, contact
your nearest SUBARU dealer immedi-
ately.&
Oil pressure warning
light
CAUTION
Do not operate the engine with the
oil pressure warning light on. This
may cause serious engine damage.
If this light comes on when the engine is
running, it may indicate that the engine oil
pressure is low and the lubricating system
is not working properly. If the light comes on while driving or does
not go out after the engine starts, stop the
engine at the first safe opportunity and
check the engine oil level. If the oil level is
low, add oil immediately. If the engine oil is
at the proper level but the light remains on,
contact your nearest SUBARU dealer
immediately.
&
AT OIL TEMPerature
warning light
The AT oil temperature warning light
comes on when the ignition switch is
turned to the
“ON”position and goes out
after approximately 2 seconds.
If this light comes on when the engine is
running, it may indicate that the automatic
transmission fluid temperature is too hot.
If the light comes on while driving,
immediately stop the vehicle in a safe
place and let the engine idle until the
warning light goes off.
! Automatic transmission control
system warning
If the light flashes after the engine starts, it
may indicate that the automatic transmis-
sion control system is not working prop-
erly. Contact your nearest SUBARU deal-
er for service immediately.
Instruments and controls
3-13
– CONTINUED –
ProCarManuals.com
Page 134 of 409
3-14
Instruments and controls
&
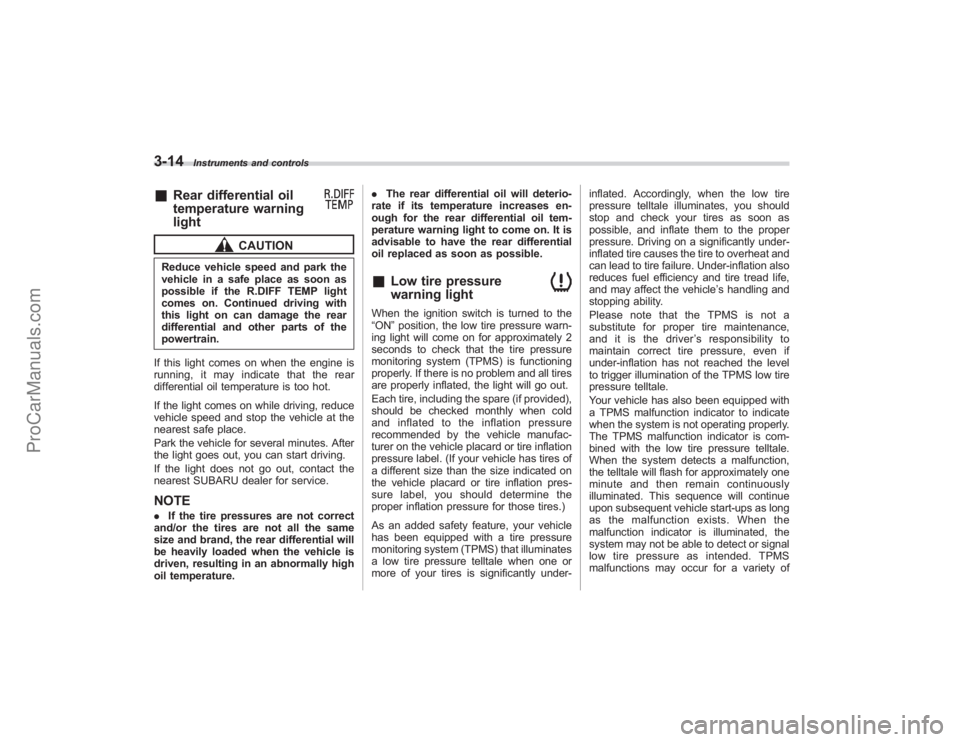
Rear differential oil
temperature warning
light
CAUTION
Reduce vehicle speed and park the
vehicle in a safe place as soon as
possible if the R.DIFF TEMP light
comes on. Continued driving with
this light on can damage the rear
differential and other parts of the
powertrain.
If this light comes on when the engine is
running, it may indicate that the rear
differential oil temperature is too hot.
If the light comes on while driving, reduce
vehicle speed and stop the vehicle at the
nearest safe place.
Park the vehicle for several minutes. After
the light goes out, you can start driving.
If the light does not go out, contact the
nearest SUBARU dealer for service.NOTE. If the tire pressures are not correct
and/or the tires are not all the same
size and brand, the rear differential will
be heavily loaded when the vehicle is
driven, resulting in an abnormally high
oil temperature. .
The rear differential oil will deterio-
rate if its temperature increases en-
ough for the rear differential oil tem-
perature warning light to come on. It is
advisable to have the rear differential
oil replaced as soon as possible.
&
Low tire pressure
warning light
When the ignition switch is turned to the
“ON ”position, the low tire pressure warn-
ing light will come on for approximately 2
seconds to check that the tire pressure
monitoring system (TPMS) is functioning
properly. If there is no problem and all tires
are properly inflated, the light will go out.
Each tire, including the spare (if provided),
should be checked monthly when cold
and inflated to the inflation pressure
recommended by the vehicle manufac-
turer on the vehicle placard or tire inflation
pressure label. (If your vehicle has tires of
a different size than the size indicated on
the vehicle placard or tire inflation pres-
sure label, you should determine the
proper inflation pressure for those tires.)
As an added safety feature, your vehicle
has been equipped with a tire pressure
monitoring system (TPMS) that illuminates
a low tire pressure telltale when one or
more of your tires is significantly under- inflated. Accordingly, when the low tire
pressure telltale illuminates, you should
stop and check your tires as soon as
possible, and inflate them to the proper
pressure. Driving on a significantly under-
inflated tire causes the tire to overheat and
can lead to tire failure. Under-inflation also
reduces fuel efficiency and tire tread life,
and may affect the vehicle
’s handling and
stopping ability.
Please note that the TPMS is not a
substitute for proper tire maintenance,
and it is the driver ’s responsibility to
maintain correct tire pressure, even if
under-inflation has not reached the level
to trigger illumination of the TPMS low tire
pressure telltale.
Your vehicle has also been equipped with
a TPMS malfunction indicator to indicate
when the system is not operating properly.
The TPMS malfunction indicator is com-
bined with the low tire pressure telltale.
When the system detects a malfunction,
the telltale will flash for approximately one
minute and then remain continuously
illuminated. This sequence will continue
upon subsequent vehicle start-ups as long
as the malfunction exists. When the
malfunction indicator is illuminated, the
system may not be able to detect or signal
low tire pressure as intended. TPMS
malfunctions may occur for a variety of
ProCarManuals.com
Page 310 of 409
9-14
In case of emergency
5. Start the engine of the vehicle with the
booster battery and run it at moderate
speed. Then start the engine of the vehicle
that has the discharged battery.
6. When finished, carefully disconnect
the cables in exactly the reverse order.
Engine overheating
WARNING
Never attempt to remove the radia-
tor cap until the engine has been
shut off and has fully cooled down.
When the engine is hot, the coolant
is under pressure. Removing the
cap while the engine is still hot
could release a spray of boiling hot
coolant, which could burn you very
seriously.
If the engine overheats, safely pull off the
road and stop the vehicle in a safe place.& If steam is coming from the
engine compartmentTurn off the engine and get everyone
away from the vehicle until it cools down.&If no steam is coming from
the engine compartment1. Keep the engine running at idling
speed.
2. Open the hood to ventilate the engine
compartment.
Confirm that the cooling fan is turning. If
the fan is not turning, immediately turn off the engine and contact your authorized
dealer for repair.
3. After the engine coolant temperature
has dropped, turn off the engine.
If the temperature gauge stays at the
overheated zone, turn off the engine.
4. After the engine has fully cooled down,
check the coolant level in the reserve
tank.
If the coolant level is below the
“LOW ”
mark, add coolant up to the “FULL”mark.
5. If there is no coolant in the reserve
tank, add coolant to the reserve tank.
Then remove the radiator cap and fill the
radiator with coolant.
If you remove the radiator cap from a hot
radiator, first wrap a thick cloth around the
radiator cap, then turn the cap counter-
clockwise slowly without pressing down
until it stops. Release the pressure from
the radiator. After the pressure has been
fully released, remove the cap by pressing
down and turning it.
ProCarManuals.com
Page 323 of 409
Maintenance schedule................................... 11-3
Maintenance precautions............................... 11-3
Before checking or servicing in the engine compartment ................................................. 11-4
When you do checking or servicing in the engine compartment while the engine is running ....... 11-4
Engine hood................................................... 11-4
Engine compartment overview ...................... 11-6
Engine oil ........................................................ 11-7
Checking the oil level ...................................... 11-7
Changing the oil and oil filter ........................... 11-8
Recommended grade and viscosity ................. 11-9
Recommended grade and viscosity under severe driving conditions ....................................... 11-10
Cooling system............................................ 11-11
Hose and connections ................................... 11-11
Engine coolant .............................................. 11-11
Air cleaner element ...................................... 11-14
Replacing the air cleaner element .................. 11-14
Spark plugs.................................................. 11-15
Recommended spark plugs ........................... 11-15
Drive belts.................................................... 11-15
Automatic transmission fluid ...................... 11-15
Checking the fluid level................................. 11-15
Recommended fluid ...................................... 11-16
Front differential gear oil ............................. 11-17
Checking the oil level.................................... 11-17
Recommended grade and viscosity ............... 11-17
Rear differential gear oil.............................. 11-18
Checking the gear oil level ............................ 11-18 Recommended grade and viscosity
............... 11-18
Power steering fluid..................................... 11-19
Checking the fluid level ................................. 11-19
Recommended fluid ...................................... 11-20
Brake fluid..................................................... 11-20
Checking the fluid level ................................. 11-20
Recommended brake fluid ............................ 11-21
Brake booster............................................... 11-21
Brake pedal ................................................... 11-21
Checking the brake pedal free play ............... 11-21
Checking the brake pedal reserve distance ..................................................... 11-22
Replacement of brake pad and lining ......... 11-22
Breaking-in of new brake pads and
linings ........................................................ 11-22
Parking brake stroke .................................... 11-23
Tires and wheels ........................................... 11-23
Types of tires................................................ 11-23
Tire pressure monitoring system (TPMS) ....... 11-24
Tire inspection .............................................. 11-25
Tire pressures and wear ............................... 11-25
Wheel balance .............................................. 11-27
Wear indicators ............................................ 11-28
Tire rotation direction mark ........................... 11-28
Tire rotation .................................................. 11-28
Tire replacement ........................................... 11-29
Wheel replacement ....................................... 11-29
Aluminum wheels......................................... 11-30
Chrome plated wheels (if equipped) ........... 11-31
Windshield washer fluid ............................... 11-32
Maintenance and service
11
ProCarManuals.com
Page 333 of 409
Cooling system
WARNING
Never attempt to remove the radia-
tor cap until the engine has been
shut off and has cooled down
completely. Since the coolant is
under pressure, you may suffer
serious burns from a spray of boil-
ing hot coolant when the cap is
removed.
CAUTION
.The cooling system has been
filled at the factory with a high
quality, corrosion-inhibiting,
year-around coolant which pro-
vides protection against freezing
down to −33 8F( −36 8C).
Subaru engines use aluminum
components that require the
anti-corrosive and anti-freeze
properties of Subaru Genuine
Coolant, which is specifically
formulated for the Subaru cool-
ing system. Failure to use Subaru
Genuine Coolant along with
Subaru Cooling System Condi-
tioner at the recommended main- tenance intervals may result in
problems, including, but not lim-
ited to shortened life of engine
components and cooling system
clogging, coolant leaks and en-
gine damage from overheating.
Problems caused by the failure to
use Subaru Genuine Coolant and
Subaru Cooling System Condi-
tioner at recommended intervals
are not covered under the
Subaru Limited Warranty.
While there may be other generic
products that may provide the
required protection, they have
not been tested for compatibility
with Subaru engines and cooling
system components, and there-
fore not recommended.
. Do not splash the engine coolant
over painted parts. The alcohol
contained in the engine coolant
may damage the paint surface.
& Hose and connectionsYour vehicle employs an electric cooling
fan which is thermostatically controlled to
operate when the engine coolant reaches
a specific temperature.
If the radiator cooling fan does not operate even when the engine coolant tempera-
ture gauge exceeds the normal operating
range, the cooling fan circuit may be
defective. Check the fuse and replace it
if necessary. If the fuse is not blown, have
the cooling system checked by your
SUBARU dealer.
If frequent addition of coolant is neces-
sary, there may be a leak in the engine
cooling system. It is recommended that
the cooling system and connections be
checked for leaks, damage, or looseness.
&
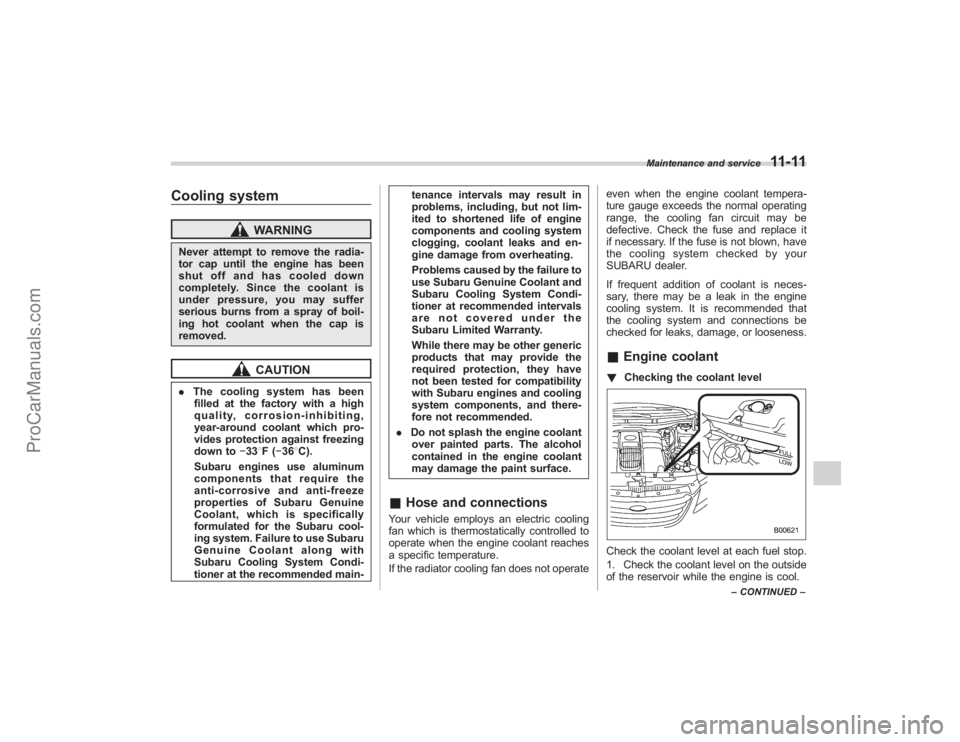
Engine coolant! Checking the coolant levelCheck the coolant level at each fuel stop.
1. Check the coolant level on the outside
of the reservoir while the engine is cool.
Maintenance and service
11-11
–CONTINUED –
ProCarManuals.com
Page 334 of 409
11-12
Maintenance and service
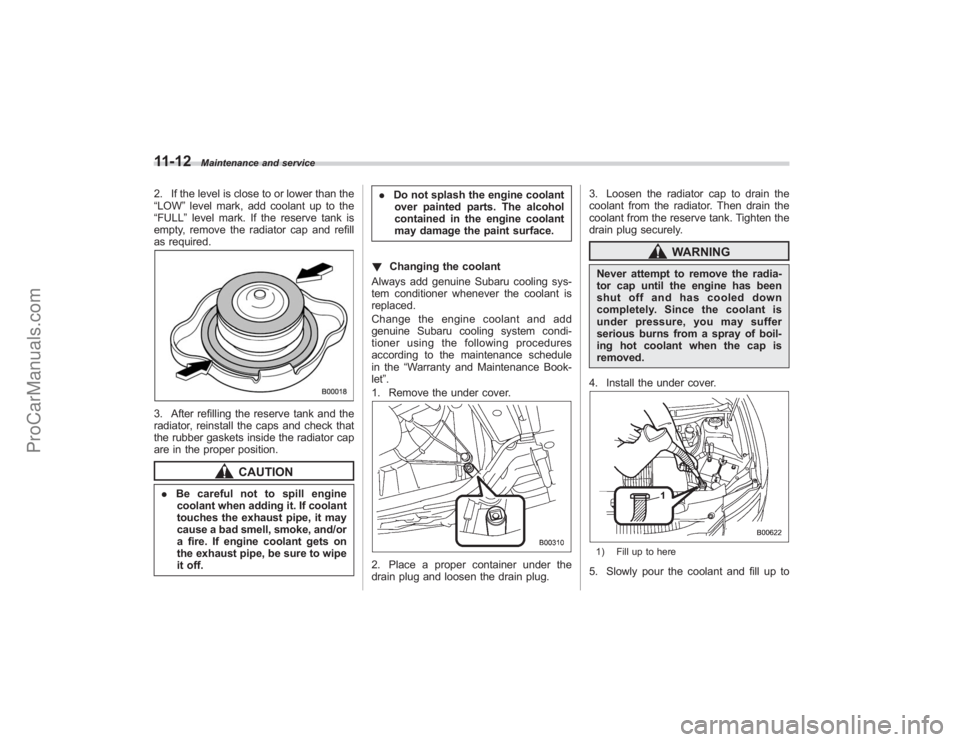
2. If the level is close to or lower than the
“LOW”level mark, add coolant up to the
“FULL ”level mark. If the reserve tank is
empty, remove the radiator cap and refill
as required.3. After refilling the reserve tank and the
radiator, reinstall the caps and check that
the rubber gaskets inside the radiator cap
are in the proper position.
CAUTION
. Be careful not to spill engine
coolant when adding it. If coolant
touches the exhaust pipe, it may
cause a bad smell, smoke, and/or
a fire. If engine coolant gets on
the exhaust pipe, be sure to wipe
it off. .
Do not splash the engine coolant
over painted parts. The alcohol
contained in the engine coolant
may damage the paint surface.
! Changing the coolant
Always add genuine Subaru cooling sys-
tem conditioner whenever the coolant is
replaced.
Change the engine coolant and add
genuine Subaru cooling system condi-
tioner using the following procedures
according to the maintenance schedule
in the “Warranty and Maintenance Book-
let ”.
1. Remove the under cover.
2. Place a proper container under the
drain plug and loosen the drain plug. 3. Loosen the radiator cap to drain the
coolant from the radiator. Then drain the
coolant from the reserve tank. Tighten the
drain plug securely.
WARNING
Never attempt to remove the radia-
tor cap until the engine has been
shut off and has cooled down
completely. Since the coolant is
under pressure, you may suffer
serious burns from a spray of boil-
ing hot coolant when the cap is
removed.
4. Install the under cover.1) Fill up to here5. Slowly pour the coolant and fill up to
ProCarManuals.com