SUBARU TRIBECA 2010 1.G Owners Manual
Manufacturer: SUBARU, Model Year: 2010, Model line: TRIBECA, Model: SUBARU TRIBECA 2010 1.GPages: 422, PDF Size: 12.87 MB
Page 171 of 422
3-42Instruments and controls
!Compass zone adjustment
1. The zone setting is factory preset to
Zone 8. Refer to the “Compass calibration
zone ”map attached to the end of this
manual to verify that the compass zone
setting is correct for your geographical location.
2. Press and hold the right button for 3
seconds then release, and the word“ ZONE ”will briefly appear and then the
zone number will be displayed.
3. Press the right-hand button repeatedly
to cycle the display through all possible
zone settings. Stop cycling when the
correct zone setting for your location isdisplayed.
4. Releasing the button for 3 seconds will
exit the zone setting mode. &
Outside mirrors
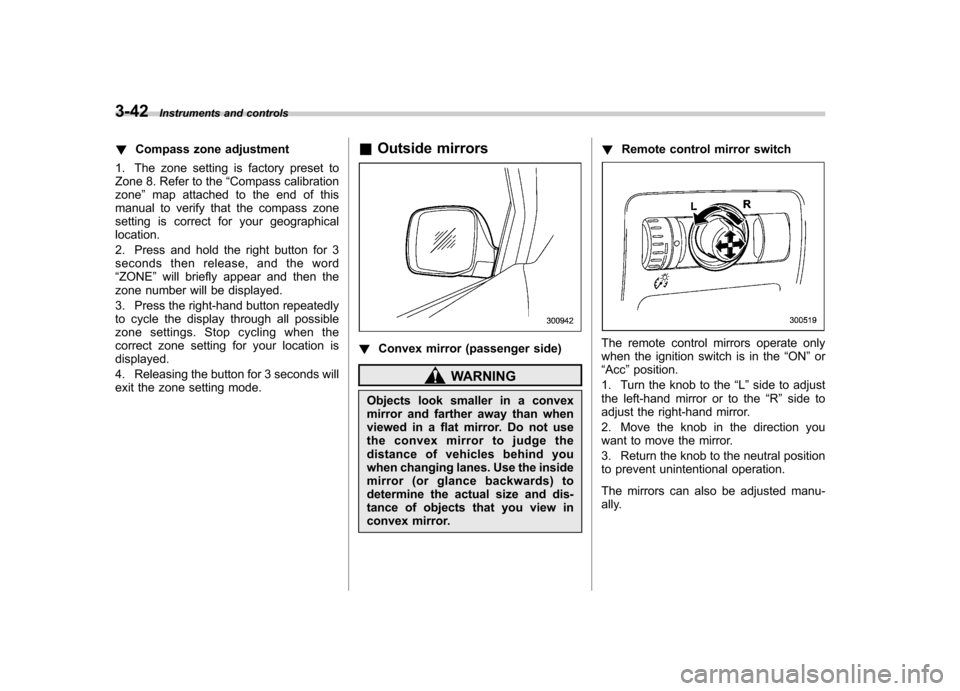
! Convex mirror (passenger side)
WARNING
Objects look smaller in a convex
mirror and farther away than when
viewed in a flat mirror. Do not use
the convex mirror to judge the
distance of vehicles behind you
when changing lanes. Use the inside
mirror (or glance backwards) to
determine the actual size and dis-
tance of objects that you view in
convex mirror. !
Remote control mirror switch
The remote control mirrors operate only
when the ignition switch is in the “ON ”or
“ Acc ”position.
1. Turn the knob to the “L ” side to adjust
the left-hand mirror or to the “R ” side to
adjust the right-hand mirror.
2. Move the knob in the direction you
want to move the mirror.
3. Return the knob to the neutral position
to prevent unintentional operation.
The mirrors can also be adjusted manu-
ally.
Page 172 of 422
!Outside mirror defogger
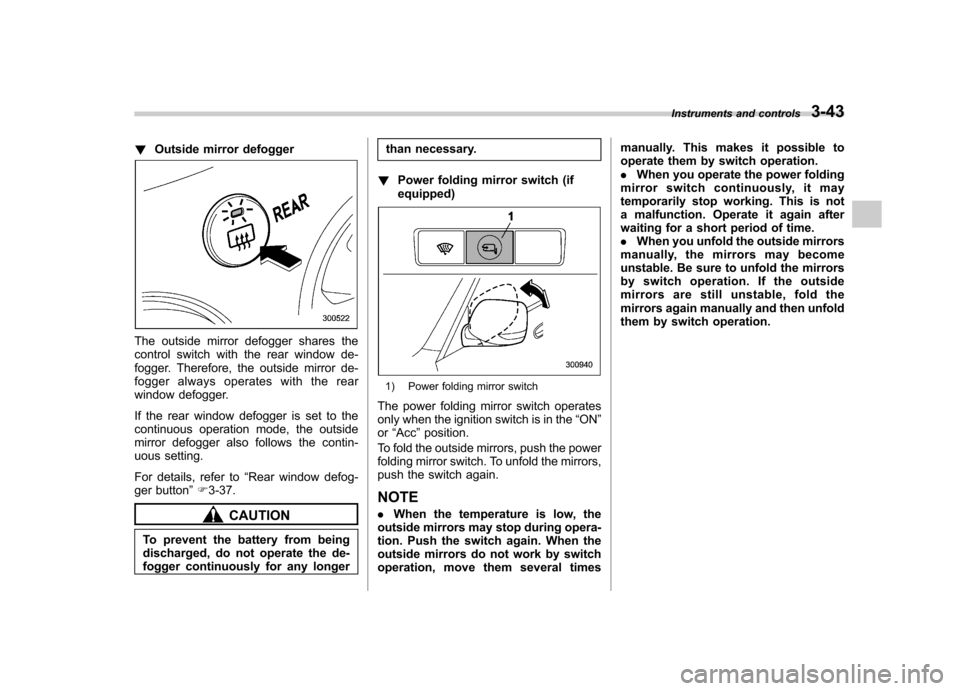
The outside mirror defogger shares the
control switch with the rear window de-
fogger. Therefore, the outside mirror de-
fogger always operates with the rear
window defogger.
If the rear window defogger is set to the
continuous operation mode, the outside
mirror defogger also follows the contin-
uous setting.
For details, refer to “Rear window defog-
ger button ”F 3-37.
CAUTION
To prevent the battery from being
discharged, do not operate the de-
fogger continuously for any longer than necessary.
! Power folding mirror switch (ifequipped)
1) Power folding mirror switch
The power folding mirror switch operates
only when the ignition switch is in the “ON ”
or “Acc ”position.
To fold the outside mirrors, push the power
folding mirror switch. To unfold the mirrors,
push the switch again.
NOTE . When the temperature is low, the
outside mirrors may stop during opera-
tion. Push the switch again. When the
outside mirrors do not work by switch
operation, move them several times manually. This makes it possible to
operate them by switch operation..
When you operate the power folding
mirror switch continuously, it may
temporarily stop working. This is not
a malfunction. Operate it again after
waiting for a short period of time.. When you unfold the outside mirrors
manually, the mirrors may become
unstable. Be sure to unfold the mirrors
by switch operation. If the outside
mirrors are still unstable, fold the
mirrors again manually and then unfold
them by switch operation. Instruments and controls
3-43
Page 173 of 422
3-44Instruments and controls
Tilt steering wheel
WARNING
Do not adjust the steering wheel tilt
position while driving. This may
cause loss of vehicle control and
result in personal injury.
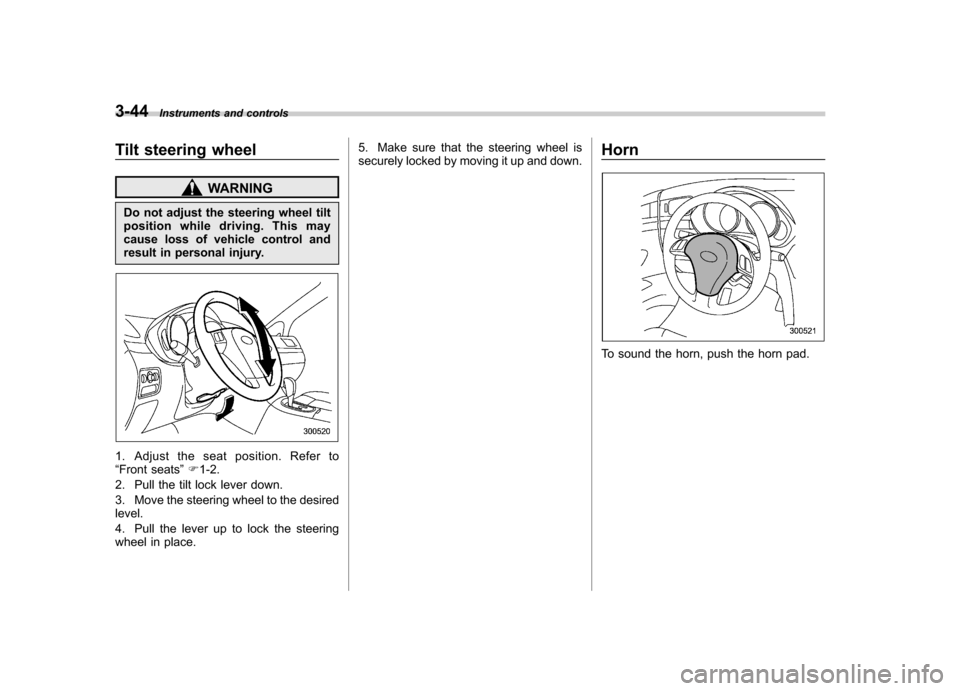
1. Adjust the seat position. Refer to “ Front seats ”F 1-2.
2. Pull the tilt lock lever down.
3. Move the steering wheel to the desired level.
4. Pull the lever up to lock the steering
wheel in place. 5. Make sure that the steering wheel is
securely locked by moving it up and down.
Horn
To sound the horn, push the horn pad.
Page 174 of 422
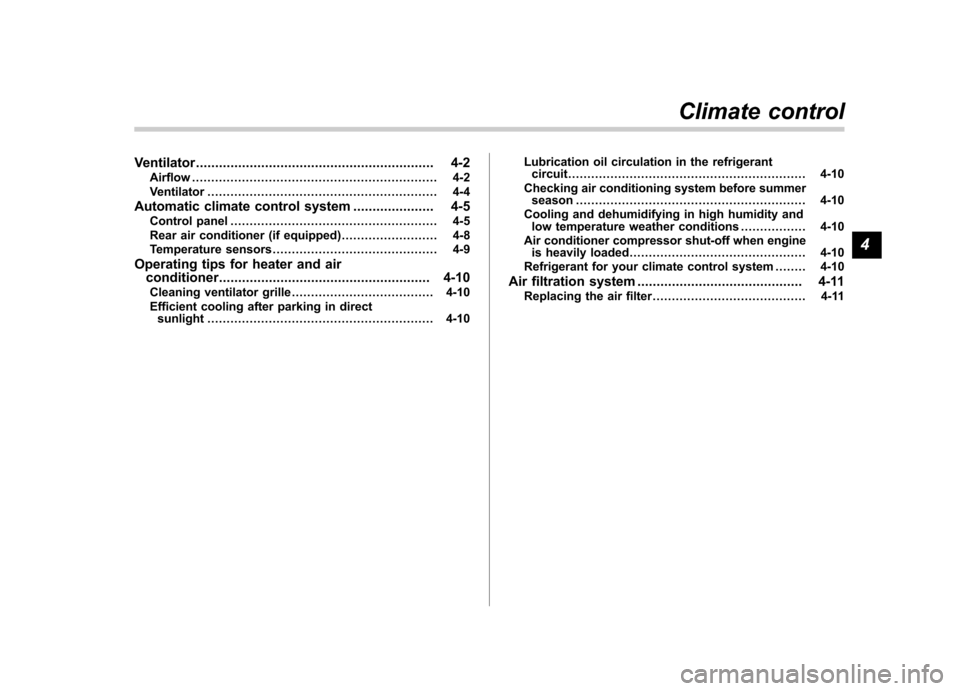
Ventilator.............................................................. 4-2
Airflow ................................................................ 4-2
Ventilator ............................................................ 4-4
Automatic climate control system ..................... 4-5
Control panel ...................................................... 4-5
Rear air conditioner (if equipped) ......................... 4-8
Temperature sensors ........................................... 4-9
Operating tips for heater and air conditioner ....................................................... 4-10
Cleaning ventilator grille ..................................... 4-10
Efficient cooling after parking in direct sunlight ........................................................... 4-10 Lubrication oil circulation in the refrigerant
circuit .............................................................. 4-10
Checking air conditioning system before summer season ............................................................ 4-10
Cooling and dehumidifying in high humidity and low temperature weather conditions ................. 4-10
Air conditioner compressor shut-off when engine is heavily loaded .............................................. 4-10
Refrigerant for your climate control system ... ..... 4-10
Air filtration system ........................................... 4-11
Replacing the air filter ........................................ 4-11Climate control
4
Page 175 of 422

4-2Climate control
Ventilator &Airflow
Ventilator and airflow: Standard: If equipped
Page 176 of 422

!Airflow mode selection
*: If equipped Climate control
4-3
– CONTINUED –
Page 177 of 422
4-4Climate control
& Ventilator
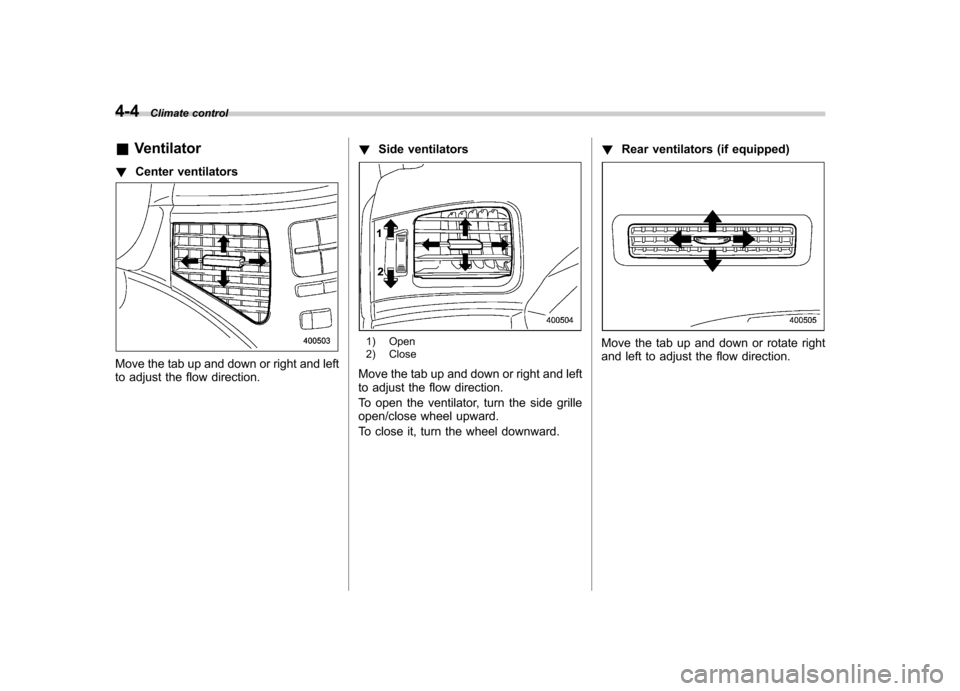
! Center ventilators
Move the tab up and down or right and left
to adjust the flow direction. !
Side ventilators
1) Open
2) Close
Move the tab up and down or right and left
to adjust the flow direction.
To open the ventilator, turn the side grille
open/close wheel upward.
To close it, turn the wheel downward. !
Rear ventilators (if equipped)Move the tab up and down or rotate right
and left to adjust the flow direction.
Page 178 of 422
Automatic climate control system NOTE .Operate the automatic climate con-
trol system when the engine is running. . The blower fan rotates at a low
speed when the engine coolant tem-
perature is low.
For efficient defogging or dehumidify-
ing in cold weather, press the “A/C ”
button.. Even when cooling is not necessary,
setting the temperature much lower
than the current outlet air temperature
turns on the air conditioner compres-
sor automatically and the indicator
light on the “A/C ”button illuminates.
. 7-seater models each have a rear air
conditioner. The fan speed of the rear
air conditioner can be adjusted, but
other adjustments (outlet air tempera-
ture, air distribution, etc.) are not
possible for the rear air conditioner.
For details, refer to “Rear air condi-
tioner ”F 4-8.
The automatic climate control system
automatically controls outlet air tempera-
ture, fan speed, airflow distribution, air
inlet control, and air conditioner compres-
sor operation. It activates when the “
AUTO ”button is pressed, and is used to
maintain a constant, comfortable climate
within the passenger compartment.
The temperature can be set within a range
of 65 to 85 8F (18 to 32 8C).
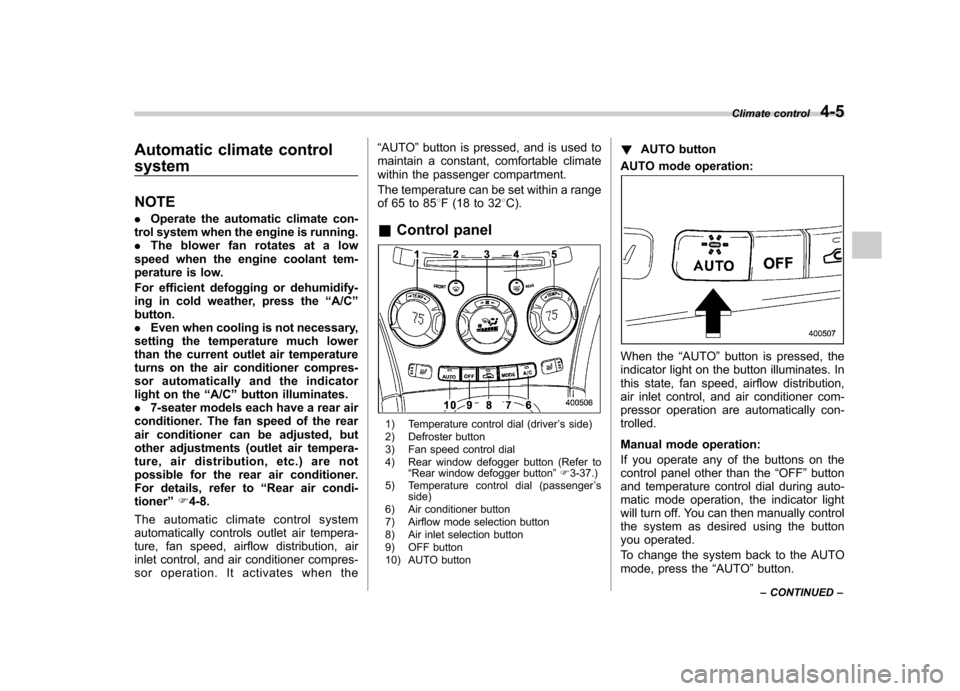
& Control panel
1) Temperature control dial (driver ’s side)
2) Defroster button
3) Fan speed control dial
4) Rear window defogger button (Refer to “Rear window defogger button ”F 3-37.)
5) Temperature control dial (passenger ’s
side)
6) Air conditioner button
7) Airflow mode selection button
8) Air inlet selection button
9) OFF button
10) AUTO button !
AUTO button
AUTO mode operation:
When the “AUTO ”button is pressed, the
indicator light on the button illuminates. In
this state, fan speed, airflow distribution,
air inlet control, and air conditioner com-
pressor operation are automatically con-trolled.
Manual mode operation:
If you operate any of the buttons on the
control panel other than the “OFF ”button
and temperature control dial during auto-
matic mode operation, the indicator light
will turn off. You can then manually control
the system as desired using the button
you operated.
To change the system back to the AUTO
mode, press the “AUTO ”button.
Climate control
4-5
– CONTINUED –
Page 179 of 422

4-6Climate control
! OFF button
The Automatic Climate Control system
turns off (the air conditioner compressor
and fan turn off) when the “OFF ”button is
pressed.
When the “OFF ”button is pressed, the
outside air introduction mode (air inlet
selection OFF) is automatically selected. !
Temperature control dialDriver ’s side
Passenger ’s side
It is possible to make separate tempera-
ture settings for the driver ’ssideand passenger
’s side. Each temperature
setting is shown on the display. With the
dial set at your desired temperature, the
system automatically adjusts the tempera-
ture of air supplied from the outlets such
that the desired temperature is achieved
and maintained.
Turning the dial counterclockwise and
releasing it reduces the temperature by1 8F (0.5 8C). Turning the dial clockwise
and releasing it increases the temperature
by 1 8F (0.5 8C). Holding the dial in either
turned position causes the temperature to
change continuously.
With the minimum temperature set, the
system gives maximum cooling perfor-
mance. With the maximum temperature
set, the system gives maximum heatingperformance.
Page 180 of 422
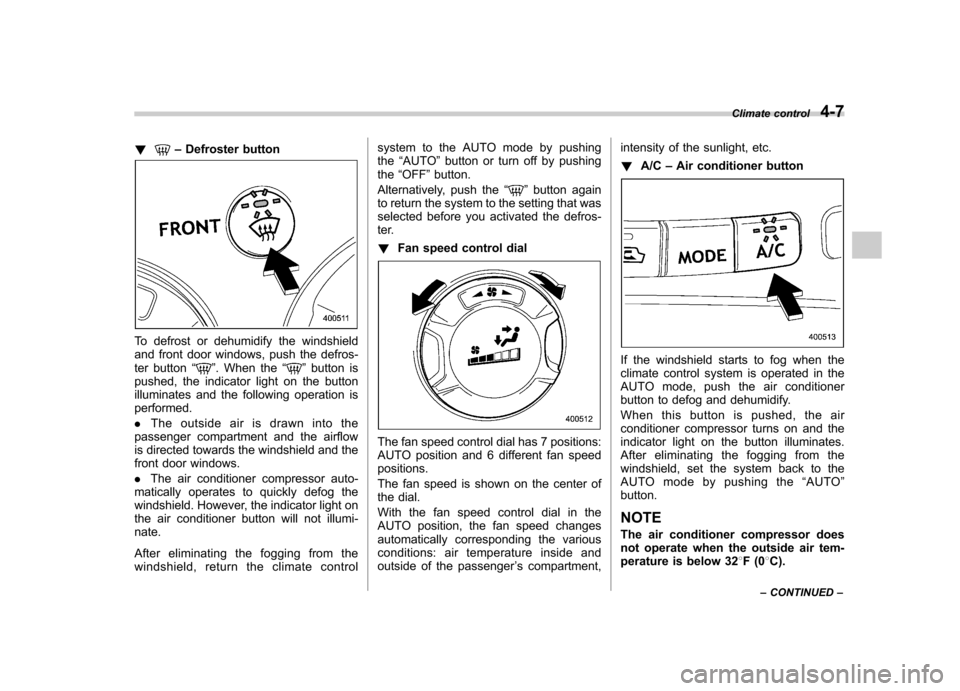
!–Defroster button
To defrost or dehumidify the windshield
and front door windows, push the defros-
ter button “
”. When the “”button is
pushed, the indicator light on the button
illuminates and the following operation isperformed. . The outside air is drawn into the
passenger compartment and the airflow
is directed towards the windshield and the
front door windows. . The air conditioner compressor auto-
matically operates to quickly defog the
windshield. However, the indicator light on
the air conditioner button will not illumi-nate.
After eliminating the fogging from the
windshield, return the climate control system to the AUTO mode by pushingthe
“AUTO ”button or turn off by pushing
the “OFF ”button.
Alternatively, push the “
”button again
to return the system to the setting that was
selected before you activated the defros-
ter. ! Fan speed control dial
The fan speed control dial has 7 positions:
AUTO position and 6 different fan speedpositions.
The fan speed is shown on the center of
the dial.
With the fan speed control dial in the
AUTO position, the fan speed changes
automatically corresponding the various
conditions: air temperature inside and
outside of the passenger ’s compartment, intensity of the sunlight, etc. !
A/C –Air conditioner button
If the windshield starts to fog when the
climate control system is operated in the
AUTO mode, push the air conditioner
button to defog and dehumidify.
When this button is pushed, the air
conditioner compressor turns on and the
indicator light on the button illuminates.
After eliminating the fogging from the
windshield, set the system back to the
AUTO mode by pushing the “AUTO ”
button.
NOTE
The air conditioner compressor does
not operate when the outside air tem-
perature is below 32 8F(0 8C).
Climate control
4-7
– CONTINUED –