light SUBARU TRIBECA 2011 1.G Navigation Manual
[x] Cancel search | Manufacturer: SUBARU, Model Year: 2011, Model line: TRIBECA, Model: SUBARU TRIBECA 2011 1.GPages: 126, PDF Size: 20.27 MB
Page 8 of 126

Before Use
Replacing the DVD-ROM disc
If you need to replace the DVD-ROM disc, make sure the
replacement disc is compatible with your system’s main
unit. Inserting an incompatible disc could damage the unit.■Handling precautions for DVD-ROM discs• Handle DVD-ROM discs carefully. Any DVD-ROM disc with
excessive warping or scratches on its surface can cause
reading errors.
• Store DVD-ROM discs away from direct sunlight, which can
cause warping and render them unusable.
• DVD-ROM discs rotate at high speeds inside the system’s
main unit. Never use a cracked or badly warped disc; doing
so could damage the unit.
• To clean a DVD-ROM disc, lightly wipe it with a soft cloth in
straight lines from the center hole toward the outer edge.
• Never clean DVD-ROM discs with benzene, thinner, record
spray, antistatic spray, or chemical swabs.
• Do not touch the DVD-ROM disc’s data surface (the surface
without a printed label). A dirty data surface can cause
reading errors. Always hold a DVD-ROM disc by the center
hole and at one point on the outer edge, or by two points
on the outer edge.
• Do not write anything on DVD-ROM discs or affix anything,
such as stickers, to them.
7
TribecaNavi_US_B3112BE.qxd 06.12.12 11:08 AM Page 7
Page 47 of 126

46
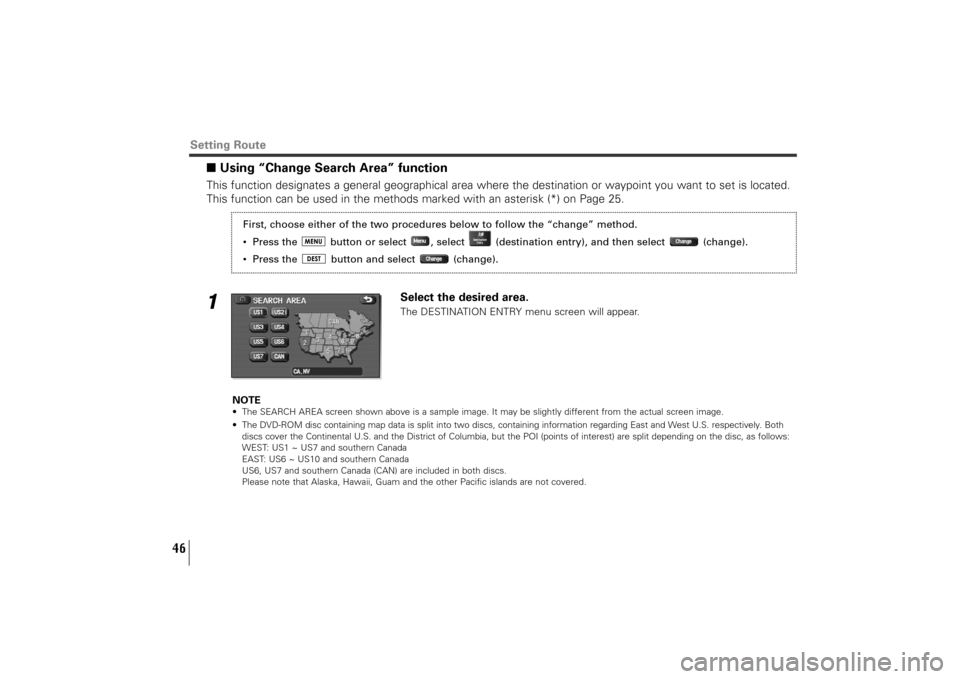
■Using “Change Search Area” function This function designates a general geographical area where the destination or waypoint you want to set is located.
This function can be used in the methods marked with an asterisk (*) on Page 25.1
Select the desired area.The DESTINATION ENTRY menu screen will appear.
NOTE
• The SEARCH AREA screen shown above is a sample image. It may be slightly different from the actual screen image.
• The DVD-ROM disc containing map data is split into two discs, containing information regarding East and West U.S. respectively. Both
discs cover the Continental U.S. and the District of Columbia, but the POI (points of interest) are split depending on the disc, as follows:
WEST: US1 ~ US7 and southern Canada
EAST: US6 ~ US10 and southern Canada
US6, US7 and southern Canada (CAN) are included in both discs.
Please note that Alaska, Hawaii, Guam and the other Pacific islands are not covered.
Setting Route
First, choose either of the two procedures below to follow the “change” method.
• Press the button or select , select (destination entry), and then select (change).
• Press the button and select (change).
TribecaNavi_US_B3112BE.qxd 06.12.12 11:08 AM Page 46
Page 73 of 126

72
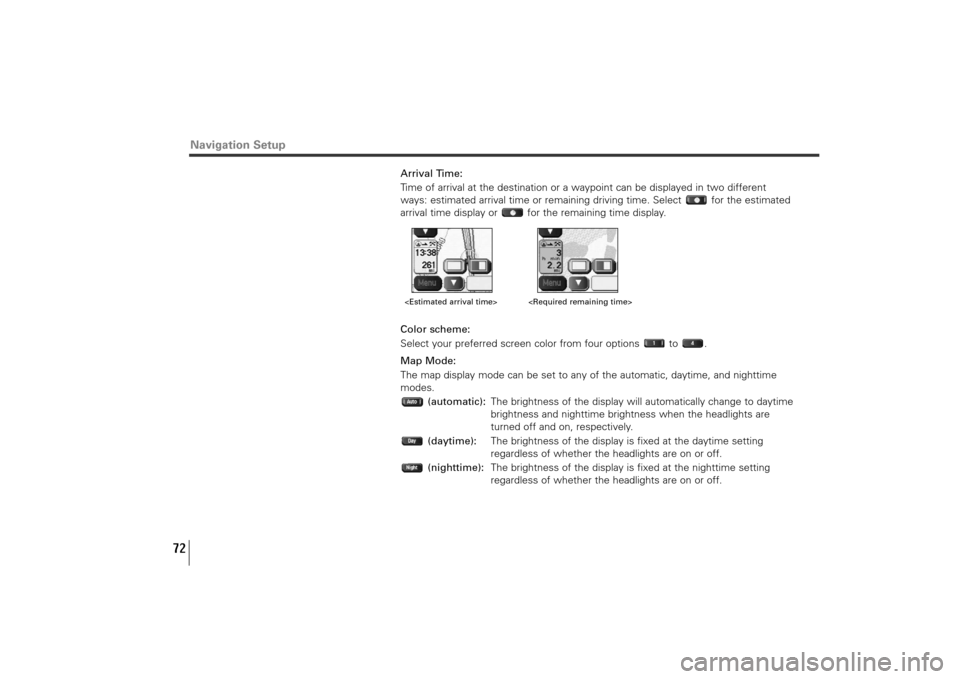
Arrival Time:
Time of arrival at the destination or a waypoint can be displayed in two different
ways: estimated arrival time or remaining driving time. Select for the estimated
arrival time display or for the remaining time display.
Color scheme:
Select your preferred screen color from four options to .
Map Mode:
The map display mode can be set to any of the automatic, daytime, and nighttime
modes.
(automatic):The brightness of the display will automatically change to daytime
brightness and nighttime brightness when the headlights are
turned off and on, respectively.
(daytime):The brightness of the display is fixed at the daytime setting
regardless of whether the headlights are on or off.
(nighttime):The brightness of the display is fixed at the nighttime setting
regardless of whether the headlights are on or off.
Navigation Setup
TribecaNavi_US_B3112BE.qxd 06.12.12 11:08 AM Page 72
Page 83 of 126

82
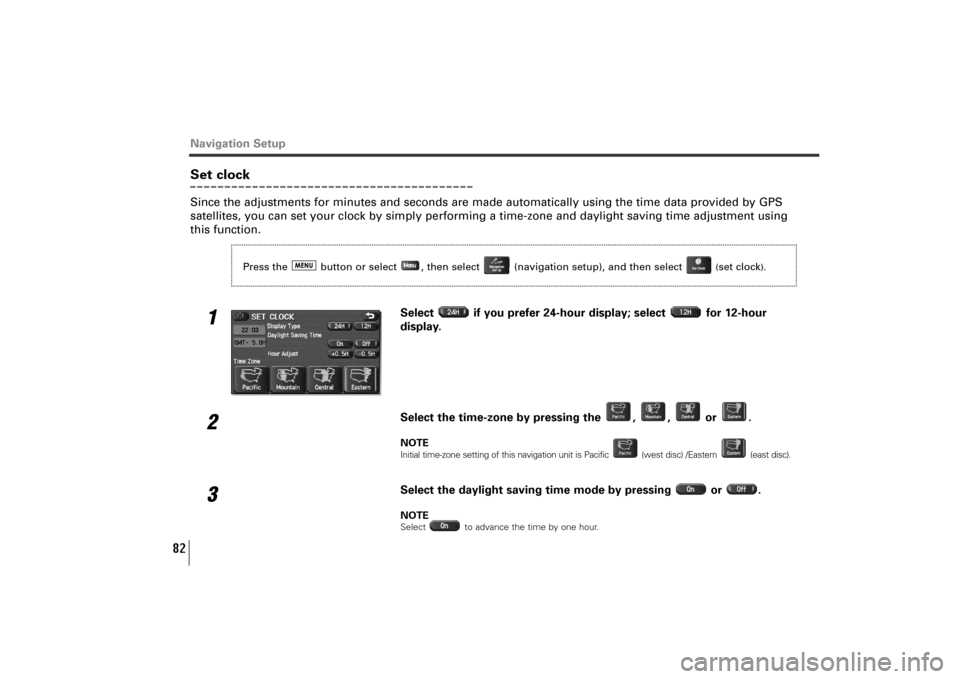
Navigation SetupSet clockSince the adjustments for minutes and seconds are made automatically using the time data provided by GPS
satellites, you can set your clock by simply performing a time-zone and daylight saving time adjustment using
this function.
1
Select if you prefer 24-hour display; select for 12-hour
display.
2
Select the time-zone by pressing the , , or .NOTEInitial time-zone setting of this navigation unit is Pacific (west disc) /Eastern (east disc).
3
Select the daylight saving time mode by pressing or .NOTESelect to advance the time by one hour.
Press the button or select , then select (navigation setup), and then select
(set clock
).
TribecaNavi_US_B3112BE.qxd 06.12.12 11:08 AM Page 82