headlights SUBARU WRX 2018 User Guide
[x] Cancel search | Manufacturer: SUBARU, Model Year: 2018, Model line: WRX, Model: SUBARU WRX 2018Pages: 578, PDF Size: 33.21 MB
Page 205 of 578
(210,1)
北米Model "A1700BE-B" EDITED: 2017/ 10/ 11
–When your vehicle is tilted, such as
in case the vehicle has a flat tire or is
being towed
–Immediately after the engine has
started
.In the following conditions, the head-
light mode will not be automatically chan-
ged from the high beam to the low beam.
–When your vehicle passes an on-
coming vehicle suddenly in a blind
curve
–When another vehicle passes in
front of your vehicle
–When an oncoming vehicle or ve-
hicle ahead comes in and out of view
because of continuous curves, median
strips, roadside trees, etc.
.If the stereo camera detects the light of
the front fog lights of an oncoming vehicle,
the headlight mode may change from the
high beam to the low beam automatically.
.The headlight mode may change from
the high beam to the low beam, or the low
beam mode may continue, when affected
by a street light, traffic signal, illumination
of an advertisement board, or a reflective
object such as a road sign and signboard.
.The timing of the change of headlight
mode may differ due to the following
factors.
–the vehicle condition (e.g., the num-
ber of passengers or the weight ofloaded cargo)
–surrounding situation (e.g., the
movement and direction of an oncom-
ing vehicle or vehicle ahead)
–detection limitations of the camera
angle
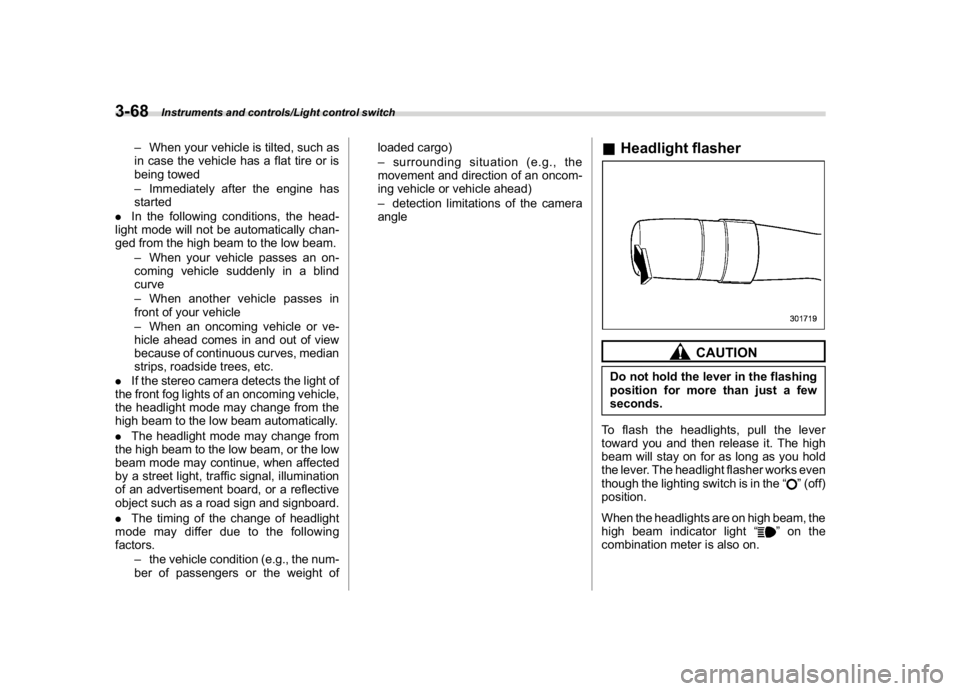
&Headlight flasher
CAUTION
Do not hold the lever in the flashing
position for more than just a few
seconds.
To flash the headlights, pull the lever
toward you and then release it. The high
beam will stay on for as long as you hold
the lever. The headlight flasher works even
though the lighting switch is in the“
”(off)
position.
When the headlights are on high beam, the
high beam indicator light“
”on the
combination meter is also on.
Instruments and controls/Light control switch
3-68
Page 208 of 578
(213,1)
北米Model "A1700BE-B" EDITED: 2017/ 10/ 11
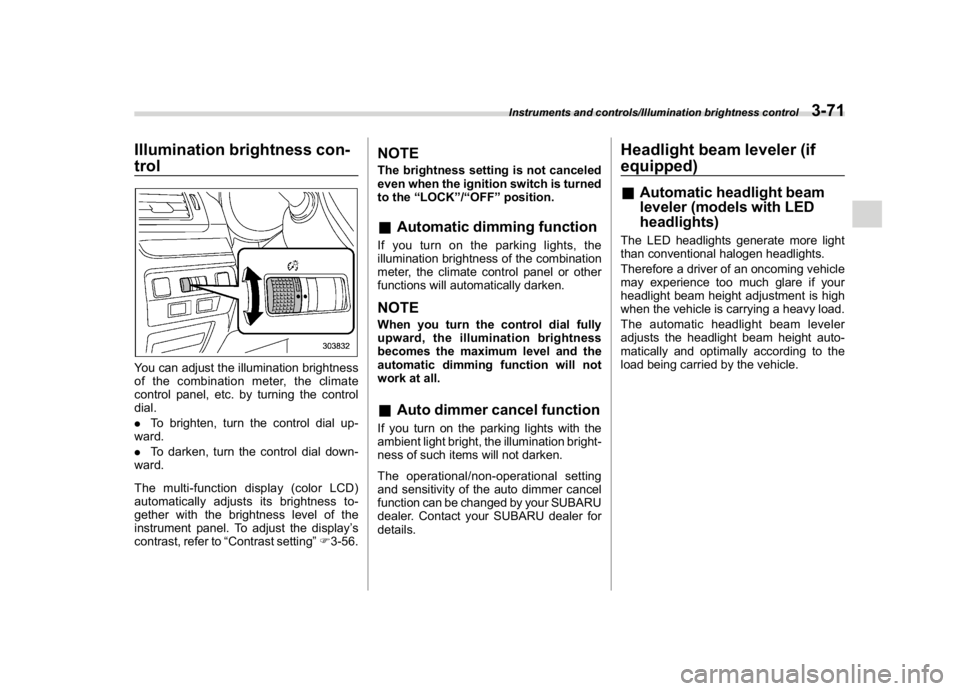
Illumination brightness con-
trolYou can adjust the illumination brightness
of the combination meter, the climate
control panel, etc. by turning the control
dial.
.To brighten, turn the control dial up-
ward.
.To darken, turn the control dial down-
ward.
Themulti-functiondisplay(colorLCD)
automatically adjusts its brightness to-
gether with the brightness level of the
instrument panel. To adjust the display’s
contrast, refer to“Contrast setting”F3-56.
NOTEThe brightness setting is not canceled
even when the ignition switch is turned
to the“LOCK”/“OFF”position.&Automatic dimming functionIf you turn on the parking lights, the
illumination brightness of the combination
meter, the climate control panel or other
functions will automatically darken.NOTEWhen you turn the control dial fully
upward, the illumination brightness
becomes the maximum level and the
automatic dimming function will not
work at all.&Auto dimmer cancel functionIf you turn on the parking lights with the
ambient light bright, the illumination bright-
ness of such items will not darken.
The operational/non-operational setting
and sensitivity of the auto dimmer cancel
function can be changed by your SUBARU
dealer. Contact your SUBARU dealer for
details.
Headlight beam leveler (if
equipped)&Automatic headlight beam
leveler (models with LED
headlights)The LED headlights generate more light
than conventional halogen headlights.
Therefore a driver of an oncoming vehicle
may experience too much glare if your
headlight beam height adjustment is high
when the vehicle is carrying a heavy load.
The automatic headlight beam leveler
adjusts the headlight beam height auto-
matically and optimally according to the
load being carried by the vehicle.
Instruments and controls/Illumination brightness control
3-71
3
Page 209 of 578
(214,1)
北米Model "A1700BE-B" EDITED: 2017/ 10/ 11
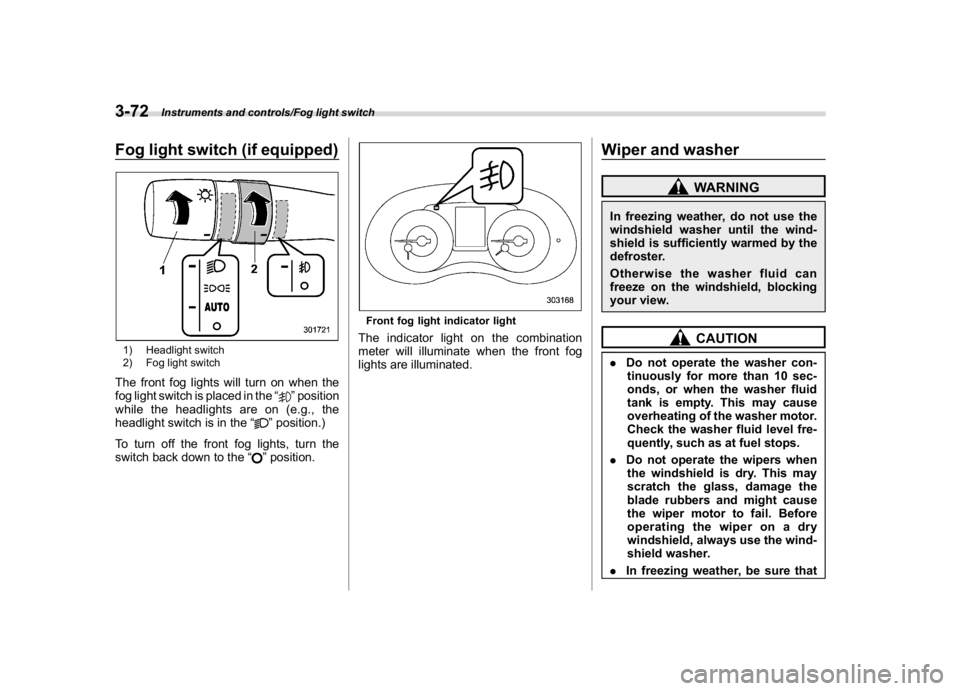
Fog light switch (if equipped)1) Headlight switch
2) Fog light switchThe front fog lights will turn on when the
fog light switch is placed in the“
”position
while the headlights are on (e.g., the
headlight switch is in the“
”position.)
To turn off the front fog lights, turn the
switch back down to the“”position.
Front fog light indicator lightThe indicator light on the combination
meter will illuminate when the front fog
lights are illuminated.
Wiper and washer
WARNING
In freezing weather, do not use the
windshield washer until the wind-
shield is sufficiently warmed by the
defroster.
Otherwise the washer fluid can
freeze on the windshield, blocking
your view.
CAUTION
.Do not operate the washer con-
tinuously for more than 10 sec-
onds, or when the washer fluid
tank is empty. This may cause
overheating of the washer motor.
Check the washer fluid level fre-
quently, such as at fuel stops.
.Do not operate the wipers when
the windshield is dry. This may
scratch the glass, damage the
blade rubbers and might cause
the wiper motor to fail. Before
operating the wiper on a dry
windshield, always use the wind-
shield washer.
.In freezing weather, be sure that
Instruments and controls/Fog light switch
3-72
Page 212 of 578
(217,1)
北米Model "A1700BE-B" EDITED: 2017/ 10/ 11
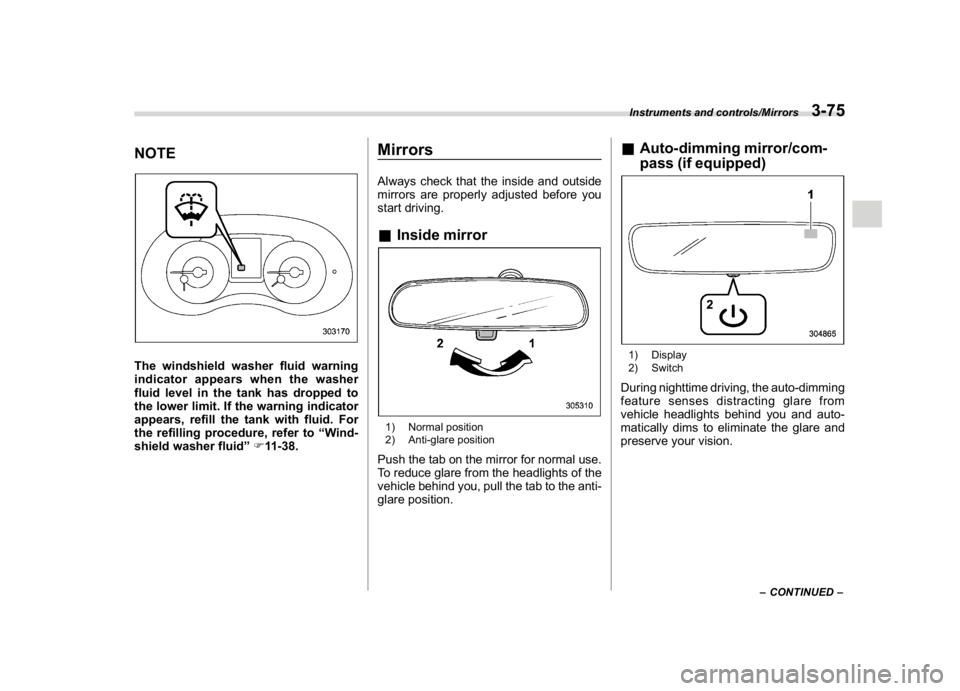
NOTEThe windshield washer fluid warning
indicator appears when the washer
fluid level in the tank has dropped to
the lower limit. If the warning indicator
appears, refill the tank with fluid. For
the refilling procedure, refer to“Wind-
shield washer fluid”F11-38.
MirrorsAlways check that the inside and outside
mirrors are properly adjusted before you
start driving.&Inside mirror1) Normal position
2) Anti-glare positionPush the tab on the mirror for normal use.
To reduce glare from the headlights of the
vehicle behind you, pull the tab to the anti-
glare position.
&Auto-dimming mirror/com-
pass (if equipped)1) Display
2) SwitchDuring nighttime driving, the auto-dimming
feature senses distracting glare from
vehicle headlights behind you and auto-
matically dims to eliminate the glare and
preserve your vision.
–CONTINUED–
Instruments and controls/Mirrors
3-75
3
Page 213 of 578
(218,1)
北米Model "A1700BE-B" EDITED: 2017/ 10/ 11
!To Operate the Auto-Dimming Fea-
ture
Press the“
”switch to turn the auto-
dimming feature on/off. The auto-dimming
feature is enabled when the switch’s green
LED indicator is on. The auto-dimming
feature will default to on with each ignition
cycle.
!To Operate the Compass Feature
1. To turn the compass feature on/off,
press and hold the“
”switch for more
than 3 seconds or until the display turns
on/off. The compass feature will default to
on with each ignition cycle.
2. If the display reads“C”, slowly drive the
vehicle in circles until compass is cali-
brated.
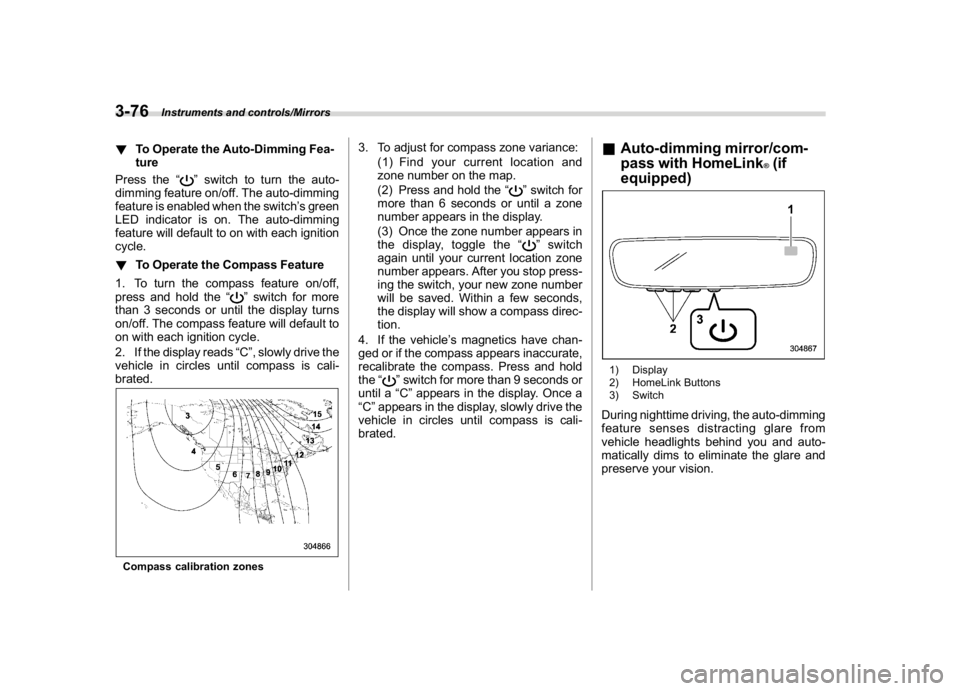
Compass calibration zones
3. To adjust for compass zone variance:
(1) Find your current location and
zone number on the map.
(2) Press and hold the“
”switch for
more than 6 seconds or until a zone
number appears in the display.
(3) Once the zone number appears in
the display, toggle the“”switch
again until your current location zone
number appears. After you stop press-
ing the switch, your new zone number
will be saved. Within a few seconds,
the display will show a compass direc-
tion.
4. If the vehicle’s magnetics have chan-
ged or if the compass appears inaccurate,
recalibrate the compass. Press and hold
the“
”switch for more than 9 seconds or
until a“C”appears in the display. Once a
“C”appears in the display, slowly drive the
vehicle in circles until compass is cali-
brated.
&Auto-dimming mirror/com-
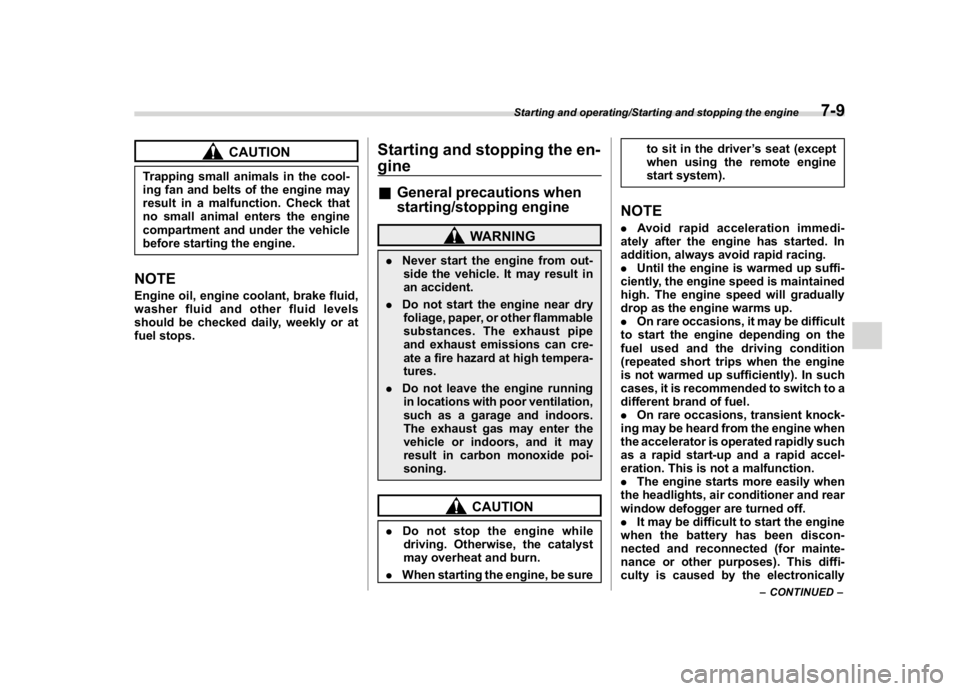
pass with HomeLink
®(if
equipped)
1) Display
2) HomeLink Buttons
3) SwitchDuring nighttime driving, the auto-dimming
feature senses distracting glare from
vehicle headlights behind you and auto-
matically dims to eliminate the glare and
preserve your vision.
Instruments and controls/Mirrors
3-76
Page 358 of 578
(371,1)
北米Model "A1700BE-B" EDITED: 2017/ 10/ 11
CAUTION
Trapping small animals in the cool-
ing fan and belts of the engine may
result in a malfunction. Check that
no small animal enters the engine
compartment and under the vehicle
before starting the engine.NOTEEngine oil, engine coolant, brake fluid,
washer fluid and other fluid levels
should be checked daily, weekly or at
fuel stops.
Starting and stopping the en-
gine&General precautions when
starting/stopping engine
WARNING
.Never start the engine from out-
side the vehicle. It may result in
an accident.
.Do not start the engine near dry
foliage, paper, or other flammable
substances. The exhaust pipe
and exhaust emissions can cre-
ate a fire hazard at high tempera-
tures.
.Do not leave the engine running
in locations with poor ventilation,
such as a garage and indoors.
The exhaust gas may enter the
vehicle or indoors, and it may
result in carbon monoxide poi-
soning.
CAUTION
.Do not stop the engine while
driving. Otherwise, the catalyst
may overheat and burn.
.When starting the engine, be sureto sit in the driver’s seat (except
when using the remote engine
start system).
NOTE.Avoid rapid acceleration immedi-
ately after the engine has started. In
addition, always avoid rapid racing.
.Until the engine is warmed up suffi-
ciently, the engine speed is maintained
high. The engine speed will gradually
drop as the engine warms up.
.On rare occasions, it may be difficult
to start the engine depending on the
fuel used and the driving condition
(repeated short trips when the engine
is not warmed up sufficiently). In such
cases, it is recommended to switch to a
different brand of fuel.
.On rare occasions, transient knock-
ing may be heard from the engine when
the accelerator is operated rapidly such
as a rapid start-up and a rapid accel-
eration. This is not a malfunction.
.The engine starts more easily when
the headlights, air conditioner and rear
window defogger are turned off.
.It may be difficult to start the engine
when the battery has been discon-
nected and reconnected (for mainte-
nance or other purposes). This diffi-
culty is caused by the electronically
–CONTINUED–
Starting and operating/Starting and stopping the engine
7-9
7
Page 410 of 578
(423,1)
北米Model "A1700BE-B" EDITED: 2017/ 10/ 11
tected.
The indicator light will flash to warn the
driver of dangers under the following
conditions.
.While the indicator light is illuminating, if
the turn signal lever is operated toward the
side in which this light turned on
.When reversing the vehicle while the
system detects a vehicle approaching
from either side
!BSD/RCTA approach indicator
light dimming function
When the headlights are on, the bright-
ness of the BSD/RCTA approach indicator
light will be reduced.NOTE.You may have difficulty seeing the
BSD/RCTA approach indicator light
under the following conditions.
–When sunlight shines directly on
it
–When the headlight beams from a
vehicle traveling behind shines di-
rectly on it
.While the illumination brightness
control dial is in the fully upward
position, even if the headlights are
turned on, the brightness of the BSD/
RCTA approach indicator light will not
be reduced. For details about theillumination brightness control dial,
refer to“Illumination brightness con-
trol”F3-71.
!BSD/RCTA approach warning buz-
zer (only when reversing)
A warning buzzer sounds along with
flashing of the BSD/RCTA approach in-
dicator light to warn the driver of dangers.
You can change the setting of the warning
buzzer volume by operating the combina-
tion meter display (color LCD). For details,
refer to“BSD/RCTA”F3-43.
!Safety tips regarding the BSD/RCTA
approach indicator light/warning
buzzer
.In the following cases, operation of the
BSD/RCTA approach indicator light and
the warning buzzer may be delayed or the
system may fail to issue these warnings.
–When a vehicle moves to the neigh-
boring lane from a lane next to the
neighboring lane
–When you are driving on a steep
incline or on repeated sharp uphill and
downhill grades
–When you are going beyond a pass
–When both your vehicle and a
vehicle driving on a neighboring lane
are driving on the far side of each lane.
–When several narrowly-spaced ve-hicles are approaching in a row
–In low radius bends (tight bends or
when making turns at an intersection)
–When there is a difference in height
between your lane and the neighboring
lane
–Immediately after the BSD/RCTA is
activated by pressing the BSD/RCTA
OFF switch
–Immediately after the shift lever/
select lever is shifted to the“R”position
–When extremely heavy cargo is
loaded in the trunk
.During reversing, operation of the BSD/
RCTA approach indicator light and the
warning buzzer may be delayed or the
system may fail to issue these warnings
under the following conditions.
–When backing out of an angled
parking space
–When a large-sized vehicle is
parked next to your vehicle (That
vehicle prevents the propagation of
radar waves.)
–When reversing on sloped roads
–When reversing at a high speed
–CONTINUED–
Starting and operating/BSD/RCTA
7-61
7
Page 479 of 578
(500,1)
北米Model "A1700BE-B" EDITED: 2017/ 10/ 11
Parking brake stroke (models without
electronic parking brake system)................... 11-30
Tires and wheels................................................. 11-30
Types of tires...................................................... 11-30
Tire pressure monitoring system (TPMS)
(if equipped)..................................................... 11-30
Tire inspection.................................................... 11-32
Tire pressures and wear...................................... 11-32
Wheel balance.................................................... 11-34
Wear indicators................................................... 11-35
Rotational direction of tires................................. 11-35
Tire rotation........................................................ 11-36
Tire replacement................................................. 11-36
Wheel replacement............................................. 11-37
Alloy wheels........................................................ 11-38
Windshield washer fluid..................................... 11-38
Replacement of wiper blades............................ 11-39
Windshield wiper blade assembly........................ 11-40
Windshield wiper blade rubber............................ 11-40
Battery................................................................. 11-41Fuses....................................................................11-42
Installation of accessories..................................11-44
Replacing bulbs...................................................11-44
Headlights (models with LED headlights)............ 11-44
High beam headlight
(models without LED headlights)..................... 11-44
Low beam headlight*, front side marker light,
parking light* and front turn signal light*......... 11-46
Front turn signal light
(models with LED headlights).......................... 11-48
Front fog light
(models with the LED front fog light)............... 11-48
Front fog light (models without the LED front
fog light) (if equipped)..................................... 11-49
Rear combination lights...................................... 11-49
License plate light.............................................. 11-50
Other bulbs........................................................ 11-51
Replacing battery................................................11-51
Safety precautions.............................................. 11-51
Replacing battery of access key fob................... 11-52
Replacing transmitter battery.............................. 11-53
Maintenance and service
Page 521 of 578
(542,1)
北米Model "A1700BE-B" EDITED: 2017/ 10/ 11
Installation of accessoriesAlways consult your SUBARU dealer
before installing fog lights or any other
electrical equipment in your vehicle. Such
accessories may cause the electronic
system to malfunction if they are incor-
rectly installed or if they are not suited for
the vehicle.
Replacing bulbs
WARNING
Bulbs may become very hot while
illuminated. Before replacing bulbs,
turn off the lights and wait until the
bulbs cool down. Otherwise, there is
a risk of sustaining a burn injury.
CAUTION
.Replace any bulb only with a new
bulb of the specified wattage.
Using a bulb of different wattage
could result in a fire. For the
specified wattage of each bulb,
refer to“Bulb chart”F12-14.
.Do not touch the glass portion of
the light bulb with bare hands.
When holding the glass portion is
unavoidable, hold it using with a
clean dry cloth to avoid getting
moisture and grease on the bulb.
Ifthereisanyfingerprintsor
grease on the bulb surface, wipe
them away with a soft cloth
moistened with alcohol. Also, if
the bulb is scratched or dropped,
it may blow out or crack.
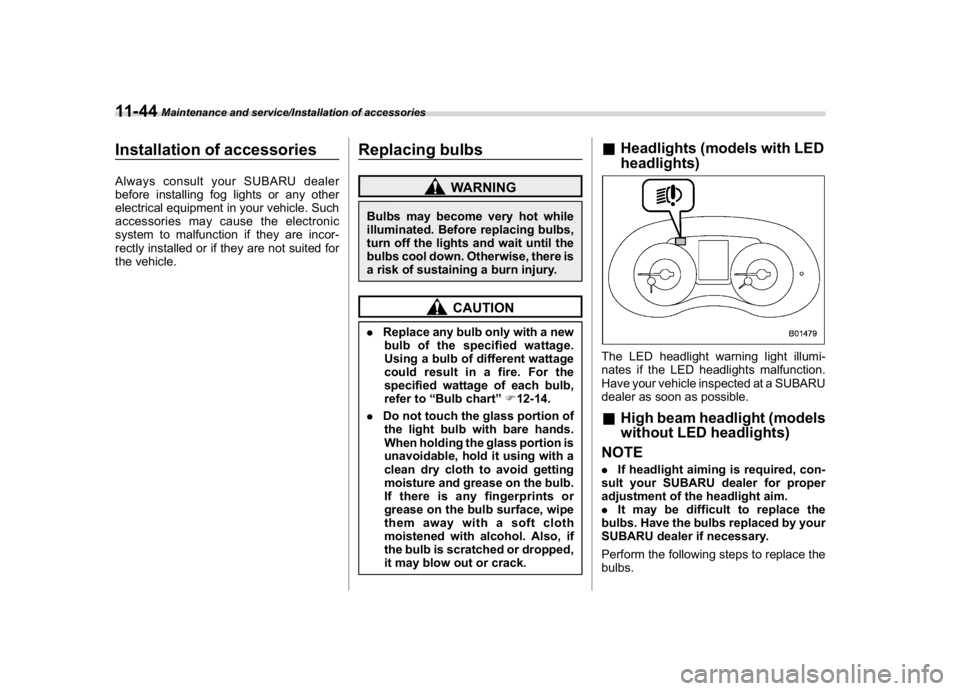
&Headlights (models with LED
headlights)The LED headlight warning light illumi-
nates if the LED headlights malfunction.
Have your vehicle inspected at a SUBARU
dealer as soon as possible.&High beam headlight (models
without LED headlights)
NOTE.If headlight aiming is required, con-
sult your SUBARU dealer for proper
adjustment of the headlight aim.
.It may be difficult to replace the
bulbs. Have the bulbs replaced by your
SUBARU dealer if necessary.
Perform the following steps to replace the
bulbs.
Maintenance and service/Installation of accessories
11-44
Page 523 of 578
(544,1)
北米Model "A1700BE-B" EDITED: 2017/ 10/ 11
the headlight assembly by turning it clock-
wise.
4. Replace the bulb with a new one. At
this time, use care not to touch the bulb
surface.
5. To install the bulb to the headlight
assembly, turn it to the reverse direction
until it clicks.
6. Reconnect the electrical connector.
7.Left-hand side:Set the washer fluid
filler pipe to the original place and secure it
by a clip.
Right-hand side:Install the air intake duct
with clips.&Low beam headlight*, front
side marker light, parking
light* and front turn signal
light**: models without LED headlightsNOTE.If headlight aiming is required, con-
sult your SUBARU dealer for proper
adjustment of the headlight aim.
.It may be difficult to replace the
bulbs. Have the bulbs replaced by your
SUBARU dealer if necessary.
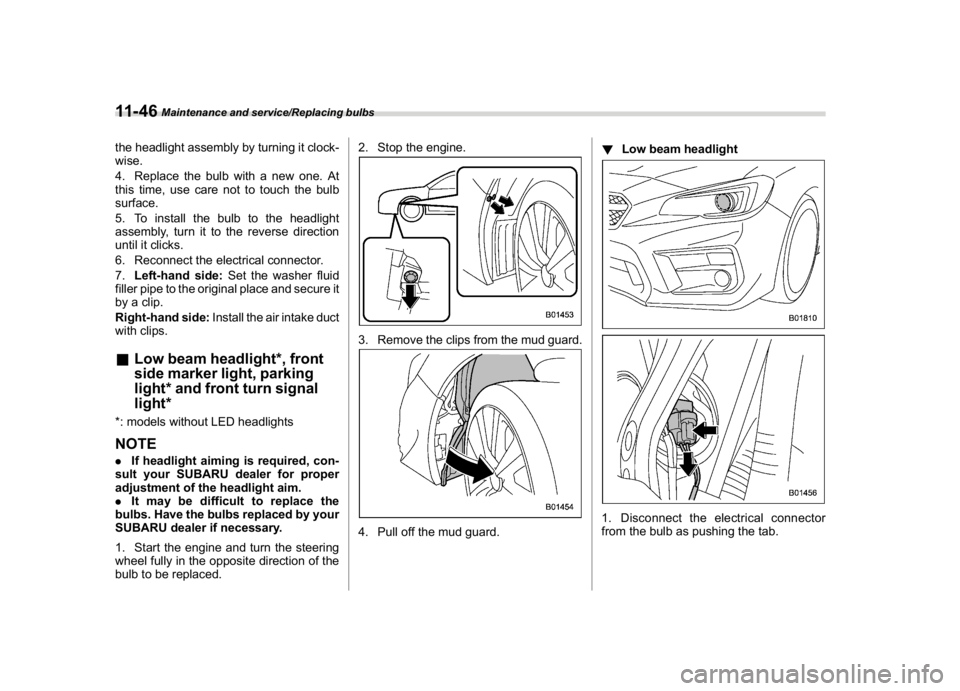
1. Start the engine and turn the steering
wheel fully in the opposite direction of the
bulb to be replaced.2. Stop the engine.
3. Remove the clips from the mud guard.4. Pull off the mud guard.!Low beam headlight
1. Disconnect the electrical connector
from the bulb as pushing the tab.
Maintenance and service/Replacing bulbs
11-46