key SUZUKI AERIO 2007 1.G User Guide
[x] Cancel search | Manufacturer: SUZUKI, Model Year: 2007, Model line: AERIO, Model: SUZUKI AERIO 2007 1.GPages: 232, PDF Size: 3.34 MB
Page 33 of 232
Downloaded from www.Manualslib.com manuals search engine 2-20 BEFORE DRIVING
54G27-03E
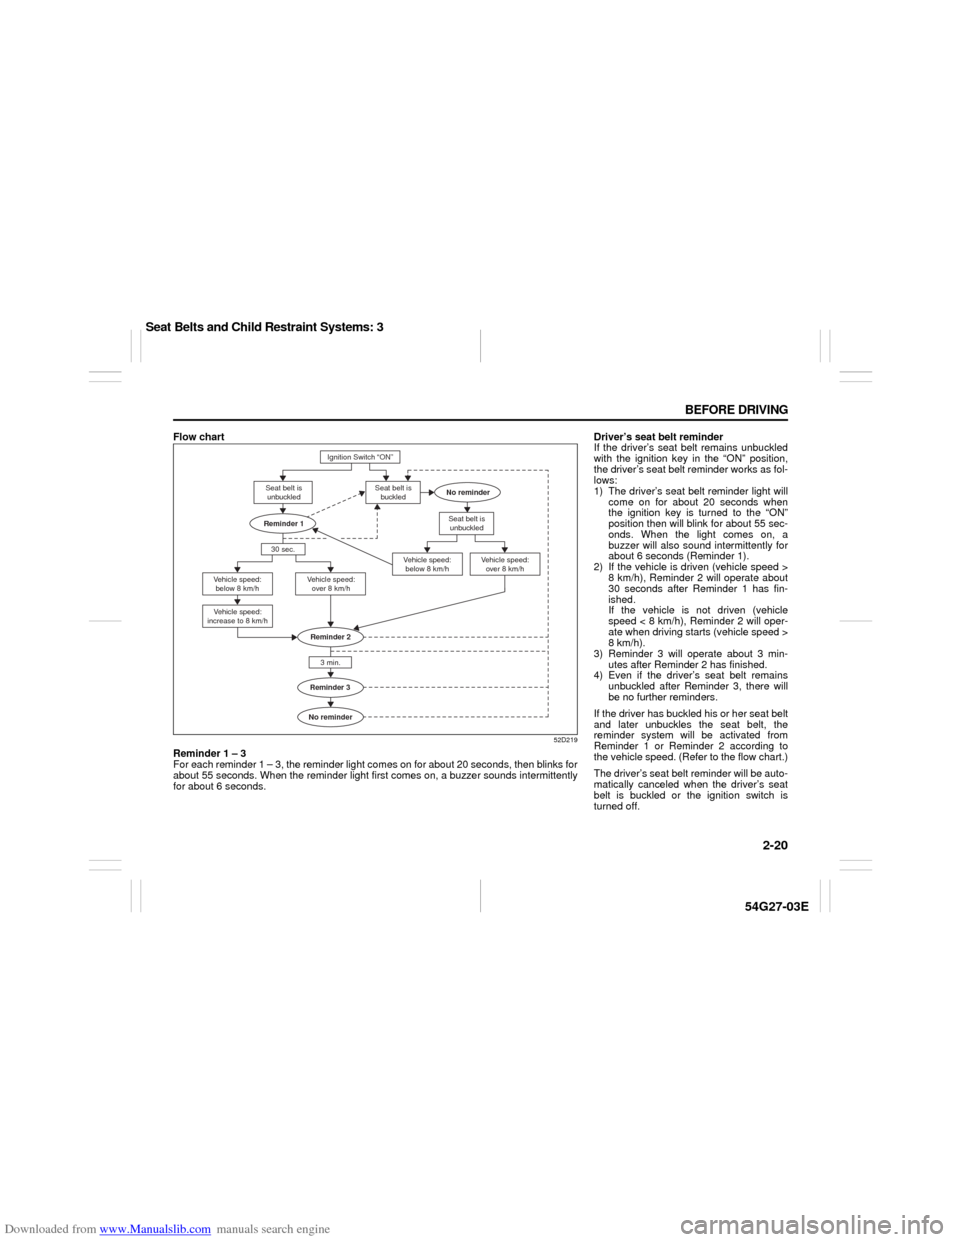
Flow chart
52D219
Reminder 1 – 3
For each reminder 1 – 3, the reminder light comes on for about 20 seconds, then blinks for
about 55 seconds. When the reminder light first comes on, a buzzer sounds intermittently
for about 6 seconds.
Ignition Switch “ON”
Seat belt is
buckled
30 sec.Reminder 1
Vehicle speed:
increase to 8 km/hSeat belt is
unbuckled
Vehicle speed:
below 8 km/hVehicle speed:
over 8 km/h
Reminder 3
No reminder3 min. Reminder 2
No reminder Seat belt is
unbuckled
Vehicle speed:
below 8 km/hVehicle speed:
over 8 km/h
Driver’s seat belt reminder
If the driver’s seat belt remains unbuckled
with the ignition key in the “ON” position,
the driver’s seat belt reminder works as fol-
lows:
1) The driver’s seat belt reminder light will
come on for about 20 seconds when
the ignition key is turned to the “ON”
position then will blink for about 55 sec-
onds. When the light comes on, a
buzzer will also sound intermittently for
about 6 seconds (Reminder 1).
2) If the vehicle is driven (vehicle speed >
8 km/h), Reminder 2 will operate about
30 seconds after Reminder 1 has fin-
ished.
If the vehicle is not driven (vehicle
speed < 8 km/h), Reminder 2 will oper-
ate when driving starts (vehicle speed >
8 km/h).
3) Reminder 3 will operate about 3 min-
utes after Reminder 2 has finished.
4) Even if the driver’s seat belt remains
unbuckled after Reminder 3, there will
be no further reminders.
If the driver has buckled his or her seat belt
and later unbuckles the seat belt, the
reminder system will be activated from
Reminder 1 or Reminder 2 according to
the vehicle speed. (Refer to the flow chart.)
The driver’s seat belt reminder will be auto-
matically canceled when the driver’s seat
belt is buckled or the ignition switch is
turned off.
Seat Belts and Child Restraint Systems: 3
Page 56 of 232
Downloaded from www.Manualslib.com manuals search engine 3-1 STEERING COLUMN CONTROLS
54G27-03E
65D611
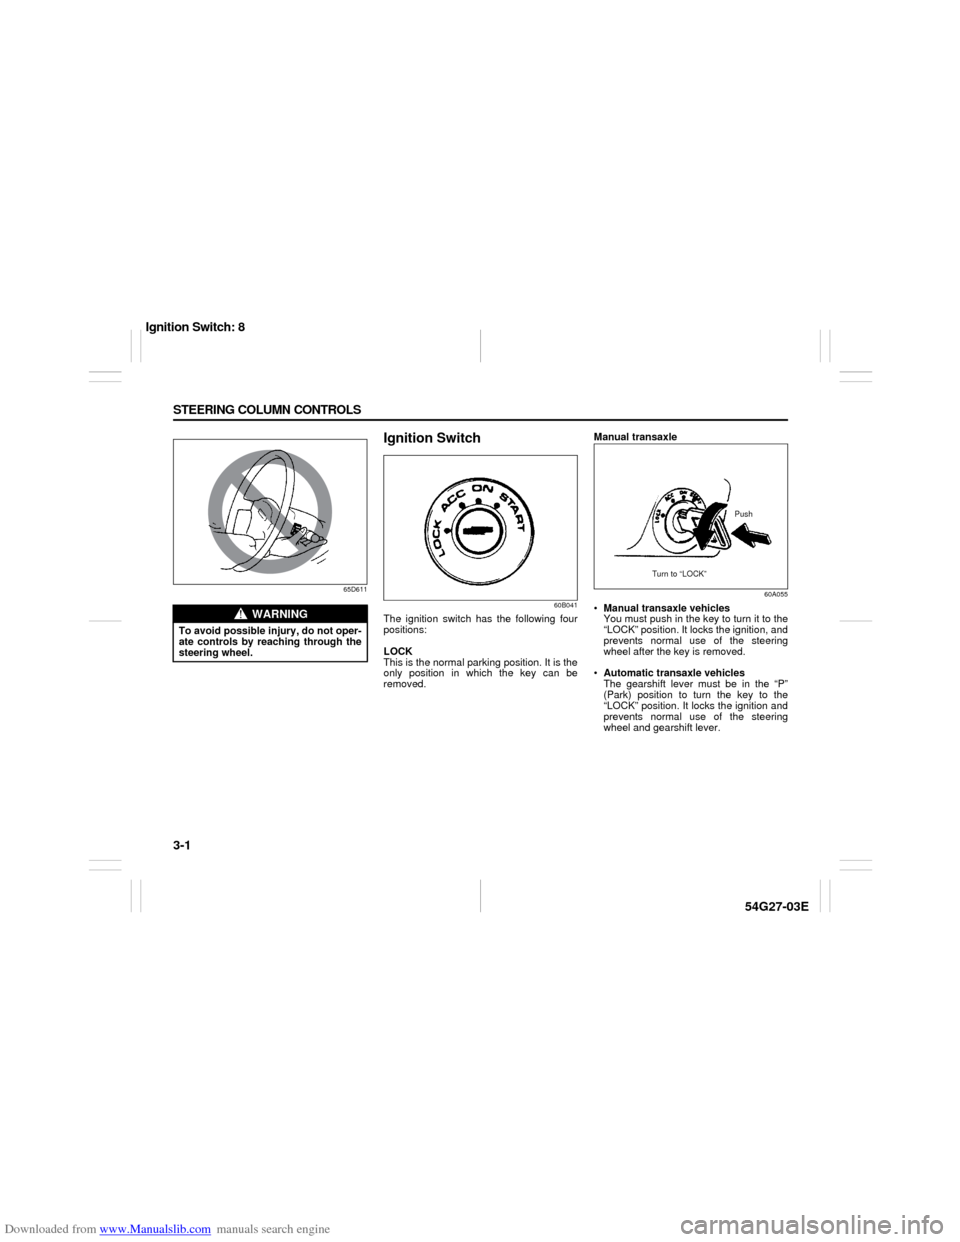
Ignition Switch
60B041
The ignition switch has the following four
positions:
LOCK
This is the normal parking position. It is the
only position in which the key can be
removed.Manual transaxle
60A055
Manual transaxle vehicles
You must push in the key to turn it to the
“LOCK” position. It locks the ignition, and
prevents normal use of the steering
wheel after the key is removed.
Automatic transaxle vehicles
The gearshift lever must be in the “P”
(Park) position to turn the key to the
“LOCK” position. It locks the ignition and
prevents normal use of the steering
wheel and gearshift lever.
WARNING
To avoid possible injury, do not oper-
ate controls by reaching through the
steering wheel.
Push
Turn to “LOCK”
Ignition Switch: 8
Page 57 of 232
Downloaded from www.Manualslib.com manuals search engine 3-2 STEERING COLUMN CONTROLS
54G27-03E
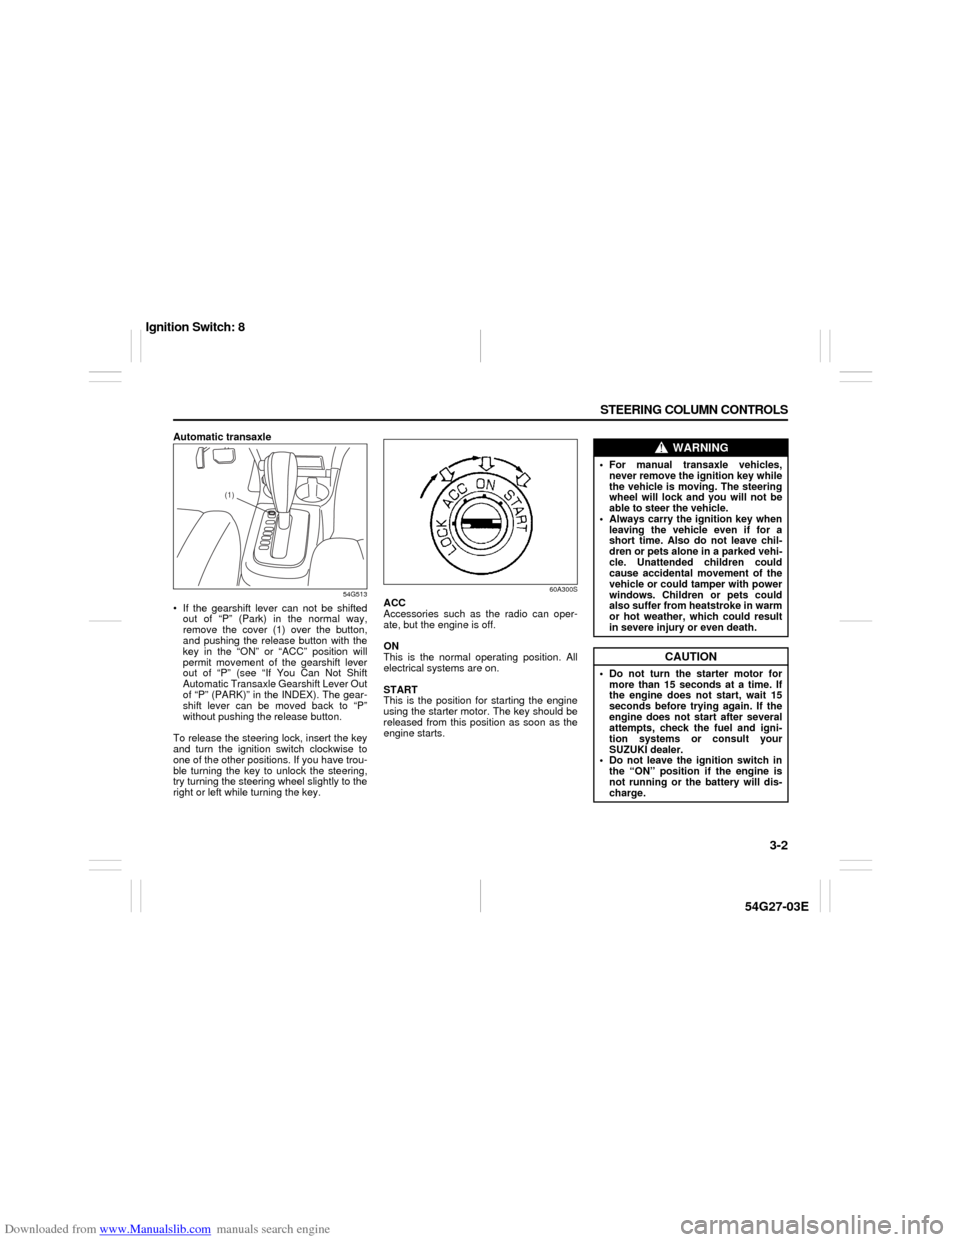
Automatic transaxle
54G513
If the gearshift lever can not be shifted
out of “P” (Park) in the normal way,
remove the cover (1) over the button,
and pushing the release button with the
key in the “ON” or “ACC” position will
permit movement of the gearshift lever
out of “P” (see “If You Can Not Shift
Automatic Transaxle Gearshift Lever Out
of “P” (PARK)” in the INDEX). The gear-
shift lever can be moved back to “P”
without pushing the release button.
To release the steering lock, insert the key
and turn the ignition switch clockwise to
one of the other positions. If you have trou-
ble turning the key to unlock the steering,
try turning the steering wheel slightly to the
right or left while turning the key.
60A300S
ACC
Accessories such as the radio can oper-
ate, but the engine is off.
ON
This is the normal operating position. All
electrical systems are on.
START
This is the position for starting the engine
using the starter motor. The key should be
released from this position as soon as the
engine starts.
(1)
WARNING
For manual transaxle vehicles,
never remove the ignition key while
the vehicle is moving. The steering
wheel will lock and you will not be
able to steer the vehicle.
Always carry the ignition key when
leaving the vehicle even if for a
short time. Also do not leave chil-
dren or pets alone in a parked vehi-
cle. Unattended children could
cause accidental movement of the
vehicle or could tamper with power
windows. Children or pets could
also suffer from heatstroke in warm
or hot weather, which could result
in severe injury or even death.
CAUTION
Do not turn the starter motor for
more than 15 seconds at a time. If
the engine does not start, wait 15
seconds before trying again. If the
engine does not start after several
attempts, check the fuel and igni-
tion systems or consult your
SUZUKI dealer.
Do not leave the ignition switch in
the “ON” position if the engine is
not running or the battery will dis-
charge.
Ignition Switch: 8
Page 58 of 232
Downloaded from www.Manualslib.com manuals search engine 3-3 STEERING COLUMN CONTROLS
54G27-03E
Lighting/Turn Signal Control
LeverThis control lever is located on the out-
board side of the steering column. Operate
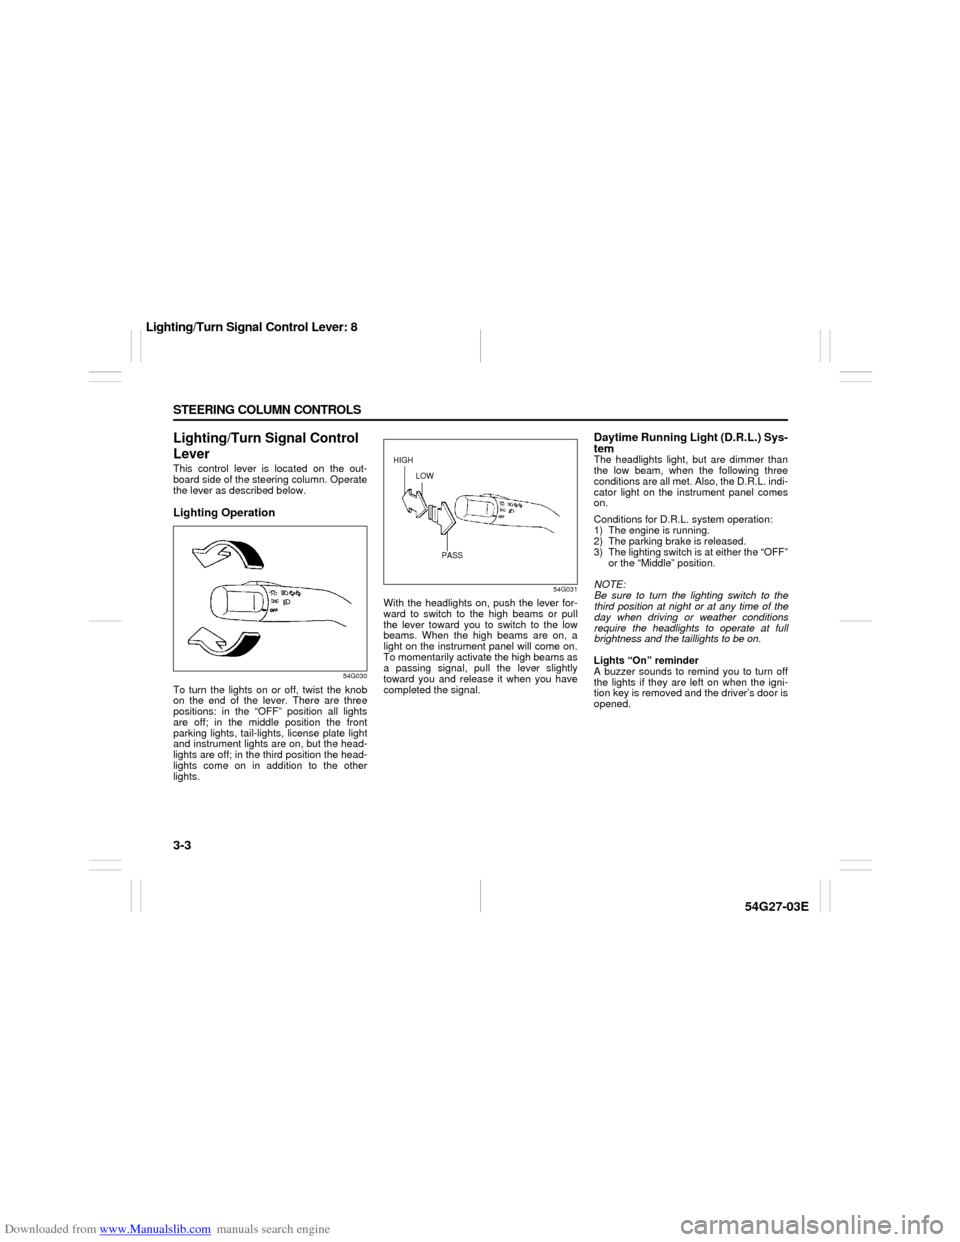
the lever as described below.Lighting Operation
54G030
To turn the lights on or off, twist the knob
on the end of the lever. There are three
positions: in the “OFF” position all lights
are off; in the middle position the front
parking lights, tail-lights, license plate light
and instrument lights are on, but the head-
lights are off; in the third position the head-
lights come on in addition to the other
lights.
54G031
With the headlights on, push the lever for-
ward to switch to the high beams or pull
the lever toward you to switch to the low
beams. When the high beams are on, a
light on the instrument panel will come on.
To momentarily activate the high beams as
a passing signal, pull the lever slightly
toward you and release it when you have
completed the signal.
Daytime Running Light (D.R.L.) Sys-
temThe headlights light, but are dimmer than
the low beam, when the following three
conditions are all met. Also, the D.R.L. indi-
cator light on the instrument panel comes
on.
Conditions for D.R.L. system operation:
1) The engine is running.
2) The parking brake is released.
3) The lighting switch is at either the “OFF”
or the “Middle” position.
NOTE:
Be sure to turn the lighting switch to the
third position at night or at any time of the
day when driving or weather conditions
require the headlights to operate at full
brightness and the taillights to be on.
Lights “On” reminder
A buzzer sounds to remind you to turn off
the lights if they are left on when the igni-
tion key is removed and the driver’s door is
opened.
HIGH
LOW
PASS
Lighting/Turn Signal Control Lever: 8
Page 69 of 232
Downloaded from www.Manualslib.com manuals search engine 4-4 INSTRUMENT PANEL
54G27-03E
For details of the ABS, refer to “Anti-Lock
Brake System (ABS)” in the “OPERATING
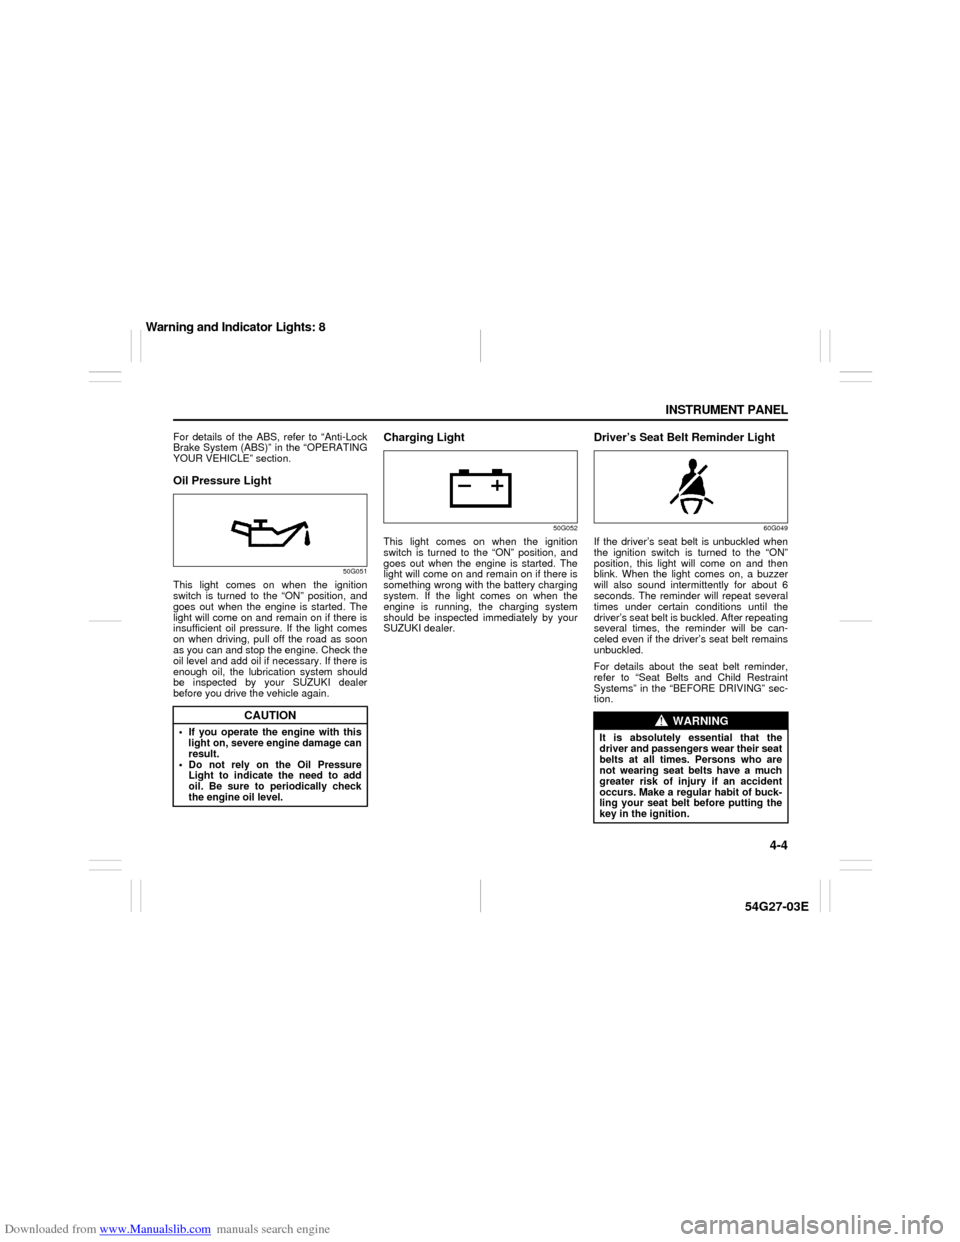
YOUR VEHICLE” section.Oil Pressure Light
50G051
This light comes on when the ignition
switch is turned to the “ON” position, and
goes out when the engine is started. The
light will come on and remain on if there is
insufficient oil pressure. If the light comes
on when driving, pull off the road as soon
as you can and stop the engine. Check the
oil level and add oil if necessary. If there is
enough oil, the lubrication system should
be inspected by your SUZUKI dealer
before you drive the vehicle again.
Charging Light
50G052
This light comes on when the ignition
switch is turned to the “ON” position, and
goes out when the engine is started. The
light will come on and remain on if there is
something wrong with the battery charging
system. If the light comes on when the
engine is running, the charging system
should be inspected immediately by your
SUZUKI dealer.
Driver’s Seat Belt Reminder Light
60G049
If the driver’s seat belt is unbuckled when
the ignition switch is turned to the “ON”
position, this light will come on and then
blink. When the light comes on, a buzzer
will also sound intermittently for about 6
seconds. The reminder will repeat several
times under certain conditions until the
driver’s seat belt is buckled. After repeating
several times, the reminder will be can-
celed even if the driver’s seat belt remains
unbuckled.
For details about the seat belt reminder,
refer to “Seat Belts and Child Restraint
Systems” in the “BEFORE DRIVING” sec-
tion.
CAUTION
If you operate the engine with this
light on, severe engine damage can
result.
Do not rely on the Oil Pressure
Light to indicate the need to add
oil. Be sure to periodically check
the engine oil level.
WARNING
It is absolutely essential that the
driver and passengers wear their seat
belts at all times. Persons who are
not wearing seat belts have a much
greater risk of injury if an accident
occurs. Make a regular habit of buck-
ling your seat belt before putting the
key in the ignition.
Warning and Indicator Lights: 8
Page 79 of 232
Downloaded from www.Manualslib.com manuals search engine 4-14 INSTRUMENT PANEL
54G27-03E
Systems” in the “BEFORE DRIVING” sec-
tion.
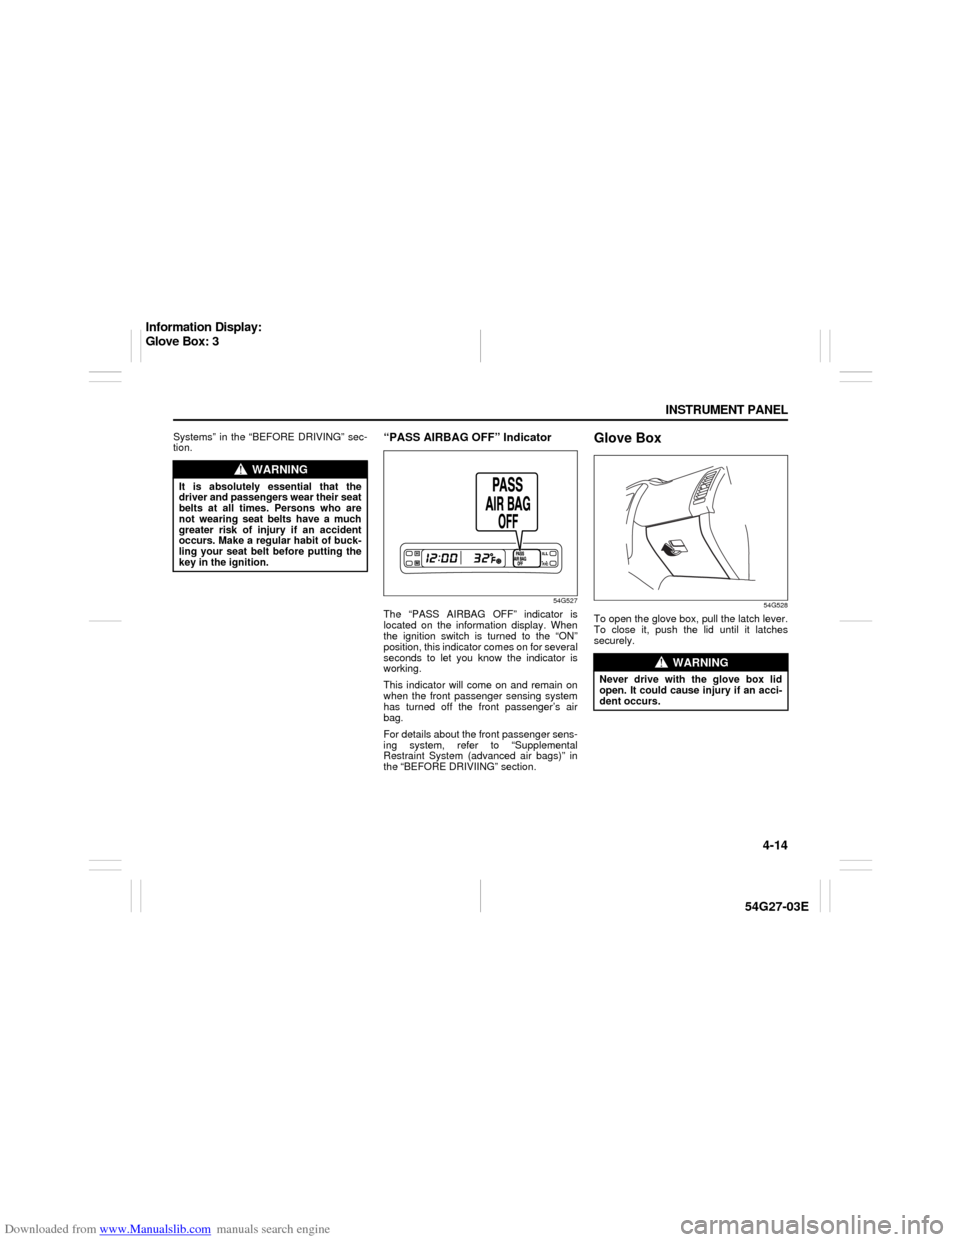
“PASS AIRBAG OFF” Indicator
54G527
The “PASS AIRBAG OFF” indicator is
located on the information display. When
the ignition switch is turned to the “ON”
position, this indicator comes on for several
seconds to let you know the indicator is
working.
This indicator will come on and remain on
when the front passenger sensing system
has turned off the front passenger’s air
bag.
For details about the front passenger sens-
ing system, refer to “Supplemental
Restraint System (advanced air bags)” in
the “BEFORE DRIVIING” section.
Glove Box
54G528
To open the glove box, pull the latch lever.
To close it, push the lid until it latches
securely.
WARNING
It is absolutely essential that the
driver and passengers wear their seat
belts at all times. Persons who are
not wearing seat belts have a much
greater risk of injury if an accident
occurs. Make a regular habit of buck-
ling your seat belt before putting the
key in the ignition.
WARNING
Never drive with the glove box lid
open. It could cause injury if an acci-
dent occurs.
Information Display:
Glove Box: 3
Page 119 of 232
Downloaded from www.Manualslib.com manuals search engine 5-4 OTHER CONTROLS AND EQUIPMENT
54G27-03E
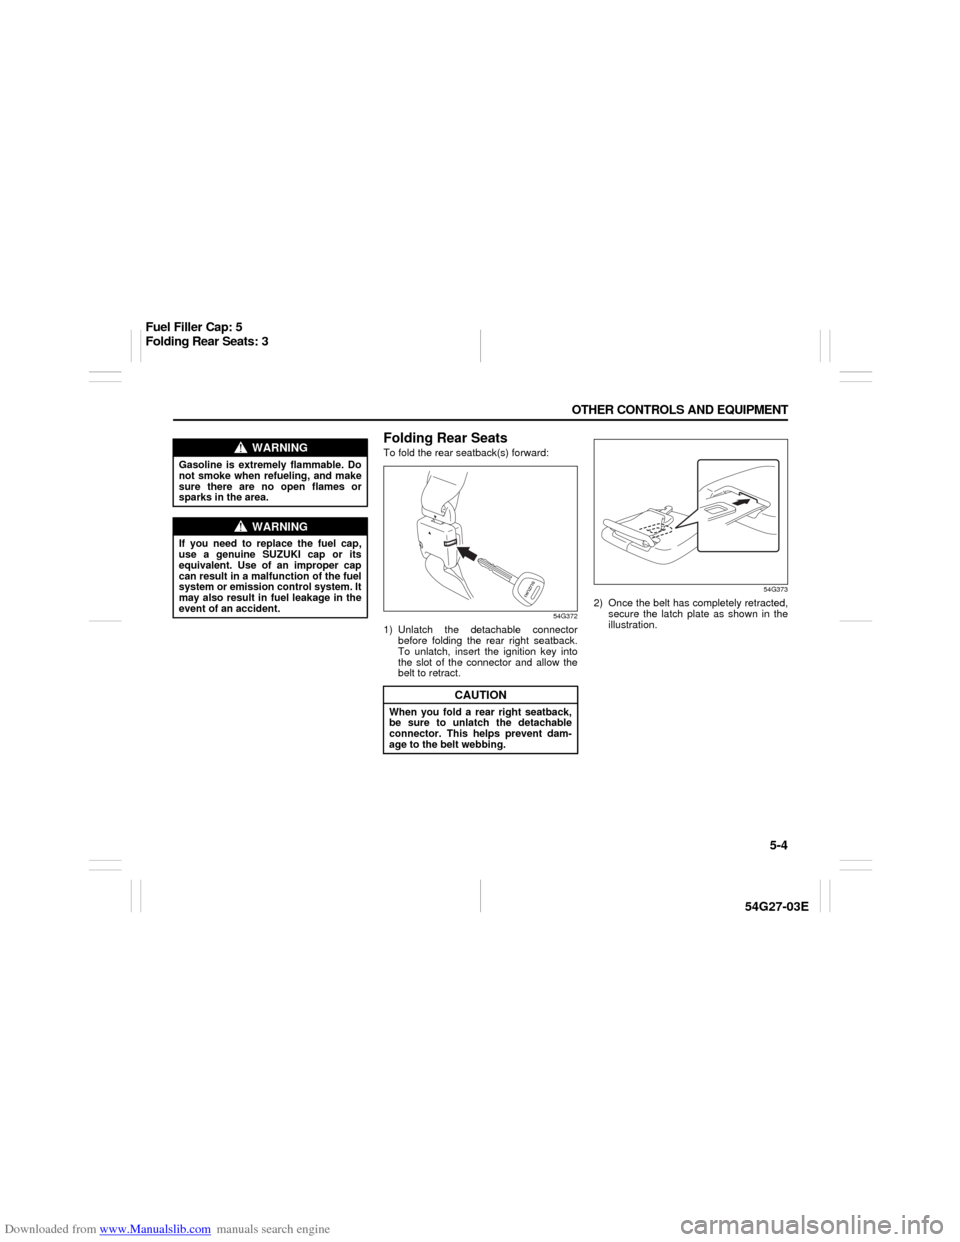
Folding Rear SeatsTo fold the rear seatback(s) forward:
54G372
1) Unlatch the detachable connector
before folding the rear right seatback.
To unlatch, insert the ignition key into
the slot of the connector and allow the
belt to retract.
54G373
2) Once the belt has completely retracted,
secure the latch plate as shown in the
illustration.
WARNING
Gasoline is extremely flammable. Do
not smoke when refueling, and make
sure there are no open flames or
sparks in the area.
WARNING
If you need to replace the fuel cap,
use a genuine SUZUKI cap or its
equivalent. Use of an improper cap
can result in a malfunction of the fuel
system or emission control system. It
may also result in fuel leakage in the
event of an accident.
CAUTION
When you fold a rear right seatback,
be sure to unlatch the detachable
connector. This helps prevent dam-
age to the belt webbing.
Fuel Filler Cap: 5
Folding Rear Seats: 3
Page 121 of 232
Downloaded from www.Manualslib.com manuals search engine 5-6 OTHER CONTROLS AND EQUIPMENT
54G27-03E
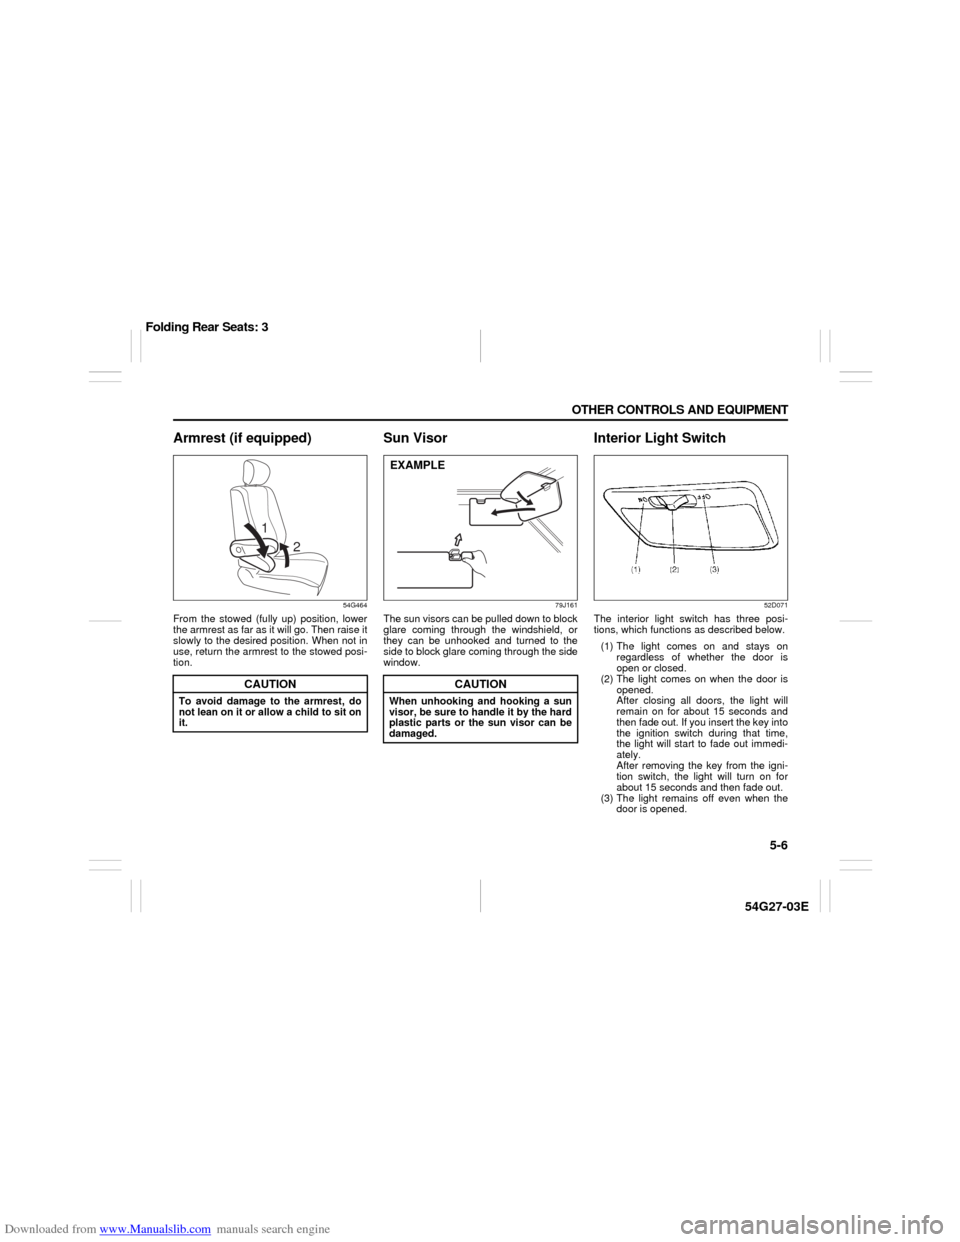
Armrest (if equipped)
54G464
From the stowed (fully up) position, lower
the armrest as far as it will go. Then raise it
slowly to the desired position. When not in
use, return the armrest to the stowed posi-
tion.
Sun Visor
79J161
The sun visors can be pulled down to block
glare coming through the windshield, or
they can be unhooked and turned to the
side to block glare coming through the side
window.
Interior Light Switch
52D071
The interior light switch has three posi-
tions, which functions as described below.
(1) The light comes on and stays on
regardless of whether the door is
open or closed.
(2) The light comes on when the door is
opened.
After closing all doors, the light will
remain on for about 15 seconds and
then fade out. If you insert the key into
the ignition switch during that time,
the light will start to fade out immedi-
ately.
After removing the key from the igni-
tion switch, the light will turn on for
about 15 seconds and then fade out.
(3) The light remains off even when the
door is opened.
CAUTION
To avoid damage to the armrest, do
not lean on it or allow a child to sit on
it.
1
2
CAUTION
When unhooking and hooking a sun
visor, be sure to handle it by the hard
plastic parts or the sun visor can be
damaged.EXAMPLE
Folding Rear Seats: 3
Page 130 of 232
Downloaded from www.Manualslib.com manuals search engine 6-1 OPERATING YOUR VEHICLE
54G27-03E
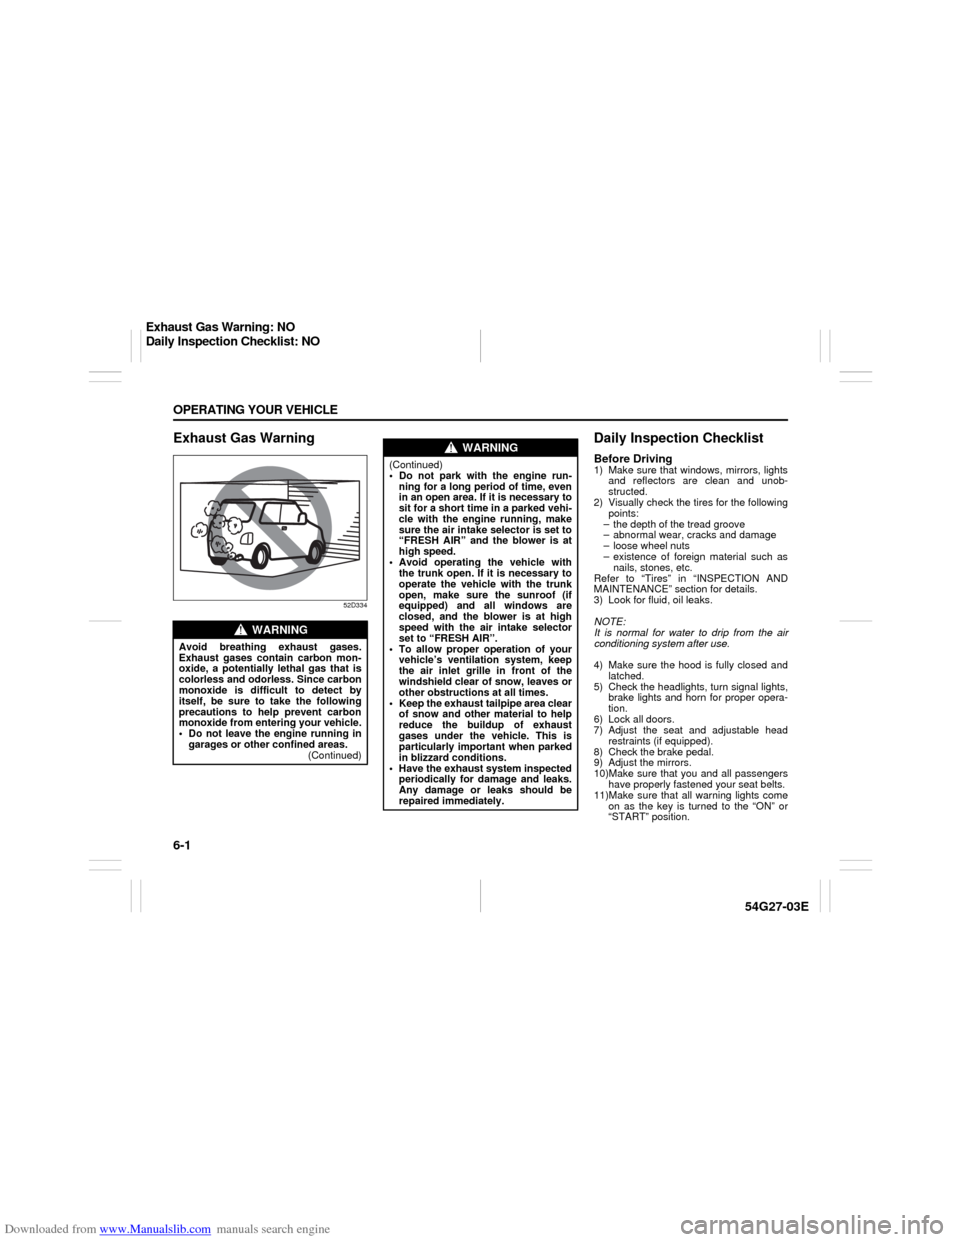
Exhaust Gas Warning
52D334
Daily Inspection ChecklistBefore Driving1) Make sure that windows, mirrors, lights
and reflectors are clean and unob-
structed.
2) Visually check the tires for the following
points:
– the depth of the tread groove
– abnormal wear, cracks and damage
– loose wheel nuts
– existence of foreign material such as
nails, stones, etc.
Refer to “Tires” in “INSPECTION AND
MAINTENANCE” section for details.
3) Look for fluid, oil leaks.
NOTE:
It is normal for water to drip from the air
conditioning system after use.
4) Make sure the hood is fully closed and
latched.
5) Check the headlights, turn signal lights,
brake lights and horn for proper opera-
tion.
6) Lock all doors.
7) Adjust the seat and adjustable head
restraints (if equipped).
8) Check the brake pedal.
9) Adjust the mirrors.
10)Make sure that you and all passengers
have properly fastened your seat belts.
11)Make sure that all warning lights come
on as the key is turned to the “ON” or
“START” position.
WARNING
Avoid breathing exhaust gases.
Exhaust gases contain carbon mon-
oxide, a potentially lethal gas that is
colorless and odorless. Since carbon
monoxide is difficult to detect by
itself, be sure to take the following
precautions to help prevent carbon
monoxide from entering your vehicle.
Do not leave the engine running in
garages or other confined areas.
(Continued)
WARNING
(Continued)
Do not park with the engine run-
ning for a long period of time, even
in an open area. If it is necessary to
sit for a short time in a parked vehi-
cle with the engine running, make
sure the air intake selector is set to
“FRESH AIR” and the blower is at
high speed.
Avoid operating the vehicle with
the trunk open. If it is necessary to
operate the vehicle with the trunk
open, make sure the sunroof (if
equipped) and all windows are
closed, and the blower is at high
speed with the air intake selector
set to “FRESH AIR”.
To allow proper operation of your
vehicle’s ventilation system, keep
the air inlet grille in front of the
windshield clear of snow, leaves or
other obstructions at all times.
Keep the exhaust tailpipe area clear
of snow and other material to help
reduce the buildup of exhaust
gases under the vehicle. This is
particularly important when parked
in blizzard conditions.
Have the exhaust system inspected
periodically for damage and leaks.
Any damage or leaks should be
repaired immediately.
Exhaust Gas Warning: NO
Daily Inspection Checklist: NO
Page 131 of 232

Downloaded from www.Manualslib.com manuals search engine 6-2 OPERATING YOUR VEHICLE
54G27-03E
12)Check all gauges.
13)Make sure that the BRAKE light turns
off when the parking brake is released.
Once a week, or each time you fill your fuel
tank, perform the following under-hood
checks:
1) Engine oil level
2) Coolant level
3) Brake fluid level
4) Power steering (if equipped) fluid level
5) Windshield washer fluid level
6) Hood latch operation
Pull the hood release handle inside the
vehicle. Make sure that you cannot
open the hood all the way without
releasing the secondary latch. Be sure
to close the hood securely after check-
ing for proper latch operation. See the
item “All latches, hinges and locks” of
“CHASSIS AND BODY” in the “Periodic
Maintenance Schedule” section in the
“INSPECTION AND MAINTENANCE”
section for lubrication schedule.
Starting the EngineBefore Starting the Engine1) Make sure the parking brake is set fully.
2) Manual Transaxle – Shift into “N” (Neu-
tral) and depress the clutch pedal all
the way to the floor.
Hold it while starting the engine.
Automatic Transaxle – If the gearshift
lever is not in “P” (Park) position, shift
into “P”. (If you need to re-start the
engine while the vehicle is moving, shift
into “N”.)
NOTE:
The engine of manual transaxle vehicle will
not start unless the clutch pedal is
depressed.
NOTE:
Automatic transaxle vehicles have a starter
interlock device which is designed to keep
the starter from operating if the transaxle is
in any of the drive positions.
Starting a Cold EngineWith your foot off the accelerator pedal,
crank the engine by turning the ignition key
to “START”. Release the key when the
engine starts.
If the engine does not start after 15 sec-
onds of cranking, wait about 15 seconds,
then press down the accelerator pedal to
1/3 of its travel and try cranking the engine
again. Release the key and accelerator
pedal when the engine starts.
If the engine still does not start, try holding
the accelerator pedal all the way to the
floor while cranking. This should clear the
engine if it is flooded.
If you are unable to start the engine using
this procedure, consult your SUZUKI
dealer.Starting a Warm EngineUse the same procedure as for “Starting a
Cold Engine”.
WARNING
Make sure the hood is fully closed
and latched before driving. If it is not,
it can fly up unexpectedly during
driving, obstructing your view and
resulting in an accident.
WARNING
Make sure that the parking brake is
set fully and the transaxle is in Neu-
tral (or Park for vehicles with an auto-
matic transaxle) before attempting to
start the engine.
CAUTION
Stop turning the starter immedi-
ately after the engine has started or
the starter system can be dam-
aged.
Do not crank the engine for more
than 15 seconds at a time. If the
engine doesn’t start on the first try,
wait about 15 seconds before try-
ing again.
Daily Inspection Checklist: NO
Starting the Engine: 1