instrument panel SUZUKI CELERIO 2017 Owners Manual
[x] Cancel search | Manufacturer: SUZUKI, Model Year: 2017, Model line: CELERIO, Model: SUZUKI CELERIO 2017Pages: 201, PDF Size: 5.82 MB
Page 51 of 201

2-29
BEFORE DRIVING
76MH1-74E
76MH1-74E
Speedometer
The speedometer indicates vehicle speed.
Tachometer (if equipped)
The tachometer indicates engine speed in revolutions per minute.
Fuel Gauge
With tachometer
76MH0A037
Without tachometer
76MH0A038
When the ignition switch is in the “ON” position, this gauge gives an approximate indication of the amount of fuel in the fueltank. “F” stands for full and “E” stands for empty.
If the fuel meter indicator shows only one segment to “E”, refill the tank as soon aspossible.
NOTE: If the last segment blinks, it means that thefuel is almost empty.
If the low fuel warning light (1) comes on, fill the fuel tank immediately.
NOTE:The activation point of the low fuel warning light (1) varies depending on road condi- tions (for example, slope or curve) anddriving conditions because of fuel moving in the tank.
Refer to “Low Fuel Warning Light” in“Warning and Indicator Lights” in this sec- tion for details.
The mark (2) indicates that the fuel filler door is located on the left side of the vehi-cle.
Brightness Control
76MH0A039
When the ignition switch is turned to the“ON” position, the pointer lights come on.
Your vehicle has a system to automaticallydim the brightness of the instrument panellights when the position lights or headlights are on.
When the position lights and/or headlights are ON, you can control the meter illumina- tion intensity.
NOTICE
Never drive the vehicle with theengine revving in the red zone, orsevere engine damage can result. Keep the engine speed below the red zone even when downshifting to alower gear position. Refer to “Down- shifting maximum allowable speeds” in the “OPERATING YOUR VEHICLE”section.
(1)(2)
EXAMPLE
(1)
(2)
EXAMPLE(1)
EXAMPLE
40
Page 52 of 201
2-30
BEFORE DRIVING
76MH1-74E
76MH1-74E
To increase the brightness of the instru- ment panel lights, turn the brightness con- trol knob (1) clockwise.To reduce the brightness of the instrument panel lights, turn the brightness control knob (1) counterclockwise.
NOTE: • If you do not turn the brightness controlknob within about 5 seconds of activat-ing the brightness control display, thebrightness control display will be can- celed automatically.• When you reconnect the battery, thebrightness of the instrument panel lightswill be reinitialized. Readjust the bright- ness according to your preference.
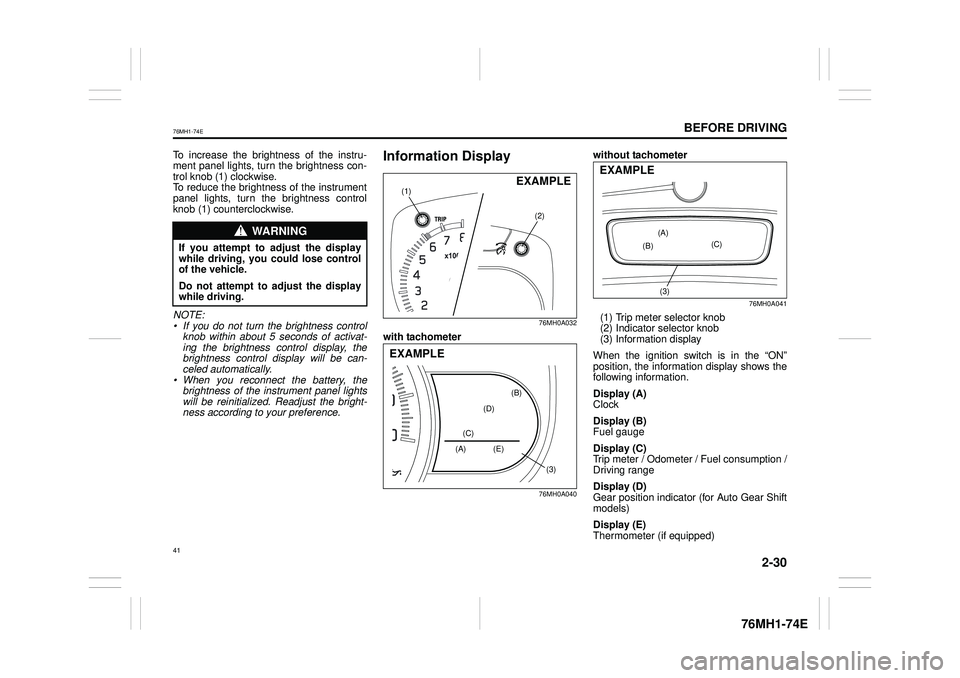
Information Display
76MH0A032
with tachometer
76MH0A040
without tachometer
76MH0A041
(1) Trip meter selector knob (2) Indicator selector knob (3) Information display
When the ignition switch is in the “ON”position, the information display shows thefollowing information.
Display (A) Clock
Display (B) Fuel gauge
Display (C) Trip meter / Odometer / Fuel consumption / Driving range
Display (D) Gear position indicator (for Auto Gear Shift models)
Display (E) Thermometer (if equipped)
WA R N I N G
If you attempt to adjust the displaywhile driving, you could lose controlof the vehicle.
Do not attempt to adjust the displaywhile driving.
(2)
(1)EXAMPLE
(3)
(A) (E)
(B)
(C)
(D)
EXAMPLE
(3)
(A)
(B)(C)
EXAMPLE
41
Page 61 of 201
2-39
BEFORE DRIVING
76MH1-74E
76MH1-74E
If one of these happens, have the system inspected by your MARUTI SUZUKI dealer. If the ABS becomes inoperative, the brake system will function as an ordinary brake system that does not have this ABS sys-tem.
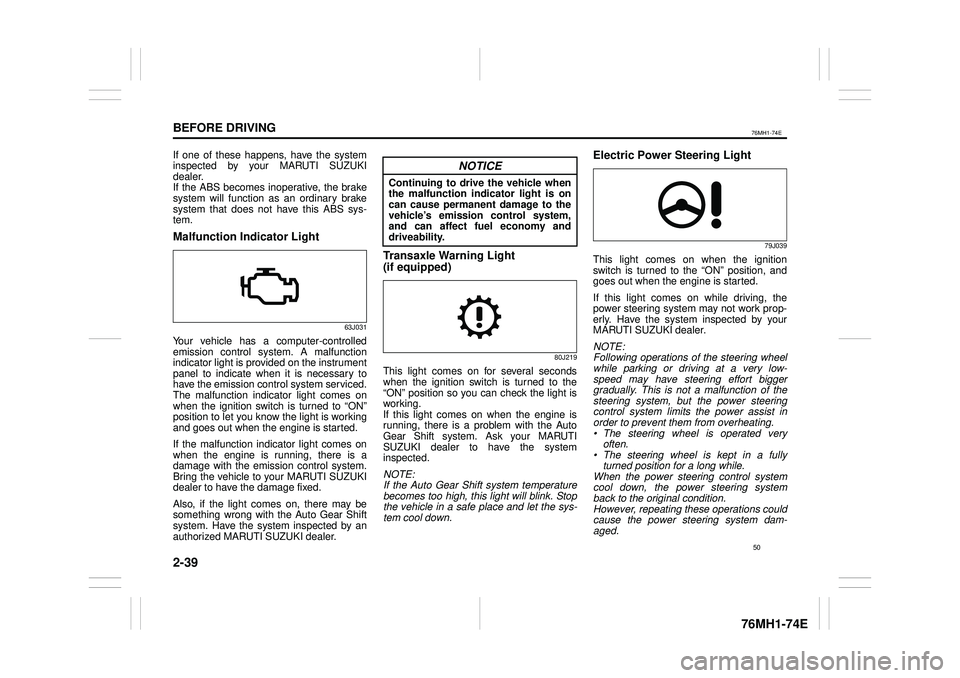
Malfunction Indicator Light
63J031
Your vehicle has a computer-controlledemission control system. A malfunctionindicator light is provided on the instrument panel to indicate when it is necessary to have the emission control system serviced.The malfunction indicator light comes on when the ignition switch is turned to “ON” position to let you know the light is workingand goes out when the engine is started.
If the malfunction indicator light comes on when the engine is running, there is a damage with the emission control system.Bring the vehicle to your MARUTI SUZUKI dealer to have the damage fixed.
Also, if the light comes on, there may be something wrong with the Auto Gear Shift system. Have the system inspected by an authorized MARUTI SUZUKI dealer.
Transaxle Warning Light
(if equipped)
80J219
This light comes on for several seconds when the ignition switch is turned to the “ON” position so you can check the light isworking. If this light comes on when the engine is running, there is a problem with the AutoGear Shift system. Ask your MARUTI SUZUKI dealer to have the system inspected.
NOTE: If the Auto Gear Shift system temperaturebecomes too high, this light will blink. Stop the vehicle in a safe place and let the sys- tem cool down.
Electric Power Steering Light
79J039
This light comes on when the ignitionswitch is turned to the “ON” position, and goes out when the engine is started.
If this light comes on while driving, the power steering system may not work prop- erly. Have the system inspected by yourMARUTI SUZUKI dealer.
NOTE: Following operations of the steering wheel while parking or driving at a very low- speed may have steering effort biggergradually. This is not a malfunction of the steering system, but the power steering control system limits the power assist inorder to prevent them from overheating. • The steering wheel is operated veryoften.• The steering wheel is kept in a fullyturned position for a long while. When the power steering control system cool down, the power steering system back to the original condition. However, repeating these operations couldcause the power steering system dam-aged.
NOTICE
Continuing to drive the vehicle whenthe malfunction indicator light is oncan cause permanent damage to the vehicle’s emission control system, and can affect fuel economy anddriveability.
50
Page 63 of 201
2-41
BEFORE DRIVING
76MH1-74E
76MH1-74E
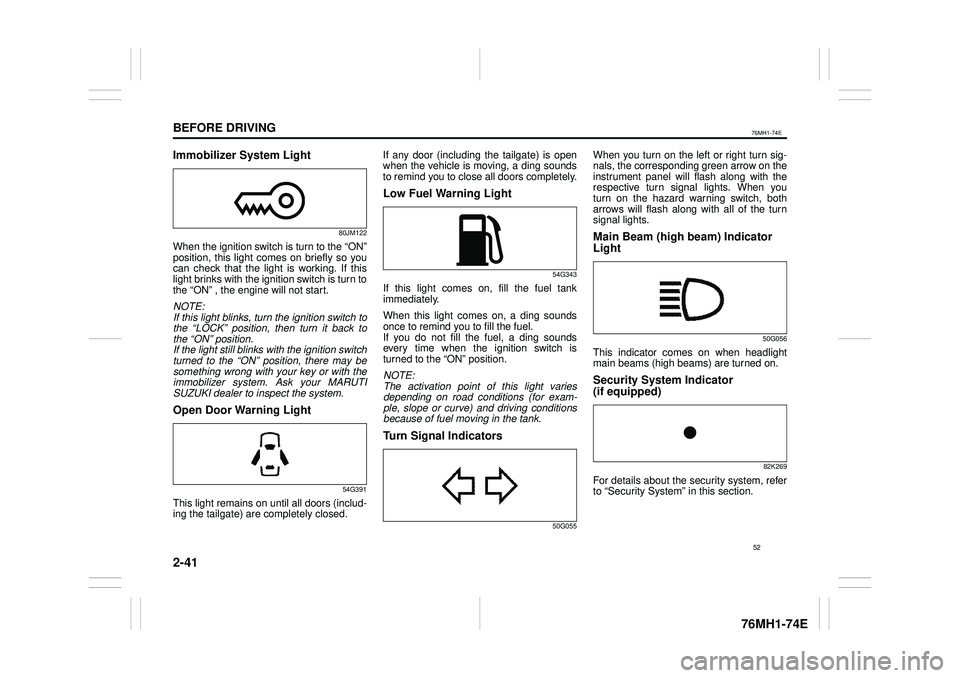
Immobilizer System Light
80JM122
When the ignition switch is turn to the “ON” position, this light comes on briefly so you can check that the light is working. If thislight brinks with the ignition switch is turn to the “ON” , the engine will not start.
NOTE: If this light blinks, turn the ignition switch to the “LOCK” position, then turn it back to the “ON” position. If the light still blinks with the ignition switchturned to the “ON” position, there may be something wrong with your key or with the immobilizer system. Ask your MARUTISUZUKI dealer to inspect the system.
Open Door Warning Light
54G391
This light remains on until all doors (includ-ing the tailgate) are completely closed.
If any door (including the tailgate) is open when the vehicle is moving, a ding sounds to remind you to close all doors completely.
Low Fuel Warning Light
54G343
If this light comes on, fill the fuel tankimmediately.
When this light comes on, a ding sounds once to remind you to fill the fuel. If you do not fill the fuel, a ding sounds every time when the ignition switch isturned to the “ON” position.
NOTE: The activation point of this light varies depending on road conditions (for exam- ple, slope or curve) and driving conditionsbecause of fuel moving in the tank.
Turn Signal Indicators
50G055
When you turn on the left or right turn sig- nals, the corresponding green arrow on the instrument panel will flash along with therespective turn signal lights. When you turn on the hazard warning switch, both arrows will flash along with all of the turnsignal lights.
Main Beam (high beam) Indicator
Light
50G056
This indicator comes on when headlight main beams (high beams) are turned on.
Security System Indicator
(if equipped)
82K269
For details about the security system, referto “Security System” in this section.
52
Page 65 of 201
2-43
BEFORE DRIVING
76MH1-74E
76MH1-74E
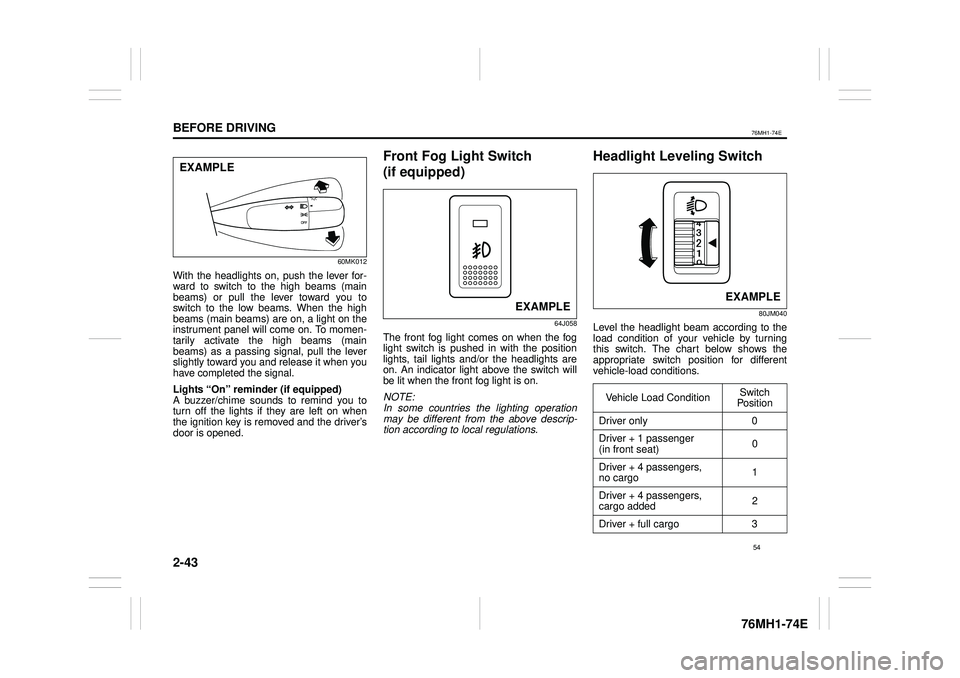
60MK012
With the headlights on, push the lever for- ward to switch to the high beams (mainbeams) or pull the lever toward you to switch to the low beams. When the high beams (main beams) are on, a light on theinstrument panel will come on. To momen- tarily activate the high beams (main beams) as a passing signal, pull the lever slightly toward you and release it when you have completed the signal.
Lights
Page 86 of 201
3-16
OPERATING YOUR VEHICLE
76MH1-74E
76MH1-74E
Brake Assist System (if equipped)When you slam the brakes on, the brake assist system judges as an emergencystop and provides more powerful braking for a driver who cannot hold down the brake pedal firmly.
NOTE: If you quickly and forcefully depress thebrakes, you may hear a clicking sound in the brake pedal. This is normal and indi- cates that the brake a ssist system is acti- vated properly.
Anti-Lock Brake System (ABS)
(if equipped)ABS will help you avoid skidding by elec- tronically controlling braking pressure. It will also help you maintain steering controlwhen braking on slippery surfaces or when braking hard. The ABS works automatically, so you donot need any special braking technique. Just push the brake pedal down without pumping. The ABS will operate whenever itsenses that the wheels are locking up. You
may feel the brake pedal moves a little while the ABS is operating.
NOTE: The ABS will not work if vehicle speed is under about 10 km/h (6 mph).
63J081
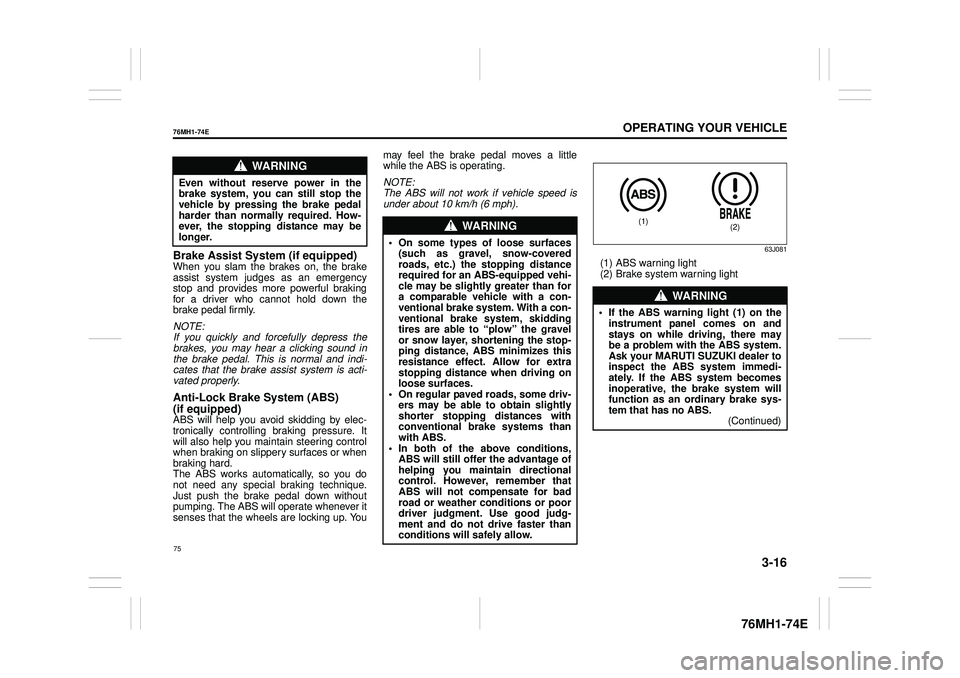
(1) ABS warning light (2) Brake system warning light
WA R N I N G
Even without reserve power in the brake system, you can still stop thevehicle by pressing the brake pedal harder than normally required. How- ever, the stopping distance may belonger.WA R N I N G
• On some types of loose surfaces(such as gravel, snow-coveredroads, etc.) the stopping distance required for an ABS-equipped vehi- cle may be slightly greater than fora comparable vehicle with a con- ventional brake system. With a con- ventional brake system, skiddingtires are able to “plow” the gravel or snow layer, shortening the stop- ping distance, ABS minimizes thisresistance effect. Allow for extra stopping distance when driving on loose surfaces.• On regular paved roads, some driv- ers may be able to obtain slightly shorter stopping distances withconventional brake systems than with ABS. • In both of the above conditions,ABS will still offer the advantage of helping you maintain directional control. However, remember thatABS will not compensate for bad road or weather conditions or poor driver judgment. Use good judg-ment and do not drive faster than conditions will safely allow.
WA R N I N G
• If the ABS warning light (1) on the instrument panel comes on and stays on while driving, there maybe a problem with the ABS system. Ask your MARUTI SUZUKI dealer to inspect the ABS system immedi-ately. If the ABS system becomes inoperative, the brake system will function as an ordinary brake sys-tem that has no ABS. (Continued)
(1)(2)
75
Page 87 of 201
3-17
OPERATING YOUR VEHICLE
76MH1-74E
76MH1-74E
How the ABS WorksA computer continuously monitors wheel speed. The computer compares the changes in wheel speed when braking. If the wheels slow suddenly, indicating askidding situation, the computer will change braking pressure several times each second to prevent the wheels fromlocking. When you start your vehicle after a stop you may hear a momentary motor noise as the system checks itself.
WA R N I N G
(Continued)• If the ABS warning light (1) and theBrake system warning light (2) on the instrument panel simultane- ously stays on or comes on whendriving, both anti-lock function and rear brake force control function (proportioning val ve function) of the ABS system may have failed. If so, the rear wheels may easily skid or the vehicle can even spin in theworst case when braking on a slip- pery road or when hard braking even on a dry paved road. Ask yourMARUTI SUZUKI dealer to inspect the ABS system immediately. Drive carefully, avoiding hard braking asmuch as possible.
WA R N I N G
The ABS may not work properly iftires or wheels other than thosespecified in the owner’s manual are used. This is because the ABS works by comparing changes in wheelspeed. When replacing tires or wheels, use only the size and type specified in this owner’s manual.
76
Page 102 of 201
5-6
OTHER CONTROLS AND EQUIPMENT
76MH1-74E
Glove Box
76MH0A073
To open the glove box, pull the latch lever. To close it, push the lid until it latchessecurely.
WA R N I N G
Never drive with the glove box lidopen. It could cause injury if an acci- dent occurs.
EXAMPLE
Cup Holder and Storage Area
76MH0A074
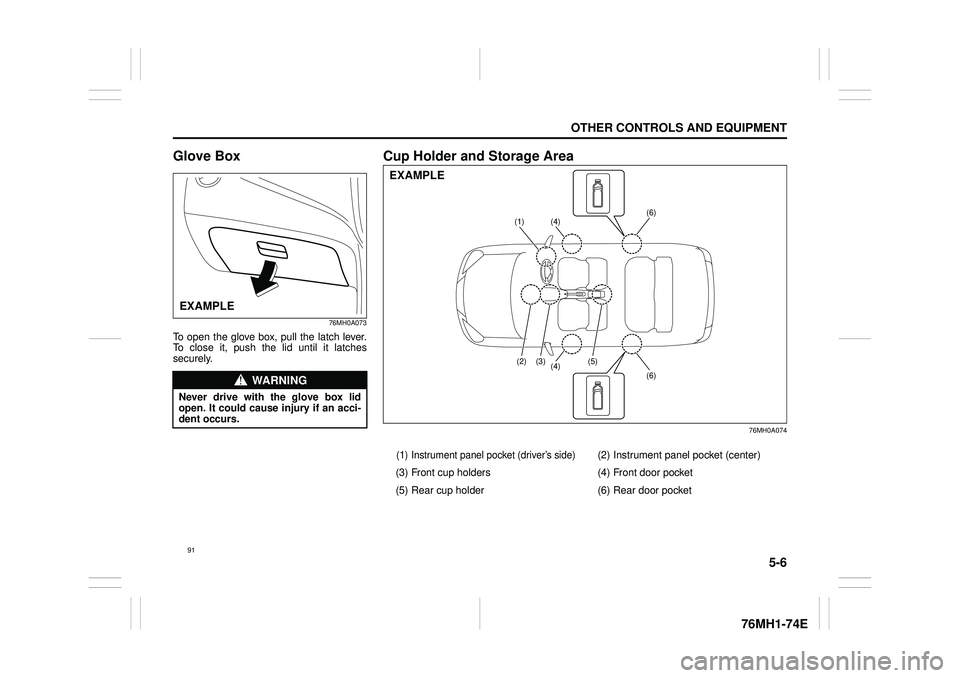
(1) Instrument panel pocket (driver’s side)(2) Instrument panel pocket (center)
(3) Front cup holders (4) Front door pocket
(5) Rear cup holder (6) Rear door pocket
(4)(1)
(4) (5)(3)(2)
(6)
(6)
EXAMPLE
91
Page 103 of 201

5-7
OTHER CONTROLS AND EQUIPMENT
76MH1-74E
76MH1-74E
Instrument Panel Pocket
(driver’s side) (1) /
Instrument Panel Pocket (center) (2)
Front Cup Holders (3)
Rear Cup Holder (5)
76MH0A075
Open the top to use the cup holder.
Rear Door Pocket (6)This pocket is provided for holding light and small items.
Bottle holder You should hold a bottle with a cap in the holder.
Floor Mats (if equipped)
68LM554
To prevent the driver’s side floor mat fromsliding forward and possibly interfering withthe operation of the pedals, Maruti genuine floor mats are recommended. Whenever you put the driver’s side floormat back in the vehicle after it has been removed, be sure to hook the floor mat grommet(s) to the fastener(s) and positionthe floor mat properly in the footwell.
When you replace the floor mats in your vehicle with a different type such as all- weather floor mats, we highly recommend using Maruti genuine floor mats for properfitting.
WA R N I N G
Do not place any objects which may fall out from the pocket when the vehi-cle is moving. Failure to take the precaution may result in an object interfering with thepedals and causing a loss of vehicle control or an accident.
WA R N I N G
Failure to take the precautions listedbelow could cause personal injury or vehicle damage.• Be careful when you are using the cup holders to hold a cup contain- ing hot liquid. Spilling out hot liquidcan cause burn injury. • Do not use the cup holders to hold sharp-edged, hard, or breakableobjects. Objects in the cup holdersmay be thrown about during a sud- den stop or impact, and could cause personal injury. • Be careful not to sp ill liquid or insert any foreign materi als into the mov- ing part of the gearshift lever, or anyelectrical components. Liquid or for- eign materials may damage these parts.
EXAMPLEEXAMPLE
92
Page 191 of 201

9-2
APPEARANCE CARE
76MH1-74E
76MH1-74E
Vehicle Cleaning
76G044S
Cleaning the Interior
Vinyl upholstery Prepare a solution of soap or mild deter-gent mixed with warm water. Apply the solution to the vinyl with a sponge or soft cloth and let it soak for a few minutes toloosen dirt. Rub the surface with a clean, damp cloth to remove dirt and the soap solution. If somedirt still remains on the surface, repeat this procedure.
Fabric upholstery Remove loose dirt with a vacuum cleaner. Using a mild soap solution, rub stainedareas with a clean damp cloth. To remove soap, rub the areas again with a cloth dampened with water. Repeat this until thestain is removed, or use a commercial fab- ric cleaner for tougher stains. If you use a fabric cleaner, carefully follow the manu-facturer’s instructions and precautions.
Seat belts Clean seat belts with a mild soap and water. Do not use bleach or dye on the belts. They may weaken the fabric in thebelts.
Vinyl floor mats Ordinary dirt can be removed from vinyl with water or mild soap. Use a brush to help loosen dirt. After the dirt is loosened,rinse the mat thoroughly with water and dry it in the shade.
Carpets Remove dirt and soil as much as possible with a vacuum cleaner. Using a mild soapsolution, rub stained areas with a clean damp cloth. To remove soap, rub the areas again with a cloth dampened with water.Repeat this until the stain is removed, or use a commercial carpet cleaner for tougher stains. If you use a carpet cleaner,carefully follow the manufacturer’s instruc- tions and precautions.
Instrument panel and console Remove loose dirt with a vacuum cleaner. Gently wipe dirt off with a tightly squeezed damp clean cloth. Repeat this until the dirt is removed.
Cleaning the Exterior
WA R N I N G
Do not apply additional undercoating or rust preventive coating on oraround exhaust system components such as the catalytic converter, exhaust pipes, etc. A fire could bestarted if the undercoating substance becomes overheated.
WA R N I N G
When cleaning the interior or exterior of the vehicle, NEVER USE flammablesolvents such as lacquer thinners, petrol, benzene or cleaning materials such as bleaches or strong householddetergents. The materials could cause personal injury or damage to the vehi- cle.
NOTICE
Do not use chemical products that contain silicon to wipe electrical components such as the air condi-tioning system, audio, navigation system, or other switches. These will cause damage to the components.
NOTICE
It is important that your vehicle bekept clean and free from dirt. Failureto keep your vehicle clean may result in fading of the pa int or corrosion to various parts of the vehicle body.
180