SUZUKI CELERIO 2018 Owners Manual
Manufacturer: SUZUKI, Model Year: 2018, Model line: CELERIO, Model: SUZUKI CELERIO 2018Pages: 201, PDF Size: 5.82 MB
Page 91 of 201
4-3
DRIVING TIPS
76MH1-74E
76MH1-74E
Keep weight to a minimum The heavier the load, the more fuel the vehicle consumes. Take out any luggageor cargo when it is not necessary.
Keep tire pressures correct Underinflation of the tires can waste fuel due to increased running resistance of the tires. Keep your tires inflated to the correctpressure shown on the label on the driver’s side door or the driver’s door lock pillar.
Highway Driving
When driving at highway speeds, pay attention to the following: Stopping distance progressively increases with vehicle speed. Apply the brakes far enough ahead of the stoppingpoint to allow for the extra stopping dis- tance. On rainy days, “Hydroplaning” can occur.“Hydroplaning” is the loss of direct con- tact between the road surface and the vehicle’s tires due to a water film formingbetween them. Steering or braking the vehicle while “Hydroplaning” can be very difficult, and loss of control can occur.Keep speed down when the road surface is wet. At high speeds, the vehicle may beaffected by side winds. Therefore, reduce speed and be prepared for unex- pected buffeting, which can occur at theexits of tunnels, when passing by a cut of a hill, or when being overtaken by large vehicles, etc.
Driving on Hills
76MH0A063
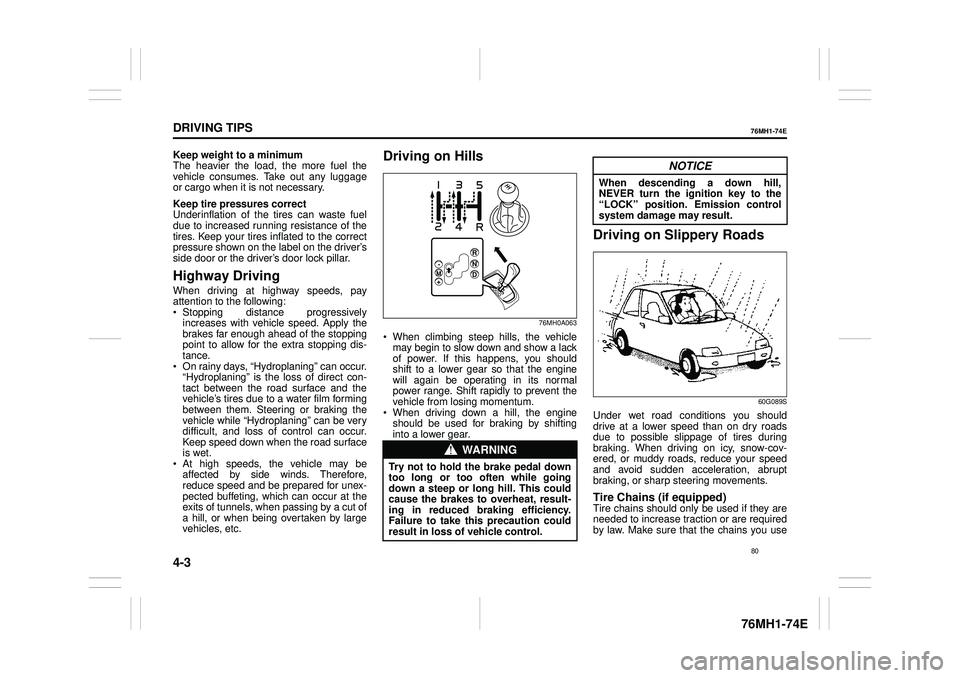
When climbing steep hills, the vehiclemay begin to slow down and show a lackof power. If this happens, you should shift to a lower gear so that the engine will again be operating in its normalpower range. Shift rapidly to prevent the vehicle from losing momentum. When driving down a hill, the engineshould be used for braking by shifting into a lower gear.
Driving on Slippery Roads
60G089S
Under wet road conditions you should drive at a lower speed than on dry roadsdue to possible slippage of tires during braking. When driving on icy, snow-cov- ered, or muddy roads, reduce your speedand avoid sudden acceleration, abrupt braking, or sharp steering movements.
Tire Chains (if equipped)Tire chains should only be used if they are needed to increase traction or are required by law. Make sure that the chains you use
WA R N I N G
Try not to hold the brake pedal down too long or too often while goingdown a steep or long hill. This could cause the brakes to overheat, result- ing in reduced braking efficiency.Failure to take this precaution could result in loss of vehicle control.
R N D -M+
NOTICE
When descending a down hill, NEVER turn the igni tion key to the “LOCK” position. Emission control system damage may result.
80
Page 92 of 201
4-4
DRIVING TIPS
76MH1-74E
76MH1-74E
are the correct size for your vehicle’s tires. Also make sure that there is enough clear- ance between the fenders and the chainsas installed on the tires.
Install the chains on the front tires tightly, according to the chain manufacturer’s instructions. Retight en the chains after driving about 1.0 km (1/2 mile) if neces-sary. With the chains installed, drive slowly.
If Your Vehicle Gets StuckIf your vehicle gets stuck in snow, mud, orsand, follow the directions below:
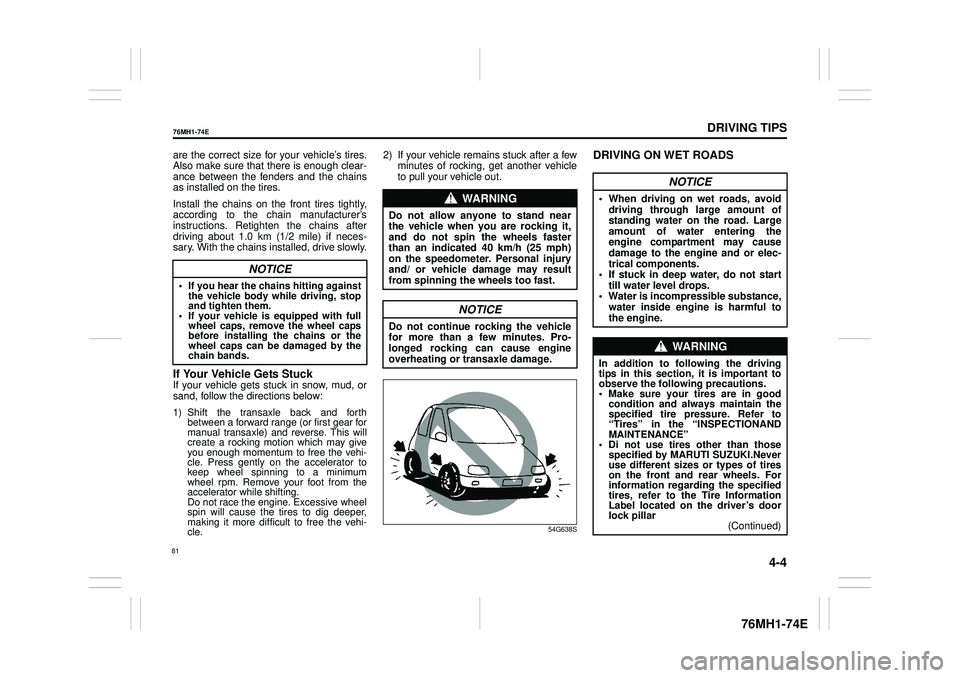
1) Shift the transaxle back and forth between a forward range (or first gear formanual transaxle) and reverse. This willcreate a rocking motion which may giveyou enough momentum to free the vehi- cle. Press gently on the accelerator to keep wheel spinning to a minimumwheel rpm. Remove your foot from theaccelerator while shifting. Do not race the engine. Excessive wheelspin will cause the tires to dig deeper,making it more difficult to free the vehi- cle.
2) If your vehicle remains stuck after a few minutes of rocking, get another vehicle to pull your vehicle out.
54G638S
DRIVING ON WET ROADS
NOTICE
• If you hear the chains hitting against the vehicle body while driving, stopand tighten them.• If your vehicle is equipped with fullwheel caps, remove the wheel caps before installing the chains or the wheel caps can be damaged by thechain bands.
WA R N I N G
Do not allow anyone to stand near the vehicle when you are rocking it,and do not spin the wheels faster than an indicated 40 km/h (25 mph) on the speedometer. Personal injuryand/ or vehicle damage may result from spinning the wheels too fast.
NOTICE
Do not continue rocking the vehicle for more than a few minutes. Pro-longed rocking can cause engine overheating or transaxle damage.
NOTICE
• When driving on wet roads, avoid driving through large amount of standing water on the road. Large amount of water entering theengine compartment may cause damage to the engine and or elec- trical components.• If stuck in deep water, do not start till water level drops. • Water is incompressible substance,water inside engine is harmful to the engine.
WA R N I N G
In addition to following the driving tips in this section, it is important to observe the following precautions. • Make sure your tires are in good condition and always maintain the specified tire pressure. Refer to“Tires” in the “INSPECTIONAND MAINTENANCE” • Di not use tires other than thosespecified by MARUTI SUZUKI.Never use different sizes or types of tires on the front and rear wheels. Forinformation regard ing the specified tires, refer to the Tire Information Label located on the driver’s doorlock pillar(Continued)
81
Page 93 of 201
4-5
DRIVING TIPS
76MH1-74E
76MH1-74E
Do’s and Dont’s for Safe
Driving
Exercise care in handling your vehicle. Be conscious of not only your own safety butalso the safety of others on the road, and thus enjoy the best and most comfortable driving experience.
This section contains basic rules for safe driving. Read it carefully for good under-standing of the content so that you can enjoy safe and pleasant driving in your Maruti Suzuki vehicle.
72F-08-002
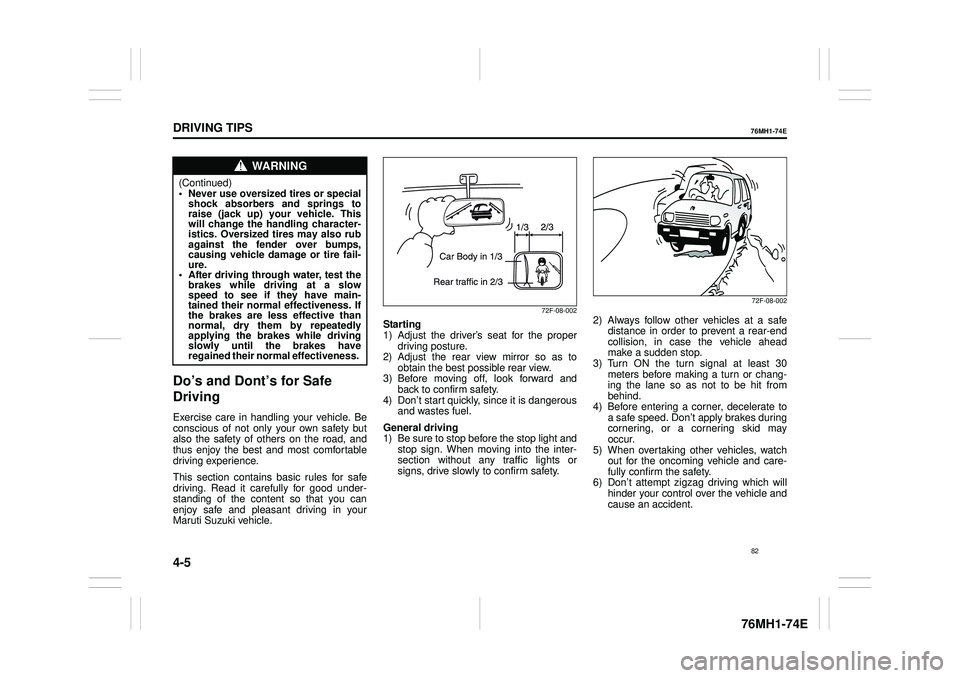
Starting 1) Adjust the driver
Page 94 of 201
4-6
DRIVING TIPS
76MH1-74E
76MH1-74E
72F-08-011
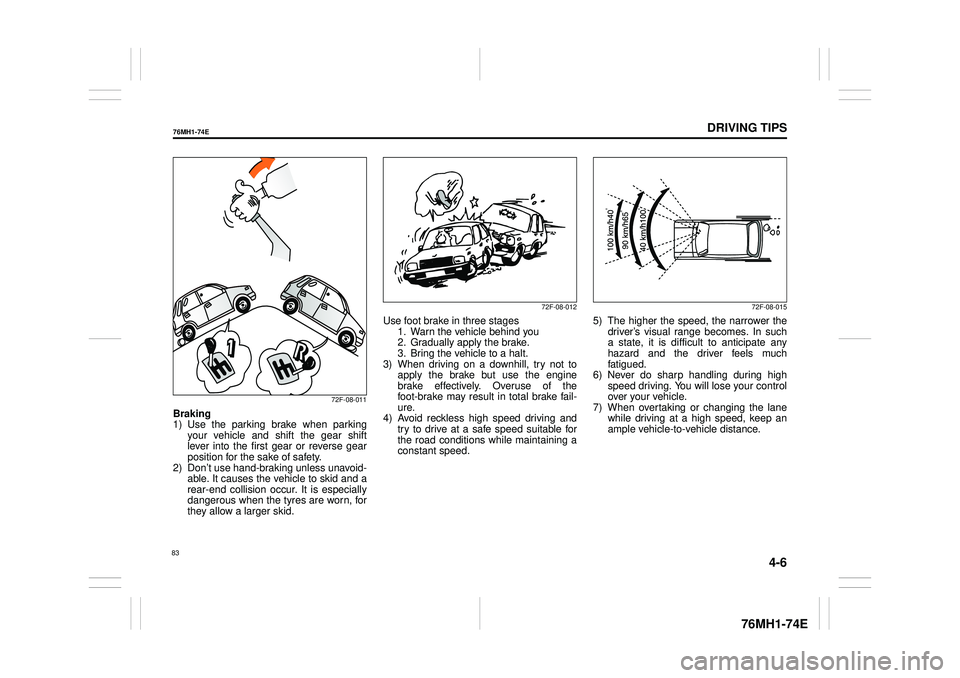
Braking 1) Use the parking brake when parking your vehicle and shift the gear shift lever into the first gear or reverse gearposition for the sake of safety. 2) Don
Page 95 of 201
4-7
DRIVING TIPS
76MH1-74E
76MH1-74E
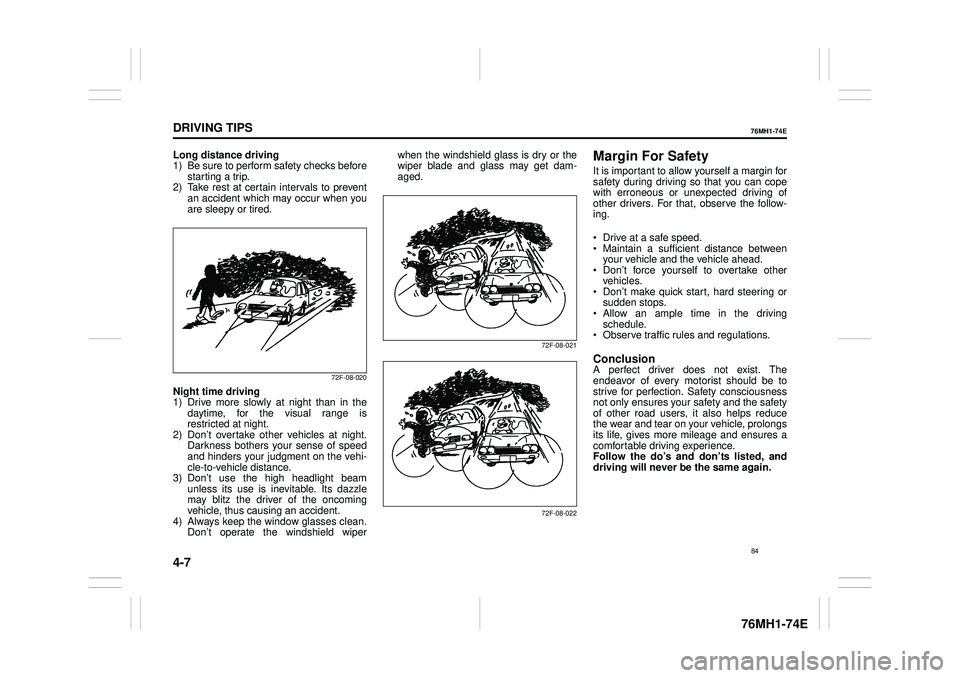
Long distance driving 1) Be sure to perform safety checks before starting a trip.2) Take rest at certain intervals to prevent an accident which may occur when you are sleepy or tired.
72F-08-020
Night time driving1) Drive more slowly at night than in thedaytime, for the visual range is restricted at night. 2) Don
Page 96 of 201
OTHER CONTROLS AND EQUIPMENT
76MH1-74E
76MH1-74E
OTHER CONTROLS AND EQUIPMENTFuel Filler Cap ..................................................................... 5-1
Engine Hood ........................................................................ 5-2
Sun Visor ............................................................................. 5-3
Interior Light ........................................................................ 5-4
Accessory Socket ........ ....................................................... 5-5
AUX/USB Socket (if equipped) ........................................... 5-5
Assist Grips (if equipped) .................................................. 5-5
Glove Box ............................................................................ 5-6
Cup Holder and Storage Area ............................................ 5-6
Floor Mats (if equipped) ..................................................... 5-7
Luggage Compartment Hooks ........................................... 5-8
Luggage Compartment Cover (if equipped) ..................... 5-8
Frame Hooks ....................................................................... 5-9
Manual Heating and Air Conditioning System ................. 5-10
Radio Antenna ..................................................................... 5-13
Audio System (if equipped) ................................................ 5-14
85
Page 97 of 201

5-1
OTHER CONTROLS AND EQUIPMENT
76MH1-74E
76MH1-74E
Fuel Filler Cap
76MH0A064
74LHT0511
The fuel filler cap is lo cated on the left rear side of the vehicle. The fuel filler door can be unlocked by pulling up the opener leverlocated on the outboard side of the driver’s seat and locked by simply closing the door.
68KN048
To remove the fuel filler cap: 1) Open the fuel filler door. 2) Remove the cap by turning it counter- clockwise.
76MH0A065
NOTE: If the cap holder (1) is equipped with the fuel filler door, hold the fuel filler cap whenrefueling.
To reinstall the fuel filler cap: 1) Turn the cap clockwise until you hear several clicks. 2) Close the fuel filler door.
EXAMPLE
EXAMPLE
CAUTION
Remove the fuel fill er cap slowly. The fuel may be under pressure and mayspray out, causing injury.
Open Close
EXAMPLE
WA R N I N G
Fuel is extremely flammable. Do notsmoke when refueling, and makesure there are no open flames or sparks in the area.
(1)
EXAMPLE
86
Page 98 of 201
5-2
OTHER CONTROLS AND EQUIPMENT
76MH1-74E
76MH1-74E
Engine Hood
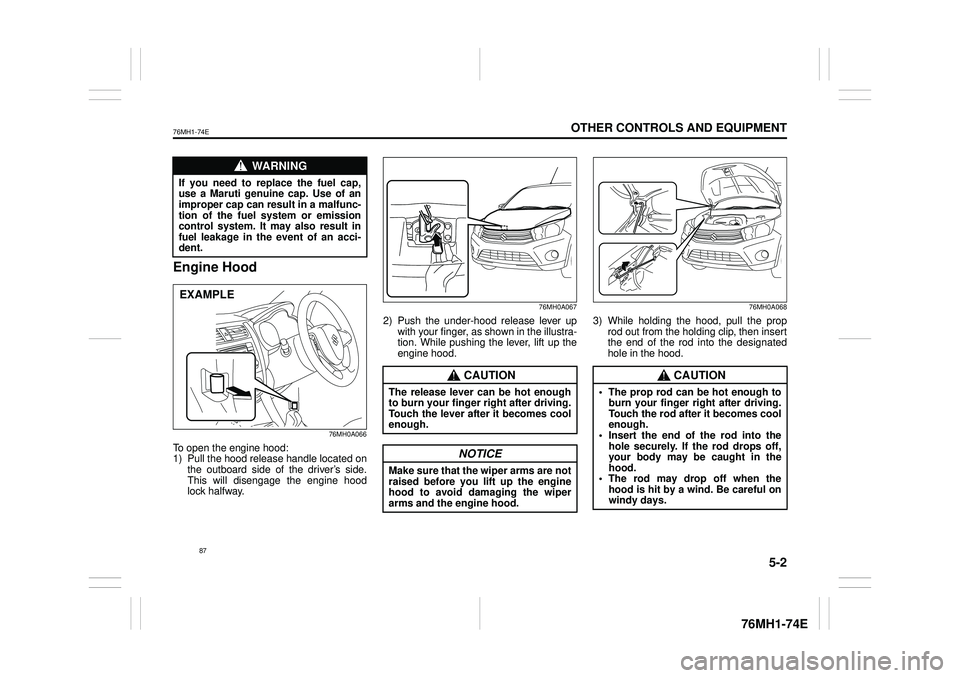
76MH0A066
To open the engine hood: 1) Pull the hood release handle located onthe outboard side of the driver’s side. This will disengage the engine hood lock halfway.
76MH0A067
2) Push the under-hood release lever up with your finger, as shown in the illustra- tion. While pushing the lever, lift up theengine hood.
76MH0A068
3) While holding the hood, pull the prop rod out from the holding clip, then insert the end of the rod into the designatedhole in the hood.
WA R N I N G
If you need to replace the fuel cap,use a Maruti genuine cap. Use of animproper cap can result in a malfunc- tion of the fuel system or emission control system. It may also result infuel leakage in the event of an acci- dent.
EXAMPLE
CAUTION
The release lever can be hot enough to burn your finger right after driving. Touch the lever after it becomes cool enough.
NOTICE
Make sure that the wiper arms are notraised before you lift up the engine hood to avoid damaging the wiper arms and the engine hood.
CAUTION
• The prop rod can be hot enough toburn your finger right after driving. Touch the rod after it becomes cool enough.• Insert the end of the rod into the hole securely. If the rod drops off, your body may be caught in thehood. • The rod may drop off when the hood is hit by a wind. Be careful onwindy days.
87
Page 99 of 201

5-3
OTHER CONTROLS AND EQUIPMENT
76MH1-74E
76MH1-74E
To close the engine hood: 1) Lift the hood up slightly and remove the prop rod from the hole. Put the prop rodback to the holding clip.
76MS014
2) Lower the hood to about 20 cm abovethe hood latch, then let it drop down. Make sure the hood is securely latched after closing.
Sun Visor
79J161
The sun visors can be pulled down to block glare coming through the windshield, orthey can be unhooked and turned to the side to block glare coming through the side window.
Card holder (if equipped)
67LH064
(1) Card holder
You can put a card in the card holder (1) on the back of the sun visor.
WA R N I N G
Make sure the hood is fully closedand latched before driv ing. If it is not, it can fly up unexpectedly duringdriving, obstructing your view and resulting in an accident.
EXAMPLE
CAUTION
To avoid injury, be sure no part of the occupant’s body such as hands orhead is in the path of the hood when closing it.
NOTICE
Pressing the hood from above may damage the hood.
EXAMPLE
NOTICE
When unhooking and hooking a sunvisor, be sure to handle it by the hardplastic parts or the sun visor can be damaged.
NOTICE
When you park your vehicle outdoorsin direct sunlight or in hot weather, do not leave plastic cards in theholder. The heat may distort them.
(1)
EXAMPLE
88
Page 100 of 201
5-4
OTHER CONTROLS AND EQUIPMENT
76MH1-74E
76MH1-74E
Vanity mirror (if equipped)
74LHT0532
(2) Vanity mirror
There is a vanity mirror (2) on the back of the sun visor.
Interior Light
Ty p e A
61MM0A107
Ty p e B
76MH0A138
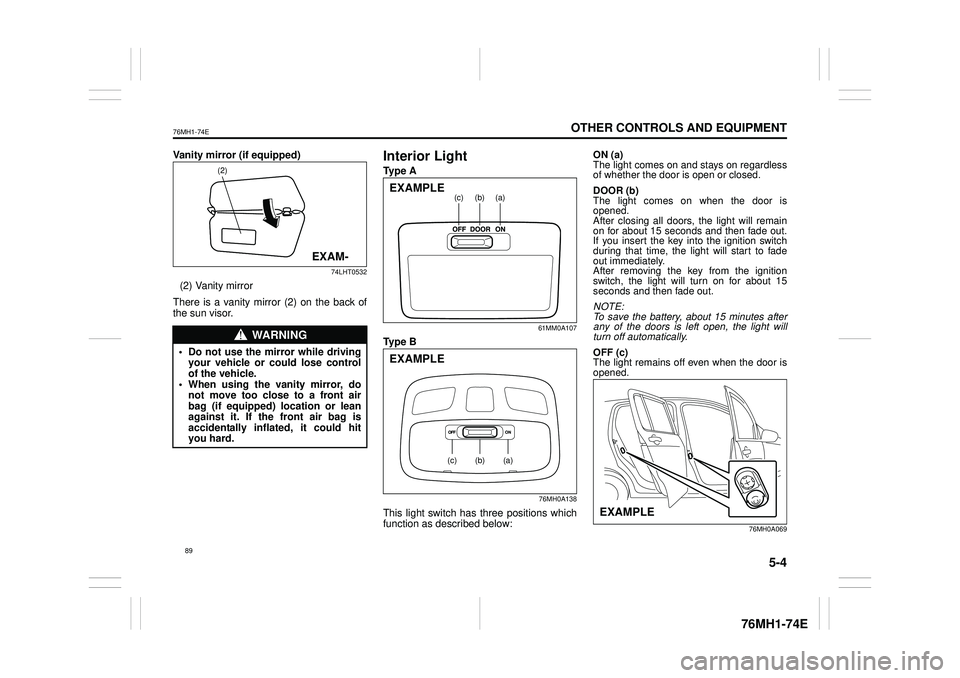
This light switch has three positions which function as described below:
ON (a) The light comes on and stays on regardless of whether the door is open or closed.
DOOR (b) The light comes on when the door isopened. After closing all doors, the light will remain on for about 15 seconds and then fade out.If you insert the key into the ignition switch during that time, the light will start to fade out immediately. After removing the key from the ignition switch, the light will turn on for about 15 seconds and then fade out.
NOTE: To save the battery, about 15 minutes after any of the doors is left open, the light will turn off automatically.
OFF (c) The light remains off even when the door is opened.
76MH0A069
WA R N I N G
• Do not use the mirror while driving your vehicle or could lose controlof the vehicle. • When using the vanity mirror, do not move too close to a front airbag (if equipped) location or lean against it. If the front air bag is accidentally inflated, it could hityou hard.
(2)
EXAM-
(a)(b)(c)EXAMPLE
(a)(b)(c)
EXAMPLE
EXAMPLE
89