warning light SUZUKI CELERIO 2022 User Guide
[x] Cancel search | Manufacturer: SUZUKI, Model Year: 2022, Model line: CELERIO, Model: SUZUKI CELERIO 2022Pages: 201, PDF Size: 5.82 MB
Page 63 of 201
2-41
BEFORE DRIVING
76MH1-74E
76MH1-74E
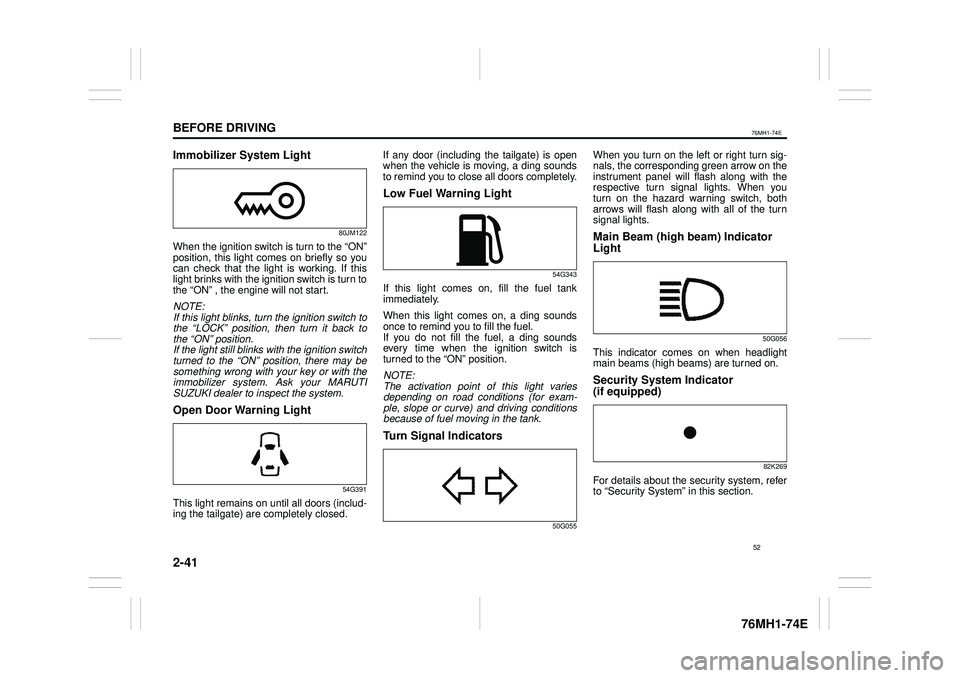
Immobilizer System Light
80JM122
When the ignition switch is turn to the “ON” position, this light comes on briefly so you can check that the light is working. If thislight brinks with the ignition switch is turn to the “ON” , the engine will not start.
NOTE: If this light blinks, turn the ignition switch to the “LOCK” position, then turn it back to the “ON” position. If the light still blinks with the ignition switchturned to the “ON” position, there may be something wrong with your key or with the immobilizer system. Ask your MARUTISUZUKI dealer to inspect the system.
Open Door Warning Light
54G391
This light remains on until all doors (includ-ing the tailgate) are completely closed.
If any door (including the tailgate) is open when the vehicle is moving, a ding sounds to remind you to close all doors completely.
Low Fuel Warning Light
54G343
If this light comes on, fill the fuel tankimmediately.
When this light comes on, a ding sounds once to remind you to fill the fuel. If you do not fill the fuel, a ding sounds every time when the ignition switch isturned to the “ON” position.
NOTE: The activation point of this light varies depending on road conditions (for exam- ple, slope or curve) and driving conditionsbecause of fuel moving in the tank.
Turn Signal Indicators
50G055
When you turn on the left or right turn sig- nals, the corresponding green arrow on the instrument panel will flash along with therespective turn signal lights. When you turn on the hazard warning switch, both arrows will flash along with all of the turnsignal lights.
Main Beam (high beam) Indicator
Light
50G056
This indicator comes on when headlight main beams (high beams) are turned on.
Security System Indicator
(if equipped)
82K269
For details about the security system, referto “Security System” in this section.
52
Page 64 of 201
2-42
BEFORE DRIVING
76MH1-74E
76MH1-74E
NOTE: If the security system indicator blinks whenthe ignition switch is in the “ON” position, there may be something wrong with the security system. Ask your MARUTI SUZUKI dealer to inspect the system.
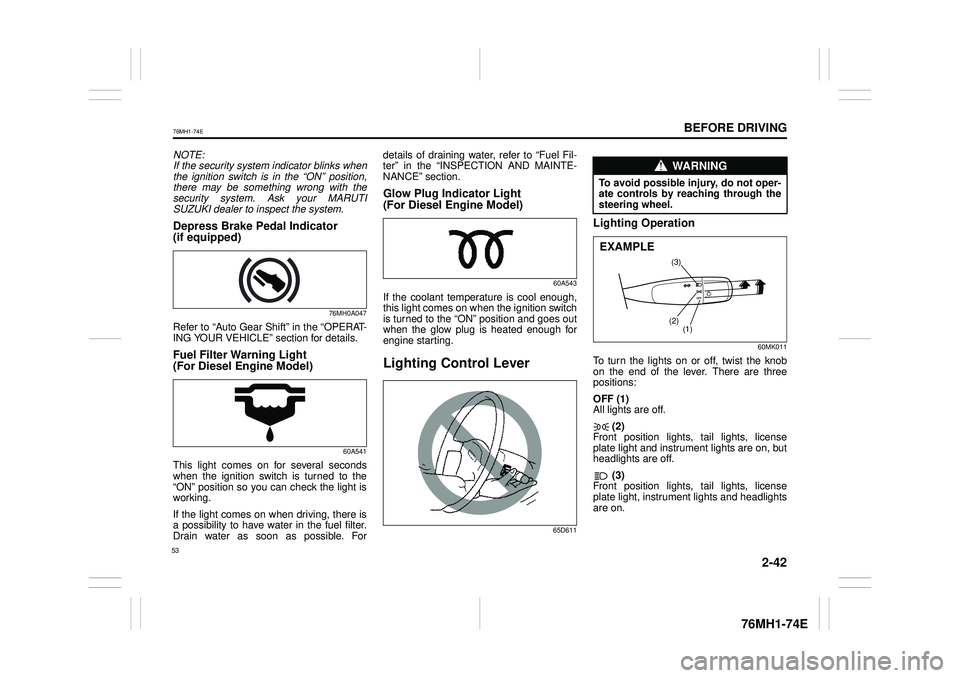
Depress Brake Pedal Indicator (if equipped)
76MH0A047
Refer to “Auto Gear Shift” in the “OPERAT- ING YOUR VEHICLE” section for details.
Fuel Filter Warning Light (For Diesel Engine Model)
60A541
This light comes on for several seconds when the ignition switch is turned to the “ON” position so you can check the light is working.
If the light comes on when driving, there is a possibility to have water in the fuel filter.Drain water as soon as possible. For
details of draining water, refer to “Fuel Fil- ter” in the “INSPECTION AND MAINTE- NANCE” section.
Glow Plug Indicator Light (For Diesel Engine Model)
60A543
If the coolant temperature is cool enough, this light comes on when the ignition switch is turned to the “ON” position and goes out when the glow plug is heated enough forengine starting.
Lighting Control Lever
65D611
Lighting Operation
60MK011
To turn the lights on or off, twist the knobon the end of the lever. There are threepositions:
OFF (1) All lights are off.
(2)Front position lights, tail lights, license plate light and instrument lights are on, but headlights are off.
(3)Front position lights, tail lights, licenseplate light, instrument lights and headlights are on.
WA R N I N G
To avoid possible injury, do not oper- ate controls by reaching through thesteering wheel.
(3)
(2)(1)
EXAMPLE
53
Page 67 of 201
2-45
BEFORE DRIVING
76MH1-74E
76MH1-74E
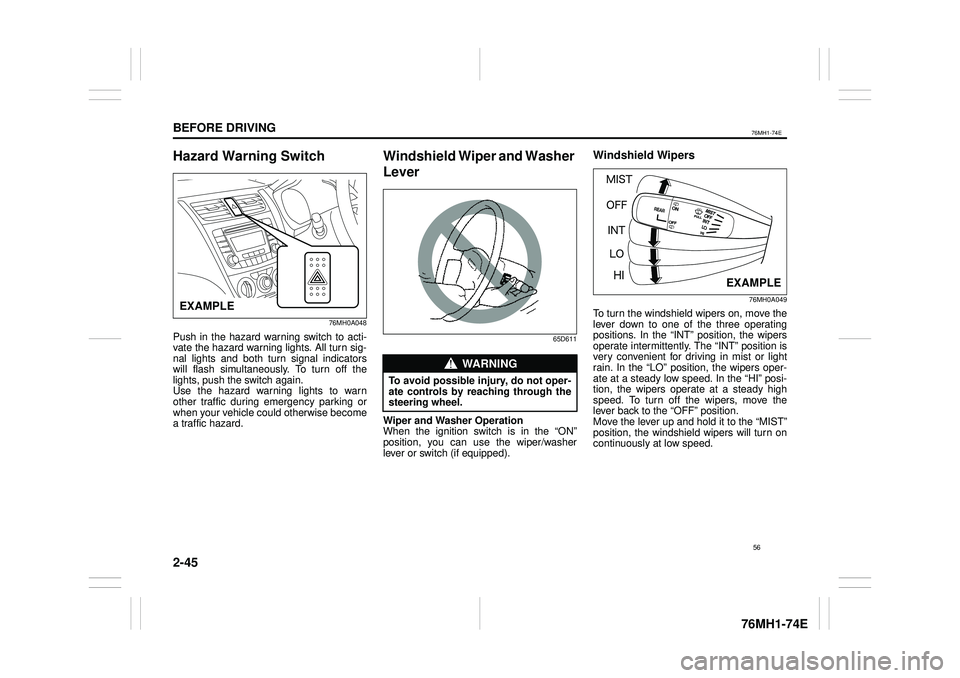
Hazard Warning Switch
76MH0A048
Push in the hazard warning switch to acti- vate the hazard warning lights. All turn sig-nal lights and both turn signal indicators will flash simultaneously. To turn off the lights, push the switch again.Use the hazard warning lights to warn other traffic during emergency parking or when your vehicle could otherwise becomea traffic hazard.
Windshield Wiper and Washer
Lever
65D611
Wiper and Washer Operation When the ignition switch is in the “ON”position, you can use the wiper/washer lever or switch (if equipped).
Windshield Wipers
76MH0A049
To turn the windshield wipers on, move the lever down to one of the three operating positions. In the “INT” position, the wipers operate intermittently. The “INT” position isvery convenient for driving in mist or light rain. In the “LO” position, the wipers oper- ate at a steady low speed. In the “HI” posi-tion, the wipers operate at a steady high speed. To turn off the wipers, move the lever back to the “OFF” position.Move the lever up and hold it to the “MIST” position, the windshield wipers will turn on continuously at low speed.
EXAMPLE
WA R N I N G
To avoid possible injury, do not oper- ate controls by reaching through the steering wheel.
EXAMPLE
56
Page 71 of 201
3-1
OPERATING YOUR VEHICLE
76MH1-74E
76MH1-74E
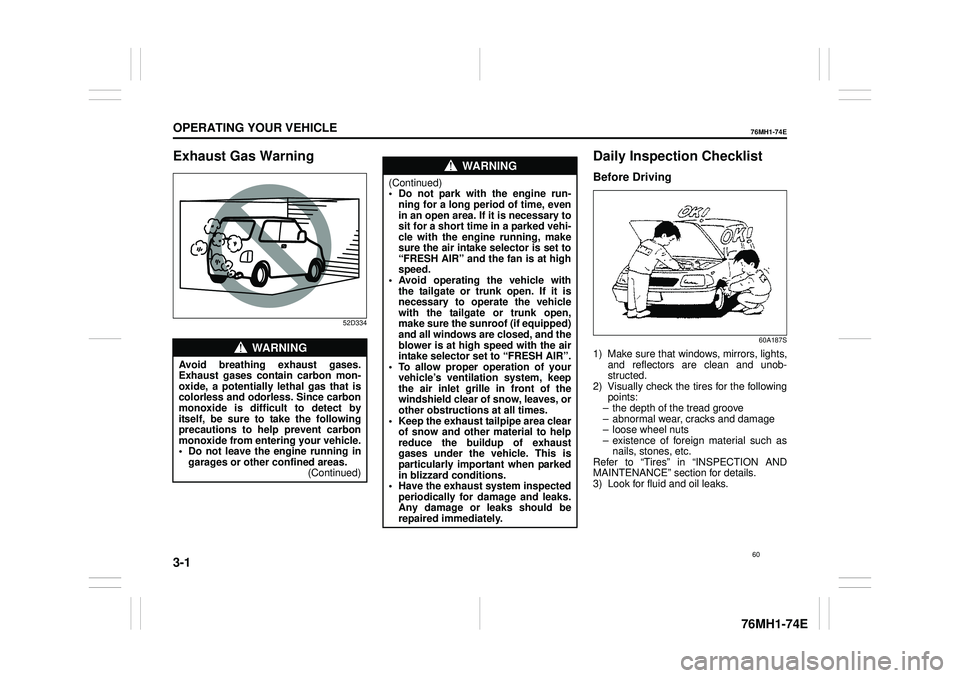
Exhaust Gas Warning
52D334
Daily Inspection Checklist
Before Driving
60A187S
1) Make sure that windows, mirrors, lights, and reflectors are clean and unob-structed. 2) Visually check the tires for the following points:– the depth of the tread groove – abnormal wear, cracks and damage – loose wheel nuts– existence of foreign material such as nails, stones, etc. Refer to “Tires” in “INSPECTION ANDMAINTENANCE” section for details. 3) Look for fluid and oil leaks.
WA R N I N G
Avoid breathing exhaust gases. Exhaust gases contain carbon mon- oxide, a potentially lethal gas that is colorless and odorless. Since carbonmonoxide is difficult to detect by itself, be sure to take the following precautions to help prevent carbonmonoxide from entering your vehicle. • Do not leave the engine running in garages or other confined areas.(Continued)
WA R N I N G
(Continued)• Do not park with the engine run- ning for a long period of time, even in an open area. If it is necessary to sit for a short time in a parked vehi- cle with the engine running, make sure the air intake selector is set to “FRESH AIR” and the fan is at highspeed. • Avoid operating the vehicle with the tailgate or trunk open. If it isnecessary to operate the vehicle with the tailgate or trunk open, make sure the sunroof (if equipped)and all windows are closed, and the blower is at high speed with the air intake selector set to “FRESH AIR”.• To allow proper operation of your vehicle’s ventilation system, keep the air inlet grille in front of thewindshield clear of snow, leaves, or other obstructions at all times. • Keep the exhaust tailpipe area clearof snow and other material to help reduce the buildup of exhaust gases under the vehicle. This isparticularly important when parked in blizzard conditions. • Have the exhaust system inspectedperiodically for damage and leaks. Any damage or leaks should be repaired immediately.
60
Page 72 of 201
3-2
OPERATING YOUR VEHICLE
76MH1-74E
76MH1-74E
NOTE: It is normal for water to drip from the air conditioning system after use.
4) Make sure the hood is fully closed and latched.5) Check the headlights, turn signal lights, brake lights and horn for proper opera- tion.6) Adjust the seat and head restraint (if equipped). 7) Check the brake pedal and the parkingbrake lever. 8) Adjust the mirrors. 9) Make sure that you and all passengershave properly fastened your seat belts. 10)Make sure that all warning lights come on as the key is turned to the “ON” posi-tion. 11)Check all gauges. 12)Make sure that the BRAKE SYSTEMWARNING light turns off when the parking brake is released.
Once a week, or each time you fill your fuel tank, perform the following under-hood checks:
1) Engine oil level 2) Coolant level3) Brake fluid level 4) Windshield washer fluid level 5) Battery solution level6) Hood latch operation Pull the hood release handle inside the vehicle. Make sure that you cannotopen the hood all the way without
releasing the secondary latch. Be sure to close the hood securely after check- ing for proper latch operation. See “Alllatches, hinges & locks” of “CHASSIS AND BODY” in the “Periodic Mainte- nance Schedule” in the “INSPECTIONAND MAINTENANCE” section for lubri- cation schedule.
Once a month, or each time you fill your fuel tank, check the tire pressure using a tire pressure gauge. Also check the tirepressure of the spare tire.
Engine Oil Consumption
It is normal for the engine to consume some engine oil during normal vehicle operation.
The amount of engine oil consumed depends on the viscosity of the oil, thequality of the oil and the conditions the vehicle is driven under. More oil is consumed during high-speeddriving and when there is frequent acceler- ation and deceleration. Under high loads, your engine also will consume more oil.A new engine also consumes more oil, since its pistons, piston rings and cylinder
walls have not yet become conditioned. New engines reach the normal level of oil consumption only after approximately 5000km (3000 miles) driving.
Oil consumption: Max. 1.0 L per 1000 km (1 Qt. per 600 miles)
When judging the amount of oil consump- tion, note that the oil may become diluted and make it difficult to accurately judge thetrue oil level. As an example, if a vehicle is used for repeated short trips, and consumes a nor-mal amount of oil, the dipstick may not show any drop in the oil level at all, even after 1000 km (600 miles) or more of driv-ing. This is because the oil is gradually becoming diluted with fuel or moisture, making it appear that the oil level has notchanged. You should also be aware that the diluting ingredients evaporate out when the vehicleis subsequently driven at high speeds, such as on an expressway, making it appear that oil is excessively consumedafter high-speed driving.
WA R N I N G
Make sure the hood is fully closed and latched before driv ing. If it is not, it can fly up unexpectedly duringdriving, obstructing your view and resulting in an accident.
61
Page 75 of 201

3-5
OPERATING YOUR VEHICLE
76MH1-74E
76MH1-74E
NOTE: (For Auto Gear Shift Model)For details on how to use the gearshift lever to park the vehicle, refer to “Parking” in “Auto Gear Shift” in this section.
Parking Brake Reminder Buzzer (if
equipped)A buzzer sounds intermittently to remind you to release the parking brake if youstart the vehicle without releasing the park- ing brake. Make sure that the parking brake is fully released and the brake sys-tem warning light turns off.
Pedal
Manual transaxle
80J2121
Auto Gear Shift
80J2122
Clutch Pedal (1)
(For manual transaxle)The clutch pedal is used to disengage the drive to the wheels when starting theengine, stopping, or shifting the gearshift lever. Depressing the pedal disengages the clutch.
Brake Pedal (2)Your MARUTI SUZUKI vehicle is equipped with front disc brakes and rear drum brakes. Depressing the brake pedalapplies both sets of brakes.
You may hear occasional brake squeal when you apply the brakes. This is a nor- mal condition caused by environmental factors such as co ld, wet, snow, etc.
WA R N I N G
When parking the vehicle in extremely cold weather, the followingprocedure should be used: 1) Set the parking brake. 2) Manual transaxl e - turn off the engine, then shift into reverse or first gear. Auto Gear Shift – shift into reverseor first gear and check the gear position indicato r in the instru- ment cluster to ma ke sure that the transaxle is engaged in 1st or reverse, then turn off the engine. 3) Get out of the vehicle and putchocks under the wheels. 4) Release the parking brake. When you return to your vehicle,you must remember to first set the parking brake, then remove the wheel chocks.
(2)(1)
(3)
EXAMPLE
(3)
(2)
EXAMPLE
WA R N I N G
Do not drive with your foot resting onthe clutch pedal. It could result inexcessive clutch wear, clutch dam- age, or unexpected loss of engine braking.
WA R N I N G
If brake squeal is excessive andoccurs each time the brakes areapplied, you should have the brakes checked by your MARUTI SUZUKI dealer.
64
Page 84 of 201

3-14
OPERATING YOUR VEHICLE
76MH1-74E
76MH1-74E
If the gearshift lever is in the “M” posi- tion, the gear will be downshifted to 1st when the vehicle stops.
Parking Unlike an automatic transaxle, Auto GearShift does not have a parking position. The vehicle can be parked with the gearshift lever in any position.1) Apply the parking brake firmly. 2) While depressing the brake pedal, shift the gearshift lever to the “R” position ona downhill slope, and to the 1st position in the drive (D) mode or the “M(1)” posi- tion in the manual (M) mode on anuphill slope and confirm the gear posi- tion by checking the gear position indi- cator.3) Stop the engine.
NOTE: • After the engine is stopped, the gear in the transaxle does not change even ifyou shift the gearshift lever in any posi- tion. Always shift the gearshift lever before stop the engine.• Check the transaxle gear position by looking at the gear position indicator, then turn the ignition switch off to stopthe engine. Release the brake pedal after a few seconds. The gearshift lever will be locked in the position it was inwhen the ignition switch was turned off.
Parking cancel Depress the brake pedal, turn the ignition switch to the “ON” position, and shift thegearshift lever to the “N” position. The gear will be disengaged.
WA R N I N G
• When stopping, for example, at a traffic light, be su re to depress the brake pedal firmly. For your safety, apply the parking brake, too, when stopping on a hill.• When racing the engine, make sure that the gear is in the “N” position by checking the gear position indi- cator. If the accelerator is operated with the gear in any other position, the vehicle may move resulting inan unexpected accident. • Do not leave your vehicle unat- tended while the engine is running.• When leaving the vehicle, stop the engine and park the vehicle with a gear engaged. If you need to leavethe vehicle with the engine running, apply the parking brakes firmly, and shift the gearshift lever to the“N” position. Otherwise, the vehi- cle may move unexpectedly and may cause an accident.
NOTICE
• On a slope, never hold the vehicleat a stop using only the acceleratorpedal or the creeping function. If you perform this operation for a certain period of time, a warningbuzzer will sound, and in some cases the engine will stall. This can also cause excessive damage tothe clutch. • If the gearshift lever is operated more than necessary, the systemmay not allow operation of the gearshift lever for a certain period of time, and the gear may not beshifted appropriately. Therefore, do not operate the gearshift lever if not necessary.
WA R N I N G
• If the gear is not engaged properlyand completely be fore the ignition switch is turned off, the vehicle may not be parked with the gearengaged. Always confirm the gear position by checking the gear posi- tion indicator when parking.• On a downhill slope, the gear should be put in reverse, and in 1st gear on an uphill slope. Otherwise,the vehicle may move, and cause an unexpected accident. If the gear is left in the “N” position, the vehi-cle cannot be parked with a gear engaged.
73
Page 86 of 201
3-16
OPERATING YOUR VEHICLE
76MH1-74E
76MH1-74E
Brake Assist System (if equipped)When you slam the brakes on, the brake assist system judges as an emergencystop and provides more powerful braking for a driver who cannot hold down the brake pedal firmly.
NOTE: If you quickly and forcefully depress thebrakes, you may hear a clicking sound in the brake pedal. This is normal and indi- cates that the brake a ssist system is acti- vated properly.
Anti-Lock Brake System (ABS)
(if equipped)ABS will help you avoid skidding by elec- tronically controlling braking pressure. It will also help you maintain steering controlwhen braking on slippery surfaces or when braking hard. The ABS works automatically, so you donot need any special braking technique. Just push the brake pedal down without pumping. The ABS will operate whenever itsenses that the wheels are locking up. You
may feel the brake pedal moves a little while the ABS is operating.
NOTE: The ABS will not work if vehicle speed is under about 10 km/h (6 mph).
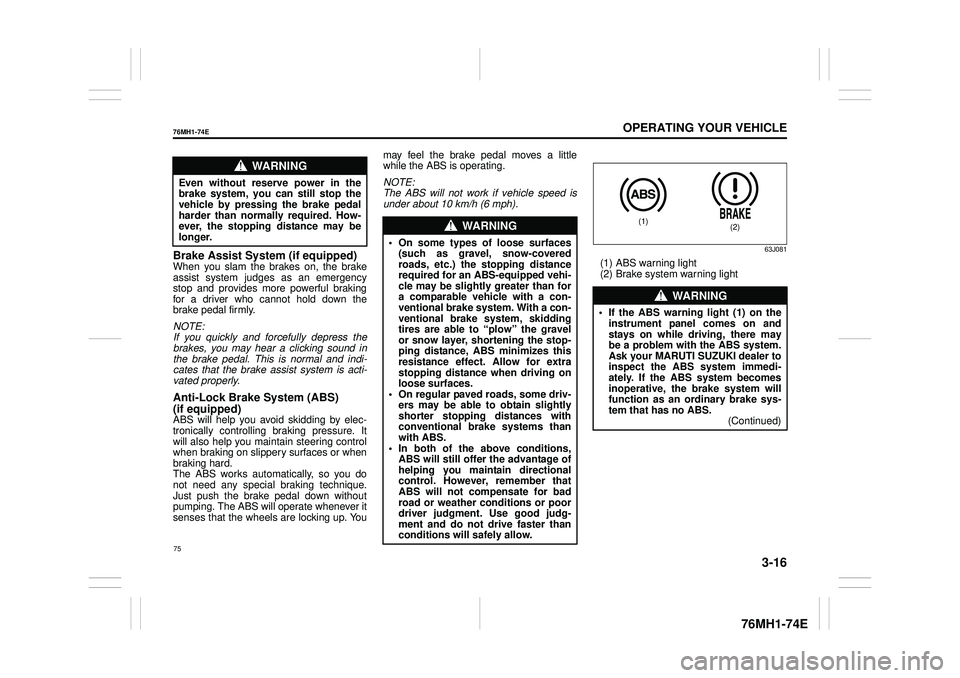
63J081
(1) ABS warning light (2) Brake system warning light
WA R N I N G
Even without reserve power in the brake system, you can still stop thevehicle by pressing the brake pedal harder than normally required. How- ever, the stopping distance may belonger.WA R N I N G
• On some types of loose surfaces(such as gravel, snow-coveredroads, etc.) the stopping distance required for an ABS-equipped vehi- cle may be slightly greater than fora comparable vehicle with a con- ventional brake system. With a con- ventional brake system, skiddingtires are able to “plow” the gravel or snow layer, shortening the stop- ping distance, ABS minimizes thisresistance effect. Allow for extra stopping distance when driving on loose surfaces.• On regular paved roads, some driv- ers may be able to obtain slightly shorter stopping distances withconventional brake systems than with ABS. • In both of the above conditions,ABS will still offer the advantage of helping you maintain directional control. However, remember thatABS will not compensate for bad road or weather conditions or poor driver judgment. Use good judg-ment and do not drive faster than conditions will safely allow.
WA R N I N G
• If the ABS warning light (1) on the instrument panel comes on and stays on while driving, there maybe a problem with the ABS system. Ask your MARUTI SUZUKI dealer to inspect the ABS system immedi-ately. If the ABS system becomes inoperative, the brake system will function as an ordinary brake sys-tem that has no ABS. (Continued)
(1)(2)
75
Page 87 of 201
3-17
OPERATING YOUR VEHICLE
76MH1-74E
76MH1-74E
How the ABS WorksA computer continuously monitors wheel speed. The computer compares the changes in wheel speed when braking. If the wheels slow suddenly, indicating askidding situation, the computer will change braking pressure several times each second to prevent the wheels fromlocking. When you start your vehicle after a stop you may hear a momentary motor noise as the system checks itself.
WA R N I N G
(Continued)• If the ABS warning light (1) and theBrake system warning light (2) on the instrument panel simultane- ously stays on or comes on whendriving, both anti-lock function and rear brake force control function (proportioning val ve function) of the ABS system may have failed. If so, the rear wheels may easily skid or the vehicle can even spin in theworst case when braking on a slip- pery road or when hard braking even on a dry paved road. Ask yourMARUTI SUZUKI dealer to inspect the ABS system immediately. Drive carefully, avoiding hard braking asmuch as possible.
WA R N I N G
The ABS may not work properly iftires or wheels other than thosespecified in the owner’s manual are used. This is because the ABS works by comparing changes in wheelspeed. When replacing tires or wheels, use only the size and type specified in this owner’s manual.
76
Page 165 of 201
7-16
INSPECTION AND MAINTENANCE
76MH1-74E
76MH1-74E
“MAX” and “MIN” lines. If the brake fluid level is near the “MIN” line, fill it up to the “MAX” line with Maruti genuine brake fluid.
NOTE: With disc brakes, the fluid level can beexpected to gradually fall as the brake pads wear.
Brake PedalCheck if the brake peda l stops at the regu- lar height without “spongy” feeling when you depress it. If not, have the brake sys- tem inspected by your MARUTI SUZUKIdealer. If you doubt the brake pedal for the regular height, check it as follows:
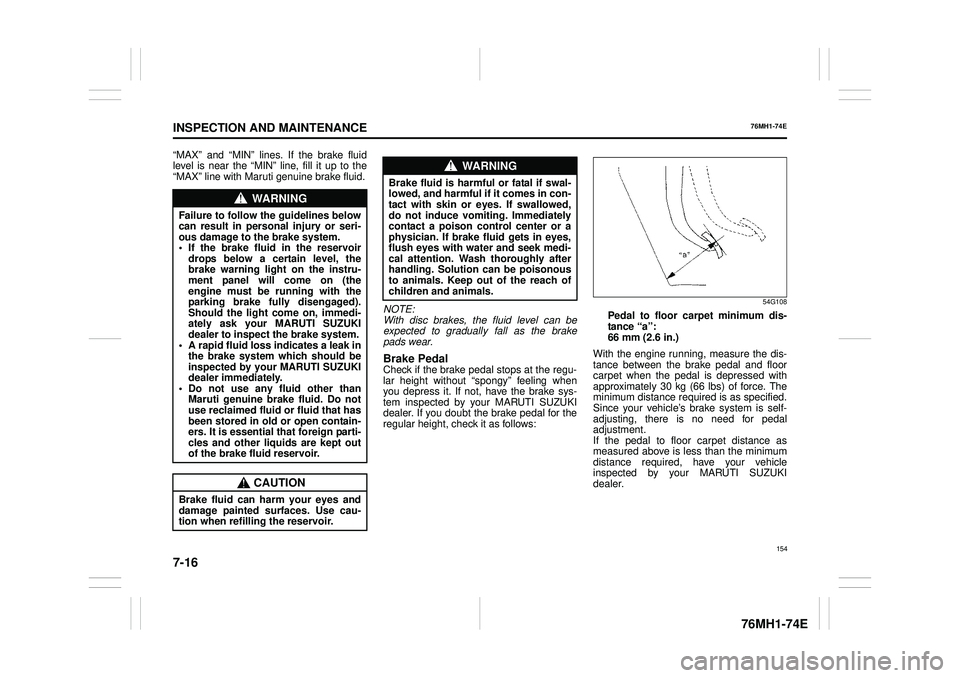
54G108
Pedal to floor car pet minimum dis- tance “a”: 66 mm (2.6 in.)
With the engine running, measure the dis- tance between the brake pedal and floorcarpet when the pedal is depressed with approximately 30 kg (66 lbs) of force. The minimum distance required is as specified.Since your vehicle’s brake system is self- adjusting, there is no need for pedal adjustment. If the pedal to floor carpet distance as measured above is less than the minimum distance required, have your vehicleinspected by your MARUTI SUZUKI dealer.
WA R N I N G
Failure to follow the guidelines below can result in personal injury or seri-ous damage to the brake system. • If the brake fluid in the reservoir drops below a certain level, thebrake warning light on the instru- ment panel will come on (the engine must be running with theparking brake fully disengaged). Should the light come on, immedi- ately ask your MARUTI SUZUKIdealer to inspect the brake system. • A rapid fluid loss indicates a leak in the brake system which should beinspected by your MARUTI SUZUKI dealer immediately. • Do not use any fluid other thanMaruti genuine brake fluid. Do not use reclaimed fluid or fluid that has been stored in old or open contain-ers. It is essential that foreign parti- cles and other liquids are kept out of the brake fluid reservoir.
CAUTION
Brake fluid can harm your eyes anddamage painted surfaces. Use cau- tion when refilling the reservoir.
WA R N I N G
Brake fluid is harmful or fatal if swal- lowed, and harmful if it comes in con-tact with skin or e yes. If swallowed, do not induce vomiting. Immediately contact a poison control center or aphysician. If brake fluid gets in eyes, flush eyes with water and seek medi- cal attention. Wash thoroughly afterhandling. Solution can be poisonous to animals. Keep out of the reach of children and animals.
154