window SUZUKI CELERIO 2022 Owners Manual
[x] Cancel search | Manufacturer: SUZUKI, Model Year: 2022, Model line: CELERIO, Model: SUZUKI CELERIO 2022Pages: 201, PDF Size: 5.82 MB
Page 22 of 201
76MH1-74E
BEFORE DRIVINGKeys ...................................................................................... 2-1
Door Locks .......................................................................... 2-2
Keyless Entry System Transmitte r (if equipped) ............. 2-5
Security System (if equipped) ............................................ 2-7
Windows .............................................................................. 2-10
Mirrors .................................................................................. 2-11
Front Seats .......................................................................... 2-13
Rear Seats ............................................................................ 2-13
Seat Belts and Child Restraint Systems ........................... 2-15
Supplemental Restraint System (air bags)
(if equipped) ......................................................................... 2-23
Instrument Cluster .............................................................. 2-28
Speedometer ....................................................................... 2-29
Tachometer (if equipped) ................................................... 2-29
Brightness Control .............................................................. 2-29
Information Display ............................................................. 2-30
Fuel Gauge ........................................................................... 2-31
Warning and Indicator Lights ............................................ 2-37
Lighting Control Lever ........................................................ 2-42
Front Fog Light Switch (if equipped) ................................ 2-43
Headlight Leveling Switch .................................................. 2-43
Turn Signal Control Lever .................................................. 2-44
Hazard Warning Switch ...................................................... 2-45
Windshield Wiper and Washer L ever ................................ 2-45
Tilt Steering Lock Lever (if equipped) ............................... 2-47
Horn ...................................................................................... 2-47
Heated Rear Window Switch (if equipped) ....................... 2-47
11
76MH1-74E
Page 32 of 201
2-10
BEFORE DRIVING
76MH1-74E
76MH1-74E
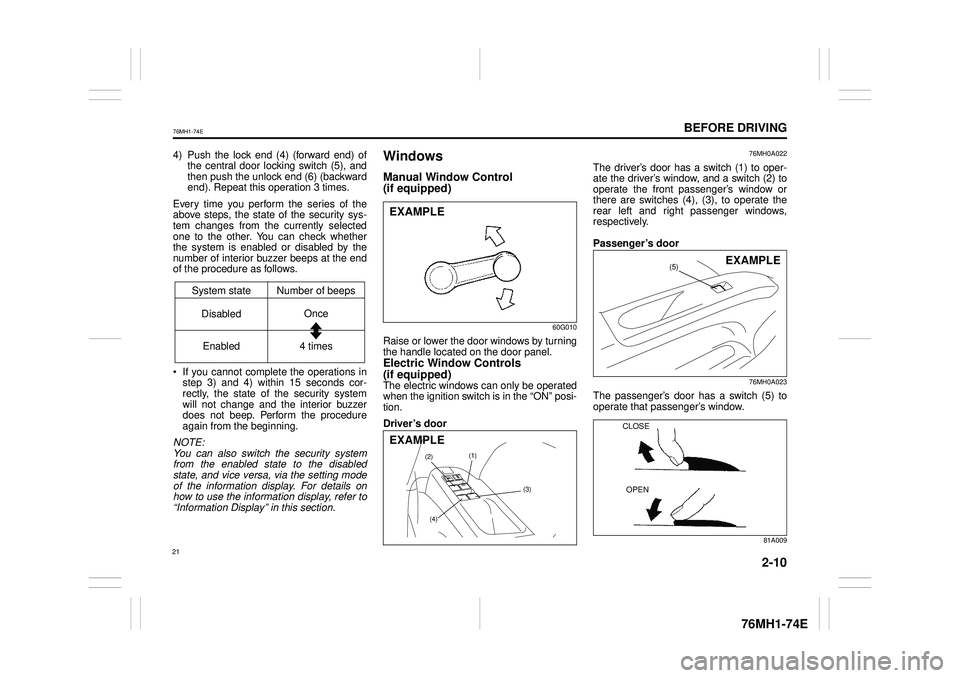
4) Push the lock end (4) (forward end) ofthe central door locking switch (5), and then push the unlock end (6) (backwardend). Repeat this operation 3 times.
Every time you perform the series of theabove steps, the state of the security sys- tem changes from the currently selected one to the other. You can check whetherthe system is enabled or disabled by the number of interior buzzer beeps at the end of the procedure as follows.
If you cannot complete the operations instep 3) and 4) within 15 seconds cor- rectly, the state of the security systemwill not change and the interior buzzer does not beep. Perform the procedure again from the beginning.
NOTE: You can also switch the security systemfrom the enabled state to the disabled state, and vice versa, via the setting mode of the information display. For details onhow to use the information display, refer to“Information Display” in this section.
Windows
Manual Window Control
(if equipped)
60G010
Raise or lower the door windows by turning the handle located on the door panel.
Electric Window Controls
(if equipped)The electric windows can only be operated when the ignition switch is in the “ON” posi- tion.
Driver’s door
76MH0A022
The driver’s door has a switch (1) to oper- ate the driver’s window, and a switch (2) tooperate the front passenger’s window or there are switches (4), (3), to operate the rear left and right passenger windows,respectively.
Passenger’s door
76MH0A023
The passenger’s door has a switch (5) to operate that passenger’s window.
81A009
System state Number of beeps
DisabledOnce
Enabled 4 times
EXAMPLE
(1)(2)
(3)
(4)
EXAMPLE
(5)EXAMPLE
CLOSE
OPEN
21
Page 33 of 201
2-11
BEFORE DRIVING
76MH1-74E
76MH1-74E
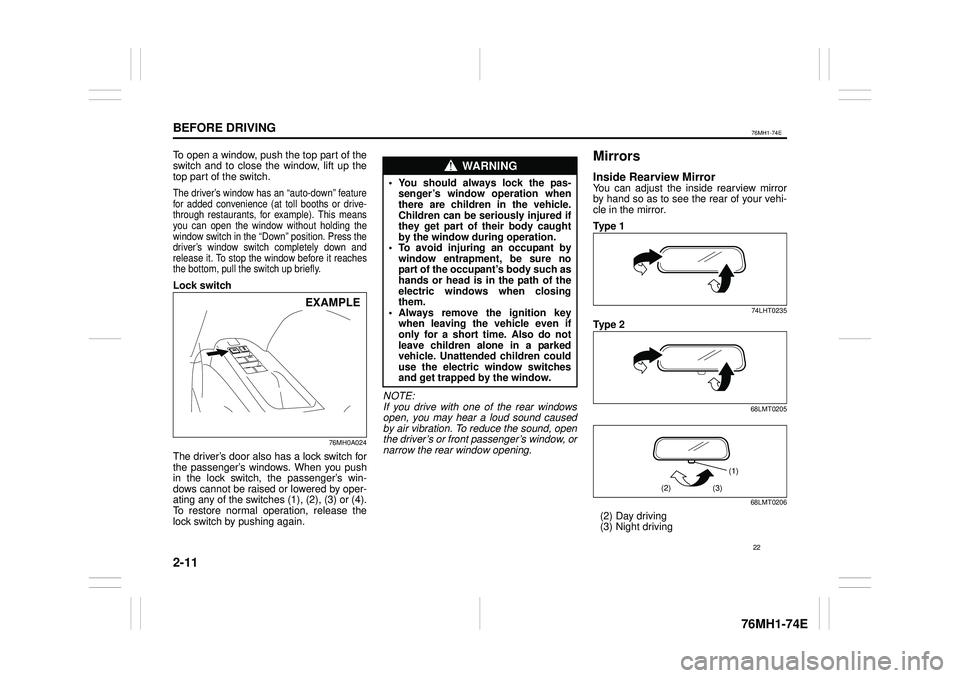
To open a window, push the top part of the switch and to close the window, lift up the top part of the switch.
The driver’s window has an “auto-down” featurefor added convenience (at toll booths or drive-through restaurants, for example). This means you can open the window without holding the window switch in the “Down” position. Press thedriver’s window switch completely down and release it. To stop the window before it reaches the bottom, pull the switch up briefly.
Lock switch
76MH0A024
The driver’s door also has a lock switch forthe passenger’s windows. When you pushin the lock switch, the passenger’s win- dows cannot be raised or lowered by oper- ating any of the switches (1), (2), (3) or (4).To restore normal operation, release the lock switch by pushing again.
NOTE:If you drive with one of the rear windows open, you may hear a loud sound causedby air vibration. To reduce the sound, open the driver’s or front passenger’s window, or narrow the rear window opening.
Mirrors
Inside Rearview MirrorYou can adjust the inside rearview mirrorby hand so as to see the rear of your vehi-cle in the mirror.
Ty p e 1
74LHT0235
Ty p e 2
68LMT0205
68LMT0206
(2) Day driving (3) Night driving
EXAMPLE
WA R N I N G
• You should always lock the pas-senger’s window operation whenthere are children in the vehicle. Children can be seriously injured if they get part of their body caughtby the window during operation.• To avoid injuring an occupant bywindow entrapment, be sure nopart of the occupant’s body such as hands or head is in the path of the electric windows when closingthem.• Always remove the ignition keywhen leaving the vehicle even ifonly for a short time. Also do not leave children alone in a parked vehicle. Unattended children coulduse the electric window switches and get trapped by the window.
(1)
(2)(3)
22
Page 68 of 201

2-46
BEFORE DRIVING
76MH1-74E
76MH1-74E
Windshield Washer
76MH0A050
To spray windshield washer fluid, pull the lever toward you. The windshield wipers will automatically turn on at low speed ifthey are not already on and the “INT” posi- tion is equipped.
Rear Window Wiper/Washer Switch
(if equipped)
76MH0A051
To turn the rear wiper on, twist the rear wiper switch on the end of the lever for-ward to the “ON” position. To turn the rear wiper off, twist the switch rearward to the “OFF” position.
With the rear wiper in the “OFF” position, twist the switch rearward and hold it thereto spray window washer fluid.
With the rear wiper in the “ON” position, turn the switch forward and hold it there to spray window washer fluid.
WA R N I N G
• To prevent windshield icing in coldweather, turn on the defroster to heat the windshield before and during windshield washer use.• Do not use radiator antifreeze inthe windshield washer reservoir. Itcan severely impair visibility when sprayed on the windshield, and canalso damage your vehicle’s paint.
EXAMPLE
NOTICE
To help prevent damage to the wind-shield wiper and washer systemcomponents, you should take the fol- lowing precautions: • Do not continue to hold in the leverwhen there is no windshield washer fluid being sprayed or the washer motor can be damaged.• Do not attempt to remove dirt froma dry windshield with the wipers oryou can damage the windshieldand the wiper blades. Always wet the windshield with washer fluid before operating the wipers.• Clear ice or packed snow from thewiper blades before using the wip-ers.• Check the washer fluid level regu-larly. Check it often when theweather is bad.• Only fill the washer fluid reservoir3/4 full during cold weather to allowroom for expansion if the tempera-ture falls low enough to freeze thesolution.
NOTICE
Clear ice or snow from the rear win- dow and rear wiper blade before using the rear wiper. Accumulatedice or snow could prevent the wiper blade from moving, causing damage to the wiper motor.
Washer
Wiper
EXAMPLE
57
Page 69 of 201
2-47
BEFORE DRIVING
76MH1-74E
76MH1-74E
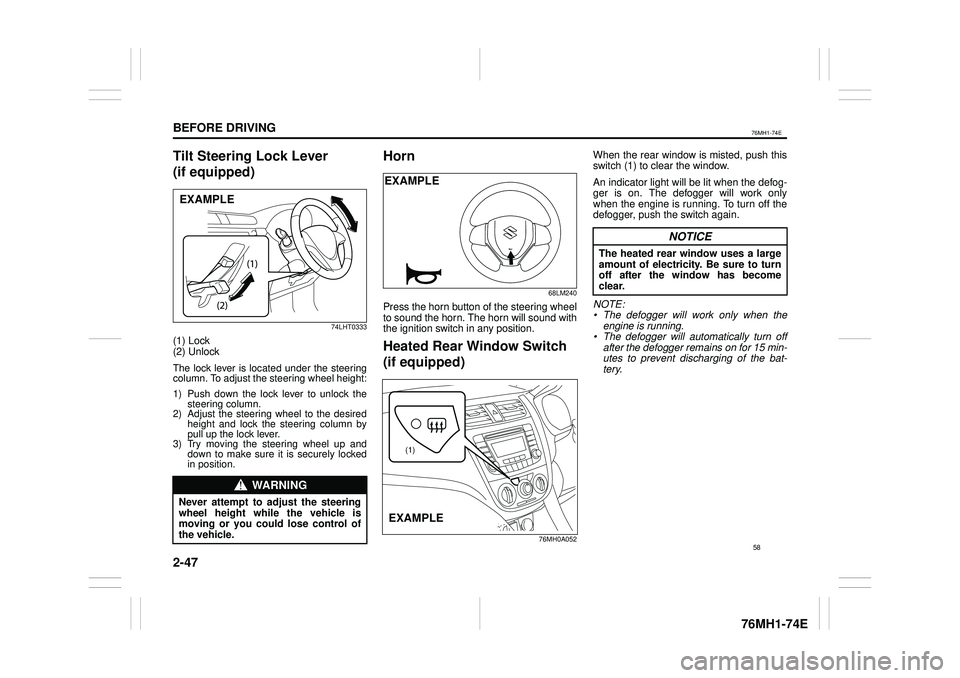
Tilt Steering Lock Lever
(if equipped)
74LHT0333
(1) Lock (2) Unlock
The lock lever is located under the steering column. To adjust the steering wheel height:
1) Push down the lock lever to unlock thesteering column.2) Adjust the steering wheel to the desiredheight and lock the steering column by pull up the lock lever.3) Try moving the steering wheel up anddown to make sure it is securely lockedin position.
Horn
68LM240
Press the horn button of the steering wheel to sound the horn. The horn will sound with the ignition switch in any position.
Heated Rear Window Switch
(if equipped)
76MH0A052
When the rear window is misted, push this switch (1) to clear the window.
An indicator light will be lit when the defog- ger is on. The defogger will work only when the engine is running. To turn off thedefogger, push the switch again.
NOTE: • The defogger will work only when theengine is running.• The defogger will automatically turn offafter the defogger remains on for 15 min-utes to prevent discharging of the bat- tery.
WA R N I N G
Never attempt to adjust the steering wheel height while the vehicle ismoving or you could lose control of the vehicle.
EXAMPLE
EXAMPLE
(1)
EXAMPLE
NOTICE
The heated rear window uses a large amount of electricity. Be sure to turn off after the window has become clear.
58
Page 71 of 201
3-1
OPERATING YOUR VEHICLE
76MH1-74E
76MH1-74E
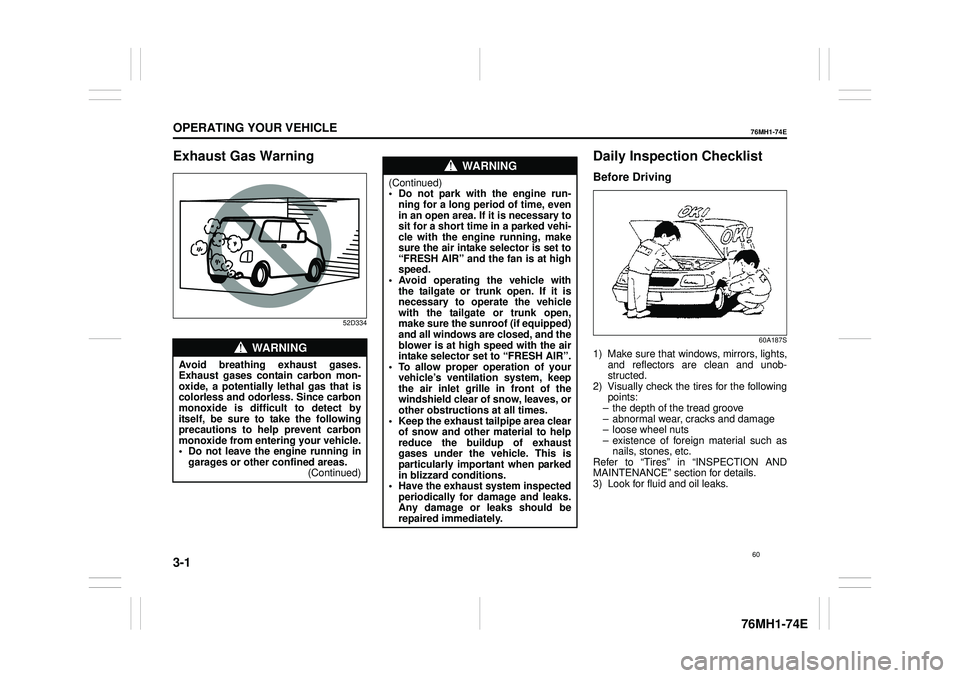
Exhaust Gas Warning
52D334
Daily Inspection Checklist
Before Driving
60A187S
1) Make sure that windows, mirrors, lights, and reflectors are clean and unob-structed. 2) Visually check the tires for the following points:– the depth of the tread groove – abnormal wear, cracks and damage – loose wheel nuts– existence of foreign material such as nails, stones, etc. Refer to “Tires” in “INSPECTION ANDMAINTENANCE” section for details. 3) Look for fluid and oil leaks.
WA R N I N G
Avoid breathing exhaust gases. Exhaust gases contain carbon mon- oxide, a potentially lethal gas that is colorless and odorless. Since carbonmonoxide is difficult to detect by itself, be sure to take the following precautions to help prevent carbonmonoxide from entering your vehicle. • Do not leave the engine running in garages or other confined areas.(Continued)
WA R N I N G
(Continued)• Do not park with the engine run- ning for a long period of time, even in an open area. If it is necessary to sit for a short time in a parked vehi- cle with the engine running, make sure the air intake selector is set to “FRESH AIR” and the fan is at highspeed. • Avoid operating the vehicle with the tailgate or trunk open. If it isnecessary to operate the vehicle with the tailgate or trunk open, make sure the sunroof (if equipped)and all windows are closed, and the blower is at high speed with the air intake selector set to “FRESH AIR”.• To allow proper operation of your vehicle’s ventilation system, keep the air inlet grille in front of thewindshield clear of snow, leaves, or other obstructions at all times. • Keep the exhaust tailpipe area clearof snow and other material to help reduce the buildup of exhaust gases under the vehicle. This isparticularly important when parked in blizzard conditions. • Have the exhaust system inspectedperiodically for damage and leaks. Any damage or leaks should be repaired immediately.
60
Page 74 of 201
3-4
OPERATING YOUR VEHICLE
76MH1-74E
76MH1-74E
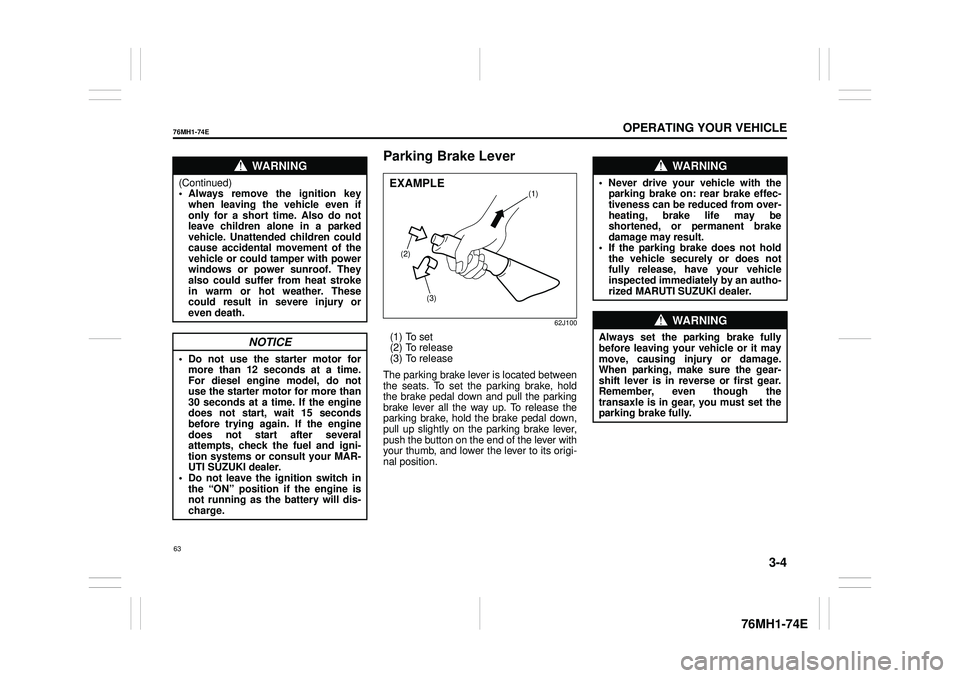
Parking Brake Lever
62J100
(1) To set (2) To release(3) To release
The parking brake lever is located between the seats. To set the parking brake, hold the brake pedal down and pull the parking brake lever all the way up. To release theparking brake, hold the brake pedal down, pull up slightly on the parking brake lever, push the button on the end of the lever withyour thumb, and lower the lever to its origi- nal position.
WA R N I N G
(Continued) • Always remove the ignition keywhen leaving the vehicle even if only for a short time. Also do not leave children alone in a parkedvehicle. Unattended children could cause accidental movement of the vehicle or could tamper with powerwindows or power sunroof. They also could suffer from heat stroke in warm or hot weather. Thesecould result in severe injury or even death.
NOTICE
• Do not use the starter motor for more than 12 seconds at a time.For diesel engine model, do not use the starter motor for more than 30 seconds at a time. If the enginedoes not start, wait 15 seconds before trying again. If the engine does not start after severalattempts, check the fuel and igni- tion systems or consult your MAR- UTI SUZUKI dealer.• Do not leave the ignition switch in the “ON” position if the engine is not running as the battery will dis-charge.
(2)
(3)
(1)EXAMPLE
WA R N I N G
• Never drive your vehicle with theparking brake on: rear brake effec-tiveness can be reduced from over- heating, brake life may be shortened, or permanent brakedamage may result. • If the parking brake does not hold the vehicle securely or does notfully release, have your vehicle inspected immediately by an autho- rized MARUTI SUZUKI dealer.
WA R N I N G
Always set the pa rking brake fully before leaving your vehicle or it may move, causing injury or damage. When parking, make sure the gear-shift lever is in reverse or first gear. Remember, even though the transaxle is in gear, you must set theparking brake fully.
63
Page 99 of 201

5-3
OTHER CONTROLS AND EQUIPMENT
76MH1-74E
76MH1-74E
To close the engine hood: 1) Lift the hood up slightly and remove the prop rod from the hole. Put the prop rodback to the holding clip.
76MS014
2) Lower the hood to about 20 cm abovethe hood latch, then let it drop down. Make sure the hood is securely latched after closing.
Sun Visor
79J161
The sun visors can be pulled down to block glare coming through the windshield, orthey can be unhooked and turned to the side to block glare coming through the side window.
Card holder (if equipped)
67LH064
(1) Card holder
You can put a card in the card holder (1) on the back of the sun visor.
WA R N I N G
Make sure the hood is fully closedand latched before driv ing. If it is not, it can fly up unexpectedly duringdriving, obstructing your view and resulting in an accident.
EXAMPLE
CAUTION
To avoid injury, be sure no part of the occupant’s body such as hands orhead is in the path of the hood when closing it.
NOTICE
Pressing the hood from above may damage the hood.
EXAMPLE
NOTICE
When unhooking and hooking a sunvisor, be sure to handle it by the hardplastic parts or the sun visor can be damaged.
NOTICE
When you park your vehicle outdoorsin direct sunlight or in hot weather, do not leave plastic cards in theholder. The heat may distort them.
(1)
EXAMPLE
88
Page 108 of 201

5-12
OTHER CONTROLS AND EQUIPMENT
76MH1-74E
76MH1-74E
Air conditioning switch (5) To turn on the air conditioning system, set the blower speed selector to a positionother than “OFF” and push in the “A/C” switch. With this “A/C” switch operation, a indicator light will come on when the airconditioning system is on. To turn off the air conditioning system, push the “A/C” switch again.
During operation of the air conditioner, you may notice slight changes in enginespeed. These changes are normal, the system is designed so that the compressor turns on or off to maintain the desired tem-perature.
Less operation of the compressor results in better fuel economy.
System Operating Instructions
Natural ventilationSelect “VENTILATION” and “FRESH AIR”, the temperature selector to the desired temperature position, and the blowerspeed selector to “OFF”. Fresh air will flow through the vehicle during driving.
Forced ventilation The control settings are the same as for natural ventilation except you set theblower speed selector to a position other than “OFF”.
Normal heating (using outside air) Select “HEAT” and “FRESH AIR”, the tem- perature selector to the desired tempera-ture position and the blower speed selector
to the desired blower speed position. Set- ting the blower speed selector to a higher blower speed position increases heatingefficiency.
Quick heating (using recirculated air) The control settings are the same as for normal heating except you select “RECIR- CULATED AIR”. If you use this heatingmethod for an extended period of time, the air in the vehicle can become contami- nated and the windows can become misty.Therefore, use this method only for quick heating and change to the normal heating method as soon as possible.
Head cooled/Feet warmed heating Select “BI-LEVEL” and “FRESH AIR”, thetemperature selector to the desired tem- perature position, and the blower speed selector to the desired blower speed posi-tion. Unless the temperature selector is in the fully COLD position or fully HOT posi- tion, the air that comes out of the centerand side outlets will be cooler than the air that comes out of the floor outlets.
Normal cooling Set the air flow selector to “VENTILA- TION”, the temperatur e selector to the desired temperature position and the blower speed selector to the desired blower speed position, and turn on the “A/C” switch. Setting the blower speed selec- tor to a higher blower speed position increases cooling efficiency.
You can switch the air intake selector to either “FRESH AIR” or “RECIRCULATED AIR” as you desire. Choosing “RECIRCU-LATED AIR” increases cooling efficiency.
Quick cooling (using recirculated air) The control settings are the same as for normal cooling except you select “RECIR- CULATED AIR” and the highest blowerspeed.
NOTE: • To turn on the air conditioning system, push in the “A/C” switch and set the blower speed selector to a position otherthan “OFF”. With this “A/C” switch opera- tion, an indicator light will come on when the air conditioning system is on. To turnoff the air conditioning system, push the “A/C” switch again. • During operation of the air conditioner,you may notice slight changes in engine speed. These changes are normal, the system is designed so that the compres-sor turns on or of f to maintain the desired temperature. Less operation of the compressor result s in better fuel economy.
NOTE: • If you select “RECIRCULATED AIR” for an extended period of time, the air in the vehicle can become contaminated.Therefore, you should occasionally select “FRESH AIR”. • If your vehicle has been left in the sunwith the windows closed, it will cool
97
Page 109 of 201
5-13
OTHER CONTROLS AND EQUIPMENT
76MH1-74E
76MH1-74E
faster if you open the windows briefly while you operate the air conditioner with the air intake selector at “FRESH AIR”and the blower at high speed.
DehumidifyingSet the air flow selector to a desired air flow selector position, the temperature selector to the desired temperature position and theblower speed selector to the desired blower speed position. Also select “FRESH AIR” and turn on the “A/C” switch.
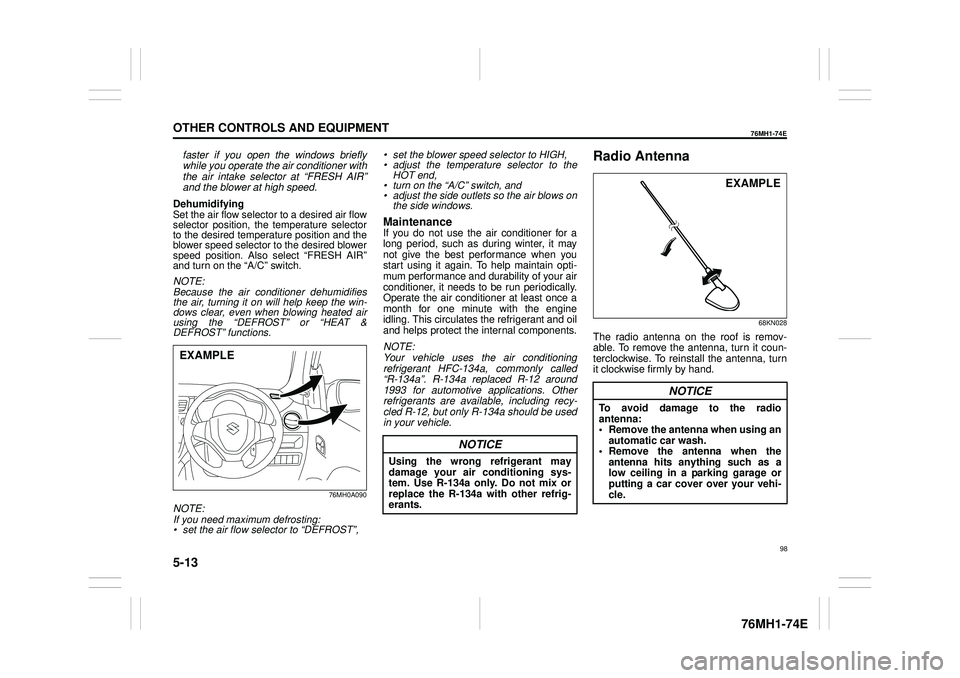
NOTE:Because the air conditioner dehumidifiesthe air, turning it on will help keep the win- dows clear, even when blowing heated air using the “DEFROST” or “HEAT &DEFROST” functions.
76MH0A090
NOTE:If you need maximum defrosting:• set the air flow selector to “DEFROST”,
• set the blower speed selector to HIGH, • adjust the temperature selector to the HOT end, • turn on the “A/C” switch, and• adjust the side outlets so the air blows on the side windows.
MaintenanceIf you do not use the air conditioner for a long period, such as during winter, it may not give the best performance when youstart using it again. To help maintain opti- mum performance and durability of your air conditioner, it needs to be run periodically.Operate the air conditioner at least once a month for one minute with the engine idling. This circulates the refrigerant and oiland helps protect the internal components.
NOTE: Your vehicle uses the air conditioning refrigerant HFC-134a, commonly called “R-134a”. R-134a replaced R-12 around1993 for automotive applications. Other refrigerants are available, including recy- cled R-12, but only R-134a should be usedin your vehicle.
Radio Antenna
68KN028
The radio antenna on the roof is remov-able. To remove the antenna, turn it coun-terclockwise. To reinstall the antenna, turn it clockwise firmly by hand.
EXAMPLE
NOTICE
Using the wrong refrigerant may damage your air conditioning sys- tem. Use R-134a only. Do not mix or replace the R-134a with other refrig-erants.
NOTICE
To avoid damage to the radio antenna: • Remove the antenna when using anautomatic car wash. • Remove the antenna when the antenna hits anything such as alow ceiling in a parking garage or putting a car cover over your vehi- cle.
EXAMPLE
98