tow SUZUKI ERTIGA 2013 1.G Owners Manual
[x] Cancel search | Manufacturer: SUZUKI, Model Year: 2013, Model line: ERTIGA, Model: SUZUKI ERTIGA 2013 1.GPages: 207, PDF Size: 5.14 MB
Page 9 of 207
Downloaded from www.Manualslib.com manuals search engine 60MK0-14E
TABLE OF CONTENTS
FUEL RECOMMENDATION
1
BEFORE DRIVING
2
OPERATING YOUR VEHICLE
3
DRIVING TIPS
4
OTHER CONTROLS AND EQUIPMENT
5
VEHICLE LOADING AND TOWING
6
INSPECTION AND MAINTENANCE
7
EMERGENCY SERVICE
8
APPEARANCE CARE
9
GENERAL INFORMATION
10
SPECIFICATIONS
11
INDEX
12
Page 17 of 207
Downloaded from www.Manualslib.com manuals search engine 2-2
BEFORE DRIVING
60MK0-14E
Ignition Key ReminderA buzzer sounds intermittently to remind
you to remove the ignition key if it is in the
ignition switch when the driver’s door is
opened.
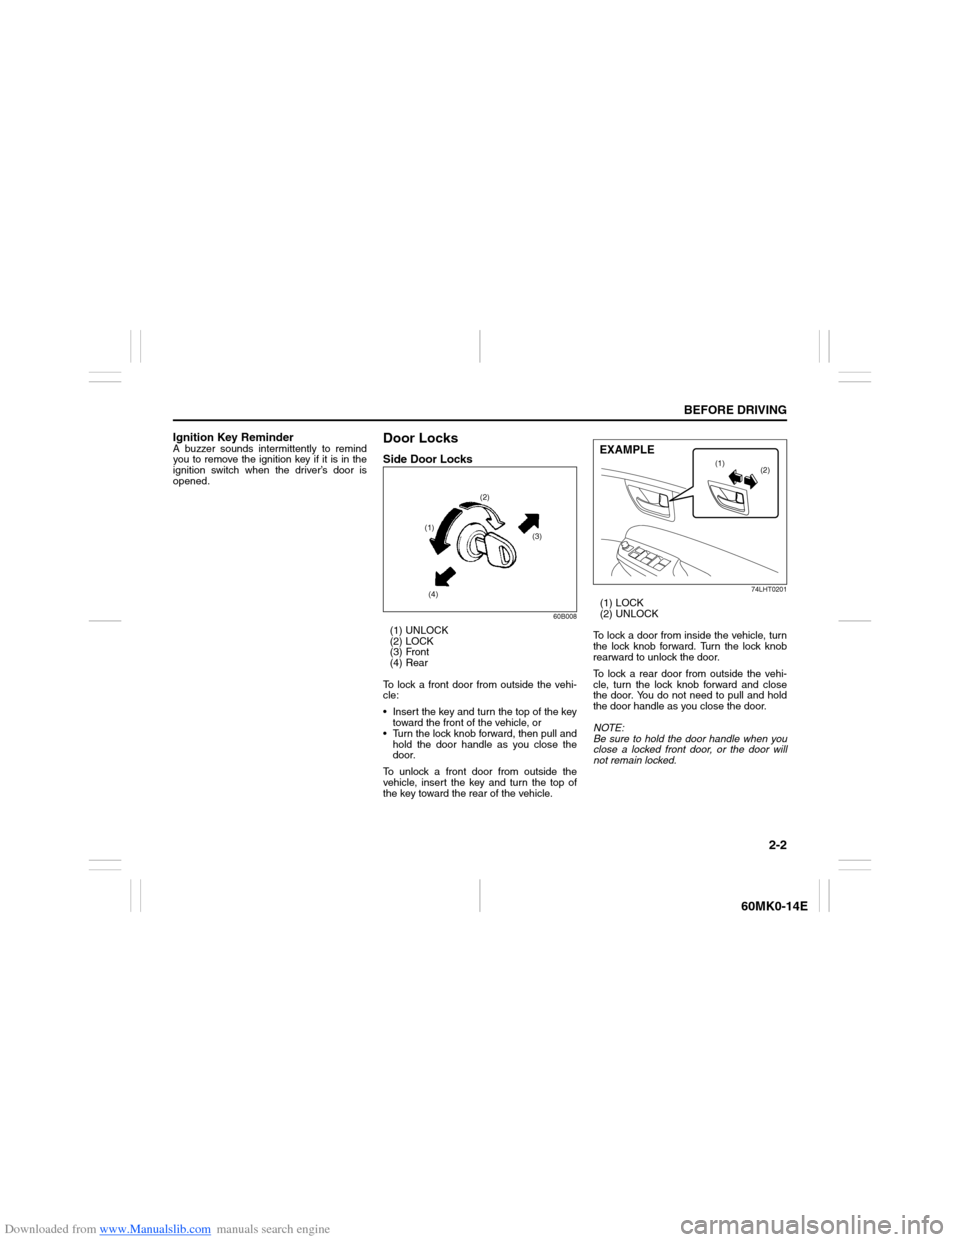
Door LocksSide Door Locks
60B008
(1) UNLOCK
(2) LOCK
(3) Front
(4) Rear
To lock a front door from outside the vehi-
cle:
Insert the key and turn the top of the key
toward the front of the vehicle, or
Turn the lock knob forward, then pull and
hold the door handle as you close the
door.
To unlock a front door from outside the
vehicle, insert the key and turn the top of
the key toward the rear of the vehicle.
74LHT0201
(1) LOCK
(2) UNLOCK
To lock a door from inside the vehicle, turn
the lock knob forward. Turn the lock knob
rearward to unlock the door.
To lock a rear door from outside the vehi-
cle, turn the lock knob forward and close
the door. You do not need to pull and hold
the door handle as you close the door.
NOTE:
Be sure to hold the door handle when you
close a locked front door, or the door will
not remain locked.
(2)
(1)
(3)
(4)
(2) (1)
EXAMPLE
Page 18 of 207
Downloaded from www.Manualslib.com manuals search engine 2-3BEFORE DRIVING
60MK0-14E
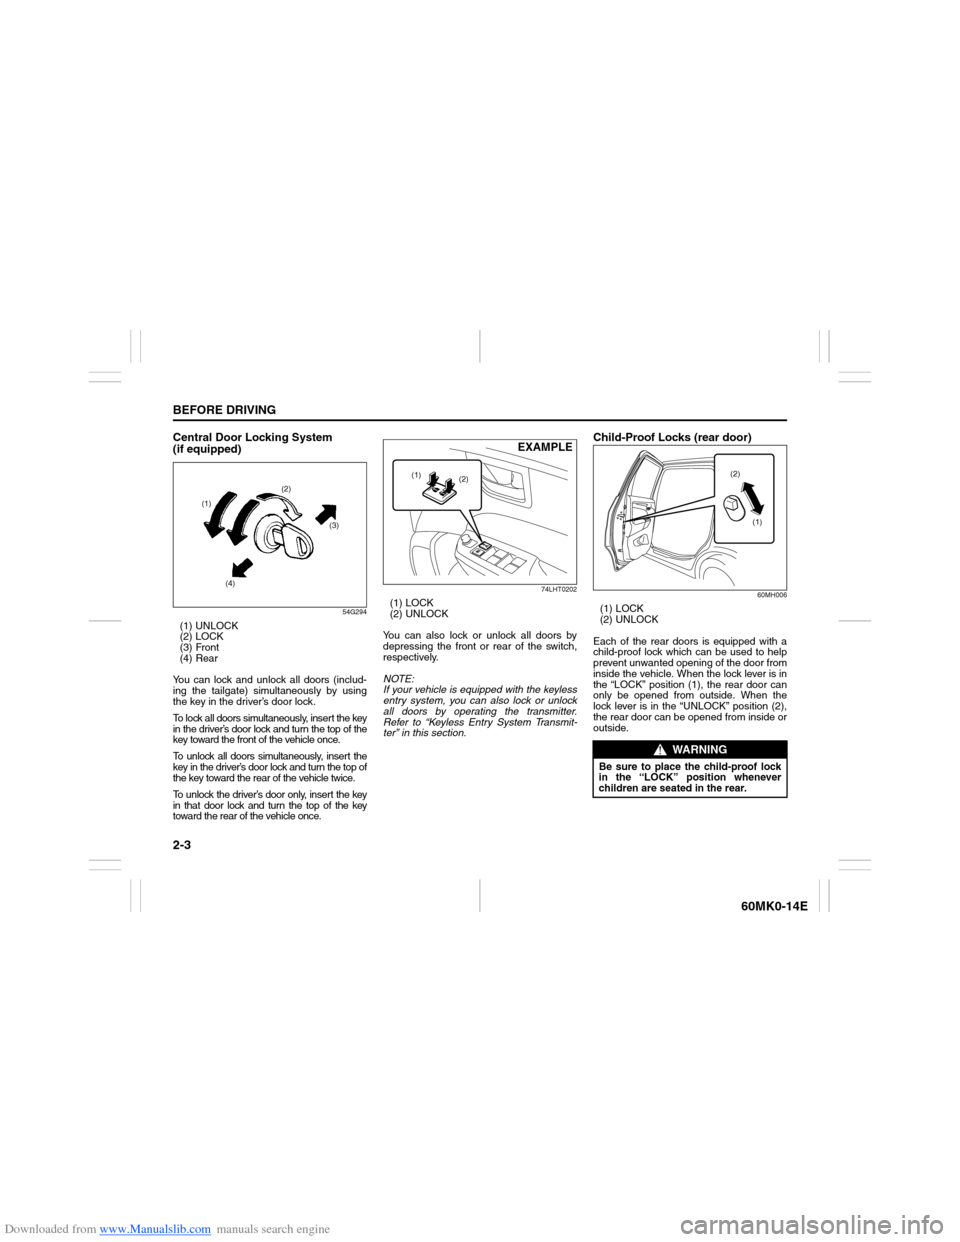
Central Door Locking System
(if equipped)
54G294
(1) UNLOCK
(2) LOCK
(3) Front
(4) Rear
You can lock and unlock all doors (includ-
ing the tailgate) simultaneously by using
the key in the driver’s door lock.
To lock all doors simultaneously, insert the key
in the driver’s door lock and turn the top of the
key toward the front of the vehicle once.
To unlock all doors simultaneously, insert the
key in the driver’s door lock and turn the top of
the key toward the rear of the vehicle twice.
To unlock the driver’s door only, insert the key
in that door lock and turn the top of the key
toward the rear of the vehicle once.
74LHT0202
(1) LOCK
(2) UNLOCK
You can also lock or unlock all doors by
depressing the front or rear of the switch,
respectively.
NOTE:
If your vehicle is equipped with the keyless
entry system, you can also lock or unlock
all doors by operating the transmitter.
Refer to “Keyless Entry System Transmit-
ter” in this section.
Child-Proof Locks (rear door)
60MH006
(1) LOCK
(2) UNLOCK
Each of the rear doors is equipped with a
child-proof lock which can be used to help
prevent unwanted opening of the door from
inside the vehicle. When the lock lever is in
the “LOCK” position (1), the rear door can
only be opened from outside. When the
lock lever is in the “UNLOCK” position (2),
the rear door can be opened from inside or
outside.
(1)(2)
(3)
(4)
EXAMPLE
(2) (1)
WARNING
Be sure to place the child-proof lock
in the “LOCK” position whenever
children are seated in the rear.
(2)
(1)
Page 21 of 207
Downloaded from www.Manualslib.com manuals search engine 2-6
BEFORE DRIVING
60MK0-14E
When the doors are unlocked:
The turn signal lights will flash twice.
If the interior light switch is in the
“DOOR” position, the interior light will
turn on for about 15 seconds and then
fade out. If you insert the key into the
ignition switch during this time, the light
will start to fade out immediately.
Be sure the doors are locked after you
operate the “LOCK” button (1).
NOTE:
If no door is opened within about 30 sec-
onds after the “UNLOCK” button (2) is
operated, the doors will automatically lock
again.
NOTE:
The maximum operating distance of the
keyless entry system transmitter is about
5 m (16 ft.), but this can vary depending
on the surroundings, especially near
other transmitting devices such as radio
towers or CB (Citizen’s Band) radios.
The door locks cannot be operated with
the transmitter, if the ignition key is
inserted in the ignition switch.
When any door is open, the door locks
can be operated only unlock with the
transmitter, and the turn signal light will
not flash.
If you lose one of the transmitters, ask
your SUZUKI dealer as soon as possible
for a replacement. Be sure to have your
dealer program the new transmitter codein your vehicle’s memory so that the old
code is erased.
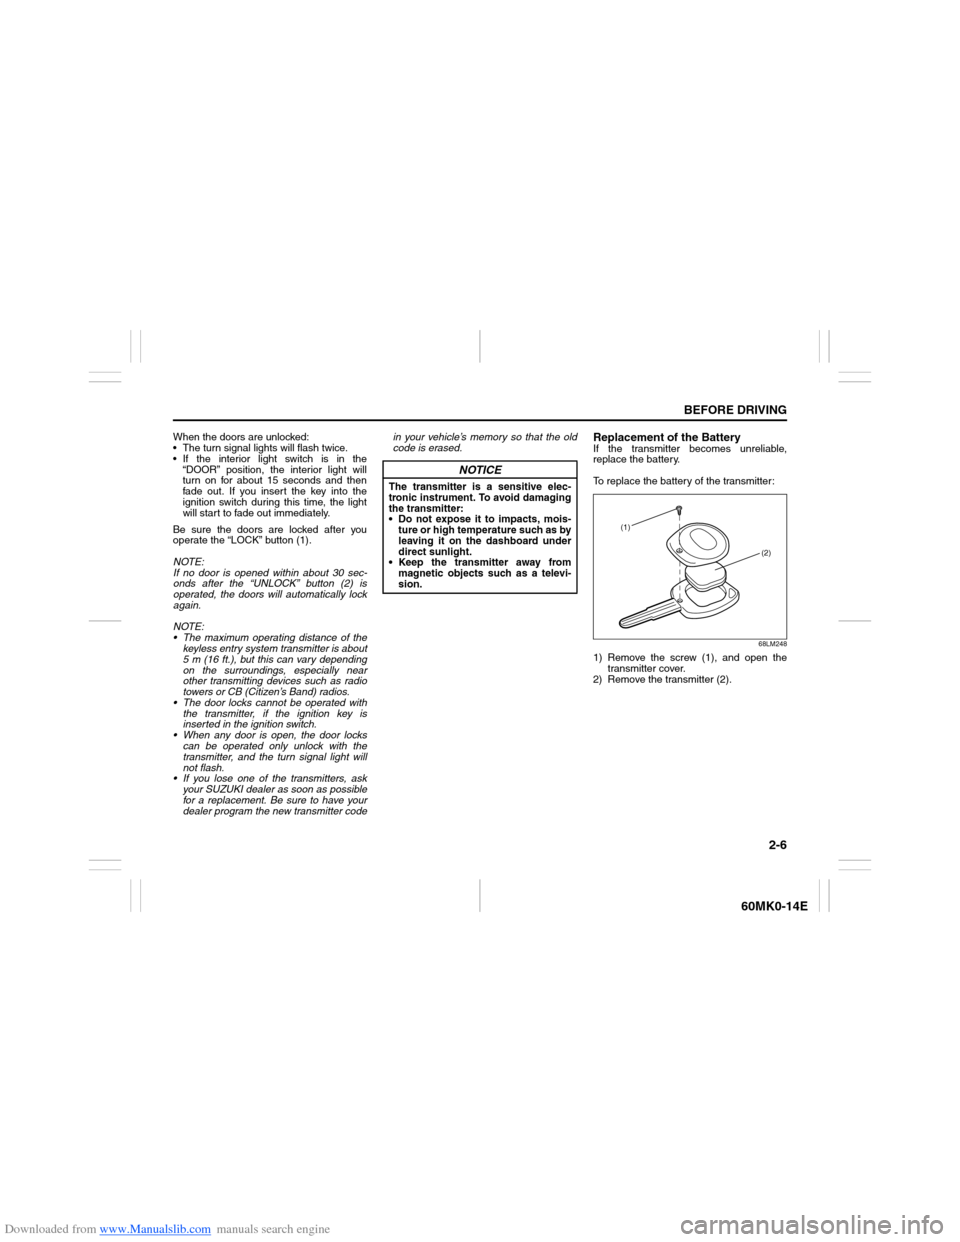
Replacement of the BatteryIf the transmitter becomes unreliable,
replace the battery.
To replace the battery of the transmitter:
68LM248
1) Remove the screw (1), and open the
transmitter cover.
2) Remove the transmitter (2).
NOTICE
The transmitter is a sensitive elec-
tronic instrument. To avoid damaging
the transmitter:
Do not expose it to impacts, mois-
ture or high temperature such as by
leaving it on the dashboard under
direct sunlight.
Keep the transmitter away from
magnetic objects such as a televi-
sion.
(1)
(2)
Page 35 of 207
Downloaded from www.Manualslib.com manuals search engine 2-20
BEFORE DRIVING
60MK0-14E
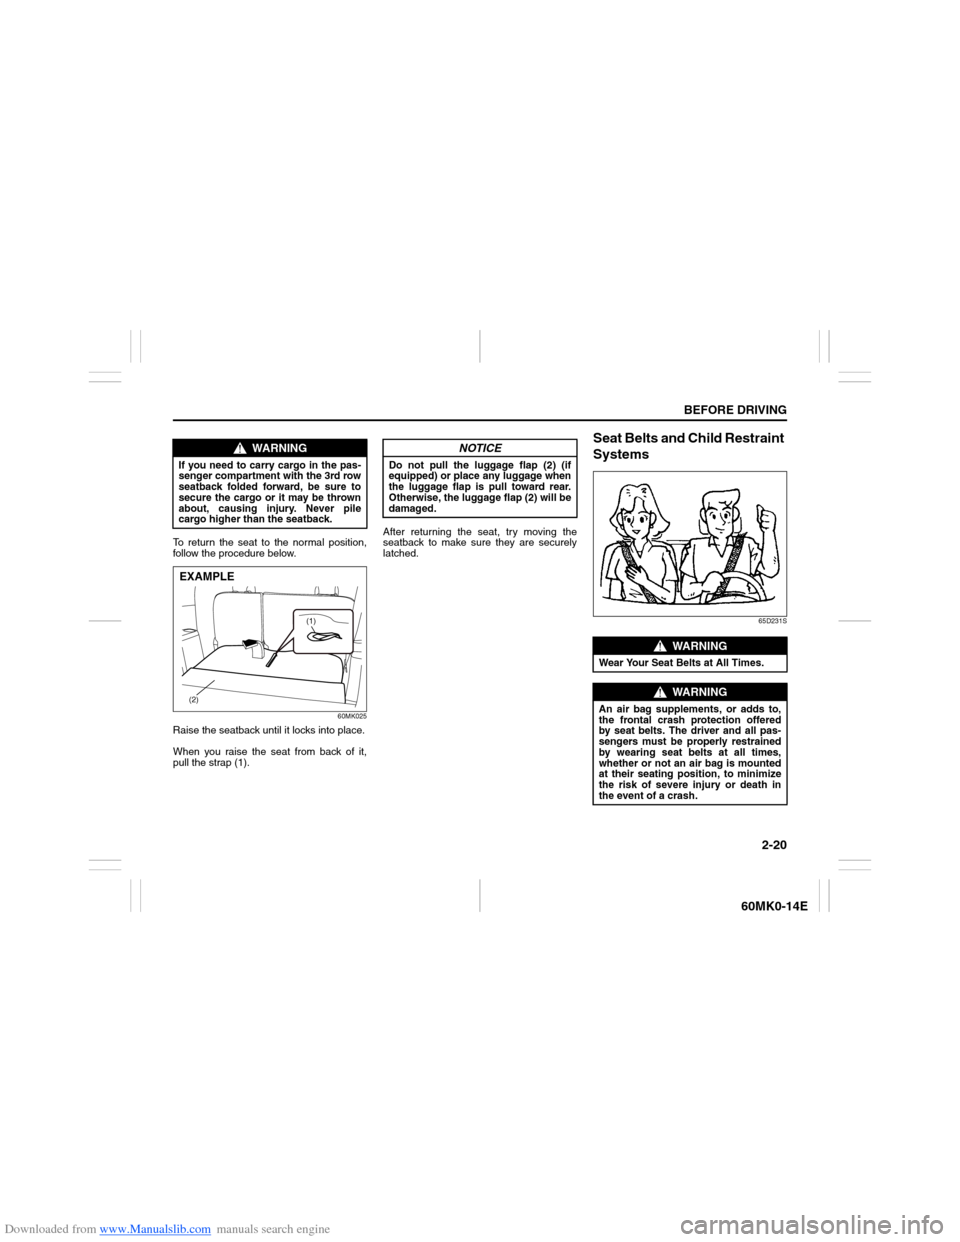
To return the seat to the normal position,
follow the procedure below.
60MK025
Raise the seatback until it locks into place.
When you raise the seat from back of it,
pull the strap (1). After returning the seat, try moving the
seatback to make sure they are securely
latched.
Seat Belts and Child Restraint
Systems
65D231S
WARNING
If you need to carry cargo in the pas-
senger compartment with the 3rd row
seatback folded forward, be sure to
secure the cargo or it may be thrown
about, causing injury. Never pile
cargo higher than the seatback.
(1)
(2)EXAMPLE
NOTICE
Do not pull the luggage flap (2) (if
equipped) or place any luggage when
the luggage flap is pull toward rear.
Otherwise, the luggage flap (2) will be
damaged.
WARNING
Wear Your Seat Belts at All Times.
WARNING
An air bag supplements, or adds to,
the frontal crash protection offered
by seat belts. The driver and all pas-
sengers must be properly restrained
by wearing seat belts at all times,
whether or not an air bag is mounted
at their seating position, to minimize
the risk of severe injury or death in
the event of a crash.
Page 53 of 207
Downloaded from www.Manualslib.com manuals search engine 2-38
BEFORE DRIVING
60MK0-14E
Warning and Indicator LightsBrake System Warning Light
65D477
Three different types of operations exist
depending on the vehicle’s specification.
1) The light comes on briefly when the
ignition switch is turned to the “ON”
position.
2) The light comes on when the parking
brake is engaged with the ignition
switch in the “ON” position.
3) The light comes on when under either
or both of above two conditions.
The light also comes on when the fluid in
the brake fluid reservoir falls below the
specified level.
The light should go out after starting the
engine and fully releasing the parking
brake, if the fluid level in the brake fluid res-
ervoir is adequate.
The light also comes on together with the
ABS warning light when the rear brake
force control function (proportioning valve
function) of the ABS system fails.If the brake system warning light comes on
while you are driving the vehicle, it may
mean that there is something wrong with
the vehicle’s brake system. If this happens,
you should:
1) Pull off the road and stop carefully.
2) Test the brakes by carefully starting and
stopping on the shoulder of the road.
– If you determine that it is safe, drive
cautiously at low speed to the nearest
dealer for repairs, or
– Have the vehicle towed to the nearest
dealer for repairs.NOTE:
Because the brake system is self-adjust-
ing, the fluid level will drop as the brake
pads become worn. Replenishing the
brake fluid reservoir is considered normal
periodic maintenance.
NOTE:
(Parking Brake Reminder Buzzer)
A buzzer sounds intermittently to remind
you to release the parking brake if you
start the vehicle without releasing the park-
ing brake. Make sure that the parking
brake is fully released and the brake sys-
tem warning light turns off.
WARNING
Remember that stopping distance
may be longer, you may have to push
harder on the pedal, and the pedal
may go down farther than normal.
WARNING
If any of the following conditions
occur, you should immediately ask
your SUZUKI dealer to inspect the
brake system.
If the brake system warning light
does not go out after the engine
has been started and the parking
brake has been fully released.
If the brake system warning light
does not come on when the igni-
tion switch is turned to the “ON”
position.
If the brake system warning light
comes on at any time during vehi-
cle operation.
Page 66 of 207
Downloaded from www.Manualslib.com manuals search engine 2-51BEFORE DRIVING
60MK0-14E
Lighting Operation
60MK011
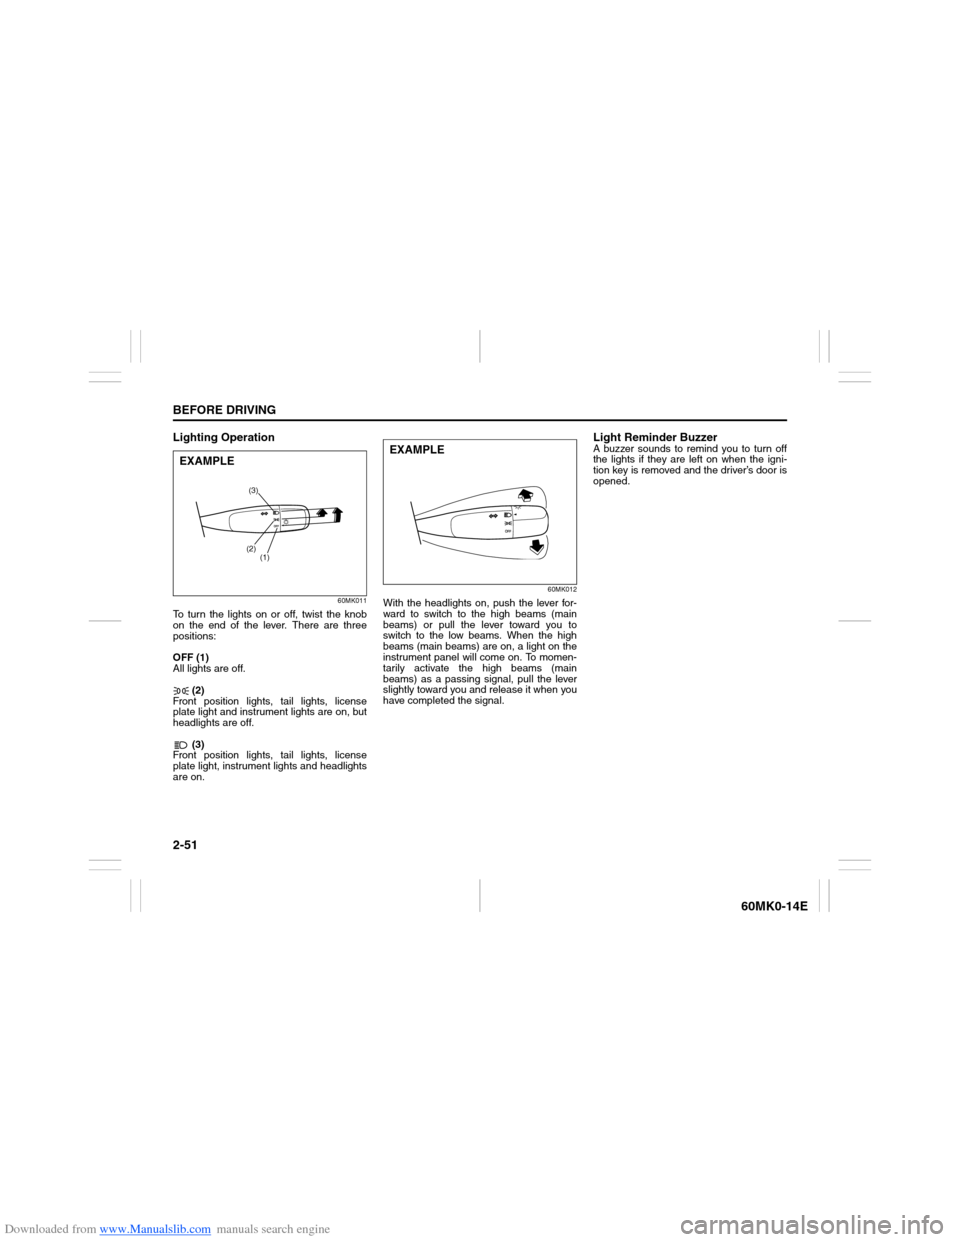
To turn the lights on or off, twist the knob
on the end of the lever. There are three
positions:
OFF (1)
All lights are off.
(2)
Front position lights, tail lights, license
plate light and instrument lights are on, but
headlights are off.
(3)
Front position lights, tail lights, license
plate light, instrument lights and headlights
are on.
60MK012
With the headlights on, push the lever for-
ward to switch to the high beams (main
beams) or pull the lever toward you to
switch to the low beams. When the high
beams (main beams) are on, a light on the
instrument panel will come on. To momen-
tarily activate the high beams (main
beams) as a passing signal, pull the lever
slightly toward you and release it when you
have completed the signal.
Light Reminder BuzzerA buzzer sounds to remind you to turn off
the lights if they are left on when the igni-
tion key is removed and the driver’s door is
opened.
(3)
(2)
(1)
EXAMPLE
EXAMPLE
Page 69 of 207
Downloaded from www.Manualslib.com manuals search engine 2-54
BEFORE DRIVING
60MK0-14E
Wiper and Washer Operation
When the ignition switch is in the “ON”
position, you can use the wiper/washer
lever or switch (if equipped).Windshield Wipers
74LHT0230
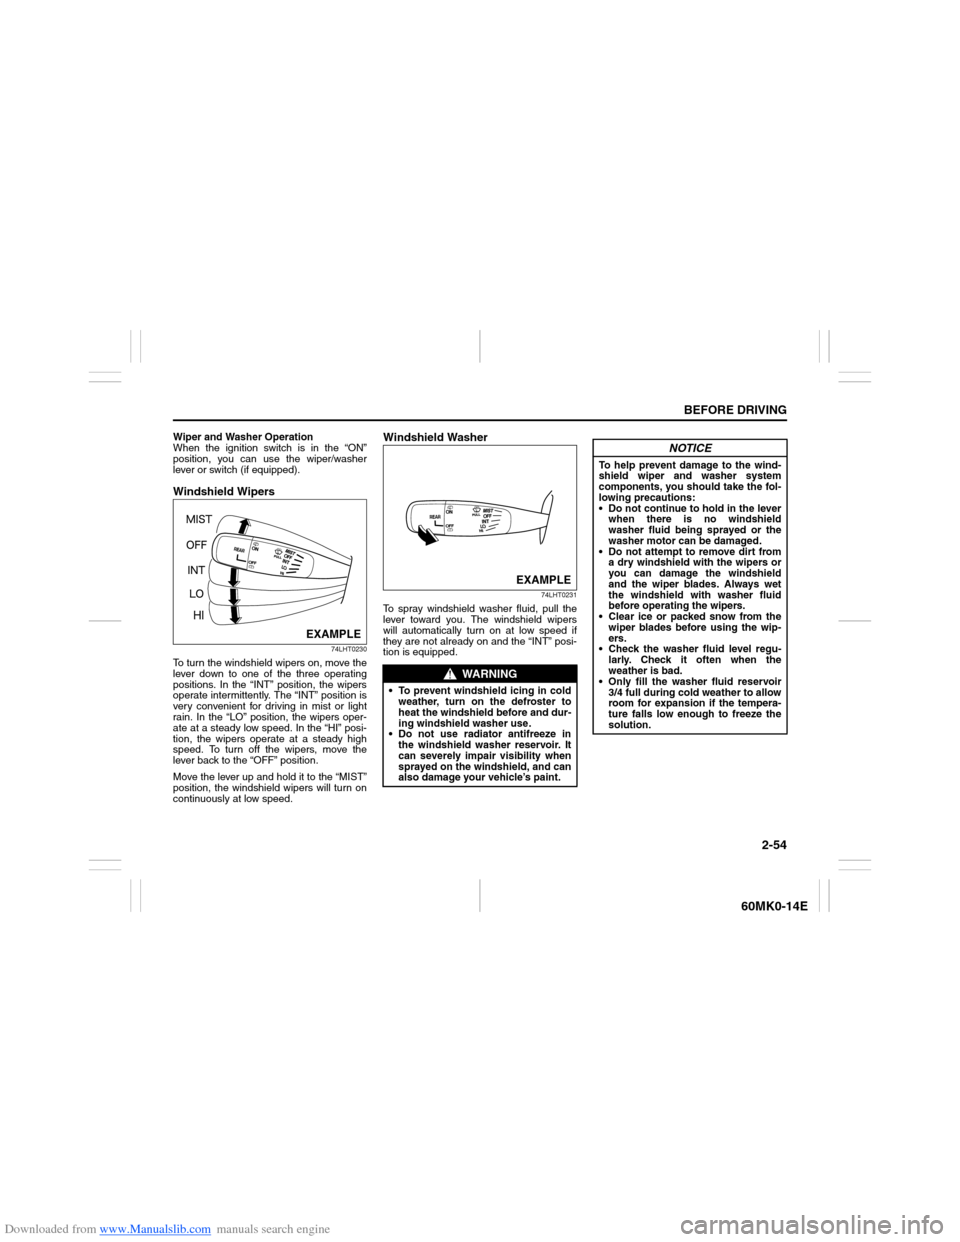
To turn the windshield wipers on, move the
lever down to one of the three operating
positions. In the “INT” position, the wipers
operate intermittently. The “INT” position is
very convenient for driving in mist or light
rain. In the “LO” position, the wipers oper-
ate at a steady low speed. In the “HI” posi-
tion, the wipers operate at a steady high
speed. To turn off the wipers, move the
lever back to the “OFF” position.
Move the lever up and hold it to the “MIST”
position, the windshield wipers will turn on
continuously at low speed.
Windshield Washer
74LHT0231
To spray windshield washer fluid, pull the
lever toward you. The windshield wipers
will automatically turn on at low speed if
they are not already on and the “INT” posi-
tion is equipped.
EXAMPLE
WARNING
To prevent windshield icing in cold
weather, turn on the defroster to
heat the windshield before and dur-
ing windshield washer use.
Do not use radiator antifreeze in
the windshield washer reservoir. It
can severely impair visibility when
sprayed on the windshield, and can
also damage your vehicle’s paint.
EXAMPLE
NOTICE
To help prevent damage to the wind-
shield wiper and washer system
components, you should take the fol-
lowing precautions:
Do not continue to hold in the lever
when there is no windshield
washer fluid being sprayed or the
washer motor can be damaged.
Do not attempt to remove dirt from
a dry windshield with the wipers or
you can damage the windshield
and the wiper blades. Always wet
the windshield with washer fluid
before operating the wipers.
Clear ice or packed snow from the
wiper blades before using the wip-
ers.
Check the washer fluid level regu-
larly. Check it often when the
weather is bad.
Only fill the washer fluid reservoir
3/4 full during cold weather to allow
room for expansion if the tempera-
ture falls low enough to freeze the
solution.
Page 90 of 207
Downloaded from www.Manualslib.com manuals search engine 4-1DRIVING TIPS
60MK0-14E
52D078S
Running-in Catalytic Converter
80G106
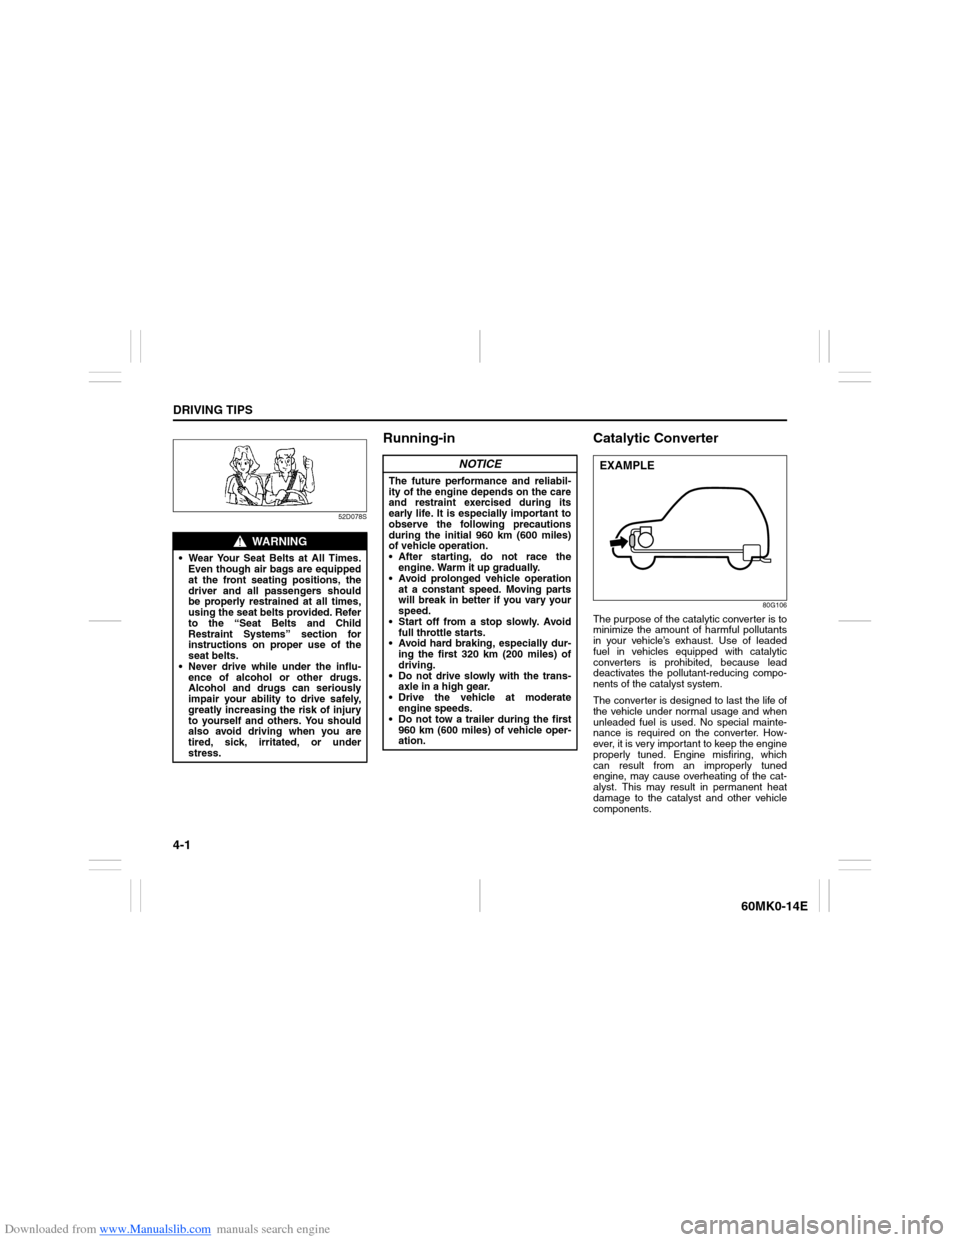
The purpose of the catalytic converter is to
minimize the amount of harmful pollutants
in your vehicle’s exhaust. Use of leaded
fuel in vehicles equipped with catalytic
converters is prohibited, because lead
deactivates the pollutant-reducing compo-
nents of the catalyst system.
The converter is designed to last the life of
the vehicle under normal usage and when
unleaded fuel is used. No special mainte-
nance is required on the converter. How-
ever, it is very important to keep the engine
properly tuned. Engine misfiring, which
can result from an improperly tuned
engine, may cause overheating of the cat-
alyst. This may result in permanent heat
damage to the catalyst and other vehicle
components.
WARNING
Wear Your Seat Belts at All Times.
Even though air bags are equipped
at the front seating positions, the
driver and all passengers should
be properly restrained at all times,
using the seat belts provided. Refer
to the “Seat Belts and Child
Restraint Systems” section for
instructions on proper use of the
seat belts.
Never drive while under the influ-
ence of alcohol or other drugs.
Alcohol and drugs can seriously
impair your ability to drive safely,
greatly increasing the risk of injury
to yourself and others. You should
also avoid driving when you are
tired, sick, irritated, or under
stress.
NOTICE
The future performance and reliabil-
ity of the engine depends on the care
and restraint exercised during its
early life. It is especially important to
observe the following precautions
during the initial 960 km (600 miles)
of vehicle operation.
After starting, do not race the
engine. Warm it up gradually.
Avoid prolonged vehicle operation
at a constant speed. Moving parts
will break in better if you vary your
speed.
Start off from a stop slowly. Avoid
full throttle starts.
Avoid hard braking, especially dur-
ing the first 320 km (200 miles) of
driving.
Do not drive slowly with the trans-
axle in a high gear.
Drive the vehicle at moderate
engine speeds.
Do not tow a trailer during the first
960 km (600 miles) of vehicle oper-
ation.
EXAMPLE
Page 91 of 207
Downloaded from www.Manualslib.com manuals search engine 4-2
DRIVING TIPS
60MK0-14E
54G584S
Improving Fuel EconomyThe following instructions will help you
improve fuel economy.
Avoid excessive idling
If you are to wait for more than a minute
while you are parked, stop the engine and
start it again later. When warming up a
cold engine, allow the engine to idle until
the temperature gauge pointer comes up
to the “C” position (if the idling is not pro-
hibited). In this position, the engine is suffi-
ciently warm for starting off.
Avoid “fast” starts
Fast starts away from lights or stop signs
will consume fuel unnecessarily and
shorten engine life. Start off slowly.
Avoid unnecessary stops
Avoid unnecessary deceleration and stop-
ping. Try to maintain a slow, steady speed
whenever possible. Slowing down and then
accelerating again uses more fuel.
Keep a steady cruising speed
Keep as constant a speed as road and traf-
fic conditions will permit.
NOTICE
To avoid damaging catalyst or other
vehicle damage:
Maintain the engine in the proper
operating condition.
In the event of an engine malfunc-
tion, particularly one involving
engine misfiring or other apparent
loss of performance, have the vehi-
cle serviced promptly.
Do not turn off the engine or inter-
rupt the ignition when the transaxle
is in gear and the vehicle is in
motion.
Do not try to start the engine by
pushing or towing the vehicle, or
coasting down a hill.
Do not idle the engine with any
spark plug wires disconnected or
removed, such as during diagnos-
tic testing.
Do not idle the vehicle for pro-
longed periods if idling seems
rough or there are other malfunc-
tions.
Do not allow the fuel tank to get
near the empty level.
Avoid driving your vehicle at exces-
sively high engine speed in or
around the red zone of the tachom-
eter (if equipped).
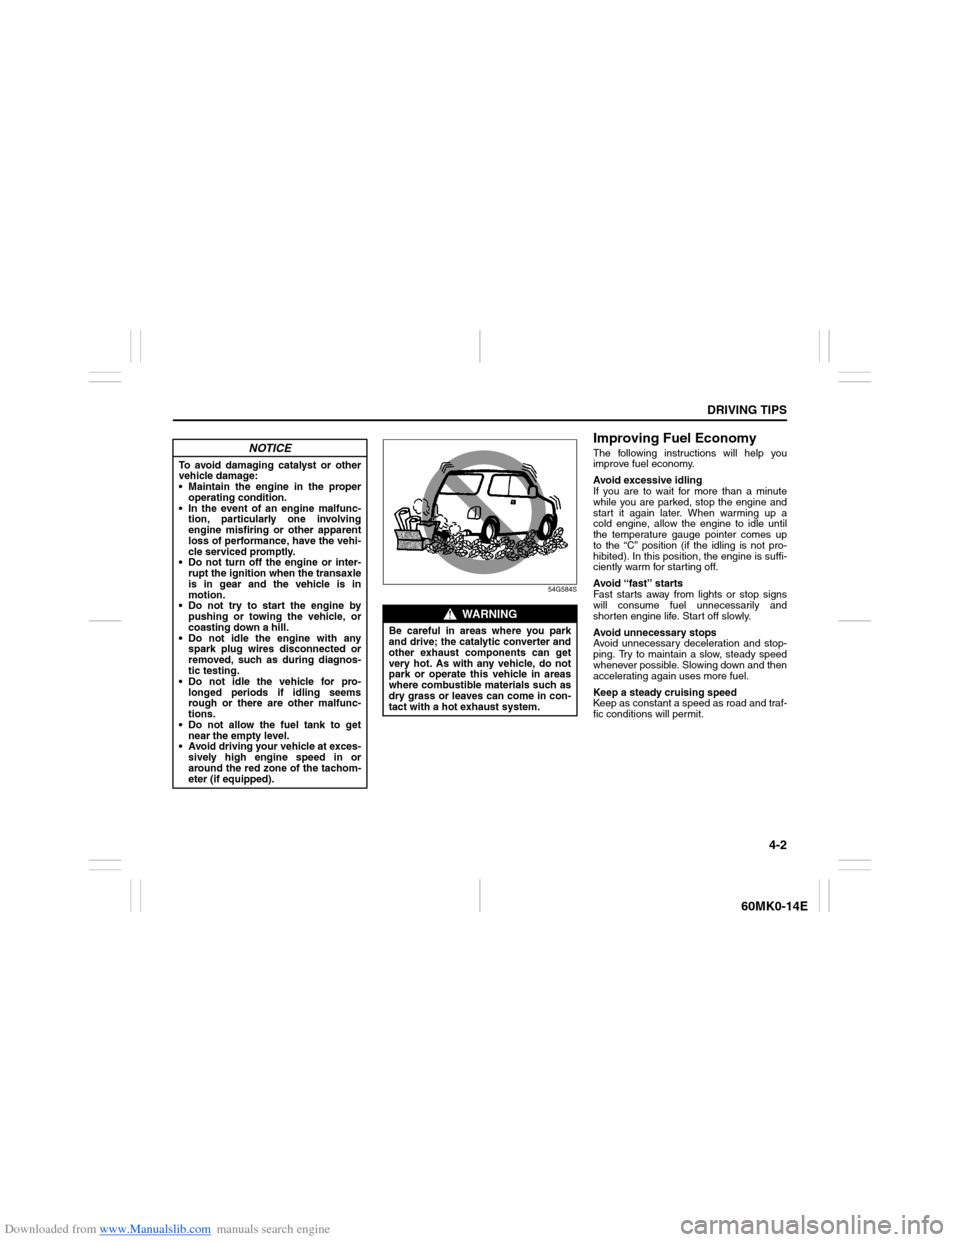
WARNING
Be careful in areas where you park
and drive; the catalytic converter and
other exhaust components can get
very hot. As with any vehicle, do not
park or operate this vehicle in areas
where combustible materials such as
dry grass or leaves can come in con-
tact with a hot exhaust system.