key SUZUKI FORENZA 2007 Owner's Manual
[x] Cancel search | Manufacturer: SUZUKI, Model Year: 2007, Model line: FORENZA, Model: SUZUKI FORENZA 2007Pages: 225, PDF Size: 4.39 MB
Page 95 of 225
3-19 INSTRUMENT PANEL
85Z03-03E
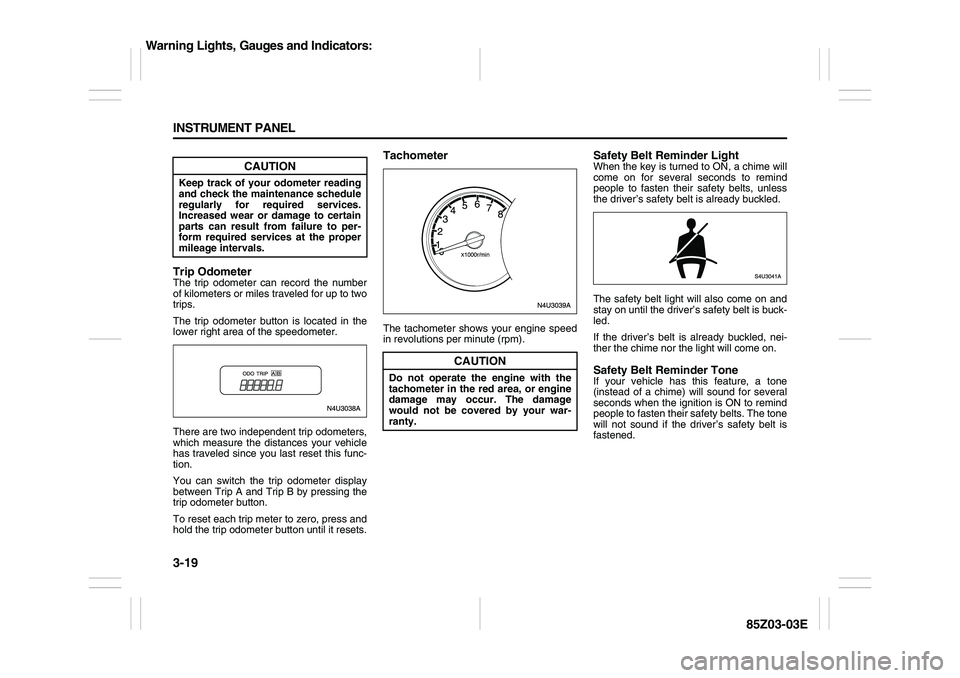
Trip OdometerThe trip odometer can record the number
of kilometers or miles traveled for up to two
trips.
The trip odometer button is located in the
lower right area of the speedometer.
There are two independent trip odometers,
which measure the distances your vehicle
has traveled since you last reset this func-
tion.
You can switch the trip odometer display
between Trip A and Trip B by pressing the
trip odometer button.
To reset each trip meter to zero, press and
hold the trip odometer button until it resets.
TachometerThe tachometer shows your engine speed
in revolutions per minute (rpm).
Safety Belt Reminder LightWhen the key is turned to ON, a chime will
come on for several seconds to remind
people to fasten their safety belts, unless
the driver’s safety belt is already buckled.
The safety belt light will also come on and
stay on until the driver’s safety belt is buck-
led.
If the driver’s belt is already buckled, nei-
ther the chime nor the light will come on.Safety Belt Reminder ToneIf your vehicle has this feature, a tone
(instead of a chime) will sound for several
seconds when the ignition is ON to remind
people to fasten their safety belts. The tone
will not sound if the driver’s safety belt is
fastened.
CAUTION
Keep track of your odometer reading
and check the maintenance schedule
regularly for required services.
Increased wear or damage to certain
parts can result from failure to per-
form required services at the proper
mileage intervals.
CAUTION
Do not operate the engine with the
tachometer in the red area, or engine
damage may occur. The damage
would not be covered by your war-
ranty.
Warning Lights, Gauges and Indicators:
Page 96 of 225
3-20 INSTRUMENT PANEL
85Z03-03E
Air Bag Readiness LightThere is an air bag readiness light on the
instrument panel. The air bag readiness
system checks the air bag’s electrical sys-
tem for malfunctions. The light tells you if
there is an electrical problem. The system
check includes the air bag sensor, the air
bag modules, the wiring and the crash
sensing and diagnostic module. For more
information on the air bag system, see “Air
Bag Systems” in section 1.
This light will come on when you start your
vehicle, and it will flash for a few seconds.
Then the light should go out. This means
the system is ready.If the air bag readiness light stays on after
you start the vehicle or comes on or
flashes when you are driving, the air bag
system may not work properly. Have your
vehicle serviced right away.
The air bag readiness light should be illu-
minated for a few seconds when you turn
the ignition key to ON. If the light doesn’t
come on then, have it fixed so it will be
ready to warn you if there is a problem.
Charging System LightThe charging system light will come on
when you turn on the ignition, and the
engine is not running, as a check to show
you it is working.
When the engine is running, the light
should go out.
If it stays on, or comes on while you are
driving, you may have a problem with the
electrical charging system. It could indicate
that you have a loose generator drive belt,
or another electrical problem. Have it
checked right away. Driving while this light
is on could drain your battery.
If you must drive a short distance with the
light on, be certain to turn off all your
accessories, such as the radio and air con-
ditioner.
WARNING
It is absolutely essential that the
driver and passengers wear their
safety belts at all times. Persons who
are not wearing safety belts have a
much greater risk of injury if an acci-
dent occurs. Make a regular habit of
buckling your safety belt before put-
ting the key in the ignition.
S4U3042A
WARNING
If the air bag readiness light stays on
after you start your vehicle, it means
the air bag system may not be work-
ing properly. The air bags in your
vehicle may not inflate in a crash, or
they could even inflate without a
crash. To help avoid injury to yourself
or others, have your vehicle serviced
right away if the air bag readiness
light stays on after you start your
vehicle.
Warning Lights, Gauges and Indicators:
Page 97 of 225
3-21 INSTRUMENT PANEL
85Z03-03E
Brake System Warning LightYour vehicle’s hydraulic brake system is
divided into two parts. If one part isn’t
working, the other part can still work and
you will be able to stop the vehicle. For
good braking, though, you need both parts
working well.
If the warning light comes on, there is a
brake problem. Have your brake system
inspected right away.
This light should come on briefly when you
turn the ignition key to ON. If it doesn’t
come on then, have it fixed so it will be
ready to warn you if there’s a problem.
When the ignition is on, the brake system
warning light will also come on when you
set your parking brake. The light will stay
on if your parking brake doesn’t release
fully. If the lights stays on after your parking
brake is fully released, it means you have a
brake problem.If the light comes on while you are driving,
pull off the road and stop carefully. You
may notice that the pedal is harder to
push. Or, the pedal may go closer to the
floor. It may take longer to stop. If the light
is still on, have the vehicle towed for ser-
vice. See “Towing Your Vehicle” in section
4.
Anti-Lock Brake System Warning
LightIf your vehicle has an anti-lock brake sys-
tem, the ABS warning light comes on
briefly when you turn the ignition ON. This
indicates that the system is performing a
self-check and the indicator bulb is operat-
ing properly. The light should go out after
several seconds.
Contact your SUZUKI dealer for repairs if
the ABS warning light does any of the fol-
lowing:
Does not come on when the ignition is
turned ON.
Does not go out after several seconds.
Comes on while driving.
If the ABS warning light comes on while
driving, your vehicle may have an ABS
malfunction. Although your vehicle will
operate normally without ABS, have your
SUZUKI dealer check the system and
make any necessary repairs as soon as
possible.
WARNING
If any of the following conditions
occur, you should immediately ask
your SUZUKI dealer to inspect the
brake system.
If the brake system warning light
does not go out after the engine
has been started and the parking
brake has been fully released.
If the brake system warning light
does not come on when the igni-
tion switch is turned to the “ON”
position.
If the brake system warning light
comes on at any time during vehi-
cle operation.
WARNING
If the brake system warning light
comes on, remember that stopping
distance may be longer, you may
have to push harder on the pedal,
and the pedal may go down farther
than normal.
Warning Lights, Gauges and Indicators:
Page 99 of 225
3-23 INSTRUMENT PANEL
85Z03-03E
cated by the system before any problem is
apparent. This may prevent more serious
damage to your vehicle. This system is
also designed to assist your service techni-
cian in correctly diagnosing any malfunc-
tion.
When the ignition is on, this light should
come on and should go out after a few sec-
onds as a check to show you it is working.
If the light doesn’t come on, have it
repaired.This light will also come on during a mal-
function in one of two ways:
Light Flashing
A misfire condition has been detected. A
misfire increases vehicle emissions and
may damage the emission control sys-
tem on your vehicle. Diagnosis and ser-
vice may be required.
Light On Steady
An emission control system malfunction
has been detected on your vehicle. Diag-
nosis and service may be required.
If the Light Is Flashing
The following may prevent more serious
damage to your vehicle:
Reducing vehicle speed.
Avoiding hard accelerations.
Avoiding steep uphill grades.
If the light stops flashing and remains on
steady, see “If the Light Is On Steady” fol-
lowing.
If the light continues to flash, when it is
safe to do so, stop the vehicle. Find a safe
place to park your vehicle. Turn the key off,
wait at least 10 seconds and restart the
engine. If the light remains on steady, see
“If the Light Is On Steady” following. If the
light is still flashing, see your SUZUKI
dealer for service as soon as possible. Fol-
low the driving guidelines described above.If the Light Is On Steady
You also may be able to correct the emis-
sion system malfunction by considering the
following:
Did you recently put fuel into your vehicle?
If so, reinstall the fuel cap, making sure to
fully install the cap. See “Filling Your Tank”
in section 5. The diagnostic system can
determine if the fuel cap has been left off
or is improperly installed. A loose or miss-
ing fuel cap will allow fuel to evaporate into
the atmosphere. A few driving trips with the
cap properly installed should turn the light
off.
Did you just drive through a deep puddle of
water?
If so, your electrical system may be wet.
The condition will usually be corrected
when the electrical system dries out. A few
driving trips should turn the light off.
Have you recently changed brands of fuel?
If so, be sure to fuel your vehicle with qual-
ity fuel. See “Gasoline Octane” in section
5. Poor fuel quality will cause your engine
not to run as efficiently as designed. You
may notice stalling after start-up, stalling
when you put the vehicle into gear, misfir-
ing, hesitation on acceleration or stumbling
on acceleration. (These conditions may go
away once the engine is warmed up.) This
will be detected by the system and cause
the light to turn on.
CAUTION
If you keep driving your vehicle with
this light on, your emission controls
may not work as well, your fuel econ-
omy may not be as good, and your
engine may not run as smoothly. This
could lead to costly repairs that may
not be covered by your warranty.
CAUTION
Modifications made to the engine,
transmission, exhaust or intake or
fuel system of your vehicle can affect
your vehicle’s emission controls and
may cause this light to come on.
Modifications to these systems could
lead to costly repairs not covered by
your warranty. This may also result in
a failure to pass a required Emission
Inspection/Maintenance test.
Warning Lights, Gauges and Indicators:
Page 102 of 225
3-26 INSTRUMENT PANEL
85Z03-03E
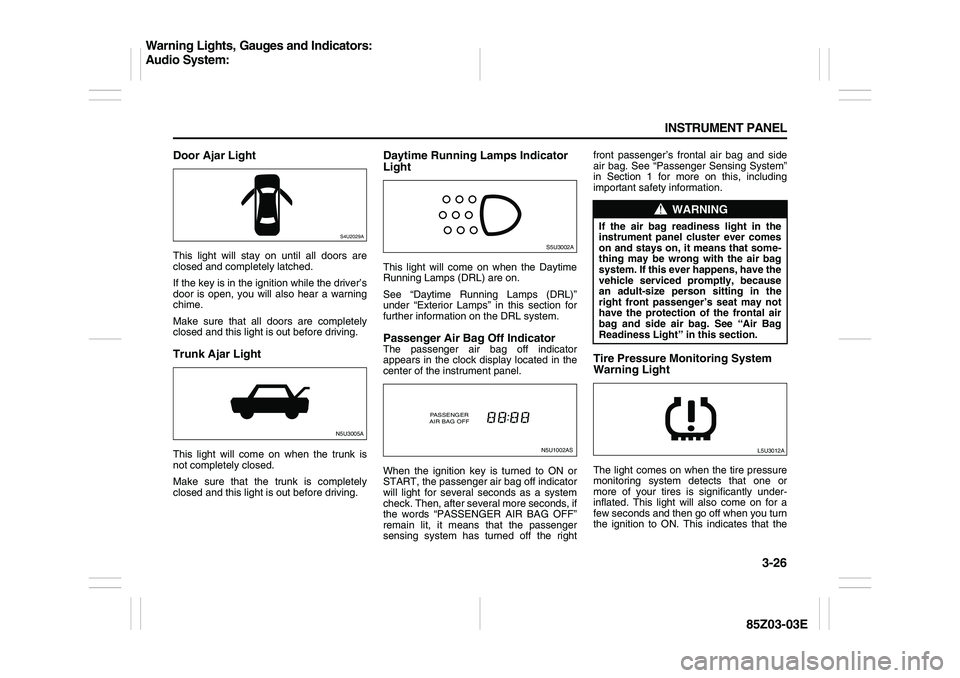
Door Ajar LightThis light will stay on until all doors are
closed and completely latched.
If the key is in the ignition while the driver’s
door is open, you will also hear a warning
chime.
Make sure that all doors are completely
closed and this light is out before driving.Trunk Ajar LightThis light will come on when the trunk is
not completely closed.
Make sure that the trunk is completely
closed and this light is out before driving.
Daytime Running Lamps Indicator
LightThis light will come on when the Daytime
Running Lamps (DRL) are on.
See “Daytime Running Lamps (DRL)”
under “Exterior Lamps” in this section for
further information on the DRL system.Passenger Air Bag Off IndicatorThe passenger air bag off indicator
appears in the clock display located in the
center of the instrument panel.
When the ignition key is turned to ON or
START, the passenger air bag off indicator
will light for several seconds as a system
check. Then, after several more seconds, if
the words “PASSENGER AIR BAG OFF”
remain lit, it means that the passenger
sensing system has turned off the rightfront passenger’s frontal air bag and side
air bag. See “Passenger Sensing System”
in Section 1 for more on this, including
important safety information.
Tire Pressure Monitoring System
Warning LightThe light comes on when the tire pressure
monitoring system detects that one or
more of your tires is significantly under-
inflated. This light will also come on for a
few seconds and then go off when you turn
the ignition to ON. This indicates that the
S4U2029AN5U3005A
S5U3002AN5U1002AS
PASSENGER
AIR BAG OFF
WARNING
If the air bag readiness light in the
instrument panel cluster ever comes
on and stays on, it means that some-
thing may be wrong with the air bag
system. If this ever happens, have the
vehicle serviced promptly, because
an adult-size person sitting in the
right front passenger’s seat may not
have the protection of the frontal air
bag and side air bag. See “Air Bag
Readiness Light” in this section.
L5U3012A
Warning Lights, Gauges and Indicators:
Audio System:
Page 103 of 225
3-27 INSTRUMENT PANEL
85Z03-03E
tire pressure monitoring system is func-
tioning properly.
Your vehicle has also been equipped with
a TPMS malfunction indictor to indicate
when the system is not operating properly.
The TPMS malfunction indicator is com-
bined with the low tire pressure telltale.
When the system detects a malfunction,
the telltale will flash for approximately one
minute and then remain continuously illu-
minated. This sequence will continue upon
subsequent vehicle start-ups as long as
the malfunction exists.In this situation, please have the system
inspected by an authorized service facility.
If you replace one or more tires and the
TPMS warning light goes off during driv-
ing, there is no problem. However, if the
warning light does not go off, or if it flashes
again when the vehicle is driven, have the
vehicle inspected by an authorized service
facility.
WARNING
Each tire, including the spare (if pro-
vided), should be checked monthly
when cold and inflated to the inflation
pressure recommended by the vehi-
cle manufacturer on the vehicle plac-
ard or tire inflation pressure label and
this manual. (If your vehicle has tires
of a different size than the size indi-
cated on the vehicle label or tire infla-
tion pressure label, you should
determine the proper tire inflation
pressure for those tires.)
As an added safety feature, your
vehicle has been equipped with a tire
pressure monitoring system (TPMS)
that illuminates a low tire pressure
telltale when one or more of your
tires is significantly under-inflated.
Accordingly, when the low tire pres-
sure telltale illuminates, you should
stop and check your tires as soon as
possible and inflate them to the
proper pressure. Driving on a signifi-
cantly under-inflated tire causes the
tire to overheat and can lead to tire
failure.
Under-inflation also reduces fuel effi-
ciency and tire tread life and may
affect the vehicle’s handling and
stopping ability.
(Continued)
WARNING
(Continued)
Please note that the TPMS is not a
substitute for proper tire mainte-
nance, and it is the driver’s responsi-
bility to maintain correct tire
pressure, even if under-inflation has
not reached the level to trigger illumi-
nation of the TPMS low tire pressure
telltale.
WARNING
If the tire pressure monitoring system
warning light does not illuminate
when the ignition key is turned to the
“ON” position, have the system
inspected by an authorized service
facility. If the warning light flashes
while driving, check to see whether
the warning light goes off after a few
minutes of driving.
WARNING
When the malfunction indicator is
illuminated, the system may not be
able to detect or signal low tire pres-
sure as intended. TPMS malfunctions
may occur for a variety of reasons,
including the installation of replace-
ment or alternate tires or wheels on
the vehicle that prevent the TPMS
from functioning properly. Always
check the TPMS malfunction telltale
after replacing one or more tires or
wheels on your vehicle to ensure that
the replacement or alternate tires and
wheels allow the TPMS to continue to
function properly.
Audio System:
Page 125 of 225
4-1 DRIVING YOUR VEHICLE
85Z03-03E
Your Driving, the Road, and
Your VehicleDefensive DrivingThe best advice anyone can give about
driving is: Drive defensively.
Please start by using a very important
safety device in your vehicle: Your safety
belt. Buckle up. See “Safety Belts: They
Are for Everyone” in section 1.
Defensive driving really means “be ready
for anything.” On city streets, rural roads or
freeways, it means “always expect the
unexpected.”
Assume that pedestrians or other drivers
are going to be careless and make mis-
takes. Anticipate what they might do. Be
ready for their mistakes.
Rear-end collisions are about the most
preventable of accidents. Yet they are com-
mon. Allow enough following distance. It’s
the best defensive driving maneuver, in
both city and rural driving. You never know
when the vehicle in front of you is going to
brake or turn suddenly.
Defensive driving requires that a driver
concentrate on the driving task. Anything
that distracts from the driving task – such
as concentrating on a cellular telephone
call, reading, or reaching for something on
the floor – makes proper defensive driving
more difficult and can even cause a colli-
sion, with resulting injury. Ask a passengerto help do things like this, or pull off the
road in a safe place to do them yourself.
These simple defensive driving tech-
niques could save your life.
Drunken DrivingDeath and injury associated with drinking
and driving is a national tragedy. It’s the
number one contributor to the highway
death toll, claiming thousands of victims
every year.
Alcohol affects four things that everyone
needs to drive a vehicle:
Judgment
Muscular Coordination
Vision
Attentiveness.
Police records show that almost half of all
motor vehicle-related deaths involve alco-
hol. In most cases, these deaths are the
result of someone who was drinking and
driving. In recent years, more than 16,000
annual motor vehicle-related deaths have
been associated with the use of alcohol,
with more than 300,000 people injured.
Many adults – by some estimates, nearly
half the adult population – choose never to
drink alcohol, so they never drive after
drinking. For persons under 21, it is
against the law in every U.S. state to drink
alcohol. There are good medical, psycho-
logical and developmental reasons for
these laws.The obvious way to eliminate the leading
highway safety problem is for people never
to drink alcohol and then drive. But what if
people do? How much is “too much” if
someone plans to drive? It’s a lot less than
many might think. Although it depends on
each person and situation, here is some
general information on the problem.
The Blood Alcohol Concentration (BAC) of
someone who is drinking depends upon
four things:
The amount of alcohol consumed
The drinker’s body weight
The amount of food that is consumed
before and during drinking
The length of time it has taken the
drinker to consume the alcohol.
According to the American Medical Associ-
ation, a 180 lb (82 kg) person who drinks
three 12 ounce (355 ml) bottles of beer in
an hour will end up with a BAC of about
0.06 percent. The person would reach the
same BAC by drinking three 4 ounce (120
ml) glasses of wine or three mixed drinks if
each had 1-1/2 ounces (45 ml) of liquors
like whiskey, gin or vodka.
Your Driving, the Road, and Your Vehicle:
Page 140 of 225
4-16 DRIVING YOUR VEHICLE
85Z03-03E
TowingTowing Your VehicleConsult your SUZUKI dealer or a profes-
sional towing service if you need to have
your disabled vehicle towed.
If you want to tow your vehicle behind
another vehicle for recreational purposes
(such as behind a motorhome), see the fol-
lowing section, “Recreational Vehicle Tow-
ing”.Recreational Vehicle TowingRecreational vehicle towing means towing
your vehicle behind another vehicle – such
as behind a motorhome. The two most
common types of recreational vehicle tow-
ing are known as “dinghy towing” (towing
your vehicle with all four wheels on the
ground) and “dolly towing” (towing your
vehicle with two wheels on the ground and
two wheels up on a device known as a
“dolly”).
With the proper preparation and equip-
ment, many vehicles can be towed in these
ways. See the following sections, “Dinghy
Towing” and “Dolly Towing”.Here are some important things to con-
sider before you do recreational vehicle
towing:
What’s the towing capacity of the towing
vehicle? Be sure you read the tow vehi-
cle manufacturer’s recommendations.
How far will you tow? Some vehicles
have restrictions on how far and how
long they can tow.
Do you have the proper towing equip-
ment? See your SUZUKI dealer or traile-
ring professional for additional advice
and equipment recommendations.
Is your vehicle ready to be towed? Just
as you would prepare your vehicle for a
long trip, you’ll want to make sure your
vehicle is prepared to be towed. See
“Before Leaving on a Long Trip” in this
section.
Dinghy Towing
Your vehicle was not designed to be towed
with all four wheels on the ground. If your
vehicle must be towed, you should use a
dolly. See “Dolly Towing” that follows for
more information.Dolly Towing
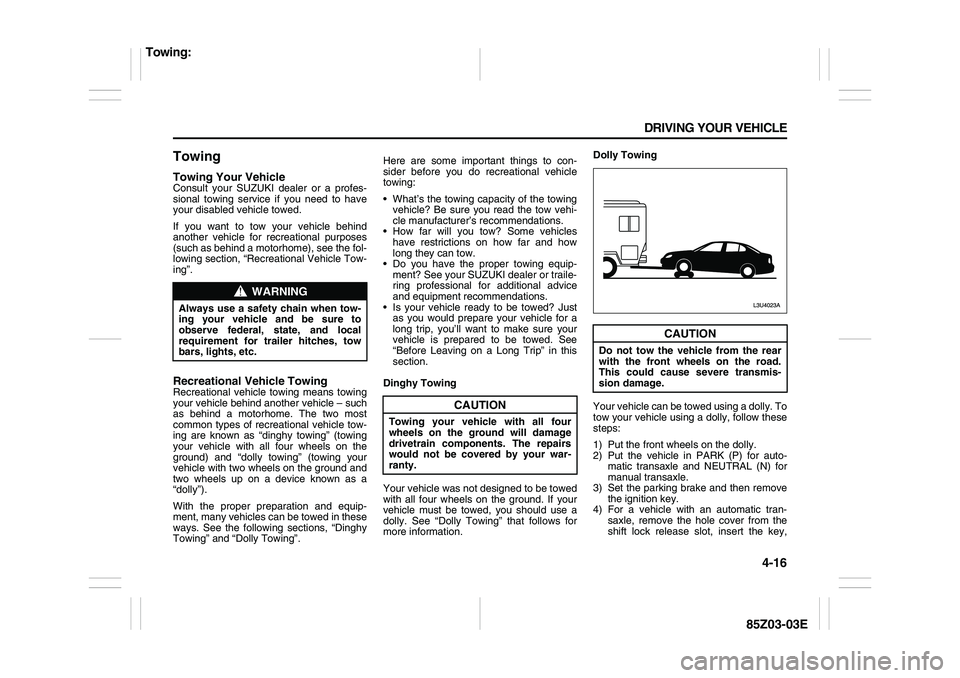
Your vehicle can be towed using a dolly. To
tow your vehicle using a dolly, follow these
steps:
1) Put the front wheels on the dolly.
2) Put the vehicle in PARK (P) for auto-
matic transaxle and NEUTRAL (N) for
manual transaxle.
3) Set the parking brake and then remove
the ignition key.
4) For a vehicle with an automatic tran-
saxle, remove the hole cover from the
shift lock release slot, insert the key,
WARNING
Always use a safety chain when tow-
ing your vehicle and be sure to
observe federal, state, and local
requirement for trailer hitches, tow
bars, lights, etc.
CAUTION
Towing your vehicle with all four
wheels on the ground will damage
drivetrain components. The repairs
would not be covered by your war-
ranty.
CAUTION
Do not tow the vehicle from the rear
with the front wheels on the road.
This could cause severe transmis-
sion damage.
Towing:
Page 161 of 225
5-17 SERVICE AND APPEARANCE CARE
85Z03-03E
2) Then keep turning the pressure cap
slowly, and remove it.
3) Fill the coolant surge tank with the
proper mixture to the MAX mark on the
coolant surge tank. Wait about five min-
utes, then check to see if the level is
below the MAX mark. If the level is
below the MAX mark, add additional
coolant to bring the level up to the MAX
mark. Repeat this procedure until the
level remains constant at the MAX mark
for at least five minutes.
4) With the coolant surge tank pressure
cap off, start the engine and let it run
until you can feel the upper radiator
hose getting hot. Watch out for the
engine cooling fan.
By this time, the coolant level inside the
coolant surge tank may be lower. If thelevel is lower than the MAX mark, add
more of the proper mixture to the cool-
ant surge tank until the level reaches
the MAX mark.
5) Then replace the pressure cap. Be sure
the pressure cap is hand-tight and fully
seated. See your SUZUKI dealer, if
necessary.
Power Steering FluidThe power steering fluid reservoir is
located toward the front of the engine com-
partment on the driver’s side of the vehicle.
See “Engine Compartment Overview” in
this section for more information on loca-
tion.
When to Check Power Steering Fluid
It is not necessary to regularly check
power steering fluid unless you suspect
there is a leak in the system or you hear an
unusual noise. A fluid loss in this system
could indicate a problem. Have the system
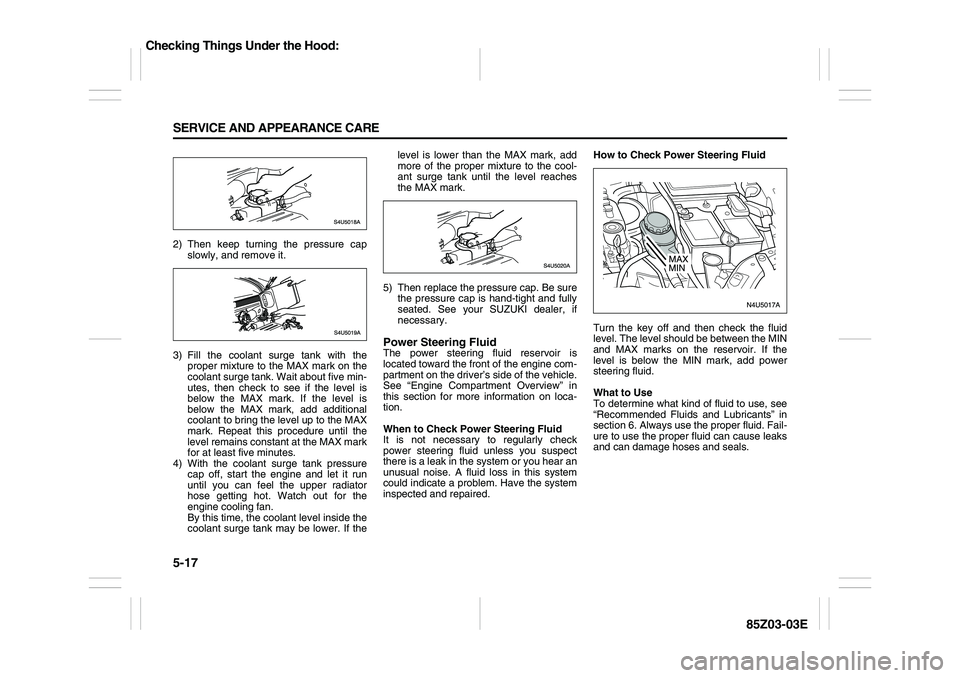
inspected and repaired.How to Check Power Steering Fluid
Turn the key off and then check the fluid
level. The level should be between the MIN
and MAX marks on the reservoir. If the
level is below the MIN mark, add power
steering fluid.
What to Use
To determine what kind of fluid to use, see
“Recommended Fluids and Lubricants” in
section 6. Always use the proper fluid. Fail-
ure to use the proper fluid can cause leaks
and can damage hoses and seals.
Checking Things Under the Hood:
Page 195 of 225
5-51 SERVICE AND APPEARANCE CARE
85Z03-03E
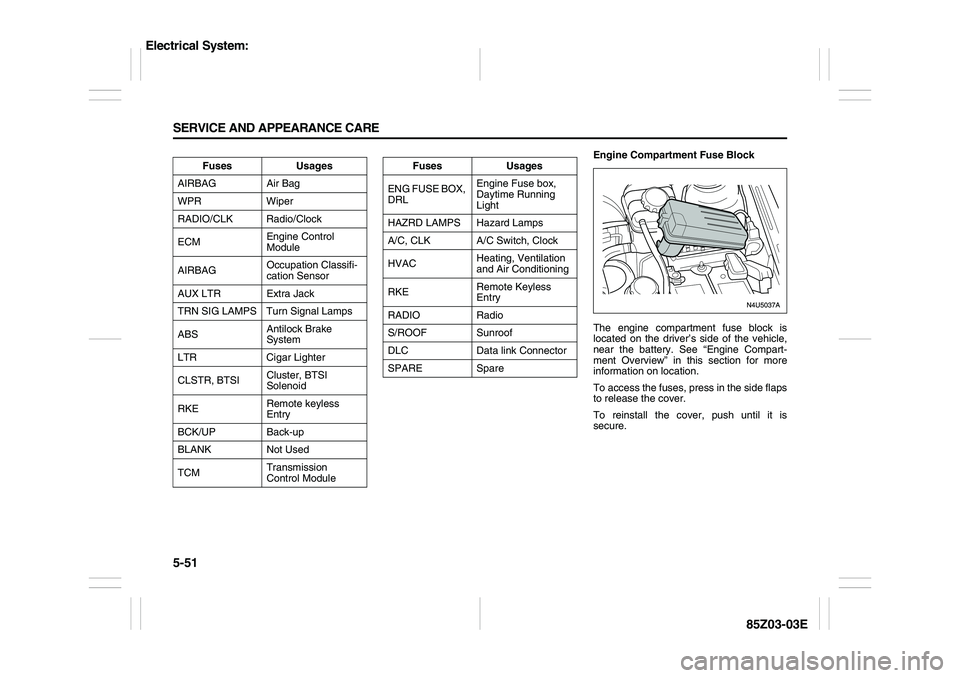
Engine Compartment Fuse Block
The engine compartment fuse block is
located on the driver’s side of the vehicle,
near the battery. See “Engine Compart-
ment Overview” in this section for more
information on location.
To access the fuses, press in the side flaps
to release the cover.
To reinstall the cover, push until it is
secure. Fuses Usages
AIRBAG Air Bag
WPR Wiper
RADIO/CLK Radio/Clock
ECMEngine Control
Module
AIRBAGOccupation Classifi-
cation Sensor
AUX LTR Extra Jack
TRN SIG LAMPS Turn Signal Lamps
ABSAntilock Brake
System
LTR Cigar Lighter
CLSTR, BTSICluster, BTSI
Solenoid
RKERemote keyless
Entry
BCK/UP Back-up
BLANK Not Used
TCMTransmission
Control Module
Fuses Usages
ENG FUSE BOX,
DRLEngine Fuse box,
Daytime Running
Light
HAZRD LAMPS Hazard Lamps
A/C, CLK A/C Switch, Clock
HVACHeating, Ventilation
and Air Conditioning
RKERemote Keyless
Entry
RADIO Radio
S/ROOF Sunroof
DLC Data link Connector
SPARE Spare
Electrical System: