mirror SUZUKI GRAND VITARA 2007 3.G Owners Manual
[x] Cancel search | Manufacturer: SUZUKI, Model Year: 2007, Model line: GRAND VITARA, Model: SUZUKI GRAND VITARA 2007 3.GPages: 211, PDF Size: 3.21 MB
Page 14 of 211
Downloaded from www.Manualslib.com manuals search engine BEFORE DRIVING
2
66J21-03E
60G404
BEFORE DRIVINGKeys ...................................................................................... 2-1
Spare Tire Nut Lock (if equipped) ...................................... 2-1
Door Locks .......................................................................... 2-2
Windows .............................................................................. 2-14
Mirrors .................................................................................. 2-16
Seat Adjustment .................................................................. 2-17
Head Restraints ................................................................... 2-19
Seat Belts and Child Restraint Systems ........................... 2-20
Supplemental Restraint System (air bags) ....................... 2-37
Page 29 of 211
Downloaded from www.Manualslib.com manuals search engine 2-15 BEFORE DRIVING
66J21-03E
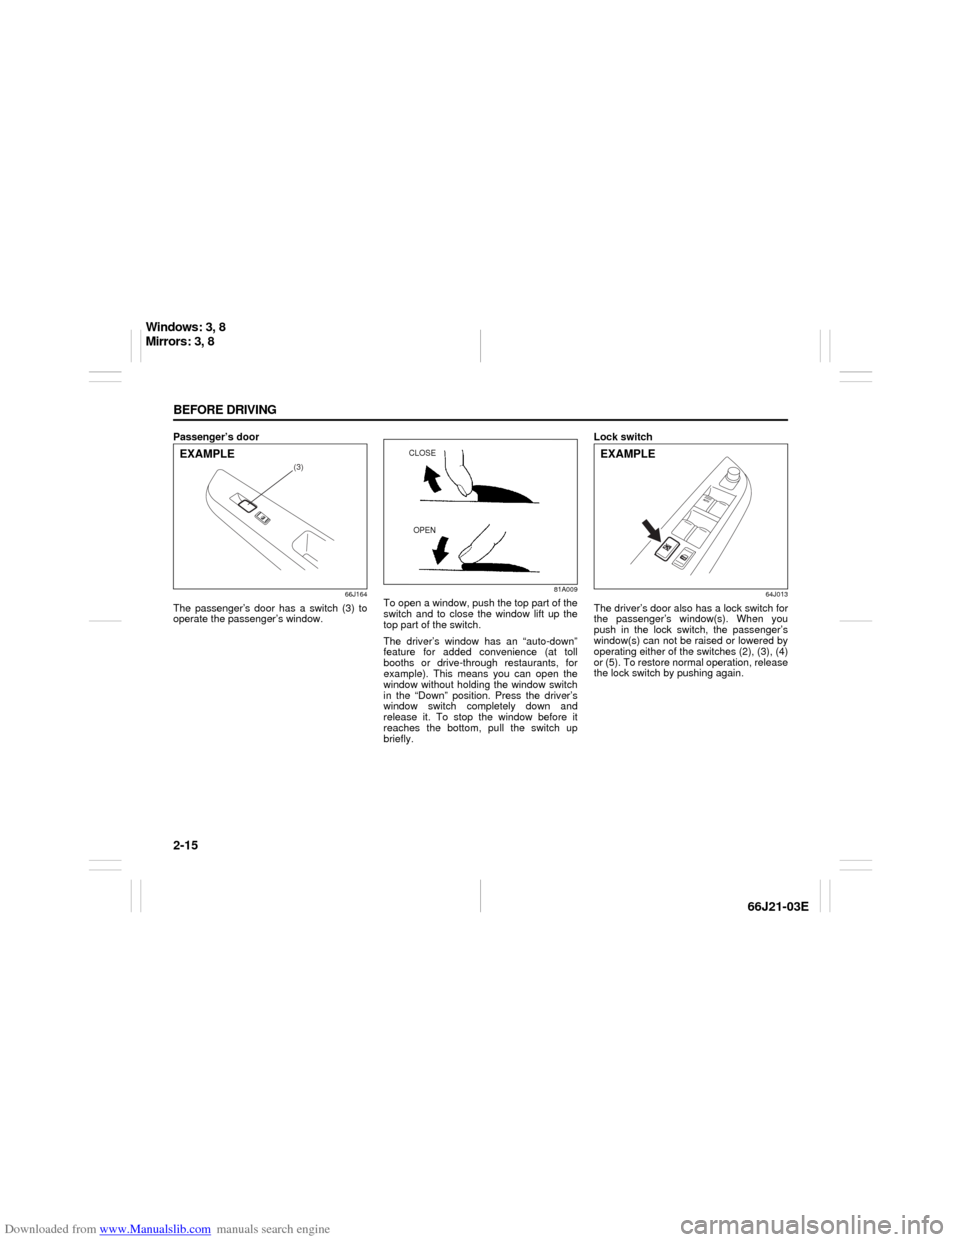
Passenger’s door
66J164
The passenger’s door has a switch (3) to
operate the passenger’s window.
81A009
To open a window, push the top part of the
switch and to close the window lift up the
top part of the switch.
The driver’s window has an “auto-down”
feature for added convenience (at toll
booths or drive-through restaurants, for
example). This means you can open the
window without holding the window switch
in the “Down” position. Press the driver’s
window switch completely down and
release it. To stop the window before it
reaches the bottom, pull the switch up
briefly.Lock switch
64J013
The driver’s door also has a lock switch for
the passenger’s window(s). When you
push in the lock switch, the passenger’s
window(s) can not be raised or lowered by
operating either of the switches (2), (3), (4)
or (5). To restore normal operation, release
the lock switch by pushing again.
(3)
EXAMPLE
CLOSE
OPEN
EXAMPLE
Windows: 3, 8
Mirrors: 3, 8
Page 30 of 211
Downloaded from www.Manualslib.com manuals search engine 2-16 BEFORE DRIVING
66J21-03E
MirrorsInside Rearview Mirror
65D410
65D409
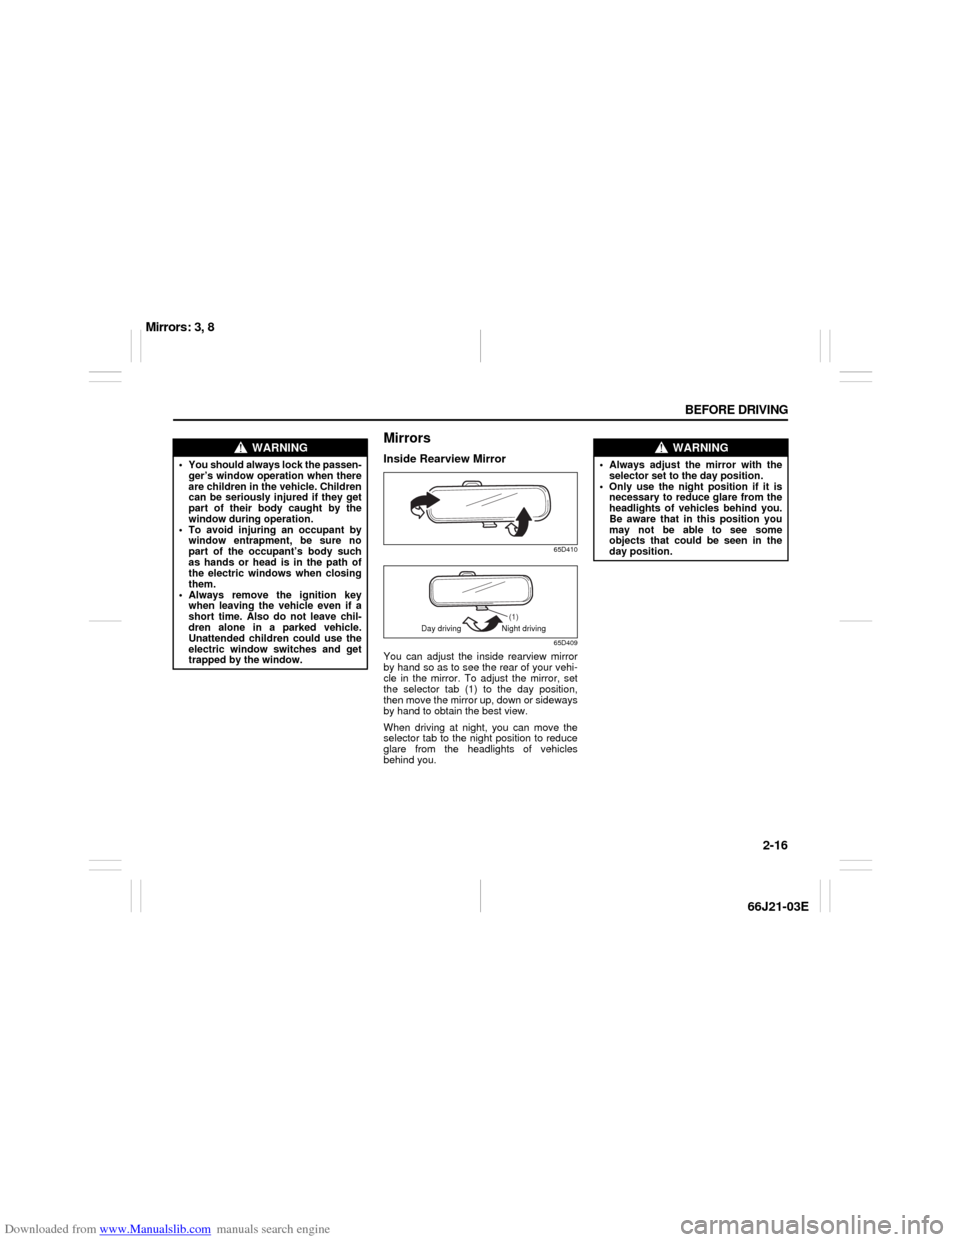
You can adjust the inside rearview mirror
by hand so as to see the rear of your vehi-
cle in the mirror. To adjust the mirror, set
the selector tab (1) to the day position,
then move the mirror up, down or sideways
by hand to obtain the best view.
When driving at night, you can move the
selector tab to the night position to reduce
glare from the headlights of vehicles
behind you.
WARNING
You should always lock the passen-
ger’s window operation when there
are children in the vehicle. Children
can be seriously injured if they get
part of their body caught by the
window during operation.
To avoid injuring an occupant by
window entrapment, be sure no
part of the occupant’s body such
as hands or head is in the path of
the electric windows when closing
them.
Always remove the ignition key
when leaving the vehicle even if a
short time. Also do not leave chil-
dren alone in a parked vehicle.
Unattended children could use the
electric window switches and get
trapped by the window.
(1)
Day driving Night driving
WARNING
Always adjust the mirror with the
selector set to the day position.
Only use the night position if it is
necessary to reduce glare from the
headlights of vehicles behind you.
Be aware that in this position you
may not be able to see some
objects that could be seen in the
day position.
Mirrors: 3, 8
Page 31 of 211
Downloaded from www.Manualslib.com manuals search engine 2-17 BEFORE DRIVING
66J21-03E
Outside Rearview Mirrors
64J014
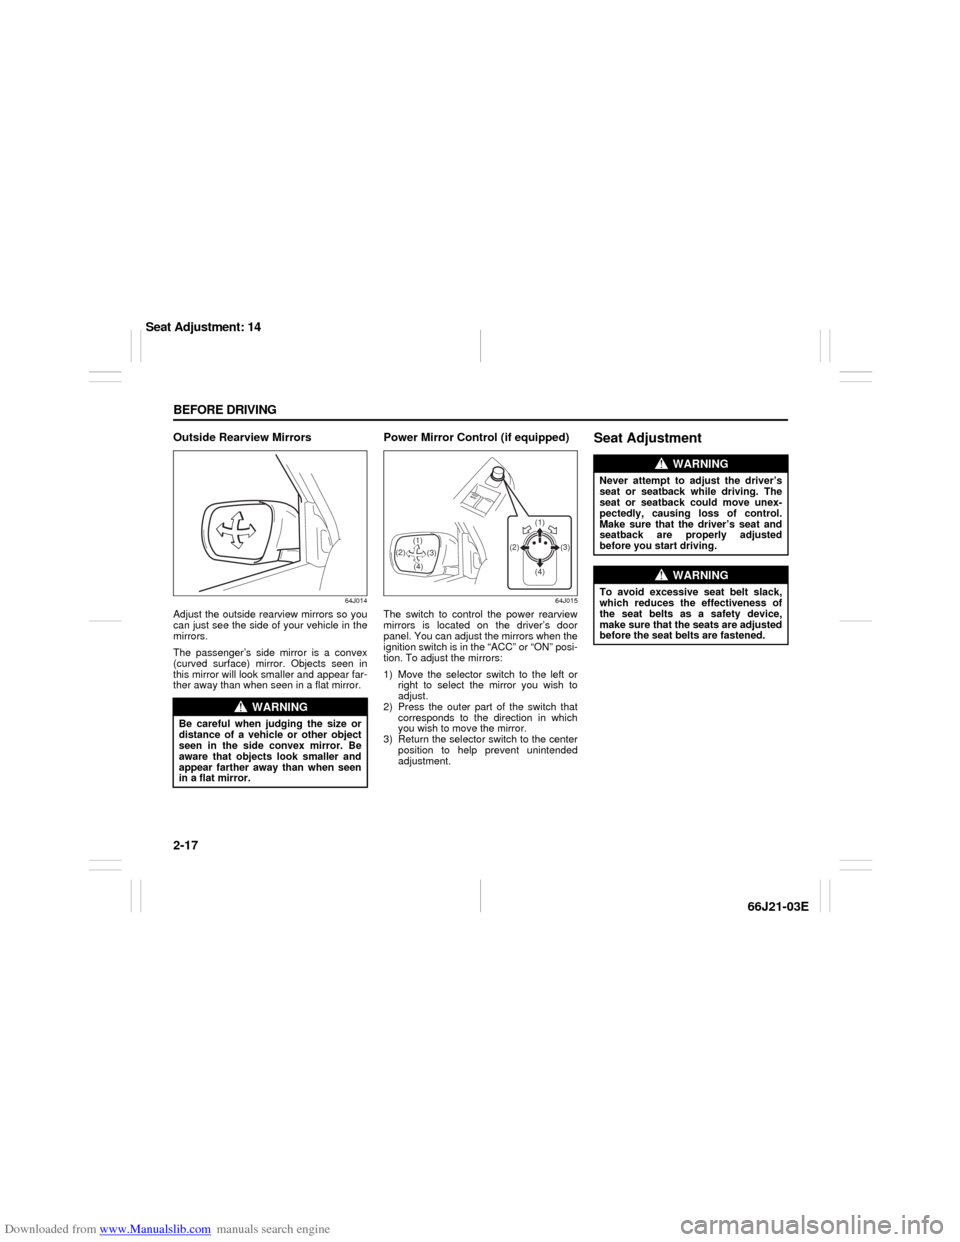
Adjust the outside rearview mirrors so you
can just see the side of your vehicle in the
mirrors.
The passenger’s side mirror is a convex
(curved surface) mirror. Objects seen in
this mirror will look smaller and appear far-
ther away than when seen in a flat mirror.
Power Mirror Control (if equipped)
64J015
The switch to control the power rearview
mirrors is located on the driver’s door
panel. You can adjust the mirrors when the
ignition switch is in the “ACC” or “ON” posi-
tion. To adjust the mirrors:
1) Move the selector switch to the left or
right to select the mirror you wish to
adjust.
2) Press the outer part of the switch that
corresponds to the direction in which
you wish to move the mirror.
3) Return the selector switch to the center
position to help prevent unintended
adjustment.
Seat Adjustment
WARNING
Be careful when judging the size or
distance of a vehicle or other object
seen in the side convex mirror. Be
aware that objects look smaller and
appear farther away than when seen
in a flat mirror.
(1)
(3) (2)
(4) (2)
(4)(3) (1)
WARNING
Never attempt to adjust the driver’s
seat or seatback while driving. The
seat or seatback could move unex-
pectedly, causing loss of control.
Make sure that the driver’s seat and
seatback are properly adjusted
before you start driving.
WARNING
To avoid excessive seat belt slack,
which reduces the effectiveness of
the seat belts as a safety device,
make sure that the seats are adjusted
before the seat belts are fastened.
Seat Adjustment: 14
Page 62 of 211
Downloaded from www.Manualslib.com manuals search engine INSTRUMENT PANEL
4
66J21-03E
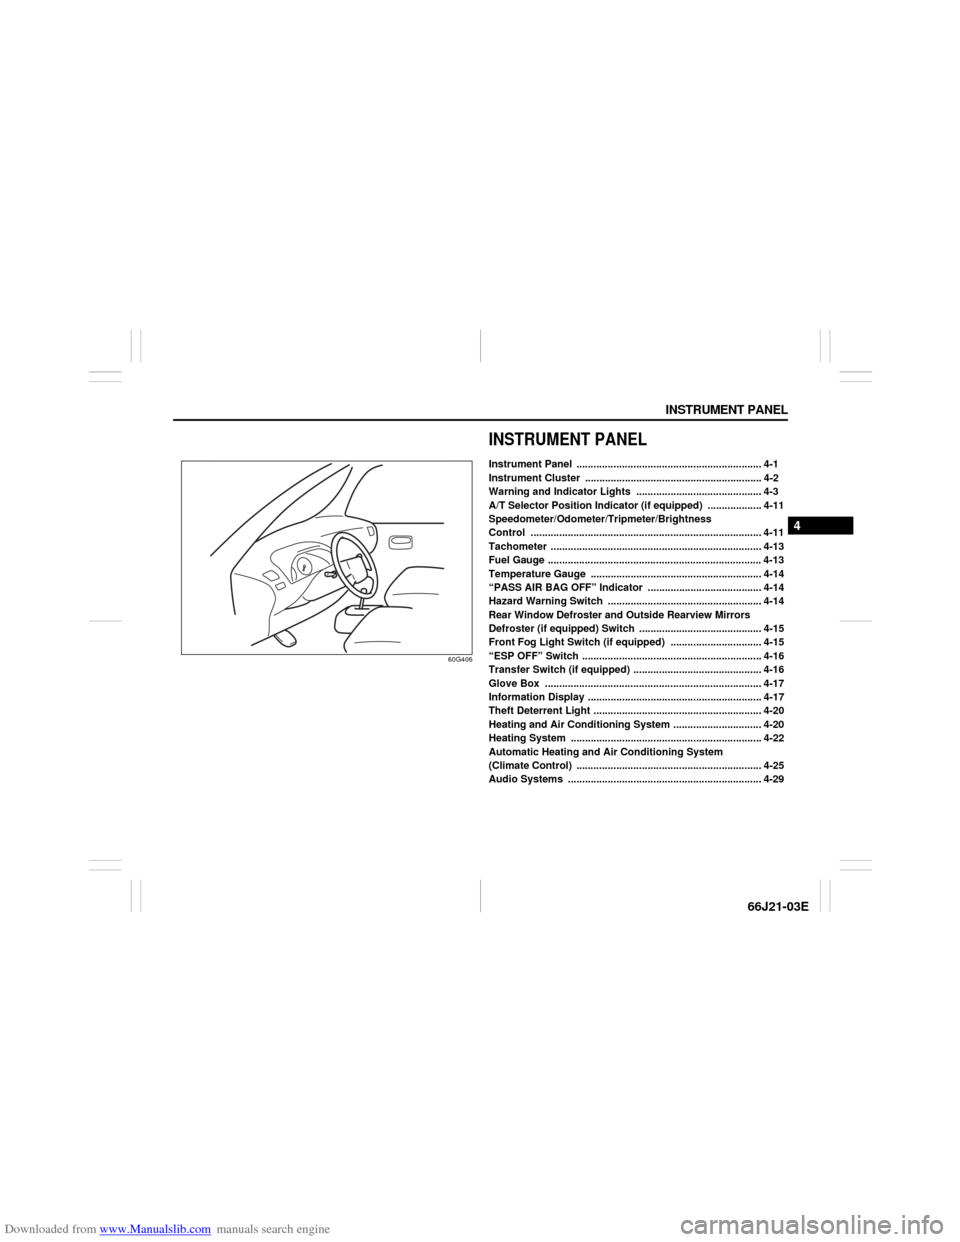
60G406
INSTRUMENT PANELInstrument Panel ................................................................. 4-1
Instrument Cluster .............................................................. 4-2
Warning and Indicator Lights ............................................ 4-3
A/T Selector Position Indicator (if equipped) ................... 4-11
Speedometer/Odometer/Tripmeter/Brightness
Control ................................................................................. 4-11
Tachometer .......................................................................... 4-13
Fuel Gauge ........................................................................... 4-13
Temperature Gauge ............................................................ 4-14
“PASS AIR BAG OFF” Indicator ........................................ 4-14
Hazard Warning Switch ...................................................... 4-14
Rear Window Defroster and Outside Rearview Mirrors
Defroster (if equipped) Switch ........................................... 4-15
Front Fog Light Switch (if equipped) ................................ 4-15
“ESP OFF” Switch ............................................................... 4-16
Transfer Switch (if equipped) ............................................. 4-16
Glove Box ............................................................................ 4-17
Information Display ............................................................. 4-17
Theft Deterrent Light ........................................................... 4-20
Heating and Air Conditioning System ............................... 4-20
Heating System ................................................................... 4-22
Automatic Heating and Air Conditioning System
(Climate Control) ................................................................. 4-25
Audio Systems .................................................................... 4-29
Page 77 of 211
Downloaded from www.Manualslib.com manuals search engine 4-15 INSTRUMENT PANEL
66J21-03E
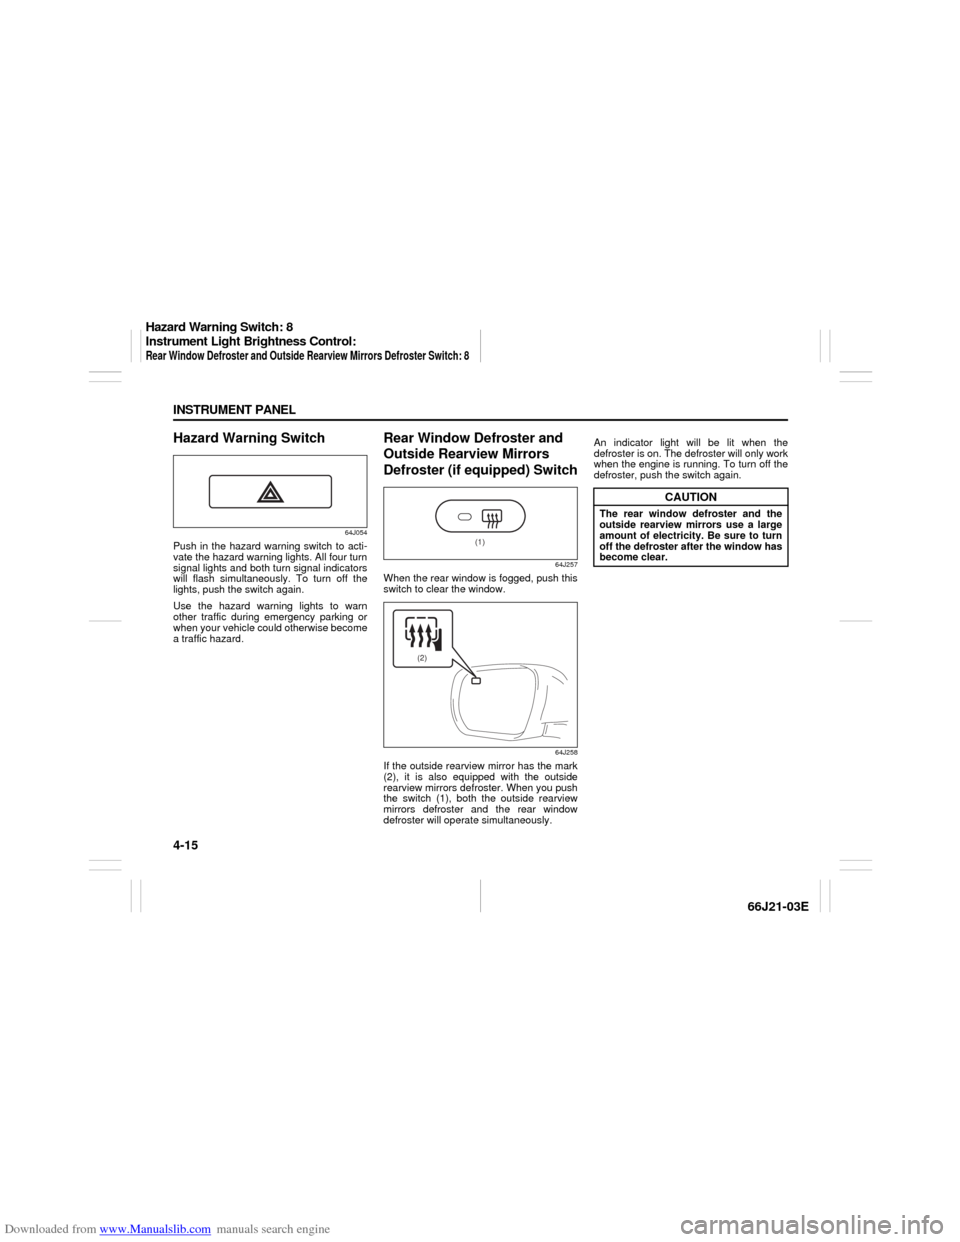
Hazard Warning Switch
64J054
Push in the hazard warning switch to acti-
vate the hazard warning lights. All four turn
signal lights and both turn signal indicators
will flash simultaneously. To turn off the
lights, push the switch again.
Use the hazard warning lights to warn
other traffic during emergency parking or
when your vehicle could otherwise become
a traffic hazard.
Rear Window Defroster and
Outside Rearview Mirrors
Defroster (if equipped) Switch
64J257
When the rear window is fogged, push this
switch to clear the window.
64J258
If the outside rearview mirror has the mark
(2), it is also equipped with the outside
rearview mirrors defroster. When you push
the switch (1), both the outside rearview
mirrors defroster and the rear window
defroster will operate simultaneously.An indicator light will be lit when the
defroster is on. The defroster will only work
when the engine is running. To turn off the
defroster, push the switch again.
(1)
(2)
CAUTION
The rear window defroster and the
outside rearview mirrors use a large
amount of electricity. Be sure to turn
off the defroster after the window has
become clear.
Hazard Warning Switch: 8
Instrument Light Brightness Control: Rear Window Defroster and Outside Rearview Mirrors Defroster Switch: 8
Page 78 of 211
Downloaded from www.Manualslib.com manuals search engine 4-16 INSTRUMENT PANEL
66J21-03E
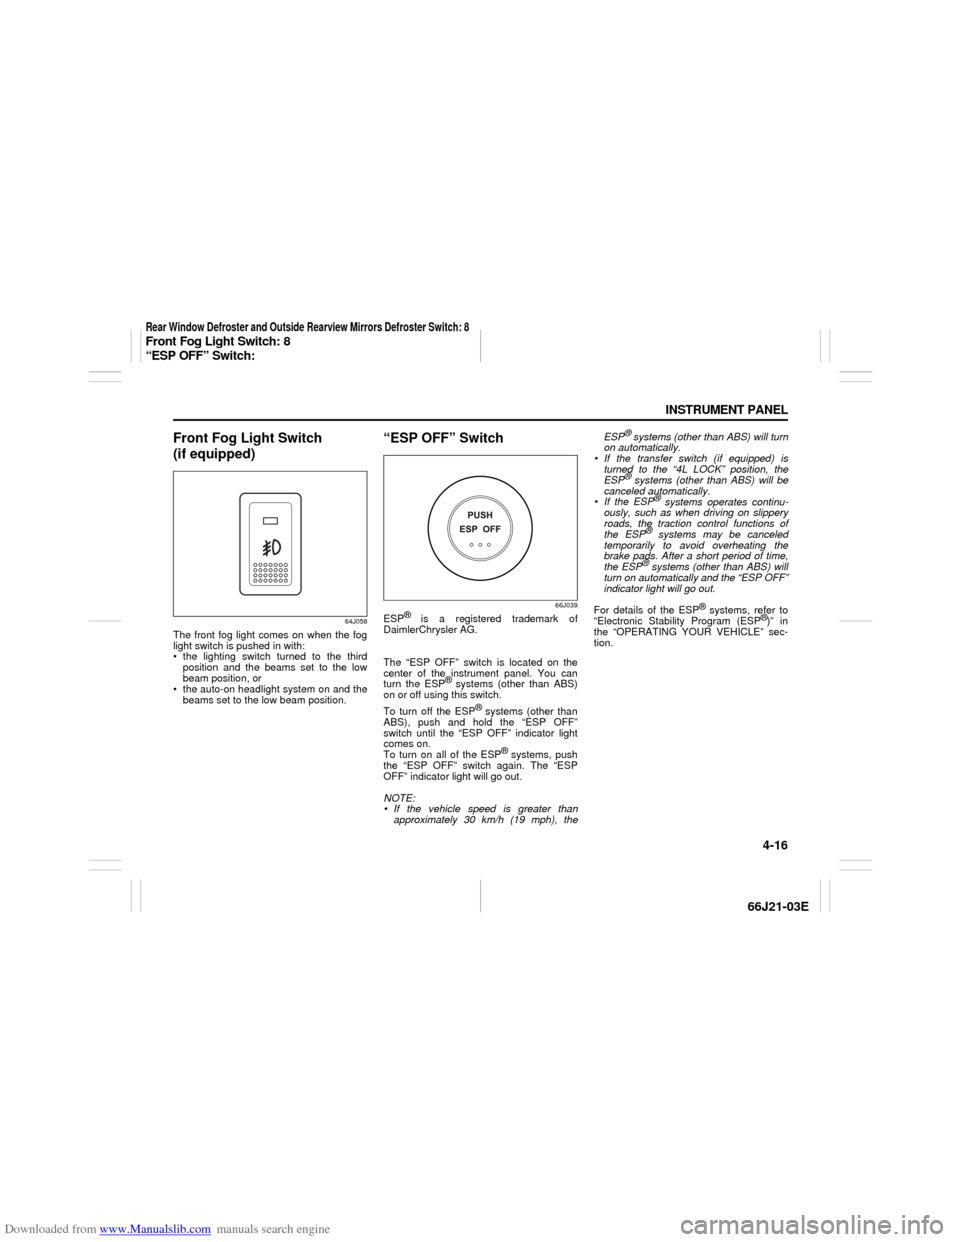
Front Fog Light Switch
(if equipped)
64J058
The front fog light comes on when the fog
light switch is pushed in with:
the lighting switch turned to the third
position and the beams set to the low
beam position, or
the auto-on headlight system on and the
beams set to the low beam position.
“ESP OFF” Switch
66J039
ESP
® is a registered trademark of
DaimlerChrysler AG.
The “ESP OFF” switch is located on the
center of the instrument panel. You can
turn the ESP
® systems (other than ABS)
on or off using this switch.
To turn off the ESP
® systems (other than
ABS), push and hold the “ESP OFF”
switch until the “ESP OFF” indicator light
comes on.
To turn on all of the ESP
® systems, push
the “ESP OFF” switch again. The “ESP
OFF” indicator light will go out.
NOTE:
If the vehicle speed is greater than
approximately 30 km/h (19 mph), theESP
® systems (other than ABS) will turn
on automatically.
If the transfer switch (if equipped) is
turned to the “4L LOCK” position, the
ESP® systems (other than ABS) will be
canceled automatically.
If the ESP
® systems operates continu-
ously, such as when driving on slippery
roads, the traction control functions of
the ESP
® systems may be canceled
temporarily to avoid overheating the
brake pads. After a short period of time,
the ESP® systems (other than ABS) will
turn on automatically and the “ESP OFF”
indicator light will go out.
For details of the ESP
® systems, refer to
“Electronic Stability Program (ESP
®)” in
the “OPERATING YOUR VEHICLE” sec-
tion.
Rear Window Defroster and Outside Rearview Mirrors Defroster Switch: 8Front Fog Light Switch: 8
“ESP OFF” Switch:
Page 129 of 211
Downloaded from www.Manualslib.com manuals search engine 8-3 VEHICLE LOADING AND TOWING
66J21-03E
Tires
MirrorsCheck to see if your vehicle’s mirrors meet
federal, state and local requirements for
mirrors used on towing vehicles. If they do
not, you must install required mirrors
before you tow.Vehicle/Trailer Weight LimitsBefore towing, you must make sure that
gross trailer weight, gross combined
weight, trailer tongue weight, gross vehicle
weight and gross axle weight (front and
rear) are within specified limits as
described below. You can measure vehicle
and trailer weights using a vehicle scale
and can measure tongue weight using a
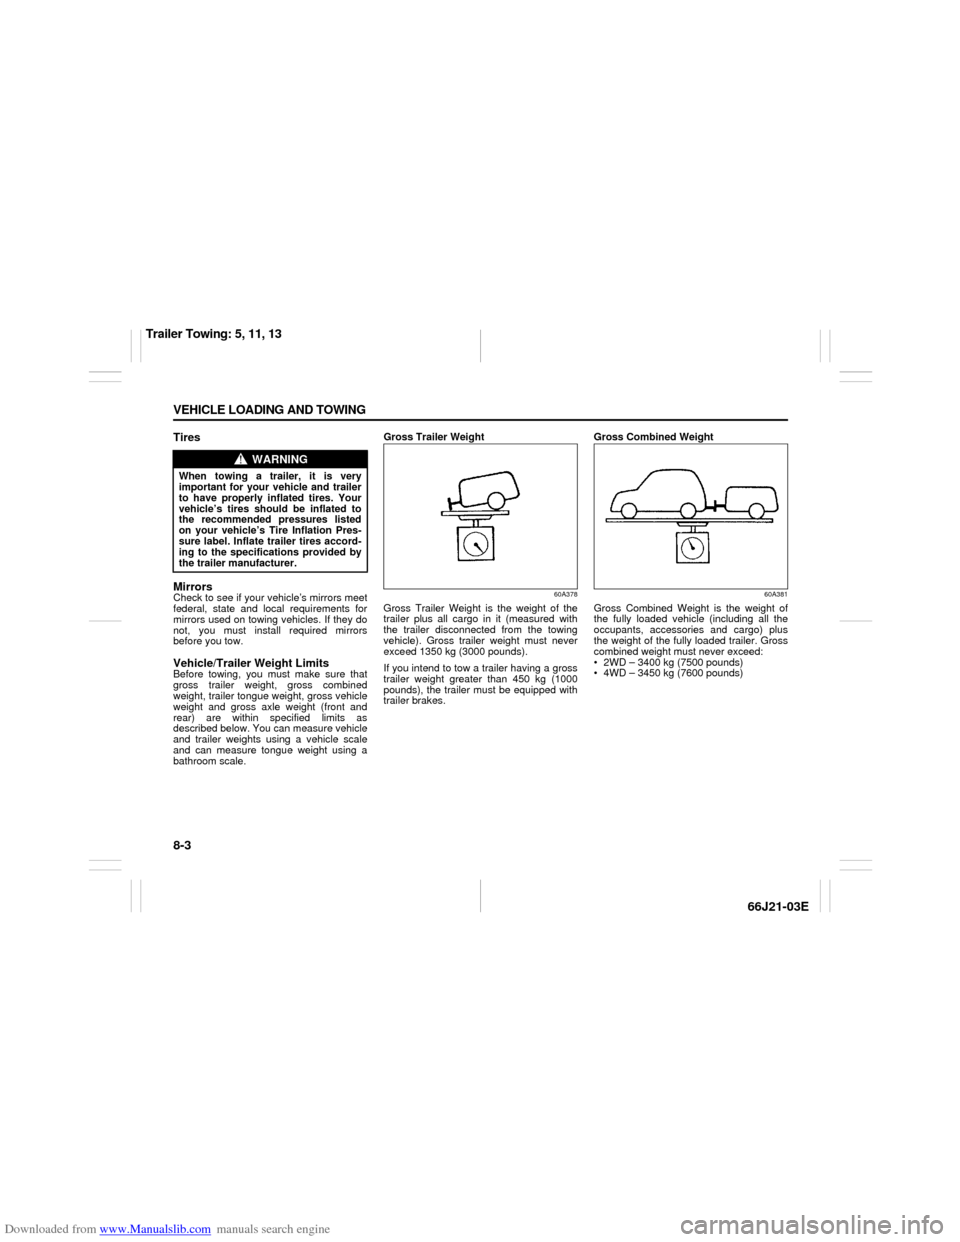
bathroom scale.Gross Trailer Weight
60A378
Gross Trailer Weight is the weight of the
trailer plus all cargo in it (measured with
the trailer disconnected from the towing
vehicle). Gross trailer weight must never
exceed 1350 kg (3000 pounds).
If you intend to tow a trailer having a gross
trailer weight greater than 450 kg (1000
pounds), the trailer must be equipped with
trailer brakes.Gross Combined Weight
60A381
Gross Combined Weight is the weight of
the fully loaded vehicle (including all the
occupants, accessories and cargo) plus
the weight of the fully loaded trailer. Gross
combined weight must never exceed:
2WD – 3400 kg (7500 pounds)
4WD – 3450 kg (7600 pounds)
WARNING
When towing a trailer, it is very
important for your vehicle and trailer
to have properly inflated tires. Your
vehicle’s tires should be inflated to
the recommended pressures listed
on your vehicle’s Tire Inflation Pres-
sure label. Inflate trailer tires accord-
ing to the specifications provided by
the trailer manufacturer.
Trailer Towing: 5, 11, 13
Page 174 of 211
Downloaded from www.Manualslib.com manuals search engine 9-36 INSPECTION AND MAINTENANCE
66J21-03E
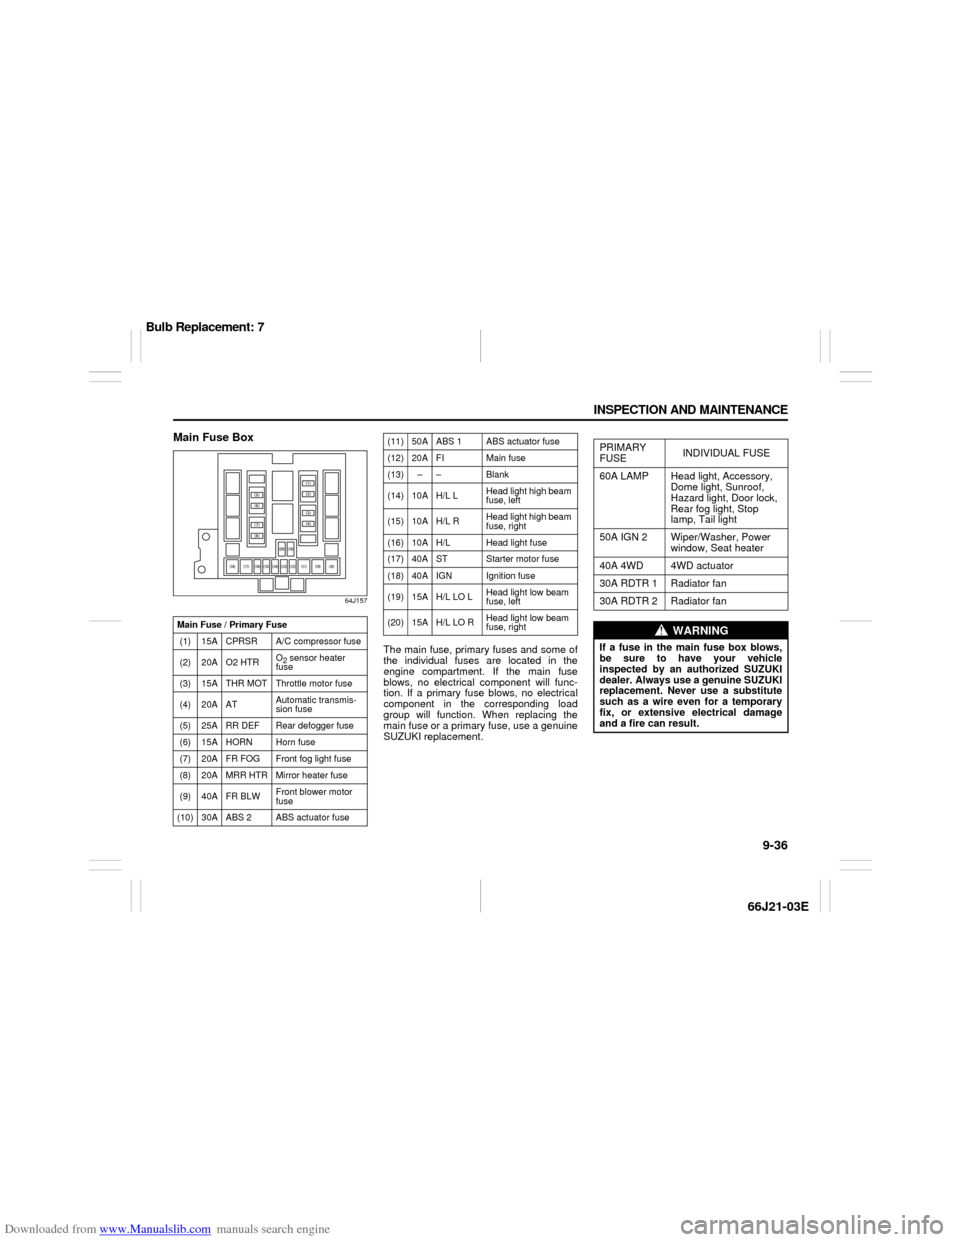
Main Fuse Box
64J157
The main fuse, primary fuses and some of
the individual fuses are located in the
engine compartment. If the main fuse
blows, no electrical component will func-
tion. If a primary fuse blows, no electrical
component in the corresponding load
group will function. When replacing the
main fuse or a primary fuse, use a genuine
SUZUKI replacement.
Main Fuse / Primary Fuse
(1) 15A CPRSR A/C compressor fuse
(2) 20A O2 HTRO
2 sensor heater
fuse
(3) 15A THR MOT Throttle motor fuse
(4) 20A ATAutomatic transmis-
sion fuse
(5) 25A RR DEF Rear defogger fuse
(6) 15A HORN Horn fuse
(7) 20A FR FOG Front fog light fuse
(8) 20A MRR HTR Mirror heater fuse
(9) 40A FR BLWFront blower motor
fuse
(10) 30A ABS 2 ABS actuator fuse
(11) 50A ABS 1 ABS actuator fuse
(12) 20A FI Main fuse
(13) – – Blank
(14) 10A H/L LHead light high beam
fuse, left
(15) 10A H/L RHead light high beam
fuse, right
(16) 10A H/L Head light fuse
(17) 40A ST Starter motor fuse
(18) 40A IGN Ignition fuse
(19) 15A H/L LO LHead light low beam
fuse, left
(20) 15A H/L LO RHead light low beam
fuse, right
PRIMARY
FUSEINDIVIDUAL FUSE
60A LAMP Head light, Accessory,
Dome light, Sunroof,
Hazard light, Door lock,
Rear fog light, Stop
lamp, Tail light
50A IGN 2 Wiper/Washer, Power
window, Seat heater
40A 4WD 4WD actuator
30A RDTR 1 Radiator fan
30A RDTR 2 Radiator fan
WARNING
If a fuse in the main fuse box blows,
be sure to have your vehicle
inspected by an authorized SUZUKI
dealer. Always use a genuine SUZUKI
replacement. Never use a substitute
such as a wire even for a temporary
fix, or extensive electrical damage
and a fire can result.
Bulb Replacement: 7
Page 175 of 211
Downloaded from www.Manualslib.com manuals search engine 9-37 INSPECTION AND MAINTENANCE
66J21-03E
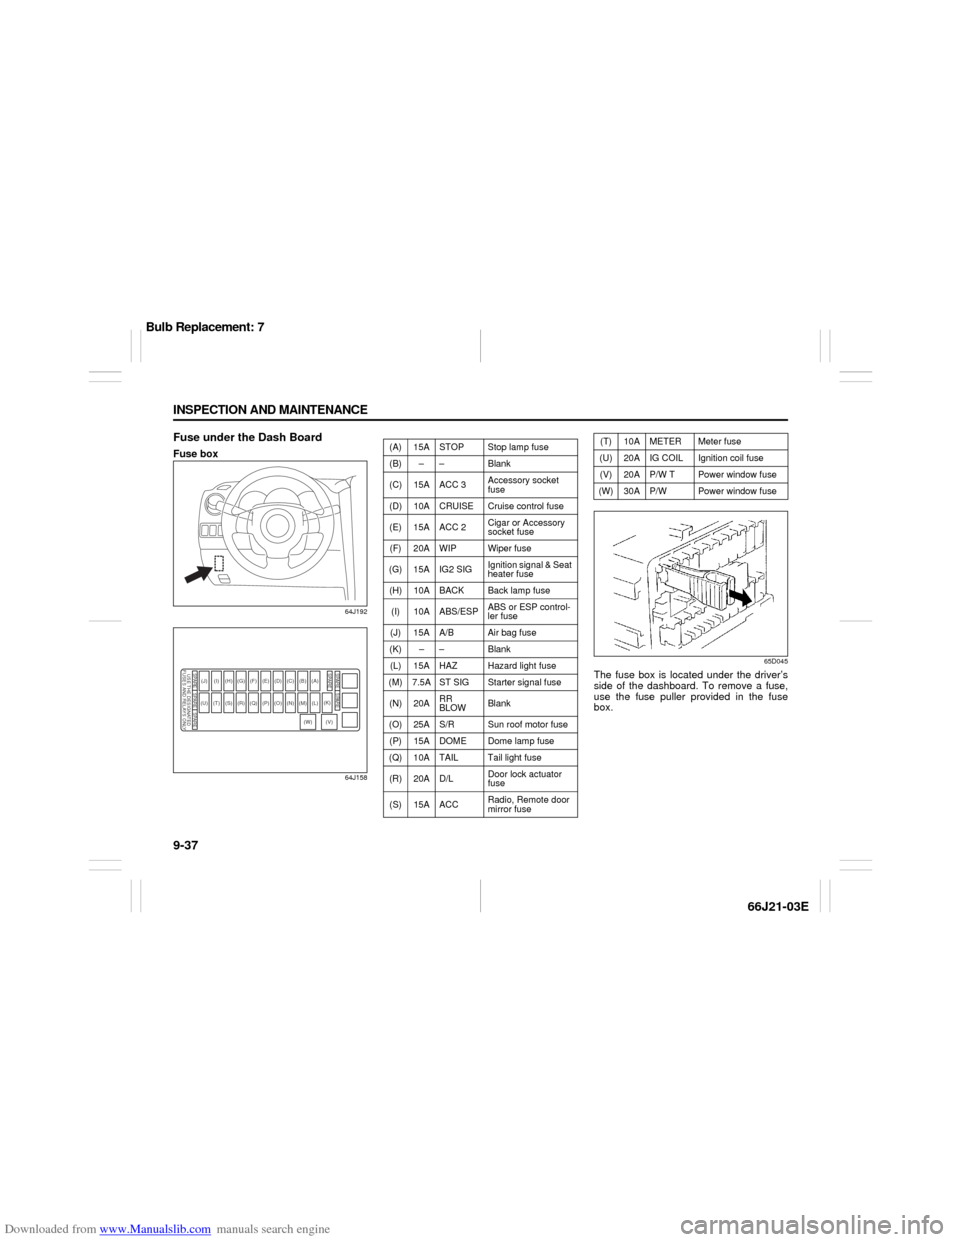
Fuse under the Dash BoardFuse box
64J192
64J15865D045
The fuse box is located under the driver’s
side of the dashboard. To remove a fuse,
use the fuse puller provided in the fuse
box.
SPARE SPARE SPARE
SPARE
USE THE DESIGNATED
FUSES AND RELAYS ONLYSPARE SPARE
(A)
(B)
(C)
(D)
(E)
(F)
(G)
(H)(I)
(J)
(L)
(M)
(N)
(O)
(P)
(Q)
(R)
(S)
(T)
(U)
(K)(V)
(W)
(A) 15A STOP Stop lamp fuse
(B) – – Blank
(C) 15A ACC 3Accessory socket
fuse
(D) 10A CRUISE Cruise control fuse
(E) 15A ACC 2Cigar or Accessory
socket fuse
(F) 20A WIP Wiper fuse
(G) 15A IG2 SIGIgnition signal & Seat
heater fuse
(H) 10A BACK Back lamp fuse
(I) 10A ABS/ESPABS or ESP control-
ler fuse
(J) 15A A/B Air bag fuse
(K) – – Blank
(L) 15A HAZ Hazard light fuse
(M) 7.5A ST SIG Starter signal fuse
(N) 20ARR
BLOWBlank
(O) 25A S/R Sun roof motor fuse
(P) 15A DOME Dome lamp fuse
(Q) 10A TAIL Tail light fuse
(R) 20A D/LDoor lock actuator
fuse
(S) 15A ACCRadio, Remote door
mirror fuse
(T) 10A METER Meter fuse
(U) 20A IG COIL Ignition coil fuse
(V) 20A P/W T Power window fuse
(W) 30A P/W Power window fuse
Bulb Replacement: 7