indicator SUZUKI GRAND VITARA 2007 3.G Owner's Manual
[x] Cancel search | Manufacturer: SUZUKI, Model Year: 2007, Model line: GRAND VITARA, Model: SUZUKI GRAND VITARA 2007 3.GPages: 211, PDF Size: 3.21 MB
Page 78 of 211
Downloaded from www.Manualslib.com manuals search engine 4-16 INSTRUMENT PANEL
66J21-03E
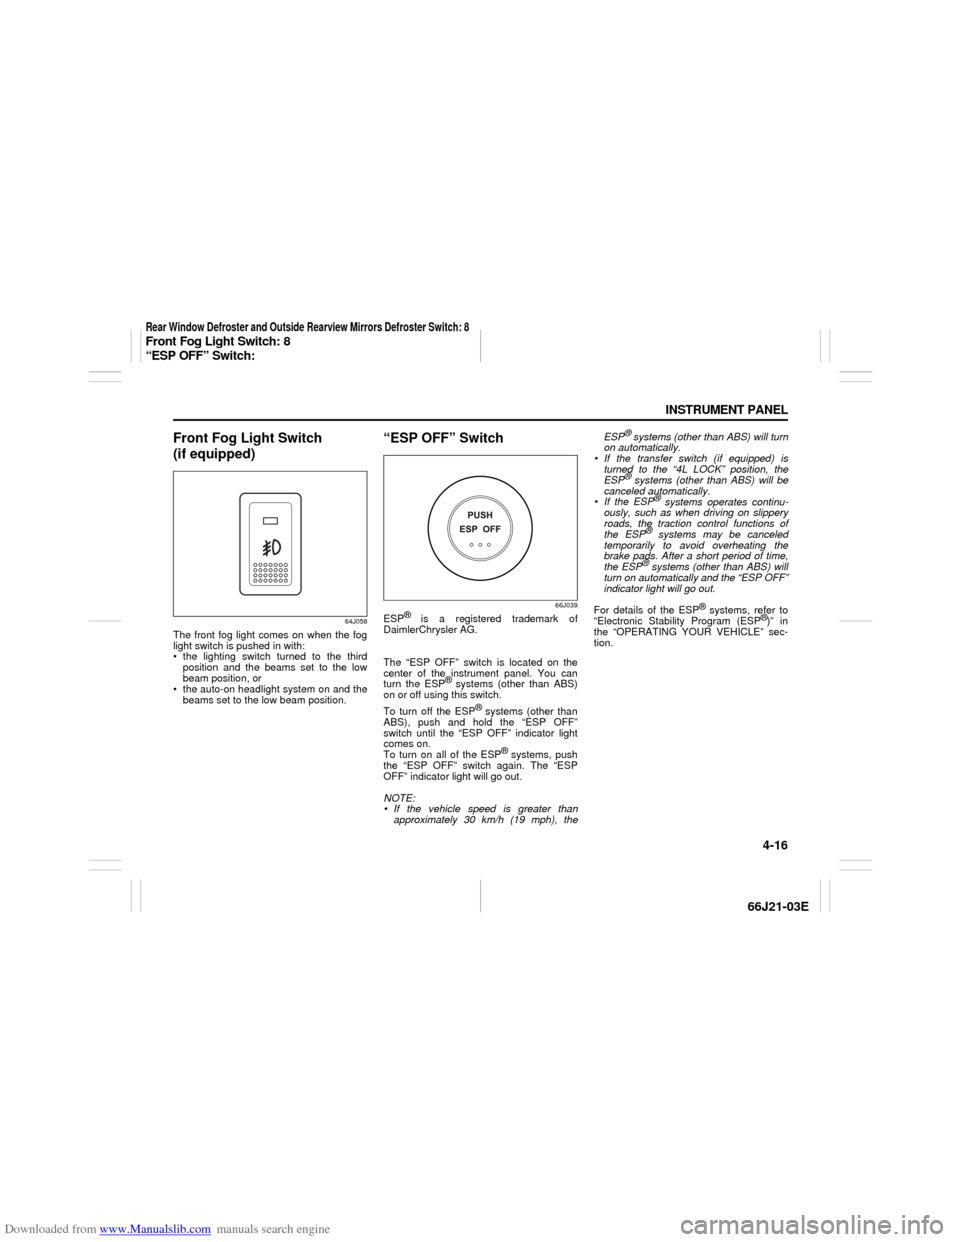
Front Fog Light Switch
(if equipped)
64J058
The front fog light comes on when the fog
light switch is pushed in with:
the lighting switch turned to the third
position and the beams set to the low
beam position, or
the auto-on headlight system on and the
beams set to the low beam position.
“ESP OFF” Switch
66J039
ESP
® is a registered trademark of
DaimlerChrysler AG.
The “ESP OFF” switch is located on the
center of the instrument panel. You can
turn the ESP
® systems (other than ABS)
on or off using this switch.
To turn off the ESP
® systems (other than
ABS), push and hold the “ESP OFF”
switch until the “ESP OFF” indicator light
comes on.
To turn on all of the ESP
® systems, push
the “ESP OFF” switch again. The “ESP
OFF” indicator light will go out.
NOTE:
If the vehicle speed is greater than
approximately 30 km/h (19 mph), theESP
® systems (other than ABS) will turn
on automatically.
If the transfer switch (if equipped) is
turned to the “4L LOCK” position, the
ESP® systems (other than ABS) will be
canceled automatically.
If the ESP
® systems operates continu-
ously, such as when driving on slippery
roads, the traction control functions of
the ESP
® systems may be canceled
temporarily to avoid overheating the
brake pads. After a short period of time,
the ESP® systems (other than ABS) will
turn on automatically and the “ESP OFF”
indicator light will go out.
For details of the ESP
® systems, refer to
“Electronic Stability Program (ESP
®)” in
the “OPERATING YOUR VEHICLE” sec-
tion.
Rear Window Defroster and Outside Rearview Mirrors Defroster Switch: 8Front Fog Light Switch: 8
“ESP OFF” Switch:
Page 81 of 211
Downloaded from www.Manualslib.com manuals search engine 4-19 INSTRUMENT PANEL
66J21-03E
Instantaneous fuel consumption (a)
If you selected instantaneous fuel con-
sumption the last time you drove the vehi-
cle, the display indicates “--.-” when the
ignition switch is turned to the “ACC” or
“ON” position. Unless the vehicle is mov-
ing, the display will indicate “--.-”.
Average fuel consumption (b)
If you selected average fuel consumption
the last time you drove the vehicle, the dis-
play shows the last value of average fuel
consumption when the ignition switch is
turned to the “ACC” or “ON” position.
Unless you reset the value of average fuel
consumption, the display will show the
value of average fuel consumption which
includes average fuel consumption during
previous driving.
To reset the value of average fuel con-
sumption, hold in the “DISP” button (6) for
more than 2 seconds when the display
shows an average fuel consumption value.
The display will indicate “--.-” and then will
show a new average fuel consumption
value after driving for a short time.
Driving range (c)
If you selected driving range the last time
you drove the vehicle, the display shows “-
-.-” for a few seconds and then shows the
current driving range when the ignition
switch is turned to the “ON” position.
The driving range shown in the display is
the approximate distance you can driveuntil the fuel gauge indicates “E” based a
current driving conditions.
When the remaining fuel in fuel tank
reaches a low level, the display “--.-” will
appear.
If the low fuel warning light comes on, fill
the fuel tank immediately regardless of the
value of driving range shown in the dis-
play.
As the driving range after refueling is cal-
culated based on the last driving condition,
the value is different each time you refuel.
NOTE:
When you reconnect the negative (–)
terminal to the battery, the value of driv-
ing range will be shown after driving for a
while.
For new vehicle with low mileage, the
driving range may not be shown
promptly in the display when beginning
to drive. The driving range will be shown
after a while.
NOTE:
The values of fuel consumption and driving
range shown in the display are affected by
conditions such as the following;
road condition
surrounding traffic condition
driving condition
vehicle condition
when the malfunction indicator light
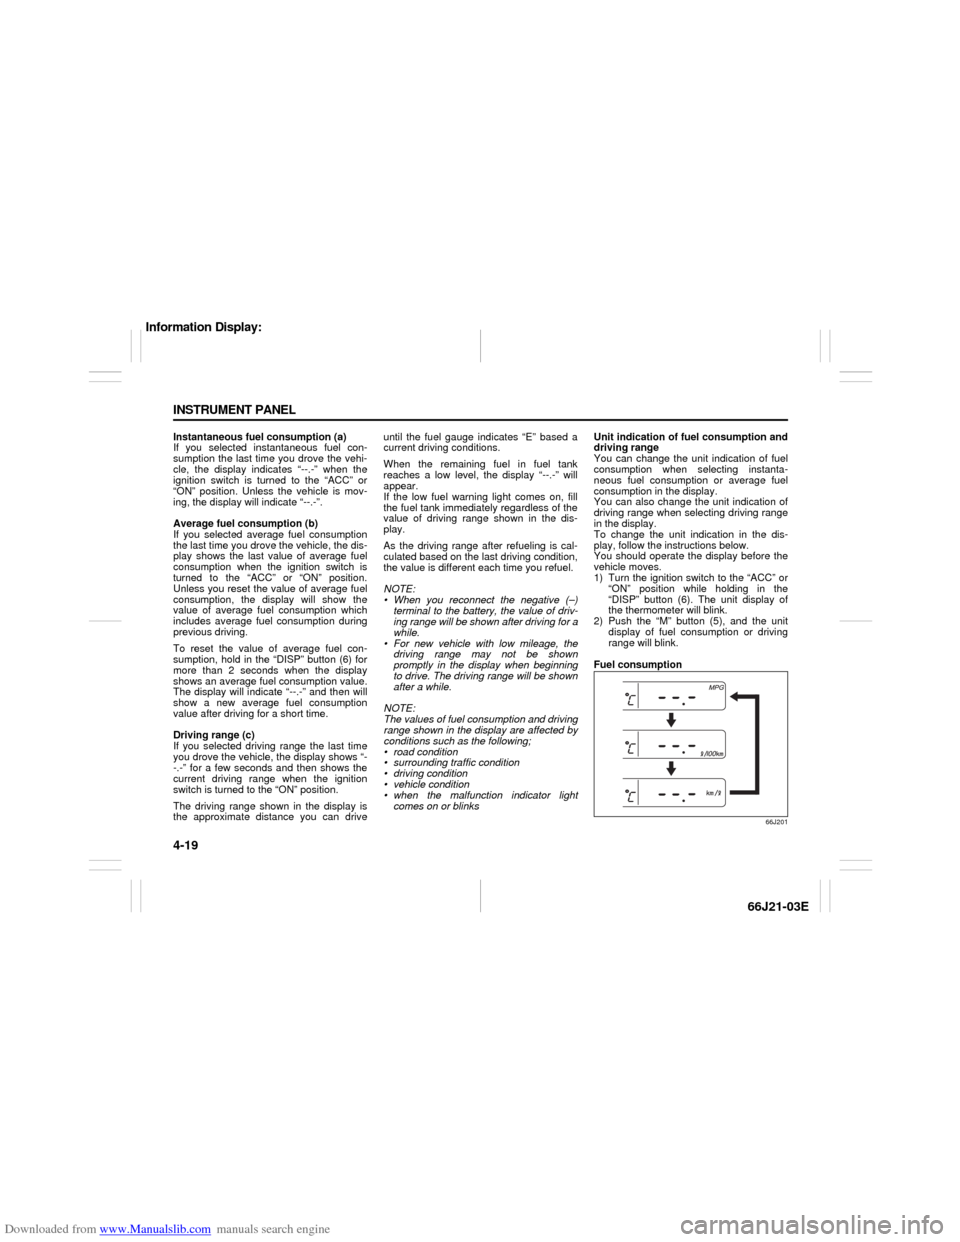
comes on or blinksUnit indication of fuel consumption and
driving range
You can change the unit indication of fuel
consumption when selecting instanta-
neous fuel consumption or average fuel
consumption in the display.
You can also change the unit indication of
driving range when selecting driving range
in the display.
To change the unit indication in the dis-
play, follow the instructions below.
You should operate the display before the
vehicle moves.
1) Turn the ignition switch to the “ACC” or
“ON” position while holding in the
“DISP” button (6). The unit display of
the thermometer will blink.
2) Push the “M” button (5), and the unit
display of fuel consumption or driving
range will blink.
Fuel consumption
66J201
Information Display:
Page 84 of 211
Downloaded from www.Manualslib.com manuals search engine 4-22 INSTRUMENT PANEL
66J21-03E
Side outlet
63J045
When “Open”, air comes out from the side
outlets regardless of the air flow selector
position.
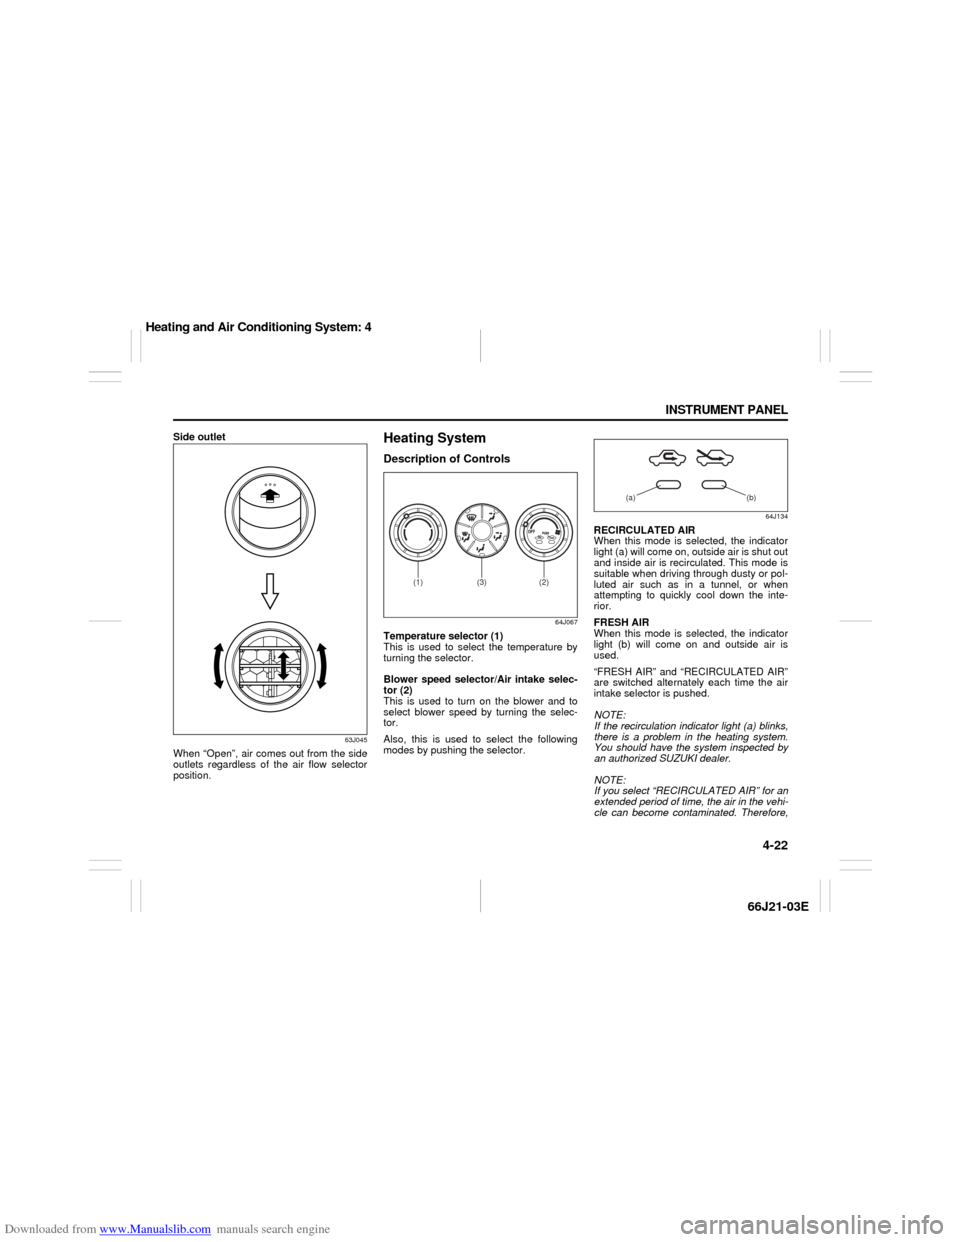
Heating SystemDescription of Controls
64J067
Temperature selector (1)
This is used to select the temperature by
turning the selector.
Blower speed selector/Air intake selec-
tor (2)
This is used to turn on the blower and to
select blower speed by turning the selec-
tor.
Also, this is used to select the following
modes by pushing the selector.
64J134
RECIRCULATED AIR
When this mode is selected, the indicator
light (a) will come on, outside air is shut out
and inside air is recirculated. This mode is
suitable when driving through dusty or pol-
luted air such as in a tunnel, or when
attempting to quickly cool down the inte-
rior.
FRESH AIR
When this mode is selected, the indicator
light (b) will come on and outside air is
used.
“FRESH AIR” and “RECIRCULATED AIR”
are switched alternately each time the air
intake selector is pushed.
NOTE:
If the recirculation indicator light (a) blinks,
there is a problem in the heating system.
You should have the system inspected by
an authorized SUZUKI dealer.
NOTE:
If you select “RECIRCULATED AIR” for an
extended period of time, the air in the vehi-
cle can become contaminated. Therefore,
(2)
(1)
(3)
(a) (b)
Heating and Air Conditioning System: 4
Page 85 of 211
Downloaded from www.Manualslib.com manuals search engine 4-23 INSTRUMENT PANEL
66J21-03E
you should occasionally select “FRESH
AIR”.
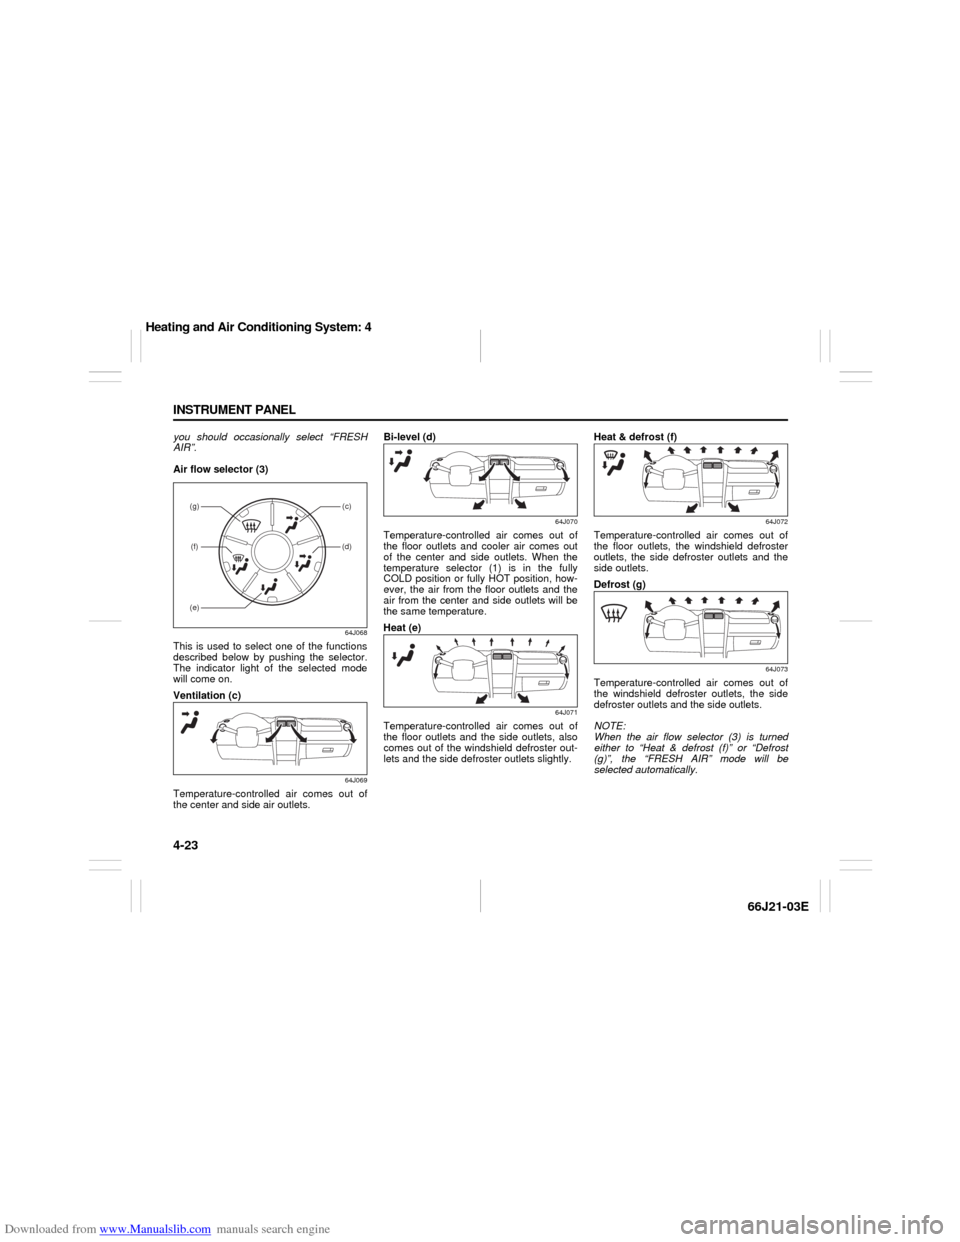
Air flow selector (3)
64J068
This is used to select one of the functions
described below by pushing the selector.
The indicator light of the selected mode
will come on.
Ventilation (c)
64J069
Temperature-controlled air comes out of
the center and side air outlets.Bi-level (d)
64J070
Temperature-controlled air comes out of
the floor outlets and cooler air comes out
of the center and side outlets. When the
temperature selector (1) is in the fully
COLD position or fully HOT position, how-
ever, the air from the floor outlets and the
air from the center and side outlets will be
the same temperature.
Heat (e)
64J071
Temperature-controlled air comes out of
the floor outlets and the side outlets, also
comes out of the windshield defroster out-
lets and the side defroster outlets slightly.Heat & defrost (f)
64J072
Temperature-controlled air comes out of
the floor outlets, the windshield defroster
outlets, the side defroster outlets and the
side outlets.
Defrost (g)
64J073
Temperature-controlled air comes out of
the windshield defroster outlets, the side
defroster outlets and the side outlets.
NOTE:
When the air flow selector (3) is turned
either to “Heat & defrost (f)” or “Defrost
(g)”, the “FRESH AIR” mode will be
selected automatically.
(g)(f)
(c)(d)
(e)
Heating and Air Conditioning System: 4
Page 87 of 211
Downloaded from www.Manualslib.com manuals search engine 4-25 INSTRUMENT PANEL
66J21-03E
Automatic Heating and Air
Conditioning System
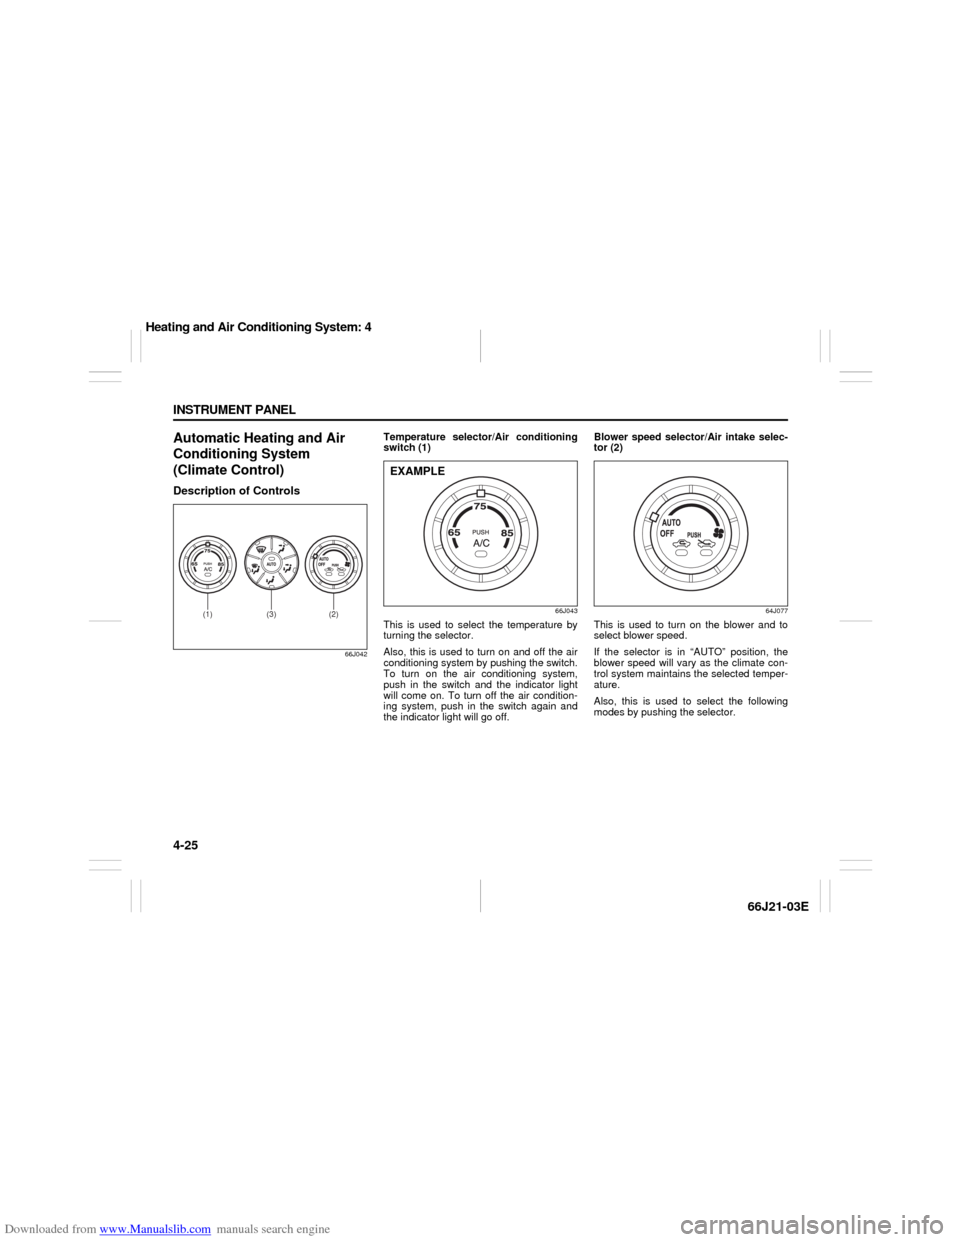
(Climate Control)Description of Controls
66J042
Temperature selector/Air conditioning
switch (1)
66J043
This is used to select the temperature by
turning the selector.
Also, this is used to turn on and off the air
conditioning system by pushing the switch.
To turn on the air conditioning system,
push in the switch and the indicator light
will come on. To turn off the air condition-
ing system, push in the switch again and
the indicator light will go off. Blower speed selector/Air intake selec-
tor (2)
64J077
This is used to turn on the blower and to
select blower speed.
If the selector is in “AUTO” position, the
blower speed will vary as the climate con-
trol system maintains the selected temper-
ature.
Also, this is used to select the following
modes by pushing the selector.
(2)
(1)
(3)
EXAMPLE
Heating and Air Conditioning System: 4
Page 88 of 211
Downloaded from www.Manualslib.com manuals search engine 4-26 INSTRUMENT PANEL
66J21-03E
64J134
RECIRCULATED AIR
When this mode is selected, the indicator
light (a) will come on, outside air is shut out
and inside air is recirculated. This mode is
suitable when driving through the polluted
air such as a tunnel, or attempting to
quickly cool down.
FRESH AIR
When this mode is selected, the indicator
light (b) will come on and outside air is
used.
“FRESH AIR” and “RECIRCULATED AIR”
are switched alternately each time the air
intake selector is pushed.
NOTE:
If the recirculation indicator light (a) blinks,
there is a problem in the heating system
and/or air conditioning system. You should
have the system inspected by an autho-
rized SUZUKI dealer.
NOTE:
If you select “RECIRCULATED AIR” for an
extended period of time, the air in the vehi-
cle can become contaminated. Therefore,you should occasionally select “FRESH
AIR”.
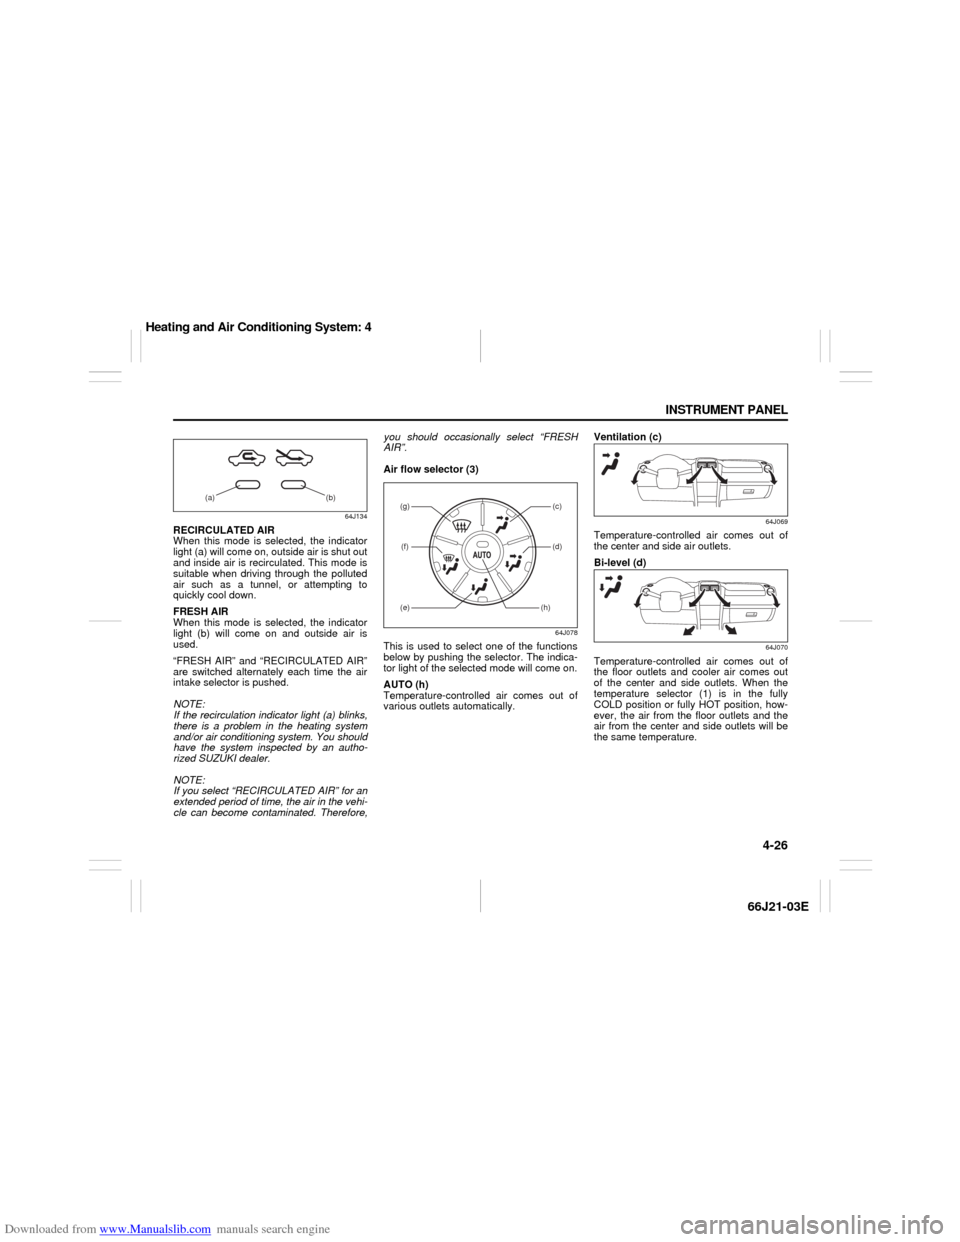
Air flow selector (3)
64J078
This is used to select one of the functions
below by pushing the selector. The indica-
tor light of the selected mode will come on.
AUTO (h)
Temperature-controlled air comes out of
various outlets automatically.Ventilation (c)
64J069
Temperature-controlled air comes out of
the center and side air outlets.
Bi-level (d)
64J070
Temperature-controlled air comes out of
the floor outlets and cooler air comes out
of the center and side outlets. When the
temperature selector (1) is in the fully
COLD position or fully HOT position, how-
ever, the air from the floor outlets and the
air from the center and side outlets will be
the same temperature.
(a) (b)
(g)(f)
(c)(d)
(e)
(h)
Heating and Air Conditioning System: 4
Page 96 of 211
Downloaded from www.Manualslib.com manuals search engine 4-34 INSTRUMENT PANEL
66J21-03E
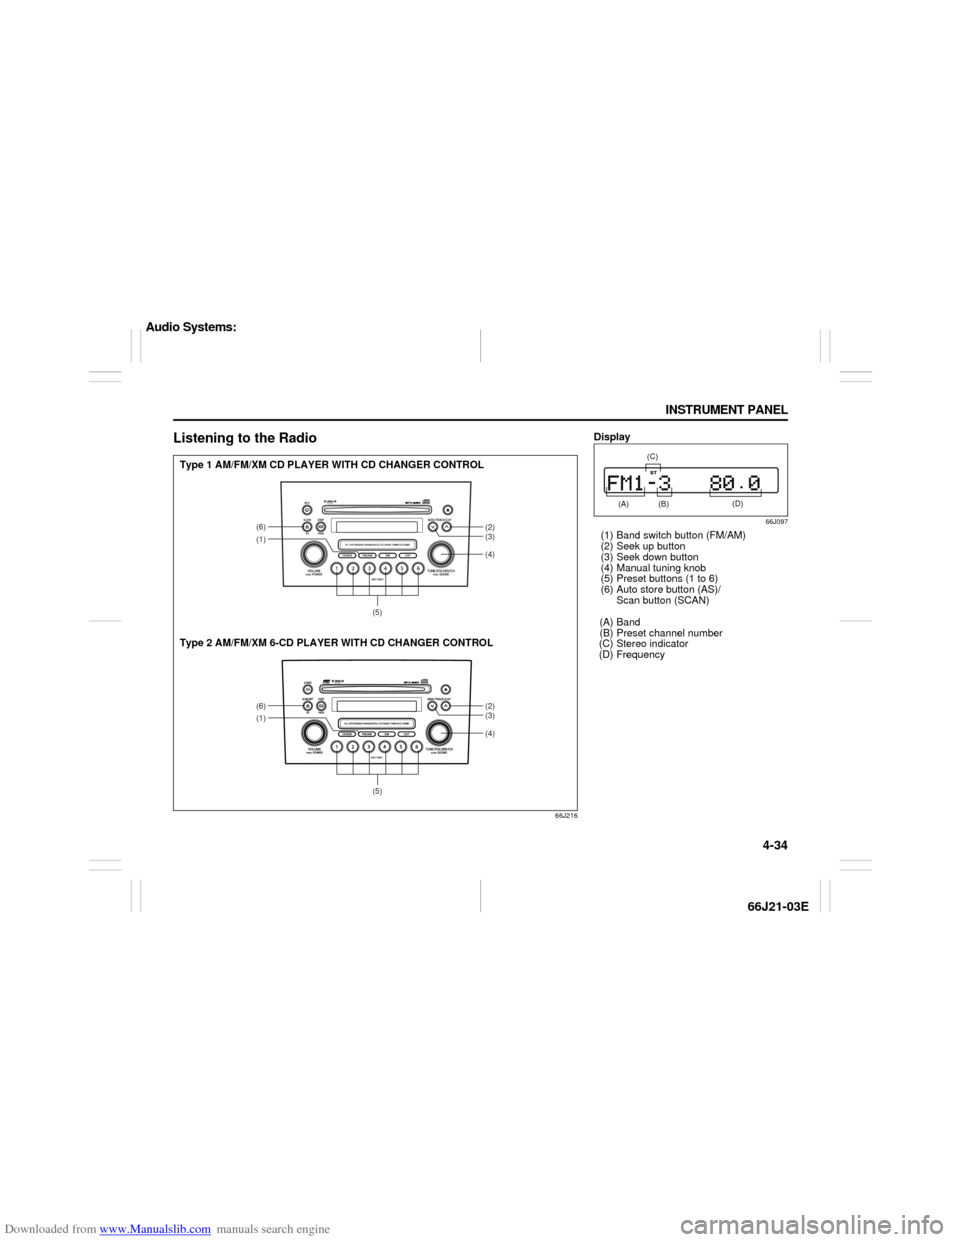
Listening to the Radio
66J216
(1)
(4)(6)
(2)
(3)
(5)
(1)
(4)(6)
(2)
(3)
(5)
Type 1 AM/FM/XM CD PLAYER WITH CD CHANGER CONTROL
Type 2 AM/FM/XM 6-CD PLAYER WITH CD CHANGER CONTROL
Display
66J097
(1) Band switch button (FM/AM)
(2) Seek up button
(3) Seek down button
(4) Manual tuning knob
(5) Preset buttons (1 to 6)
(6) Auto store button (AS)/
Scan button (SCAN)
(A) Band
(B) Preset channel number
(C) Stereo indicator
(D) Frequency
(A)
(B)
(C)
(D)
Audio Systems:
Page 97 of 211
Downloaded from www.Manualslib.com manuals search engine 4-35 INSTRUMENT PANEL
66J21-03E
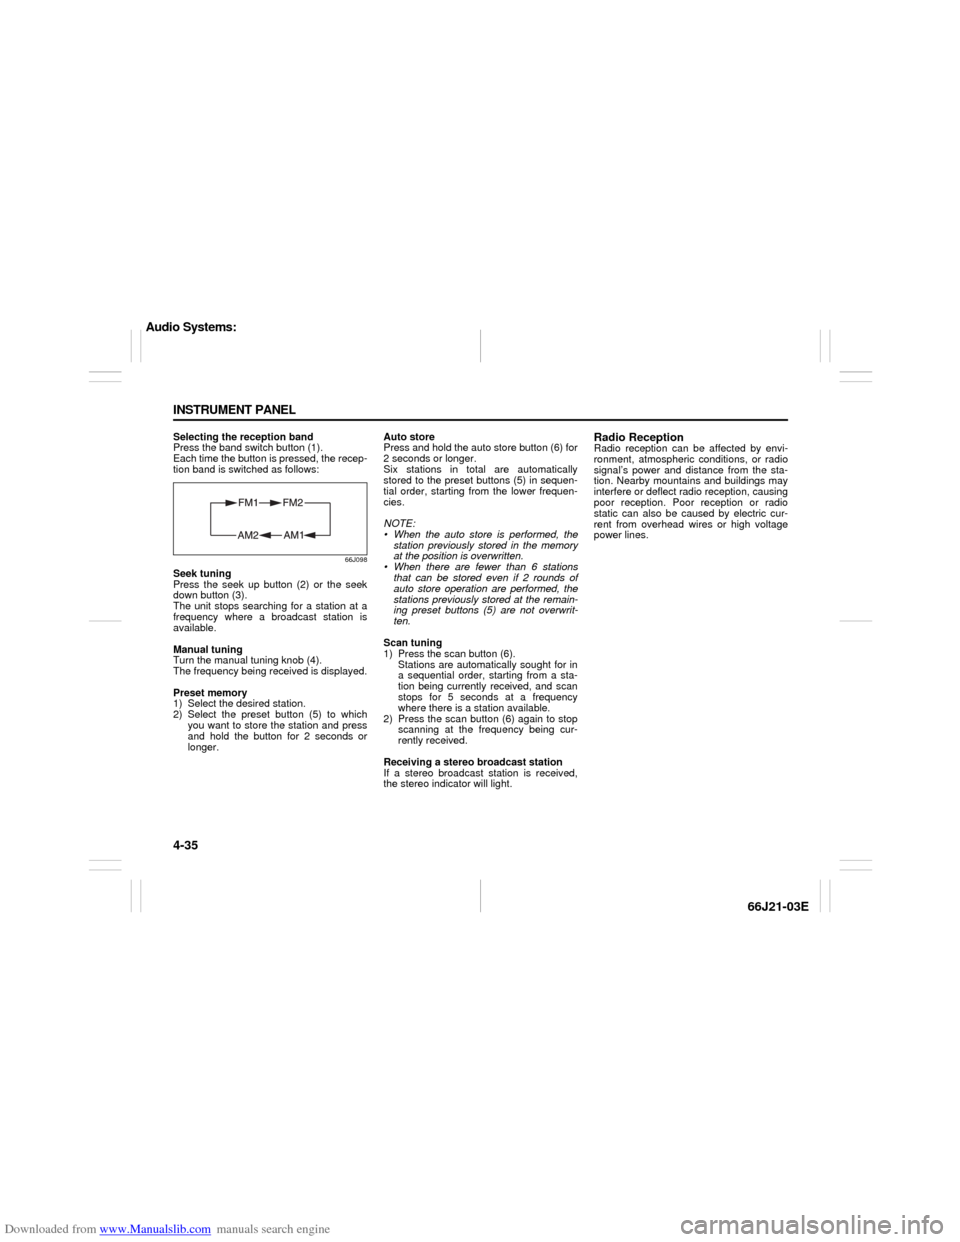
Selecting the reception band
Press the band switch button (1).
Each time the button is pressed, the recep-
tion band is switched as follows:
66J098
Seek tuning
Press the seek up button (2) or the seek
down button (3).
The unit stops searching for a station at a
frequency where a broadcast station is
available.
Manual tuning
Turn the manual tuning knob (4).
The frequency being received is displayed.
Preset memory
1) Select the desired station.
2) Select the preset button (5) to which
you want to store the station and press
and hold the button for 2 seconds or
longer.Auto store
Press and hold the auto store button (6) for
2 seconds or longer.
Six stations in total are automatically
stored to the preset buttons (5) in sequen-
tial order, starting from the lower frequen-
cies.
NOTE:
When the auto store is performed, the
station previously stored in the memory
at the position is overwritten.
When there are fewer than 6 stations
that can be stored even if 2 rounds of
auto store operation are performed, the
stations previously stored at the remain-
ing preset buttons (5) are not overwrit-
ten.
Scan tuning
1) Press the scan button (6).
Stations are automatically sought for in
a sequential order, starting from a sta-
tion being currently received, and scan
stops for 5 seconds at a frequency
where there is a station available.
2) Press the scan button (6) again to stop
scanning at the frequency being cur-
rently received.
Receiving a stereo broadcast station
If a stereo broadcast station is received,
the stereo indicator will light.
Radio ReceptionRadio reception can be affected by envi-
ronment, atmospheric conditions, or radio
signal’s power and distance from the sta-
tion. Nearby mountains and buildings may
interfere or deflect radio reception, causing
poor reception. Poor reception or radio
static can also be caused by electric cur-
rent from overhead wires or high voltage
power lines.
Audio Systems:
Page 99 of 211
Downloaded from www.Manualslib.com manuals search engine 4-37 INSTRUMENT PANEL
66J21-03E
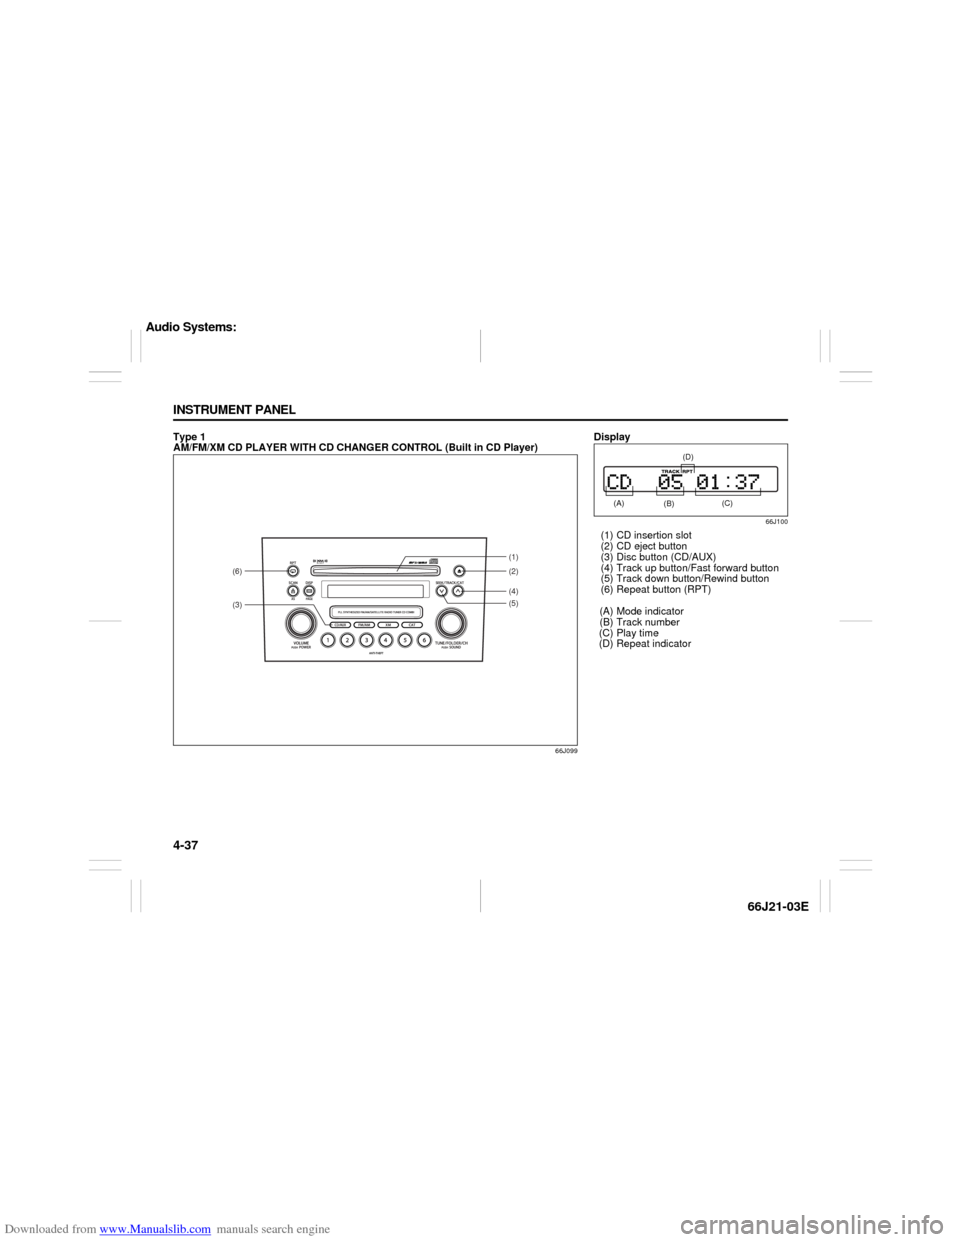
Type 1
AM/FM/XM CD PLAYER WITH CD CHANGER CONTROL (Built in CD Player)
66J099
(3)(6)
(4)(2) (1)
(5)
Display
66J100
(1) CD insertion slot
(2) CD eject button
(3) Disc button (CD/AUX)
(4) Track up button/Fast forward button
(5) Track down button/Rewind button
(6) Repeat button (RPT)
(A) Mode indicator
(B) Track number
(C) Play time
(D) Repeat indicator (A)
(B)
(C)
(D)
Audio Systems:
Page 100 of 211
Downloaded from www.Manualslib.com manuals search engine 4-38 INSTRUMENT PANEL
66J21-03E
NOTE:
About Single CDs (8 cm CDs)
No adapter is required to play a single
CD.
A single CD is inserted from the center
of the CD insertion slot.
Since an ejected single CD is not auto-
matically reloaded, be sure to remove
the ejected single CD.Loading a CD
Insert a CD in the CD insertion slot (1).
When a CD is loaded, play starts and the
CD indicator (A) lights.
Ejecting a CD
Press the CD eject button (2).
If you left a CD ejected for a period of
about 15 seconds, it will be automatically
drawn inside the unit. (Auto reload func-
tion)
The backup eject function:
This function allows you to eject a CD with
the power turned off by pressing the CD
eject button (2).
Listening to a CD
When a CD is inserted, it is automatically
played back.
When a CD is already inside the unit,
press the disc button (3) to play back the
CD. When a CD is inside the unit, the CD
indicator (A) is lit on the display unit.Selecting a track
Press the track up button (4) to listen to
the next track.
Press the track down button (5) twice to
listen to the previous track.
When the track down button (5) is
pressed once, the track being currently
played will return to the beginning.
Fast forwarding/Rewinding a track
Hold in the fast forward button (4) to
advance a track rapidly.
Hold in the rewind button (5) to rewind a
track.
Repeat play
Press the repeat button (6).
The repeat indicator (D) lights and the
track currently being played is played
repeatedly.
Press the repeat button (6) again to cancel
repeat play.
CAUTION
If you forcefully try to push an
ejected CD inside the unit before auto
reloading, the disc surface might be
scratched.
Audio Systems: