check engine SUZUKI GRAND VITARA 2008 3.G Operating Manual
[x] Cancel search | Manufacturer: SUZUKI, Model Year: 2008, Model line: GRAND VITARA, Model: SUZUKI GRAND VITARA 2008 3.GPages: 40, PDF Size: 1.23 MB
Page 1 of 40

Downloaded from www.Manualslib.com manuals search engine OPERATING YOUR VEHICLE
OPERATING YOUR VEHICLE
Exhaust Gas Warning ......................................................... 3·1
Daily Inspection Checklist .................................................. 3·2
Engine Oil Consumption .................................................... 3·3
Ignition
Switch ..................................................................... 3·3
Parking Brake Lever .............................. ~ ............................ 3·7
Pedal
........................................................................\
............ :3·8
Starting the Engine ....•...................................... : .................. 3·9
Using the Transmission ..................................................... 3·11
If You Can Not Shift Automatic Transmission Gearshift
Lever
Out of "P" (PARK) .................................................... 3·17
Using the Transfer Switch (if equipped) ........................... 3·18
Cruise Control (if equipped) ............................................... 3·29
Braking ........................................................................\
......... 3·30
Electronic
Stability Program (ESP®) (if equipped) .......... 3·33
60G40B
Page 3 of 40

Downloaded from www.Manualslib.com manuals search engine Daily Inspection Checklist
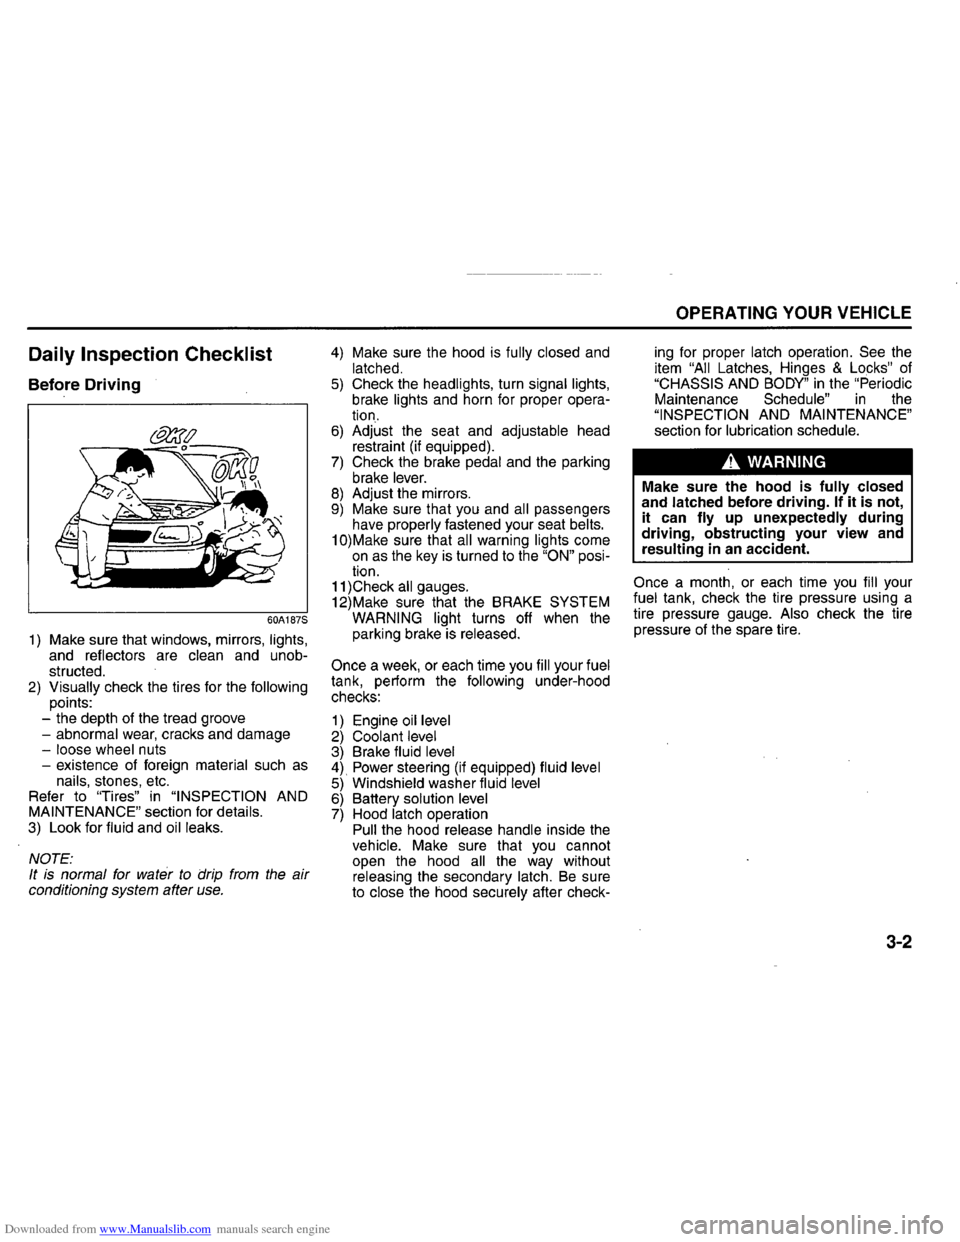
Before Driving
60A187S
1) Make sure that windows, mirrors, lights, and reflectors are clean and unob
structed.
2) Visually check the tires for the following points:
- the depth of the tread groove
-
abnormal wear, cracks and damage
-loose wheel nuts
- existence of foreign material such as nails, stones, etc.
Refer to "Tires" in "INSPECTION AND MAINTENANCE" section for details. 3) Look for fluid and oil leaks.
NOTE:
It is normal for water to drip from the air conditioning system after use.
4) Make sure the hood is fully closed and latched. 5) Check the headlights, turn signal lights, brake lights and horn for proper opera
tion.
6) Adjust the seat and adjustable head
restraint (if equipped).
7) Check the brake pedal and the parking
brake lever. 8) Adjust the mirrors. 9) Make sure that you and all passengers
have properly fastened your seat belts.
10)Make sure that all warning lights come on as the key is turned to the "ON" posi
tion.
11 )Check all gauges.
12)Make sure that the BRAKE SYSTEM
WARNING light turns off when the
parking brake is released.
Once
a week, or each time you fill your fuel tank, perform the following under-hood
checks:
1) Engine oil level 2) Coolant level 3) Brake fluid level 4) Power steering (if equipped) fluid level 5) Windshield washer fluid level 6) Battery solution level 7) Hood latch operation Pull the hood release handle inside the vehicle. Make sure that you cannot
open the hood all the way without releasing the secondary latch. Be sure
to close the hood securely after check-
OPERATING YOUR VEHICLE
ing for proper latch operation. See the
item "All Latches, Hinges & Locks" of "CHASSIS AND BODY" in the "Periodic Maintenance Schedule" in the "INSPECTION AND MAINTENANCE" section for lubrication schedule.
A WARNING
Make sure the hood is fully closed
and latched before driving. If it is not,
it can fly up unexpectedly during
driving,
obstructing your view and
resulting in an accident.
Once a month, or each time you fill your fuel tank, check the tire pressure using a
tire pressure gauge. Also check the tire
pressure of the spare tire.
3-2
Page 8 of 40

Downloaded from www.Manualslib.com manuals search engine OPERATING YOUR VEHICLE
A. WARNING
(Continued) • Always return the ignition switch to the "LOCK" position and remove
the ignition key and the remote controller (if equipped) when leaving the vehicle even if a short time. Also do not leave children or pets alone in a parked vehicle. Unat
tended children could cause accidental movement of the vehicle or could tamper with power windows or power sunroof. They also could suffer from heat stroke in warm or hot weather. These could result in
severe injury or even death.
CAUTION
• Do not use the starter motor for more than 15 seconds at a time.
For diesel engine model, do not use the starter motor for more than 30 seconds at a time. If the engine
does not start, wait 15 seconds
before trying again. If the engine
does not start after several attempts, check the fuel and ignition systems or consult your SUZUKI dealer.
• Do not leave the ignition switch in
the "ON" position if the engine is not running as the battery will discharge.
3-7
Parking Brake Lever
EXAMPLE
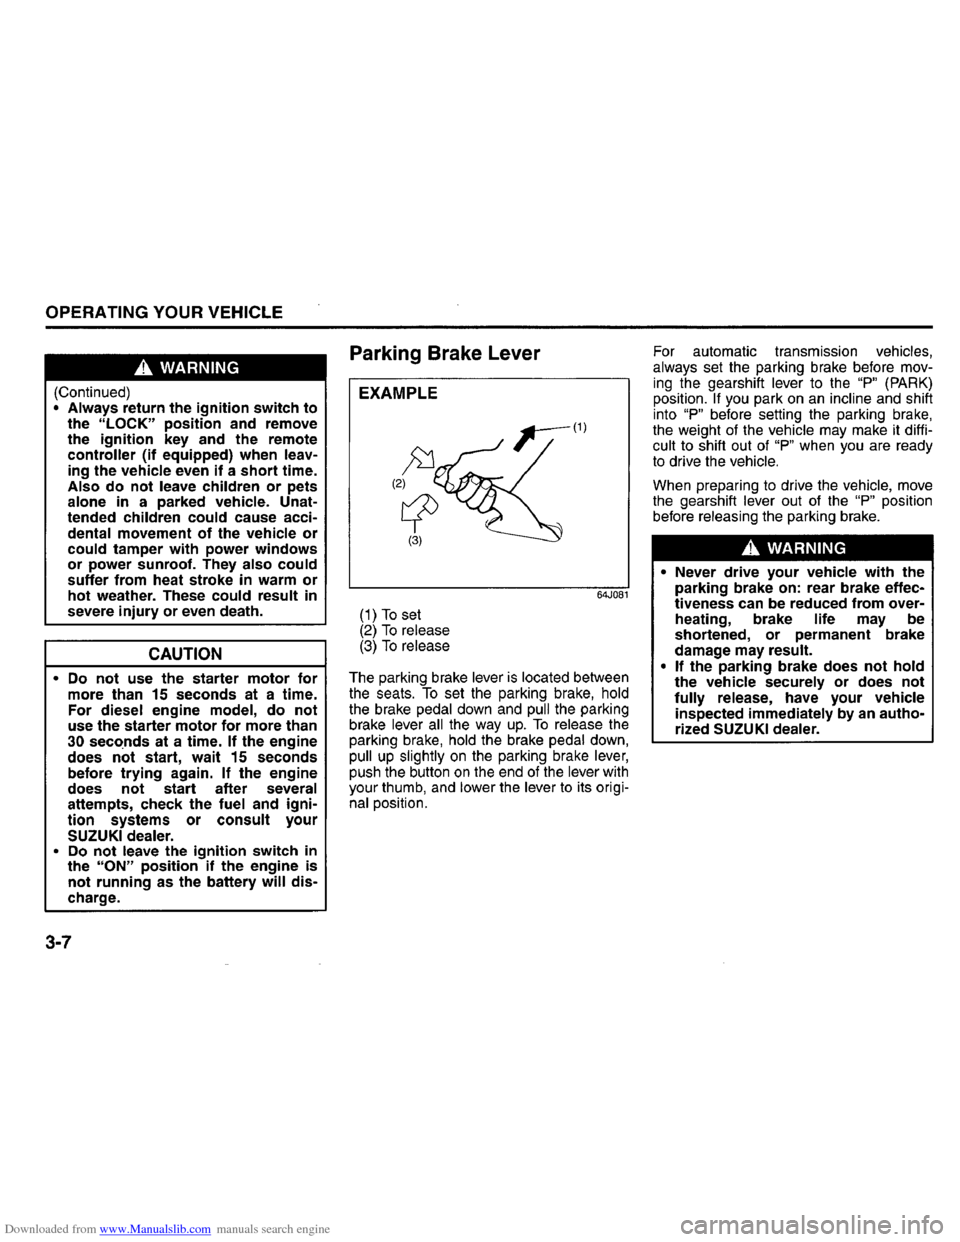
(1) To set (2) To release (3) To release
64J081
The parking brake lever is located between the seats. To set the parking brake, hold the brake pedal down and pull the parking
brake lever all the way up. To release the parking brake, hold the brake pedal down, pull up slightly on the parking brake lever, push the button on the end of the lever with
your thumb, and lower the lever to its original position. For
automatic transmission
vehicles,
always set the parking brake before moving the gearshift lever to the "P" (PARK) position. If you park on an incline and shift
into "P" before setting the parking brake, the weight of the vehicle may make it difficult to shift out of "P" when you are ready to drive the vehicle.
When preparing to drive the vehicle, move the gearshift lever out of the "P" position
before releasing the parking brake.
A. WARNING
• Never drive your vehicle with the
parking brake on: rear brake effec
tiveness can be reduced from over
heating, brake life may be
shortened,
or permanent brake
damage may result.
• If
the parking brake does not hold the vehicle securely or does not fully release, have your vehicle inspected immediately by an autho
rized SUZUKI dealer.
Page 9 of 40

Downloaded from www.Manualslib.com manuals search engine A WARNING
Always set the parking brake fully before leaving your vehicle or it may
move, causing injury or damage.
When parking, make sure the
gearshift lever for manual transmission
vehicles is in 1 st gear or "R" (Reverse) and the gearshift lever for
automatic transmission vehicles is in "P" (Park). Never leave the transfer
lever (if equipped) in "N" (Neutral)
when you are parked.
Remember, even though the transmission is in gear or in Park, you must set the parking brake fully.
A WARNING
When parking the vehicle in extremely cold weather, the following procedure should be used: 1) Set the parking brake. 2) Shift the manual transmission into
reverse or first gear, or the automatic transmission into "P" (Park). 3) With the engine off, get out of the
vehicle and put chocks under the
wheels.
4) Release the parking brake.
When
you return to your vehicle, you must remember to first set the
parking brake, then remove the
wheel chocks.
Pedal
Manual transmission
(2)
(1)
Automatic transmission
(2)
(3)
64JOB2
(3)
64JOB3
OPERATING YOUR VEHICLE
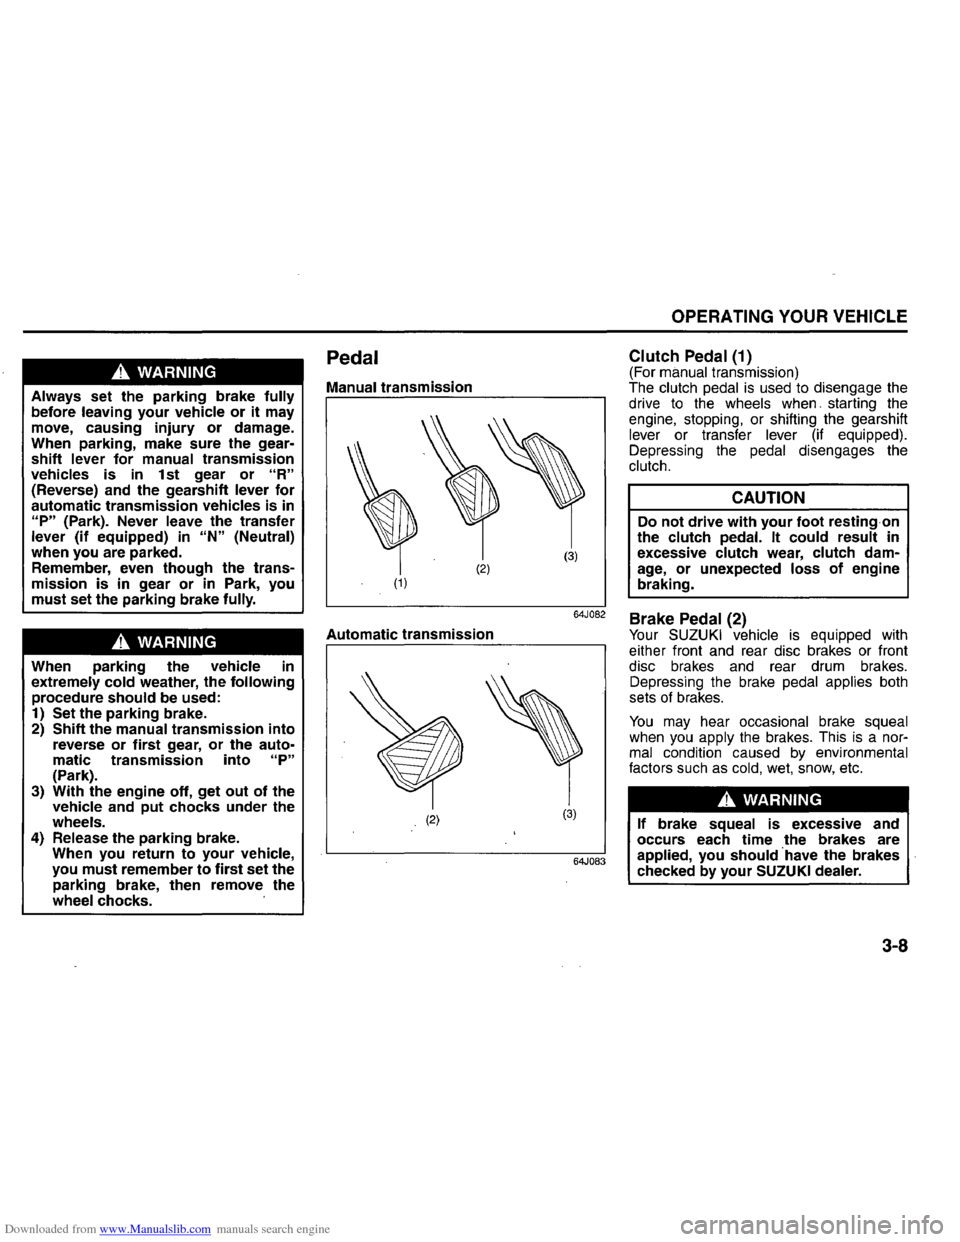
Clutch Pedal (1) (For manual transmission)
The clutch pedal is used to disengage the
drive to the wheels when, starting the
engine, stopping, or shifting the gearshift
lever or transfer lever (if equipped).
Depressing the pedal disengages the
clutch.
CAUTION
Do not drive with your foot resting-on the clutch pedal. It could result in excessive clutch wear, clutch damage, or unexpected loss of engine
braking.
Brake Pedal (2) Your SUZUKI vehicle is equipped with
either front and rear disc brakes or front
disc brakes and rear drum brakes.
Depressing the brake pedal applies both
sets
of brakes.
You may hear occasional brake squeal
when you apply the brakes. This is a normal condition caused by environmental
factors such as cold, wet, snow, etc.
A WARNING
If brake squeal is excessive and
occurs each time the brakes are
applied,
you should 'have the brakes
checked by your SUZUKI dealer.
3-8
Page 33 of 40

Downloaded from www.Manualslib.com manuals search engine (8) or ABS
(1) (2)
(CD)
BRAKE (3)
(1) ABS warning light Type 1 (2) ABS warning light Type 2 (3) Brake system warning light
A WARNING
65D451
If the ABS warning light «1) or (2» on
the instrument panel comes on and
stays on while driving, there may be a
problem with the ABS system. If this happens:
1) Pull off the road and stop care
fully.
2) Turn the ignition switch to "LOCK" and then start the engine again.
(Continued)
A WARNING
(Continued) If the warning light comes on briefly then turns off, the system is normal.
If the. warning light still stays on,
have the system inspected by your
SUZUKI dealer immediately.
If the ABS system becomes inoperative, the brake system will function as
an ordinary brake system that has no
ABS.
A WARNING
If the ABS warning light «1) or (2» and the Brake system warning light (3) on the instrument panel simulta
neously stays on or comes on when
driving, both anti-lock function and
rear brake force control function (proportioning valve function) of the ABS system may have failed. If so, the rear wheels may easily skid or the vehicle can even spin in the worst case when
braking on a slippery road or when
hard braking even on a dry paved
road. Ask your SUZUKI dealer to inspect the ABS system immediately. Drive carefully, avoiding hard braking
as much as possible.
OPERATING YOUR VEHICLE
How the ABS Works A computer continuously monitors wheel speed. The' computer compares the
changes in wheel speed when braking. If the wheels slow suddenly, indicating a
skidding Situation, the computer will change braking pressure several times
each second to prevent the wheels from locking. When you start your vehicle or when you accelerate after a hard stop, you may hear a momentary motor or clicking sound as the system resets or checks itself.
A WARNING
The ABS may not work properly if
tires or wheels other than those
specified in the owner's manual are
used. This is because the ABS works
by comparing changes in wheel speed. When replacing tires or wheels, use only the size and type
specified in this owner's manual.
3-32
Page 34 of 40

Downloaded from www.Manualslib.com manuals search engine OPERATING YOUR VEHICLE
Electronic Stability Program
(ESP~ (if equipped)
ESP® is a registered trademark of Daimler AG.
The Electronic Stability Program (ESP~ helps to control the vehicle during corner
ing if front wheels or rear wheels skid. It also assists you in maintaining traction while accelerating on loose or slippery road surfaces. It does this by regulating the
engine's output, and by selectively applying the brakes. In addition, ESP® helps to
avoid skidding by controlling braking pres
sure.
A WARNING
The ESP® cannot enhance the vehi
cle's driving stability in all situations and does not control your vehicle's entire braking system. The ESP® cannot prevent accidents, including those resulting from excessive speed
in turns, or hydroplaning. Only a safe
and attentive driver can prevent accidents. The capabilities of an ESP®equipped vehicle must never be used
as a substitute for careful driving.
3-33
The ESP® has the following three systems:
Stability Control System The vehicle stability control system helps provide integrated control of systems such as anti-lock brakes, traction control, engine control, etc. This system automatically
controls the brakes and engine to help pre
vent the vehicle from skidding when cor
nering on a slippery road surface or when
turning the steering wheel abruptly.
Traction Control System The traction control system automatically
helps prevent the spinning of wheels when
the vehicle is started or accelerated on slippery road surfaces. The system oper
ates only if it senses that some of the wheels are spinning or beginning to lose traction. When this happens, the system
operates the front or rear brakes and
reduces engine power to
limit wheel spin.
NOTE: You may hear a clicking sound in the
engine compartment for a few seconds when you start the engine or just after the
vehicle begins to move. This means that
the above systems are in the self-check mode. This sound does not indicate a mal
function.
Anti-Lock Braking System (ABS) ABS will help you avoid skidding by elec
tronically controlling braking pressure. It will also help you maintain steering control when braking on slippery surfaces or when
braking hard. The ABS works automatically, so you do not have to use any special braking technique. Just push the brake pedal down without pumping. The ABS will operate whenever it senses that wheels are locking up. You may feel the brake pedal pulsate while the ABS is operating.
(For more information on ABS, see "Brak
ing" in the "OPERATING YOUR VEHICLE" section.)
NOTE: If the ABS system is activated, you may
hear a clunking noise and/or feel pulsating in the brake pedal. This is normal and indi
cates that the brake fluid pressure is being
controffed properly