clutch SUZUKI GRAND VITARA 2008 3.G Owners Manual
[x] Cancel search | Manufacturer: SUZUKI, Model Year: 2008, Model line: GRAND VITARA, Model: SUZUKI GRAND VITARA 2008 3.GPages: 290, PDF Size: 4.99 MB
Page 1 of 290

Part No. 99011-66J22-03E
July, 2007
OWNER’S MANUAL
99011-66J22-03E GRAND VITARA
Printed in Japan
See page 1-1
12.5 mm
Keep With Vehicle At All Times.
Contains Important Information
On Safety, Operation & Maintenance.
SERVICE STATION INFORMATION
Fuel recommendation: Brake and clutch fluid:
Engine oil recommendation: Automatic transmission fluid:
Tire cold pressure:
For further details, see “Engine Oil and Filter” in the
“INSPECTION AND MAINTENANCE” section.DOT3
See the “Tire Information Label” located on the
driver’s door lock pillar.
2008Engine oil with “Starburst” symbol
Made from 100% recycled paper,
except for cover.
ENGLISH
Suzuki Red: PANTONE 485
Suzuki Blue: PANTONE 294
SUZUKI ATF 3317 or Mobil ATF 3309
Page 72 of 290
3-11STEERING COLUMN CONTROLS
66J22-03E
66J193
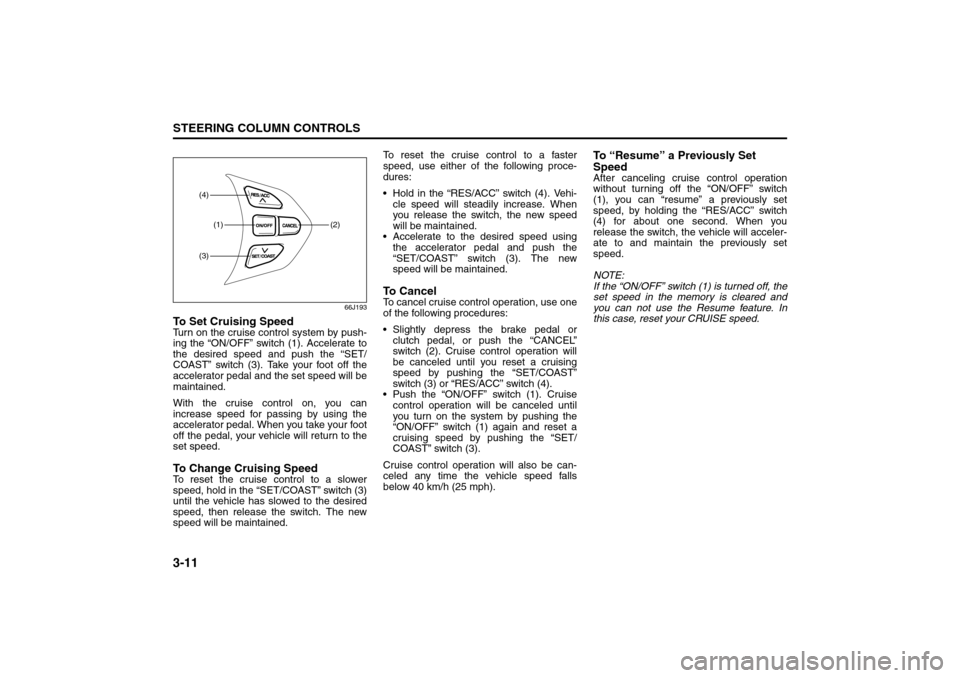
To Set Cruising SpeedTurn on the cruise control system by push-
ing the “ON/OFF” switch (1). Accelerate to
the desired speed and push the “SET/
COAST” switch (3). Take your foot off the
accelerator pedal and the set speed will be
maintained.
With the cruise control on, you can
increase speed for passing by using the
accelerator pedal. When you take your foot
off the pedal, your vehicle will return to the
set speed.To Change Cruising SpeedTo reset the cruise control to a slower
speed, hold in the “SET/COAST” switch (3)
until the vehicle has slowed to the desired
speed, then release the switch. The new
speed will be maintained.To reset the cruise control to a faster
speed, use either of the following proce-
dures:
Hold in the “RES/ACC” switch (4). Vehi-
cle speed will steadily increase. When
you release the switch, the new speed
will be maintained.
Accelerate to the desired speed using
the accelerator pedal and push the
“SET/COAST” switch (3). The new
speed will be maintained.
To C a n c e lTo cancel cruise control operation, use one
of the following procedures:
Slightly depress the brake pedal or
clutch pedal, or push the “CANCEL”
switch (2). Cruise control operation will
be canceled until you reset a cruising
speed by pushing the “SET/COAST”
switch (3) or “RES/ACC” switch (4).
Push the “ON/OFF” switch (1). Cruise
control operation will be canceled until
you turn on the system by pushing the
“ON/OFF” switch (1) again and reset a
cruising speed by pushing the “SET/
COAST” switch (3).
Cruise control operation will also be can-
celed any time the vehicle speed falls
below 40 km/h (25 mph).
To “Resume” a Previously Set
SpeedAfter canceling cruise control operation
without turning off the “ON/OFF” switch
(1), you can “resume” a previously set
speed, by holding the “RES/ACC” switch
(4) for about one second. When you
release the switch, the vehicle will acceler-
ate to and maintain the previously set
speed.
NOTE:
If the “ON/OFF” switch (1) is turned off, the
set speed in the memory is cleared and
you can not use the Resume feature. In
this case, reset your CRUISE speed.
(1) (2)
(4)(3)
Cruise Control: 7, 8
Page 133 of 290
5-2
OTHER CONTROLS AND EQUIPMENT
66J22-03E
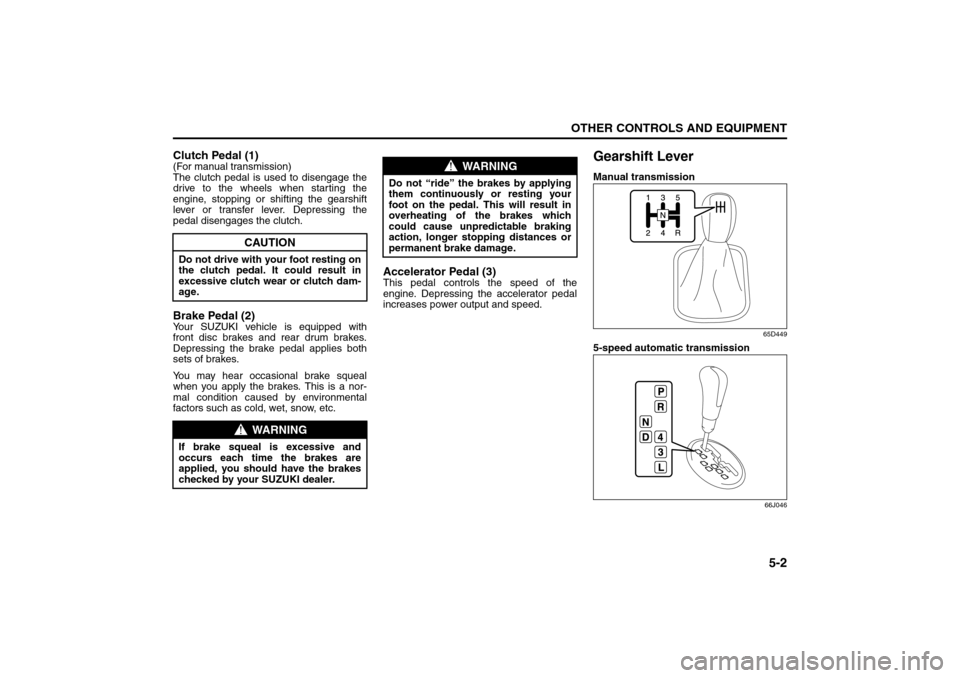
Clutch Pedal (1)(For manual transmission)
The clutch pedal is used to disengage the
drive to the wheels when starting the
engine, stopping or shifting the gearshift
lever or transfer lever. Depressing the
pedal disengages the clutch.Brake Pedal (2)Your SUZUKI vehicle is equipped with
front disc brakes and rear drum brakes.
Depressing the brake pedal applies both
sets of brakes.
You may hear occasional brake squeal
when you apply the brakes. This is a nor-
mal condition caused by environmental
factors such as cold, wet, snow, etc.
Accelerator Pedal (3)This pedal controls the speed of the
engine. Depressing the accelerator pedal
increases power output and speed.
Gearshift LeverManual transmission
65D449
5-speed automatic transmission
66J046
CAUTION
Do not drive with your foot resting on
the clutch pedal. It could result in
excessive clutch wear or clutch dam-
age.
WARNING
If brake squeal is excessive and
occurs each time the brakes are
applied, you should have the brakes
checked by your SUZUKI dealer.
WARNING
Do not “ride” the brakes by applying
them continuously or resting your
foot on the pedal. This will result in
overheating of the brakes which
could cause unpredictable braking
action, longer stopping distances or
permanent brake damage.
Pedals: 6
Gearshift Lever: 10
Page 161 of 290
6-2
OPERATING YOUR VEHICLE
66J22-03E
Daily Inspection ChecklistBefore Driving1) Make sure that windows, mirrors, lights
and reflectors are clean and unob-
structed.
2) Visually check the tires for the following
points:
– the depth of the tread groove
– abnormal wear, cracks and damage
– loose wheel nuts
– existence of foreign material such as
nails, stones, etc.
Refer to “Tires” in “INSPECTION AND
MAINTENANCE” section for details.
3) Look for fluid, oil leaks.
NOTE:
It is normal for water to drip from the air
conditioning system after use.
4) Make sure the hood is fully closed and
latched.
5) Check the headlights, turn signal lights,
brake lights and horn for proper opera-
tion.
6) Lock all doors.
7) Adjust the seat and adjustable head
restraints (if equipped).
8) Check the brake pedal and the parking
brake lever.
9) Adjust the mirrors.
10)Make sure that you and all passengers
have properly fastened your seat belts.11)Make sure that all warning lights come
on as the key is turned to the “ON” or
“START” position.
12)Check all gauges.
13)Make sure that the BRAKE SYSTEM
WARNING light turns off when the
parking brake is released.
Once a week, or each time you fill your fuel
tank, perform the following under-hood
checks:
1) Engine oil level
2) Coolant level
3) Brake fluid level
4) Power steering (if equipped) fluid level
5) Windshield washer fluid level
6) Hood latch operation
Pull the hood release handle inside the
vehicle. Make sure that you cannot
open the hood all the way without
releasing the secondary latch. Be sure
to close the hood securely after check-
ing for proper latch operation. See the
item “All Latches, Hinges and Locks” of
“CHASSIS AND BODY” in the “Periodic
Maintenance Schedule” in the
“INSPECTION AND MAINTENANCE”
section for lubrication schedule.
Starting the EngineBefore Starting the Engine1) Make sure the parking brake is set fully.
2) Manual Transmission – Shift into “N”
(Neutral) and depress the clutch pedal
all the way to the floor.
Hold it while starting the engine.
Automatic Transmission – If the gear-
shift lever is not in “P” (Park) position,
shift into “P”. (If you need to re-start the
engine while the vehicle is moving, shift
into “N”.)
NOTE:
The engine of manual transmission vehicle
will not start unless the clutch pedal is
depressed.
NOTE:
Automatic transmission vehicles have a
starter interlock device which is designed
to keep the starter from operating if the
transmission is in any of the drive posi-
tions.
WARNING
Make sure the hood is fully closed
and latched before driving. If it is not,
it can fly up unexpectedly during
driving, obstructing your view and
resulting in an accident.
WARNING
Make sure that the parking brake is
set fully and the transmission is in
Neutral (or Park for vehicles with an
automatic transmission) before
attempting to start the engine.
Daily Inspection Checklist: NO
Starting the Engine: 1
Page 166 of 290
6-7OPERATING YOUR VEHICLE
66J22-03E
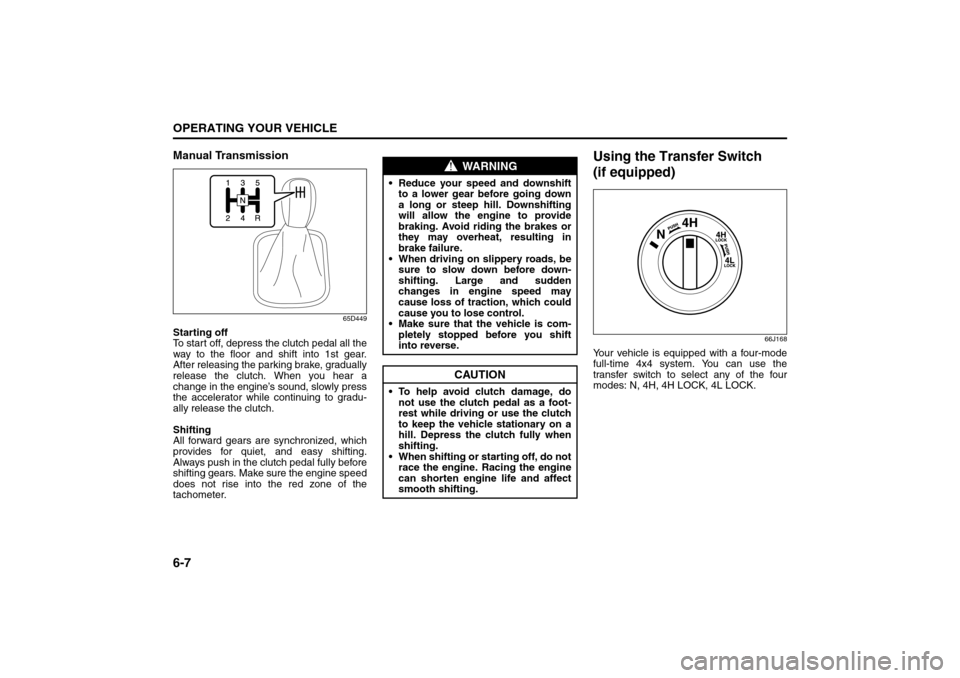
Manual Transmission
65D449
Starting off
To start off, depress the clutch pedal all the
way to the floor and shift into 1st gear.
After releasing the parking brake, gradually
release the clutch. When you hear a
change in the engine’s sound, slowly press
the accelerator while continuing to gradu-
ally release the clutch.
Shifting
All forward gears are synchronized, which
provides for quiet, and easy shifting.
Always push in the clutch pedal fully before
shifting gears. Make sure the engine speed
does not rise into the red zone of the
tachometer.
Using the Transfer Switch
(if equipped)
66J168
Your vehicle is equipped with a four-mode
full-time 4x4 system. You can use the
transfer switch to select any of the four
modes: N, 4H, 4H LOCK, 4L LOCK.
WARNING
Reduce your speed and downshift
to a lower gear before going down
a long or steep hill. Downshifting
will allow the engine to provide
braking. Avoid riding the brakes or
they may overheat, resulting in
brake failure.
When driving on slippery roads, be
sure to slow down before down-
shifting. Large and sudden
changes in engine speed may
cause loss of traction, which could
cause you to lose control.
Make sure that the vehicle is com-
pletely stopped before you shift
into reverse.
CAUTION
To help avoid clutch damage, do
not use the clutch pedal as a foot-
rest while driving or use the clutch
to keep the vehicle stationary on a
hill. Depress the clutch fully when
shifting.
When shifting or starting off, do not
race the engine. Racing the engine
can shorten engine life and affect
smooth shifting.
Using the Transmission: 10
Page 167 of 290

6-8
OPERATING YOUR VEHICLE
66J22-03E
64J143
(2)
(5)
(3)
(4)
(7)
(9)
(6)
(1)
(11)
(10)
(8)
(1) Front differential
(2) Engine
(3) Transmission
(4) High/Low clutch
(5) Transfer case
(6) Center differential
(7) Differential lock clutch
(8) Chain
(9) Rear propeller shaft
(10) Rear differential
(11) Front propeller shaft
Using the Transmission: 10
Using the Transfer Switch: 10
Page 172 of 290

6-13OPERATING YOUR VEHICLE
66J22-03E
Transfer Switch OperationOperate the transfer switch according to
the appropriate procedure described
below:
From N to 4H
Stop the vehicle completely, place the
transmission in “N” (Neutral) and depress
the brake pedal and the clutch pedal fully
(if equipped), then push in and turn the
switch to shift into “4H”.
From 4H to 4H LOCK
You can operate the transfer switch either
when the vehicle is stopped or while the
vehicle is moving.
Position the front wheels straight ahead
and turn the switch to shift into “4H LOCK”.
If the vehicle is moving, we recommend
that the speed be less than 100 km/h (60
mph) during this operation.
NOTE:
When shifting between the transfer
switch position and the transfer gear
position is unmatched, all 4WD indica-
tors will blink and the buzzer will sound.
If it is difficult to shift between “4H” and
“4H LOCK” while the vehicle is moving,
try accelerating and decelerating your
vehicle several times after turning thetransfer switch. Be sure to wait until traf-
fic conditions allow you to accelerate and
decelerate safety before using this pro-
cedure.
From 4H LOCK to 4L LOCK
Stop the vehicle completely, place the
transmission in “N” (Neutral) and depress
the brake pedal and the clutch pedal fully
(if equipped), then push in and turn the
switch to shift into “4L LOCK”.
From 4L LOCK to 4H LOCK
Stop the vehicle completely, place the
transmission in “N” (Neutral) and depress
the brake pedal and the clutch pedal fully
(if equipped), then push in and turn the
switch to shift into “4H LOCK”.
From 4H LOCK to 4H
You can operate the transfer switch either
when the vehicle is stopped or while the
vehicle is moving.
Position the front wheels straight ahead
and turn the switch to shift into “4H”. If the
vehicle is moving, we recommend that the
speed be less than 100 km/h (60 mph) dur-
ing this operation.NOTE:
When shifting between the transfer
switch position and the transfer gear
position is unmatched, all 4WD indica-
tors will blink and the buzzer will sound.
If it is difficult to shift between “4H” and
“4H LOCK” while the vehicle is moving,
try accelerating and decelerating your
vehicle several times after turning the
transfer switch. Be sure to wait until traf-
fic conditions allow you to accelerate and
decelerate safety before using this pro-
cedure.
From 4H to N
64J209
Stop the vehicle completely, place the
transmission in “N” (Neutral) and depress
the brake pedal and the clutch pedal fully
(if equipped), then push in and turn the
switch to the mark (1) at the left of the “N”
position, and hold the switch in this posi-
CAUTION
Do not operate the transfer switch
while tires are racing.
CAUTION
Do not operate the transfer switch
while tires are racing.
(1)
Using the Transfer Switch: 10
Page 173 of 290

6-14
OPERATING YOUR VEHICLE
66J22-03E
tion for 5 seconds until the “N” indicator
blinks, then turn the switch to the “N” posi-
tion.
When you turn the transfer switch to the
“N” position, “N” indicator will come on with
the buzzer sound.
CAUTION
Be sure to stop the vehicle com-
pletely before operating the trans-
fer switch to shift between “N” and
“4H”, or between “4H LOCK” and
“4L LOCK”.
Do not shift between “4H” and “4H
LOCK” unless the front wheels are
in the straight-ahead position and
we recommend that the vehicle
speed be less than 100 km/h (60
mph).
Do not operate the transfer switch
while tires are racing.
Do not operate your vehicle in “4H
LOCK” or “4L LOCK” on dry, hard
surfaces.
(Continued)
CAUTION
(Continued)
Do not operate the vehicle while a
4WD mode indicator is blinking
except when shifting between “4H”
and “4L LOCK”.
If you operate the vehicle while a
4WD mode indicator is blinking, a
buzzer will sound and the transfer
will shift to “N” (Neutral) to prevent
transfer case damage.
In this case, use the following pro-
cedure.
1) Depress the clutch pedal fully (if
equipped) or shift the automatic
transmission gearshift lever to the
“N” position.
2) Turn the transfer switch to the
position previously selected.
3) Operate the transfer switch again.
Using the Transfer Switch: 10
Page 201 of 290
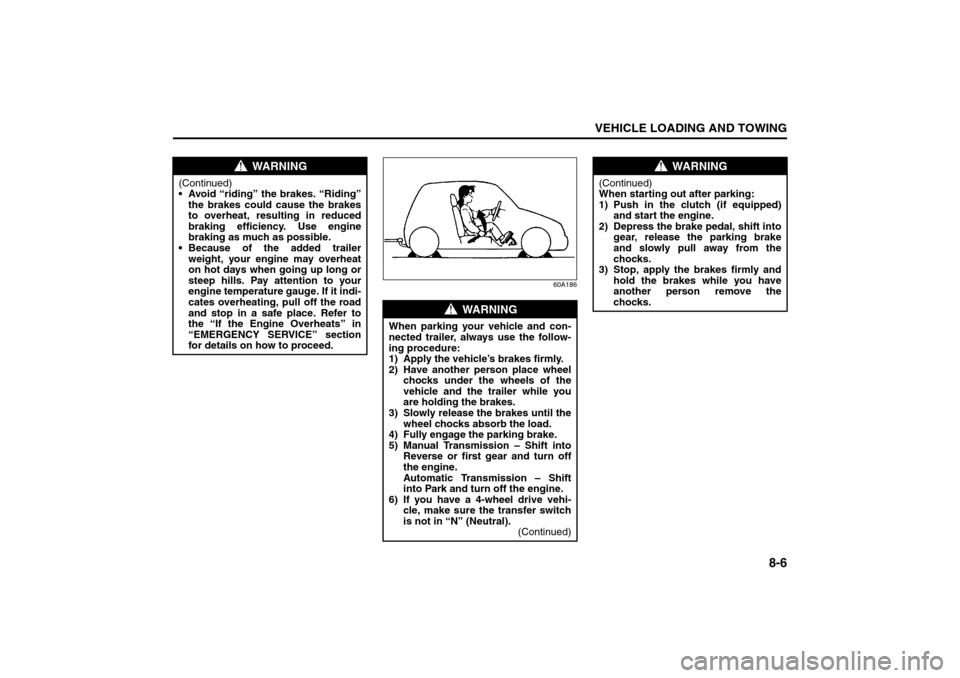
8-6
VEHICLE LOADING AND TOWING
66J22-03E
60A186
WARNING
(Continued)
Avoid “riding” the brakes. “Riding”
the brakes could cause the brakes
to overheat, resulting in reduced
braking efficiency. Use engine
braking as much as possible.
Because of the added trailer
weight, your engine may overheat
on hot days when going up long or
steep hills. Pay attention to your
engine temperature gauge. If it indi-
cates overheating, pull off the road
and stop in a safe place. Refer to
the “If the Engine Overheats” in
“EMERGENCY SERVICE” section
for details on how to proceed.
WARNING
When parking your vehicle and con-
nected trailer, always use the follow-
ing procedure:
1) Apply the vehicle’s brakes firmly.
2) Have another person place wheel
chocks under the wheels of the
vehicle and the trailer while you
are holding the brakes.
3) Slowly release the brakes until the
wheel chocks absorb the load.
4) Fully engage the parking brake.
5) Manual Transmission – Shift into
Reverse or first gear and turn off
the engine.
Automatic Transmission – Shift
into Park and turn off the engine.
6) If you have a 4-wheel drive vehi-
cle, make sure the transfer switch
is not in “N” (Neutral).
(Continued)
WARNING
(Continued)
When starting out after parking:
1) Push in the clutch (if equipped)
and start the engine.
2) Depress the brake pedal, shift into
gear, release the parking brake
and slowly pull away from the
chocks.
3) Stop, apply the brakes firmly and
hold the brakes while you have
another person remove the
chocks.
Trailer Towing: 5, 11, 13
Page 203 of 290

8-8
VEHICLE LOADING AND TOWING
66J22-03E
Before towing
64J147
Vehicles equipped with a transfer switch
may be towed from the front with all four
wheels on the ground. Be sure to use
proper towing equipment designed for rec-
reational towing and make sure that towing
speed does not exceed 90 km/h (55 mph).To tow a vehicle equipped with a trans-
fer switch with all four wheels on the
ground:
1) Turn the ignition key to the “ON” posi-
tion.
2) Place the transmission in “N” (Neutral)
and depress the brake pedal and the
clutch pedal fully (if equipped).
3) Use the transfer switch to shift into neu-
tral.
64J218
NOTE:
First, push in and turn the switch to the
mark (1) at the left of the “N” position, and
hold the switch in this position for 5 sec-
onds until the “N” indicator blinks, then turn
the switch to the “N” position.
When you turn the transfer switch to the
“N” position, “N” indicator will come on with
the buzzer sound.
4) Make sure the “N” light on the instru-
ment cluster comes on.
5) Shift the manual transmission lever into
2nd gear or the automatic transmission
lever into “P” (Park).
6) Turn the ignition key to the “ACC” posi-
tion to unlock the steering wheel.
WARNING
When you tow your vehicle, follow
the instructions below to avoid acci-
dents and damage to your vehicle. In
addition, be sure to observe govern-
ment and local requirements regard-
ing vehicle lighting and trailer hitches
or tow bars.
WARNING
A safety chain should always be used
when you tow your vehicle.
CAUTION
Do not tow your vehicle with either
front wheels or rear wheels directly
on the ground (and the transmission
in neutral). If you do, the transmis-
sion will be damaged fatally.
(1)
Towing Your Vehicle (recreational towing): 13