heater SUZUKI GRAND VITARA 2008 3.G Owners Manual
[x] Cancel search | Manufacturer: SUZUKI, Model Year: 2008, Model line: GRAND VITARA, Model: SUZUKI GRAND VITARA 2008 3.GPages: 290, PDF Size: 4.99 MB
Page 76 of 290
4-1INSTRUMENT PANEL
66J22-03E
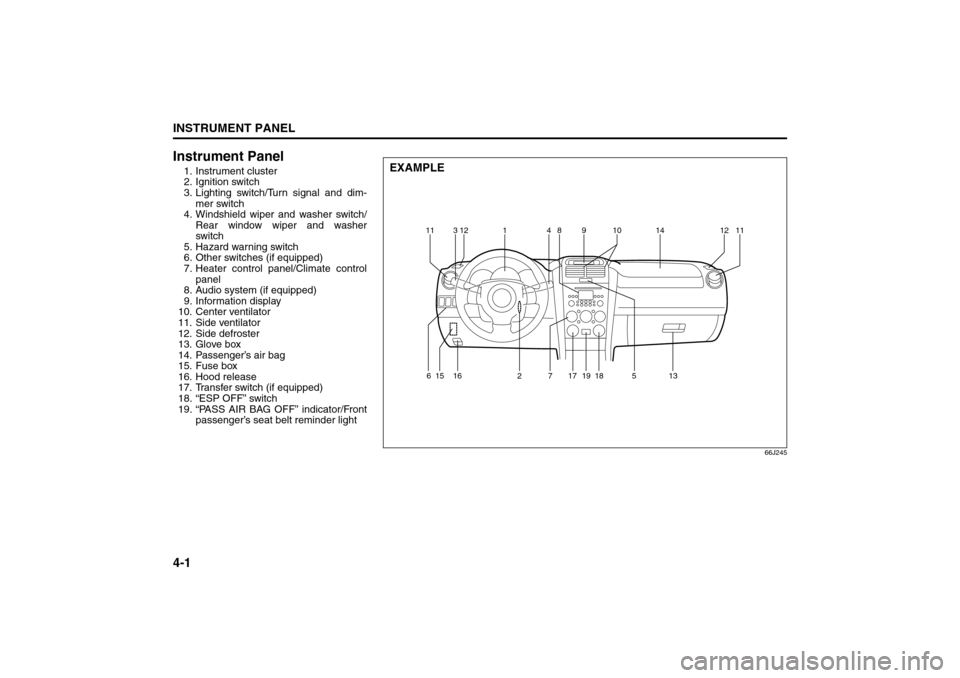
Instrument Panel1. Instrument cluster
2. Ignition switch
3. Lighting switch/Turn signal and dim-
mer switch
4. Windshield wiper and washer switch/
Rear window wiper and washer
switch
5. Hazard warning switch
6. Other switches (if equipped)
7. Heater control panel/Climate control
panel
8. Audio system (if equipped)
9. Information display
10. Center ventilator
11. Side ventilator
12. Side defroster
13. Glove box
14. Passenger’s air bag
15. Fuse box
16. Hood release
17. Transfer switch (if equipped)
18. “ESP OFF” switch
19. “PASS AIR BAG OFF” indicator/Front
passenger’s seat belt reminder light
66J245
EXAMPLE
11 12314891014 1211
615 16 2 17
18
19
7513
Instrument Panel: 3, 8
Page 104 of 290
4-29INSTRUMENT PANEL
66J22-03E
Ty p e 2
66J214
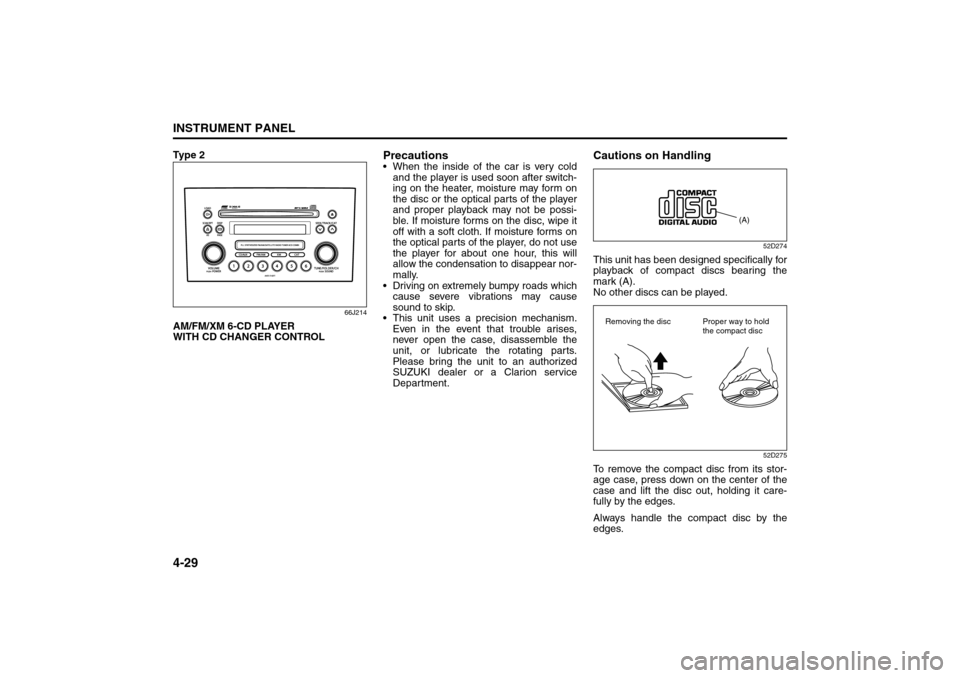
AM/FM/XM 6-CD PLAYER
WITH CD CHANGER CONTROL
Precautions When the inside of the car is very cold
and the player is used soon after switch-
ing on the heater, moisture may form on
the disc or the optical parts of the player
and proper playback may not be possi-
ble. If moisture forms on the disc, wipe it
off with a soft cloth. If moisture forms on
the optical parts of the player, do not use
the player for about one hour, this will
allow the condensation to disappear nor-
mally.
Driving on extremely bumpy roads which
cause severe vibrations may cause
sound to skip.
This unit uses a precision mechanism.
Even in the event that trouble arises,
never open the case, disassemble the
unit, or lubricate the rotating parts.
Please bring the unit to an authorized
SUZUKI dealer or a Clarion service
Department.
Cautions on Handling
52D274
This unit has been designed specifically for
playback of compact discs bearing the
mark (A).
No other discs can be played.
52D275
To remove the compact disc from its stor-
age case, press down on the center of the
case and lift the disc out, holding it care-
fully by the edges.
Always handle the compact disc by the
edges.
(A)
Removing the disc Proper way to hold
the compact disc
Audio Systems:
Page 131 of 290
OTHER CONTROLS AND EQUIPMENT
5
66J22-03E
60G407
OTHER CONTROLS AND EQUIPMENTParking Brake Lever ........................................................... 5-1
Pedals ................................................................................... 5-1
Gearshift Lever .................................................................... 5-2
Fuel Filler Cap ..................................................................... 5-3
Folding Seats ....................................................................... 5-4
Armrest ................................................................................ 5-7
Sun Visor ............................................................................. 5-7
Interior Light Switch ........................................................... 5-7
Spot Light ............................................................................ 5-8
Luggage Compartment Light ............................................. 5-9
Front Seat Heater (if equipped) .......................................... 5-9
Assist Grips (if equipped) .................................................. 5-10
Coat Hooks (if equipped) .................................................... 5-11
Sunroof (if equipped) .......................................................... 5-11
Engine Hood ........................................................................ 5-13
Cup Holder and Storage Bin (if equipped) ........................ 5-14
Overhead Console Box (if equipped) ................................ 5-15
Accessory Socket (if equipped) ......................................... 5-16
Cigarette Lighter and Ashtray ............................................ 5-17
Frame Hooks ....................................................................... 5-17
Tire Changing Tool ............................................................. 5-18
Shopping Hook (if equipped) ............................................. 5-19
Front Seat Back Pocket (if equipped) ............................... 5-19
Luggage Restraint Loops (if equipped) ............................ 5-19
Luggage Compartment Cover ............................................ 5-20
Underfloor Bins (if equipped) ............................................ 5-23
Roof Rails or Roof Rack Anchors (if equipped) ............... 5-23
HomeLink® (if equipped) .................................................... 5-25
Page 140 of 290
5-9OTHER CONTROLS AND EQUIPMENT
66J22-03E
Luggage Compartment Light
66J047
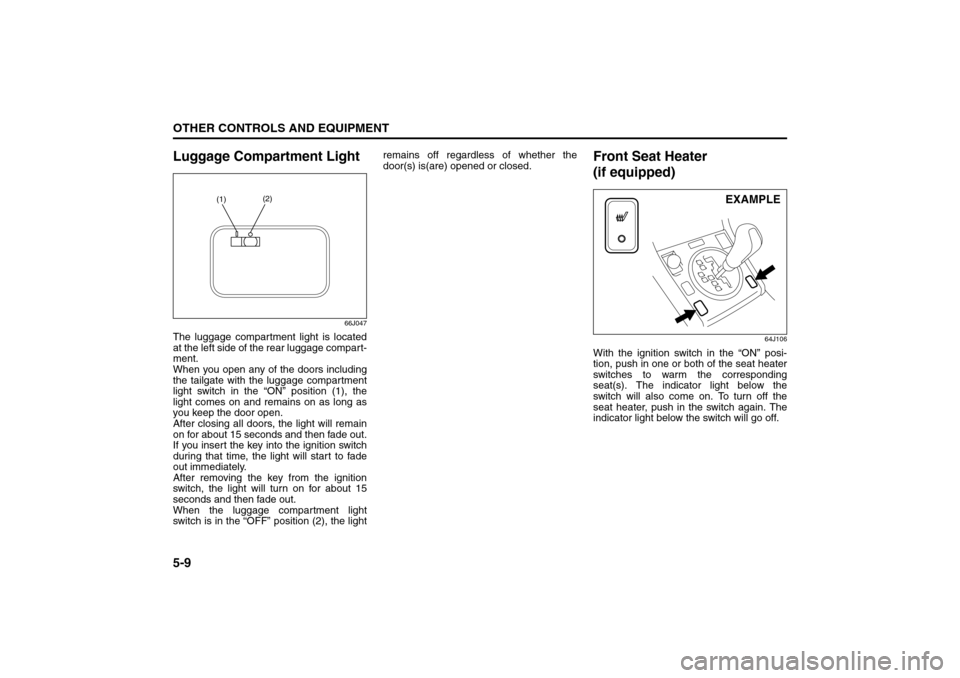
The luggage compartment light is located
at the left side of the rear luggage compart-
ment.
When you open any of the doors including
the tailgate with the luggage compartment
light switch in the “ON” position (1), the
light comes on and remains on as long as
you keep the door open.
After closing all doors, the light will remain
on for about 15 seconds and then fade out.
If you insert the key into the ignition switch
during that time, the light will start to fade
out immediately.
After removing the key from the ignition
switch, the light will turn on for about 15
seconds and then fade out.
When the luggage compartment light
switch is in the “OFF” position (2), the lightremains off regardless of whether the
door(s) is(are) opened or closed.
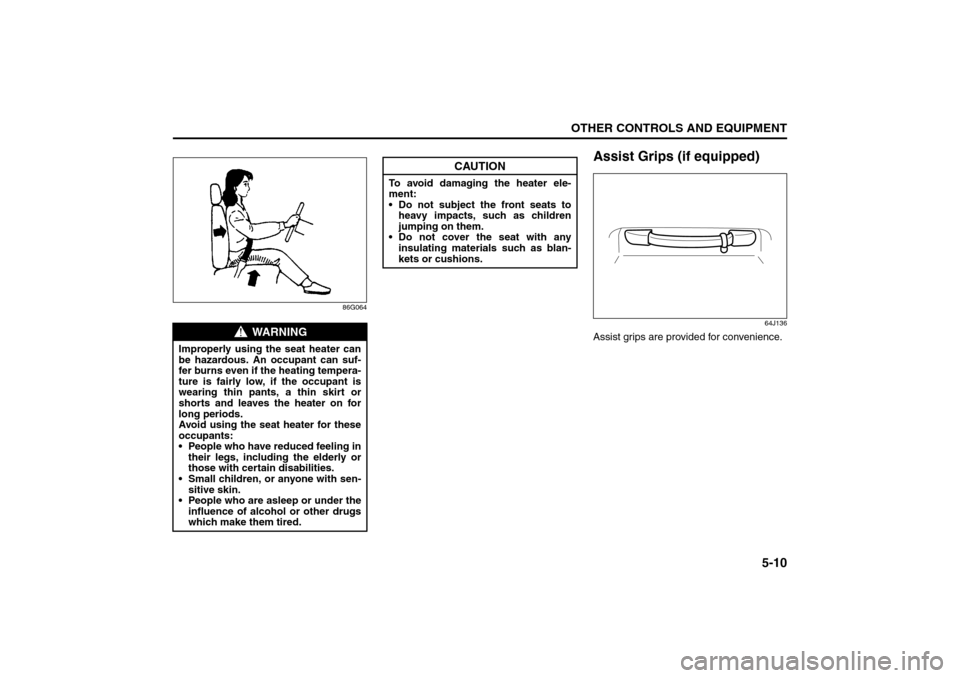
Front Seat Heater
(if equipped)
64J106
With the ignition switch in the “ON” posi-
tion, push in one or both of the seat heater
switches to warm the corresponding
seat(s). The indicator light below the
switch will also come on. To turn off the
seat heater, push in the switch again. The
indicator light below the switch will go off.
(1)(2)
EXAMPLE
Luggage Compartment Light: 7
Front Door Light:
Page 141 of 290
5-10
OTHER CONTROLS AND EQUIPMENT
66J22-03E
86G064
Assist Grips (if equipped)
64J136
Assist grips are provided for convenience.
WARNING
Improperly using the seat heater can
be hazardous. An occupant can suf-
fer burns even if the heating tempera-
ture is fairly low, if the occupant is
wearing thin pants, a thin skirt or
shorts and leaves the heater on for
long periods.
Avoid using the seat heater for these
occupants:
People who have reduced feeling in
their legs, including the elderly or
those with certain disabilities.
Small children, or anyone with sen-
sitive skin.
People who are asleep or under the
influence of alcohol or other drugs
which make them tired.
CAUTION
To avoid damaging the heater ele-
ment:
Do not subject the front seats to
heavy impacts, such as children
jumping on them.
Do not cover the seat with any
insulating materials such as blan-
kets or cushions.
Front Seat Heater: 8
Page 159 of 290
OPERATING YOUR VEHICLE
6
66J22-03E
60G408
OPERATING YOUR VEHICLEExhaust Gas Warning ......................................................... 6-1
Daily Inspection Checklist .................................................. 6-2
Starting the Engine ............................................................. 6-2
Engine Block Heater (if equipped) ..................................... 6-4
Using the Transmission ..................................................... 6-5
Using the Transfer Switch (if equipped) ........................... 6-7
Braking ................................................................................. 6-15
Electronic Stability Program (ESP®) ................................. 6-18
Tire Pressure Monitoring System (TPMS)
(if equipped) ......................................................................... 6-21
Break-In ................................................................................ 6-25
Catalytic Converter ............................................................. 6-25
Improving Fuel Economy ................................................... 6-26
Page 163 of 290
6-4
OPERATING YOUR VEHICLE
66J22-03E
When the remote controller is in the vehi-
cle except the rear luggage area, you can
turn the ignition switch without using an
ignition key.
NOTE:
If the battery of the remote controller
runs down or there are strong radio
waves or noise, the operating range may
be narrower or the remote controller may
be inoperative.
If the remote controller is too close to the
door glass, it may not operate.
The ignition switch may not turn when
the remote controller is on the instru-
ment panel, in the glove box, in the door
pocket, in the sun visor or on the floor.
You can also turn the ignition switch by
inserting the ignition key into the slot.
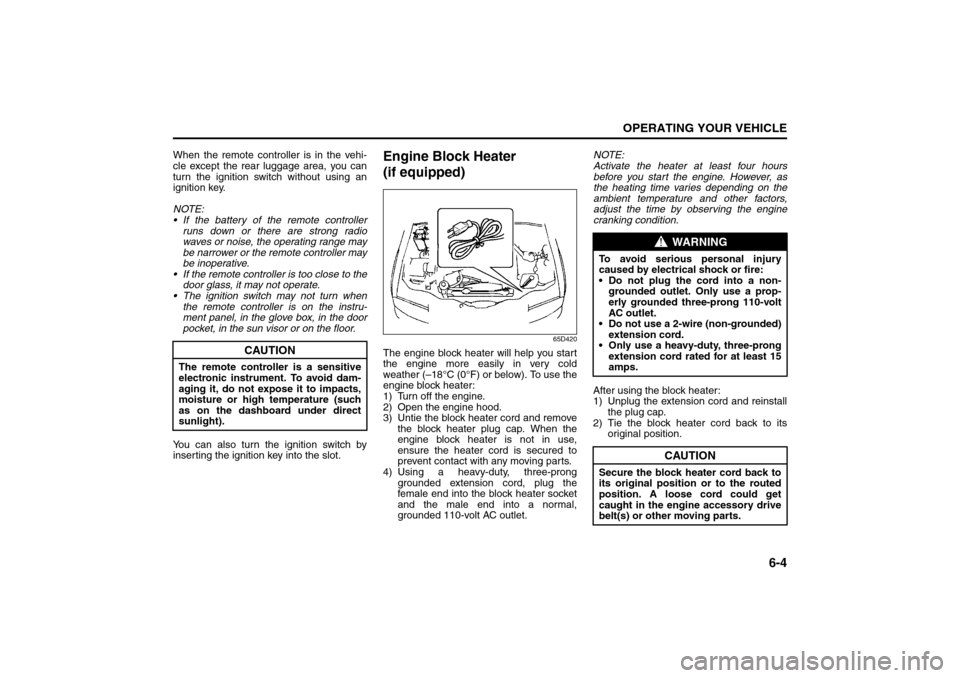
Engine Block Heater
(if equipped)
65D420
The engine block heater will help you start
the engine more easily in very cold
weather (–18°C (0°F) or below). To use the
engine block heater:
1) Turn off the engine.
2) Open the engine hood.
3) Untie the block heater cord and remove
the block heater plug cap. When the
engine block heater is not in use,
ensure the heater cord is secured to
prevent contact with any moving parts.
4) Using a heavy-duty, three-prong
grounded extension cord, plug the
female end into the block heater socket
and the male end into a normal,
grounded 110-volt AC outlet.NOTE:
Activate the heater at least four hours
before you start the engine. However, as
the heating time varies depending on the
ambient temperature and other factors,
adjust the time by observing the engine
cranking condition.
After using the block heater:
1) Unplug the extension cord and reinstall
the plug cap.
2) Tie the block heater cord back to its
original position.
CAUTION
The remote controller is a sensitive
electronic instrument. To avoid dam-
aging it, do not expose it to impacts,
moisture or high temperature (such
as on the dashboard under direct
sunlight).
WARNING
To avoid serious personal injury
caused by electrical shock or fire:
Do not plug the cord into a non-
grounded outlet. Only use a prop-
erly grounded three-prong 110-volt
AC outlet.
Do not use a 2-wire (non-grounded)
extension cord.
Only use a heavy-duty, three-prong
extension cord rated for at least 15
amps.
CAUTION
Secure the block heater cord back to
its original position or to the routed
position. A loose cord could get
caught in the engine accessory drive
belt(s) or other moving parts.
Starting the Engine: 1
Engine Block Heater: 1
Page 164 of 290
6-5OPERATING YOUR VEHICLE
66J22-03E
3) Close the engine hood securely before
starting the engine.
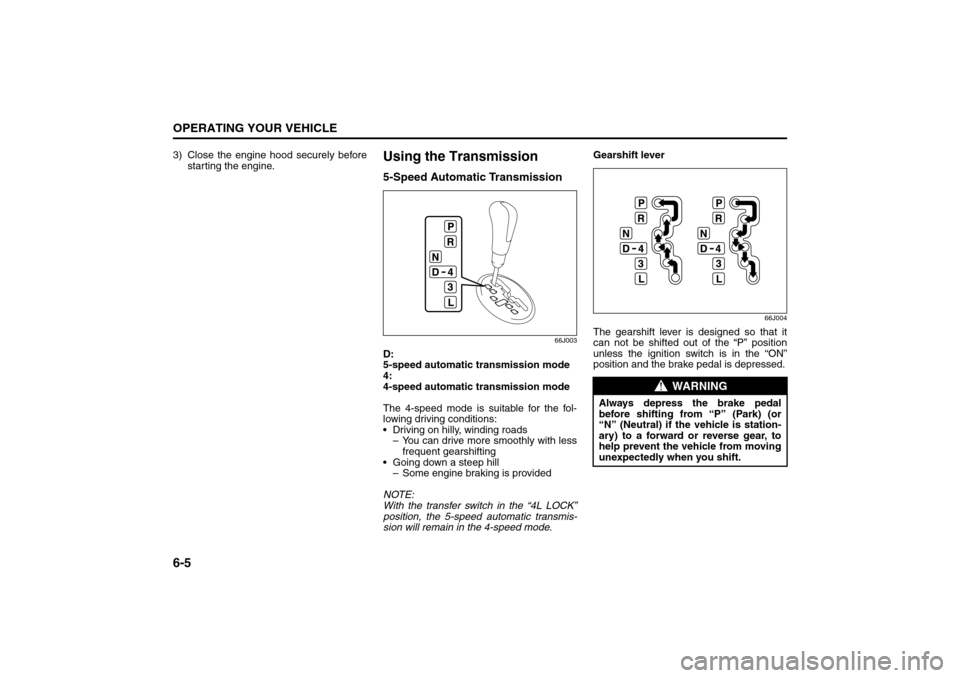
Using the Transmission5-Speed Automatic Transmission
66J003
D:
5-speed automatic transmission mode
4:
4-speed automatic transmission mode
The 4-speed mode is suitable for the fol-
lowing driving conditions:
Driving on hilly, winding roads
– You can drive more smoothly with less
frequent gearshifting
Going down a steep hill
– Some engine braking is provided
NOTE:
With the transfer switch in the “4L LOCK”
position, the 5-speed automatic transmis-
sion will remain in the 4-speed mode.Gearshift lever
66J004
The gearshift lever is designed so that it
can not be shifted out of the “P” position
unless the ignition switch is in the “ON”
position and the brake pedal is depressed.
WARNING
Always depress the brake pedal
before shifting from “P” (Park) (or
“N” (Neutral) if the vehicle is station-
ary) to a forward or reverse gear, to
help prevent the vehicle from moving
unexpectedly when you shift.
Engine Block Heater: 1
Using the Transmission: 10
Page 209 of 290

9-2
INSPECTION AND MAINTENANCE
66J22-03E
NOTICE (for U.S.A.)
Maintenance, replacement or repair of
the emission control devices and sys-
tems may be performed by any automo-
bile repair establishment or individual
using any part which has been certified
under the provisions in the Clean Air
Act sec. 207. (a) (2).
Maintenance ScheduleThe following table shows the times when
you should perform regular maintenance
on your vehicle. This table shows in miles,
kilometers and months when you should
perform inspections, adjustments, lubrica-
tion and other services. These intervals
should be shortened if driving is usually
done under severe conditions (refer to
“Maintenance Recommended Under
Severe Driving Conditions”).
WARNING
SUZUKI recommends that mainte-
nance on items marked with an aster-
isk (*) be performed by your
authorized SUZUKI dealer or a quali-
fied service technician. If you are
qualified, you may perform mainte-
nance on the unmarked items by
referring to the instructions in this
section. If you are not sure whether
you can successfully complete any of
the unmarked maintenance jobs, ask
your authorized SUZUKI dealer to do
the maintenance for you.
CAUTION
Whenever it becomes necessary to
replace parts on your vehicle, it is
recommended that you use genuine
SUZUKI replacement parts or their
equivalent.
WARNING
The shock absorbers are filled with
high pressure gas. Never attempt to
disassemble it or throw it into a fire.
Avoid storing it near a heater or heat-
ing device. When scrapping the
absorber, the gas must be released
from the absorber safely. Ask your
dealer for assistance.
Maintenance Schedule: 1, 2, 3, 4, 5, 6, 9, 10
Page 239 of 290

9-32
INSPECTION AND MAINTENANCE
66J22-03E
Snow TiresYour vehicle is equipped with all-season
tires which are designed for use in summer
and most winter conditions. For improved
traction in severe winter conditions,
SUZUKI recommends mounting radial
snow tires on all four wheels. Snow tires
must be the same size as the standard
tires. Also be sure to use the tires of the
same type and brand on all four wheels of
your vehicle.
GLOSSARY OF TIRE TERMINOL-
OGYAccessory Weight – the combined weight
(in excess of those standard items which
may be replaced) of automatic transmis-
sion, power steering, power brakes, power
windows, power seats, radio, and heater,
to the extent that these items are available
as factory-installed equipment (whether
installed or not).
Cold Tire Inflation Pressure – the pressure
in a tire that has been driven less than 1
mile or has been standing for three hours
or more.
Curb Weight – the weight of a motor vehi-
cle with standard equipment including the
maximum capacity of fuel, oil, and coolant,
and, if so equipped, air conditioning and
additional weight optional engine.
Intended Outboard Sidewall – (1) the side-
wall that contains a whitewall, bears white
lettering or bears manufacturer, brand,
and/or model name molding that is higher
or deeper than the same molding on the
other sidewall of the tire, or (2) the outward
facing sidewall of an asymmetrical tire that
has a particular side that must always face
outward when mounted on a vehicle.
Maximum Inflation Pressure – the maxi-
mum cold inflation pressure a tire is
designed to support in normal service.
Maximum Loaded Vehicle Weight – the
sum of curb weight, accessory weight,vehicle capacity weight (total load capac-
ity), and production options weight.
Normal Occupant Weight – 68 kilograms
times the number of occupants specified in
the second column of Table 1 (shown
below).
Occupant distribution – distribution of
occupants in a vehicle as specified in the
third column of Table 1 (shown below).
Production Options Weight – the combined
weight of those installed regular production
options weighing over 2.3 kilograms in
excess of those standard items which they
replace, not previously considered in curb
weight or accessory weight, including
heavy duty brakes, ride levelers, roof rack,
heavy duty battery, and special trim.
Recommended Inflation Pressure – the
cold tire inflation pressure recommended
by a manufacturer.
Rim – metal support for a tire or tire and
tube assembly upon which the tire beads
are seated.
Vehicle Capacity Weight – the rated cargo
and luggage load plus 68 kilograms (150
lbs) times the vehicle’s designated seating
capacity.
Vehicle Maximum Load on the Tire – the
load on an individual tire that is determined
by distributing to each axle its share of the
maximum loaded vehicle weight and divid-
ing by two.
WARNING
(Continued)
Replace the spare tire with a new
one as soon as the tread wear indi-
cator appears.
When replacing the spare tire, use
a replacement tire with the exact
same size and construction.
Battery: 9
Fuses: 7