emergency towing SUZUKI GRAND VITARA 2009 Owners Manual
[x] Cancel search | Manufacturer: SUZUKI, Model Year: 2009, Model line: GRAND VITARA, Model: SUZUKI GRAND VITARA 2009Pages: 337, PDF Size: 6.21 MB
Page 9 of 337
79K21-03E
TABLE OF CONTENTSCalifornia Proposition 65 Warning
WARNING
Engine exhaust, some of its constitu-
ents, and certain product compo-
nents contain or emit chemicals
known to the State of California to
cause cancer and birth defects or
other reproductive harm.
FUEL RECOMMENDATION
1
BEFORE DRIVING
2
OPERATING YOUR VEHICLE
3
DRIVING TIPS
4
OTHER CONTROLS AND EQUIPMENT
5
VEHICLE LOADING AND TOWING
6
INSPECTION AND MAINTENANCE
7
EMERGENCY SERVICE
8
APPEARANCE CARE
9
GENERAL INFORMATION
10
FUSES AND PROTECTED CIRCUITS
11
SPECIFICATIONS
12
INDEX
13
Page 243 of 337
6-6
VEHICLE LOADING AND TOWING
79K21-03E
60A186
WARNING
(Continued)
Avoid “riding” the brakes. “Riding”
the brakes could cause the brakes
to overheat, resulting in reduced
braking efficiency. Use engine
braking as much as possible.
Because of the added trailer
weight, your engine may overheat
on hot days when going up long or
steep hills. Pay attention to your
engine temperature gauge. If it indi-
cates overheating, pull off the road
and stop in a safe place. Refer to
the “If the Engine Overheats” in
“EMERGENCY SERVICE” section
for details on how to proceed.
WARNING
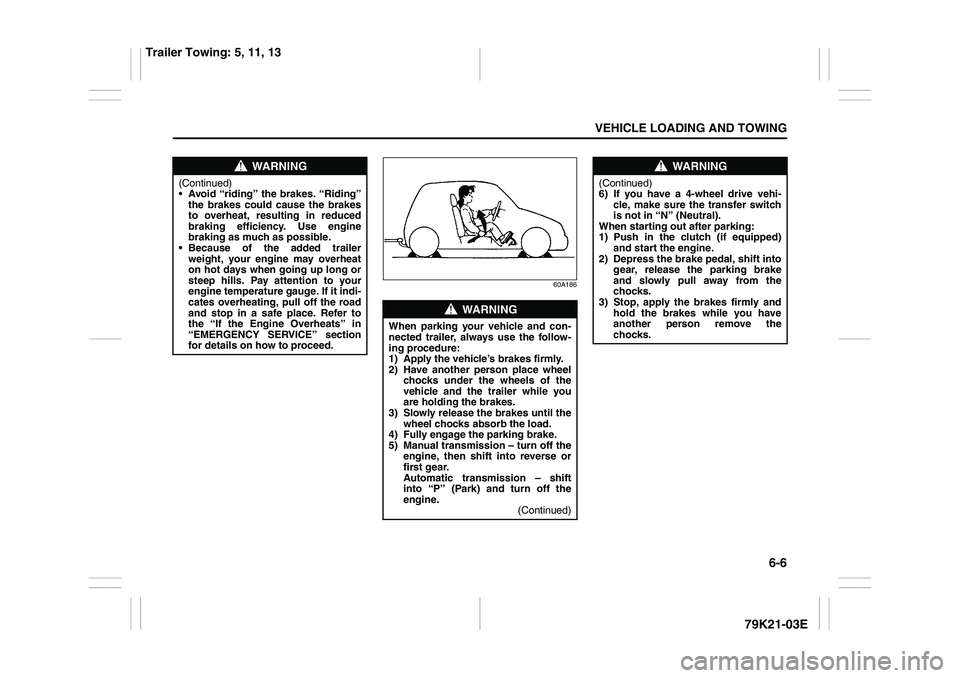
When parking your vehicle and con-
nected trailer, always use the follow-
ing procedure:
1) Apply the vehicle’s brakes firmly.
2) Have another person place wheel
chocks under the wheels of the
vehicle and the trailer while you
are holding the brakes.
3) Slowly release the brakes until the
wheel chocks absorb the load.
4) Fully engage the parking brake.
5) Manual transmission – turn off the
engine, then shift into reverse or
first gear.
Automatic transmission – shift
into “P” (Park) and turn off the
engine.
(Continued)
WARNING
(Continued)
6) If you have a 4-wheel drive vehi-
cle, make sure the transfer switch
is not in “N” (Neutral).
When starting out after parking:
1) Push in the clutch (if equipped)
and start the engine.
2) Depress the brake pedal, shift into
gear, release the parking brake
and slowly pull away from the
chocks.
3) Stop, apply the brakes firmly and
hold the brakes while you have
another person remove the
chocks.
Trailer Towing: 5, 11, 13
Page 299 of 337
EMERGENCY SERVICE
8
79K21-03E
60G411
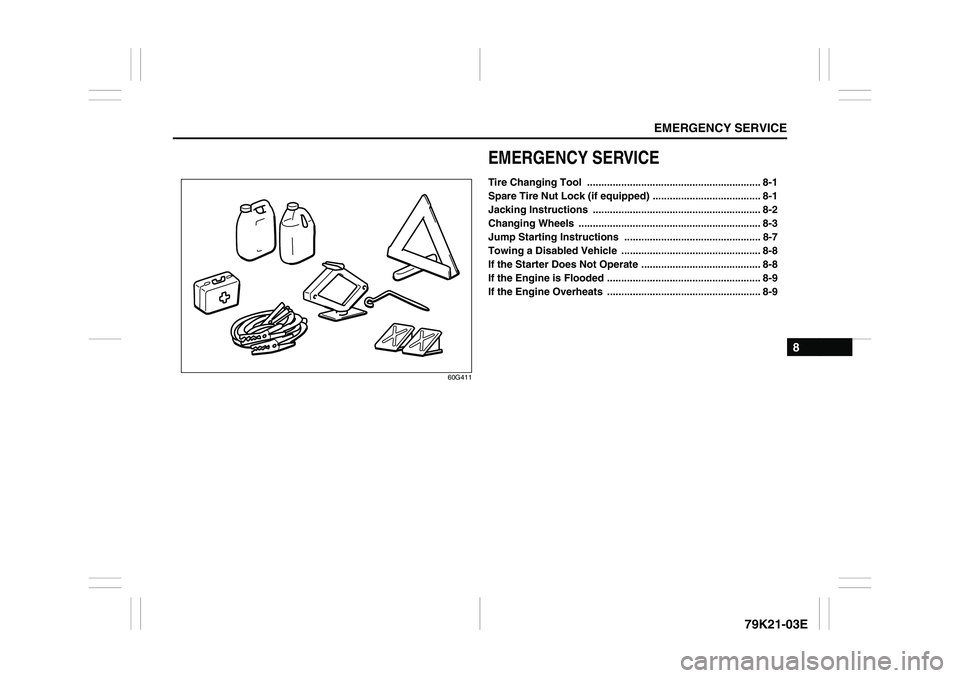
EMERGENCY SERVICETire Changing Tool ............................................................. 8-1
Spare Tire Nut Lock (if equipped) ...................................... 8-1
Jacking Instructions ........................................................... 8-2
Changing Wheels ................................................................ 8-3
Jump Starting Instructions ................................................ 8-7
Towing a Disabled Vehicle ................................................. 8-8
If the Starter Does Not Operate .......................................... 8-8
If the Engine is Flooded ...................................................... 8-9
If the Engine Overheats ...................................................... 8-9
Page 303 of 337
8-4
EMERGENCY SERVICE
79K21-03E
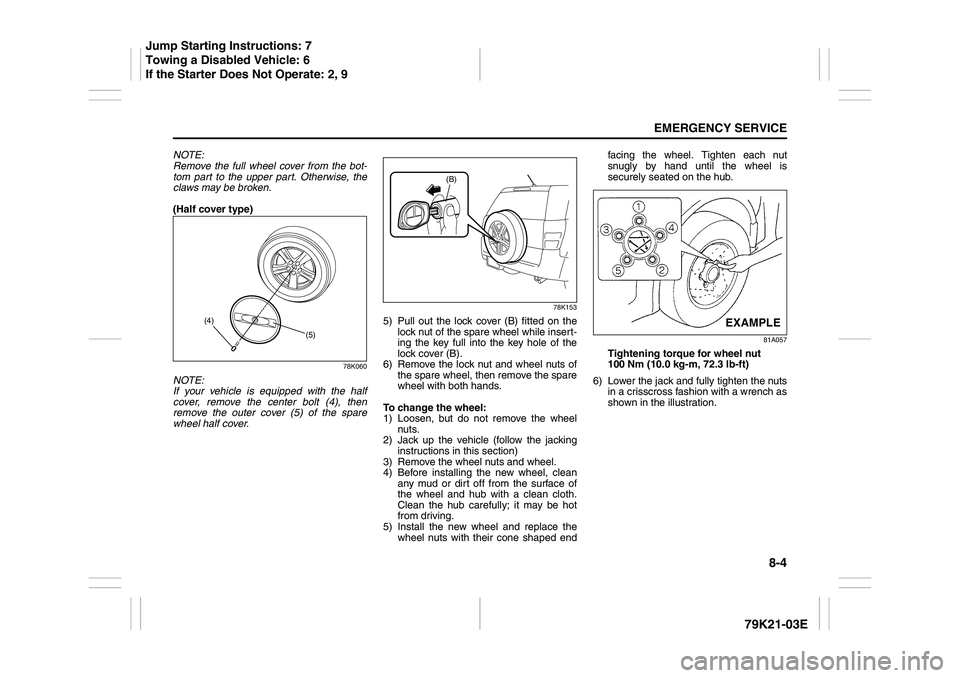
NOTE:
Remove the full wheel cover from the bot-
tom part to the upper part. Otherwise, the
claws may be broken.
(Half cover type)
78K060
NOTE:
If your vehicle is equipped with the half
cover, remove the center bolt (4), then
remove the outer cover (5) of the spare
wheel half cover.
78K153
5) Pull out the lock cover (B) fitted on the
lock nut of the spare wheel while insert-
ing the key full into the key hole of the
lock cover (B).
6) Remove the lock nut and wheel nuts of
the spare wheel, then remove the spare
wheel with both hands.
To change the wheel:
1) Loosen, but do not remove the wheel
nuts.
2) Jack up the vehicle (follow the jacking
instructions in this section)
3) Remove the wheel nuts and wheel.
4) Before installing the new wheel, clean
any mud or dirt off from the surface of
the wheel and hub with a clean cloth.
Clean the hub carefully; it may be hot
from driving.
5) Install the new wheel and replace the
wheel nuts with their cone shaped endfacing the wheel. Tighten each nut
snugly by hand until the wheel is
securely seated on the hub.
81A057
Tightening torque for wheel nut
100 Nm (10.0 kg-m, 72.3 lb-ft)
6) Lower the jack and fully tighten the nuts
in a crisscross fashion with a wrench as
shown in the illustration.
(5) (4)
(B)
EXAMPLE
Jump Starting Instructions: 7
Towing a Disabled Vehicle: 6
If the Starter Does Not Operate: 2, 9
Page 306 of 337
8-7EMERGENCY SERVICE
79K21-03E
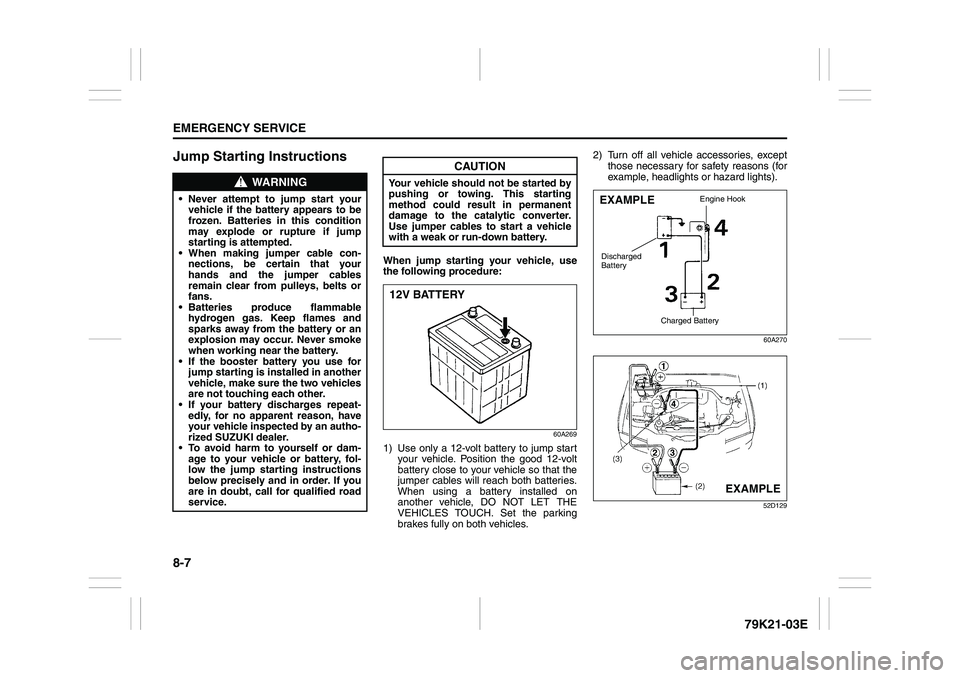
Jump Starting Instructions
When jump starting your vehicle, use
the following procedure:
60A269
1) Use only a 12-volt battery to jump start
your vehicle. Position the good 12-volt
battery close to your vehicle so that the
jumper cables will reach both batteries.
When using a battery installed on
another vehicle, DO NOT LET THE
VEHICLES TOUCH. Set the parking
brakes fully on both vehicles.2) Turn off all vehicle accessories, except
those necessary for safety reasons (for
example, headlights or hazard lights).
60A270
52D129
WARNING
Never attempt to jump start your
vehicle if the battery appears to be
frozen. Batteries in this condition
may explode or rupture if jump
starting is attempted.
When making jumper cable con-
nections, be certain that your
hands and the jumper cables
remain clear from pulleys, belts or
fans.
Batteries produce flammable
hydrogen gas. Keep flames and
sparks away from the battery or an
explosion may occur. Never smoke
when working near the battery.
If the booster battery you use for
jump starting is installed in another
vehicle, make sure the two vehicles
are not touching each other.
If your battery discharges repeat-
edly, for no apparent reason, have
your vehicle inspected by an autho-
rized SUZUKI dealer.
To avoid harm to yourself or dam-
age to your vehicle or battery, fol-
low the jump starting instructions
below precisely and in order. If you
are in doubt, call for qualified road
service.
CAUTION
Your vehicle should not be started by
pushing or towing. This starting
method could result in permanent
damage to the catalytic converter.
Use jumper cables to start a vehicle
with a weak or run-down battery.12V BATTERY
EXAMPLE
Engine Hook
Charged Battery
Discharged
Battery
EXAMPLE
Page 307 of 337
8-8
EMERGENCY SERVICE
79K21-03E
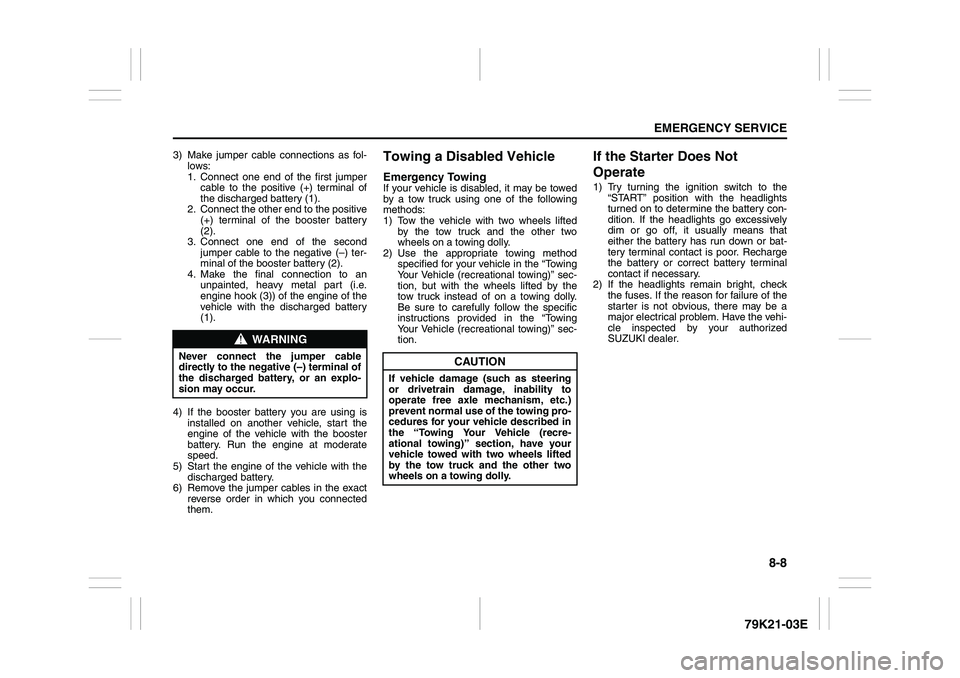
3) Make jumper cable connections as fol-
lows:
1. Connect one end of the first jumper
cable to the positive (+) terminal of
the discharged battery (1).
2. Connect the other end to the positive
(+) terminal of the booster battery
(2).
3. Connect one end of the second
jumper cable to the negative (–) ter-
minal of the booster battery (2).
4. Make the final connection to an
unpainted, heavy metal part (i.e.
engine hook (3)) of the engine of the
vehicle with the discharged battery
(1).
4) If the booster battery you are using is
installed on another vehicle, start the
engine of the vehicle with the booster
battery. Run the engine at moderate
speed.
5) Start the engine of the vehicle with the
discharged battery.
6) Remove the jumper cables in the exact
reverse order in which you connected
them.
Towing a Disabled VehicleEmergency TowingIf your vehicle is disabled, it may be towed
by a tow truck using one of the following
methods:
1) Tow the vehicle with two wheels lifted
by the tow truck and the other two
wheels on a towing dolly.
2) Use the appropriate towing method
specified for your vehicle in the “Towing
Your Vehicle (recreational towing)” sec-
tion, but with the wheels lifted by the
tow truck instead of on a towing dolly.
Be sure to carefully follow the specific
instructions provided in the “Towing
Your Vehicle (recreational towing)” sec-
tion.
If the Starter Does Not
Operate1) Try turning the ignition switch to the
“START” position with the headlights
turned on to determine the battery con-
dition. If the headlights go excessively
dim or go off, it usually means that
either the battery has run down or bat-
tery terminal contact is poor. Recharge
the battery or correct battery terminal
contact if necessary.
2) If the headlights remain bright, check
the fuses. If the reason for failure of the
starter is not obvious, there may be a
major electrical problem. Have the vehi-
cle inspected by your authorized
SUZUKI dealer.
WARNING
Never connect the jumper cable
directly to the negative (–) terminal of
the discharged battery, or an explo-
sion may occur.
CAUTION
If vehicle damage (such as steering
or drivetrain damage, inability to
operate free axle mechanism, etc.)
prevent normal use of the towing pro-
cedures for your vehicle described in
the “Towing Your Vehicle (recre-
ational towing)” section, have your
vehicle towed with two wheels lifted
by the tow truck and the other two
wheels on a towing dolly.