air conditioning SUZUKI GRAND VITARA 2010 3.G Owners Manual
[x] Cancel search | Manufacturer: SUZUKI, Model Year: 2010, Model line: GRAND VITARA, Model: SUZUKI GRAND VITARA 2010 3.GPages: 337, PDF Size: 6.21 MB
Page 12 of 337
ILLUSTRATED TABLE OF CONTENTS
79K21-03E
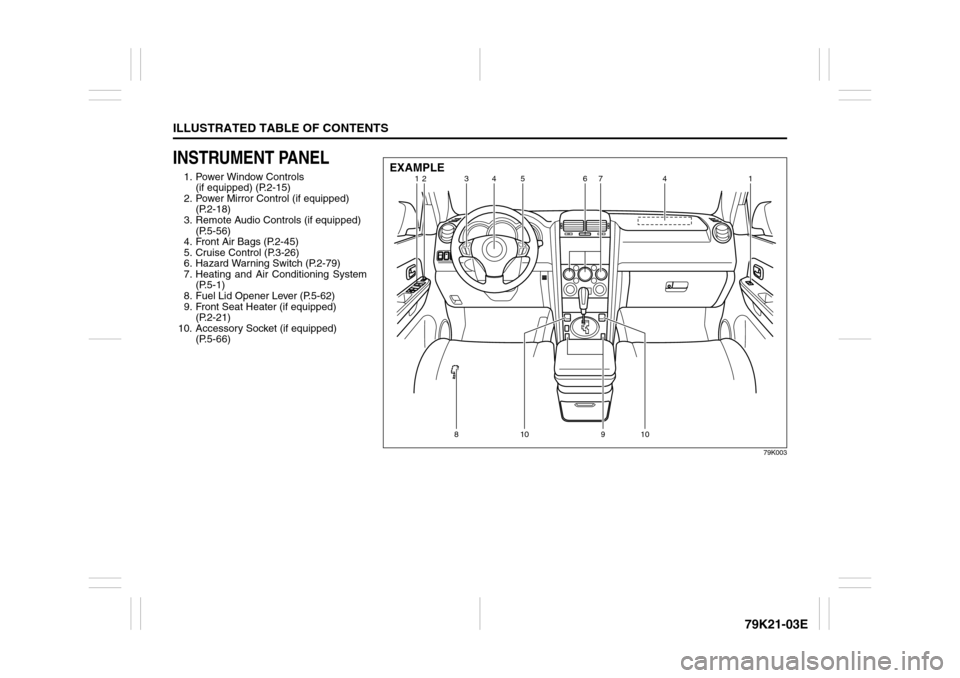
INSTRUMENT PANEL1. Power Window Controls
(if equipped) (P.2-15)
2. Power Mirror Control (if equipped)
(P.2-18)
3. Remote Audio Controls (if equipped)
(P.5-56)
4. Front Air Bags (P.2-45)
5. Cruise Control (P.3-26)
6. Hazard Warning Switch (P.2-79)
7. Heating and Air Conditioning System
(P.5-1)
8. Fuel Lid Opener Lever (P.5-62)
9. Front Seat Heater (if equipped)
(P.2-21)
10. Accessory Socket (if equipped)
(P.5-66)
79K003
12 3 4 67
41
8 9 11 12
12 3
35 467
41
810 910
EXAMPLE
Page 89 of 337
2-72
BEFORE DRIVING
79K21-03E
Distance units
You can change the units odo/trip meter
distance is displayed in.
NOTE:
When you change the units odo/trip meter
distance is displayed in, the trip meter will
be reset automatically.
Fuel economy units
You can change the units that fuel con-
sumption is displayed in.
Language
You can change the language of the infor-
mation display.
Avg. fuel economy reset
You can change when the value of average
fuel consumption is reset.
Temperature units
You can change the units that temperature
is displayed in.
NOTE:
When you change the units that tempera-
ture is displayed in, the air conditioning
system temperature display units will be
changed automatically.
Default setting
If you select “YES” and push the MODE/
ILL knob (2), all settings will be reinitial-
ized.
Warning and Indicator MessagesThe display shows the warning and indica-
tor messages to let you know about certain
vehicle problems.
A tone may also sound to alert you.
If warning and indicator messages appear
on the display, follow the messages.
Master warning indicator
78K049
When the display shows warning and indi-
cator messages, the master warning indi-
cator may also come on or blink.
NOTE:
When the problem that causes a mes-
sage to appear is corrected, the mes-
sage will disappear.
If a message is displayed, and other
problems requiring a message occur, the
message for each of the problems will be
alternately displayed about every 5 sec-
onds.
When you push and hold the MODE/ILL
knob for about 2 seconds while a mes-
sage is displayed, the message will dis-
appear temporarily. If the problem that
caused the message is not corrected,the message will appear again after 5
seconds.
Page 103 of 337
3-2
OPERATING YOUR VEHICLE
79K21-03E
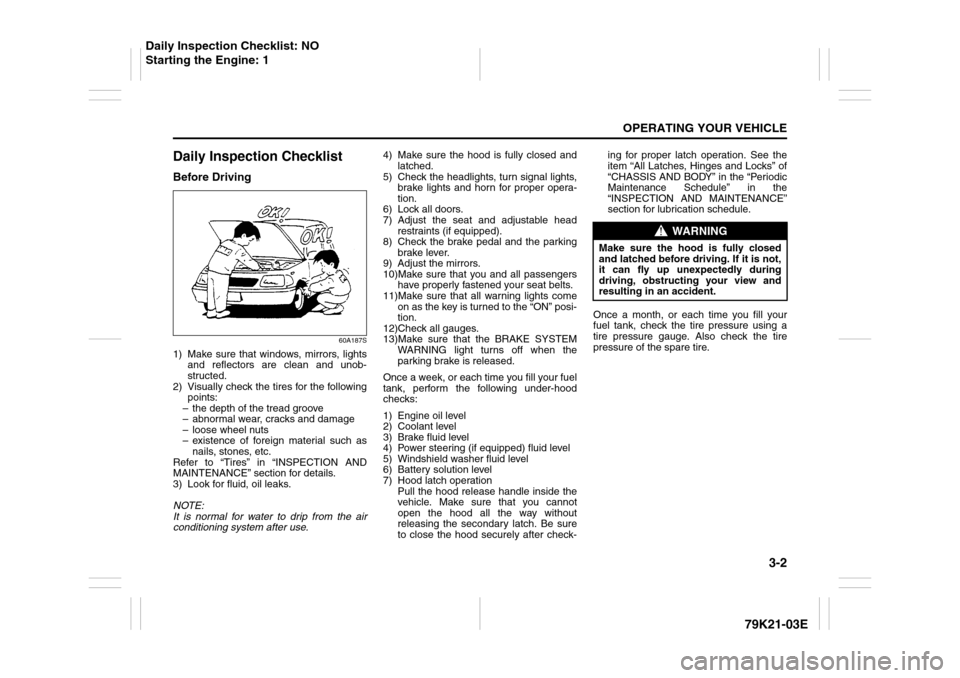
Daily Inspection ChecklistBefore Driving
60A187S
1) Make sure that windows, mirrors, lights
and reflectors are clean and unob-
structed.
2) Visually check the tires for the following
points:
– the depth of the tread groove
– abnormal wear, cracks and damage
– loose wheel nuts
– existence of foreign material such as
nails, stones, etc.
Refer to “Tires” in “INSPECTION AND
MAINTENANCE” section for details.
3) Look for fluid, oil leaks.
NOTE:
It is normal for water to drip from the air
conditioning system after use.4) Make sure the hood is fully closed and
latched.
5) Check the headlights, turn signal lights,
brake lights and horn for proper opera-
tion.
6) Lock all doors.
7) Adjust the seat and adjustable head
restraints (if equipped).
8) Check the brake pedal and the parking
brake lever.
9) Adjust the mirrors.
10)Make sure that you and all passengers
have properly fastened your seat belts.
11)Make sure that all warning lights come
on as the key is turned to the “ON” posi-
tion.
12)Check all gauges.
13)Make sure that the BRAKE SYSTEM
WARNING light turns off when the
parking brake is released.
Once a week, or each time you fill your fuel
tank, perform the following under-hood
checks:
1) Engine oil level
2) Coolant level
3) Brake fluid level
4) Power steering (if equipped) fluid level
5) Windshield washer fluid level
6) Battery solution level
7) Hood latch operation
Pull the hood release handle inside the
vehicle. Make sure that you cannot
open the hood all the way without
releasing the secondary latch. Be sure
to close the hood securely after check-ing for proper latch operation. See the
item “All Latches, Hinges and Locks” of
“CHASSIS AND BODY” in the “Periodic
Maintenance Schedule” in the
“INSPECTION AND MAINTENANCE”
section for lubrication schedule.
Once a month, or each time you fill your
fuel tank, check the tire pressure using a
tire pressure gauge. Also check the tire
pressure of the spare tire.
WARNING
Make sure the hood is fully closed
and latched before driving. If it is not,
it can fly up unexpectedly during
driving, obstructing your view and
resulting in an accident.
Daily Inspection Checklist: NO
Starting the Engine: 1
Page 153 of 337
OTHER CONTROLS AND EQUIPMENT
5
79K21-03E
60G407
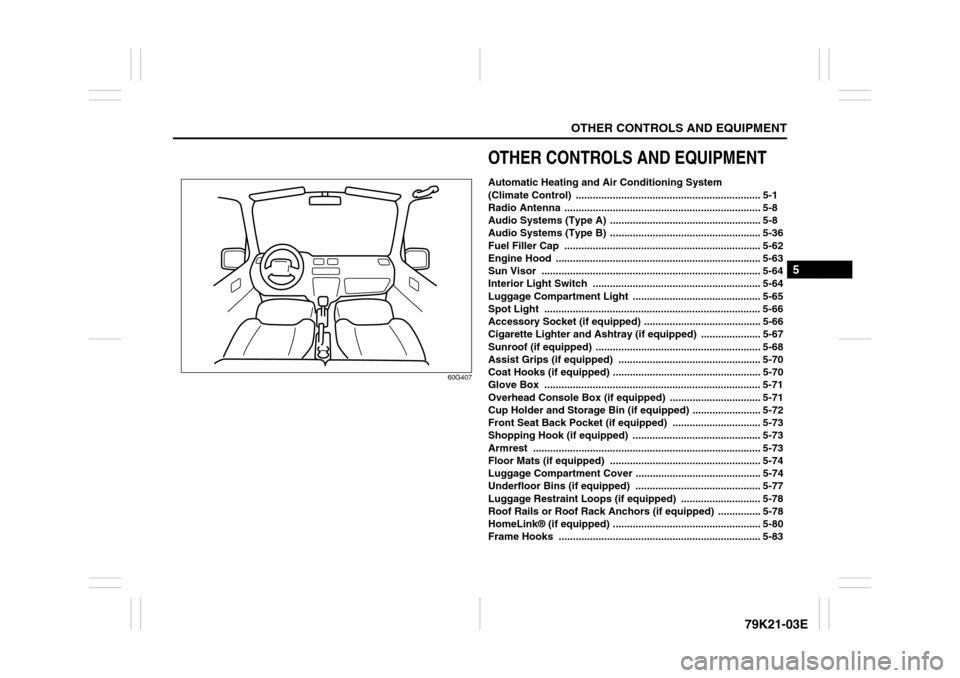
OTHER CONTROLS AND EQUIPMENTAutomatic Heating and Air Conditioning System
(Climate Control) ................................................................. 5-1
Radio Antenna ..................................................................... 5-8
Audio Systems (Type A) ..................................................... 5-8
Audio Systems (Type B) ..................................................... 5-36
Fuel Filler Cap ..................................................................... 5-62
Engine Hood ........................................................................ 5-63
Sun Visor ............................................................................. 5-64
Interior Light Switch ........................................................... 5-64
Luggage Compartment Light ............................................. 5-65
Spot Light ............................................................................ 5-66
Accessory Socket (if equipped) ......................................... 5-66
Cigarette Lighter and Ashtray (if equipped) ..................... 5-67
Sunroof (if equipped) .......................................................... 5-68
Assist Grips (if equipped) .................................................. 5-70
Coat Hooks (if equipped) .................................................... 5-70
Glove Box ............................................................................ 5-71
Overhead Console Box (if equipped) ................................ 5-71
Cup Holder and Storage Bin (if equipped) ........................ 5-72
Front Seat Back Pocket (if equipped) ............................... 5-73
Shopping Hook (if equipped) ............................................. 5-73
Armrest ................................................................................ 5-73
Floor Mats (if equipped) ..................................................... 5-74
Luggage Compartment Cover ............................................ 5-74
Underfloor Bins (if equipped) ............................................ 5-77
Luggage Restraint Loops (if equipped) ............................ 5-78
Roof Rails or Roof Rack Anchors (if equipped) ............... 5-78
HomeLink® (if equipped) .................................................... 5-80
Frame Hooks ....................................................................... 5-83
Page 154 of 337
5-1OTHER CONTROLS AND EQUIPMENT
79K21-03E
Automatic Heating and Air Conditioning System
(Climate Control)Air Outlet
66J250
1
1
2
2
3 3
5 5
5 54
EXAMPLE
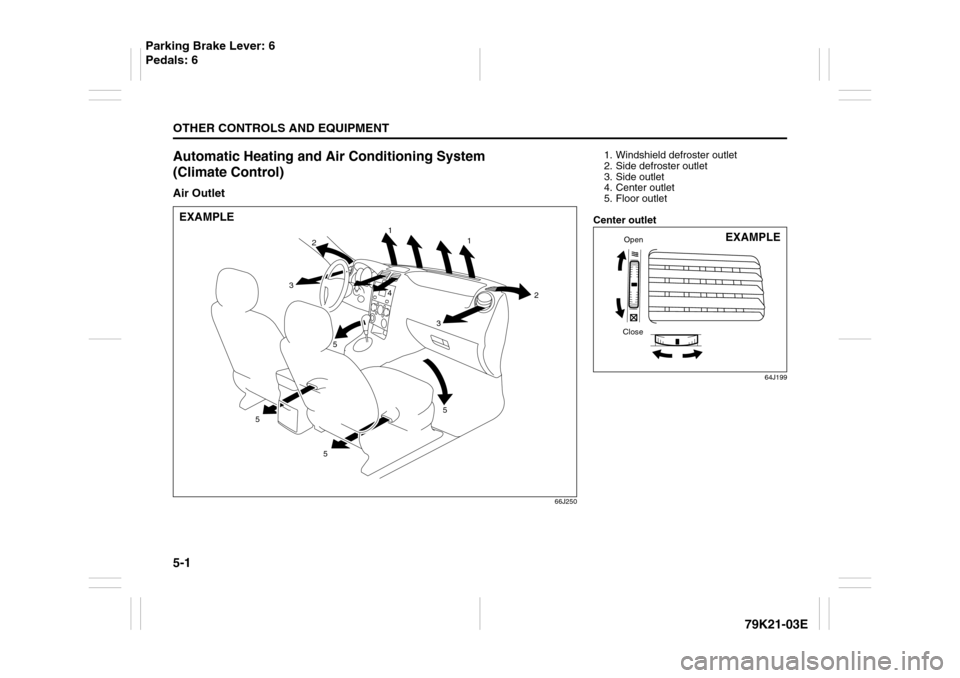
1. Windshield defroster outlet
2. Side defroster outlet
3. Side outlet
4. Center outlet
5. Floor outlet
Center outlet
64J199
CloseOpen
EXAMPLE
Parking Brake Lever: 6
Pedals: 6
Page 155 of 337
5-2
OTHER CONTROLS AND EQUIPMENT
79K21-03E
Side outlet
63J045
When “Open”, air comes out from the side
outlets regardless of the air flow selector
position.
Description of Controls
79K020
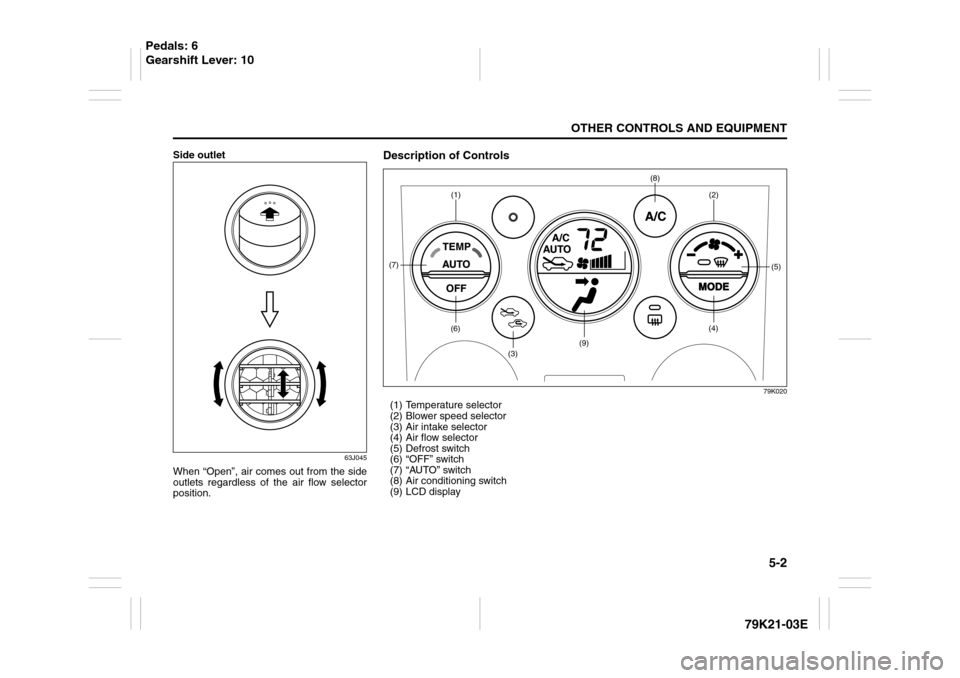
(1) Temperature selector
(2) Blower speed selector
(3) Air intake selector
(4) Air flow selector
(5) Defrost switch
(6) “OFF” switch
(7) “AUTO” switch
(8) Air conditioning switch
(9) LCD display
(1)(6)
(7)
(3)
(9)
(8)
(2)
(5)
(4)
Pedals: 6
Gearshift Lever: 10
Page 156 of 337
5-3OTHER CONTROLS AND EQUIPMENT
79K21-03E
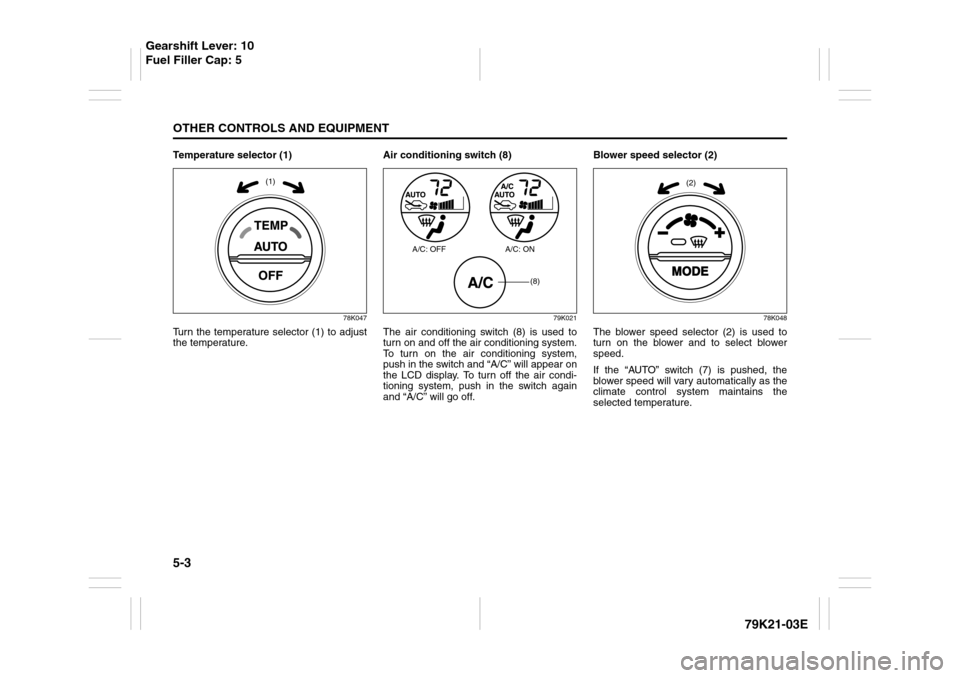
Temperature selector (1)
78K047
Turn the temperature selector (1) to adjust
the temperature.Air conditioning switch (8)
79K021
The air conditioning switch (8) is used to
turn on and off the air conditioning system.
To turn on the air conditioning system,
push in the switch and “A/C” will appear on
the LCD display. To turn off the air condi-
tioning system, push in the switch again
and “A/C” will go off. Blower speed selector (2)
78K048
The blower speed selector (2) is used to
turn on the blower and to select blower
speed.
If the “AUTO” switch (7) is pushed, the
blower speed will vary automatically as the
climate control system maintains the
selected temperature.
(1)
(8)
A/C: OFF A/C: ON
(2)
Gearshift Lever: 10
Fuel Filler Cap: 5
Page 159 of 337
5-6
OTHER CONTROLS AND EQUIPMENT
79K21-03E
Defrost
66J241
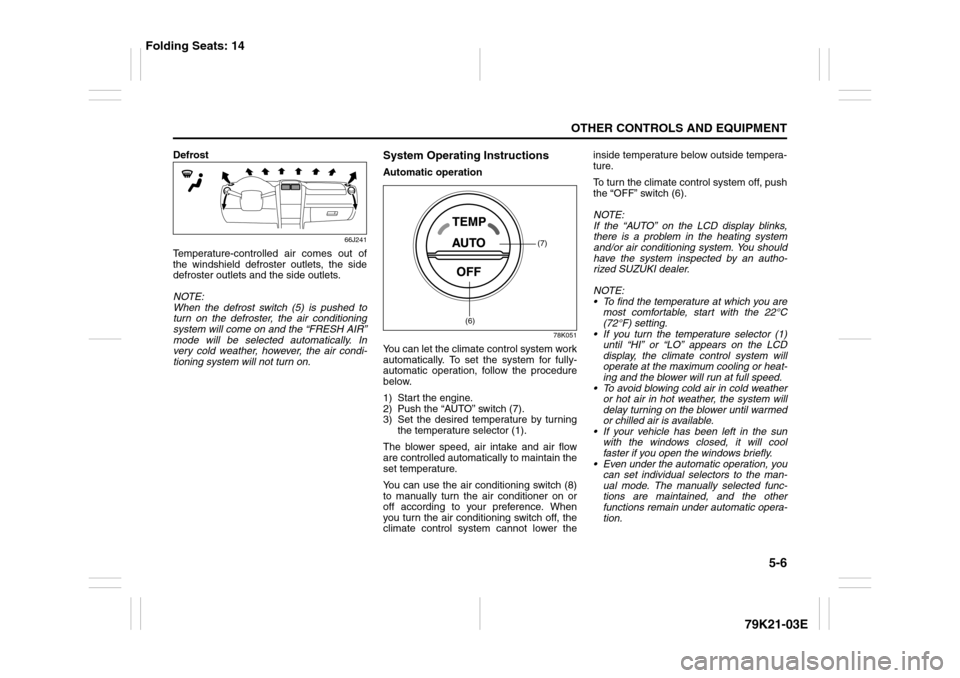
Temperature-controlled air comes out of
the windshield defroster outlets, the side
defroster outlets and the side outlets.
NOTE:
When the defrost switch (5) is pushed to
turn on the defroster, the air conditioning
system will come on and the “FRESH AIR”
mode will be selected automatically. In
very cold weather, however, the air condi-
tioning system will not turn on.
System Operating InstructionsAutomatic operation
78K051
You can let the climate control system work
automatically. To set the system for fully-
automatic operation, follow the procedure
below.
1) Start the engine.
2) Push the “AUTO” switch (7).
3) Set the desired temperature by turning
the temperature selector (1).
The blower speed, air intake and air flow
are controlled automatically to maintain the
set temperature.
You can use the air conditioning switch (8)
to manually turn the air conditioner on or
off according to your preference. When
you turn the air conditioning switch off, the
climate control system cannot lower theinside temperature below outside tempera-
ture.
To turn the climate control system off, push
the “OFF” switch (6).
NOTE:
If the “AUTO” on the LCD display blinks,
there is a problem in the heating system
and/or air conditioning system. You should
have the system inspected by an autho-
rized SUZUKI dealer.
NOTE:
To find the temperature at which you are
most comfortable, start with the 22°C
(72°F) setting.
If you turn the temperature selector (1)
until “HI” or “LO” appears on the LCD
display, the climate control system will
operate at the maximum cooling or heat-
ing and the blower will run at full speed.
To avoid blowing cold air in cold weather
or hot air in hot weather, the system will
delay turning on the blower until warmed
or chilled air is available.
If your vehicle has been left in the sun
with the windows closed, it will cool
faster if you open the windows briefly.
Even under the automatic operation, you
can set individual selectors to the man-
ual mode. The manually selected func-
tions are maintained, and the other
functions remain under automatic opera-
tion.
(7)
(6)
Folding Seats: 14
Page 160 of 337
5-7OTHER CONTROLS AND EQUIPMENT
79K21-03E
To return the blower speed selector (2),
air intake selector (3), and air flow selec-
tor (4) to automatic operation, push the
“AUTO” switch.
64J080
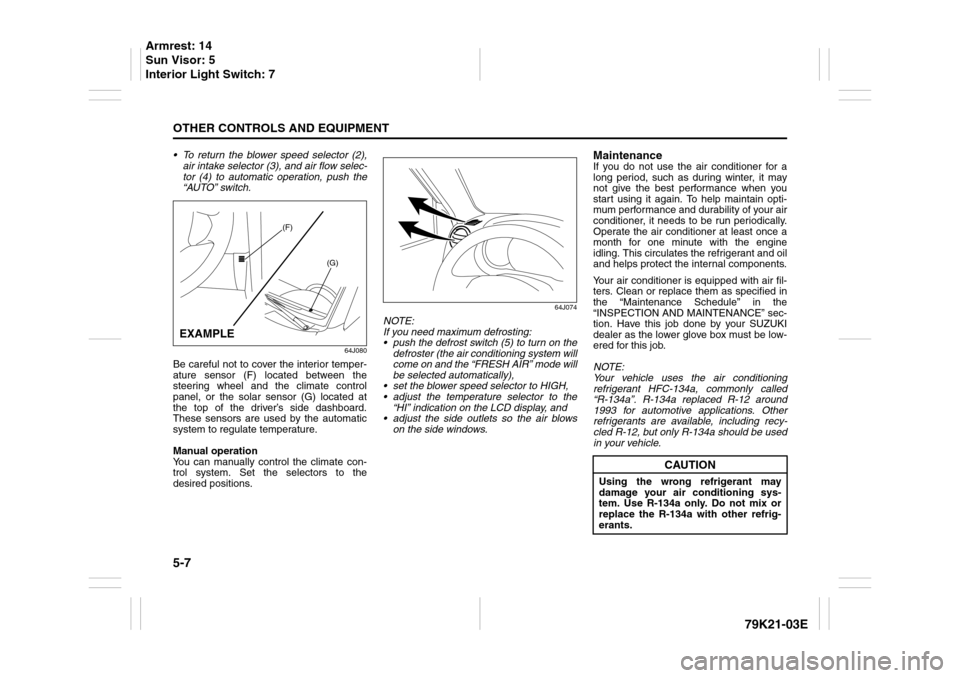
Be careful not to cover the interior temper-
ature sensor (F) located between the
steering wheel and the climate control
panel, or the solar sensor (G) located at
the top of the driver’s side dashboard.
These sensors are used by the automatic
system to regulate temperature.
Manual operation
You can manually control the climate con-
trol system. Set the selectors to the
desired positions.
64J074
NOTE:
If you need maximum defrosting:
push the defrost switch (5) to turn on the
defroster (the air conditioning system will
come on and the “FRESH AIR” mode will
be selected automatically),
set the blower speed selector to HIGH,
adjust the temperature selector to the
“HI” indication on the LCD display, and
adjust the side outlets so the air blows
on the side windows.
MaintenanceIf you do not use the air conditioner for a
long period, such as during winter, it may
not give the best performance when you
start using it again. To help maintain opti-
mum performance and durability of your air
conditioner, it needs to be run periodically.
Operate the air conditioner at least once a
month for one minute with the engine
idling. This circulates the refrigerant and oil
and helps protect the internal components.
Your air conditioner is equipped with air fil-
ters. Clean or replace them as specified in
the “Maintenance Schedule” in the
“INSPECTION AND MAINTENANCE” sec-
tion. Have this job done by your SUZUKI
dealer as the lower glove box must be low-
ered for this job.
NOTE:
Your vehicle uses the air conditioning
refrigerant HFC-134a, commonly called
“R-134a”. R-134a replaced R-12 around
1993 for automotive applications. Other
refrigerants are available, including recy-
cled R-12, but only R-134a should be used
in your vehicle.
(F)
(G)
EXAMPLE
CAUTION
Using the wrong refrigerant may
damage your air conditioning sys-
tem. Use R-134a only. Do not mix or
replace the R-134a with other refrig-
erants.
Armrest: 14
Sun Visor: 5
Interior Light Switch: 7
Page 249 of 337
INSPECTION AND MAINTENANCE
7
79K21-03E
60G410
INSPECTION AND MAINTENANCEMaintenance Schedule ....................................................... 7-2
Periodic Maintenance Schedule ........................................ 7-3
Maintenance Recommended under Severe Driving
Conditions ........................................................................... 7-7
Drive Belt ............................................................................. 7-9
Engine Oil and Filter ........................................................... 7-10
Engine Coolant .................................................................... 7-13
Air Cleaner ........................................................................... 7-16
Spark Plugs ......................................................................... 7-16
Gear Oil ................................................................................ 7-17
Clutch Pedal ........................................................................ 7-20
Automatic Transmission Fluid ........................................... 7-20
Brakes .................................................................................. 7-22
Steering Wheel .................................................................... 7-24
Tires ...................................................................................... 7-25
Battery .................................................................................. 7-36
Fuses .................................................................................... 7-36
Headlight Aiming ................................................................. 7-39
Bulb Replacement ............................................................... 7-40
Wiper Blades ....................................................................... 7-46
Windshield Washer Fluid ................................................... 7-49
Air Conditioning System .................................................... 7-49