audio SUZUKI GRAND VITARA 2013 Owners Manual
[x] Cancel search | Manufacturer: SUZUKI, Model Year: 2013, Model line: GRAND VITARA, Model: SUZUKI GRAND VITARA 2013Pages: 337, PDF Size: 6.21 MB
Page 12 of 337
ILLUSTRATED TABLE OF CONTENTS
79K21-03E
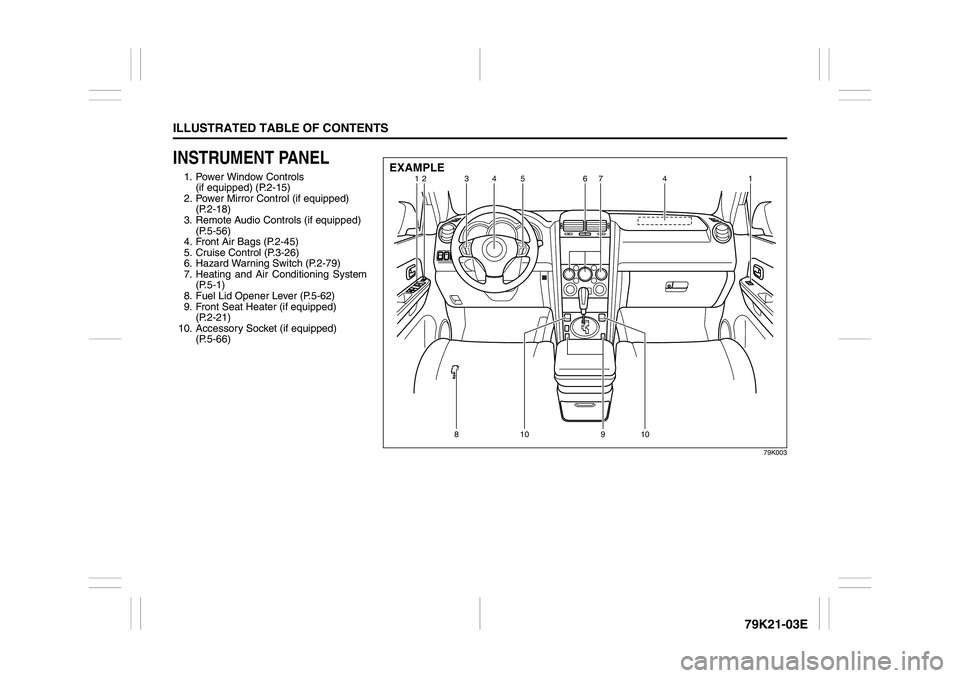
INSTRUMENT PANEL1. Power Window Controls
(if equipped) (P.2-15)
2. Power Mirror Control (if equipped)
(P.2-18)
3. Remote Audio Controls (if equipped)
(P.5-56)
4. Front Air Bags (P.2-45)
5. Cruise Control (P.3-26)
6. Hazard Warning Switch (P.2-79)
7. Heating and Air Conditioning System
(P.5-1)
8. Fuel Lid Opener Lever (P.5-62)
9. Front Seat Heater (if equipped)
(P.2-21)
10. Accessory Socket (if equipped)
(P.5-66)
79K003
12 3 4 67
41
8 9 11 12
12 3
35 467
41
810 910
EXAMPLE
Page 153 of 337
OTHER CONTROLS AND EQUIPMENT
5
79K21-03E
60G407
OTHER CONTROLS AND EQUIPMENTAutomatic Heating and Air Conditioning System
(Climate Control) ................................................................. 5-1
Radio Antenna ..................................................................... 5-8
Audio Systems (Type A) ..................................................... 5-8
Audio Systems (Type B) ..................................................... 5-36
Fuel Filler Cap ..................................................................... 5-62
Engine Hood ........................................................................ 5-63
Sun Visor ............................................................................. 5-64
Interior Light Switch ........................................................... 5-64
Luggage Compartment Light ............................................. 5-65
Spot Light ............................................................................ 5-66
Accessory Socket (if equipped) ......................................... 5-66
Cigarette Lighter and Ashtray (if equipped) ..................... 5-67
Sunroof (if equipped) .......................................................... 5-68
Assist Grips (if equipped) .................................................. 5-70
Coat Hooks (if equipped) .................................................... 5-70
Glove Box ............................................................................ 5-71
Overhead Console Box (if equipped) ................................ 5-71
Cup Holder and Storage Bin (if equipped) ........................ 5-72
Front Seat Back Pocket (if equipped) ............................... 5-73
Shopping Hook (if equipped) ............................................. 5-73
Armrest ................................................................................ 5-73
Floor Mats (if equipped) ..................................................... 5-74
Luggage Compartment Cover ............................................ 5-74
Underfloor Bins (if equipped) ............................................ 5-77
Luggage Restraint Loops (if equipped) ............................ 5-78
Roof Rails or Roof Rack Anchors (if equipped) ............... 5-78
HomeLink® (if equipped) .................................................... 5-80
Frame Hooks ....................................................................... 5-83
Page 161 of 337
5-8
OTHER CONTROLS AND EQUIPMENT
79K21-03E
Radio Antenna
63J055
The radio antenna on the roof is remov-
able. To remove the antenna, turn it coun-
terclockwise. To reinstall the antenna, turn
it clockwise firmly by hand.
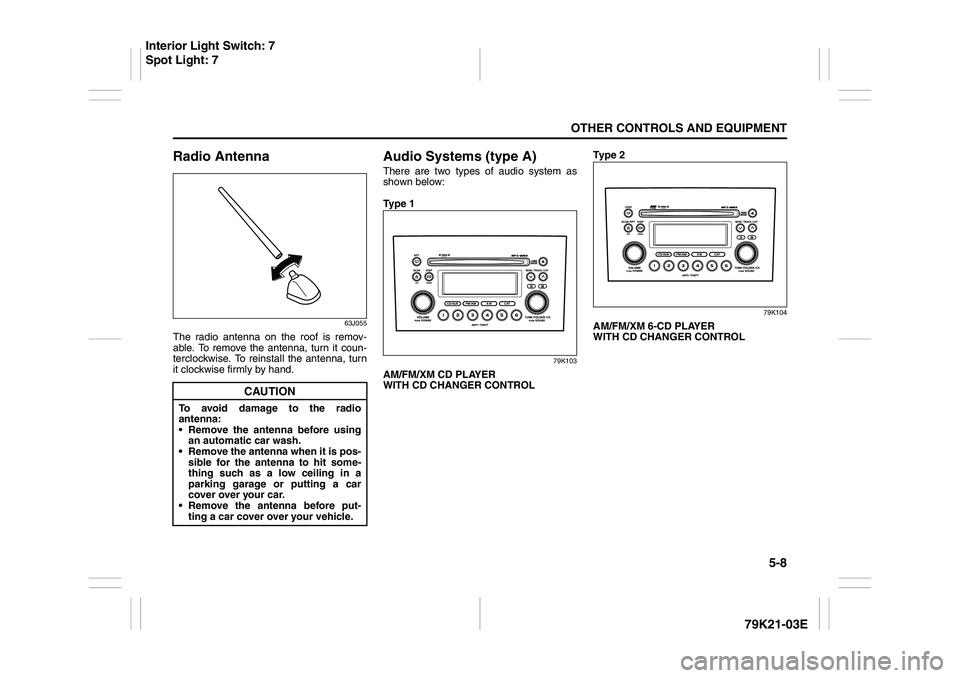
Audio Systems (type A)There are two types of audio system as
shown below:
Ty p e 1
79K103
AM/FM/XM CD PLAYER
WITH CD CHANGER CONTROLTy p e 2
79K104
AM/FM/XM 6-CD PLAYER
WITH CD CHANGER CONTROL
CAUTION
To avoid damage to the radio
antenna:
Remove the antenna before using
an automatic car wash.
Remove the antenna when it is pos-
sible for the antenna to hit some-
thing such as a low ceiling in a
parking garage or putting a car
cover over your car.
Remove the antenna before put-
ting a car cover over your vehicle.
Interior Light Switch: 7
Spot Light: 7
Page 165 of 337
5-12
OTHER CONTROLS AND EQUIPMENT
79K21-03E
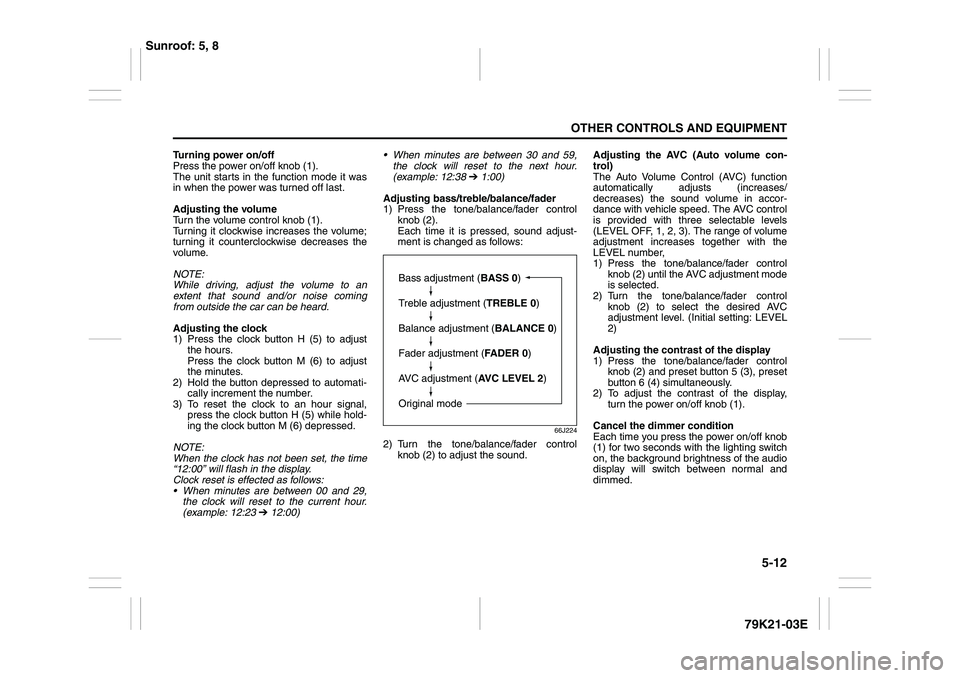
Turning power on/off
Press the power on/off knob (1).
The unit starts in the function mode it was
in when the power was turned off last.
Adjusting the volume
Turn the volume control knob (1).
Turning it clockwise increases the volume;
turning it counterclockwise decreases the
volume.
NOTE:
While driving, adjust the volume to an
extent that sound and/or noise coming
from outside the car can be heard.
Adjusting the clock
1) Press the clock button H (5) to adjust
the hours.
Press the clock button M (6) to adjust
the minutes.
2) Hold the button depressed to automati-
cally increment the number.
3) To reset the clock to an hour signal,
press the clock button H (5) while hold-
ing the clock button M (6) depressed.
NOTE:
When the clock has not been set, the time
“12:00” will flash in the display.
Clock reset is effected as follows:
When minutes are between 00 and 29,
the clock will reset to the current hour.
(example: 12:23 ➔ 12:00) When minutes are between 30 and 59,
the clock will reset to the next hour.
(example: 12:38 ➔ 1:00)
Adjusting bass/treble/balance/fader
1) Press the tone/balance/fader control
knob (2).
Each time it is pressed, sound adjust-
ment is changed as follows:
66J224
2) Turn the tone/balance/fader control
knob (2) to adjust the sound.Adjusting the AVC (Auto volume con-
trol)
The Auto Volume Control (AVC) function
automatically adjusts (increases/
decreases) the sound volume in accor-
dance with vehicle speed. The AVC control
is provided with three selectable levels
(LEVEL OFF, 1, 2, 3). The range of volume
adjustment increases together with the
LEVEL number,
1) Press the tone/balance/fader control
knob (2) until the AVC adjustment mode
is selected.
2) Turn the tone/balance/fader control
knob (2) to select the desired AVC
adjustment level. (Initial setting: LEVEL
2)
Adjusting the contrast of the display
1) Press the tone/balance/fader control
knob (2) and preset button 5 (3), preset
button 6 (4) simultaneously.
2) To adjust the contrast of the display,
turn the power on/off knob (1).
Cancel the dimmer condition
Each time you press the power on/off knob
(1) for two seconds with the lighting switch
on, the background brightness of the audio
display will switch between normal and
dimmed.
Bass adjustment (BASS 0)
Treble adjustment (TREBLE 0)
Balance adjustment (BALANCE 0)
Fader adjustment (FADER 0)
AVC adjustment (AVC LEVEL 2)
Original mode
Sunroof: 5, 8
Page 175 of 337
5-22
OTHER CONTROLS AND EQUIPMENT
79K21-03E
What is MP3/WMA?
MP3 (MPEG1/2 Audio Layer-III) and WMA
(Windows Media
TM
Audio) are the com-
pression formats of digital audio. The
former is developed by MPEG (Motion Pic-
ture Experts Group), and the latter is
developed by Microsoft Corporation. Using
these compression formats, you can
record the contents of about 10 music CDs
on a single CD media (This figures refer to
data recorded on a 650 MB CD-R or CD-
RW at a fixed bit rate of 128 kbps and a
sampling frequency of 44.1 kHz).Points to remember when making MP3/
WMA files
Common
High bit rate and high sampling fre-
quency are recommended for high qual-
ity sounds.
Selecting VBR (Variable Bit Rate) is not
recommended because playing time is
not displayed properly and sound may
be skipped.
The playback sound quality differs
depending on the encoding circum-
stances. For details, refer to the user
manual of your own encoding software
and writing software.
MP3
It is recommended to set the bit rate to
“128 kbps or more” and “fixed”.
WMA
It is recommended to set the bit rate to
“64 kbps or more” and “fixed”.
Do not set the copy protect attribute on
the WMA file to enable this unit to play
back.
NOTE:
Never assign the “.mp3”, or “.wma” file
name extension to a file that is not in the
MP3/WMA format. This may not only pro-
duce noise from the speaker damage, but
also damage your hearing.Recording MP3/WMA files on a CD-
media
You are recommended to minimize the
chances of making a disc that contains
both CD-DA files and MP3/WMA files.
If CD-DA files are on the same disc as
MP3 or WMA files, the songs may not
play in the intended order, or some
songs may not play at all.
When storing MP3 data and WMA data
on the same disc, use different folders
for each data.
Do not record files other than MP3/WMA
files and unnecessary folder on a disc.
The name of an MP3/WMA file should
be added by rules as shown in the fol-
lowing descriptions and also comply with
the rules of each file system.
The file extension “.mp3” or “.wma”
should be assigned to each file depend-
ing on the file format.
You may encounter trouble in playing
MP3/WMA files or displaying the infor-
mation of MP3/WMA files recorded with
certain writing software or CD recorders.
This unit does not have a play list func-
tion.
Although Multi-session recording is sup-
ported, the use of Disc-at-Once is rec-
ommended.
Underfloor Bins:
Roof Rails or Roof Rack Anchors: 5, 13
Page 176 of 337
5-23OTHER CONTROLS AND EQUIPMENT
79K21-03E
Compression formats
MP3
Bit rate
MPEG1 Audio Layer III : 32 k - 320 kbps
MPEG2 Audio Layer III : 8 k - 160 kbps
Sampling frequency
MPEG1 Audio Layer III : 44.1 k/48 k/32
kHz
MPEG2 Audio Layer III : 22.05 k/24 k/16
kHz
WMA (Ver.7, Ver.8, Ver.9*)
Bit rate
32 k - 192 kbps
Sampling frequency
44.1 k/48 k/32 kHz
* WMA 9 Professional/LossLess/Voice are
not supported.
Supported file systems
ISO 9660 Level 1/Level 2, Apple Extension
to ISO 9660, Joliet, RomeoMaximum number of files/folders
Maximum number of files:
CD Player: 999(files + folders)
6-CD Player: 512(files + folders)
Maximum number of files in one folder:
255
Maximum depth of trees: 8
Maximum number of folders: 255
(Root folder is included.)MP3/WMA MODE
Selecting a folder
Turn the sound control knob (1) to select a
folder.
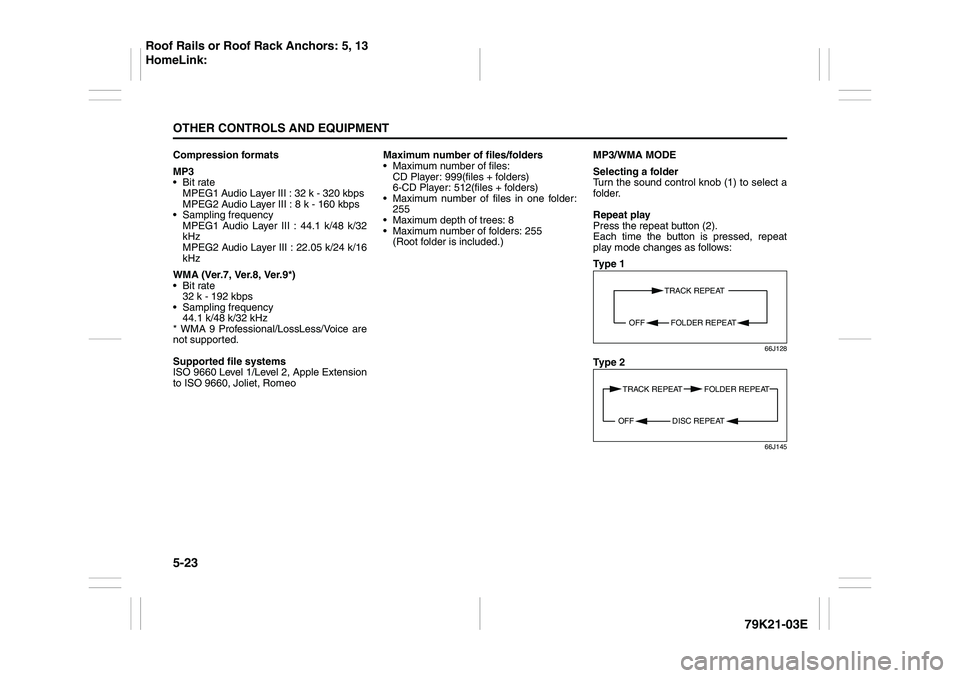
Repeat play
Press the repeat button (2).
Each time the button is pressed, repeat
play mode changes as follows:
Ty p e 1
66J128
Ty p e 2
66J145
TRACK REPEAT
FOLDER REPEAT OFF
TRACK REPEAT FOLDER REPEAT
DISC REPEAT OFF
Roof Rails or Roof Rack Anchors: 5, 13
HomeLink:
Page 180 of 337
5-27OTHER CONTROLS AND EQUIPMENT
79K21-03E
Listening to Audio for AUX (Option)
79K111
(1)(1)
Type 1 AM/FM/XM CD PLAYER WITH CD CHANGER CONTROL
Type 2 AM/FM/XM 6-CD PLAYER WITH CD CHANGER CONTROL
Display
66J221
(1) Aux button (CD/AUX)
(A) Mode indicator
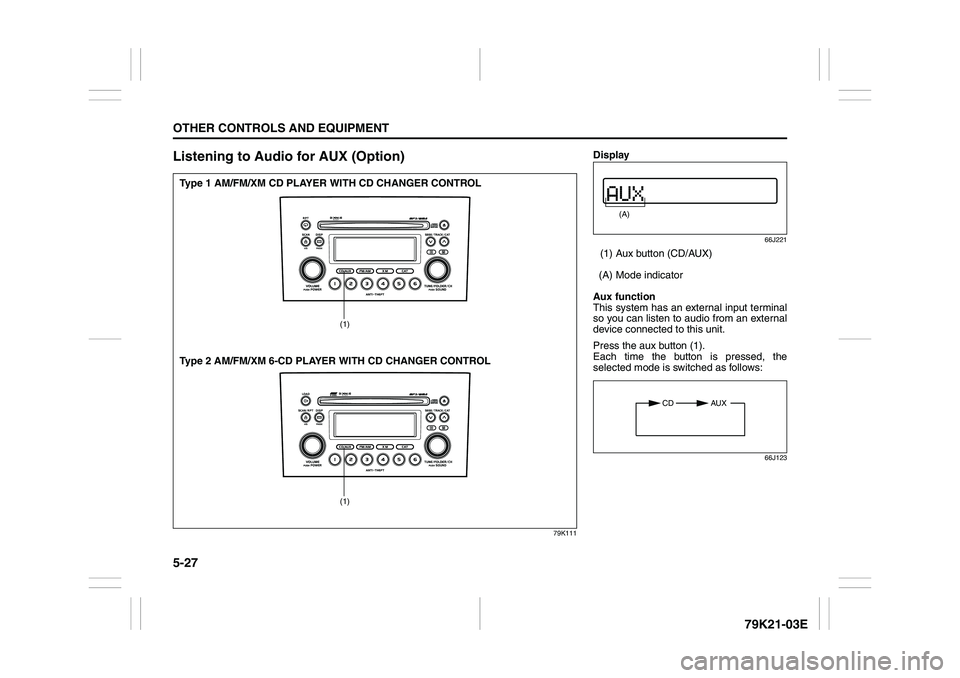
Aux function
This system has an external input terminal
so you can listen to audio from an external
device connected to this unit.
Press the aux button (1).
Each time the button is pressed, the
selected mode is switched as follows:
66J123
(A)
CD AUX
Page 183 of 337
5-30
OTHER CONTROLS AND EQUIPMENT
79K21-03E
TRACK REPEAT
The indication “TRACK RPT” appears in
the display for 2 seconds and then the
repeat indicator (E) lights.
The track being currently played is
played repeatedly.
DISC REPEAT
The indication “DISC RPT” appears in
the display for 2 seconds and then the
repeat indicator (E) lights.
When all the tracks on a disc being cur-
rently played finish playing, play starts
again at the beginning of the disc.
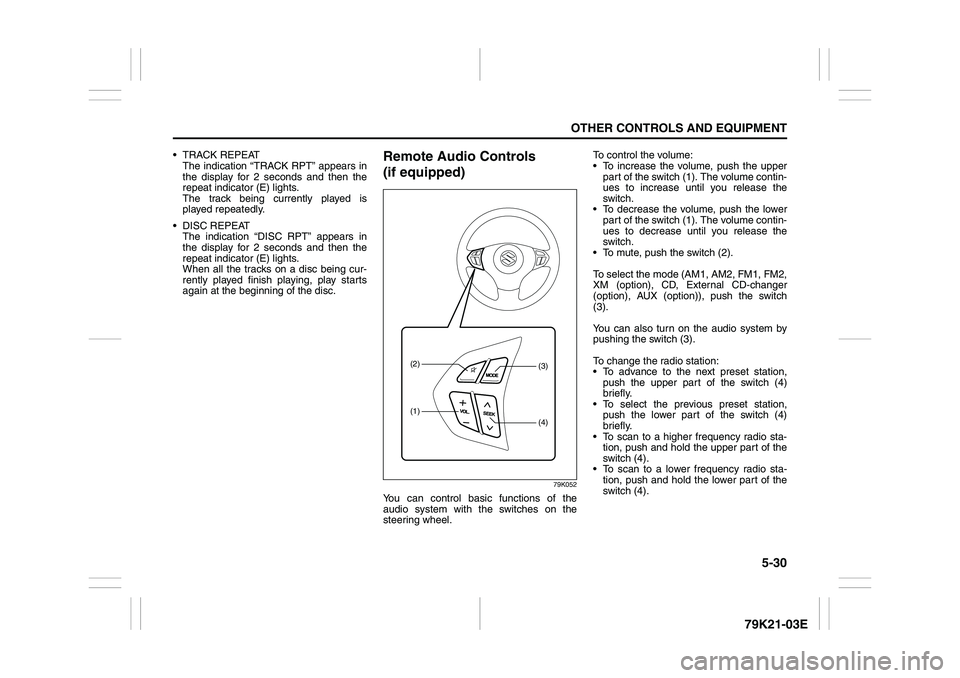
Remote Audio Controls
(if equipped)
79K052
You can control basic functions of the
audio system with the switches on the
steering wheel.To control the volume:
To increase the volume, push the upper
part of the switch (1). The volume contin-
ues to increase until you release the
switch.
To decrease the volume, push the lower
part of the switch (1). The volume contin-
ues to decrease until you release the
switch.
To mute, push the switch (2).
To select the mode (AM1, AM2, FM1, FM2,
XM (option), CD, External CD-changer
(option), AUX (option)), push the switch
(3).
You can also turn on the audio system by
pushing the switch (3).
To change the radio station:
To advance to the next preset station,
push the upper part of the switch (4)
briefly.
To select the previous preset station,
push the lower part of the switch (4)
briefly.
To scan to a higher frequency radio sta-
tion, push and hold the upper part of the
switch (4).
To scan to a lower frequency radio sta-
tion, push and hold the lower part of the
switch (4).
(1)(2)
(4)(3)
Page 185 of 337
5-32
OTHER CONTROLS AND EQUIPMENT
79K21-03E
(1) Power on/off knob
(2) Track up button/Fast forward button
(3) Preset buttons (1 to 6)
The anti-theft feature is intended to dis-
courage theft or the audio system by pre-
venting the system from operating when it
is moved to a different vehicle.
This feature works by allowing you to enter
a Personal Identification Number (PIN).
When the audio system is disconnected
from its power source, such as when the
audio system is removed or the battery is
disconnected, the system will not operate
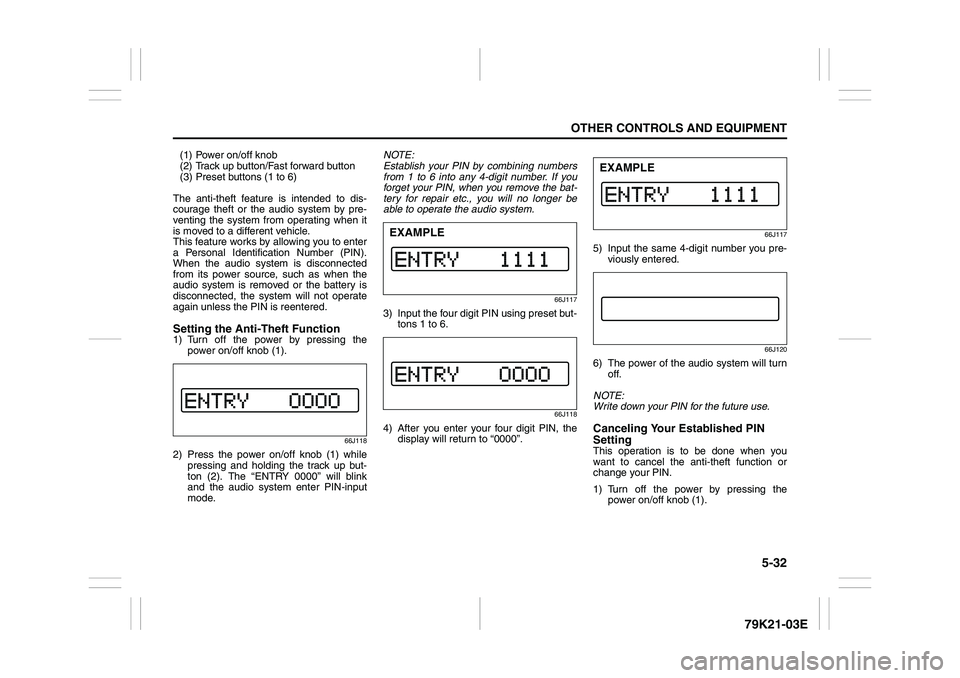
again unless the PIN is reentered.Setting the Anti-Theft Function1) Turn off the power by pressing the
power on/off knob (1).
66J118
2) Press the power on/off knob (1) while
pressing and holding the track up but-
ton (2). The “ENTRY 0000” will blink
and the audio system enter PIN-input
mode.NOTE:
Establish your PIN by combining numbers
from 1 to 6 into any 4-digit number. If you
forget your PIN, when you remove the bat-
tery for repair etc., you will no longer be
able to operate the audio system.
66J117
3) Input the four digit PIN using preset but-
tons 1 to 6.
66J118
4) After you enter your four digit PIN, the
display will return to “0000”.
66J117
5) Input the same 4-digit number you pre-
viously entered.
66J120
6) The power of the audio system will turn
off.
NOTE:
Write down your PIN for the future use.Canceling Your Established PIN
SettingThis operation is to be done when you
want to cancel the anti-theft function or
change your PIN.
1) Turn off the power by pressing the
power on/off knob (1).
EXAMPLE
EXAMPLE
Page 186 of 337
5-33OTHER CONTROLS AND EQUIPMENT
79K21-03E
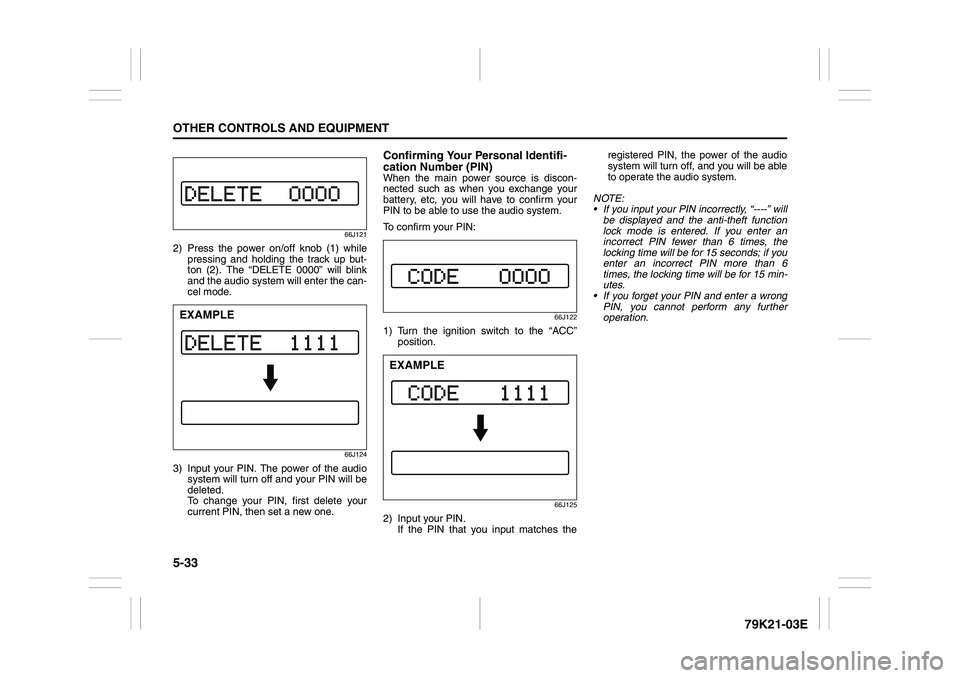
66J121
2) Press the power on/off knob (1) while
pressing and holding the track up but-
ton (2). The “DELETE 0000” will blink
and the audio system will enter the can-
cel mode.
66J124
3) Input your PIN. The power of the audio
system will turn off and your PIN will be
deleted.
To change your PIN, first delete your
current PIN, then set a new one.
Confirming Your Personal Identifi-
cation Number (PIN)When the main power source is discon-
nected such as when you exchange your
battery, etc, you will have to confirm your
PIN to be able to use the audio system.
To confirm your PIN:
66J122
1) Turn the ignition switch to the “ACC”
position.
66J125
2) Input your PIN.
If the PIN that you input matches theregistered PIN, the power of the audio
system will turn off, and you will be able
to operate the audio system.
NOTE:
If you input your PIN incorrectly, “----” will
be displayed and the anti-theft function
lock mode is entered. If you enter an
incorrect PIN fewer than 6 times, the
locking time will be for 15 seconds; if you
enter an incorrect PIN more than 6
times, the locking time will be for 15 min-
utes.
If you forget your PIN and enter a wrong
PIN, you cannot perform any further
operation.
EXAMPLE
EXAMPLE