instrument cluster SUZUKI GRAND VITARA 2013 Owners Manual
[x] Cancel search | Manufacturer: SUZUKI, Model Year: 2013, Model line: GRAND VITARA, Model: SUZUKI GRAND VITARA 2013Pages: 337, PDF Size: 6.21 MB
Page 13 of 337
ILLUSTRATED TABLE OF CONTENTS
79K21-03E
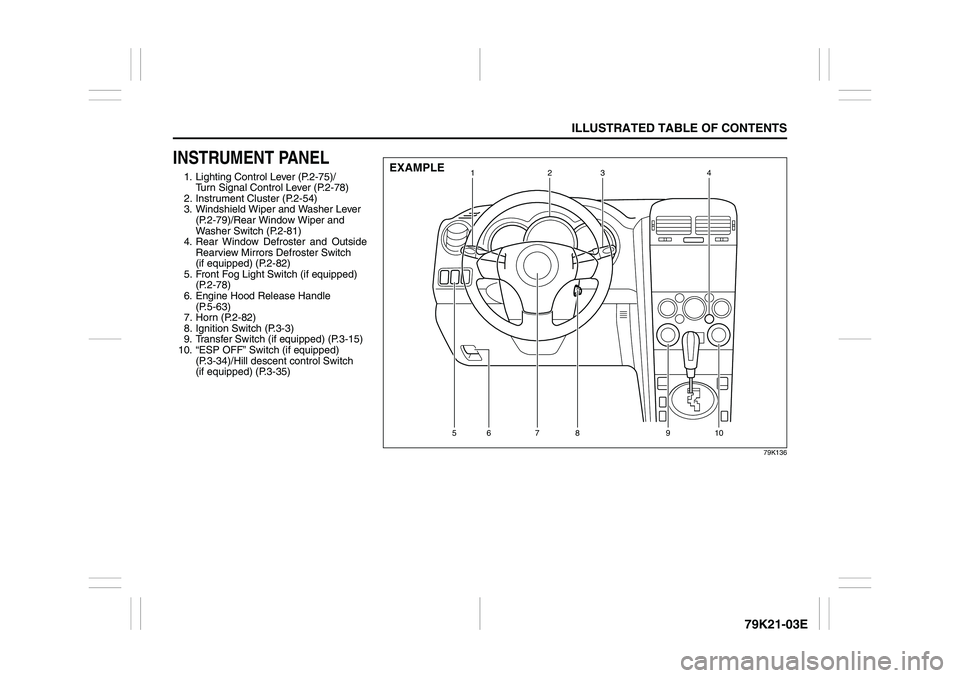
INSTRUMENT PANEL1. Lighting Control Lever (P.2-75)/
Turn Signal Control Lever (P.2-78)
2. Instrument Cluster (P.2-54)
3. Windshield Wiper and Washer Lever
(P.2-79)/Rear Window Wiper and
Washer Switch (P.2-81)
4. Rear Window Defroster and Outside
Rearview Mirrors Defroster Switch
(if equipped) (P.2-82)
5. Front Fog Light Switch (if equipped)
(P.2-78)
6. Engine Hood Release Handle
(P.5-63)
7. Horn (P.2-82)
8. Ignition Switch (P.3-3)
9. Transfer Switch (if equipped) (P.3-15)
10. “ESP OFF” Switch (if equipped)
(P.3-34)/Hill descent control Switch
(if equipped) (P.3-35)
79K136
1234
67891011
123 4
56 7 8 9 10
EXAMPLE
Page 17 of 337
BEFORE DRIVING
2
79K21-03E
60G404
BEFORE DRIVINGKeys ...................................................................................... 2-1
Door Locks .......................................................................... 2-1
Keyless Start System Remote Controller/Keyless Entry
System Transmitter ............................................................. 2-4
Theft Deterrent Light ........................................................... 2-15
Windows .............................................................................. 2-15
Mirrors .................................................................................. 2-17
Front Seats .......................................................................... 2-18
Rear Seats ............................................................................ 2-22
Seat Belts and Child Restraint Systems ........................... 2-26
Supplemental Restraint System (air bags) ....................... 2-43
Instrument Cluster .............................................................. 2-54
Warning and Indicator Lights ............................................ 2-55
Speedometer ....................................................................... 2-65
Tachometer .......................................................................... 2-65
Fuel Gauge ........................................................................... 2-65
Temperature Gauge ............................................................ 2-66
Brightness Control .............................................................. 2-66
Information Display (if equipped) ...................................... 2-67
Lighting Control Lever ........................................................ 2-75
Front Fog Light Switch (if equipped) ................................ 2-78
Turn Signal Control Lever .................................................. 2-78
Hazard Warning Switch ...................................................... 2-79
Windshield Wiper and Washer Lever ................................ 2-79
Tilt Steering Lock Lever ..................................................... 2-82
Horn ...................................................................................... 2-82
Rear Window Defroster and Outside Rearview Mirrors
Defroster (if equipped) Switch ........................................... 2-82
Page 25 of 337
2-8
BEFORE DRIVING
79K21-03E
You can use up to four remote controllers
and ignition keys for your vehicle. Ask
your SUZUKI dealer for details.
The battery life of the remote controller
is about two years, but it can vary
depending on usage conditions.
63J281
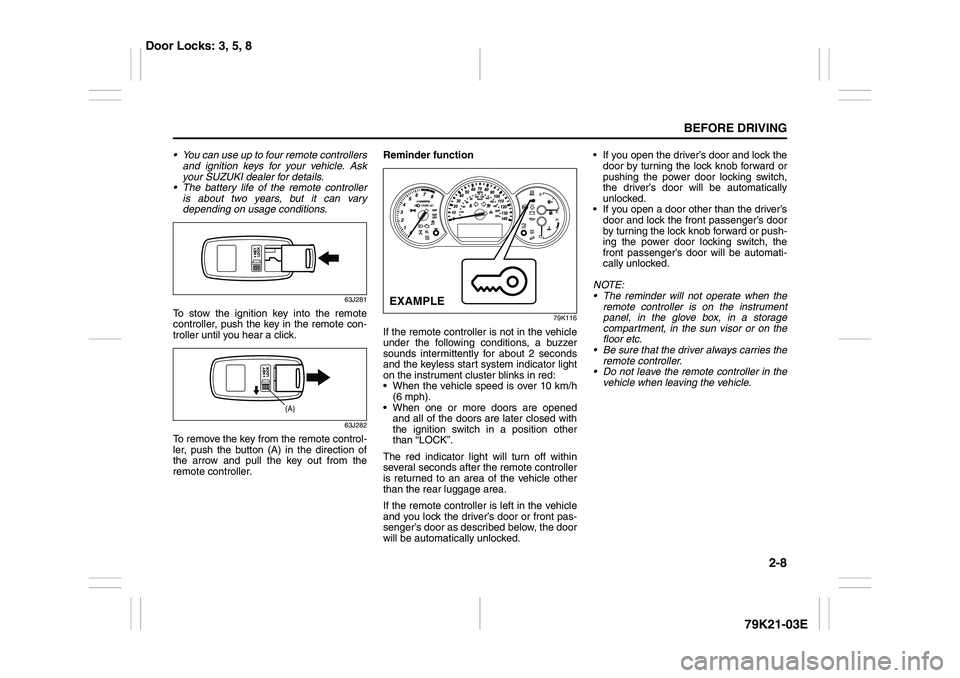
To stow the ignition key into the remote
controller, push the key in the remote con-
troller until you hear a click.
63J282
To remove the key from the remote control-
ler, push the button (A) in the direction of
the arrow and pull the key out from the
remote controller.Reminder function
79K116
If the remote controller is not in the vehicle
under the following conditions, a buzzer
sounds intermittently for about 2 seconds
and the keyless start system indicator light
on the instrument cluster blinks in red:
When the vehicle speed is over 10 km/h
(6 mph).
When one or more doors are opened
and all of the doors are later closed with
the ignition switch in a position other
than “LOCK”.
The red indicator light will turn off within
several seconds after the remote controller
is returned to an area of the vehicle other
than the rear luggage area.
If the remote controller is left in the vehicle
and you lock the driver’s door or front pas-
senger’s door as described below, the door
will be automatically unlocked. If you open the driver’s door and lock the
door by turning the lock knob forward or
pushing the power door locking switch,
the driver’s door will be automatically
unlocked.
If you open a door other than the driver’s
door and lock the front passenger’s door
by turning the lock knob forward or push-
ing the power door locking switch, the
front passenger’s door will be automati-
cally unlocked.
NOTE:
The reminder will not operate when the
remote controller is on the instrument
panel, in the glove box, in a storage
compartment, in the sun visor or on the
floor etc.
Be sure that the driver always carries the
remote controller.
Do not leave the remote controller in the
vehicle when leaving the vehicle.
(A)
EXAMPLE
Door Locks: 3, 5, 8
Page 48 of 337

2-31BEFORE DRIVING
79K21-03E
reminder light in the instrument cluster and
the front passenger’s seat belt reminder
light in the center of the instrument panel
will come on and a buzzer will sound as a
reminder to the driver and front passenger
to buckle their seat belts.
The seat belt reminder functions as shown
in the figure below. There are some differ-
ences between the driver’s seat belt
reminder and the front passenger’s seat
belt reminder. For more details, refer to the
explanation below.
WARNING
It is absolutely essential that the
driver and passengers wear their seat
belts at all times. Persons who are
not wearing seat belts have a much
greater risk of injury if an accident
occurs. Make a regular habit of buck-
ling your seat belt before putting the
key in the ignition.
Flow chart
52D219
Reminder 1 – 3
For each reminder 1 – 3, the reminder light comes on for about 20 seconds, then blinks for
about 55 seconds. When the reminder light first comes on, a buzzer sounds intermittently
for about 6 seconds.
Ignition Switch “ON”
Seat belt is
buckled
30 sec.Reminder 1
Vehicle speed:
increase to 8 km/hSeat belt is
unbuckled
Vehicle speed:
below 8 km/hVehicle speed:
over 8 km/h
Reminder 3
No reminder3 min. Reminder 2
No reminder Seat belt is
unbuckled
Vehicle speed:
below 8 km/hVehicle speed:
over 8 km/h
Seat Belts and Child Restraint Systems: 14
Page 60 of 337
2-43BEFORE DRIVING
79K21-03E
tion and the instructions and precautions
about the seat belts in this “Seat Belts and
Child Restraint Systems” section for details
on proper seat and seat belt adjustments.
Please note that the pretensioners along
with the front air bags will activate in
severe frontal collisions. Also, the preten-
sioners along with the side curtain air bags
will activate in severe rollovers. They are
not designed to activate in rear impacts,
side impacts, or minor frontal collisions.
The pretensioners can be activated only
once. If the pretensioners are activated
(that is, if the front air bags and/or the side
curtain air bags are activated), have the
pretensioner system serviced by an autho-
rized SUZUKI dealer as soon as possible.
If the “AIR BAG” light on the instrument
cluster does not blink or come on briefly
when the ignition switch is turned to the
“ON” position, stays on for more than 10
seconds, or comes on while driving, the
pretensioner system or the air bag system
may not work properly. Have both systems
inspected by an authorized SUZUKI dealer
as soon as possible.
Service on or around the pretensioner sys-
tem components or wiring must be per-
formed only by an authorized SUZUKI
dealer who is specially trained. Improper
service could result in unintended activa-
tion of pretensioners or could render the
pretensioner inoperative. Either of thesetwo conditions may result in personal
injury.
To prevent damage or unintended activa-
tion of the pretensioners, be sure the bat-
tery is disconnected and the ignition switch
has been in the “LOCK” position for at least
90 seconds before performing any electri-
cal service work on your SUZUKI. Do not
touch pretensioner system components or
wiring. The wires are wrapped with yellow
tape or yellow tubing, and the couplers are
yellow. When scrapping your SUZUKI, ask
your SUZUKI dealer, body repair shop or
scrap yard for assistance.
Supplemental Restraint
System (air bags)
54G022
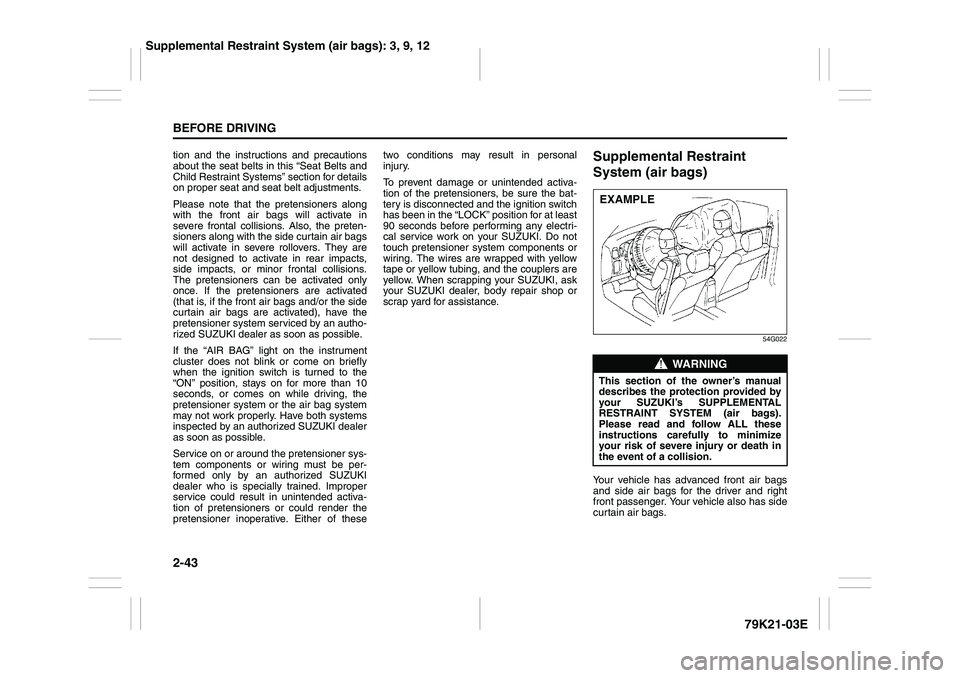
Your vehicle has advanced front air bags
and side air bags for the driver and right
front passenger. Your vehicle also has side
curtain air bags.
WARNING
This section of the owner’s manual
describes the protection provided by
your SUZUKI’s SUPPLEMENTAL
RESTRAINT SYSTEM (air bags).
Please read and follow ALL these
instructions carefully to minimize
your risk of severe injury or death in
the event of a collision.EXAMPLE
Supplemental Restraint System (air bags): 3, 9, 12
Page 62 of 337
2-45BEFORE DRIVING
79K21-03E
63J030
If the “AIR BAG” light on the instrument
cluster does not blink or come on when the
ignition switch is first turned to the “ON”
position, or the “AIR BAG” light stays on, or
comes on while driving, the air bag system
(or the seat belt pretensioner system) may
not work properly. Have the air bag system
inspected by an authorized SUZUKI dealer
as soon as possible.
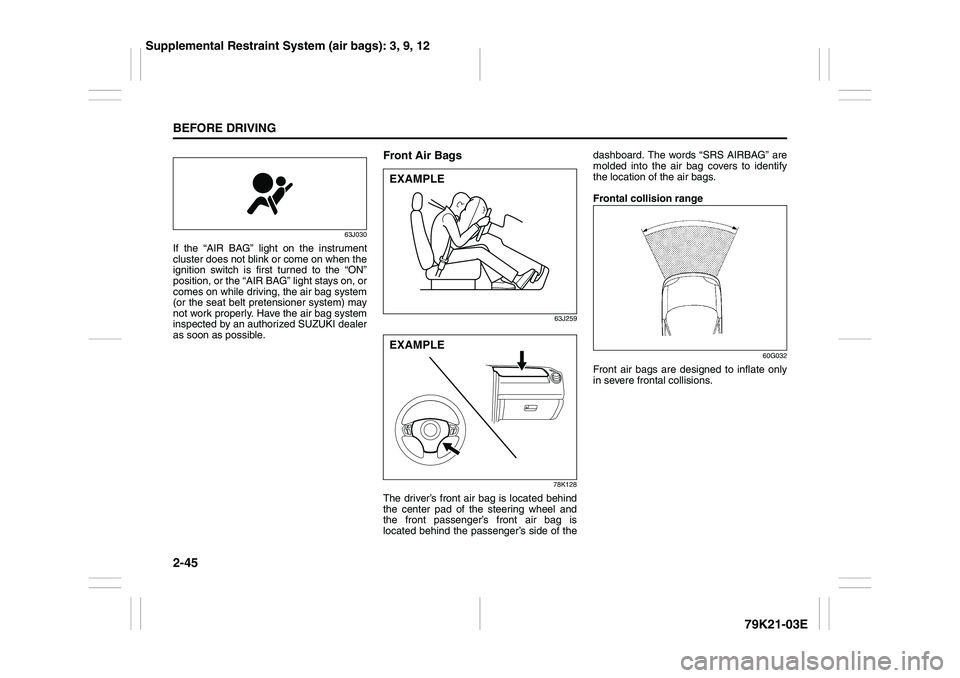
Front Air Bags
63J259
78K128
The driver’s front air bag is located behind
the center pad of the steering wheel and
the front passenger’s front air bag is
located behind the passenger’s side of thedashboard. The words “SRS AIRBAG” are
molded into the air bag covers to identify
the location of the air bags.
Frontal collision range
60G032
Front air bags are designed to inflate only
in severe frontal collisions.
EXAMPLEEXAMPLE
Supplemental Restraint System (air bags): 3, 9, 12
Page 71 of 337
2-54
BEFORE DRIVING
79K21-03E
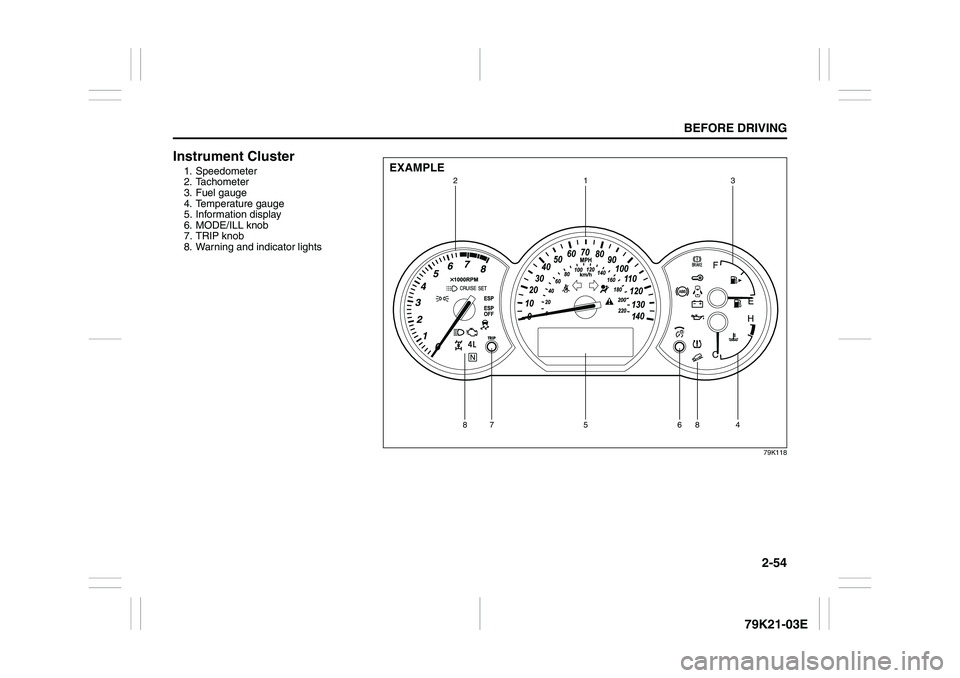
Instrument Cluster1. Speedometer
2. Tachometer
3. Fuel gauge
4. Temperature gauge
5. Information display
6. MODE/ILL knob
7. TRIP knob
8. Warning and indicator lights
79K118
EXAMPLE
1
3
2
5
88
6
7
4
Page 105 of 337
3-4
OPERATING YOUR VEHICLE
79K21-03E
ACC
Accessories such as the radio can oper-
ate, but the engine is off.
ON
This is the normal operating position. All
electrical systems are on.
START
This is the position for starting the engine
using the starter motor. The key should be
released from this position as soon as the
engine starts.
Ignition key reminder
A buzzer sounds intermittently to remind
you to remove the ignition key if it is in the
ignition switch when the driver’s door is
opened.
Vehicle With Keyless Start System
56KN076
The ignition switch can be operated with-
out using an ignition key when the remote
controller is in an area of the vehicle other
than the rear luggage area. To turn the
ignition switch, first push in the switch.
Manual transmission vehicle
You must push in the ignition switch to
turn it from the “LOCK” position to the
“ACC” position. To return to the “LOCK”
position from the “ACC” position, turn the
ignition switch counterclockwise while
pushing in the switch.
Automatic transmission vehicle
To turn the ignition switch, push the
switch.
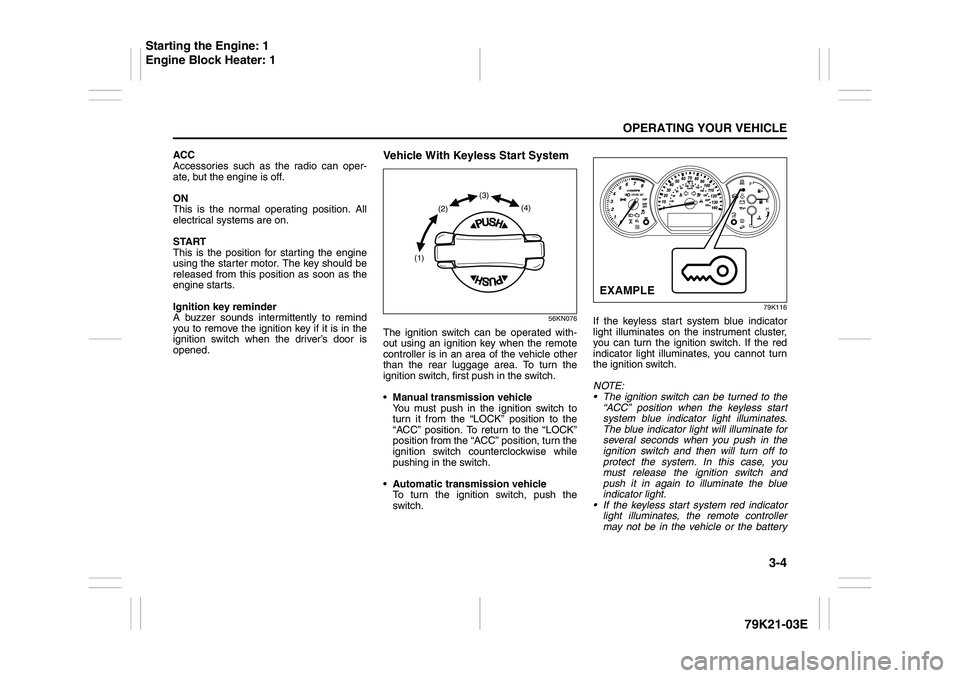
79K116
If the keyless start system blue indicator
light illuminates on the instrument cluster,
you can turn the ignition switch. If the red
indicator light illuminates, you cannot turn
the ignition switch.
NOTE:
The ignition switch can be turned to the
“ACC” position when the keyless start
system blue indicator light illuminates.
The blue indicator light will illuminate for
several seconds when you push in the
ignition switch and then will turn off to
protect the system. In this case, you
must release the ignition switch and
push it in again to illuminate the blue
indicator light.
If the keyless start system red indicator
light illuminates, the remote controller
may not be in the vehicle or the battery
(1)(2)(3)
(4)
EXAMPLE
Starting the Engine: 1
Engine Block Heater: 1
Page 128 of 337
3-27OPERATING YOUR VEHICLE
79K21-03E
“CRUISE” indicator light
52D113
When you push the “ON/OFF” switch, the
system is on and a “CRUISE” indicator
light on the instrument cluster will be on.
“SET” indicator light
65D474
When the vehicle’s speed is controlled by
the cruise control system, a “SET” indica-
tor light on the instrument cluster will be
on.
To Change Speed TemporarilyWhen the cruising speed is maintained,
you can temporarily accelerate or deceler-
ate.
To accelerate, depress the accelerator
pedal. When you take your foot off the
pedal, your vehicle will return to the set
speed.
To decelerate, depress the brake pedal.
The set speed will be canceled and “SET”
indicator light will go off. To resume the
previously set speed, push the “RES/ACC”
switch (4) and turn on the “SET” indicator
light again when vehicle speed is above 45
km/h (28 mph). The vehicle will accelerate
to and maintain the previously set speed.
NOTE:
For 4-Speed/5-Speed automatic transmis-
sion vehicle, when the cruising speed is
maintained, you cannot decelerate by
using the engine brake if you shift the gear-
shift lever from “D” to “3” position for 4-
Speed automatic transmission vehicle, and
from “D” to “4” position for 5-Speed auto-
matic transmission vehicle.
To decelerate while the cruise control is on,
depress the brake pedal or push the “SET/
COAST” switch (3).
To Change Cruising SpeedUsing the accelerator pedal
To reset at a faster cruising speed, acceler-
ate to the desired speed using the acceler-
ator pedal and push the “SET/COAST”
switch (3). The new speed will be main-
tained.
Using the brake pedal
To reset at a slower cruising speed, decel-
erate to the desired speed using the brake
pedal and push the “SET/COAST” switch
(3). The new speed will be maintained.
NOTE:
When the brake pedal is depressed, the
“SET” indicator light goes off until reset the
cruising speed.
Using the cruise control switch
To reset at a faster cruising speed, press
repeatedly or hold in the “RES/ACC”
switch (4). Vehicle speed will steadily
increase. When you release the switch, the
new speed will be maintained.
To reset at a slower cruising speed, press
repeatedly or hold in the “SET/COAST”
switch (3) until the vehicle has slowed to
the desired speed, then release the switch.
The new speed will be maintained.
NOTE:
You can adjust the set speed by approxi-
mately 1.5 km/h (1.0 mph) by pushing a
cruise control switch quickly.
Page 129 of 337
3-28
OPERATING YOUR VEHICLE
79K21-03E
Cancellation of the Cruise ControlThe “SET” indicator light will go off and the
cruise control will be canceled temporarily
with following procedures:
Push the “CANCEL” switch (2).
Depress the brake pedal.
For manual transmission, depress the
clutch pedal.
For 4-Speed automatic transmission
vehicle, shift the gearshift lever into “2”
or “L” position.
For 5-Speed automatic transmission
vehicle, shift the gearshift lever into “3”,
“2”, or “L” position.
The vehicle speed falls more than 20
km/h (12.5 mph) below the set speed.
Any time the vehicle speed falls below
40 km/h (25 mph).
When the vehicle skids and ESP
® (if
equipped) is activated.
To resume the previously set speed, push
the “RES/ACC” switch (4) and turn on the
“SET” indicator light. Besides, the vehicle
speed has to be above 45 km/h (28 mph)
when the vehicle is not in the above condi-
tions.
To turn off the cruise control system, push
the “ON/OFF” switch (1) and make sure
the “CRUISE” indicator light is off.
Also, if the malfunction indicator light in the
instrument cluster comes on or blinks, the
cruise control system will be turned off.NOTE:
If you turn off the cruise control system, the
previously set speed in the memory is
cleared. Reset your cruising speed again.
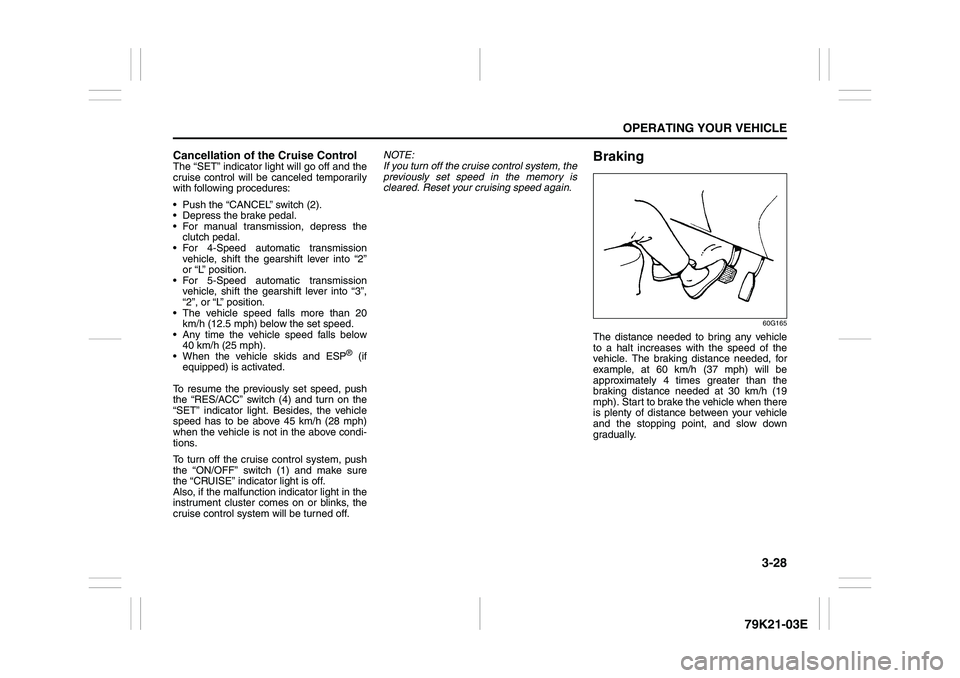
Braking
60G165
The distance needed to bring any vehicle
to a halt increases with the speed of the
vehicle. The braking distance needed, for
example, at 60 km/h (37 mph) will be
approximately 4 times greater than the
braking distance needed at 30 km/h (19
mph). Start to brake the vehicle when there
is plenty of distance between your vehicle
and the stopping point, and slow down
gradually.