wheel nut SUZUKI GRAND VITARA 2013 Owners Manual
[x] Cancel search | Manufacturer: SUZUKI, Model Year: 2013, Model line: GRAND VITARA, Model: SUZUKI GRAND VITARA 2013Pages: 337, PDF Size: 6.21 MB
Page 73 of 337
2-56
BEFORE DRIVING
79K21-03E
inflation pressure as specified in the vehi-
cle placard and owner’s manual.
The low tire pressure warning light is also
used to inform you of a TPMS malfunction.
When the system detects a malfunction,
this light will flash for approximately one
minute and then remain continuously illu-
minated. This sequence will be repeated
approximately ten minutes after subse-
quent vehicle start-ups as long as the mal-
function exists.
NOTE:
The low tire pressure warning light may not
come on immediately if you have a sudden
loss of air pressure.
Refer to “Tire Pressure Monitoring System”
in the “OPERATING YOUR VEHICLE” sec-
tion for additional details on the tire pres-
sure monitoring system. Refer to “Tires” in
the “INSPECTION AND MAINTENANCE”
WARNING
If the low tire pressure warning light
does not come on when the ignition
is turned to the “ON” position, or
comes on and blinks while driving
there may be a problem with the tire
pressure monitoring system. Have
your vehicle inspected by an autho-
rized SUZUKI dealer. Even if the light
turns off after blinking, indicating
that the monitoring system has
recovered, make sure to have an
authorized SUZUKI dealer check the
system.
WARNING
The load rating of your tires is
reduced at lower inflation pressures.
If your tires become even moderately
under-inflated, the vehicle load may
exceed the load rating of the tires,
which can lead to tire failure. The low
tire pressure warning light will not
alert you of this condition. The warn-
ing light will only come on when one
or more of your tires become signifi-
cantly under-inflated. Check and
adjust your tire inflation pressure at
least once a month. Refer to “Tires”
in the “INSPECTION AND MAINTE-
NANCE” section.
WARNING
If the low tire pressure warning light
comes on and stays on, reduce your
speed and avoid abrupt steering and
braking. Stop in a safe place as soon
as possible and check your tires.
If you have a flat tire, replace it with
the spare tire. Refer to “Jacking
Instructions” in the “EMERGENCY
SERVICE” section. Refer to
“Replacing Tires and/or Wheels”
for instructions on how to restore
normal operation of the tire pres-
sure monitoring system after you
have had a flat tire.
If one or more of your tires is
under-inflated, adjust the inflation
pressure in all of your tires to the
recommended inflation pressure as
soon as possible.
Be aware that driving on a signifi-
cantly under-inflated tire can cause
the tire to overheat and can lead to
tire failure, and may affect steering
control and brake effectiveness. This
could lead to an accident, resulting in
severe injury or death.
Page 103 of 337
3-2
OPERATING YOUR VEHICLE
79K21-03E
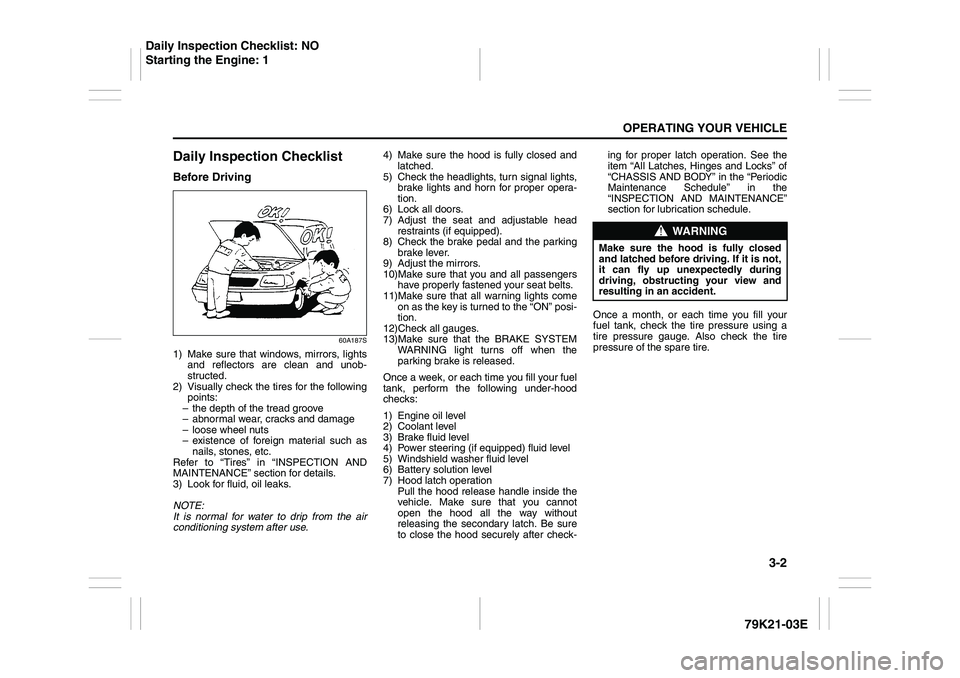
Daily Inspection ChecklistBefore Driving
60A187S
1) Make sure that windows, mirrors, lights
and reflectors are clean and unob-
structed.
2) Visually check the tires for the following
points:
– the depth of the tread groove
– abnormal wear, cracks and damage
– loose wheel nuts
– existence of foreign material such as
nails, stones, etc.
Refer to “Tires” in “INSPECTION AND
MAINTENANCE” section for details.
3) Look for fluid, oil leaks.
NOTE:
It is normal for water to drip from the air
conditioning system after use.4) Make sure the hood is fully closed and
latched.
5) Check the headlights, turn signal lights,
brake lights and horn for proper opera-
tion.
6) Lock all doors.
7) Adjust the seat and adjustable head
restraints (if equipped).
8) Check the brake pedal and the parking
brake lever.
9) Adjust the mirrors.
10)Make sure that you and all passengers
have properly fastened your seat belts.
11)Make sure that all warning lights come
on as the key is turned to the “ON” posi-
tion.
12)Check all gauges.
13)Make sure that the BRAKE SYSTEM
WARNING light turns off when the
parking brake is released.
Once a week, or each time you fill your fuel
tank, perform the following under-hood
checks:
1) Engine oil level
2) Coolant level
3) Brake fluid level
4) Power steering (if equipped) fluid level
5) Windshield washer fluid level
6) Battery solution level
7) Hood latch operation
Pull the hood release handle inside the
vehicle. Make sure that you cannot
open the hood all the way without
releasing the secondary latch. Be sure
to close the hood securely after check-ing for proper latch operation. See the
item “All Latches, Hinges and Locks” of
“CHASSIS AND BODY” in the “Periodic
Maintenance Schedule” in the
“INSPECTION AND MAINTENANCE”
section for lubrication schedule.
Once a month, or each time you fill your
fuel tank, check the tire pressure using a
tire pressure gauge. Also check the tire
pressure of the spare tire.
WARNING
Make sure the hood is fully closed
and latched before driving. If it is not,
it can fly up unexpectedly during
driving, obstructing your view and
resulting in an accident.
Daily Inspection Checklist: NO
Starting the Engine: 1
Page 141 of 337
3-40
OPERATING YOUR VEHICLE
79K21-03E
on the tire information placard should
cause the low tire pressure warning light to
turn off.
If the light turns on again shortly after
adjusting the pressure in your tires, you
may have a flat tire. If you have a flat tire,
replace it with the spare tire. Refer to
“Jacking Instructions” in the “EMER-
GENCY SERVICE” section. Refer to
“Replacing Tires and/or Wheels” for
instructions on how to restore normal oper-
ation of the tire pressure monitoring sys-
tem after you have had a flat tire.
NOTE:
When the tire inflation pressure is
adjusted in high altitude areas, the low
tire pressure light may not turn off even
after tire inflation pressure adjustment.
In this case, adjust the inflation pressure
to a slightly higher pressure than is
shown on the tire information placard.
The low tire pressure warning light may
turn off temporarily after coming on. This
could be due to surface temperature
increases after long distance driving or
traveling to a high temperature area.
Even if the tire pressure warning light
turns off after coming on, make sure to
check the inflation pressure of all tires.
To reduce the chance that the low tire
pressure warning light will come on due
to normal changes in temperature and
atmospheric pressure, it is important to
check and adjust the tire pressureswhen the tires are cold. Tires that
appear to be at the specified pressure
when checked after driving, when the
tires are warm, could have pressure
below the specification when the tires
cool down. Also, tires that are inflated to
the specified pressure in a warm garage
may have pressure below the specifica-
tion when the vehicle is driven outside in
very cold temperature. If you adjust the
tire pressure in a garage that is warmer
than the outside temperature, you
should add 1 psi to the recommended
cold tire inflation pressure for every 10°F
difference between garage temperature
and outside temperature.
For tire inflation pressure information, refer
to “Tire Inflation Pressure” in the “INSPEC-
TION AND MAINTENANCE” section.
TPMS Malfunction Indicator
When you turn off the engine, however, the
malfunction indicator resets. It takes about
ten minutes after restarting the engine for
the malfunction to be detected again and
for the light to start flashing.
WARNING
Your vehicle has also been equipped
with a TPMS malfunction indicator to
indicate when the system is not oper-
ating properly.
WARNING
The TPMS malfunction indicator is
combined with the low tire pressure
telltale. When the system detects a
malfunction, the telltale will flash for
approximately one minute and then
remain continuously illuminated.
This sequence will continue upon
subsequent vehicle start-ups as long
as the malfunction exists.
WARNING
When the malfunction indicator is
illuminated, the system may not be
able to detect or signal low tire pres-
sure as intended. TPMS malfunctions
may occur for a variety of reasons,
including the installation of replace-
ment or alternate tires or wheels on
the vehicle that prevent the TPMS
from functioning properly. Always
check the TPMS malfunction telltale
after replacing one or more tires or
wheels on your vehicle to ensure that
the replacement or alternate tires and
wheels allow the TPMS to continue to
function properly.
Page 149 of 337
4-6
DRIVING TIPS
79K21-03E
Off-Road DrivingYour vehicle has specific design character-
istics for off-road driving. When you leave
the pavement, you will encounter driving
surfaces of all kinds which may change
continually as you drive. In most cases, off-
road driving requires the use of 4-wheel
drive. If your vehicle is a 2-wheel drive
vehicle, you should limit your off-road driv-
ing only to hard, flat, nonslippery surfaces.
2-wheel drive vehicles have far less trac-
tion on off-road surfaces than 4-wheel
drive vehicles. It is important when driving
off-road to follow the guidelines below.
Use Caution on Steep Inclines
Always inspect hills before you attempt to
drive up them. Know what is on the other
side and how you will get back down. If you
have any doubt that it is safe, do not
attempt to drive over a hill. Never drive
your vehicle up an extremely steep incline.
Coming down a steep hill can be trickier
than getting up one. Keep the vehicle
heading straight down the hill and use low
gear. Do not lock the brakes. If the vehicle
begins to slide, accelerate slightly to regain
steering control.Do Not Turn on or Drive Across the Side
of Hills
Turning on or driving across the side of a
hill can be extremely hazardous. Most of
the vehicle’s weight will be transferred to
the downhill tires, which could result in the
vehicle rolling sideways. Whenever possi-
ble, avoid this potential hazard. Also, if you
have to exit your vehicle on a side-hill,
always get out on the uphill side.
Wear Your Seat Belts at All Times
You and your passengers should use the
seat belts at all times when driving off-
road. For proper seat belt use, refer to the
“Seat Belts and Child Restraint Systems”
section in this manual.
Avoid Sudden Reactions in Mud, Ice or
Snow
Be careful when off-road conditions are
slick. Reduce your speed and avoid sud-
den movements of the vehicle. If your vehi-
cle is a 2-wheel drive vehicle, do not drive
in deep snow or mud. If your vehicle is a 4-
wheel drive vehicle, be aware that driving
in deep snow or mud can cause a loss of
traction and an increase in the resistance
to the vehicle’s forward motion. Use 4WD
low gear (4L) and maintain a steady but
moderate speed with a light touch on the
steering wheel and brakes.Do not drive in the field covered with
grown grass
If you drive in the field covered with grass,
it may cause unexpected accident or vehi-
cle damage by getting caught in grown
grass.
If Your Vehicle Gets Stuck
If your vehicle gets stuck in snow, mud or
sand, follow the directions below:
1) (For vehicles equipped with transfer
switch) Turn the transfer switch to “4H
LOCK” or “4L LOCK”.
2) Shift the transmission back and forth
between a forward range (or first gear
for manual transmission) and reverse.
This will create a rocking motion which
may give you enough momentum to
free the vehicle. Press gently on the
accelerator to keep wheel spin to a min-
imum. Remove your foot from the
accelerator while shifting.
Do not race the engine. Excessive
wheel spin will cause the tires to dig
deeper, making it more difficult to free
the vehicle.
3) If your vehicle remains stuck after a few
minutes of rocking, get another vehicle
to pull you out.
Page 150 of 337
4-7DRIVING TIPS
79K21-03E
Tire ChainsTire chains should only be used if they are
needed to increase traction or are required
by law. Make sure that the chains you use
are small-link chains or cable-type chains
and are the correct size for your vehicle’s
tires. Also make sure that there is enough
clearance between the fenders and the
chains as installed on the tires.
Install the chains on the rear tires tightly,
according to the chain manufacturer’s
instructions. Retighten the chains after
driving about 1.0 km (1/2 mile) if neces-
sary. With the chains installed, drive slowly.Do not drive through deep or rushing
water
Driving in deep or rushing water can be
hazardous. You could lose control of the
vehicle and the occupants could drown.
Also, your vehicle could be seriously dam-
aged. To avoid these risks, observe the fol-
lowing instructions and precautions.
Do not drive through deep or rushing
water. Deep or rushing water, such as
fast-moving streams or floodwaters,
could carry your vehicle away from your
intended path. The water is too deep if it
covers your wheel hubs, axles or
exhaust tailpipe. Know the depth of the
water before you attempt to drive
through it.
If water blocks the tailpipe, the engine
may not start or run. If the water is deep
enough to get drawn into the engine
intake system, the engine will be badly
damaged.
Submerged brakes will have poor brak-
ing performance. Drive slowly and care-
fully. Driving slowly will also help avoid
water splashing onto the ignition system,
which could cause the engine to stall.
Even when driving through shallow or
still waters, drive carefully since the
water may be hiding ground hazards
such as holes, ditches or bumps.
WARNING
Do not allow anyone to stand near
the vehicle when you are rocking it,
and do not spin the wheels faster
than an indicated 40 km/h (25 mph)
on the speedometer. Personal
injury and/or vehicle damage may
result from spinning the wheels too
fast.
Be sure to turn the transfer switch
from “4H” to “4H LOCK” or “4L
LOCK” when the tires slip in “4H”.
The continuing tires slip in “4H”
can cause the limited slip differen-
tial gear damage in the center dif-
ferential.
CAUTION
Release the accelerator pedal when
operating the gearshift lever. Operat-
ing the lever with the engine racing
can damage the gears.
CAUTION
Do not continue rocking the vehicle
for more than a few minutes. Pro-
longed rocking can cause engine
overheating, transmission or trans-
fer case damage or tire damage.
CAUTION
If you hear the chains hitting against
the vehicle body while driving, stop
and tighten them.
Page 160 of 337
5-7OTHER CONTROLS AND EQUIPMENT
79K21-03E
To return the blower speed selector (2),
air intake selector (3), and air flow selec-
tor (4) to automatic operation, push the
“AUTO” switch.
64J080
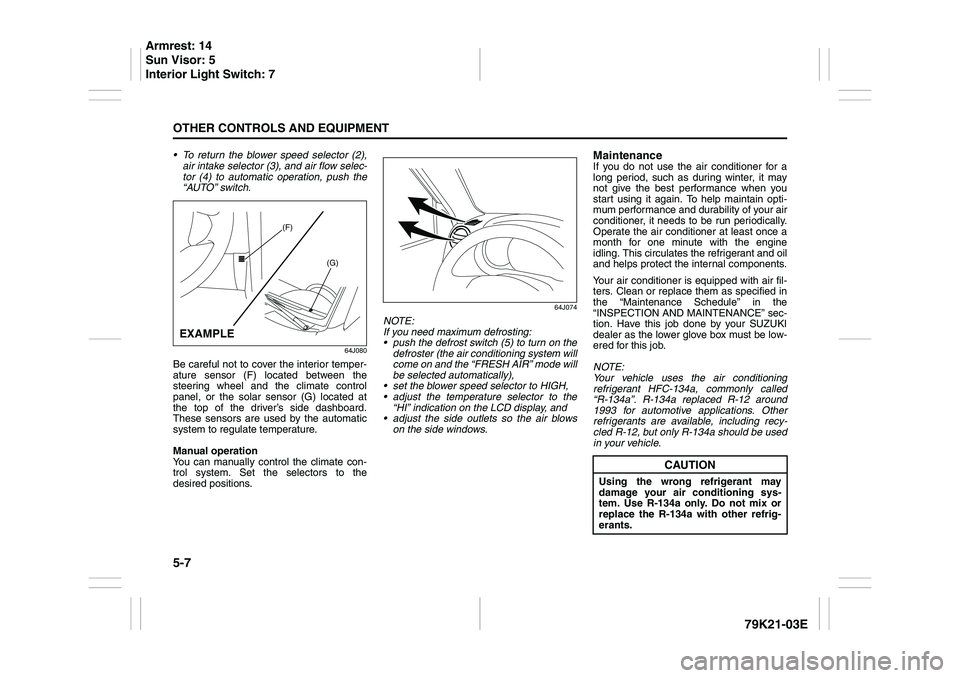
Be careful not to cover the interior temper-
ature sensor (F) located between the
steering wheel and the climate control
panel, or the solar sensor (G) located at
the top of the driver’s side dashboard.
These sensors are used by the automatic
system to regulate temperature.
Manual operation
You can manually control the climate con-
trol system. Set the selectors to the
desired positions.
64J074
NOTE:
If you need maximum defrosting:
push the defrost switch (5) to turn on the
defroster (the air conditioning system will
come on and the “FRESH AIR” mode will
be selected automatically),
set the blower speed selector to HIGH,
adjust the temperature selector to the
“HI” indication on the LCD display, and
adjust the side outlets so the air blows
on the side windows.
MaintenanceIf you do not use the air conditioner for a
long period, such as during winter, it may
not give the best performance when you
start using it again. To help maintain opti-
mum performance and durability of your air
conditioner, it needs to be run periodically.
Operate the air conditioner at least once a
month for one minute with the engine
idling. This circulates the refrigerant and oil
and helps protect the internal components.
Your air conditioner is equipped with air fil-
ters. Clean or replace them as specified in
the “Maintenance Schedule” in the
“INSPECTION AND MAINTENANCE” sec-
tion. Have this job done by your SUZUKI
dealer as the lower glove box must be low-
ered for this job.
NOTE:
Your vehicle uses the air conditioning
refrigerant HFC-134a, commonly called
“R-134a”. R-134a replaced R-12 around
1993 for automotive applications. Other
refrigerants are available, including recy-
cled R-12, but only R-134a should be used
in your vehicle.
(F)
(G)
EXAMPLE
CAUTION
Using the wrong refrigerant may
damage your air conditioning sys-
tem. Use R-134a only. Do not mix or
replace the R-134a with other refrig-
erants.
Armrest: 14
Sun Visor: 5
Interior Light Switch: 7
Page 246 of 337
6-9VEHICLE LOADING AND TOWING
79K21-03E
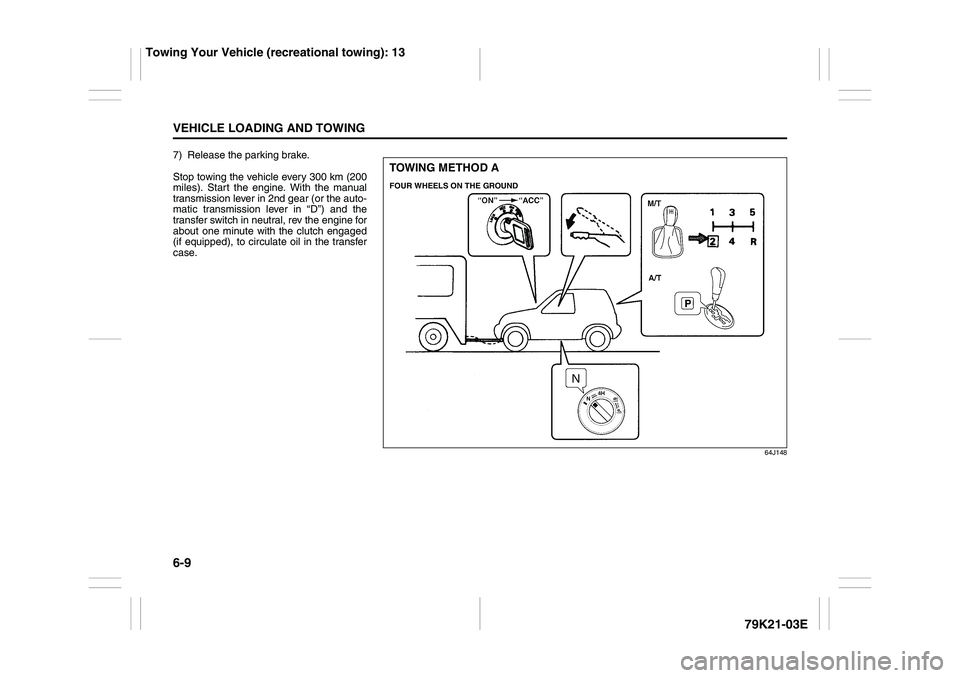
7) Release the parking brake.
Stop towing the vehicle every 300 km (200
miles). Start the engine. With the manual
transmission lever in 2nd gear (or the auto-
matic transmission lever in “D”) and the
transfer switch in neutral, rev the engine for
about one minute with the clutch engaged
(if equipped), to circulate oil in the transfer
case.
64J148
TOWING METHOD AFOUR WHEELS ON THE GROUND
Towing Your Vehicle (recreational towing): 13
Page 278 of 337
7-29INSPECTION AND MAINTENANCE
79K21-03E
1.6 mm (0.06 in.) or less and the
tire should be replaced.
3) Check for abnormal wear, cracks
and damage. Any tires with cracks
or other damage should be
replaced. If any tires show abnor-
mal wear, have them inspected by
your SUZUKI dealer.
4) Check for loose wheel nuts.
5) Check that there are no nails,
stones or other objects sticking into
the tires.
WARNING
Hitting curbs and running over
rocks can damage tires and affect
wheel alignment. Be sure to have
tires and wheel alignment
checked periodically by your
SUZUKI dealer.
WARNING
Your SUZUKI is equipped with
tires which are all the same type
and size. This is important to
ensure proper steering and han-
dling of the vehicle. Never mix
tires of different size or type on
the four wheels of your vehicle.
The size and type of tires used
should be only those approved by
SUZUKI Motor Corporation as
standard or optional equipment
for your vehicle.
WARNING
Replacing the wheels and tires
equipped on your vehicle with
certain combinations of aftermar-
ket wheels and tires can signifi-
cantly change the steering and
handling characteristics of your
vehicle. Oversized tires may also
rub against the fender over
bumps, causing vehicle damage
or tire failure. Therefore, use only
those wheel and tire combina-
tions approved by SUZUKI Motor
Corporation as standard or
optional equipment for your vehi-
cle. For information regarding the
specified tires, refer to the Tire
Information Label located on the
driver’s side door pillar or the
“SPECIFICATIONS” section.
CAUTION
Replacing the original tires with
tires of a different size may result
in false speedometer or odometer
readings. Check with your
SUZUKI dealer before purchas-
ing replacement tires that differ in
size from the original tires.
Tires: 6
Page 280 of 337
7-31INSPECTION AND MAINTENANCE
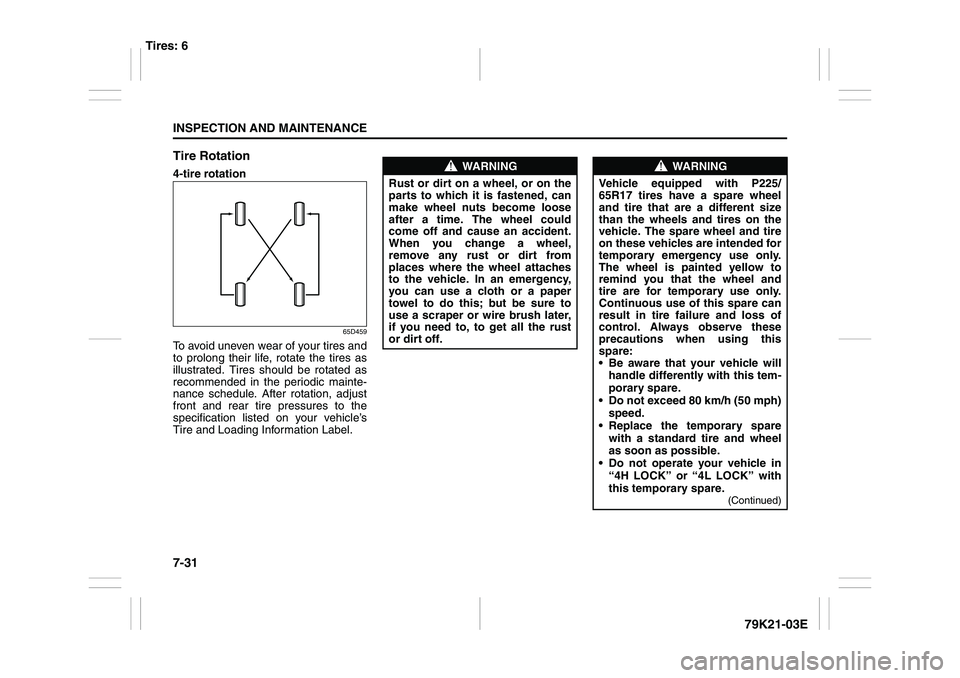
79K21-03E Tire Rotation
4-tire rotation
65D459
To avoid uneven wear of your tires and
to prolong their life, rotate the tires as
illustrated. Tires should be rotated as
recommended in the periodic mainte-
nance schedule. After rotation, adjust
front and rear tire pressures to the
specification listed on your vehicle’s
Tire and Loading Information Label.
WARNING
Rust or dirt on a wheel, or on the
parts to which it is fastened, can
make wheel nuts become loose
after a time. The wheel could
come off and cause an accident.
When you change a wheel,
remove any rust or dirt from
places where the wheel attaches
to the vehicle. In an emergency,
you can use a cloth or a paper
towel to do this; but be sure to
use a scraper or wire brush later,
if you need to, to get all the rust
or dirt off.
WARNING
Vehicle equipped with P225/
65R17 tires have a spare wheel
and tire that are a different size
than the wheels and tires on the
vehicle. The spare wheel and tire
on these vehicles are intended for
temporary emergency use only.
The wheel is painted yellow to
remind you that the wheel and
tire are for temporary use only.
Continuous use of this spare can
result in tire failure and loss of
control. Always observe these
precautions when using this
spare:
Be aware that your vehicle will
handle differently with this tem-
porary spare.
Do not exceed 80 km/h (50 mph)
speed.
Replace the temporary spare
with a standard tire and wheel
as soon as possible.
Do not operate your vehicle in
“4H LOCK” or “4L LOCK” with
this temporary spare.
(Continued)
Tires: 6
Page 299 of 337
EMERGENCY SERVICE
8
79K21-03E
60G411
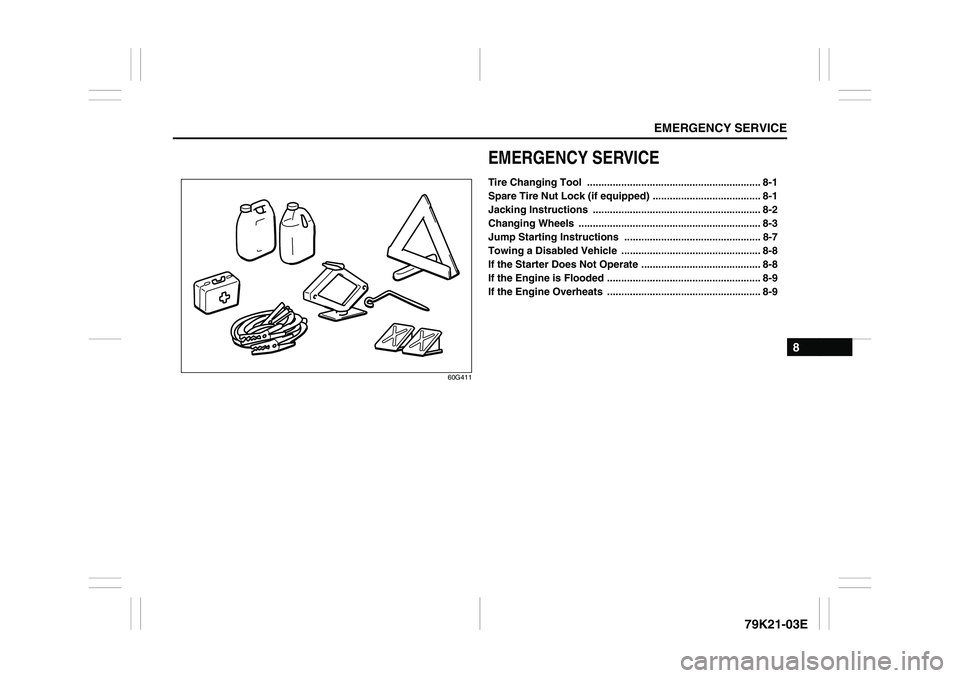
EMERGENCY SERVICETire Changing Tool ............................................................. 8-1
Spare Tire Nut Lock (if equipped) ...................................... 8-1
Jacking Instructions ........................................................... 8-2
Changing Wheels ................................................................ 8-3
Jump Starting Instructions ................................................ 8-7
Towing a Disabled Vehicle ................................................. 8-8
If the Starter Does Not Operate .......................................... 8-8
If the Engine is Flooded ...................................................... 8-9
If the Engine Overheats ...................................................... 8-9