Warm SUZUKI GRAND VITARA 2014 Owners Manual
[x] Cancel search | Manufacturer: SUZUKI, Model Year: 2014, Model line: GRAND VITARA, Model: SUZUKI GRAND VITARA 2014Pages: 337, PDF Size: 6.21 MB
Page 38 of 337
2-21BEFORE DRIVING
79K21-03E
79K036
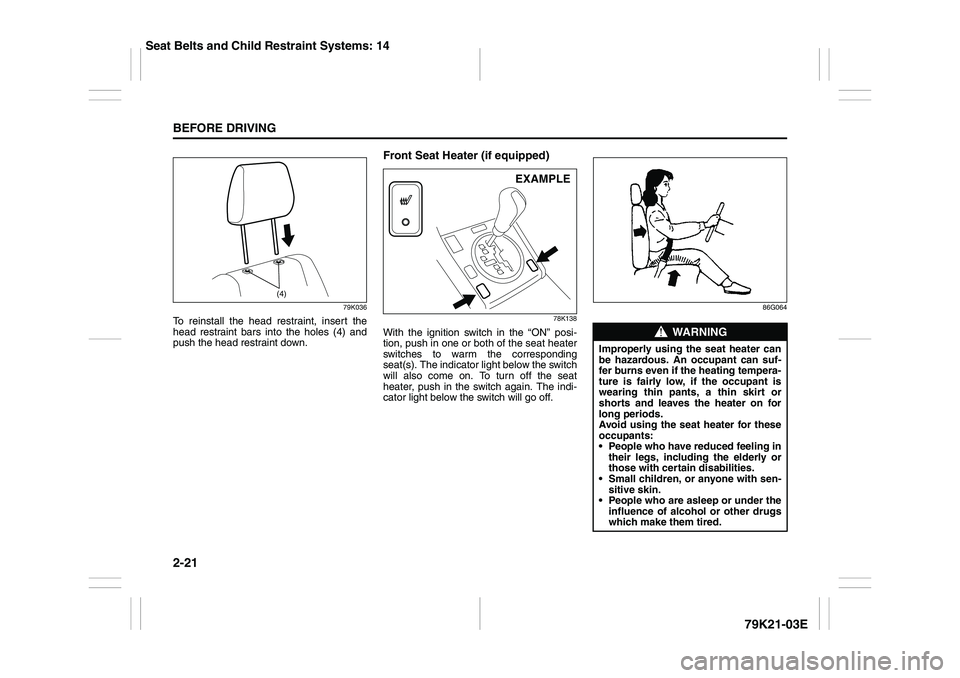
To reinstall the head restraint, insert the
head restraint bars into the holes (4) and
push the head restraint down.
Front Seat Heater (if equipped)
78K138
With the ignition switch in the “ON” posi-
tion, push in one or both of the seat heater
switches to warm the corresponding
seat(s). The indicator light below the switch
will also come on. To turn off the seat
heater, push in the switch again. The indi-
cator light below the switch will go off.
86G064
(4)
EXAMPLE
WARNING
Improperly using the seat heater can
be hazardous. An occupant can suf-
fer burns even if the heating tempera-
ture is fairly low, if the occupant is
wearing thin pants, a thin skirt or
shorts and leaves the heater on for
long periods.
Avoid using the seat heater for these
occupants:
People who have reduced feeling in
their legs, including the elderly or
those with certain disabilities.
Small children, or anyone with sen-
sitive skin.
People who are asleep or under the
influence of alcohol or other drugs
which make them tired.
Seat Belts and Child Restraint Systems: 14
Page 108 of 337
3-7OPERATING YOUR VEHICLE
79K21-03E
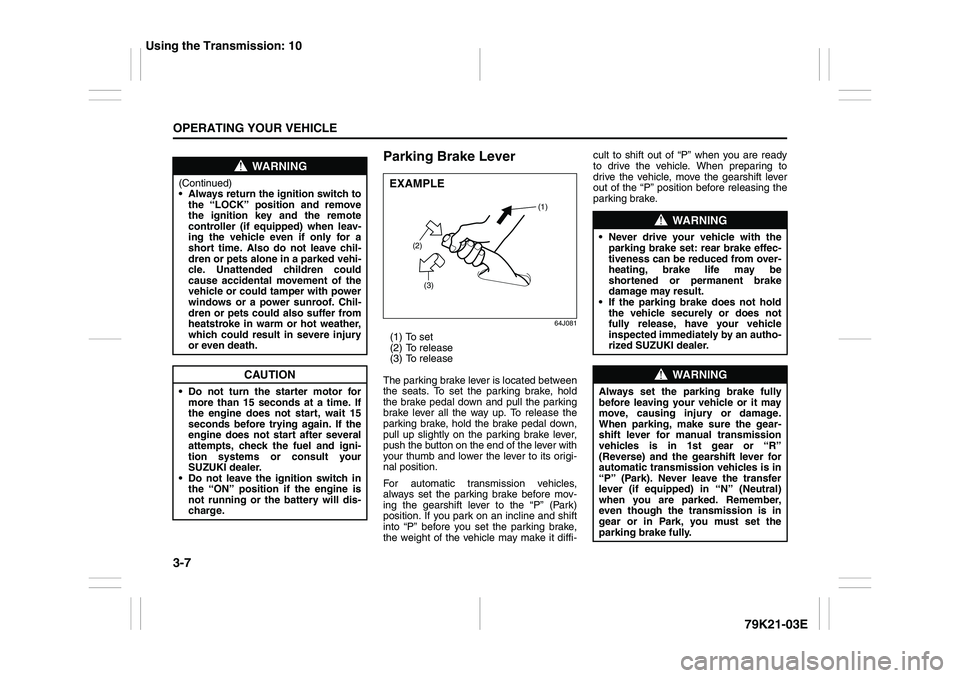
Parking Brake Lever
64J081
(1) To set
(2) To release
(3) To release
The parking brake lever is located between
the seats. To set the parking brake, hold
the brake pedal down and pull the parking
brake lever all the way up. To release the
parking brake, hold the brake pedal down,
pull up slightly on the parking brake lever,
push the button on the end of the lever with
your thumb and lower the lever to its origi-
nal position.
For automatic transmission vehicles,
always set the parking brake before mov-
ing the gearshift lever to the “P” (Park)
position. If you park on an incline and shift
into “P” before you set the parking brake,
the weight of the vehicle may make it diffi-cult to shift out of “P” when you are ready
to drive the vehicle. When preparing to
drive the vehicle, move the gearshift lever
out of the “P” position before releasing the
parking brake.
WARNING
(Continued)
Always return the ignition switch to
the “LOCK” position and remove
the ignition key and the remote
controller (if equipped) when leav-
ing the vehicle even if only for a
short time. Also do not leave chil-
dren or pets alone in a parked vehi-
cle. Unattended children could
cause accidental movement of the
vehicle or could tamper with power
windows or a power sunroof. Chil-
dren or pets could also suffer from
heatstroke in warm or hot weather,
which could result in severe injury
or even death.
CAUTION
Do not turn the starter motor for
more than 15 seconds at a time. If
the engine does not start, wait 15
seconds before trying again. If the
engine does not start after several
attempts, check the fuel and igni-
tion systems or consult your
SUZUKI dealer.
Do not leave the ignition switch in
the “ON” position if the engine is
not running or the battery will dis-
charge.
EXAMPLE
(2)
(3)(1)
WARNING
Never drive your vehicle with the
parking brake set: rear brake effec-
tiveness can be reduced from over-
heating, brake life may be
shortened or permanent brake
damage may result.
If the parking brake does not hold
the vehicle securely or does not
fully release, have your vehicle
inspected immediately by an autho-
rized SUZUKI dealer.
WARNING
Always set the parking brake fully
before leaving your vehicle or it may
move, causing injury or damage.
When parking, make sure the gear-
shift lever for manual transmission
vehicles is in 1st gear or “R”
(Reverse) and the gearshift lever for
automatic transmission vehicles is in
“P” (Park). Never leave the transfer
lever (if equipped) in “N” (Neutral)
when you are parked. Remember,
even though the transmission is in
gear or in Park, you must set the
parking brake fully.
Using the Transmission: 10
Page 110 of 337
3-9OPERATING YOUR VEHICLE
79K21-03E
Starting the EngineBefore Starting the Engine
64J140
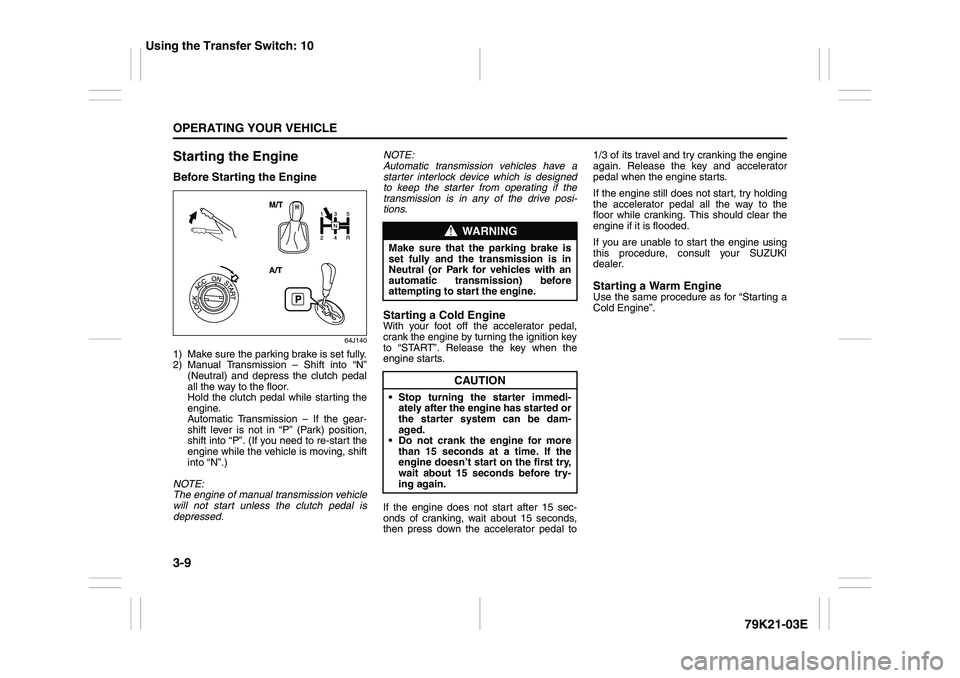
1) Make sure the parking brake is set fully.
2) Manual Transmission – Shift into “N”
(Neutral) and depress the clutch pedal
all the way to the floor.
Hold the clutch pedal while starting the
engine.
Automatic Transmission – If the gear-
shift lever is not in “P” (Park) position,
shift into “P”. (If you need to re-start the
engine while the vehicle is moving, shift
into “N”.)
NOTE:
The engine of manual transmission vehicle
will not start unless the clutch pedal is
depressed.NOTE:
Automatic transmission vehicles have a
starter interlock device which is designed
to keep the starter from operating if the
transmission is in any of the drive posi-
tions.
Starting a Cold EngineWith your foot off the accelerator pedal,
crank the engine by turning the ignition key
to “START”. Release the key when the
engine starts.
If the engine does not start after 15 sec-
onds of cranking, wait about 15 seconds,
then press down the accelerator pedal to1/3 of its travel and try cranking the engine
again. Release the key and accelerator
pedal when the engine starts.
If the engine still does not start, try holding
the accelerator pedal all the way to the
floor while cranking. This should clear the
engine if it is flooded.
If you are unable to start the engine using
this procedure, consult your SUZUKI
dealer.
Starting a Warm EngineUse the same procedure as for “Starting a
Cold Engine”.
WARNING
Make sure that the parking brake is
set fully and the transmission is in
Neutral (or Park for vehicles with an
automatic transmission) before
attempting to start the engine.
CAUTION
Stop turning the starter immedi-
ately after the engine has started or
the starter system can be dam-
aged.
Do not crank the engine for more
than 15 seconds at a time. If the
engine doesn’t start on the first try,
wait about 15 seconds before try-
ing again.
Using the Transfer Switch: 10
Page 141 of 337
3-40
OPERATING YOUR VEHICLE
79K21-03E
on the tire information placard should
cause the low tire pressure warning light to
turn off.
If the light turns on again shortly after
adjusting the pressure in your tires, you
may have a flat tire. If you have a flat tire,
replace it with the spare tire. Refer to
“Jacking Instructions” in the “EMER-
GENCY SERVICE” section. Refer to
“Replacing Tires and/or Wheels” for
instructions on how to restore normal oper-
ation of the tire pressure monitoring sys-
tem after you have had a flat tire.
NOTE:
When the tire inflation pressure is
adjusted in high altitude areas, the low
tire pressure light may not turn off even
after tire inflation pressure adjustment.
In this case, adjust the inflation pressure
to a slightly higher pressure than is
shown on the tire information placard.
The low tire pressure warning light may
turn off temporarily after coming on. This
could be due to surface temperature
increases after long distance driving or
traveling to a high temperature area.
Even if the tire pressure warning light
turns off after coming on, make sure to
check the inflation pressure of all tires.
To reduce the chance that the low tire
pressure warning light will come on due
to normal changes in temperature and
atmospheric pressure, it is important to
check and adjust the tire pressureswhen the tires are cold. Tires that
appear to be at the specified pressure
when checked after driving, when the
tires are warm, could have pressure
below the specification when the tires
cool down. Also, tires that are inflated to
the specified pressure in a warm garage
may have pressure below the specifica-
tion when the vehicle is driven outside in
very cold temperature. If you adjust the
tire pressure in a garage that is warmer
than the outside temperature, you
should add 1 psi to the recommended
cold tire inflation pressure for every 10°F
difference between garage temperature
and outside temperature.
For tire inflation pressure information, refer
to “Tire Inflation Pressure” in the “INSPEC-
TION AND MAINTENANCE” section.
TPMS Malfunction Indicator
When you turn off the engine, however, the
malfunction indicator resets. It takes about
ten minutes after restarting the engine for
the malfunction to be detected again and
for the light to start flashing.
WARNING
Your vehicle has also been equipped
with a TPMS malfunction indicator to
indicate when the system is not oper-
ating properly.
WARNING
The TPMS malfunction indicator is
combined with the low tire pressure
telltale. When the system detects a
malfunction, the telltale will flash for
approximately one minute and then
remain continuously illuminated.
This sequence will continue upon
subsequent vehicle start-ups as long
as the malfunction exists.
WARNING
When the malfunction indicator is
illuminated, the system may not be
able to detect or signal low tire pres-
sure as intended. TPMS malfunctions
may occur for a variety of reasons,
including the installation of replace-
ment or alternate tires or wheels on
the vehicle that prevent the TPMS
from functioning properly. Always
check the TPMS malfunction telltale
after replacing one or more tires or
wheels on your vehicle to ensure that
the replacement or alternate tires and
wheels allow the TPMS to continue to
function properly.
Page 145 of 337
4-2
DRIVING TIPS
79K21-03E
Shorter Wheelbase
Along with its higher ground clearance,
your vehicle has a shorter wheelbase and
shorter front and rear overhangs than
many passenger cars. These features
combine to allow you to drive your vehicle
over hillcrests without hanging up on them
or damaging the frame and chassis com-
ponents. The shorter wheelbase also
makes the steering of your vehicle more
responsive than that of vehicles with longer
wheelbases.
Narrower Body Width and Track
Your vehicle is narrower than the average
passenger car so that it can pass through
tight spaces.
Without the essential characteristics
described above: higher ground clearance,
shorter wheelbase and narrower body
width and track – your vehicle could not
provide you with excellent off road driving
performance. However, it is also true that
on-pavement driving, handling and steer-
ing will be different from what drivers expe-
rience with a conventional passenger car.
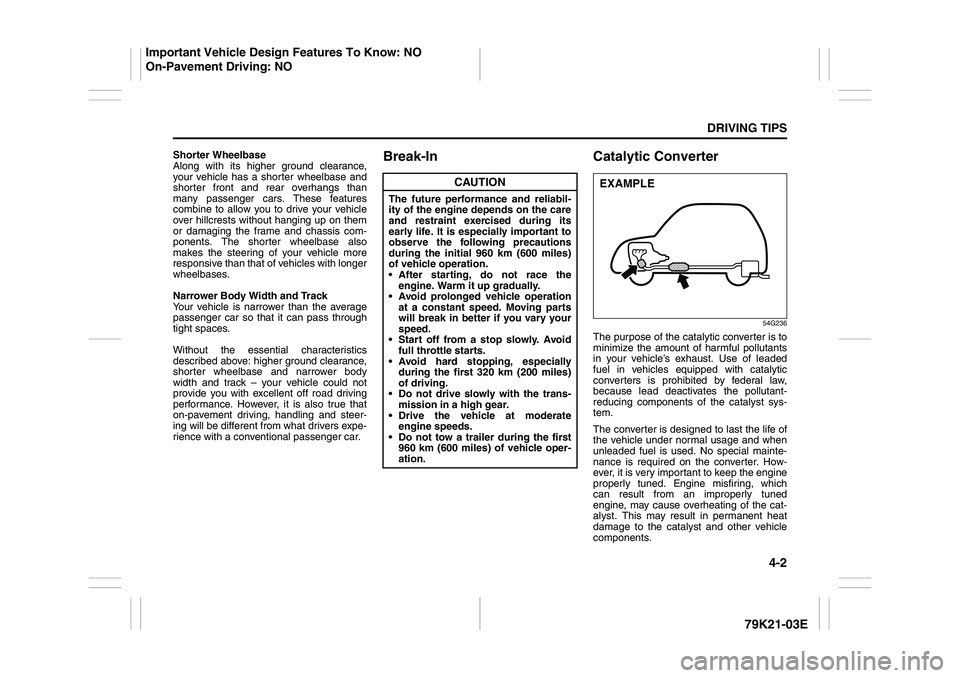
Break-In Catalytic Converter
54G236
The purpose of the catalytic converter is to
minimize the amount of harmful pollutants
in your vehicle’s exhaust. Use of leaded
fuel in vehicles equipped with catalytic
converters is prohibited by federal law,
because lead deactivates the pollutant-
reducing components of the catalyst sys-
tem.
The converter is designed to last the life of
the vehicle under normal usage and when
unleaded fuel is used. No special mainte-
nance is required on the converter. How-
ever, it is very important to keep the engine
properly tuned. Engine misfiring, which
can result from an improperly tuned
engine, may cause overheating of the cat-
alyst. This may result in permanent heat
damage to the catalyst and other vehicle
components.
CAUTION
The future performance and reliabil-
ity of the engine depends on the care
and restraint exercised during its
early life. It is especially important to
observe the following precautions
during the initial 960 km (600 miles)
of vehicle operation.
After starting, do not race the
engine. Warm it up gradually.
Avoid prolonged vehicle operation
at a constant speed. Moving parts
will break in better if you vary your
speed.
Start off from a stop slowly. Avoid
full throttle starts.
Avoid hard stopping, especially
during the first 320 km (200 miles)
of driving.
Do not drive slowly with the trans-
mission in a high gear.
Drive the vehicle at moderate
engine speeds.
Do not tow a trailer during the first
960 km (600 miles) of vehicle oper-
ation.
EXAMPLE
Important Vehicle Design Features To Know: NO
On-Pavement Driving: NO
Page 146 of 337
4-3DRIVING TIPS
79K21-03E
54G584S
Improving Fuel EconomyThe following instructions will help you
improve fuel economy.
Avoid excessive idling
If you are to wait for more than a minute
while you are parked, stop the engine and
start it again later. When warming up a
cold engine, allow the engine to idle until
the temperature gauge pointer comes up
to the “C” position. In this position, the
engine is sufficiently warm for starting off.
Avoid “jackrabbit” starts
Fast starts away from lights or stop signs
will consume fuel unnecessarily and
shorten engine life. Start off slowly.
Avoid unnecessary stops
Avoid unnecessary deceleration and stop-
ping. Try to maintain a slow, steady speed
whenever possible. Slowing down and then
accelerating again uses more fuel.
Keep a steady cruising speed
Keep as constant a speed as road and traf-
fic conditions will permit.
CAUTION
To minimize the possibility of catalyst
or other vehicle damage:
Maintain the engine in the proper
operating condition.
In the event of an engine malfunc-
tion, particularly one involving
engine misfire or other apparent
loss of performance, have the vehi-
cle serviced promptly.
Do not shut off the engine or inter-
rupt the ignition when the transmis-
sion is in gear and the vehicle is in
motion.
Do not try to start the engine by
pushing or towing the vehicle or
coasting down a hill.
Do not idle the engine with any
spark plug wires disconnected or
removed, such as during diagnos-
tic testing.
Do not idle the vehicle for pro-
longed periods if idling seems
rough or there are other malfunc-
tions.
Do not allow the fuel tank to get
near the empty level.
WARNING
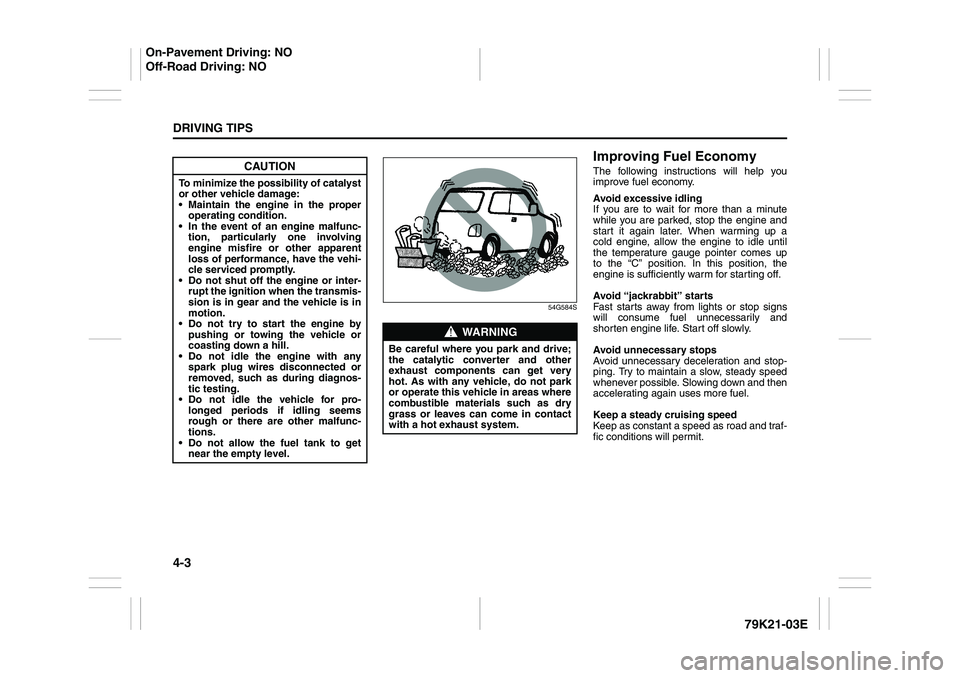
Be careful where you park and drive;
the catalytic converter and other
exhaust components can get very
hot. As with any vehicle, do not park
or operate this vehicle in areas where
combustible materials such as dry
grass or leaves can come in contact
with a hot exhaust system.
On-Pavement Driving: NO
Off-Road Driving: NO
Page 159 of 337
5-6
OTHER CONTROLS AND EQUIPMENT
79K21-03E
Defrost
66J241
Temperature-controlled air comes out of
the windshield defroster outlets, the side
defroster outlets and the side outlets.
NOTE:
When the defrost switch (5) is pushed to
turn on the defroster, the air conditioning
system will come on and the “FRESH AIR”
mode will be selected automatically. In
very cold weather, however, the air condi-
tioning system will not turn on.
System Operating InstructionsAutomatic operation
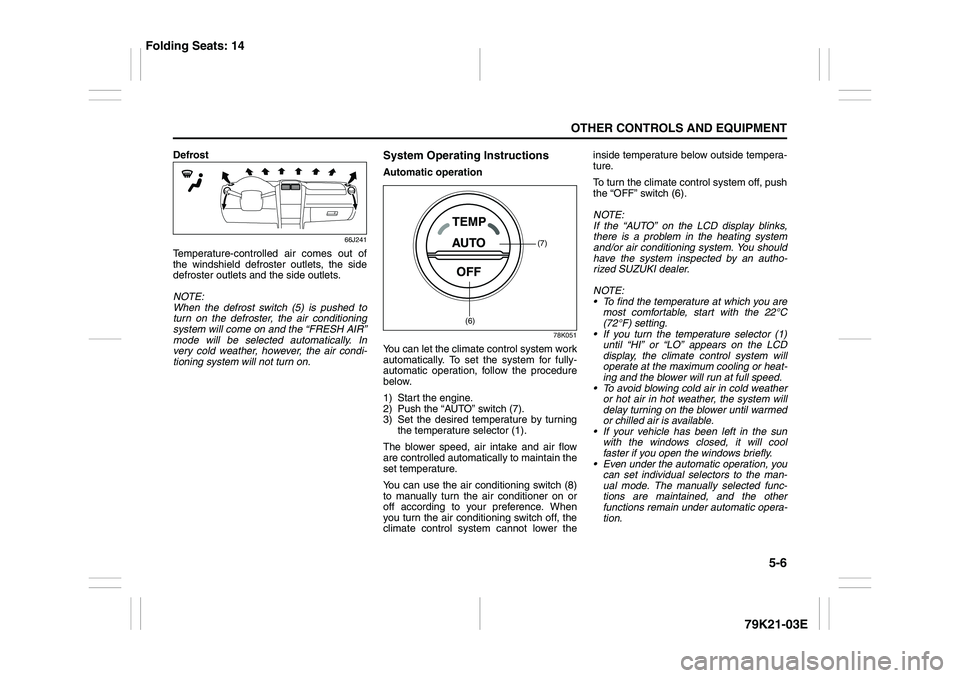
78K051
You can let the climate control system work
automatically. To set the system for fully-
automatic operation, follow the procedure
below.
1) Start the engine.
2) Push the “AUTO” switch (7).
3) Set the desired temperature by turning
the temperature selector (1).
The blower speed, air intake and air flow
are controlled automatically to maintain the
set temperature.
You can use the air conditioning switch (8)
to manually turn the air conditioner on or
off according to your preference. When
you turn the air conditioning switch off, the
climate control system cannot lower theinside temperature below outside tempera-
ture.
To turn the climate control system off, push
the “OFF” switch (6).
NOTE:
If the “AUTO” on the LCD display blinks,
there is a problem in the heating system
and/or air conditioning system. You should
have the system inspected by an autho-
rized SUZUKI dealer.
NOTE:
To find the temperature at which you are
most comfortable, start with the 22°C
(72°F) setting.
If you turn the temperature selector (1)
until “HI” or “LO” appears on the LCD
display, the climate control system will
operate at the maximum cooling or heat-
ing and the blower will run at full speed.
To avoid blowing cold air in cold weather
or hot air in hot weather, the system will
delay turning on the blower until warmed
or chilled air is available.
If your vehicle has been left in the sun
with the windows closed, it will cool
faster if you open the windows briefly.
Even under the automatic operation, you
can set individual selectors to the man-
ual mode. The manually selected func-
tions are maintained, and the other
functions remain under automatic opera-
tion.
(7)
(6)
Folding Seats: 14
Page 260 of 337
7-11INSPECTION AND MAINTENANCE
79K21-03E
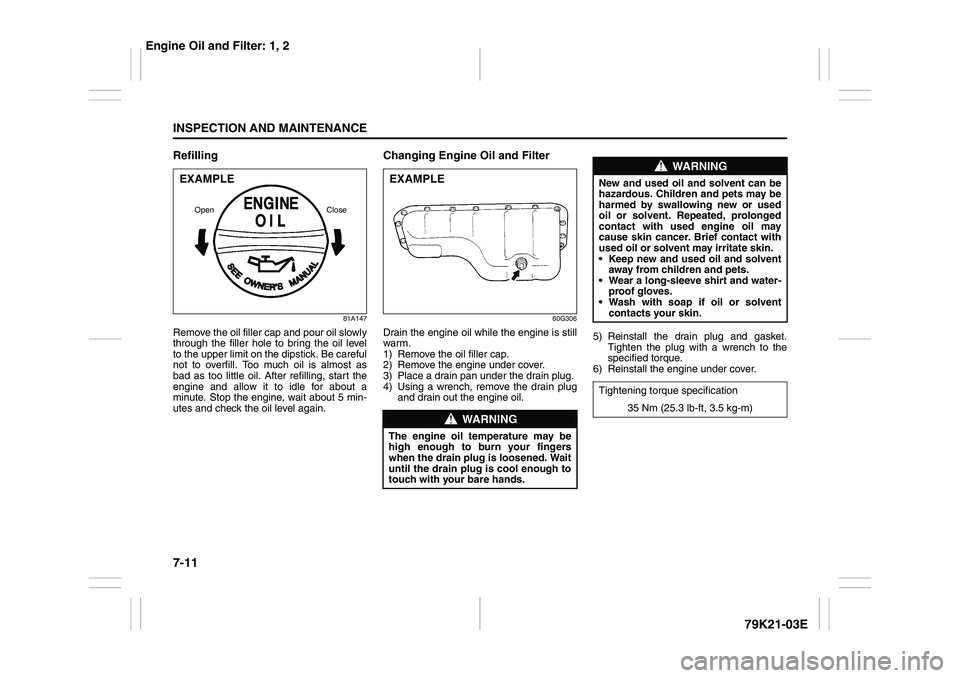
Refilling
81A147
Remove the oil filler cap and pour oil slowly
through the filler hole to bring the oil level
to the upper limit on the dipstick. Be careful
not to overfill. Too much oil is almost as
bad as too little oil. After refilling, start the
engine and allow it to idle for about a
minute. Stop the engine, wait about 5 min-
utes and check the oil level again.
Changing Engine Oil and Filter
60G306
Drain the engine oil while the engine is still
warm.
1) Remove the oil filler cap.
2) Remove the engine under cover.
3) Place a drain pan under the drain plug.
4) Using a wrench, remove the drain plug
and drain out the engine oil.5) Reinstall the drain plug and gasket.
Tighten the plug with a wrench to the
specified torque.
6) Reinstall the engine under cover.
Close Open
EXAMPLE
WARNING
The engine oil temperature may be
high enough to burn your fingers
when the drain plug is loosened. Wait
until the drain plug is cool enough to
touch with your bare hands.EXAMPLE
WARNING
New and used oil and solvent can be
hazardous. Children and pets may be
harmed by swallowing new or used
oil or solvent. Repeated, prolonged
contact with used engine oil may
cause skin cancer. Brief contact with
used oil or solvent may irritate skin.
Keep new and used oil and solvent
away from children and pets.
Wear a long-sleeve shirt and water-
proof gloves.
Wash with soap if oil or solvent
contacts your skin.
Tightening torque specification
35 Nm (25.3 lb-ft, 3.5 kg-m)
Engine Oil and Filter: 1, 2
Page 269 of 337
7-20
INSPECTION AND MAINTENANCE
79K21-03E
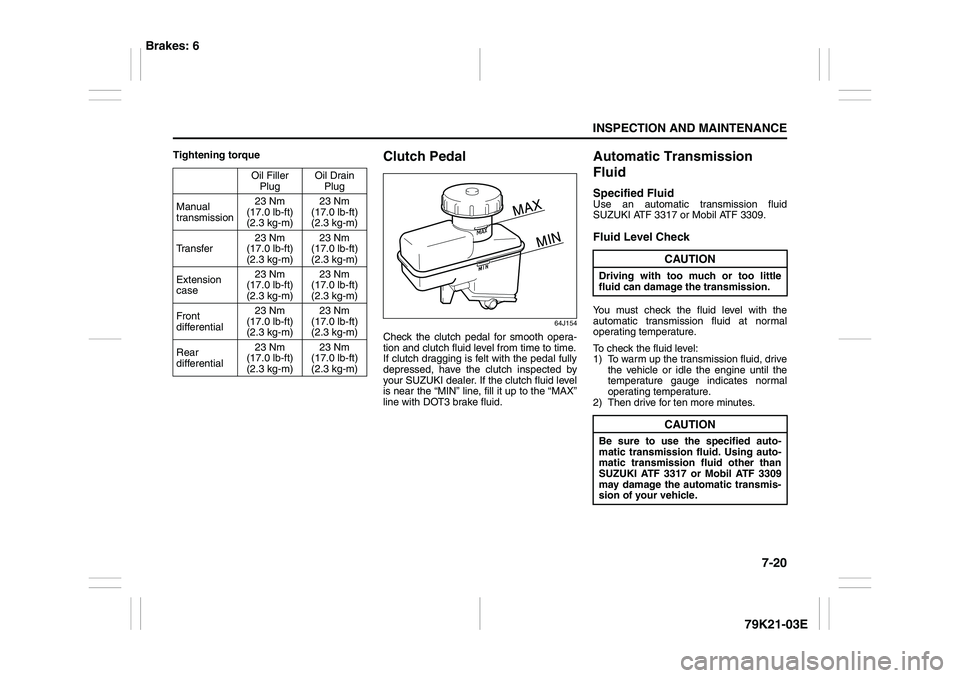
Tightening torque
Clutch Pedal
64J154
Check the clutch pedal for smooth opera-
tion and clutch fluid level from time to time.
If clutch dragging is felt with the pedal fully
depressed, have the clutch inspected by
your SUZUKI dealer. If the clutch fluid level
is near the “MIN” line, fill it up to the “MAX”
line with DOT3 brake fluid.
Automatic Transmission
FluidSpecified FluidUse an automatic transmission fluid
SUZUKI ATF 3317 or Mobil ATF 3309.Fluid Level CheckYou must check the fluid level with the
automatic transmission fluid at normal
operating temperature.
To check the fluid level:
1) To warm up the transmission fluid, drive
the vehicle or idle the engine until the
temperature gauge indicates normal
operating temperature.
2) Then drive for ten more minutes. Oil Filler
PlugOil Drain
Plug
Manual
transmission23 Nm
(17.0 lb-ft)
(2.3 kg-m) 23 Nm
(17.0 lb-ft)
(2.3 kg-m)
Tr a n s f e r23 Nm
(17.0 lb-ft)
(2.3 kg-m) 23 Nm
(17.0 lb-ft)
(2.3 kg-m)
Extension
case23 Nm
(17.0 lb-ft)
(2.3 kg-m) 23 Nm
(17.0 lb-ft)
(2.3 kg-m)
Front
differential23 Nm
(17.0 lb-ft)
(2.3 kg-m) 23 Nm
(17.0 lb-ft)
(2.3 kg-m)
Rear
differential23 Nm
(17.0 lb-ft)
(2.3 kg-m) 23 Nm
(17.0 lb-ft)
(2.3 kg-m)
CAUTION
Driving with too much or too little
fluid can damage the transmission.
CAUTION
Be sure to use the specified auto-
matic transmission fluid. Using auto-
matic transmission fluid other than
SUZUKI ATF 3317 or Mobil ATF 3309
may damage the automatic transmis-
sion of your vehicle.
Brakes: 6
Page 276 of 337
7-27INSPECTION AND MAINTENANCE
79K21-03E Tire Inflation Pressure
Tire inflation pressure should be
checked when the tire is cold. “Cold
tire inflation pressure” is the pressure
in a tire that has been driven less than
1 mile (1.6 km) or has been standing
for three hours or more.
54G307
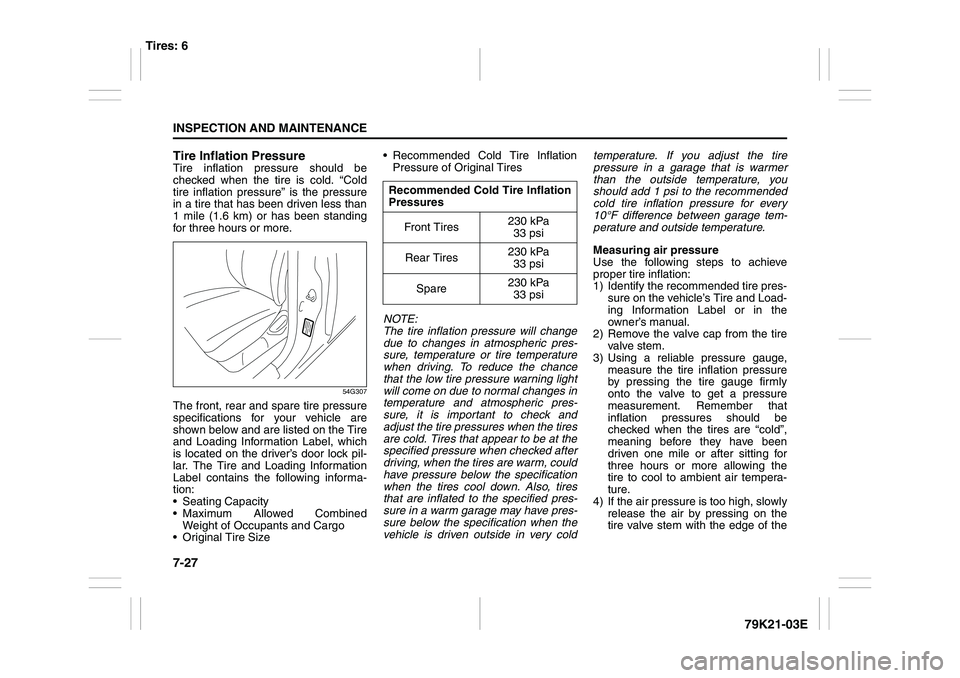
The front, rear and spare tire pressure
specifications for your vehicle are
shown below and are listed on the Tire
and Loading Information Label, which
is located on the driver’s door lock pil-
lar. The Tire and Loading Information
Label contains the following informa-
tion:
Seating Capacity
Maximum Allowed Combined
Weight of Occupants and Cargo
Original Tire Size Recommended Cold Tire Inflation
Pressure of Original Tires
NOTE:
The tire inflation pressure will change
due to changes in atmospheric pres-
sure, temperature or tire temperature
when driving. To reduce the chance
that the low tire pressure warning light
will come on due to normal changes in
temperature and atmospheric pres-
sure, it is important to check and
adjust the tire pressures when the tires
are cold. Tires that appear to be at the
specified pressure when checked after
driving, when the tires are warm, could
have pressure below the specification
when the tires cool down. Also, tires
that are inflated to the specified pres-
sure in a warm garage may have pres-
sure below the specification when the
vehicle is driven outside in very coldtemperature. If you adjust the tire
pressure in a garage that is warmer
than the outside temperature, you
should add 1 psi to the recommended
cold tire inflation pressure for every
10°F difference between garage tem-
perature and outside temperature.
Measuring air pressure
Use the following steps to achieve
proper tire inflation:
1) Identify the recommended tire pres-
sure on the vehicle’s Tire and Load-
ing Information Label or in the
owner’s manual.
2) Remove the valve cap from the tire
valve stem.
3) Using a reliable pressure gauge,
measure the tire inflation pressure
by pressing the tire gauge firmly
onto the valve to get a pressure
measurement. Remember that
inflation pressures should be
checked when the tires are “cold”,
meaning before they have been
driven one mile or after sitting for
three hours or more allowing the
tire to cool to ambient air tempera-
ture.
4) If the air pressure is too high, slowly
release the air by pressing on the
tire valve stem with the edge of the
Recommended Cold Tire Inflation
Pressures
Front Tires230 kPa
33 psi
Rear Tires230 kPa
33 psi
Spare230 kPa
33 psi
Tires: 6