turn signal SUZUKI GRAND VITARA 2017 Owners Manual
[x] Cancel search | Manufacturer: SUZUKI, Model Year: 2017, Model line: GRAND VITARA, Model: SUZUKI GRAND VITARA 2017Pages: 482, PDF Size: 21 MB
Page 13 of 482
ILLUSTRATED TABLE OF CONTENTS
54P00-01E
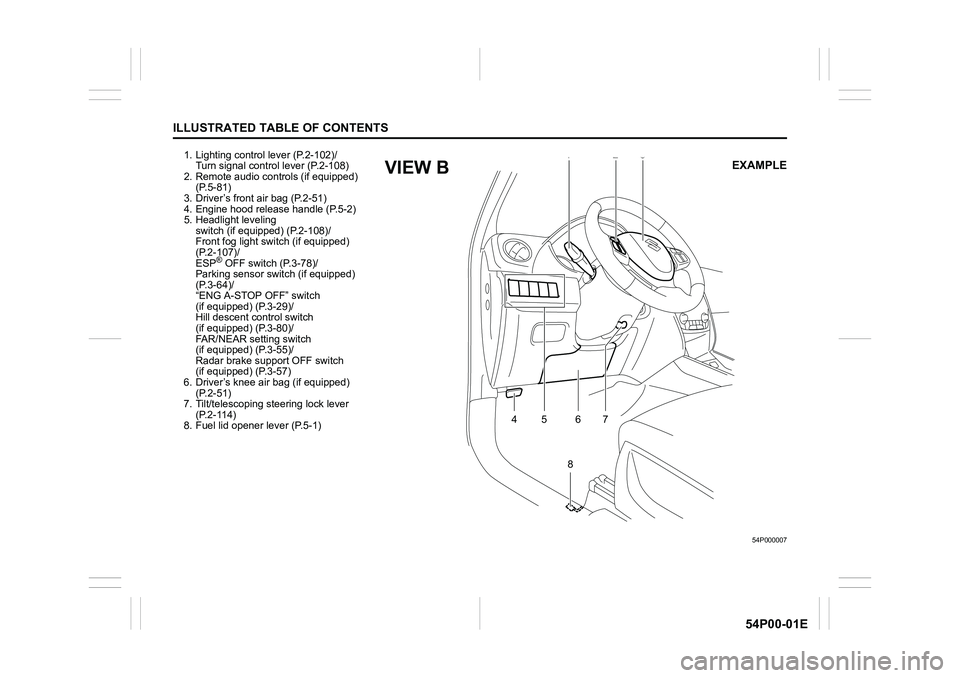
1. Lighting control lever (P.2-102)/
Turn signal control lever (P.2-108)
2. Remote audio controls (if equipped)
(P.5-81)
3. Driver’s front air bag (P.2-51)
4. Engine hood release handle (P.5-2)
5. Headlight leveling
switch (if equipped) (P.2-108)/
Front fog light switch (if equipped)
(P.2-107)/
ESP
® OFF switch (P.3-78)/
Parking sensor switch (if equipped)
(P.3-64)/
“ENG A-STOP OFF” switch
(if equipped) (P.3-29)/
Hill descent control switch
(if equipped) (P.3-80)/
FAR/NEAR setting switch
(if equipped) (P.3-55)/
Radar brake support OFF switch
(if equipped) (P.3-57)
6. Driver’s knee air bag (if equipped)
(P.2-51)
7. Tilt/telescoping steering lock lever
(P.2-114)
8. Fuel lid opener lever (P.5-1)
54P000007
1
5 467
823EXAMPLEVIEW B
Page 22 of 482
BEFORE DRIVING
2
54P00-01E
60G404
BEFORE DRIVING
Keys ...................................................................................... 2-1
Door locks ............................................................................ 2-2
Keyless push start system remote controller /
Keyless entry system transmitter ...................................... 2-6
Theft deterrent light (if equipped) ...................................... 2-16
Windows .............................................................................. 2-16
Mirrors .................................................................................. 2-20
Front seats ........................................................................... 2-21
Rear seats ............................................................................ 2-24
Seat belts and child restraint systems .............................. 2-28
Child restraint system ........................................................ 2-40
Supplemental restraint system (air bags) ......................... 2-50
Instrument cluster ............................................................... 2-63
Speedometer ....................................................................... 2-64
Tachometer .......................................................................... 2-64
Fuel gauge ........................................................................... 2-64
Temperature gauge ............................................................. 2-65
Brightness control .............................................................. 2-65
Information display ............................................................. 2-66
Warning and indicator lights .............................................. 2-88
Lighting control lever ........................................................2-102
Front fog light switch (if equipped) ..................................2-107
Headlight leveling switch (if equipped) ............................2-108
Turn signal control lever ...................................................2-108
Hazard warning switch ......................................................2-110
Windshield wiper and washer lever .................................2-110
Tilt/telescoping steering lock lever ..................................2-114
Horn .....................................................................................2-115
Heated rear window switch / heated outside rearview
mirror switch (if equipped) ................................................2-115
Page 29 of 482
2-7
BEFORE DRIVING
54P00-01E
Keyless push start system remote controller (Type A)
The remote controller enables the follow-
ing operations:
• You can lock or unlock the doors by
operating LOCK/UNLOCK buttons on
the remote controller. Refer to the expla-
nation in this section.
• You can lock or unlock the doors by
pushing the request switch. For details,
refer to the explanation in this section.
• You can start the engine without using
an ignition key. For details, refer to
“Engine switch” in “OPERATING YOUR
VEHICLE” section.
68LM206
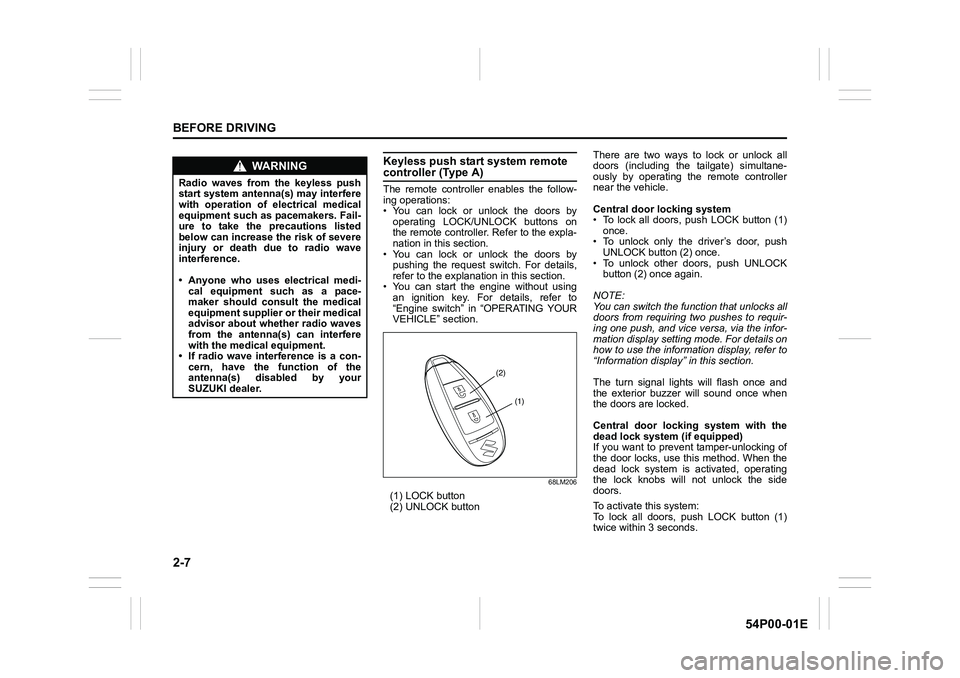
(1) LOCK button
(2) UNLOCK buttonThere are two ways to lock or unlock all
doors (including the tailgate) simultane-
ously by operating the remote controller
near the vehicle.
Central door locking system
• To lock all doors, push LOCK button (1)
once.
• To unlock only the driver’s door, push
UNLOCK button (2) once.
• To unlock other doors, push UNLOCK
button (2) once again.
NOTE:
You can switch the function that unlocks all
doors from requiring two pushes to requir-
ing one push, and vice versa, via the infor-
mation display setting mode. For details on
how to use the information display, refer to
“Information display” in this section.
The turn signal lights will flash once and
the exterior buzzer will sound once when
the doors are locked.
Central door locking system with the
dead lock system (if equipped)
If you want to prevent tamper-unlocking of
the door locks, use this method. When the
dead lock system is activated, operating
the lock knobs will not unlock the side
doors.
To activate this system:
To lock all doors, push LOCK button (1)
twice within 3 seconds.
WA R N I N G
Radio waves from the keyless push
start system antenna(s) may interfere
with operation of electrical medical
equipment such as pacemakers. Fail-
ure to take the precautions listed
below can increase the risk of severe
injury or death due to radio wave
interference.
• Anyone who uses electrical medi-
cal equipment such as a pace-
maker should consult the medical
equipment supplier or their medical
advisor about whether radio waves
from the antenna(s) can interfere
with the medical equipment.
• If radio wave interference is a con-
cern, have the function of the
antenna(s) disabled by your
SUZUKI dealer.
(1)
(2)
Page 30 of 482
2-8
BEFORE DRIVING
54P00-01E
To release this system:
• To unlock only the driver’s door, push
UNLOCK button (2) once.
• To unlock other doors, push UNLOCK
button (2) once again.
NOTE:
You can switch the function that unlocks all
doors from requiring two pushes to requir-
ing one push, and vice versa, via the infor-
mation display setting mode. For details on
how to use the information display, refer to
“Information display” in this section.
The turn signal lights will flash once and
the exterior buzzer will sound once when
the doors are locked, and then the turn sig-
nal lights will flash once and the exterior
buzzer will sound once again when the
doors are locked with the dead lock sys-
tem.
With the remote controller inside the vehi-
cle, if you push LOCK button on the
remote controller, the exterior buzzer will
sound and doors cannot be locked.
When the doors are unlocked:
• The turn signal lights will flash twice and
the exterior buzzer will sound twice.• If the interior light switch is in DOOR
position, the interior light will turn on for
about 15 seconds and then fade out. If
you press the engine switch during this
time, the light will start to fade out imme-
diately.
Check that the doors are locked after you
operate LOCK button (1).
If no door is opened within about 30 sec-
onds after UNLOCK button (2) is operated,
the doors will automatically lock again.
NOTE:
• The maximum operating distance of the
remote controller is about 5 m (16 ft.),
but this can vary depending on the sur-
roundings, especially near other trans-
mitting devices such as radio towers or
CB (Citizen’s Band) radios.
• The door locks cannot be operated with
the remote controller if the ignition mode
is in any other mode than “LOCK” (OFF).
• When any door is open, if you push
LOCK button on the remote controller,
the exterior buzzer will sound and doors
cannot be locked.
• If you lose one of the remote controllers,
ask your SUZUKI dealer as soon as pos-
sible for replacement. Have your dealer
program the new remote controller code
in your vehicle’s memory so that the old
code is erased.Keyless unlocking/locking using the
request switches
54P000206
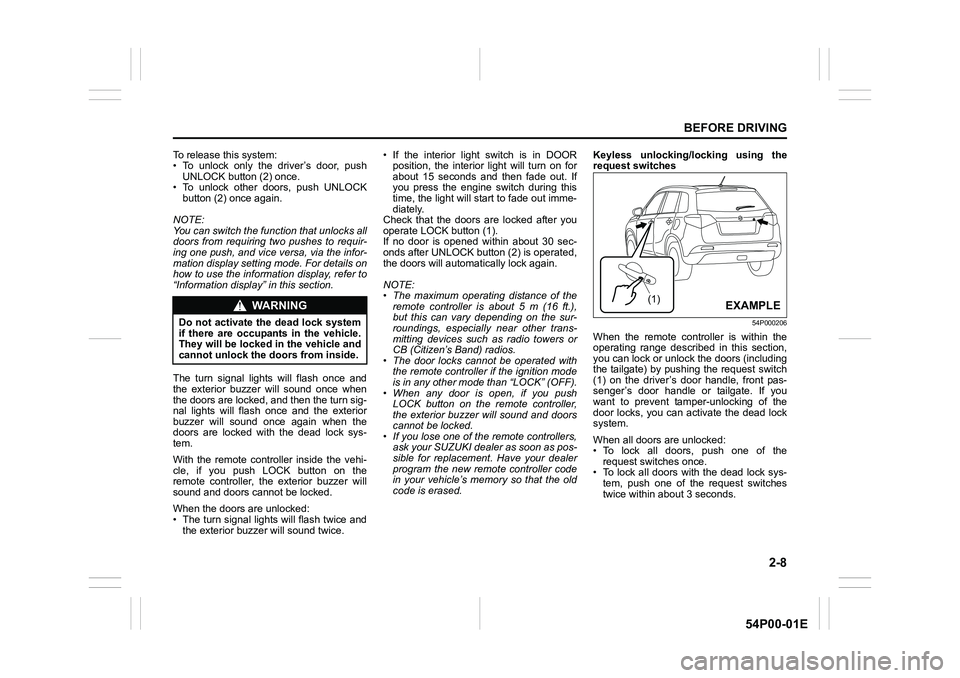
When the remote controller is within the
operating range described in this section,
you can lock or unlock the doors (including
the tailgate) by pushing the request switch
(1) on the driver’s door handle, front pas-
senger’s door handle or tailgate. If you
want to prevent tamper-unlocking of the
door locks, you can activate the dead lock
system.
When all doors are unlocked:
• To lock all doors, push one of the
request switches once.
• To lock all doors with the dead lock sys-
tem, push one of the request switches
twice within about 3 seconds.
WA R N I N G
Do not activate the dead lock system
if there are occupants in the vehicle.
They will be locked in the vehicle and
cannot unlock the doors from inside.
(1)EXAMPLE
Page 31 of 482
2-9
BEFORE DRIVING
54P00-01E
The turn signal lights will flash once and
the exterior buzzer will sound once when
the doors are locked, and then the turn sig-
nal lights will flash once and the exterior
buzzer will sound once again when the
doors are locked with the dead lock sys-
tem.
To unlock a door or all doors:
• Push one of the request switches once
to unlock only one door.
• Push one of the request switches twice
to unlock all doors.
NOTE:
You can switch the function that unlocks all
doors from requiring two pushes to requir-
ing one push, and vice versa, via the infor-
mation display setting mode. For details on
how to use the information display, refer to
“Information display” in this section.
When the doors are unlocked:
• The turn signal lights will flash twice and
the exterior buzzer will sound twice.
• If the interior light switch is in DOOR
position, the interior light will turn on for
about 15 seconds and then fade out. If
you press the engine switch during thistime, the light will start to fade out imme-
diately.
Check that the doors are locked after you
operate the request switch to lock the
doors.
NOTE:
• The door locks cannot be operated by
the request switch under the following
conditions:
– If any door is open or is not completely
closed.
– If the ignition mode is in any other
mode than “LOCK” (OFF).
• If no doors are opened within about 30
seconds after unlocking the doors by
pushing the request switch, the doors
will be locked again automatically.
80J056
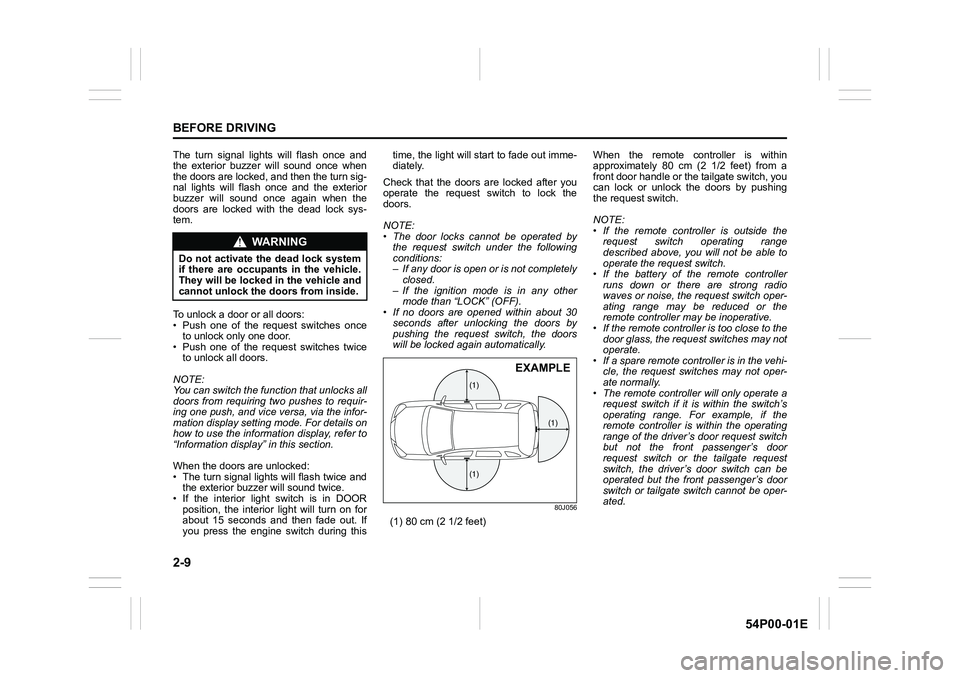
(1) 80 cm (2 1/2 feet)When the remote controller is within
approximately 80 cm (2 1/2 feet) from a
front door handle or the tailgate switch, you
can lock or unlock the doors by pushing
the request switch.
NOTE:
• If the remote controller is outside the
request switch operating range
described above, you will not be able to
operate the request switch.
• If the battery of the remote controller
runs down or there are strong radio
waves or noise, the request switch oper-
ating range may be reduced or the
remote controller may be inoperative.
• If the remote controller is too close to the
door glass, the request switches may not
operate.
• If a spare remote controller is in the vehi-
cle, the request switches may not oper-
ate normally.
• The remote controller will only operate a
request switch if it is within the switch’s
operating range. For example, if the
remote controller is within the operating
range of the driver’s door request switch
but not the front passenger’s door
request switch or the tailgate request
switch, the driver’s door switch can be
operated but the front passenger’s door
switch or tailgate switch cannot be oper-
ated.
WA R N I N G
Do not activate the dead lock system
if there are occupants in the vehicle.
They will be locked in the vehicle and
cannot unlock the doors from inside.
(1)
(1)
(1)
EXAMPLE
Page 36 of 482
2-14
BEFORE DRIVING
54P00-01E
NOTE:
You can switch the function that unlocks all
doors from requiring two pushes to requir-
ing one push, and vice versa, via the infor-
mation display setting mode. For details on
how to use the information display, refer to
“Information display” in this section.
The turn signal lights will flash once when
the doors are locked and then the turn sig-
nal lights will flash once again when the
doors are locked with the dead lock sys-
tem.
When the doors are unlocked:
• The turn signal lights will flash twice.
• If the interior light switch is in DOOR
position, the interior light will turn on for
about 15 seconds and then fade out. If
you insert the key into the ignition switch
during this time, the light will start to fade
out immediately.
Check that the doors are locked after you
operate LOCK button (1).
NOTE:
If no door is opened within about 30 sec-
onds after UNLOCK button (2) is operated,
the doors will automatically lock again.NOTE:
• The maximum operating distance of the
keyless entry system transmitter is about
5 m (16 ft.), but this can vary depending
on the surroundings, especially near
other transmitting devices such as radio
towers or CB (Citizen’s Band) radios.
• The door locks cannot be operated with
the transmitter, if the ignition key is
inserted in the ignition switch.
• When any door is open, the door locks
can only be unlocked with the transmit-
ter, and the turn signal light will not flash.
• If you lose one of the transmitters, ask
your SUZUKI dealer as soon as possible
for a replacement. Have your dealer pro-
gram the new transmitter code in your
vehicle’s memory so that the old code is
erased.Battery replacement
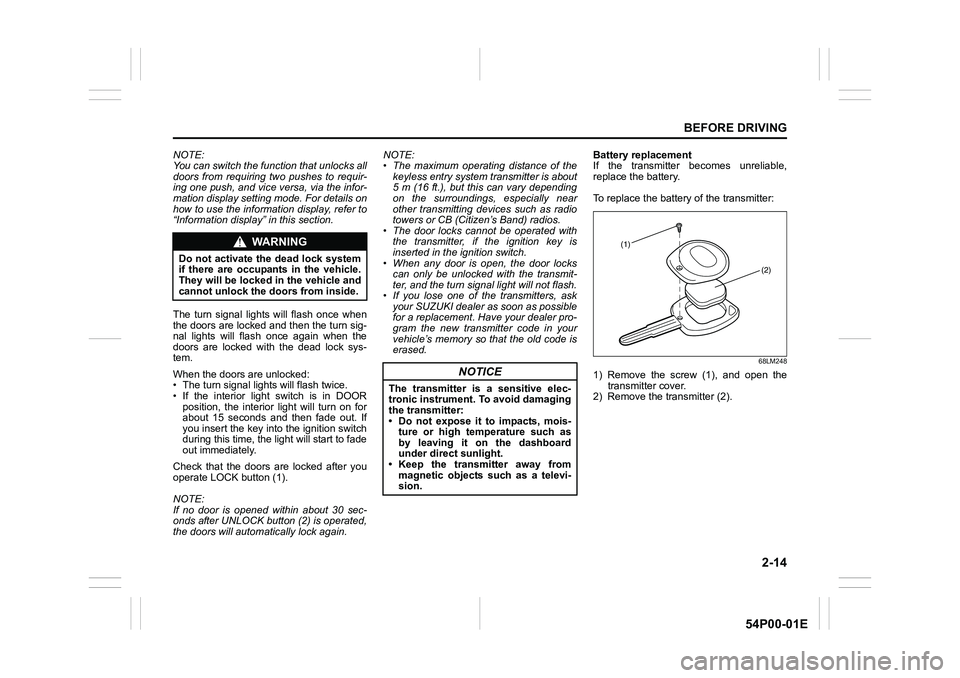
If the transmitter becomes unreliable,
replace the battery.
To replace the battery of the transmitter:
68LM248
1) Remove the screw (1), and open the
transmitter cover.
2) Remove the transmitter (2).
WA R N I N G
Do not activate the dead lock system
if there are occupants in the vehicle.
They will be locked in the vehicle and
cannot unlock the doors from inside.
NOTICE
The transmitter is a sensitive elec-
tronic instrument. To avoid damaging
the transmitter:
• Do not expose it to impacts, mois-
ture or high temperature such as
by leaving it on the dashboard
under direct sunlight.
• Keep the transmitter away from
magnetic objects such as a televi-
sion.
(1)
(2)
Page 95 of 482
2-73
BEFORE DRIVING
54P00-01E
Door lock (Door lock setting)
You can choose either once or twice oper-
ation(s) to unlock all doors (including the
tailgate) or release the dead lock system (if
equipped) by turning the key, or operating
the keyless entry system transmitter, key-
less push start system remote controller or
request switch.
You can also turn off or on the buzzer
sound when the door(s) is(are) locked or
unlocked.
Lights (Light setting)
(Footwell light setting) (if equipped)
The footwell lights can be programmed for
interlocked operation with either lighting
control or door operation and for no light-
ing.
Lane change (Turn signal light setting)
The turn signal and its indicator can be set
whether they flash three times even if you
return the turn signal control lever immedi-
ately after moving it.Antitheft (Theft deterrent alarm system
setting) (if equipped)
You can switch the theft deterrent alarm
system from the enabled state to the dis-
abled state, and vice versa.
The state of the theft deterrent alarm sys-
tem is shown on the information display as
follows:
• Mode A: Disabled state
• Mode D: Enabled state
NOTE:
For the theft deterrent alarm system of
Mexico and South Africa models, refer to
“For European countries, Mexico and
South Africa” in “SUPPLEMENT” section.Oil change (Oil life monitoring system
reset setting) (if equipped for gasoline
engine model)
The oil life monitoring system must be
reset after changing the engine oil and oil
filter.
TPMS (Tire pressure monitoring system
setting) (if equipped)
• You can check the current tire inflation
pressure on the information display.
• You can set one of the initial values of
tire pressure below that are indicated on
the tire information label.
– Comfort Mode
–Eco Mode
– Load Mode
Refer to “Tire pressure monitoring system
(TPMS) (if equipped)” in “OPERATING
YOUR VEHICLE” section for details.
Page 120 of 482
2-98
BEFORE DRIVING
54P00-01E
Turn signal indicators
50G055
When you turn on the left or right turn sig-
nals, the corresponding green arrow on the
instrument cluster will flash along with the
respective turn signal lights. When you
turn on the hazard warning switch, both
arrows will flash along with all of the turn
signal lights.
Main beam (high beam) indicator
light
50G056
This indicator comes on when headlight
main beams (high beams) are turned on.
Illumination indicator light
64J045
This indicator light comes on while the
position lights, tail light and/or the head-
lights are on.
4WD warning light (if equipped)
57L30042
When the ignition switch is turned to “ON”
position or the engine switch is pressed to
change the ignition mode to “ON”, this light
comes on briefly so you can check that the
light is working.
• This light comes on if there is any prob-
lem with the four-mode 4WD system.
The system will be deactivated automati-
cally.
• The light blinks if the vehicle is in either
of the following conditions, and the sys-
tem will be deactivated automatically.
– Wheels of different diameters are fitted
to the vehicle.
– Drive train components overheat as a
result of spinning of a drive wheel in
mud or snow.
NOTE:
Should the light blink, immediately move
the vehicle to a safe place and park it there
to protect the drive train components. If
you let the engine run at idle for a while
except for the case of different sized
wheels are fitted, the light will go out and
the system will resume.
Page 122 of 482
2-100
BEFORE DRIVING
54P00-01E
Whenever the engine oil and oil filter are
changed, the light must be reset to monitor
the next oil change timing properly. To
reset the light, consult your SUZUKI
dealer.
NOTE:
• Note that engine oil degrades faster
under the following conditions:
– Mainly urban use of the vehicle,
requiring more frequent regeneration
of the DPF
®;
– Use of the vehicle for short drives, in
which the engine does not have time
to reach its regular operating tem-
perature;
– Repeated interruptions to the regen-
eration process signaled by the DPF
®
warning light coming on.
• Since special procedures and tools are
required, ask your authorized SUZUKI
dealer to reset the oil life monitoring sys-
tem for diesel engine.
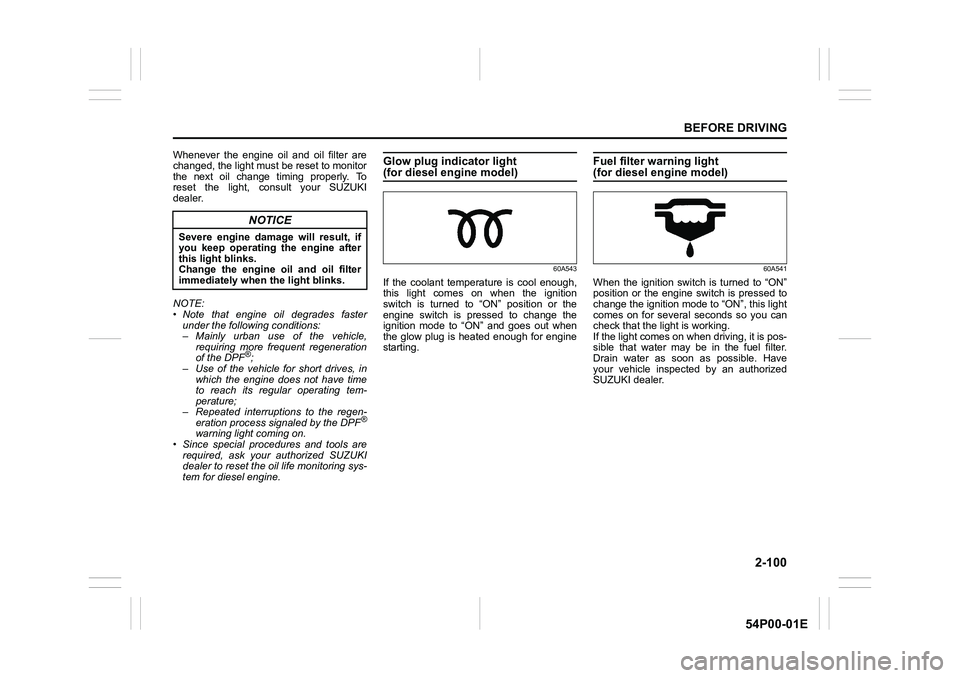
Glow plug indicator light (for diesel engine model)
60A543
If the coolant temperature is cool enough,
this light comes on when the ignition
switch is turned to “ON” position or the
engine switch is pressed to change the
ignition mode to “ON” and goes out when
the glow plug is heated enough for engine
starting.
Fuel filter warning light (for diesel engine model)
60A541
When the ignition switch is turned to “ON”
position or the engine switch is pressed to
change the ignition mode to “ON”, this light
comes on for several seconds so you can
check that the light is working.
If the light comes on when driving, it is pos-
sible that water may be in the fuel filter.
Drain water as soon as possible. Have
your vehicle inspected by an authorized
SUZUKI dealer.
NOTICE
Severe engine damage will result, if
you keep operating the engine after
this light blinks.
Change the engine oil and oil filter
immediately when the light blinks.
Page 127 of 482
2-105
BEFORE DRIVING
54P00-01E
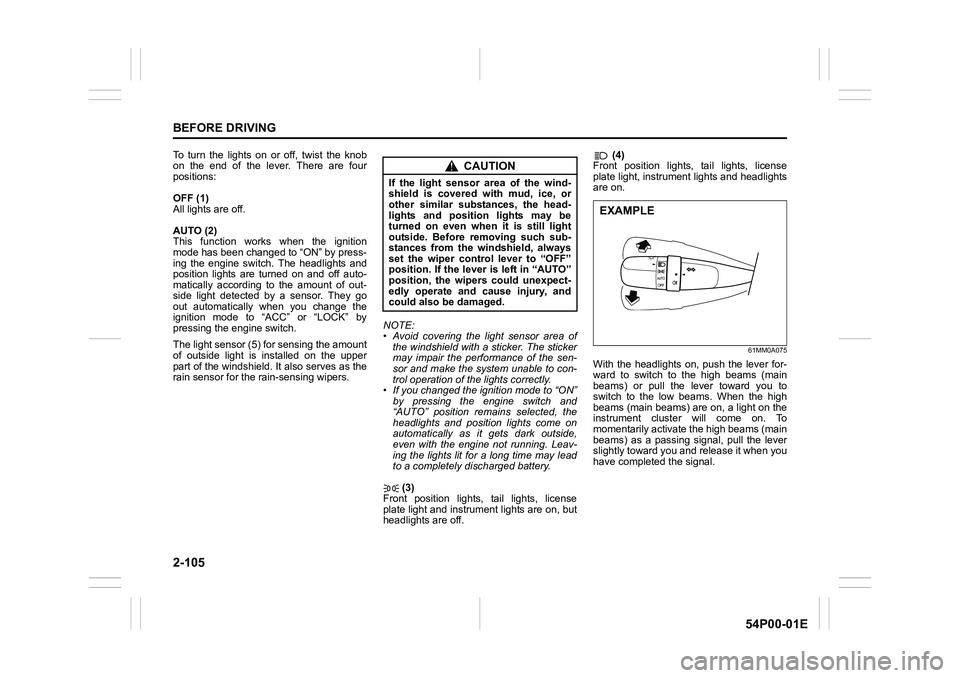
To turn the lights on or off, twist the knob
on the end of the lever. There are four
positions:
OFF (1)
All lights are off.
AUTO (2)
This function works when the ignition
mode has been changed to “ON” by press-
ing the engine switch. The headlights and
position lights are turned on and off auto-
matically according to the amount of out-
side light detected by a sensor. They go
out automatically when you change the
ignition mode to “ACC” or “LOCK” by
pressing the engine switch.
The light sensor (5) for sensing the amount
of outside light is installed on the upper
part of the windshield. It also serves as the
rain sensor for the rain-sensing wipers.NOTE:
• Avoid covering the light sensor area of
the windshield with a sticker. The sticker
may impair the performance of the sen-
sor and make the system unable to con-
trol operation of the lights correctly.
• If you changed the ignition mode to “ON”
by pressing the engine switch and
“AUTO” position remains selected, the
headlights and position lights come on
automatically as it gets dark outside,
even with the engine not running. Leav-
ing the lights lit for a long time may lead
to a completely discharged battery.
(3)
Front position lights, tail lights, license
plate light and instrument lights are on, but
headlights are off. (4)
Front position lights, tail lights, license
plate light, instrument lights and headlights
are on.
61MM0A075
With the headlights on, push the lever for-
ward to switch to the high beams (main
beams) or pull the lever toward you to
switch to the low beams. When the high
beams (main beams) are on, a light on the
instrument cluster will come on. To
momentarily activate the high beams (main
beams) as a passing signal, pull the lever
slightly toward you and release it when you
have completed the signal.
CAUTION
If the light sensor area of the wind-
shield is covered with mud, ice, or
other similar substances, the head-
lights and position lights may be
turned on even when it is still light
outside. Before removing such sub-
stances from the windshield, always
set the wiper control lever to “OFF”
position. If the lever is left in “AUTO”
position, the wipers could unexpect-
edly operate and cause injury, and
could also be damaged.
EXAMPLE