Jack SUZUKI GRAND VITARA 2018 Owners Manual
[x] Cancel search | Manufacturer: SUZUKI, Model Year: 2018, Model line: GRAND VITARA, Model: SUZUKI GRAND VITARA 2018Pages: 482, PDF Size: 21 MB
Page 16 of 482
ILLUSTRATED TABLE OF CONTENTS
54P00-01E
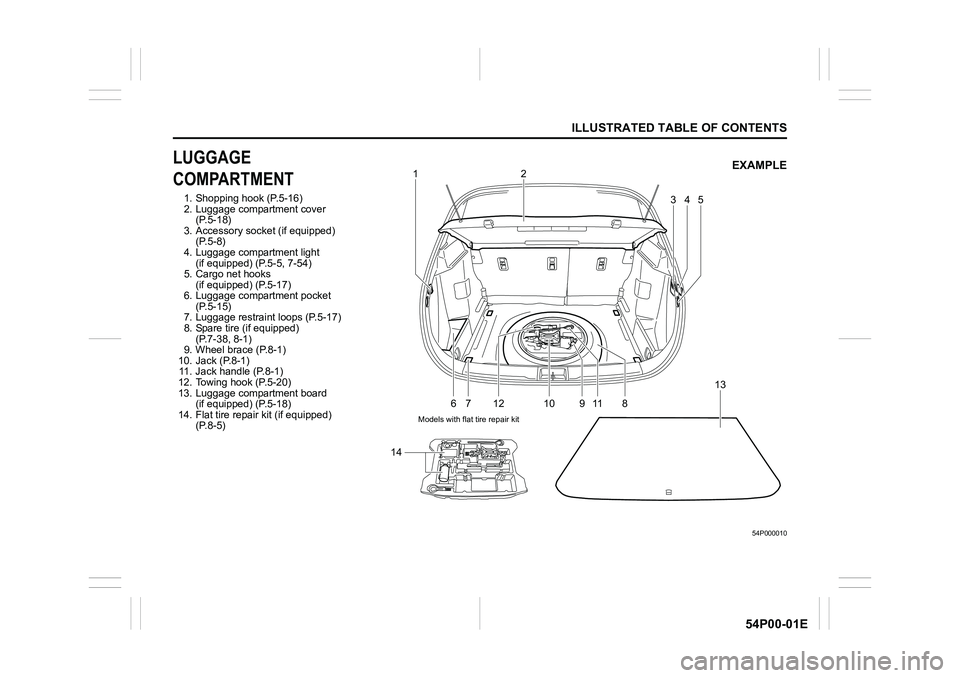
LUGGAGE
COMPARTMENT
1. Shopping hook (P.5-16)
2. Luggage compartment cover
(P.5-18)
3. Accessory socket (if equipped)
(P.5-8)
4. Luggage compartment light
(if equipped) (P.5-5, 7-54)
5. Cargo net hooks
(if equipped) (P.5-17)
6. Luggage compartment pocket
(P.5-15)
7. Luggage restraint loops (P.5-17)
8. Spare tire (if equipped)
(P.7-38, 8-1)
9. Wheel brace (P.8-1)
10. Jack (P.8-1)
11. Jack handle (P.8-1)
12. Towing hook (P.5-20)
13. Luggage compartment board
(if equipped) (P.5-18)
14. Flat tire repair kit (if equipped)
(P.8-5)
54P000010
1
6
75
8 9 10 11 1213
142
34EXAMPLE
Models with flat tire repair kit
Page 28 of 482
2-6
BEFORE DRIVING
54P00-01E
If you cannot unlatch the tailgate by push-
ing the unlatch switch (1) due to a dis-
charged battery or malfunction, follow the
procedure below to unlatch the tailgate
from inside the vehicle.
1) Fold the rear seat forward for easier
access. Refer to “Folding rear seats”
section for details on how to fold the
rear seat forward.
54P000205
2) Push open the tailgate from inside by
pushing up on the emergency lever (2)
using a flat-bladed screwdriver or the
jack handle. The tailgate will be latched
again by closing the tailgate simply.
If the tailgate cannot be unlatched by push-
ing the unlatch switch (1), have the vehicle
inspected by your SUZUKI dealer.
Keyless push start system
remote controller / Keyless
entry system transmitter
68LM205
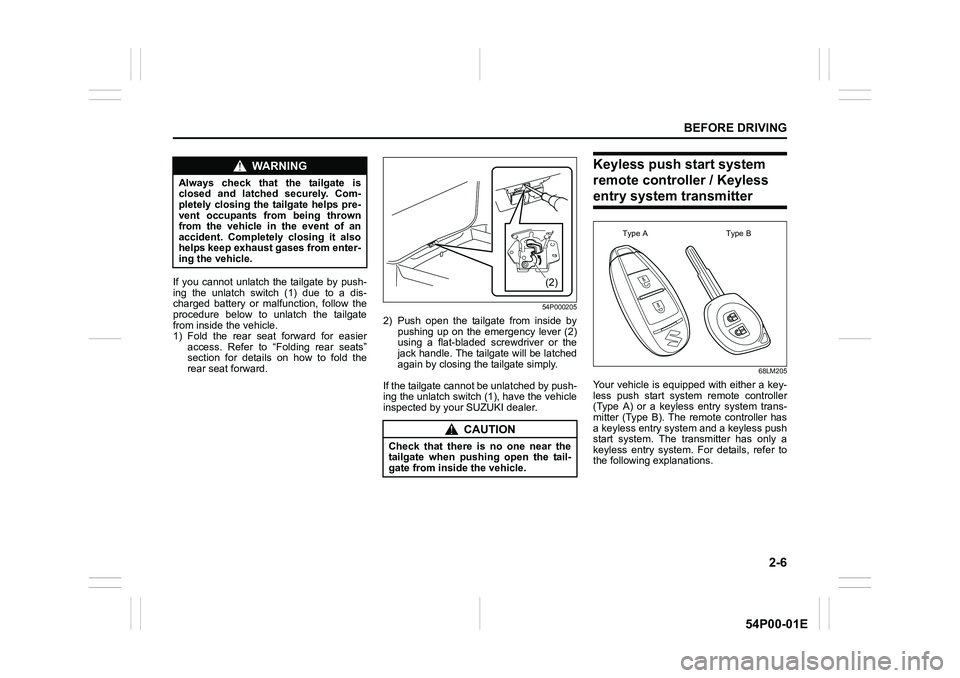
Your vehicle is equipped with either a key-
less push start system remote controller
(Type A) or a keyless entry system trans-
mitter (Type B). The remote controller has
a keyless entry system and a keyless push
start system. The transmitter has only a
keyless entry system. For details, refer to
the following explanations.
WA R N I N G
Always check that the tailgate is
closed and latched securely. Com-
pletely closing the tailgate helps pre-
vent occupants from being thrown
from the vehicle in the event of an
accident. Completely closing it also
helps keep exhaust gases from enter-
ing the vehicle.
CAUTION
Check that there is no one near the
tailgate when pushing open the tail-
gate from inside the vehicle.
(2)
Type A Type B
Page 111 of 482
2-89
BEFORE DRIVING
54P00-01E
Refer to “Tire pressure monitoring system
(TPMS) (if equipped)” in “OPERATING
YOUR VEHICLE” section for additional
details on the tire pressure monitoring sys-
tem. Refer to “Tires” in “INSPECTION AND
MAINTENANCE” section for information
on maintaining proper tire pressure.
WA R N I N G
The load-carrying capacity of your
tires is reduced at lower inflation
pressures. If your tires are even mod-
erately under-inflated, the load on the
tires may exceed the load-carrying
capacity of the tires, which could lead
to tire failure. The low tire pressure
warning light will not alert you to this
condition, because it only comes on
when one or more of your tires
becomes significantly under-inflated.
Check and adjust your tire inflation
pressure at least once a month. Refer
to “Tires” in “INSPECTION AND
MAINTENANCE” section.
WA R N I N G
Continuing to drive with the low tire
pressure warning light on can lead to
an accident, resulting in severe injury
or death.
If the low tire pressure warning light
comes on and stays on, reduce your
speed and avoid abrupt steering and
braking. Be aware that driving on a
significantly under-inflated tire can
cause the tire to overheat and can
lead to tire failure, and may affect
steering control and brake effective-
ness. Stop the vehicle in a safe place
as soon as possible and check your
tires.
• If you have a flat tire, replace it with
the spare tire (if equipped). Refer to
“Jacking instructions” in “EMER-
GENCY SERVICE” section for the
tire replacement method. Also refer
to “Replacing tires and/or wheels”
for instructions on how to restore
normal operation of the TPMS after
you have had a flat tire.
(Continued)
WA R N I N G
(Continued)
• If your vehicle is equipped with a
flat tire repair kit instead of a spare
tire, refer to “Flat tire repair kit (if
equipped)” in “EMERGENCY SER-
VICE” section for instructions on
how to perform an emergency
repair of a flat tire.
• If one or more of your tires is
under-inflated, adjust the inflation
pressure of all tires to the recom-
mended inflation pressure as soon
as possible.
Page 225 of 482
3-85
OPERATING YOUR VEHICLE
54P00-01E
The low tire pressure warning light can
come on due to normal causes such as
natural air leakage and pressure changes
caused by changes in temperature or
atmospheric pressure. Adjusting the air
pressure in the tires to the pressure shown
on the tire information placard should
cause the low tire pressure warning light to
turn off.
To make the low tire pressure warning light
go off, adjust the tire pressures when the
tires are cold, and drive the vehicle for
about 10 minutes.
When the adjusted tire pressure is recog-
nized, the low tire pressure warning light
will go off and the information display
shows the current tire pressure (if you
select the TPMS monitor).If the light turns on again shortly after
adjusting the pressure in your tires, you
may have a flat tire. If you have a flat tire,
replace it with the spare tire (if equipped).
Refer to “Jacking instructions” in “EMER-
GENCY SERVICE” section. Refer to
“Replacing tires and/or wheels” for instruc-
tions on how to restore normal operation of
the tire pressure monitoring system after
you have had a flat tire.
WA R N I N G
Continuing to drive with the low tire
pressure warning light on can lead to
an accident, resulting in severe injury
or death.
If the low tire pressure warning light
comes on and stays on, reduce your
speed and avoid abrupt steering and
braking. Be aware that driving on a
significantly under-inflated tire can
cause the tire to overheat and can
lead to tire failure, and may affect
steering control and brake effective-
ness. Stop in a safe place as soon as
possible and check your tires.
• If you have a flat tire, replace it with
the spare tire (if equipped). Refer to
“Jacking instructions” in “EMER-
GENCY SERVICE” section for tire
replacement. Also refer to “Replac-
ing tires and/or wheels” for instruc-
tions on how to restore normal
operation of the TPMS after you
have had a flat tire.
(Continued)
WA R N I N G
(Continued)
• If your vehicle is equipped with a
flat tire repair kit instead of a spare
tire, refer to “Flat tire repair kit” in
“EMERGENCY SERVICE” section
for instructions on how to perform
an emergency repair of a flat tire.
• If one or more of your tires is
under-inflated, adjust the inflation
pressure in all of your tires to the
recommended inflation pressure as
soon as possible.
NOTICE
If the low tire pressure warning light
does not go off even when you drive
for more than 10 minutes after adjust-
ing the cold tire pressure, there may
be a problem with the TPMS. Have
your vehicle inspected by an autho-
rized SUZUKI dealer.
Page 240 of 482
4-6
DRIVING TIPS
54P00-01E
WA R N I N G
(Continued)
• Do not use tires other than those
specified by SUZUKI. Never use dif-
ferent sizes or types of tires on the
front and rear wheels. For informa-
tion regarding the specified tires,
refer to the tire information label
located on the driver’s door lock
pillar.
• Never use oversized tires or spe-
cial shock absorbers and springs
to raise (jack up) your vehicle. This
will change the handling character-
istics. Oversized tires may also rub
against the fender over bumps,
causing vehicle damage or tire fail-
ure.
• After driving through water, test the
brakes while driving at a slow
speed to see if they have main-
tained their normal effectiveness. If
the brakes are less effective than
normal, dry them by repeatedly
applying the brakes while driving
slowly until the brakes have
regained their normal effective-
ness.
Page 262 of 482
5-20
OTHER CONTROLS AND EQUIPMENT
54P00-01E
You can use the roof rails or the roof rack
anchors to attach the optional roof rack
which is available at your SUZUKI dealer.
If you use a roof rack, observe the instruc-
tions and precautions in this section and
provided with the roof rack.
• Check that the roof rack is securely
installed.
• To mount various types of cargo (such
as skis, bicycles, etc.) properly, use suit-
able attachments which are available at
your SUZUKI dealer. Install the attach-
ments properly and securely according
to the instructions provided. Do not
mount cargo directly on the roof panel.
The cargo can damage the roof panel.
• The gross weight of the roof rack plus
cargo must not exceed the loading
capacity.
– Roof rails: 75 kg (165 lbs)
– Roof rack anchors: 50 kg (110 lbs)
Also, do not let the gross vehicle weight
(fully loaded vehicle including driver,
passengers, cargo, roof load and trailer
tongue weight) exceed the Gross Vehi-
cle Weight Rating (GVWR) listed in
“SPECIFICATIONS” section.
• Mount and secure the cargo onto the
roof rack properly according to the
instructions provided. Stow the heaviest
items at the bottom and distribute the
cargo as evenly as possible.
• Do not carry large items that hang over
the bumpers or the sides of the vehicle.Otherwise, these items could block your
view.
• Secure the front and rear ends of long
items such as wood panels and surf-
boards, to both the front and rear of the
vehicle. You should protect the painted
surfaces of the vehicle from scuffing
caused by tie-down ropes.
• Check periodically that the roof rack is
securely installed and free from damage.
• For vehicles with roof rack anchors,
check that the anchors are covered with
the caps when not in use.Frame hooks
Your SUZUKI not recommend you use the
frame hooks for towing another vehicle.
SUZUKI was originally designed to tow
your vehicle on the road emergency tow-
ing.
If your vehicle needs to be towed in an
emergency, refer to “Towing” in “EMER-
GENCY SERVICE” section.
WA R N I N G
• Abrupt maneuvers or failure to
properly secure cargo can allow
the cargo to fly off the vehicle and
hit others, causing personal injury
or property damage.
• Mount cargo securely and avoid
abrupt maneuvers such as jackrab-
bit starts, sharp turns, fast corner-
ing and sudden braking. Check
periodically that cargo is securely
fastened.
• Large, bulky, long or flat items can
affect vehicle aerodynamics or be
caught by the wind, and can reduce
vehicle control resulting in an acci-
dent and personal injury. Drive cau-
tiously at a safely reduced speed
when carrying this type of cargo.
WA R N I N G
Observe the following instructions
when using frame hooks. The towing
hook or vehicle body may break and
cause serious injury or damage.
• Do not use the frame hooks for
towing another vehicle.
• Avoid pulling the vehicle to get out
of severe snowy, muddy or sandy
conditions, sudden starts or erratic
driving maneuvers which could
cause excessive stress on the tow-
ing hook.
In such case, we recommend that
you contact a professional service.
Page 263 of 482
5-21
OTHER CONTROLS AND EQUIPMENT
54P00-01E
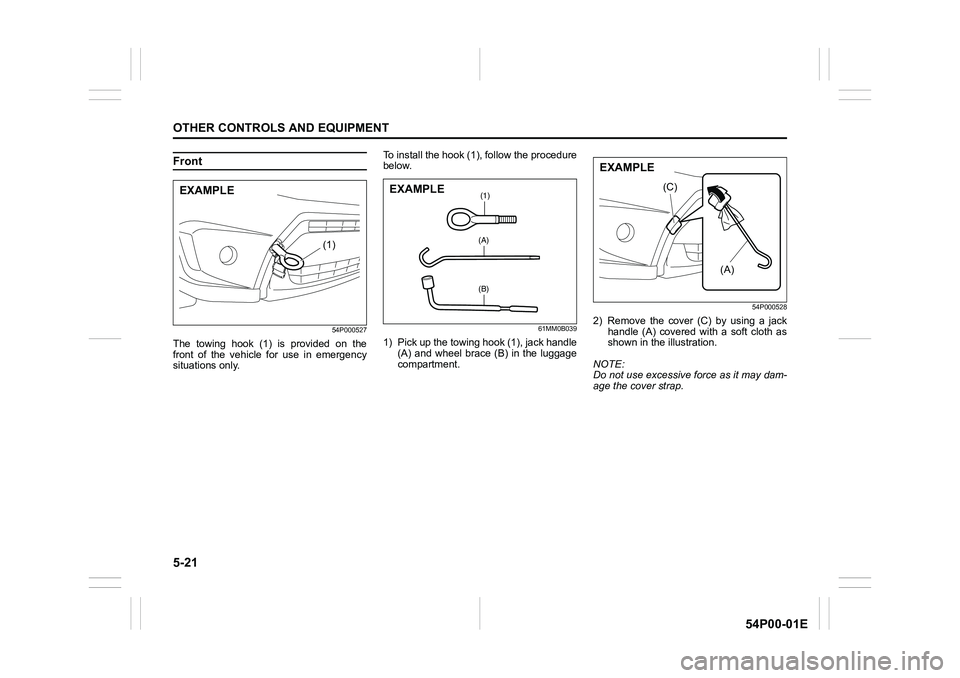
Front
54P000527
The towing hook (1) is provided on the
front of the vehicle for use in emergency
situations only.To install the hook (1), follow the procedure
below.
61MM0B039
1) Pick up the towing hook (1), jack handle
(A) and wheel brace (B) in the luggage
compartment.
54P000528
2) Remove the cover (C) by using a jack
handle (A) covered with a soft cloth as
shown in the illustration.
NOTE:
Do not use excessive force as it may dam-
age the cover strap.
(1)
EXAMPLE(1)
(A)
(B)
EXAMPLE
(A)
(C)
EXAMPLE
Page 339 of 482
7-1
INSPECTION AND MAINTENANCE
54P00-01E
60B128S
WA R N I N G
Take extreme care when working on
your vehicle to prevent accidental
injury. Carefully observe the follow-
ing precautions:
• To prevent damage or unintended
activation of the air bag system or
seat belt pretensioner system, check
that the battery is disconnected and
the ignition switch has been in
“LOCK” position or the ignition
mode has been “LOCK” (OFF) for at
least 90 seconds before performing
any electrical service work on your
SUZUKI vehicle. Do not touch air
bag system components, seat belt
pretensioner system components or
wires.
The wires are wrapped with yellow
tape or yellow tubing, and the cou-
plers are yellow for easy identifica-
tion.
• Do not leave the engine running in
garages or other confined areas.
(Continued)
WA R N I N G
(Continued)
• When the engine is running, keep
hands, clothing, tools, and other
objects away from the fan and drive
belt. Even though the fan may not
be moving, it can automatically
turn on without warning.
• When it is necessary to perform
service work with the engine run-
ning, check that the parking brake
is set fully and the transaxle is in
Neutral.
• Do not touch ignition wires or other
ignition system parts when starting
the engine or when the engine is
running, or you could receive an
electric shock.
• Be careful not to touch a hot
engine, exhaust manifold and
pipes, muffler, radiator and water
hoses.
• Do not allow smoking, sparks, or
flames around fuel or the battery.
Flammable fumes are present.
• Do not get under your vehicle if it is
supported only with the portable
jack provided in your vehicle.
• Be careful not to cause accidental
short circuits between the positive
and negative battery terminals.
(Continued)
WA R N I N G
(Continued)
• Keep used oil, coolant, and other
fluids away from children and pets.
Dispose of used fluids properly;
never pour them on the ground,
into sewers, etc.
Page 400 of 482
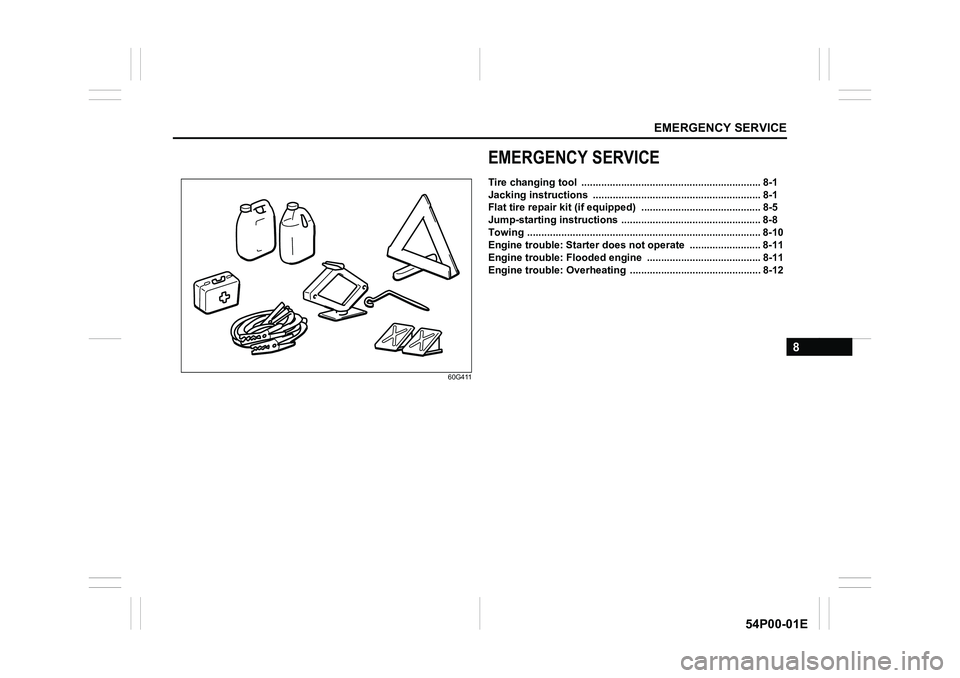
EMERGENCY SERVICE
8
54P00-01E
60G411
EMERGENCY SERVICE
Tire changing tool ............................................................... 8-1
Jacking instructions ........................................................... 8-1
Flat tire repair kit (if equipped) .......................................... 8-5
Jump-starting instructions ................................................. 8-8
Towing .................................................................................. 8-10
Engine trouble: Starter does not operate ......................... 8-11
Engine trouble: Flooded engine ........................................ 8-11
Engine trouble: Overheating .............................................. 8-12
Page 401 of 482
8-1
EMERGENCY SERVICE
54P00-01E
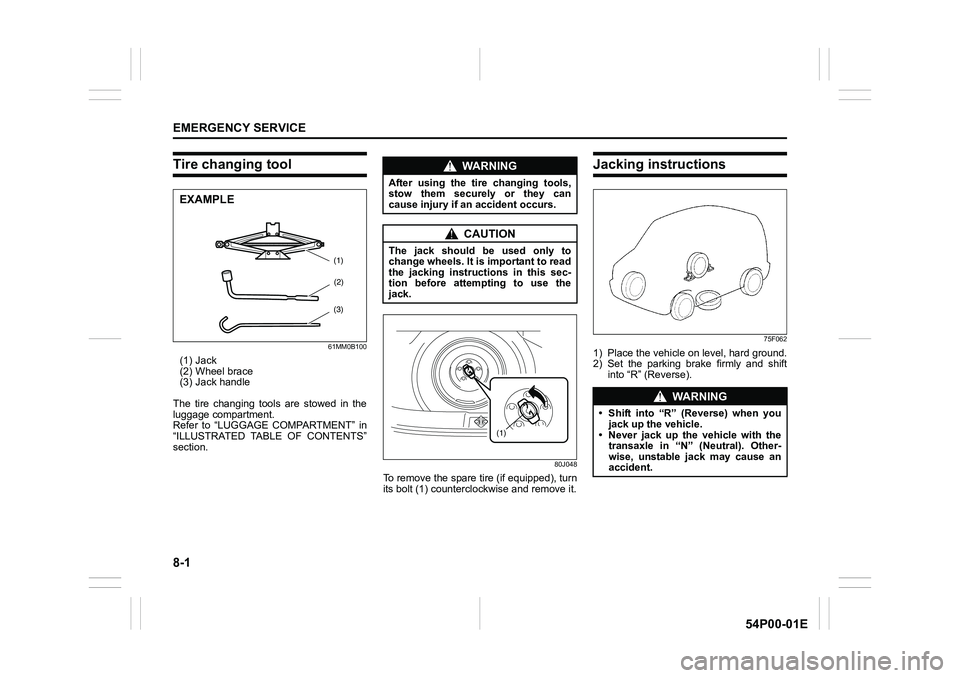
Tire changing tool
61MM0B100
(1) Jack
(2) Wheel brace
(3) Jack handle
The tire changing tools are stowed in the
luggage compartment.
Refer to “LUGGAGE COMPARTMENT” in
“ILLUSTRATED TABLE OF CONTENTS”
section.
80J048
To remove the spare tire (if equipped), turn
its bolt (1) counterclockwise and remove it.
Jacking instructions
75F062
1) Place the vehicle on level, hard ground.
2) Set the parking brake firmly and shift
into “R” (Reverse).
EXAMPLE
(3)
(2)
(1)
WA R N I N G
After using the tire changing tools,
stow them securely or they can
cause injury if an accident occurs.
CAUTION
The jack should be used only to
change wheels. It is important to read
the jacking instructions in this sec-
tion before attempting to use the
jack.
(1)
WA R N I N G
• Shift into “R” (Reverse) when you
jack up the vehicle.
• Never jack up the vehicle with the
transaxle in “N” (Neutral). Other-
wise, unstable jack may cause an
accident.