flat tire SUZUKI GRAND VITARA 2019 User Guide
[x] Cancel search | Manufacturer: SUZUKI, Model Year: 2019, Model line: GRAND VITARA, Model: SUZUKI GRAND VITARA 2019Pages: 482, PDF Size: 21 MB
Page 225 of 482
3-85
OPERATING YOUR VEHICLE
54P00-01E
The low tire pressure warning light can
come on due to normal causes such as
natural air leakage and pressure changes
caused by changes in temperature or
atmospheric pressure. Adjusting the air
pressure in the tires to the pressure shown
on the tire information placard should
cause the low tire pressure warning light to
turn off.
To make the low tire pressure warning light
go off, adjust the tire pressures when the
tires are cold, and drive the vehicle for
about 10 minutes.
When the adjusted tire pressure is recog-
nized, the low tire pressure warning light
will go off and the information display
shows the current tire pressure (if you
select the TPMS monitor).If the light turns on again shortly after
adjusting the pressure in your tires, you
may have a flat tire. If you have a flat tire,
replace it with the spare tire (if equipped).
Refer to “Jacking instructions” in “EMER-
GENCY SERVICE” section. Refer to
“Replacing tires and/or wheels” for instruc-
tions on how to restore normal operation of
the tire pressure monitoring system after
you have had a flat tire.
WA R N I N G
Continuing to drive with the low tire
pressure warning light on can lead to
an accident, resulting in severe injury
or death.
If the low tire pressure warning light
comes on and stays on, reduce your
speed and avoid abrupt steering and
braking. Be aware that driving on a
significantly under-inflated tire can
cause the tire to overheat and can
lead to tire failure, and may affect
steering control and brake effective-
ness. Stop in a safe place as soon as
possible and check your tires.
• If you have a flat tire, replace it with
the spare tire (if equipped). Refer to
“Jacking instructions” in “EMER-
GENCY SERVICE” section for tire
replacement. Also refer to “Replac-
ing tires and/or wheels” for instruc-
tions on how to restore normal
operation of the TPMS after you
have had a flat tire.
(Continued)
WA R N I N G
(Continued)
• If your vehicle is equipped with a
flat tire repair kit instead of a spare
tire, refer to “Flat tire repair kit” in
“EMERGENCY SERVICE” section
for instructions on how to perform
an emergency repair of a flat tire.
• If one or more of your tires is
under-inflated, adjust the inflation
pressure in all of your tires to the
recommended inflation pressure as
soon as possible.
NOTICE
If the low tire pressure warning light
does not go off even when you drive
for more than 10 minutes after adjust-
ing the cold tire pressure, there may
be a problem with the TPMS. Have
your vehicle inspected by an autho-
rized SUZUKI dealer.
Page 226 of 482
3-86
OPERATING YOUR VEHICLE
54P00-01E
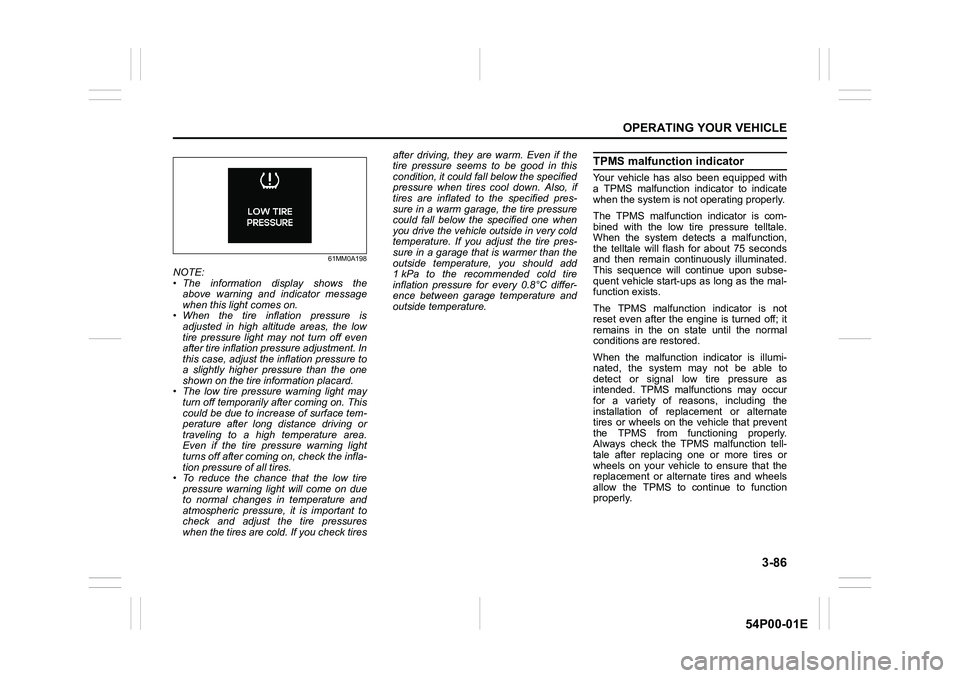
61MM0A198
NOTE:
• The information display shows the
above warning and indicator message
when this light comes on.
• When the tire inflation pressure is
adjusted in high altitude areas, the low
tire pressure light may not turn off even
after tire inflation pressure adjustment. In
this case, adjust the inflation pressure to
a slightly higher pressure than the one
shown on the tire information placard.
• The low tire pressure warning light may
turn off temporarily after coming on. This
could be due to increase of surface tem-
perature after long distance driving or
traveling to a high temperature area.
Even if the tire pressure warning light
turns off after coming on, check the infla-
tion pressure of all tires.
• To reduce the chance that the low tire
pressure warning light will come on due
to normal changes in temperature and
atmospheric pressure, it is important to
check and adjust the tire pressures
when the tires are cold. If you check tiresafter driving, they are warm. Even if the
tire pressure seems to be good in this
condition, it could fall below the specified
pressure when tires cool down. Also, if
tires are inflated to the specified pres-
sure in a warm garage, the tire pressure
could fall below the specified one when
you drive the vehicle outside in very cold
temperature. If you adjust the tire pres-
sure in a garage that is warmer than the
outside temperature, you should add
1 kPa to the recommended cold tire
inflation pressure for every 0.8°C differ-
ence between garage temperature and
outside temperature.
TPMS malfunction indicator
Your vehicle has also been equipped with
a TPMS malfunction indicator to indicate
when the system is not operating properly.
The TPMS malfunction indicator is com-
bined with the low tire pressure telltale.
When the system detects a malfunction,
the telltale will flash for about 75 seconds
and then remain continuously illuminated.
This sequence will continue upon subse-
quent vehicle start-ups as long as the mal-
function exists.
The TPMS malfunction indicator is not
reset even after the engine is turned off; it
remains in the on state until the normal
conditions are restored.
When the malfunction indicator is illumi-
nated, the system may not be able to
detect or signal low tire pressure as
intended. TPMS malfunctions may occur
for a variety of reasons, including the
installation of replacement or alternate
tires or wheels on the vehicle that prevent
the TPMS from functioning properly.
Always check the TPMS malfunction tell-
tale after replacing one or more tires or
wheels on your vehicle to ensure that the
replacement or alternate tires and wheels
allow the TPMS to continue to function
properly.
Page 227 of 482
3-87
OPERATING YOUR VEHICLE
54P00-01E
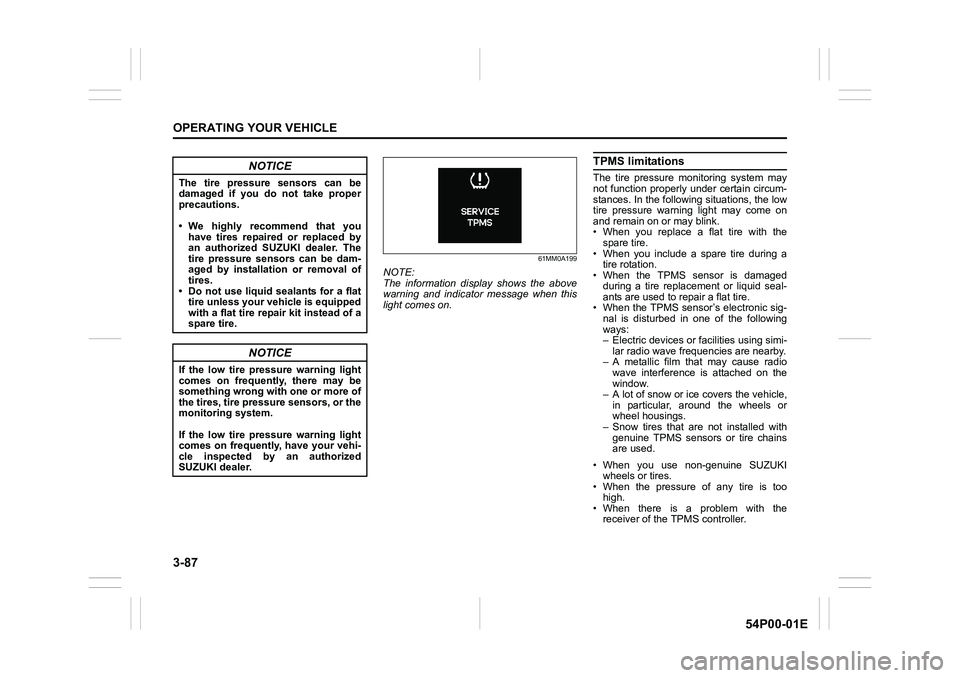
61MM0A199
NOTE:
The information display shows the above
warning and indicator message when this
light comes on.
TPMS limitations
The tire pressure monitoring system may
not function properly under certain circum-
stances. In the following situations, the low
tire pressure warning light may come on
and remain on or may blink.
• When you replace a flat tire with the
spare tire.
• When you include a spare tire during a
tire rotation.
• When the TPMS sensor is damaged
during a tire replacement or liquid seal-
ants are used to repair a flat tire.
• When the TPMS sensor’s electronic sig-
nal is disturbed in one of the following
ways:
– Electric devices or facilities using simi-
lar radio wave frequencies are nearby.
– A metallic film that may cause radio
wave interference is attached on the
window.
– A lot of snow or ice covers the vehicle,
in particular, around the wheels or
wheel housings.
– Snow tires that are not installed with
genuine TPMS sensors or tire chains
are used.
• When you use non-genuine SUZUKI
wheels or tires.
• When the pressure of any tire is too
high.
• When there is a problem with the
receiver of the TPMS controller.NOTICE
The tire pressure sensors can be
damaged if you do not take proper
precautions.
• We highly recommend that you
have tires repaired or replaced by
an authorized SUZUKI dealer. The
tire pressure sensors can be dam-
aged by installation or removal of
tires.
• Do not use liquid sealants for a flat
tire unless your vehicle is equipped
with a flat tire repair kit instead of a
spare tire.
NOTICE
If the low tire pressure warning light
comes on frequently, there may be
something wrong with one or more of
the tires, tire pressure sensors, or the
monitoring system.
If the low tire pressure warning light
comes on frequently, have your vehi-
cle inspected by an authorized
SUZUKI dealer.
Page 228 of 482
3-88
OPERATING YOUR VEHICLE
54P00-01E
TPMS setting
• You can check the current tire inflation
pressure on the information display.
• You can set one of the initial value of tire
pressure below that is indicated on the
tire information label.
– Comfort Mode
–Eco Mode
– Load ModeTo check the current tire inflation pres-
sure
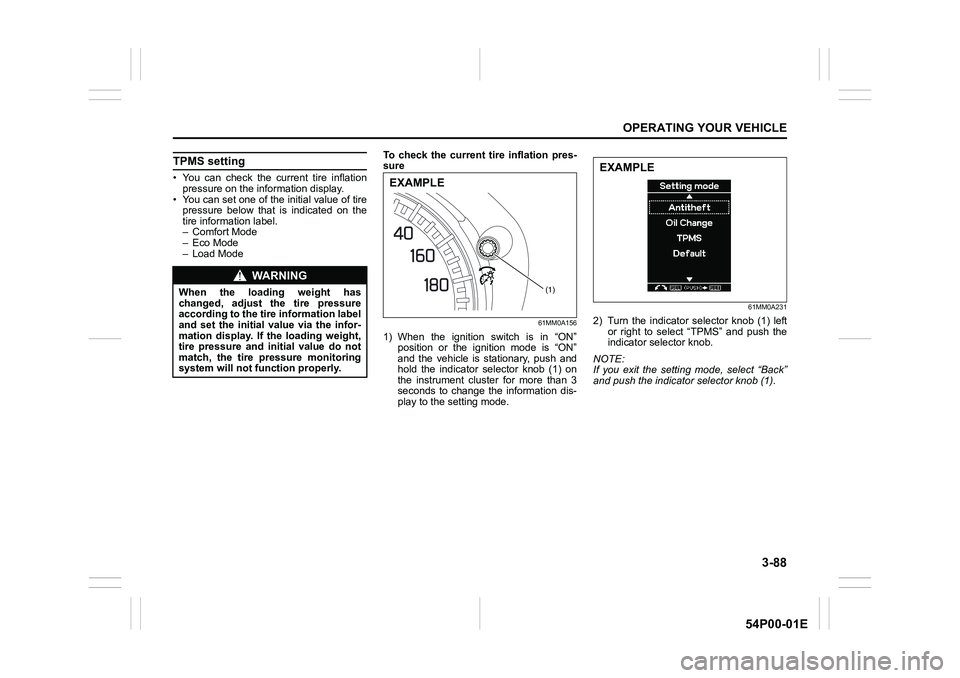
61MM0A156
1) When the ignition switch is in “ON”
position or the ignition mode is “ON”
and the vehicle is stationary, push and
hold the indicator selector knob (1) on
the instrument cluster for more than 3
seconds to change the information dis-
play to the setting mode.
61MM0A231
2) Turn the indicator selector knob (1) left
or right to select “TPMS” and push the
indicator selector knob.
NOTE:
If you exit the setting mode, select “Back”
and push the indicator selector knob (1).
WA R N I N G
When the loading weight has
changed, adjust the tire pressure
according to the tire information label
and set the initial value via the infor-
mation display. If the loading weight,
tire pressure and initial value do not
match, the tire pressure monitoring
system will not function properly.(1)
EXAMPLE
EXAMPLE
Page 229 of 482
3-89
OPERATING YOUR VEHICLE
54P00-01E
61MM0A232
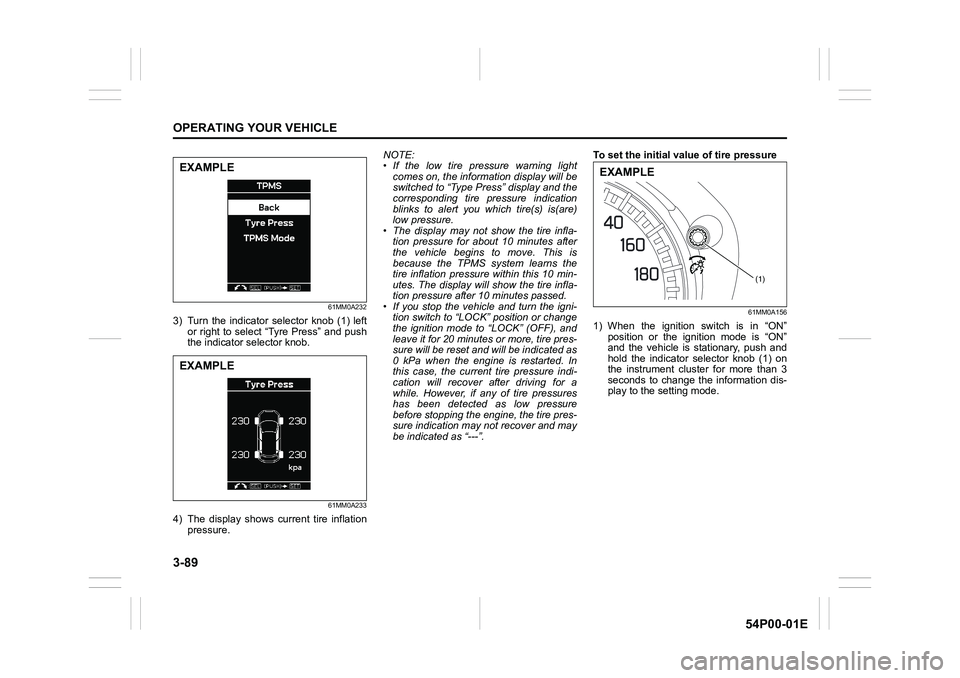
3) Turn the indicator selector knob (1) left
or right to select “Tyre Press” and push
the indicator selector knob.
61MM0A233
4) The display shows current tire inflation
pressure.NOTE:
• If the low tire pressure warning light
comes on, the information display will be
switched to “Type Press” display and the
corresponding tire pressure indication
blinks to alert you which tire(s) is(are)
low pressure.
• The display may not show the tire infla-
tion pressure for about 10 minutes after
the vehicle begins to move. This is
because the TPMS system learns the
tire inflation pressure within this 10 min-
utes. The display will show the tire infla-
tion pressure after 10 minutes passed.
• If you stop the vehicle and turn the igni-
tion switch to “LOCK” position or change
the ignition mode to “LOCK” (OFF), and
leave it for 20 minutes or more, tire pres-
sure will be reset and will be indicated as
0 kPa when the engine is restarted. In
this case, the current tire pressure indi-
cation will recover after driving for a
while. However, if any of tire pressures
has been detected as low pressure
before stopping the engine, the tire pres-
sure indication may not recover and may
be indicated as “---”.To set the initial value of tire pressure
61MM0A156
1) When the ignition switch is in “ON”
position or the ignition mode is “ON”
and the vehicle is stationary, push and
hold the indicator selector knob (1) on
the instrument cluster for more than 3
seconds to change the information dis-
play to the setting mode.
EXAMPLE
EXAMPLE
(1)
EXAMPLE
Page 231 of 482
3-91
OPERATING YOUR VEHICLE
54P00-01E
Replacing tires and/or wheels
If you got a flat tire and replaced it with the
spare tire, SUZUKI recommends that you
have an authorized SUZUKI dealer mount
a new tire on the wheel that had the flat
tire. The TPMS is already set up to recog-
nize the ID code of the original wheel, and
normal TPMS operation will be restored.
If you need to replace any wheels on your
vehicle, your dealer must check that TPMS
sensors are installed in the new wheels
and must set up the TPMS to recognize
the new sensors.
NOTE:
A TPMS sensor is not installed in the spare
tire. You should use the spare tire only in
an emergency situation, and should
replace the spare tire as soon as possible
to restore normal TPMS operation.The tire pressure monitoring system, trans-
mitter model S180052024 and receiver
model 40398036 are in compliance with
the essential requirements and other rele-
vant provisions of Directive 1999/5/EC.
WA R N I N G
Use of tires or wheels not recom-
mended by SUZUKI can result in fail-
ure of the TPMS.
When replacing tires and wheels, use
only tires and wheels recommended
by SUZUKI as standard or optional
equipment for your vehicle. Refer to
“Tires” in “INSPECTION AND MAIN-
TENANCE” section for additional
information.
Page 237 of 482
4-3
DRIVING TIPS
54P00-01E
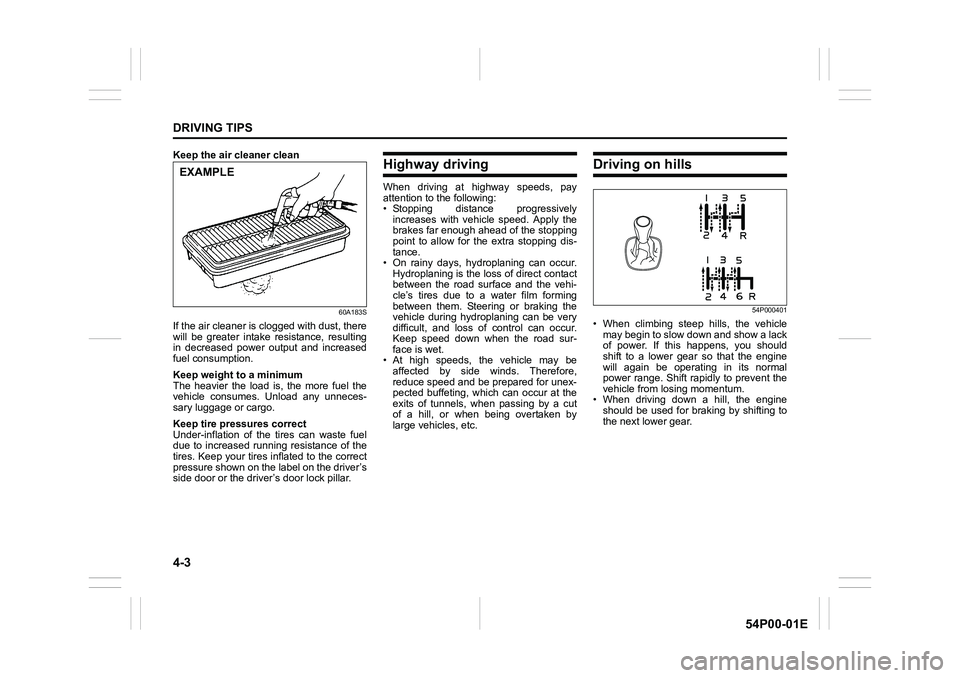
Keep the air cleaner clean
60A183S
If the air cleaner is clogged with dust, there
will be greater intake resistance, resulting
in decreased power output and increased
fuel consumption.
Keep weight to a minimum
The heavier the load is, the more fuel the
vehicle consumes. Unload any unneces-
sary luggage or cargo.
Keep tire pressures correct
Under-inflation of the tires can waste fuel
due to increased running resistance of the
tires. Keep your tires inflated to the correct
pressure shown on the label on the driver’s
side door or the driver’s door lock pillar.
Highway driving
When driving at highway speeds, pay
attention to the following:
• Stopping distance progressively
increases with vehicle speed. Apply the
brakes far enough ahead of the stopping
point to allow for the extra stopping dis-
tance.
• On rainy days, hydroplaning can occur.
Hydroplaning is the loss of direct contact
between the road surface and the vehi-
cle’s tires due to a water film forming
between them. Steering or braking the
vehicle during hydroplaning can be very
difficult, and loss of control can occur.
Keep speed down when the road sur-
face is wet.
• At high speeds, the vehicle may be
affected by side winds. Therefore,
reduce speed and be prepared for unex-
pected buffeting, which can occur at the
exits of tunnels, when passing by a cut
of a hill, or when being overtaken by
large vehicles, etc.
Driving on hills
54P000401
• When climbing steep hills, the vehicle
may begin to slow down and show a lack
of power. If this happens, you should
shift to a lower gear so that the engine
will again be operating in its normal
power range. Shift rapidly to prevent the
vehicle from losing momentum.
• When driving down a hill, the engine
should be used for braking by shifting to
the next lower gear.
EXAMPLE
Page 335 of 482
6-3
VEHICLE LOADING AND TOWING
54P00-01E
Tires
Mirrors
Check if your vehicle’s mirrors meet local
requirements for mirrors used on towing
vehicles. If they do not, you must install the
required mirrors before you tow.
Vehicle/trailer loading
To load your vehicle and trailer properly,
you must know how to measure gross
trailer weight and trailer nose weight.
Gross trailer weight is the weight of the
trailer plus all the cargo in it. You can mea-
sure gross trailer weight by putting the fully
loaded trailer on a vehicle scale.
Nose weight is the downward force
exerted on the tow bar by the trailer cou-pler, with the trailer fully loaded and the
coupler at its normal towing height. This
weight can be measured using a bathroom
scale.
The weight of your loaded trailer (gross
trailer weight) should never exceed towing
capacity.
Distribute cargo in your trailer so that nose
weight is about 10% of gross trailer weight,
but does not exceed the maximum vertical
load on trailer hitch point. You should mea-
sure gross trailer weight and nose weight
before towing to check that your load is
properly distributed.
Additional trailer towing warnings
WA R N I N G
When towing a trailer, it is very
important for your vehicle and trailer
to have properly inflated tires. Your
vehicle’s tires should be inflated to
the pressures listed on your vehicles
tire information label. If laden pres-
sures are listed on the label, the tires
should be inflated to the laden pres-
sures. Inflate trailer tires according to
the specifications provided by the
trailer manufacturer.
WA R N I N G
Improper weight distribution of your
trailer may result in poor vehicle han-
dling and swaying of the trailer.
Always check that trailer nose weight
is about 10% of gross trailer weight,
but does not exceed the maximum
vertical load on trailer hitch point.
Also check that the cargo is properly
secured. Failure to observe this
requirement may result in an acci-
dent.
WA R N I N G
Never overload cargo on your trailer
or your vehicle. Gross trailer weight
must never exceed towing capacity.
Gross vehicle weight (sum of the
weights of the vehicle, all the occu-
pants, accessories including tow
bars and a trailer hitch, cargo and
trailer nose weight) must never
exceed the Gross Vehicle Weight Rat-
ing (GVWR) listed in “SPECIFICA-
TIONS” section.
WA R N I N G
Connect trailer lights and hook up
safety chains every time you tow.
NOTICE
Because towing a trailer puts addi-
tional stress on your vehicle, more
frequent maintenance will be
required than under normal driving
conditions. Follow the schedule in
“Maintenance recommended under
severe driving conditions”.
Page 374 of 482
7-36
INSPECTION AND MAINTENANCE
54P00-01E
Tires
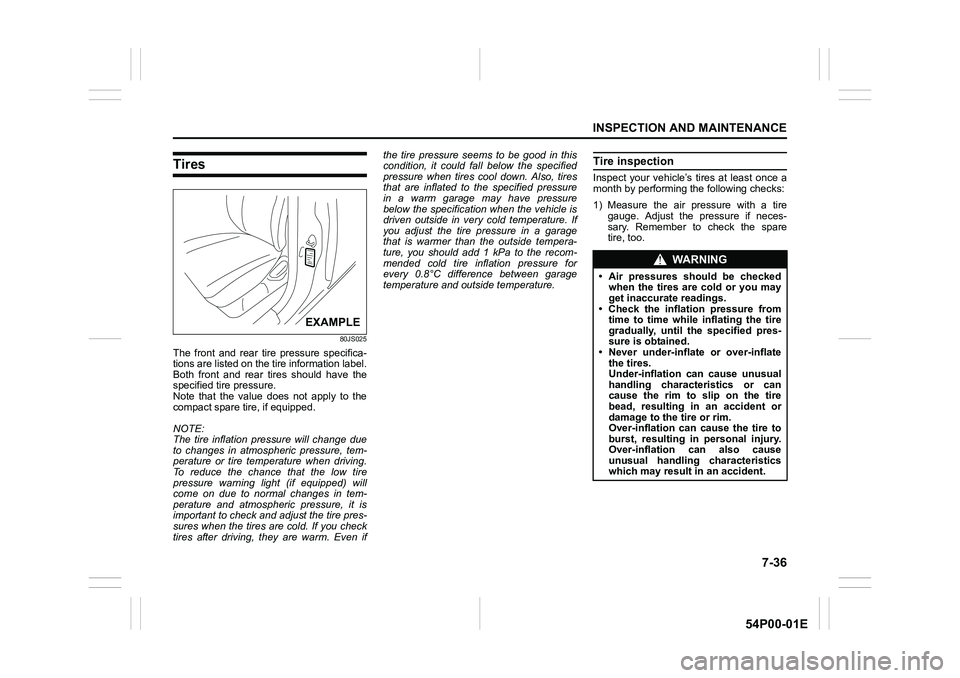
80JS025
The front and rear tire pressure specifica-
tions are listed on the tire information label.
Both front and rear tires should have the
specified tire pressure.
Note that the value does not apply to the
compact spare tire, if equipped.
NOTE:
The tire inflation pressure will change due
to changes in atmospheric pressure, tem-
perature or tire temperature when driving.
To reduce the chance that the low tire
pressure warning light (if equipped) will
come on due to normal changes in tem-
perature and atmospheric pressure, it is
important to check and adjust the tire pres-
sures when the tires are cold. If you check
tires after driving, they are warm. Even ifthe tire pressure seems to be good in this
condition, it could fall below the specified
pressure when tires cool down. Also, tires
that are inflated to the specified pressure
in a warm garage may have pressure
below the specification when the vehicle is
driven outside in very cold temperature. If
you adjust the tire pressure in a garage
that is warmer than the outside tempera-
ture, you should add 1 kPa to the recom-
mended cold tire inflation pressure for
every 0.8°C difference between garage
temperature and outside temperature.
Tire inspection
Inspect your vehicle’s tires at least once a
month by performing the following checks:
1) Measure the air pressure with a tire
gauge. Adjust the pressure if neces-
sary. Remember to check the spare
tire, too.
EXAMPLE
WA R N I N G
• Air pressures should be checked
when the tires are cold or you may
get inaccurate readings.
• Check the inflation pressure from
time to time while inflating the tire
gradually, until the specified pres-
sure is obtained.
• Never under-inflate or over-inflate
the tires.
Under-inflation can cause unusual
handling characteristics or can
cause the rim to slip on the tire
bead, resulting in an accident or
damage to the tire or rim.
Over-inflation can cause the tire to
burst, resulting in personal injury.
Over-inflation can also cause
unusual handling characteristics
which may result in an accident.
Page 376 of 482
7-38
INSPECTION AND MAINTENANCE
54P00-01E
Tire rotation
4-tire rotation
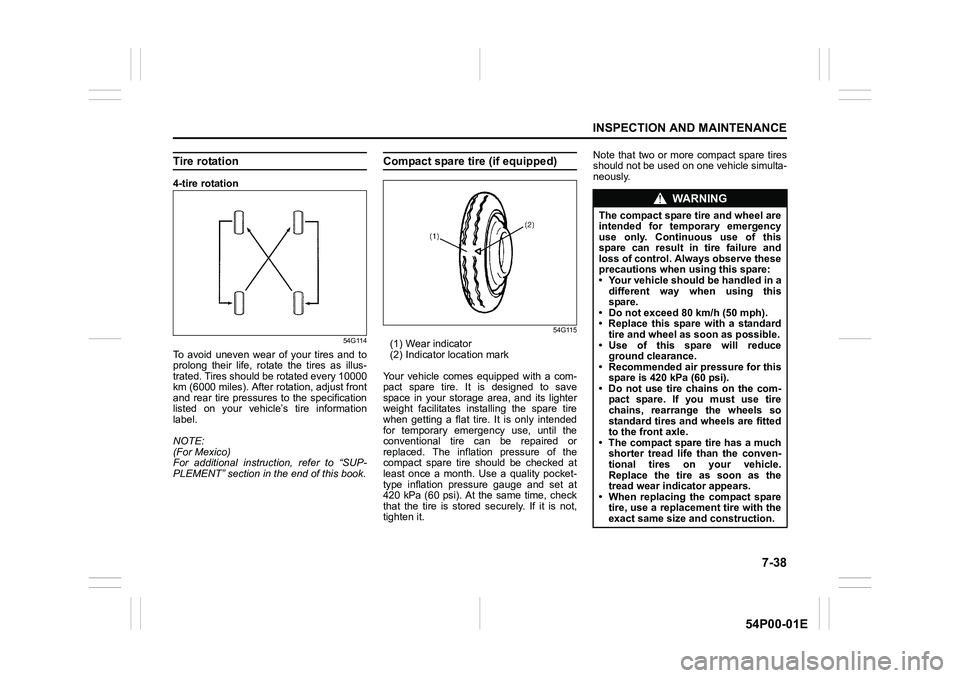
54G114
To avoid uneven wear of your tires and to
prolong their life, rotate the tires as illus-
trated. Tires should be rotated every 10000
km (6000 miles). After rotation, adjust front
and rear tire pressures to the specification
listed on your vehicle’s tire information
label.
NOTE:
(For Mexico)
For additional instruction, refer to “SUP-
PLEMENT” section in the end of this book.
Compact spare tire (if equipped)
54G115
(1) Wear indicator
(2) Indicator location mark
Your vehicle comes equipped with a com-
pact spare tire. It is designed to save
space in your storage area, and its lighter
weight facilitates installing the spare tire
when getting a flat tire. It is only intended
for temporary emergency use, until the
conventional tire can be repaired or
replaced. The inflation pressure of the
compact spare tire should be checked at
least once a month. Use a quality pocket-
type inflation pressure gauge and set at
420 kPa (60 psi). At the same time, check
that the tire is stored securely. If it is not,
tighten it.Note that two or more compact spare tires
should not be used on one vehicle simulta-
neously.
WA R N I N G
The compact spare tire and wheel are
intended for temporary emergency
use only. Continuous use of this
spare can result in tire failure and
loss of control. Always observe these
precautions when using this spare:
• Your vehicle should be handled in a
different way when using this
spare.
• Do not exceed 80 km/h (50 mph).
• Replace this spare with a standard
tire and wheel as soon as possible.
• Use of this spare will reduce
ground clearance.
• Recommended air pressure for this
spare is 420 kPa (60 psi).
• Do not use tire chains on the com-
pact spare. If you must use tire
chains, rearrange the wheels so
standard tires and wheels are fitted
to the front axle.
• The compact spare tire has a much
shorter tread life than the conven-
tional tires on your vehicle.
Replace the tire as soon as the
tread wear indicator appears.
• When replacing the compact spare
tire, use a replacement tire with the
exact same size and construction.