oil change SUZUKI GRAND VITARA 2021 User Guide
[x] Cancel search | Manufacturer: SUZUKI, Model Year: 2021, Model line: GRAND VITARA, Model: SUZUKI GRAND VITARA 2021Pages: 482, PDF Size: 21 MB
Page 158 of 482
3-18
OPERATING YOUR VEHICLE
54P00-01E
Diesel particulate filter (DPF®) (For diesel engine model)
The DPF® filters off the soot particles in
the exhaust gas, so the DPF® could get
clogged depending on the driving condi-
tion. The DPF
® is cleaned by the regener-
ating function that combusts the soot
particles in the DPF
® by raising the
exhaust gas temperature during driving or
idling.
When a certain amount of soot particles is
accumulated in the DPF
®, the DPF® will
regenerate automatically to avoid clogging
the filter. When the DPF
® regenerates
during idling, the engine revolutions will
increase by about 100 rpm and the radia-
tor fan will operate. Therefore, you may
hear a little louder engine sounds (includ-
ing the fan sounds) and/or the exhaust gas
temperature could be higher due to com-
bustion of the soot particles.
NOTE:
When you drive or idle your vehicle, white
smoke may be emitted depending on the
grade of fuel used.This is due to automatic regeneration of
particle filter. It does not affect the way the
vehicle runs.
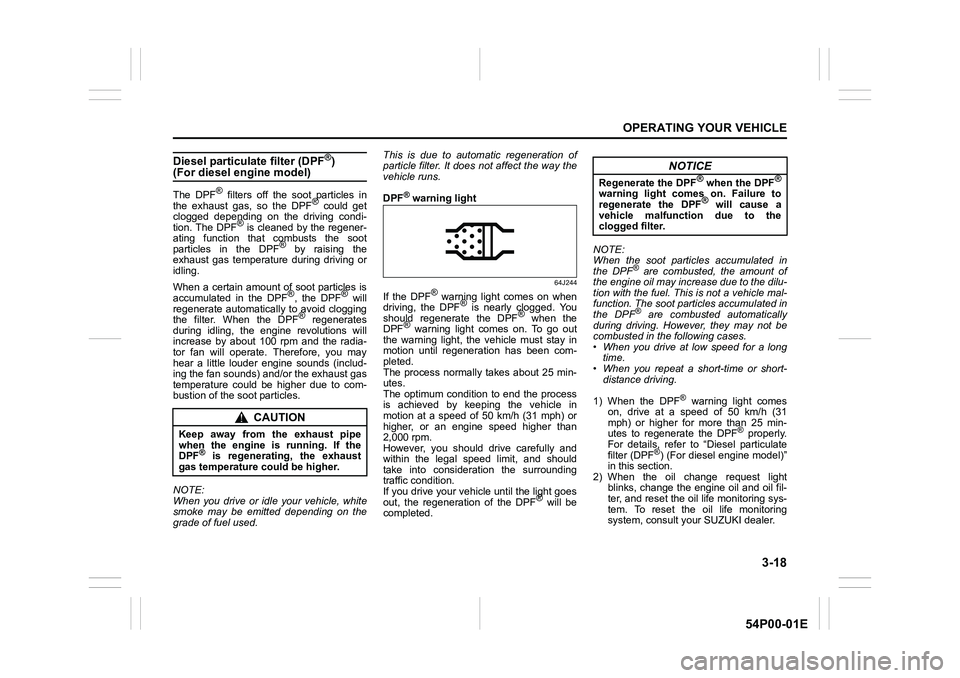
DPF
® warning light
64J244
If the DPF® warning light comes on when
driving, the DPF® is nearly clogged. You
should regenerate the DPF® when the
DPF® warning light comes on. To go out
the warning light, the vehicle must stay in
motion until regeneration has been com-
pleted.
The process normally takes about 25 min-
utes.
The optimum condition to end the process
is achieved by keeping the vehicle in
motion at a speed of 50 km/h (31 mph) or
higher, or an engine speed higher than
2,000 rpm.
However, you should drive carefully and
within the legal speed limit, and should
take into consideration the surrounding
traffic condition.
If you drive your vehicle until the light goes
out, the regeneration of the DPF
® will be
completed.NOTE:
When the soot particles accumulated in
the DPF
® are combusted, the amount of
the engine oil may increase due to the dilu-
tion with the fuel. This is not a vehicle mal-
function. The soot particles accumulated in
the DPF
® are combusted automatically
during driving. However, they may not be
combusted in the following cases.
• When you drive at low speed for a long
time.
• When you repeat a short-time or short-
distance driving.
1) When the DPF
® warning light comes
on, drive at a speed of 50 km/h (31
mph) or higher for more than 25 min-
utes to regenerate the DPF
® properly.
For details, refer to “Diesel particulate
filter (DPF
®) (For diesel engine model)”
in this section.
2) When the oil change request light
blinks, change the engine oil and oil fil-
ter, and reset the oil life monitoring sys-
tem. To reset the oil life monitoring
system, consult your SUZUKI dealer.
CAUTION
Keep away from the exhaust pipe
when the engine is running. If the
DPF
® is regenerating, the exhaust
gas temperature could be higher.
NOTICE
Regenerate the DPF® when the DPF®
warning light comes on. Failure to
regenerate the DPF® will cause a
vehicle malfunction due to the
clogged filter.
Page 159 of 482
3-19
OPERATING YOUR VEHICLE
54P00-01E
3) When the engine oil level exceeds the
MAX level on the dipstick, consult your
SUZUKI dealer.Using transaxle
Manual transaxle
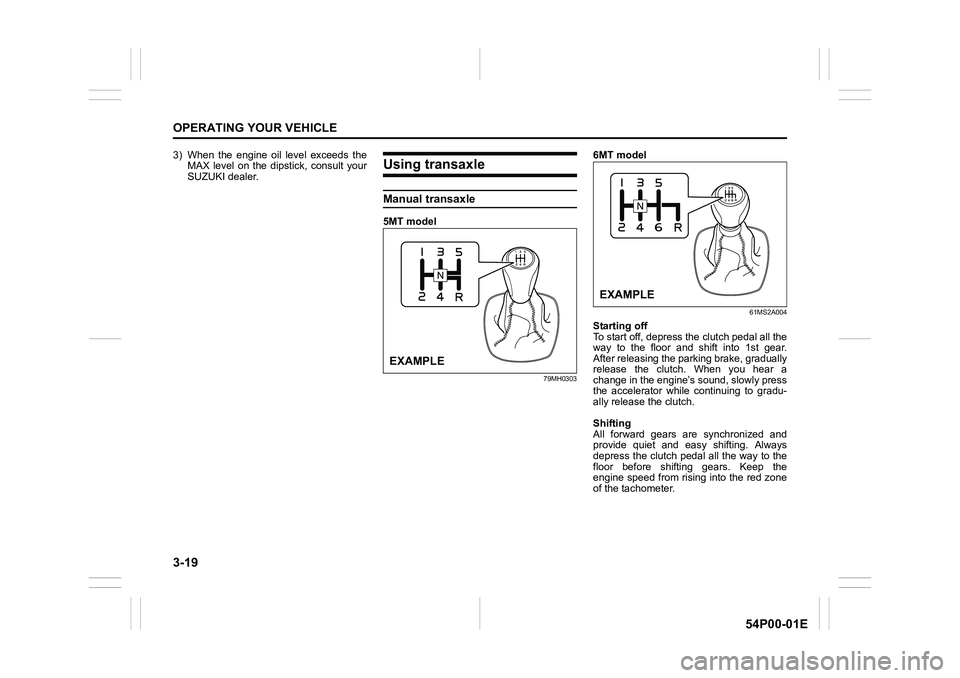
5MT model
79MH0303
6MT model
61MS2A004
Starting off
To start off, depress the clutch pedal all the
way to the floor and shift into 1st gear.
After releasing the parking brake, gradually
release the clutch. When you hear a
change in the engine’s sound, slowly press
the accelerator while continuing to gradu-
ally release the clutch.
Shifting
All forward gears are synchronized and
provide quiet and easy shifting. Always
depress the clutch pedal all the way to the
floor before shifting gears. Keep the
engine speed from rising into the red zone
of the tachometer.
EXAMPLE
EXAMPLE
Page 164 of 482
3-24
OPERATING YOUR VEHICLE
54P00-01E
the other hand, the driving mode does not
return to the LOCK mode automatically. You
should select the LOCK mode according to
the driving conditions.
NOTE:
• The information display shows current
driving mode.
• When the ignition switch is turned to
“ON” position or the engine switch is
pressed to change the ignition mode to
“ON”, the AUTO mode is selected auto-
matically.
• The driving mode switch can be oper-
ated when the vehicle is either stopped
or moving.
• Check that the front wheels are in the
straight ahead position when operating
the driving mode switch.
• While making turns or accelerating and
decelerating, operating the driving mode
switch, turning the ignition switch to
“ACC” or “LOCK” position or pressing
the engine switch to change the ignition
mode to “ACC” or “LOCK” may cause a
shock, but this is not a system malfunc-
tion.
• When you operate your vehicle under
conditions that involve wheel spin, such
as driving off-road in the sand or water
or when a wheel has run off the road, the
difference in the amount of revolution
between front wheels and rear wheels
increases (wheels run idle). If this state
continues, the oil temperature of the
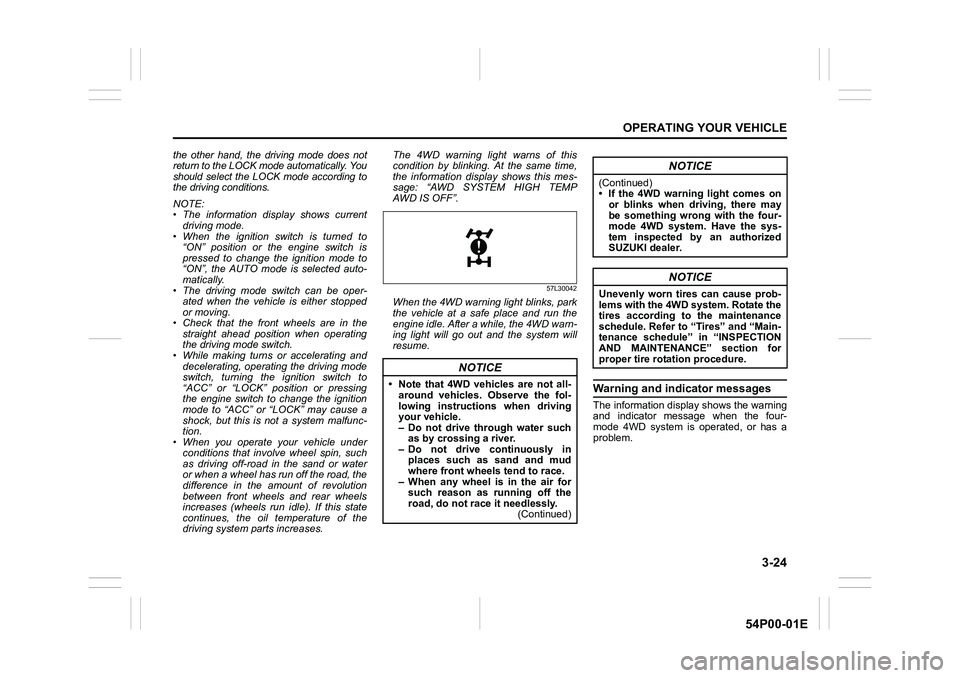
driving system parts increases. The 4WD warning light warns of this
condition by blinking. At the same time,
the information display shows this mes-
sage: “AWD SYSTEM HIGH TEMP
AWD IS OFF”.
57L30042
When the 4WD warning light blinks, park
the vehicle at a safe place and run the
engine idle. After a while, the 4WD warn-
ing light will go out and the system will
resume.
Warning and indicator messages
The information display shows the warning
and indicator message when the four-
mode 4WD system is operated, or has a
problem.
NOTICE
• Note that 4WD vehicles are not all-
around vehicles. Observe the fol-
lowing instructions when driving
your vehicle.
– Do not drive through water such
as by crossing a river.
– Do not drive continuously in
places such as sand and mud
where front wheels tend to race.
– When any wheel is in the air for
such reason as running off the
road, do not race it needlessly.
(Continued)
NOTICE
(Continued)
• If the 4WD warning light comes on
or blinks when driving, there may
be something wrong with the four-
mode 4WD system. Have the sys-
tem inspected by an authorized
SUZUKI dealer.
NOTICE
Unevenly worn tires can cause prob-
lems with the 4WD system. Rotate the
tires according to the maintenance
schedule. Refer to “Tires” and “Main-
tenance schedule” in “INSPECTION
AND MAINTENANCE” section for
proper tire rotation procedure.
Page 342 of 482
7-4
INSPECTION AND MAINTENANCE
54P00-01E
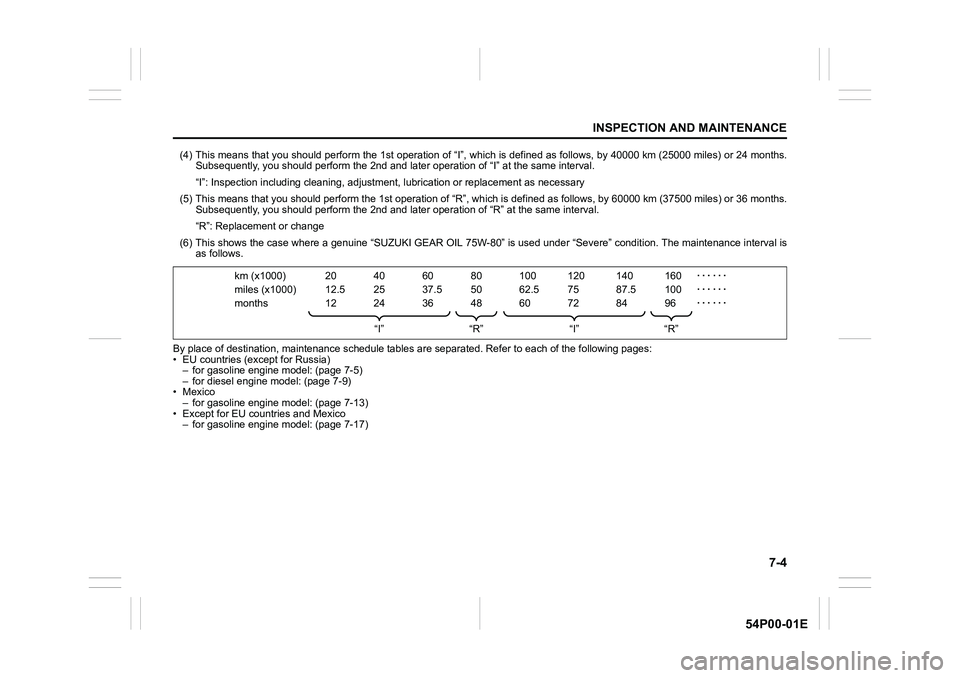
(4) This means that you should perform the 1st operation of “I”, which is defined as follows, by 40000 km (25000 miles) or 24 months.
Subsequently, you should perform the 2nd and later operation of “I” at the same interval.
“I”: Inspection including cleaning, adjustment, lubrication or replacement as necessary
(5) This means that you should perform the 1st operation of “R”, which is defined as follows, by 60000 km (37500 miles) or 36 months.
Subsequently, you should perform the 2nd and later operation of “R” at the same interval.
“R”: Replacement or change
(6) This shows the case where a genuine “SUZUKI GEAR OIL 75W-80” is used under “Severe” condition. The maintenance interval is
as follows.
By place of destination, maintenance schedule tables are separated. Refer to each of the following pages:
• EU countries (except for Russia)
– for gasoline engine model: (page 7-5)
– for diesel engine model: (page 7-9)
•Mexico
– for gasoline engine model: (page 7-13)
• Except for EU countries and Mexico
– for gasoline engine model: (page 7-17)
km (x1000)
miles (x1000)
months20
12.5
1240
25
2460
37.5
3680
50
48100
62.5
60120
75
72140
87.5
84160
100
96
“I” “R” “I” “R”
Page 345 of 482
7-7
INSPECTION AND MAINTENANCE
54P00-01E
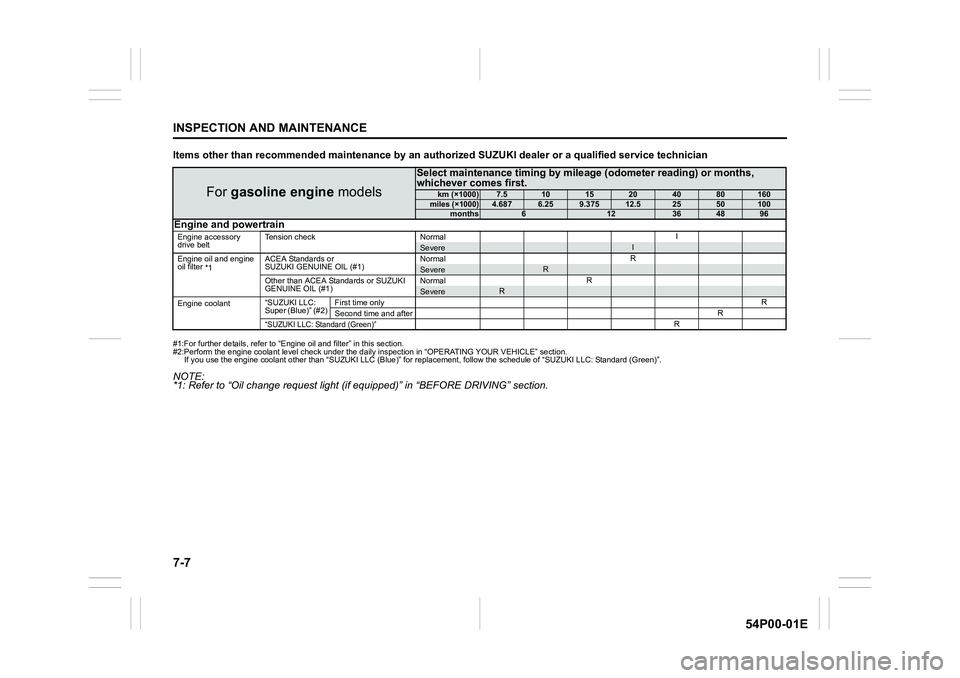
Items other than recommended maintenance by an authorized SUZUKI dealer or a qualified service technician
#1:For further details, refer to “Engine oil and filter” in this section.
#2:Perform the engine coolant level check under the daily inspection in “OPERATING YOUR VEHICLE” section.
If you use the engine coolant other than “SUZUKI LLC (Blue)” for replacement, follow the schedule of “SUZUKI LLC: Standard (Green)”.
NOTE:
*1: Refer to “Oil change request light (if equipped)” in “BEFORE DRIVING” section.
For gasoline engine models
Select maintenance timing by mileage (odometer reading) or months,
whichever comes first.
km (×1000)7.51015204080160miles (×1000)4.6876.259.37512.52550100months612364896Engine and powertrain
Engine accessory
drive beltTension check NormalISevereI
Engine oil and engine
oil filter
*1ACEA Standards or
SUZUKI GENUINE OIL (#1)NormalRSevereR
Other than ACEA Standards or SUZUKI
GENUINE OIL (#1)NormalRSevereR
Engine coolant“SUZUKI LLC:
Super (Blue)” (#2) First time only R
Second time and afterR
“SUZUKI LLC: Standard (Green)”R
Page 349 of 482
7-11
INSPECTION AND MAINTENANCE
54P00-01E
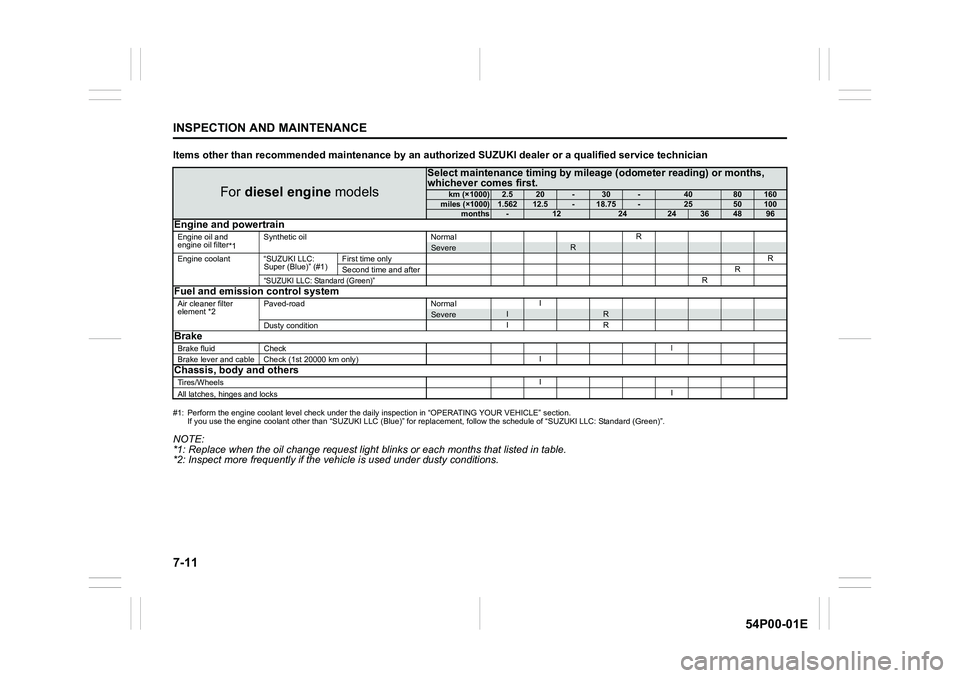
Items other than recommended maintenance by an authorized SUZUKI dealer or a qualified service technician
#1: Perform the engine coolant level check under the daily inspection in “OPERATING YOUR VEHICLE” section.
If you use the engine coolant other than “SUZUKI LLC (Blue)” for replacement, follow the schedule of “SUZUKI LLC: Standard (Green)”.
NOTE:
*1: Replace when the oil change request light blinks or each months that listed in table.
*2: Inspect more frequently if the vehicle is used under dusty conditions.
For diesel engine models
Select maintenance timing by mileage (odometer reading) or months,
whichever comes first.
km (×1000)2.520-30-4080160miles (×1000)1.56212.5-18.75-2550100months-122424364896Engine and powertrain
Engine oil and
engine oil filter
*1Synthetic oil NormalRSevereR
Engine coolant “SUZUKI LLC:
Super (Blue)” (#1)First time onlyR
Second time and afterR
“SUZUKI LLC: Standard (Green)”R
Fuel and emission control system
Air cleaner filter
element *2Paved-road NormalISevereIR
Dusty conditionIRBrake
Brake fluid CheckI
Brake lever and cable Check (1st 20000 km only)IChassis, body and others
Tires/WheelsI
All latches, hinges and locksI
Page 360 of 482
7-22
INSPECTION AND MAINTENANCE
54P00-01E
Pull out the oil dipstick, wipe oil off with a
clean cloth, insert the dipstick all the way
into the engine, and then remove it again.
The oil on the stick should be between the
upper and lower limits shown on the stick.
If the oil level indication is near the lower
limit, add enough oil to raise the level to
the upper limit.NOTE:
When the soot particles accumulated in
the DPF
® are combusted, the amount of
the engine oil may increase due to the dilu-
tion with the fuel. This is not a vehicle mal-
function. The soot particles accumulated in
the DPF
® are combusted automatically
during driving. However, they may not be
combusted in the following cases.
• When you drive at low speed for a long
time
• When you repeat a short-time or short-
distance driving
1) When the DPF
® warning light comes
on, drive at a speed of 50 km/h (31
mph) or higher for more than 25 min-
utes to regenerate the DPF
® properly.
For details, refer to “Diesel particulate
filter (DPF
®)” in “OPERATING YOUR
VEHICLE” section.
2) When the oil change request light
blinks, change the engine oil and oil fil-
ter, and reset the oil life monitoring sys-
tem. To reset the oil life monitoring
system, consult your SUZUKI dealer.
3) When the engine oil level exceeds the
MAX level on the dipstick, consult your
SUZUKI dealer.
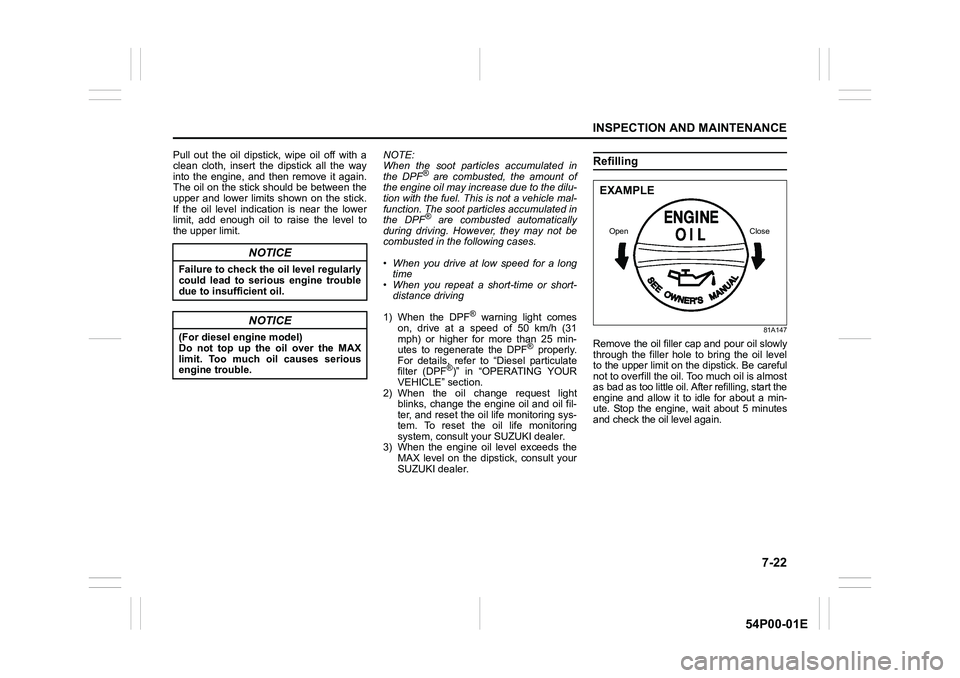
Refilling
81A147
Remove the oil filler cap and pour oil slowly
through the filler hole to bring the oil level
to the upper limit on the dipstick. Be careful
not to overfill the oil. Too much oil is almost
as bad as too little oil. After refilling, start the
engine and allow it to idle for about a min-
ute. Stop the engine, wait about 5 minutes
and check the oil level again.
NOTICE
Failure to check the oil level regularly
could lead to serious engine trouble
due to insufficient oil.
NOTICE
(For diesel engine model)
Do not top up the oil over the MAX
limit. Too much oil causes serious
engine trouble.
EXAMPLE
Open Close
Page 362 of 482
7-24
INSPECTION AND MAINTENANCE
54P00-01E
5) Reinstall the drain plug and gasket.
Tighten the plug with a wrench to the
specified torque.
NOTE:
• Whenever the engine oil is changed, the
oil life monitoring must be reset to moni-
tor the next oil change timing properly.
To reset the light, consult your SUZUKI
dealer. If you reset it by yourself, refer to
“Setting mode” in “BEFORE DRIVING”
section (for gasoline engine model).
• For more information of the oil change
request light and oil life monitoring, refer
to “Oil change request light (if equipped)”
and “Information display” in “BEFORE
DRIVING” section.
Oil filter replacement
NOTE:
(For diesel engine model)
Since special procedures and tools are
required, ask your authorized SUZUKI
dealer for this job.
1) Using an oil filter wrench, turn the oil fil-
ter counterclockwise and remove it.
2) Using a clean rag, wipe off the mount-
ing surface on the engine where the
new filter will be seated.
3) Smear a small amount of engine oil
around the rubber gasket of the new oil
filter.
4) Screw the new filter by hand until the fil-
ter gasket contacts the mounting sur-
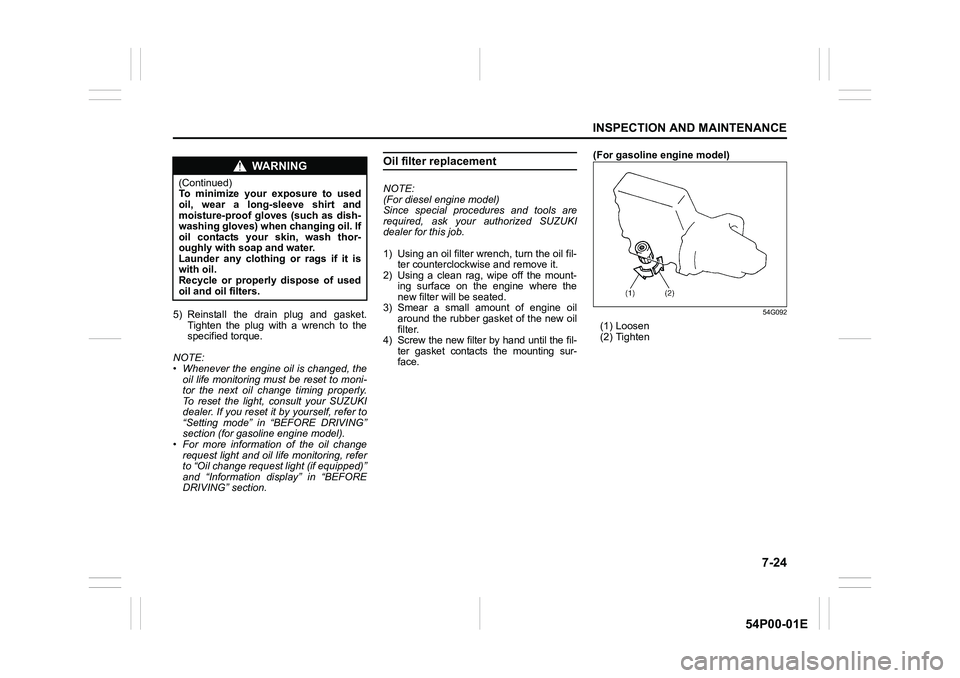
face.(For gasoline engine model)
54G092
(1) Loosen
(2) Tighten
WA R N I N G
(Continued)
To minimize your exposure to used
oil, wear a long-sleeve shirt and
moisture-proof gloves (such as dish-
washing gloves) when changing oil. If
oil contacts your skin, wash thor-
oughly with soap and water.
Launder any clothing or rags if it is
with oil.
Recycle or properly dispose of used
oil and oil filters.
Page 370 of 482
7-32
INSPECTION AND MAINTENANCE
54P00-01E
To check the gear oil level, use the fol-
lowing procedure:
1) Park the vehicle on a level surface with
the parking brake applied. Then, stop
the engine.
2) Remove the oil filler and level plug.
For the manual transaxle;
3) If gear oil flows from the plug hole, the
oil level is correct. Reinstall the plug. If
gear oil does not flow from the plug
hole, add oil through the filler plug hole
until oil flows a little from the plug hole.
For the transfer and rear differential;
3) Check the inside of the hole with your
finger. If the oil level comes up to the
bottom of the plug hole, the oil level is
correct. If so, reinstall the plug.
4) If the oil level is low, add gear oil
through the oil filler and level plug hole
until the oil level reaches the bottom of
the filler hole, and then reinstall the
plug.
Tightening torque for oil filler and level
plug
Manual transaxle (1) or (2):
21 Nm (2.1 kg-m, 15.5 lb-ft)
Transfer (3) / Rear differential (4):
23 Nm (2.3 kg-m, 17.0 lb-ft)
Gear oil change
Since special procedures, materials and
tools are required, ask your authorized
SUZUKI dealer for this job.
Clutch pedal
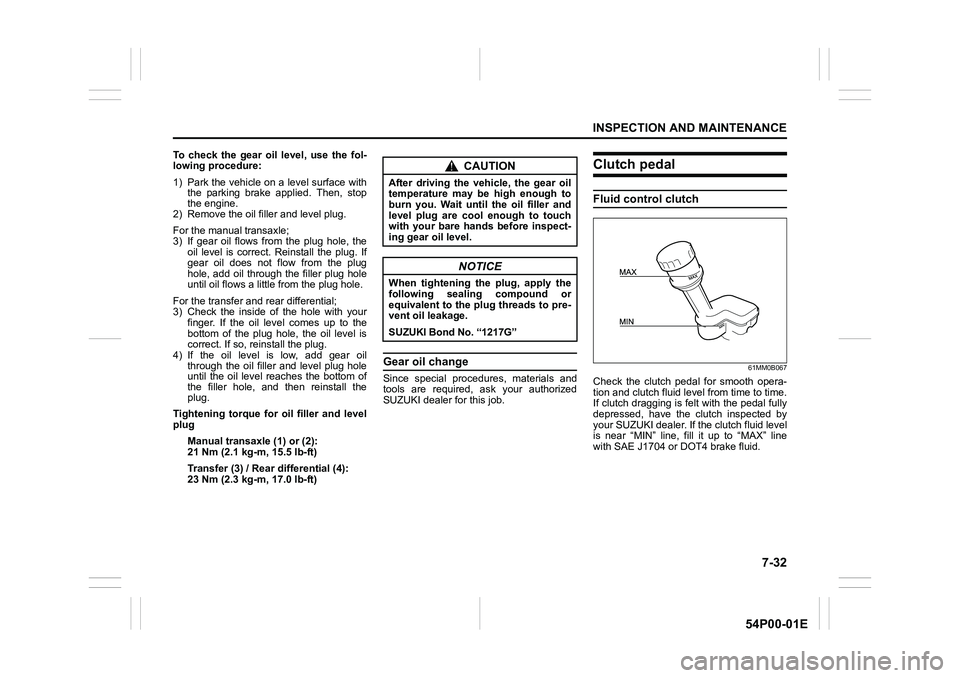
Fluid control clutch
61MM0B067
Check the clutch pedal for smooth opera-
tion and clutch fluid level from time to time.
If clutch dragging is felt with the pedal fully
depressed, have the clutch inspected by
your SUZUKI dealer. If the clutch fluid level
is near “MIN” line, fill it up to “MAX” line
with SAE J1704 or DOT4 brake fluid.
CAUTION
After driving the vehicle, the gear oil
temperature may be high enough to
burn you. Wait until the oil filler and
level plug are cool enough to touch
with your bare hands before inspect-
ing gear oil level.
NOTICE
When tightening the plug, apply the
following sealing compound or
equivalent to the plug threads to pre-
vent oil leakage.
SUZUKI Bond No. “1217G”
Page 404 of 482
8-4
EMERGENCY SERVICE
54P00-01E
NOTE:
For more details, contact an authorized
SUZUKI dealer.
Changing wheels
To change a wheel, use the following pro-
cedure:
1) Remove the jack, tools and spare
wheel from the vehicle.
2) Loosen, but do not remove the wheel
bolts.
3) Jack up the vehicle (follow the jacking
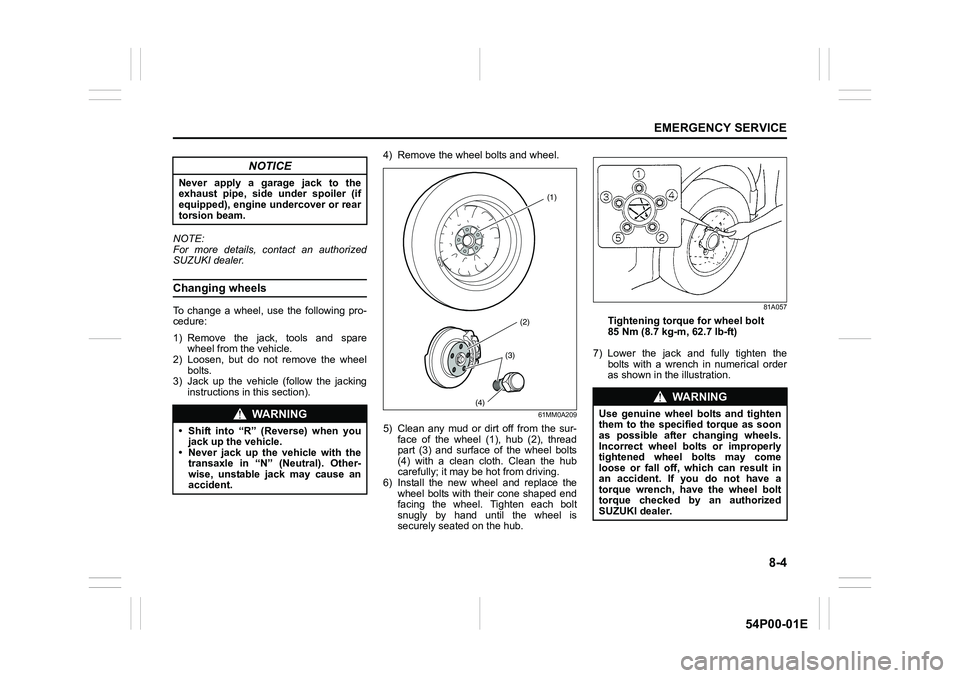
instructions in this section).4) Remove the wheel bolts and wheel.
61MM0A209
5) Clean any mud or dirt off from the sur-
face of the wheel (1), hub (2), thread
part (3) and surface of the wheel bolts
(4) with a clean cloth. Clean the hub
carefully; it may be hot from driving.
6) Install the new wheel and replace the
wheel bolts with their cone shaped end
facing the wheel. Tighten each bolt
snugly by hand until the wheel is
securely seated on the hub.
81A057
Tightening torque for wheel bolt
85 Nm (8.7 kg-m, 62.7 lb-ft)
7) Lower the jack and fully tighten the
bolts with a wrench in numerical order
as shown in the illustration.
NOTICE
Never apply a garage jack to the
exhaust pipe, side under spoiler (if
equipped), engine undercover or rear
torsion beam.
WA R N I N G
• Shift into “R” (Reverse) when you
jack up the vehicle.
• Never jack up the vehicle with the
transaxle in “N” (Neutral). Other-
wise, unstable jack may cause an
accident.
(2)
(4)
(1)
(3)
WA R N I N G
Use genuine wheel bolts and tighten
them to the specified torque as soon
as possible after changing wheels.
Incorrect wheel bolts or improperly
tightened wheel bolts may come
loose or fall off, which can result in
an accident. If you do not have a
torque wrench, have the wheel bolt
torque checked by an authorized
SUZUKI dealer.