battery specification SUZUKI IGNIS 2017 Owners Manual
[x] Cancel search | Manufacturer: SUZUKI, Model Year: 2017, Model line: IGNIS, Model: SUZUKI IGNIS 2017Pages: 505, PDF Size: 8.36 MB
Page 39 of 505
2-16
BEFORE DRIVING
75RM4-01E
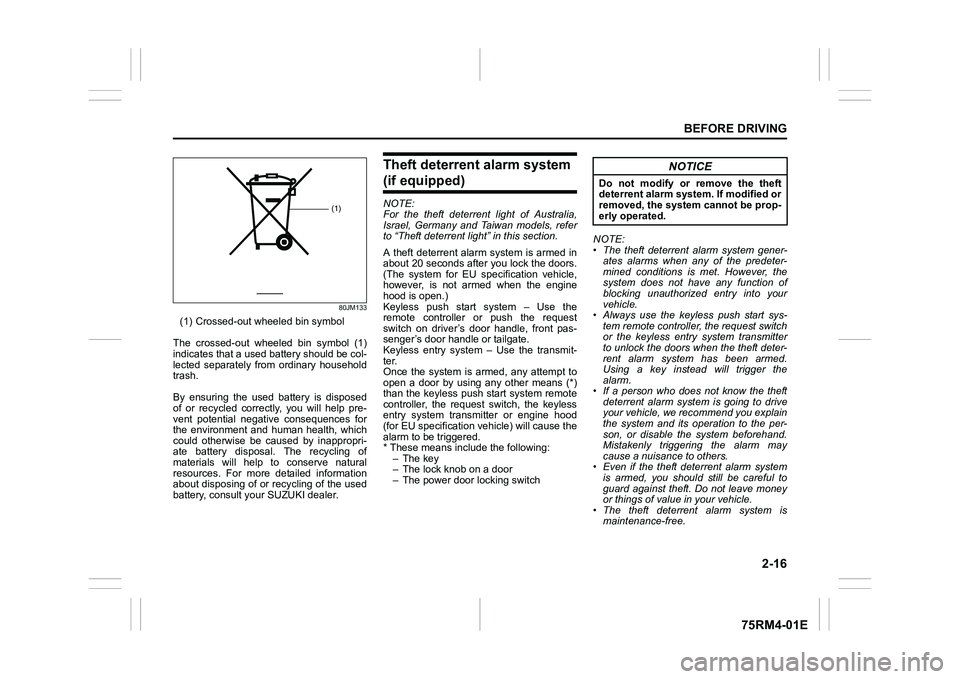
80JM133
(1) Crossed-out wheeled bin symbol
The crossed-out wheeled bin symbol (1)
indicates that a used battery should be col-
lected separately from ordinary household
trash.
By ensuring the used battery is disposed
of or recycled correctly, you will help pre-
vent potential negative consequences for
the environment and human health, which
could otherwise be caused by inappropri-
ate battery disposal. The recycling of
materials will help to conserve natural
resources. For more detailed information
about disposing of or recycling of the used
battery, consult your SUZUKI dealer.
Theft deterrent alarm system (if equipped)NOTE:
For the theft deterrent light of Australia,
Israel, Germany and Taiwan models, refer
to “Theft deterrent light” in this section.
A theft deterrent alarm system is armed in
about 20 seconds after you lock the doors.
(The system for EU spec ification vehicle,
however, is not armed when the engine
hood is open.)
Keyless push start system – Use the
remote controller or push the request
switch on driver’s door handle, front pas-
senger’s door handle or tailgate.
Keyless entry system – Use the transmit-
ter.
Once the system is armed, any attempt to
open a door by using any other means (*)
than the keyless push start system remote
controller, the request switch, the keyless
entry system transmitter or engine hood
(for EU specification vehicle) will cause the
alarm to be triggered.
* These means include the following:
–The key
– The lock knob on a door
– The power door locking switch NOTE:
• The theft deterrent alarm system gener-
ates alarms when any of the predeter-
mined conditions is met. However, the
system does not have any function of
blocking unauthorized entry into your
vehicle.
• Always use the keyless push start sys-
tem remote controller, the request switch
or the keyless entry system transmitter
to unlock the doors when the theft deter-
rent alarm system has been armed.
Using a key instead will trigger the
alarm.
• If a person who does not know the theft deterrent alarm system is going to drive
your vehicle, we recommend you explain
the system and its operation to the per-
son, or disable the system beforehand.
Mistakenly triggering the alarm may
cause a nuisance to others.
• Even if the theft deterrent alarm system is armed, you should still be careful to
guard against theft. Do not leave money
or things of value in your vehicle.
• The theft deterrent alarm system is
maintenance-free.
(1)
NOTICE
Do not modify or remove the theft
deterrent alarm system. If modified or
removed, the system cannot be prop-
erly operated.
Page 40 of 505

2-17BEFORE DRIVING
75RM4-01E
How to arm the theft deterrent alarm
system (when enabled)
Lock all doors (including the tailgate) using
the keyless push start system remote con-
troller, the request switch or the keyless
entry system transmitter. The theft deter-
rent light (1) will start blinking, and the theft
deterrent alarm system will be armed in
about 20 seconds.
While the system is be ing armed, the indi-
cator continues to blink at intervals of
approximately 2 seconds.
75RM313
NOTE:
• To prevent the alarm from being acci- dentally triggered, avoid arming it while
anyone remains inside the vehicle. The
alarm will be triggered if any person
inside unlocks a door or engine hood (for
EU specification vehicle) by operating
the lock knob or power door locking
switch.
• The theft deterrent alarm system is not armed when all doors are locked using
the key from outside, or using the door
lock knobs or the power door locking
switch from inside.
• If any door is not operated within approx-
imately 30 seconds after the doors have
been unlocked using the keyless push
start system remote controller, the
request switch or the keyless entry sys-
tem transmitter, the doors are automati-
cally locked again. After the doors are
locked, the theft de terrent alarm system
will be armed in about 20 seconds if the
system is in the enabled state.
How to disarm the theft deterrent alarm
system
Simply unlock the doors using the keyless
push start system rem ote controller, the
request switch or the keyless entry system
transmitter. The theft deterrent light will go
out, indicating that t he theft deterrent alarm
system is disarmed. How to stop
the alarm
Should the alarm be triggered accidentally,
unlock the doors using the keyless push
start system remote c ontroller, the request
switch or the keyless entry system trans-
mitter, or press the engine switch to
change the ignition mode to ON or turn the
ignition switch to “ON” position. The alarm
will then stop.
NOTE:
• Even after the alarm has stopped, if you
lock the doors using the keyless push
start system remote controller, the
request switch or the keyless entry sys-
tem transmitter, the theft deterrent alarm
system will be rearmed with a delay of
about 20 seconds.
• If you disconnect the lead-acid battery while the theft deterrent alarm system is
in the armed condition or the alarm is
actually in operation, the alarm will be
triggered or re-triggered when the bat-
tery is then reconnected, although, in the
latter case, the alarm remains stopped
for the period between disconnection
and reconnection of the lead-acid bat-
tery.
• Even after the alarm has stopped at the
end of the predetermined operation time,
it will be triggered again if any door or
engine hood (for EU specification vehi-
cle) is opened without disarming the
theft deterrent alarm system.
(1)
EXAMPLE
Page 98 of 505
2-75BEFORE DRIVING
75RM4-01E
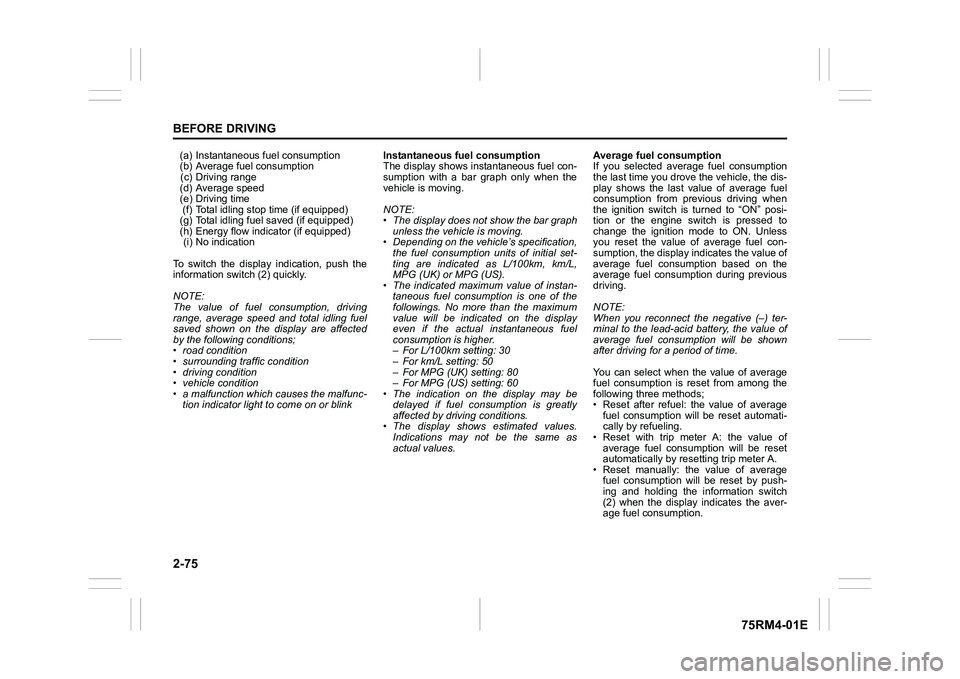
(a) Instantaneous fuel consumption
(b) Average fuel consumption(c) Driving range
(d) Average speed
(e) Driving time (f) Total idling stop time (if equipped)
(g) Total idling fuel saved (if equipped)
(h) Energy flow indicator (if equipped) (i) No indication
To switch the display indication, push the
information switch (2) quickly.
NOTE:
The value of fuel consumption, driving
range, average speed and total idling fuel
saved shown on the display are affected
by the following conditions;
• road condition
• surrounding traffic condition
• driving condition
• vehicle condition
• a malfunction which causes the malfunc- tion indicator light to come on or blink Instantaneous fuel consumption
The display shows instantaneous fuel con-
sumption with a bar graph only when the
vehicle is moving.
NOTE:
• The display does not show the bar graph
unless the vehicle is moving.
• Depending on the vehicle’s specification,
the fuel consumption units of initial set-
ting are indicated as L/100km, km/L,
MPG (UK) or MPG (US).
• The indicated maximum value of instan- taneous fuel consumption is one of the
followings. No more than the maximum
value will be indicated on the display
even if the actual instantaneous fuel
consumption is higher.
– For L/100km setting: 30
– For km/L setting: 50
– For MPG (UK) setting: 80
– For MPG (US) setting: 60
• The indication on the display may be
delayed if fuel consumption is greatly
affected by driving conditions.
• The display shows estimated values.
Indications may not be the same as
actual values. Average fuel consumption
If you selected average fuel consumption
the last time you drove
the vehicle, the dis-
play shows the last value of average fuel
consumption from previous driving when
the ignition switch is turned to “ON” posi-
tion or the engine switch is pressed to
change the ignition mode to ON. Unless
you reset the value of average fuel con-
sumption, the display indicates the value of
average fuel consumption based on the
average fuel consumption during previous
driving.
NOTE:
When you reconnect the negative (–) ter-
minal to the lead-acid battery, the value of
average fuel consumption will be shown
after driving for a period of time.
You can select when the value of average
fuel consumption is reset from among the
following three methods;
• Reset after refuel: the value of average fuel consumption will be reset automati-
cally by refueling.
• Reset with trip meter A: the value of average fuel consumption will be reset
automatically by resetting trip meter A.
• Reset manually: the value of average fuel consumption will be reset by push-
ing and holding the information switch
(2) when the display indicates the aver-
age fuel consumption.
Page 118 of 505
2-95BEFORE DRIVING
75RM4-01E
Trip meter
The trip meter can be used to measure the
distance traveled on short trips or between
fuel stops.
You can use the trip meter A or trip meter B
independently.
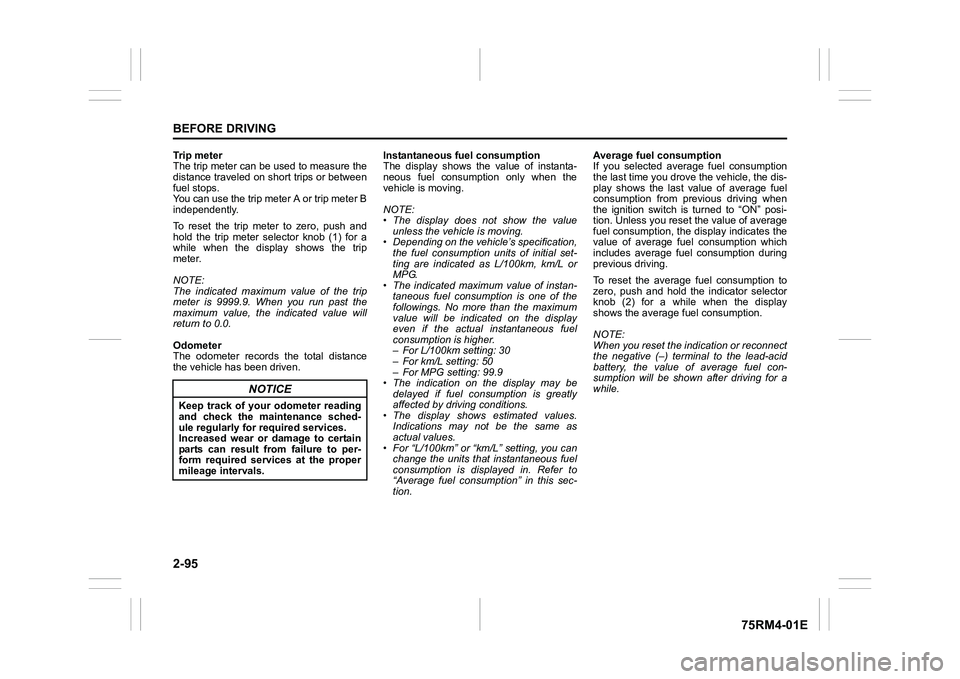
To reset the trip meter to zero, push and
hold the trip meter selector knob (1) for a
while when the display shows the trip
meter.
NOTE:
The indicated maximum value of the trip
meter is 9999.9. When you run past the
maximum value, the indicated value will
return to 0.0.
Odometer
The odometer records the total distance
the vehicle has been driven. Instantaneous fuel consumption
The display shows the value of instanta-
neous fuel consumption only when the
vehicle is moving.
NOTE:
• The display does not show the value
unless the vehicle is moving.
• Depending on the vehicle’s specification,
the fuel consumption units of initial set-
ting are indicated as L/100km, km/L or
MPG.
• The indicated maximum value of instan- taneous fuel consumption is one of the
followings. No more than the maximum
value will be indicated on the display
even if the actual instantaneous fuel
consumption is higher.
– For L/100km setting: 30
– For km/L setting: 50
– For MPG setting: 99.9
• The indication on the display may be delayed if fuel consumption is greatly
affected by driving conditions.
• The display shows estimated values. Indications may not be the same as
actual values.
• For “L/100km” or “km/L” setting, you can change the units that instantaneous fuel
consumption is displayed in. Refer to
“Average fuel consumption” in this sec-
tion. Average fuel consumption
If you selected average fuel consumption
the last time you drove
the vehicle, the dis-
play shows the last value of average fuel
consumption from previous driving when
the ignition switch is turned to “ON” posi-
tion. Unless you reset the value of average
fuel consumption, the display indicates the
value of average fuel consumption which
includes average fuel consumption during
previous driving.
To reset the average fuel consumption to
zero, push and hold the indicator selector
knob (2) for a while when the display
shows the average fuel consumption.
NOTE:
When you reset the indication or reconnect
the negative (–) terminal to the lead-acid
battery, the value of average fuel con-
sumption will be shown after driving for a
while.
NOTICE
Keep track of your odometer reading
and check the maintenance sched-
ule regularly for required services.
Increased wear or damage to certain
parts can result from failure to per-
form required services at the proper
mileage intervals.
Page 261 of 505
5-6
OTHER CONTROLS AND EQUIPMENT
75RM4-01E
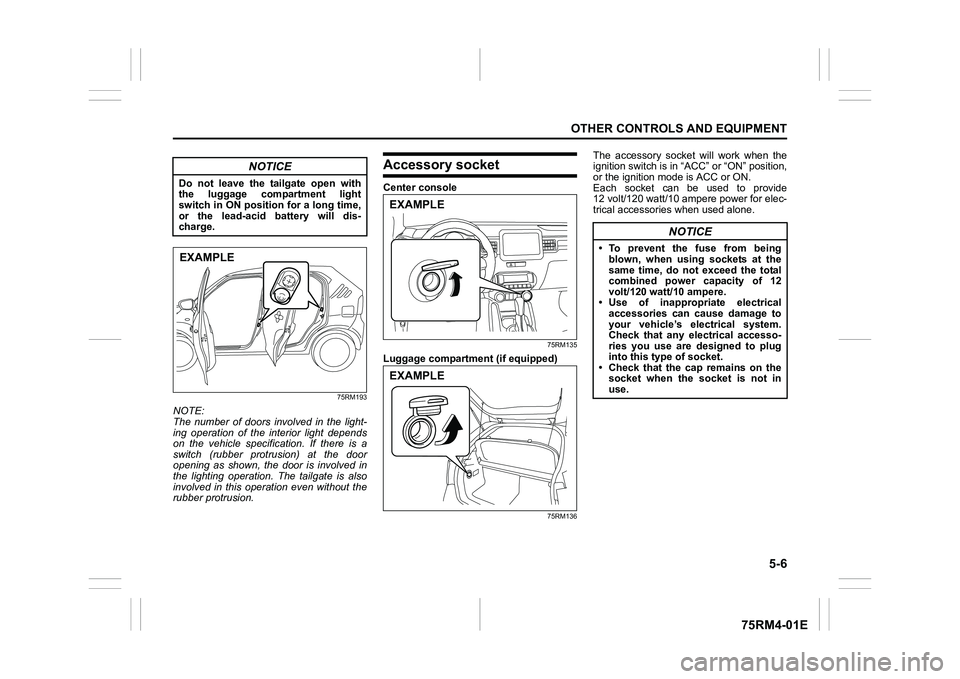
75RM193
NOTE:
The number of doors involved in the light-
ing operation of the interior light depends
on the vehicle specification. If there is a
switch (rubber protrusion) at the door
opening as shown, the door is involved in
the lighting operation. The tailgate is also
involved in this operation even without the
rubber protrusion.
Accessory socketCenter console
75RM135
Luggage compartmen t (if equipped)
75RM136
The accessory socket will work when the
ignition switch is in “ACC” or “ON” position,
or the ignition mode is ACC or ON.
Each socket can be used to provide
12 volt/120 watt/10 ampere power for elec-
trical accessories when used alone.
NOTICE
Do not leave the tailgate open with
the luggage compartment light
switch in ON position for a long time,
or the lead-acid battery will dis-
charge.EXAMPLE
EXAMPLEEXAMPLE
NOTICE
• To prevent the fuse from being blown, when using sockets at the
same time, do not exceed the total
combined power capacity of 12
volt/120 watt/10 ampere.
• Use of inappropriate electrical accessories can cause damage to
your vehicle’s electrical system.
Check that any electrical accesso-
ries you use are designed to plug
into this type of socket.
• Check that the cap remains on the socket when the socket is not in
use.
Page 434 of 505
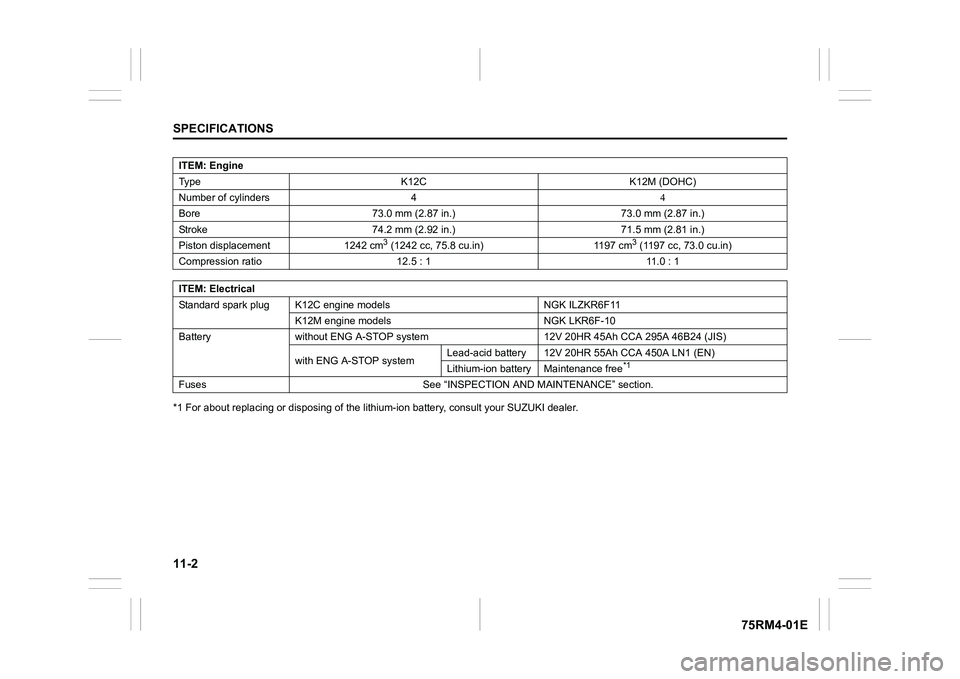
11-2SPECIFICATIONS
75RM4-01E
*1 For about replacing or disposing of the lithium-ion battery, consult your SUZUKI dealer.
ITEM: Engine
Type K12C K12M (DOHC)
Number of cylinders 4
Bore 73.0 mm (2.87 in.) 73.0 mm (2.87 in.)
Stroke 74.2 mm (2.92 in .) 71.5 mm (2.81 in.)
Piston displacement 1242 cm
3 (1242 cc, 75.8 cu.in) 1197 cm
3 (1197 cc, 73.0 cu.in)
Compression ratio 12.5 : 1 11.0 : 1
ITEM: Electrical
Standard spark plug K12C engine models NGK ILZKR6F11 K12M engine models NGK LKR6F-10
Battery without ENG A-STOP system 12V 20HR 45Ah CCA 295A 46B24 (JIS)
with ENG A-STOP system Lead-acid battery 12V 20HR
55Ah CCA 450A LN1 (EN)
Lithium-ion battery Maintenance free
*1
Fuses See “INSPECTION AND MAINTENANCE” section.