parking brake lever SUZUKI IGNIS 2017 Owners Manual
[x] Cancel search | Manufacturer: SUZUKI, Model Year: 2017, Model line: IGNIS, Model: SUZUKI IGNIS 2017Pages: 505, PDF Size: 8.36 MB
Page 14 of 505
ILLUSTRATED TABLE OF CONTENTS
75RM4-01E
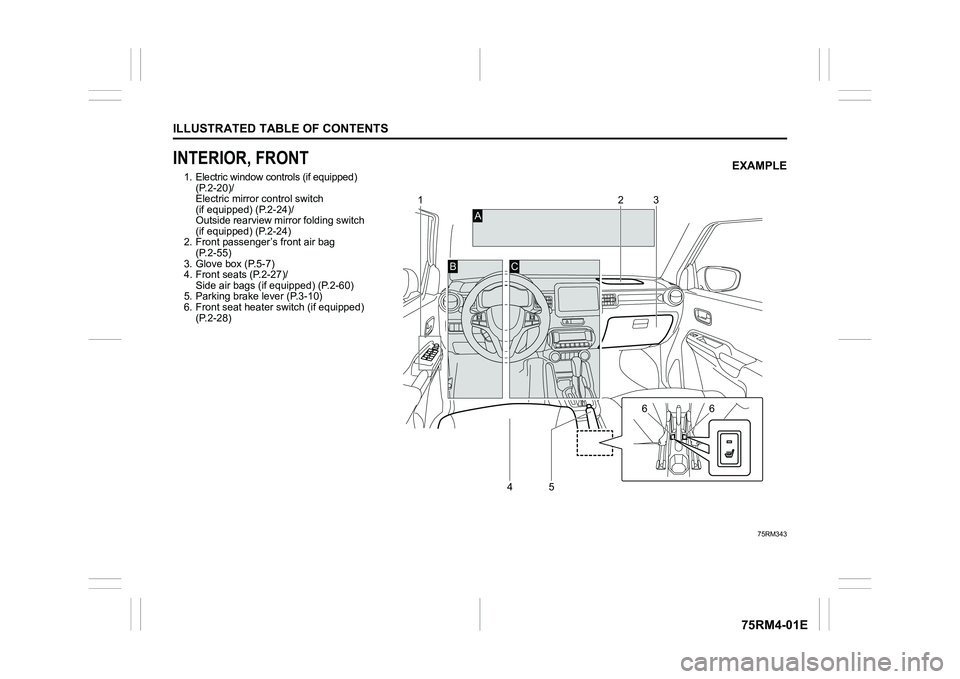
INTERIOR, FRONT1. Electric window controls (if equipped) (P.2-20)/
Electric mirror control switch
(if equipped) (P.2-24)/
Outside rearview mirror folding switch
(if equipped) (P.2-24)
2. Front passenger’s front air bag
(P.2-55)
3. Glove box (P.5-7)
4. Front seats (P.2-27)/
Side air bags (if equipped) (P.2-60)
5. Parking brake lever (P.3-10)
6. Front seat heater switch (if equipped)
(P.2-28)
75RM343
B
C
A
3
2
45 66
1
EXAMPLE
Page 153 of 505
OPERATING YOUR VEHICLE
3
75RM4-01E
60G408
OPERATING YOUR VEHICLEExhaust gas warning .......................................................... 3-1
Daily inspection checklist .................................... .............. 3-1
Engine oil consumption ........................................ ............. 3-2
Ignition switch
(vehicle without keyless push s tart system) ....................3-3
Engine switch
(vehicle with keyless push sta rt system) .......................... 3-5
Keyless push start system (if equipped) .......................... 3-6
Parking brake lever ........................................... .................. 3-10
Pedal ......................................................... ............................ 3-12
Starting engine
(vehicle without keyless push s tart system) ....................3-13
Starting engine
(vehicle with keyless push sta rt system) .......................... 3-14
Using transaxle ... ....................... ......................................... 3-17
Gearshift indicator (if equipped) ............................. ........... 3-33
ENG A-STOP system
(engine auto stop start system) (if equipped) ................. .3-35
Cruise control (if equipped) ............................................... 3-48
Speed limiter (if equipped) ................................... .............. 3-51
Dual camera brake support (if equipped) ......................... 3-53
Emergency stop signal (ESS) (if equipped) ......................3-71
Rearview camera (if equipped) ................................. ......... 3-72
Braking ....................................................... .......................... 3-75
Electronic stabi lity program (ESP
®) (if equipped) ........... 3-78
Tire pressure monito ring system (TPMS) (i f equipped) .. 3-85
Page 155 of 505
3-2
OPERATING YOUR VEHICLE
75RM4-01E
NOTE:
It is normal for water to drip from the air
conditioning system after use.
4) Check that the hood is fully closed andlatched.
5) Check the headlights, turn signal lights, brake lights and horn for proper opera-
tion.
6) Adjust the seat and head restraint.
7) Check the brake pedal and the parking brake lever.
8) Adjust the mirrors.
9) Check that you and all passengers have properly fastened your seat belts.
10)Check that all warning lights come on as the ignition switch is turned to “ON”
position or the engine switch is pressed
to change the ignition mode to ON.
11)Check all gauges.
12)Check that the brake system warning light turns off when the parking brake is
released.
Once a week, or each time you fill your fuel
tank, perform the following under-hood
checks:
1) Engine oil level
2) Coolant level
3) Brake fluid level
4) Lead-acid battery solution level
5) Windshield washer fluid level
6) Hood latch operation Pull the hood release handle inside the
vehicle. Check that you cannot open the hood all the way without releasing
the secondary latch. Close the hood
securely after checking for proper latch
operation. See the item “All latches,
hinges and locks” of “Chassis, body
and others” in “Maintenance schedule”
in the “INSPECTION AND MAINTE-
NANCE” section for lubrication sched-
ule.
Once a month, or each time you fill your
fuel tank, check the tire pressure using a
tire pressure gauge. Also check the tire
pressure of the spare tire.
Engine oil consumptionIt is normal for the engine to consume
some engine oil during normal vehicle
operation.
The amount of engine oil consumption
depends on viscosity and quality of the oil
and your driving conditions.
More oil is consumed during high-speed
driving and when there is frequent acceler-
ation and deceleration. Under high loads,
your engine also will consume more oil.
A new engine also consumes more oil,
since its pistons, piston rings and cylinder
walls have not yet become conditioned.
New engines reach the normal level of oil
consumption only after approximately
5000 km (3000 miles) driving.
Oil consumption:
Max. 1.0 L per 1000 km
(1 Qt. per 600 miles)
When judging the amount of oil consump-
tion, note that the oil may become diluted
and it is difficult to judge the accurate oil
level.
As an example, if a vehicle is used for
repeated short trips, and consumes a nor-
mal amount of oil, the dipstick may not
show any drop in the oil level at all, even
after 1000 km (600 miles) or more of driv-
ing. This is because the oil gradually
becomes diluted with fuel or moisture,
WA R N I N G
Check that the hood is fully closed
and latched before d riving. If it is not,
it can fly up unexpectedly during
driving, obstructing your view and
resulting in an accident.
Page 163 of 505
3-10
OPERATING YOUR VEHICLE
75RM4-01E
NOTE:
• Even when the remote controller is in theinterior workable area, if it is in any of the
following conditions, you may not be
able to start the engine or select the igni-
tion modes, and the REMOTE CON-
TROLLER OUTSIDE warning may be
given.
– The remote controller’s battery is low.
– The remote controller is affected by strong radio signals or noise.
– The remote controller is in contact with
or covered by a metallic object.
– The remote controller is in stowage such as the glove box or a door
pocket.
– The remote controller is in the sun
visor pocket or on the floor.
• Even when the remote controller is out- side the interior workable area, if it is in
any of the following conditions, you may
be able to start the engine or select the
ignition mode. The REMOTE CON-
TROLLER OUTSIDE warning may not
be given at that time.
– The remote controller is outside the
vehicle but very close to a door.
– The remote controller is on the instru-
ment panel.
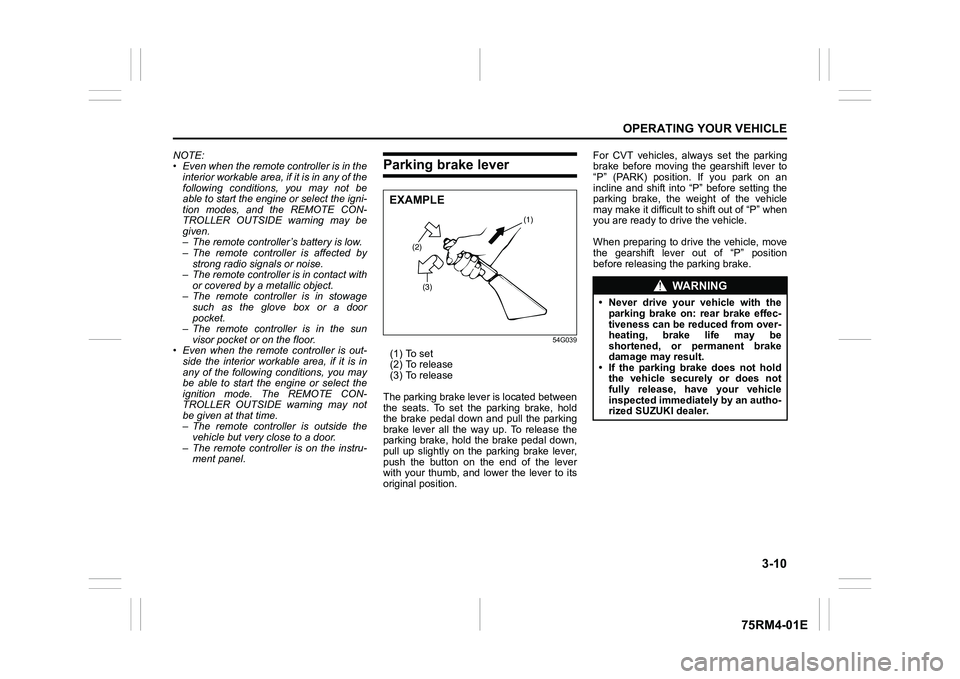
Parking brake lever
54G039
(1) To set
(2) To release
(3) To release
The parking brake lever is located between
the seats. To set the parking brake, hold
the brake pedal down and pull the parking
brake lever all the way up. To release the
parking brake, hold the brake pedal down,
pull up slightly on the parking brake lever,
push the button on the end of the lever
with your thumb, and lower the lever to its
original position. For CVT vehicles, always set the parking
brake before moving the gearshift lever to
“P” (PARK) position. If you park on an
incline and shift into “P” before setting the
parking brake, the weight of the vehicle
may make it difficult to shift out of “P” when
you are ready to drive the vehicle.
When preparing to drive the vehicle, move
the gearshift lever out of “P” position
before releasing the parking brake.
(2)
(3) (1)
EXAMPLE
WA R N I N G
• Never drive your vehicle with the
parking brake on: rear brake effec-
tiveness can be reduced from over-
heating, brake life may be
shortened, or permanent brake
damage may result.
• If the parking brake does not hold the vehicle securely or does not
fully release, have your vehicle
inspected immediately by an autho-
rized SUZUKI dealer.
Page 164 of 505
3-11OPERATING YOUR VEHICLE
75RM4-01E
NOTE:
(For Auto Gear Shift Model)
For details on how to use the gearshift
lever to park the vehicle, refer to “Parking”
in “Auto Gear Shift” in this section.
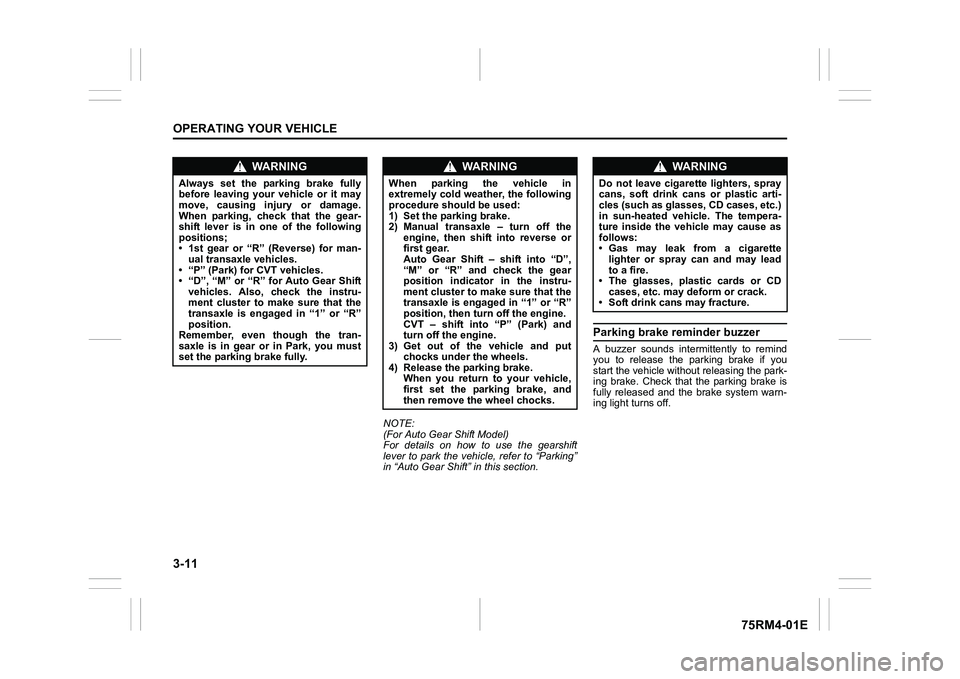
Parking brake reminder buzzerA buzzer sounds intermittently to remind
you to release the parking brake if you
start the vehicle without releasing the park-
ing brake. Check that the parking brake is
fully released and the brake system warn-
ing light turns off.
WA R N I N G
Always set the parking brake fully
before leaving your vehicle or it may
move, causing injury or damage.
When parking, check that the gear-
shift lever is in one of the following
positions;
• 1st gear or “R” (Reverse) for man-ual transaxle vehicles.
• “P” (Park) for CVT vehicles.
• “D”, “M” or “R” for Auto Gear Shift vehicles. Also, check the instru-
ment cluster to make sure that the
transaxle is engaged in “1” or “R”
position.
Remember, even though the tran-
saxle is in gear or in Park, you must
set the parking brake fully.
WA R N I N G
When parking the vehicle in
extremely cold weather, the following
procedure should be used:
1) Set the parking brake.
2) Manual transaxle – turn off the
engine, then shift into reverse or
first gear.
Auto Gear Shift – shift into “D”,
“M” or “R” and check the gear
position indicator in the instru-
ment cluster to make sure that the
transaxle is engaged in “1” or “R”
position, then tur n off the engine.
CVT – shift into “P” (Park) and
turn off the engine.
3) Get out of the vehicle and put
chocks under the wheels.
4) Release the parking brake. When you return to your vehicle,
first set the parking brake, and
then remove the wheel chocks.
WA R N I N G
Do not leave cigarette lighters, spray
cans, soft drink cans or plastic arti-
cles (such as glasses, CD cases, etc.)
in sun-heated vehicle. The tempera-
ture inside the vehicle may cause as
follows:
• Gas may leak from a cigarette lighter or spray can and may lead
to a fire.
• The glasses, plastic cards or CD cases, etc. may deform or crack.
• Soft drink cans may fracture.
Page 166 of 505
3-13OPERATING YOUR VEHICLE
75RM4-01E
Starting engine
(vehicle without keyless push start system)Before starting engine
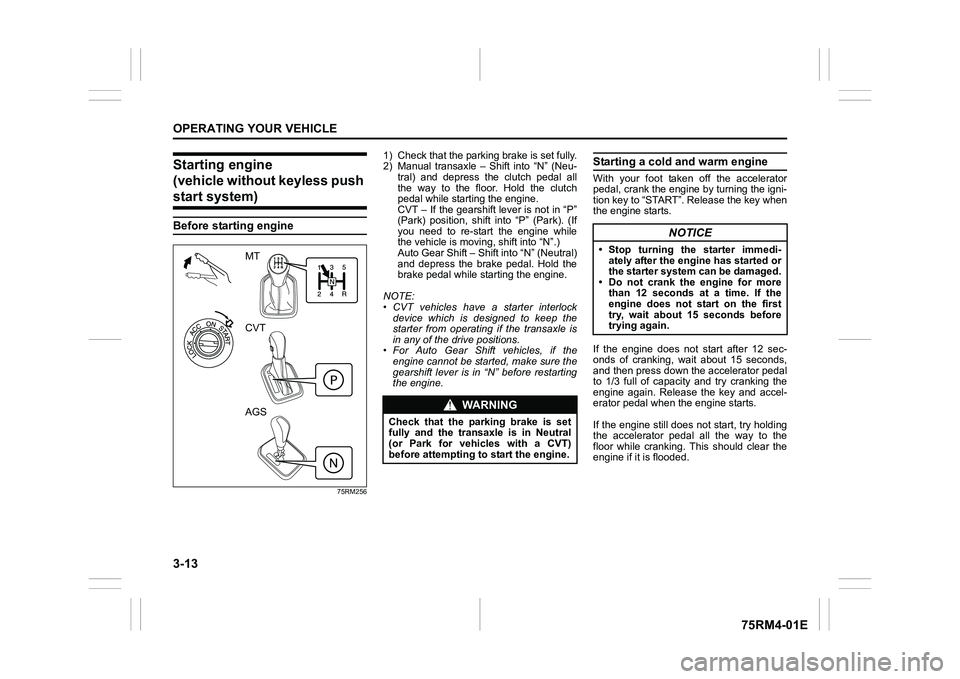
75RM256
1) Check that the parking brake is set fully.
2) Manual transaxle – Shift into “N” (Neu- tral) and depress the clutch pedal all
the way to the floor. Hold the clutch
pedal while starting the engine.
CVT – If the gearshift lever is not in “P”
(Park) position, shift into “P” (Park). (If
you need to re-start the engine while
the vehicle is movi ng, shift into “N”.)
Auto Gear Shift – Shift into “N” (Neutral)
and depress the brake pedal. Hold the
brake pedal while starting the engine.
NOTE:
• CVT vehicles have a starter interlock device which is designed to keep the
starter from operating if the transaxle is
in any of the drive positions.
• For Auto Gear Shift vehicles, if the engine cannot be started, make sure the
gearshift lever is in “N” before restarting
the engine.
Starting a cold and warm engineWith your foot taken off the accelerator
pedal, crank the engine by turning the igni-
tion key to “START”. Release the key when
the engine starts.
If the engine does not start after 12 sec-
onds of cranking, wait about 15 seconds,
and then press down the accelerator pedal
to 1/3 full of capacity and try cranking the
engine again. Release the key and accel-
erator pedal when the engine starts.
If the engine still does not start, try holding
the accelerator pedal all the way to the
floor while cranking. This should clear the
engine if it is flooded.
MT
CVT
AGS
WA R N I N G
Check that the parking brake is set
fully and the transaxle is in Neutral
(or Park for vehicles with a CVT)
before attempting to start the engine.
NOTICE
• Stop turning the starter immedi-ately after the engine has started or
the starter system can be damaged.
• Do not crank the engine for more than 12 seconds at a time. If the
engine does not start on the first
try, wait about 15 seconds before
trying again.
Page 167 of 505
3-14
OPERATING YOUR VEHICLE
75RM4-01E
Starting engine
(vehicle with keyless push start system)Before starting engine
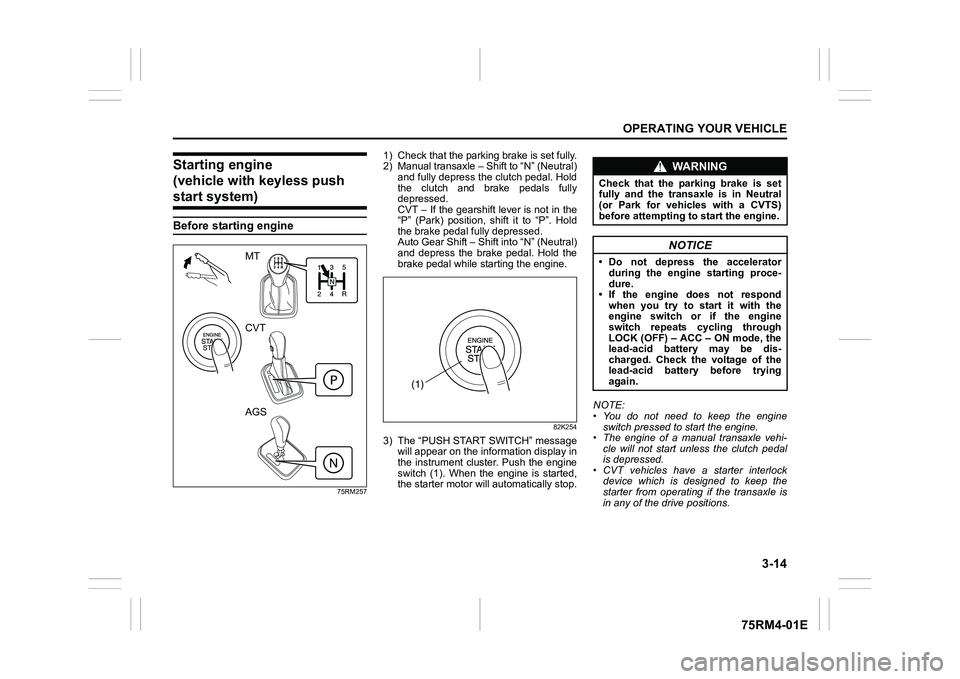
75RM257
1) Check that the parking brake is set fully.
2) Manual transaxle – Shift to “N” (Neutral) and fully depress the clutch pedal. Hold
the clutch and brake pedals fully
depressed.
CVT – If the gearshift lever is not in the
“P” (Park) position, shift it to “P”. Hold
the brake pedal fully depressed.
Auto Gear Shift – Shift into “N” (Neutral)
and depress the brake pedal. Hold the
brake pedal while starting the engine.
82K254
3) The “PUSH START SWITCH” messagewill appear on the information display in
the instrument cluster. Push the engine
switch (1). When the engine is started,
the starter motor will automatically stop. NOTE:
• You do not need to keep the engine
switch pressed to start the engine.
• The engine of a manual transaxle vehi- cle will not start unless the clutch pedal
is depressed.
• CVT vehicles have a starter interlock device which is designed to keep the
starter from operating if the transaxle is
in any of the drive positions.
MT
CVT
AGS
(1)
WA R N I N G
Check that the parking brake is set
fully and the transaxle is in Neutral
(or Park for vehicles with a CVTS)
before attempting to start the engine.
NOTICE
• Do not depress the accelerator
during the engine starting proce-
dure.
• If the engine does not respond when you try to start it with the
engine switch or if the engine
switch repeats cycling through
LOCK (OFF) – ACC – ON mode, the
lead-acid battery may be dis-
charged. Check the voltage of the
lead-acid battery before trying
again.
Page 169 of 505
3-16
OPERATING YOUR VEHICLE
75RM4-01E
If the master warning indicator light
blinks and the engine cannot be started
Your keyless push start system remote
controller may not be sensed as being
within the interior workable area. Try again
after checking that you have the remote
controller with you. If the engine still can-
not be started, the battery of the remote
controller may be discharged. To start the
engine, use the following method:
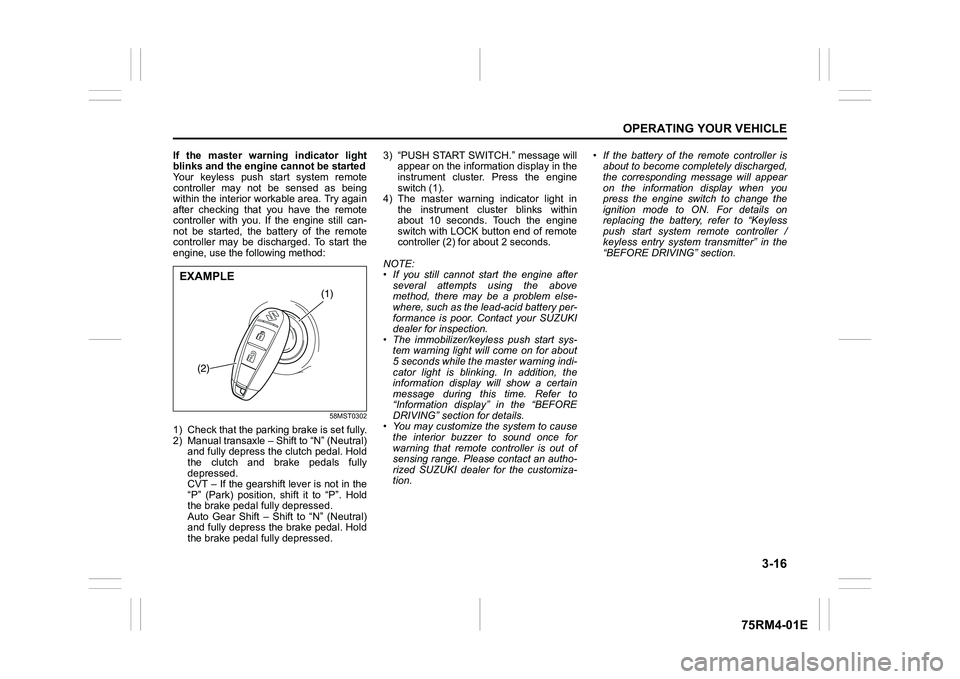
58MST0302
1) Check that the parking brake is set fully.
2) Manual transaxle – Shift to “N” (Neutral) and fully depress the clutch pedal. Hold
the clutch and brake pedals fully
depressed.
CVT – If the gearshift lever is not in the
“P” (Park) position, shift it to “P”. Hold
the brake pedal fully depressed.
Auto Gear Shift – Shift to “N” (Neutral)
and fully depress the brake pedal. Hold
the brake pedal fully depressed. 3) “PUSH START SWITCH.” message will
appear on the information display in the
instrument cluster. Press the engine
switch (1).
4) The master warning indicator light in the instrument cluster blinks within
about 10 seconds. Touch the engine
switch with LOCK button end of remote
controller (2) for about 2 seconds.
NOTE:
• If you still cannot start the engine after several attempts using the above
method, there may be a problem else-
where, such as the lead-acid battery per-
formance is poor. Contact your SUZUKI
dealer for inspection.
• The immobilizer/keyless push start sys- tem warning light will come on for about
5 seconds while the master warning indi-
cator light is blinking. In addition, the
information display will show a certain
message during this time. Refer to
“Information display” in the “BEFORE
DRIVING” section for details.
• You may customize the system to cause
the interior buzzer to sound once for
warning that remote controller is out of
sensing range. Please contact an autho-
rized SUZUKI dealer for the customiza-
tion. • If the battery of the remote controller is
about to become completely discharged,
the corresponding message will appear
on the information display when you
press the engine switch to change the
ignition mode to ON. For details on
replacing the battery, refer to “Keyless
push start system remote controller /
keyless entry system transmitter” in the
“BEFORE DRIVING” section.
(1)
(2)
EXAMPLE
Page 177 of 505
3-24
OPERATING YOUR VEHICLE
75RM4-01E
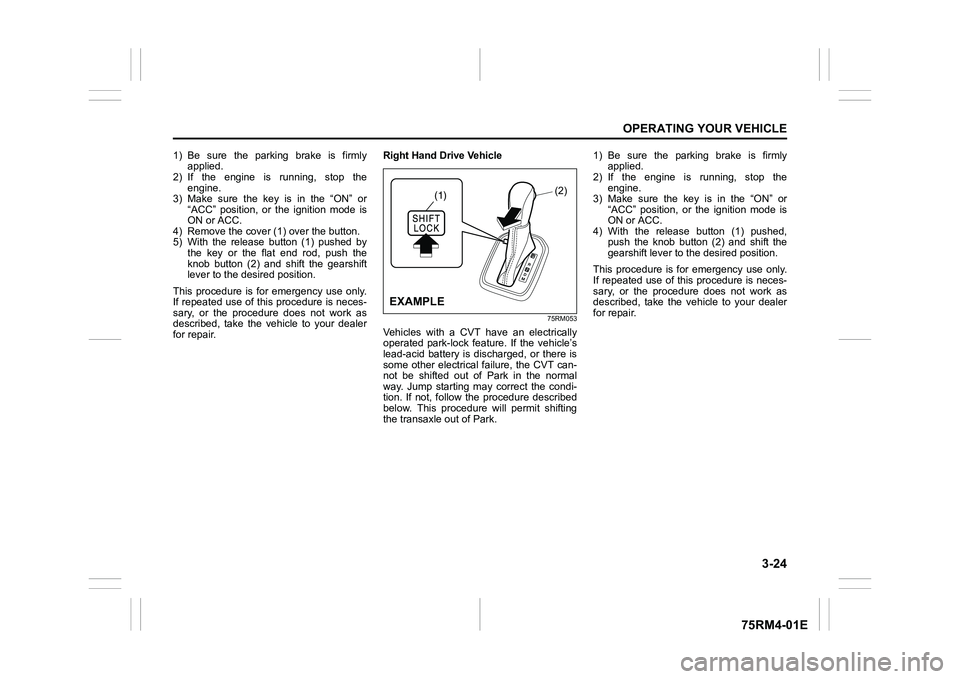
1) Be sure the parking brake is firmlyapplied.
2) If the engine is running, stop the
engine.
3) Make sure the key is in the “ON” or “ACC” position, or the ignition mode is
ON or ACC.
4) Remove the cover ( 1) over the button.
5) With the release button (1) pushed by
the key or the flat end rod, push the
knob button (2) and shift the gearshift
lever to the desired position.
This procedure is for emergency use only.
If repeated use of this procedure is neces-
sary, or the procedure does not work as
described, take the vehicle to your dealer
for repair. Right Hand Drive Vehicle
75RM053
Vehicles with a CVT have an electrically
operated park-lock feat
ure. If the vehicle’s
lead-acid battery is discharged, or there is
some other electrical failure, the CVT can-
not be shifted out of Park in the normal
way. Jump starting may correct the condi-
tion. If not, follow the procedure described
below. This procedure will permit shifting
the transaxle out of Park. 1) Be sure the parking brake is firmly
applied.
2) If the engine is running, stop the
engine.
3) Make sure the key is in the “ON” or “ACC” position, or the ignition mode is
ON or ACC.
4) With the release button (1) pushed, push the knob button (2) and shift the
gearshift lever to t he desired position.
This procedure is for emergency use only.
If repeated use of this procedure is neces-
sary, or the procedure does not work as
described, take the vehicle to your dealer
for repair.
(1)
(2)
EXAMPLE
Page 179 of 505
3-26
OPERATING YOUR VEHICLE
75RM4-01E
Starting the engine
When starting the engine, always place the
gearshift lever in the “N” position and
depress the brake pedal firmly. The engine
cannot be started unless the gearshift
lever is in the “N” position and the brake
pedal is depressed.
If you parked vehicle with gear engaged on
last time (if you can see “1” or “R”), shift
into “N” (Neutral) and depress the brake
pedal. Hold the brake pedal while starting
the engine. You can hear buzzer in short
time.
NOTE:
If you start the engine without the gearshift
lever in the “N” position, the gear position
indicator in the instrument cluster will blink.
Clutch operation
You can select either the Drive (D) mode or
the Manual (M) mode. Since this vehicle
controls clutch operation electronically in
either mode, you do not need to operate
the clutch.Creeping function
This vehicle has a creeping function that
helps the vehicle to start smoothly by
engaging the clutch. When the gearshift
lever is in any of the positions “D”, “M” or
“R”, and you release your foot from the
brake pedal, the vehicle starts slowly with-
out depressing the accelerator pedal. The
creeping function is disabled if you
depress the brake pedal or pull up the
parking brake lever.
NOTE:
If the driver’s door is opened and/or the
parking brake lever is engaged with the
gear in the “M”, “D” or “R” position, the
creeping function will not operate.
Parking and Stopping the vehicle
Auto Gear Shift does not have a parking
position. Park the vehicle with a gear
engaged. Make sure that the gearshift
lever is “D”, “M”, or “R”.
Also, check the instrument cluster to make
sure that the transaxle is engaged in “1” or
“R” position.Drive (D) mode
When the Drive (D) mode is activated, the
most appropriate gear
position is automati-
cally selected upon operation of the accel-
erator pedal and variation of vehicle
speed.
Normal driving:
1) Start the engine as instructed in “Start- ing the engine” in this section.
2) With your foot on the brake pedal, shift the gearshift lever to the “D” position.
When the gearshift lever is shifted to
the “D” position, the gear will be shifted
to 1st.
NOTE:
• If 1st gear cannot be engaged even though the gearshift lever has been
shifted from the “N” to the “D” position,
the system will re-try shifting automati-
cally. This will take some time, noise
may be heard from the gears, and shift-
ing gear shock may occur. However,
they do not indicate malfunction.
• The “N” indicator will flush, the depress brake pedal indicator will come on and a
warning buzzer (long pulse sound) will
sound if any of the following cases
occur;
– If you shift the gearshift lever from the
“N” to the “D” position without depress-
ing the brake pedal
– If the system is unable to re-try shifting
You should depress the brake pedal and
shift the gearshift lever to “N” position,
then shift to “D” again.
NOTICE
A buzzer will sound continuously if
the vehicle is operated with the gear-
shift lever in-between of each shift
positions. The vehicle will become
inoperative if you continue to operate
the vehicle with the gearshift lever in-
between shift positions.