steering wheel SUZUKI IGNIS 2021 Owners Manual
[x] Cancel search | Manufacturer: SUZUKI, Model Year: 2021, Model line: IGNIS, Model: SUZUKI IGNIS 2021Pages: 505, PDF Size: 8.36 MB
Page 79 of 505
2-56
BEFORE DRIVING
75RM4-01E
Therefore, an air bag is not a substitute for
seat belts. To maximize your protection,
always fasten your seat belts. Be aware
that no system can prevent all possible
injuries that may occur in an accident.
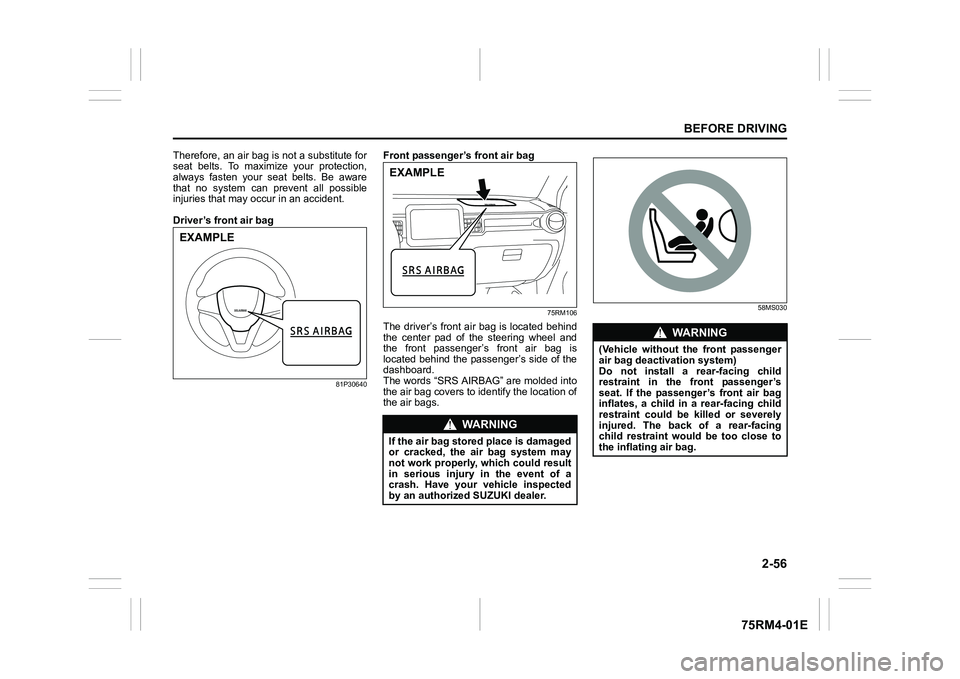
Driver’s front air bag
81P30640
Front passenger’ s front air bag
75RM106
The driver’s front air bag is located behind
the center pad of the steering wheel and
the front passenger’s front air bag is
located behind the passenger’s side of the
dashboard.
The words “SRS AIRBAG” are molded into
the air bag covers to identify the location of
the air bags.
58MS030
EXAMPLE
WA R N I N G
If the air bag stored place is damaged
or cracked, the air bag system may
not work properly, which could result
in serious injury in the event of a
crash. Have your vehicle inspected
by an authorized SUZUKI dealer.EXAMPLE
WA R N I N G
(Vehicle without the front passenger
air bag deactivation system)
Do not install a rear-facing child
restraint in the front passenger’s
seat. If the passenger’s front air bag
inflates, a child in a rear-facing child
restraint could be killed or severely
injured. The back of a rear-facing
child restraint would be too close to
the inflating air bag.
Page 86 of 505
2-63BEFORE DRIVING
75RM4-01E
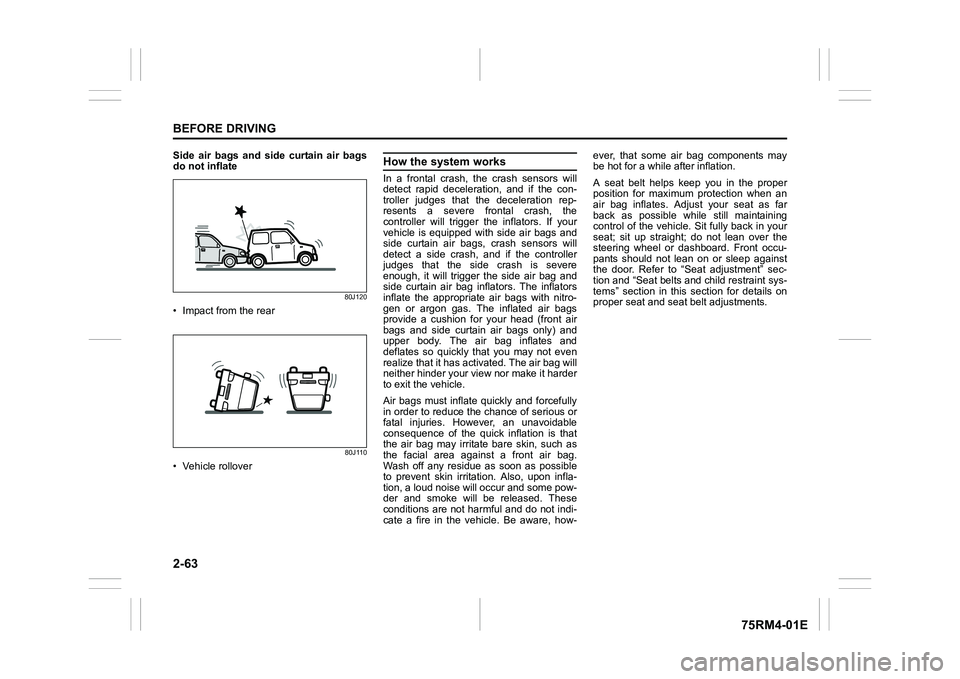
Side air bags and side curtain air bags
do not inflate
80J120
• Impact from the rear
80J110
• Vehicle rollover
How the system worksIn a frontal crash, the crash sensors will
detect rapid deceleration, and if the con-
troller judges that the deceleration rep-
resents a severe frontal crash, the
controller will trigger the inflators. If your
vehicle is equipped with side air bags and
side curtain air bags, crash sensors will
detect a side crash, and if the controller
judges that the side crash is severe
enough, it will trigger the side air bag and
side curtain air bag inflators. The inflators
inflate the appropriate air bags with nitro-
gen or argon gas. The inflated air bags
provide a cushion for your head (front air
bags and side curtain air bags only) and
upper body. The air bag inflates and
deflates so quickly that you may not even
realize that it has activated. The air bag will
neither hinder your view nor make it harder
to exit the vehicle.
Air bags must inflate quickly and forcefully
in order to reduce the chance of serious or
fatal injuries. However, an unavoidable
consequence of the quick inflation is that
the air bag may irritate bare skin, such as
the facial area against a front air bag.
Wash off any residue as soon as possible
to prevent skin irritation. Also, upon infla-
tion, a loud noise will occur and some pow-
der and smoke will be released. These
conditions are not harmful and do not indi-
cate a fire in the vehicle. Be aware, how-ever, that some air bag components may
be hot for a while after inflation.
A seat belt helps keep you in the proper
position for maximum protection when an
air bag inflates. Adjust your seat as far
back as possible while still maintaining
control of the vehicle. Sit fully back in your
seat; sit up straight; do not lean over the
steering wheel or dashboard. Front occu-
pants should not lean on or sleep against
the door. Refer to “Seat adjustment” sec-
tion and “Seat belts and child restraint sys-
tems” section in this
section for details on
proper seat and seat belt adjustments.
Page 87 of 505
2-64
BEFORE DRIVING
75RM4-01E
65D610
54G582
Even though your vehicle is moderately
damaged by a crash, it may not be severe
enough to trigger front, side or side curtain
air bags to inflate. If your vehicle sustains
any front-end or side damage, have the air
bag system inspected by an authorized
SUZUKI dealer to ensure that it works
properly.
WA R N I N G
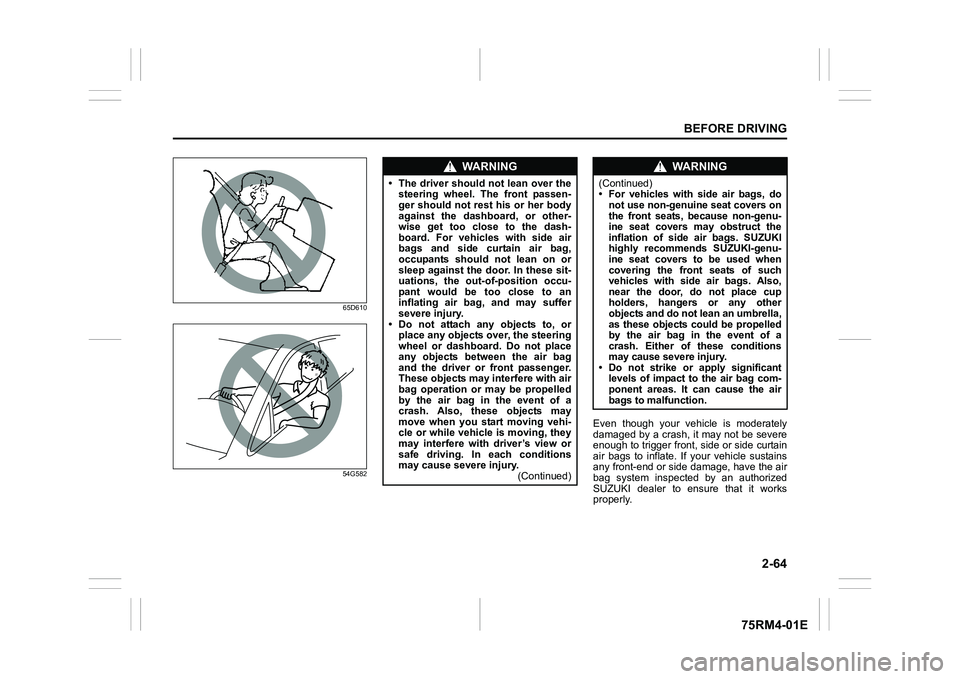
• The driver should not lean over the steering wheel. The front passen-
ger should not rest his or her body
against the dashboard, or other-
wise get too close to the dash-
board. For vehicles with side air
bags and side curtain air bag,
occupants should not lean on or
sleep against the door. In these sit-
uations, the out-of-position occu-
pant would be too close to an
inflating air bag, and may suffer
severe injury.
• Do not attach any objects to, or place any objects ov er, the steering
wheel or dashboard. Do not place
any objects between the air bag
and the driver or front passenger.
These objects may interfere with air
bag operation or may be propelled
by the air bag in the event of a
crash. Also, these objects may
move when you start moving vehi-
cle or while vehicle is moving, they
may interfere with driver’s view or
safe driving. In each conditions
may cause severe injury. (Continued)
WA R N I N G
(Continued)
• For vehicles with side air bags, do
not use non-genuine seat covers on
the front seats, because non-genu-
ine seat covers may obstruct the
inflation of side air bags. SUZUKI
highly recommends SUZUKI-genu-
ine seat covers to be used when
covering the front seats of such
vehicles with side air bags. Also,
near the door, do not place cup
holders, hangers or any other
objects and do not lean an umbrella,
as these objects could be propelled
by the air bag in the event of a
crash. Either of these conditions
may cause severe injury.
• Do not strike or apply significant levels of impact to the air bag com-
ponent areas. It can cause the air
bags to malfunction.
Page 110 of 505
2-87BEFORE DRIVING
75RM4-01E
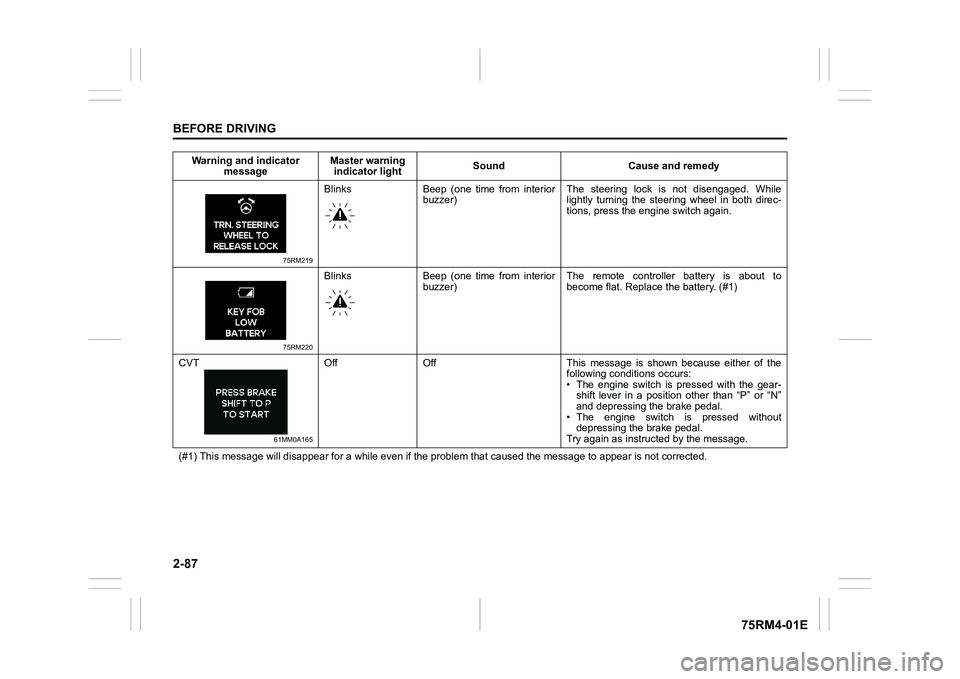
75RM219
Blinks Beep (one time from interiorbuzzer) The steering lock is not disengaged. While
lightly turning the steering wheel in both direc-
tions, press the engine switch again.
75RM220
Blinks Beep (one time from interior
buzzer) The remote controller battery is about to
become flat. Repla
ce the battery. (#1)
CVT
61MM0A165
Off Off This message is shown because either of the following conditions occurs:
• The engine switch is pressed with the gear-shift lever in a position other than “P” or “N”
and depressing the brake pedal.
• The engine switch is pressed without depressing the brake pedal.
Try again as instruct ed by the message.
(#1) This message will disappear for a while even if the proble m that caused the message to appear is not corrected.
Warning and indicator
message Master warning
indicator light Sound Cause and remedy
Page 125 of 505
2-102
BEFORE DRIVING
75RM4-01E
Refer to “Tire pressure monitoring system
(TPMS)” in the “OPERATING YOUR VEHI-
CLE” section for additional details on the
tire pressure monitoring system. Refer to
“Tires” in the “INSPECTION AND MAIN-
TENANCE” section for information on
maintaining proper tire pressure.
WA R N I N G
The load-carrying capacity of your
tires is reduced at lower inflation
pressures. If your tires are even mod-
erately under-inflated, the load on the
tires may exceed the load-carrying
capacity of the tires, which could lead
to tire failure. The low tire pressure
warning light will not alert you to this
condition, because it only comes on
when one or more of your tires
becomes significan tly under-inflated.
Check and adjust your tire inflation
pressure at least once a month. Refer
to “Tires” in the “INSPECTION AND
MAINTENANCE” section.
WA R N I N G
Continuing to drive with the low tire
pressure warning light on can lead to
an accident, resulting in severe injury
or death.
If the low tire pressure warning light
comes on and stays on, reduce your
speed and avoid abrupt steering and
braking. Be aware that driving on a
significantly unde r-inflated tire can
cause the tire to overheat and can
lead to tire failure, and may affect
steering control and brake effective-
ness. Stop the vehicle in a safe place
as soon as possible and check your
tires.
• If you have a flat tire, replace it with
the spare tire (if e quipped). Refer to
“Jacking instructions” in the
“EMERGENCY SERVICE” section
for the tire replacement method.
Also refer to “Replacing tires and/
or wheels” for instructions on how
to restore normal operation of the
TPMS after you have had a flat tire. (Continued)
WA R N I N G
(Continued)
• If your vehicle is equipped with a
flat tire repair kit instead of a spare
tire, refer to “Flat tire repair kit (if
equipped)” in the “EMERGENCY
SERVICE” section for instructions
on how to perform an emergency
repair of a flat tire.
• If one or more of your tires is under-inflated, adjust the inflation
pressure of all tires to the recom-
mended inflation pressure as soon
as possible.
Page 131 of 505
2-108
BEFORE DRIVING
75RM4-01E
Immobilizer/keyless push start sys-tem warning light
80JM122
When the ignition switch is turned to “ON”
position or the engine switch is pressed to
change the ignition mode to ON, this light
comes on briefly so you can check that the
light is working.
If this light stays on, there is a problem with
the system or the steering lock cannot be
released. If this happens, press the engine
switch, turning the steering wheel to the
right or left. If this light still stays on, ask
your SUZUKI dealer to have the system
inspected.
Open door warning light
54G391
This light remains on until all doors (includ-
ing the tailgate) are completely closed.
If any door (including the tailgate) is open
when the vehicle is moving, a ding sounds
to remind you to close all doors completely.
Low fuel warning light
54G343
If this light comes on, fill the fuel tank
immediately.
When this light comes on, a ding sounds
once to remind you to fill the fuel.
If you do not fill the fuel, a ding sounds
every time when the ignition switch is
turned to “ON” position or the engine
switch is pressed to change the ignition
mode to ON.
NOTE:
The activation point of this light varies
depending on road conditions (for exam-
ple, slope or curve) and driving conditions
because of fuel moving in the tank.
Page 132 of 505
2-109BEFORE DRIVING
75RM4-01E
Electric power steering light
79J039
When the ignition switch is turned to “ON”
position or the engine switch is pressed to
change the ignition mode to ON, this light
comes on. When the engine is started, the
light goes out.
If this light comes on while driving, the
power steering system may not work prop-
erly. Have the system inspected by your
SUZUKI dealer.
NOTE:
The following steering wheel operations
may gradually take more effort while park-
ing or driving at a very low speed. This is
not a malfunction of the steering system,
but the power steering control system lim-
its the power assist in order to prevent it
from overheating.
• The steering wheel is operated veryoften.
• The steering wheel is kept in a fully turned position for a long while.
When the power steering control system
cools down, the powe r steering system will
return to its original condition. However, repeating these operations could
cause damage to the power steering sys-
tem.
NOTE:
If the power steering system does not work
properly, it will require greater effort to
steer, but you still will be able to steer.
NOTE:
If the steering is operated, you may hear
noise caused by electric power steering
operation. This is normal and indicates that
the power steering system works properly.
High engine coolant temperature warning light (red color)
54G344
When the ignition switch is turned to “ON”
position or the engine switch is pressed to
change the ignition mode to ON, this light
comes on briefly so you can check that the
light is working. If this light blinks while
driving, it means the engine is running hot.
Avoid driving conditions that may lead to
actual overheating. If the light stays on
without blinking, then the engine is over-
heating. Follow the instructions in “Engine
trouble: Overheating” in the “EMER-
GENCY SERVICE” section.
NOTICE
Continuing to drive the vehicle when
engine overheating is indicated can
result in severe engine damage.
Page 139 of 505
2-116
BEFORE DRIVING
75RM4-01E
Dual camera brake support warning light (if equipped)
80P0382
When the ignition switch is turned to “ON”
position, this light comes on briefly so you
can check that the light is working.
If the function of the stereo camera stops
temporarily or failure, this light will blink
when the ignition switch is in “ON” position.
For details, refer to “Dual camera brake
support” in the “OPERATING YOUR VEHI-
CLE” section.
Lighting control lever
57L21128
Lighting operation
75RM149
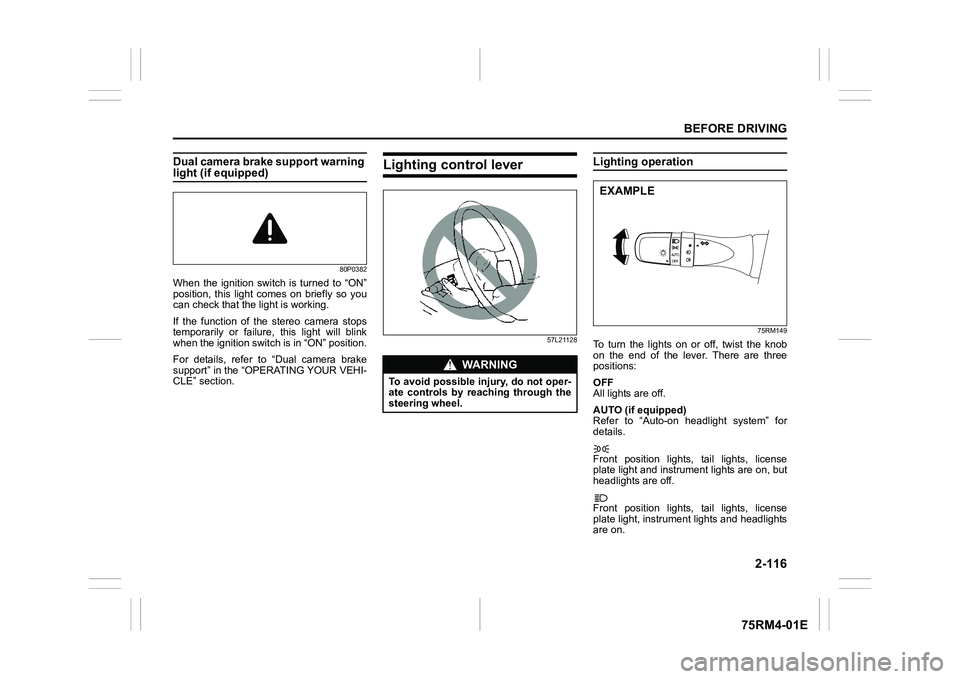
To turn the lights on or off, twist the knob
on the end of the lever. There are three
positions:
OFF
All lights are off.
AUTO (if equipped)
Refer to “Auto-on headlight system” for
details.
Front position lights, tail lights, license
plate light and instrument lights are on, but
headlights are off.
Front position lights, tail lights, license
plate light, instrument lights and headlights
are on.
WA R N I N G
To avoid possible injury, do not oper-
ate controls by reaching through the
steering wheel.
EXAMPLE
Page 146 of 505
2-123BEFORE DRIVING
75RM4-01E
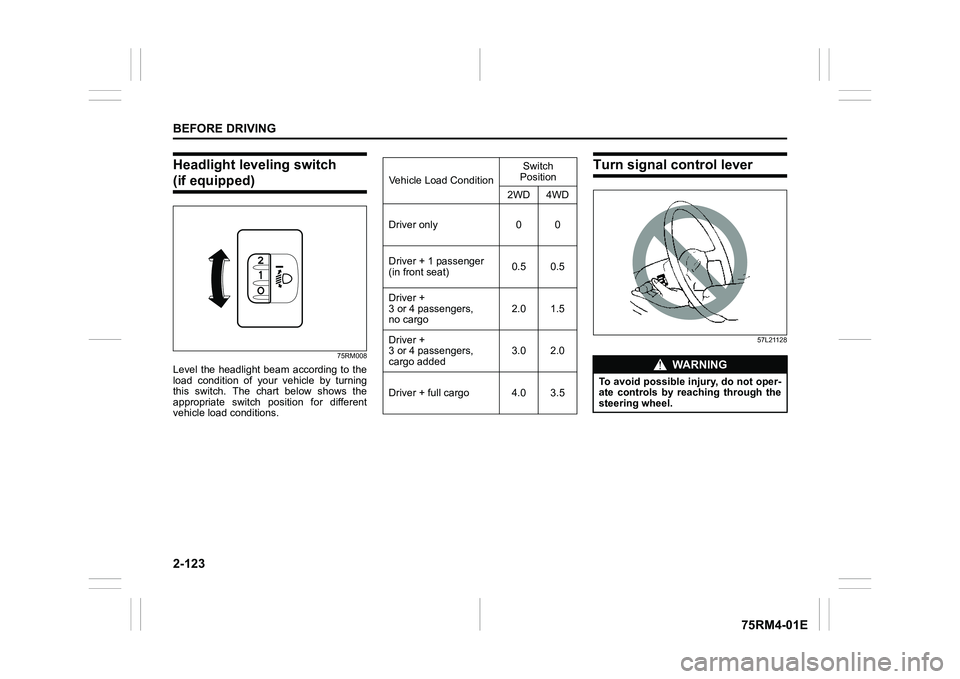
Headlight leveling switch (if equipped)
75RM008
Level the headlight beam according to the
load condition of your vehicle by turning
this switch. The chart below shows the
appropriate switch position for different
vehicle load conditions.
Turn signal control lever
57L21128
Vehicle Load ConditionSwitch
Position
2WD 4WD
Driver only 0 0
Driver + 1 passenger
(in front seat) 0.5 0.5
Driver +
3 or 4 passengers,
no cargo 2.0 1.5
Driver +
3 or 4 passengers,
cargo added 3.0 2.0
Driver + full cargo 4.0 3.5
WA R N I N G
To avoid possible injury, do not oper-
ate controls by reaching through the
steering wheel.
Page 148 of 505
2-125BEFORE DRIVING
75RM4-01E
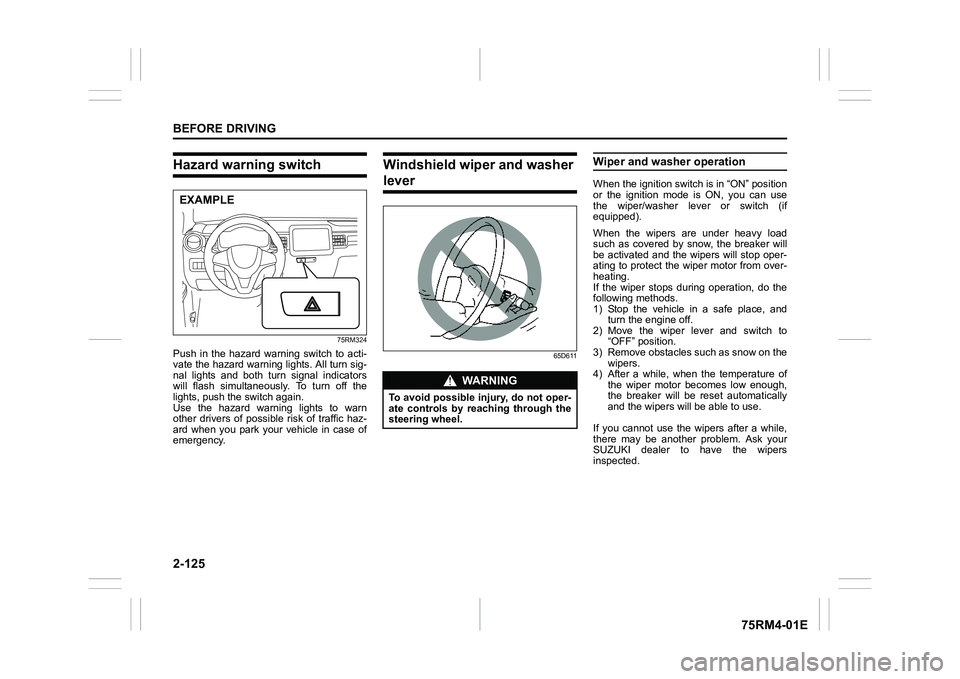
Hazard warning switch
75RM324
Push in the hazard warning switch to acti-
vate the hazard warning lights. All turn sig-
nal lights and both turn signal indicators
will flash simultaneously. To turn off the
lights, push the switch again.
Use the hazard warning lights to warn
other drivers of possible risk of traffic haz-
ard when you park your vehicle in case of
emergency.
Windshield wiper and washer lever
65D611
Wiper and washer operationWhen the ignition switch is in “ON” position
or the ignition mode is ON, you can use
the wiper/washer lever or switch (if
equipped).
When the wipers are under heavy load
such as covered by snow, the breaker will
be activated and the wipers will stop oper-
ating to protect the wiper motor from over-
heating.
If the wiper stops during operation, do the
following methods.
1) Stop the vehicle in a safe place, andturn the engine off.
2) Move the wiper lever and switch to “OFF” position.
3) Remove obstacles such as snow on the wipers.
4) After a while, when the temperature of
the wiper motor becomes low enough,
the breaker will be reset automatically
and the wipers will be able to use.
If you cannot use the wipers after a while,
there may be another problem. Ask your
SUZUKI dealer to have the wipers
inspected.
EXAMPLE
WA R N I N G
To avoid possible injury, do not oper-
ate controls by reaching through the
steering wheel.