engine SUZUKI IGNIS 2022 User Guide
[x] Cancel search | Manufacturer: SUZUKI, Model Year: 2022, Model line: IGNIS, Model: SUZUKI IGNIS 2022Pages: 505, PDF Size: 8.36 MB
Page 31 of 505
2-8
BEFORE DRIVING
75RM4-01E
There are two ways to lock or unlock all
doors (including the tailgate) simultane-
ously by operating the remote controller
near the vehicle.
Central door locking system
• To lock all doors, push LOCK button (1)once.
• For models except for Hong Kong, to
unlock only the driver’s door, push
UNLOCK button (2) once. To unlock
other doors, push UNLOCK button (2)
once again.
• For Hong Kong models, to unlock all doors, push UNLOCK button (2) once.
NOTE:
For models except for Hong Kong, you can
switch the function that unlocks all doors
from requiring two pushes to requiring one
push, and vice versa, via the information
display setting mode. For details on how to
use the information display, refer to “Infor-
mation display” in this section.
The turn signal lights will flash once and
the exterior buzzer will sound once when
the doors are locked.
Central door locking system with the
dead lock system (if equipped)
If you want to prevent tamper-unlocking of
the door locks, use this method. When the
dead lock system is activated, operating the
lock knobs will not unlock the side doors. To activate this system:
To lock all doors, push LOCK button (1)
twice within 3 seconds.
To release this system:
• To unlock only the driver’s door, push
UNLOCK button (2) once.
• To unlock other doors, push UNLOCK
button (2) once again.
NOTE:
You can switch the fu nction that unlocks all
doors from requiring two pushes to requir-
ing one push, and vice versa, via the infor-
mation display setting mode. For details on
how to use the informati on display, refer to
“Information display” in this section.
The turn signal lights will flash once and
the exterior buzzer will sound once when
the doors are locked, and then the turn sig-
nal lights will flash once and the exterior
buzzer will sound once again when the
doors are locked with the dead lock sys-
tem.
With the remote controller inside the vehi-
cle, if you push LOCK button on the
remote controller, the exterior buzzer will
sound and doors cannot be locked. When the doors are unlocked:
• The turn signal lights will flash twice and
the exterior buzzer will sound twice.
• If the interior light switch is in DOOR position, the interior light will turn on for
about 15 seconds and then fade out. If
you press the engine switch during this
time, the light will start to fade out imme-
diately.
Check that the doors are locked after you
operate LOCK button (1).
If no door is opened within about 30 sec-
onds after UNLOCK button (2) is operated,
the doors will automatically lock again.
NOTE:
• The maximum operating distance of the
remote controller is about 5 m (16 ft.),
but this can vary depending on the sur-
roundings, especially near other trans-
mitting devices such as radio towers or
CB (Citizen’s Band) radios.
• The door locks cannot be operated with
the remote controller if the ignition mode
is in any other mode than LOCK (OFF).
• When any door is open, if you push
LOCK button on the remote controller,
the exterior buzzer will sound and doors
cannot be locked.
• If you lose one of the remote controllers, ask your SUZUKI dealer as soon as pos-
sible for replacement. Have your dealer
program the new remo te controller code
in your vehicle’s memory so that the old
code is erased.
WA R N I N G
Do not activate the dead lock system
if there are occupants in the vehicle.
They will be locked in the vehicle and
cannot unlock the doors from inside.
Page 32 of 505
2-9BEFORE DRIVING
75RM4-01E
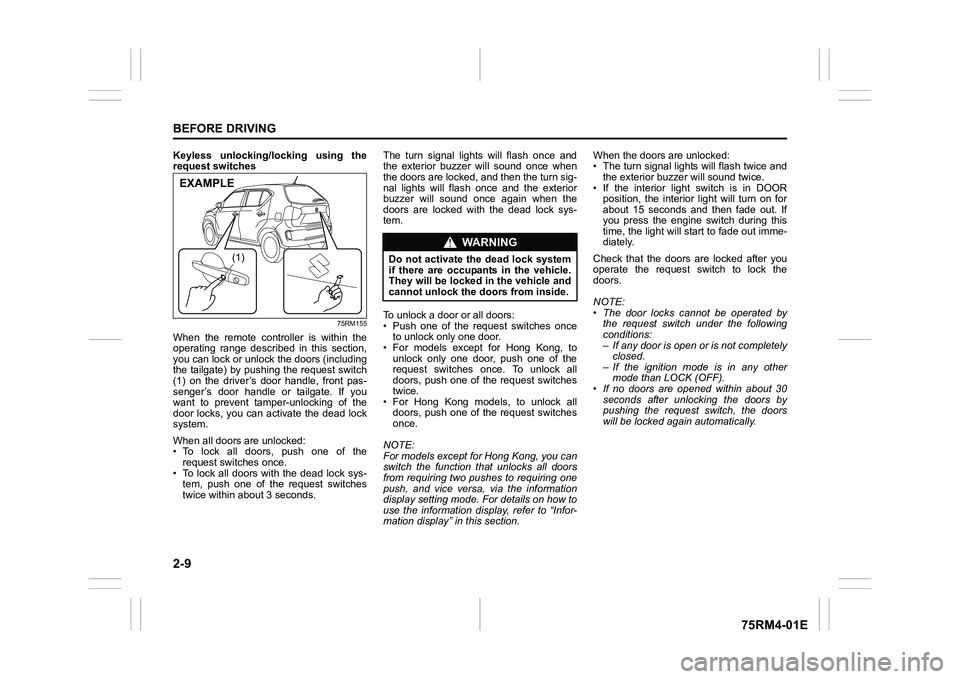
Keyless unlocking/locking using the
request switches
75RM155
When the remote controller is within the
operating range described in this section,
you can lock or unlock the doors (including
the tailgate) by pushing the request switch
(1) on the driver’s door handle, front pas-
senger’s door handle or tailgate. If you
want to prevent tamper-unlocking of the
door locks, you can activate the dead lock
system.
When all doors are unlocked:
• To lock all doors, push one of the request switches once.
• To lock all doors with the dead lock sys- tem, push one of the request switches
twice within abou t 3 seconds. The turn signal lights will flash once and
the exterior buzzer will sound once when
the doors are locked, and then the turn sig-
nal lights will flash once and the exterior
buzzer will sound once again when the
doors are locked with the dead lock sys-
tem.
To unlock a door or all doors:
• Push one of the request switches once
to unlock only one door.
• For models except for Hong Kong, to
unlock only one door, push one of the
request switches once. To unlock all
doors, push one of the request switches
twice.
• For Hong Kong models, to unlock all doors, push one of the request switches
once.
NOTE:
For models except for Hong Kong, you can
switch the function that unlocks all doors
from requiring two pushes to requiring one
push, and vice versa, via the information
display setting mode. For details on how to
use the information display, refer to “Infor-
mation display” in this section. When the doors are unlocked:
• The turn signal lights will flash twice and
the exterior buzzer will sound twice.
• If the interior light switch is in DOOR position, the interior light will turn on for
about 15 seconds and then fade out. If
you press the engine switch during this
time, the light will start to fade out imme-
diately.
Check that the doors are locked after you
operate the request switch to lock the
doors.
NOTE:
• The door locks cannot be operated by the request switch under the following
conditions:
– If any door is open or is not completelyclosed.
– If the ignition mode is in any other mode than LOCK (OFF).
• If no doors are opened within about 30
seconds after unlocking the doors by
pushing the request switch, the doors
will be locked again automatically.
(1)
EXAMPLE
WA R N I N G
Do not activate the dead lock system
if there are occupants in the vehicle.
They will be locked in the vehicle and
cannot unlock the doors from inside.
Page 34 of 505
2-11BEFORE DRIVING
75RM4-01E
57L21016
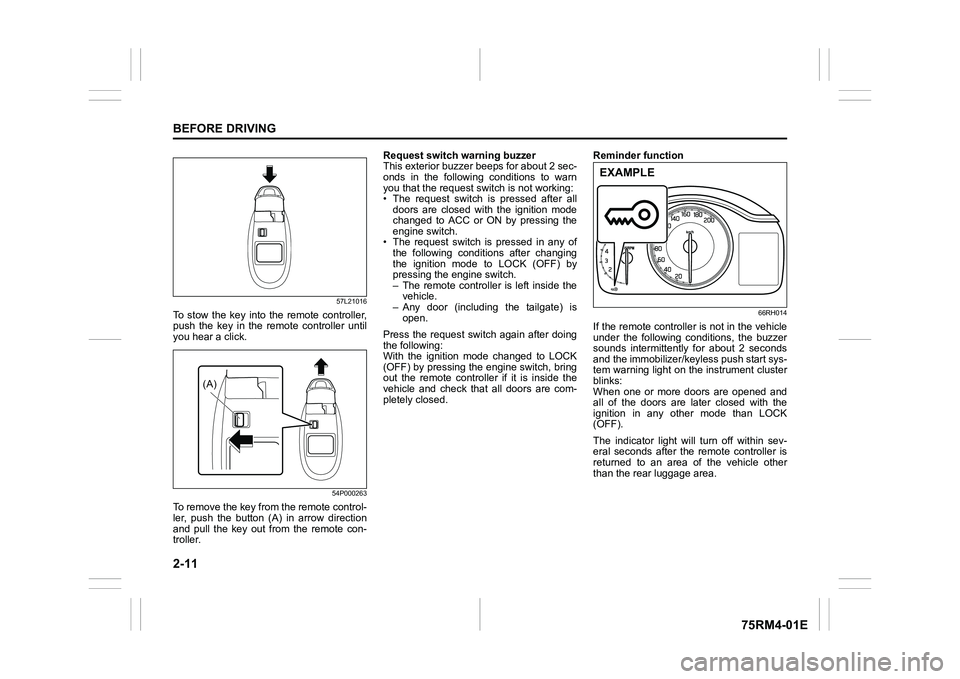
To stow the key into the remote controller,
push the key in the remote controller until
you hear a click.
54P000263
To remove the key from the remote control-
ler, push the button (A) in arrow direction
and pull the key out from the remote con-
troller.Request switch warning buzzer
This exterior buzzer beeps for about 2 sec-
onds in the following conditions to warn
you that the request s
witch is not working:
• The request switch is pressed after all doors are closed with the ignition mode
changed to ACC or ON by pressing the
engine switch.
• The request switch is pressed in any of
the following conditions after changing
the ignition mode to LOCK (OFF) by
pressing the engine switch.
– The remote controller is left inside thevehicle.
– Any door (including the tailgate) is
open.
Press the request switch again after doing
the following:
With the ignition mode changed to LOCK
(OFF) by pressing the engine switch, bring
out the remote controller if it is inside the
vehicle and check that all doors are com-
pletely closed. Reminder function
66RH014
If the remote controller is not in the vehicle
under the following conditions, the buzzer
sounds intermittently for about 2 seconds
and the immobilizer/keyless push start sys-
tem warning light on the instrument cluster
blinks:
When one or more doors are opened and
all of the doors are later closed with the
ignition in any other mode than LOCK
(OFF).
The indicator light will turn off within sev-
eral seconds after the remote controller is
returned to an area of the vehicle other
than the rear luggage area.
(A)
EXAMPLE
Page 39 of 505
2-16
BEFORE DRIVING
75RM4-01E
80JM133
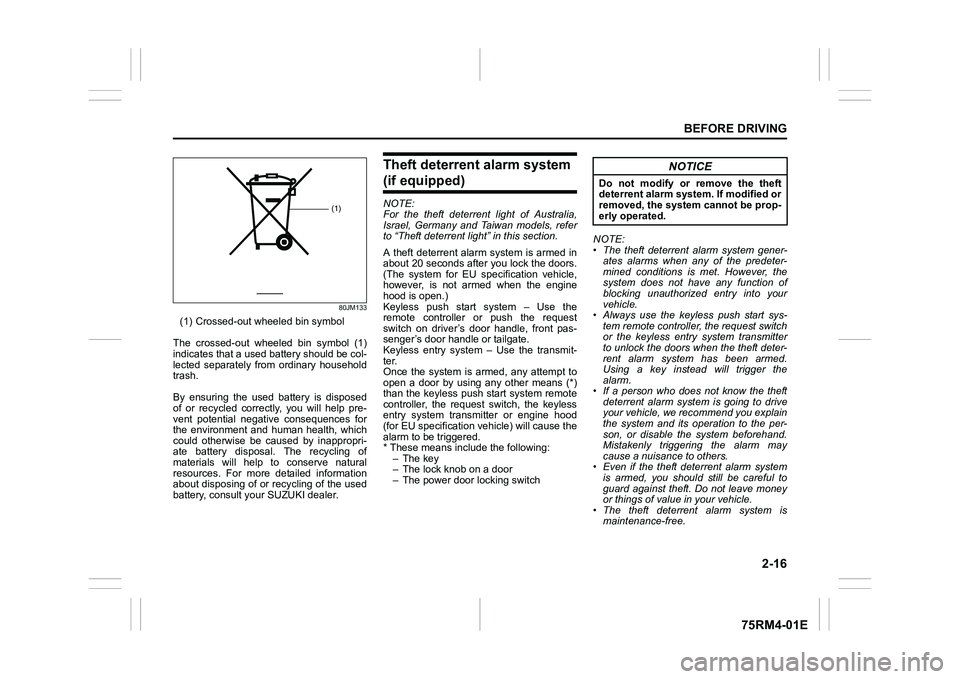
(1) Crossed-out wheeled bin symbol
The crossed-out wheeled bin symbol (1)
indicates that a used battery should be col-
lected separately from ordinary household
trash.
By ensuring the used battery is disposed
of or recycled correctly, you will help pre-
vent potential negative consequences for
the environment and human health, which
could otherwise be caused by inappropri-
ate battery disposal. The recycling of
materials will help to conserve natural
resources. For more detailed information
about disposing of or recycling of the used
battery, consult your SUZUKI dealer.
Theft deterrent alarm system (if equipped)NOTE:
For the theft deterrent light of Australia,
Israel, Germany and Taiwan models, refer
to “Theft deterrent light” in this section.
A theft deterrent alarm system is armed in
about 20 seconds after you lock the doors.
(The system for EU spec ification vehicle,
however, is not armed when the engine
hood is open.)
Keyless push start system – Use the
remote controller or push the request
switch on driver’s door handle, front pas-
senger’s door handle or tailgate.
Keyless entry system – Use the transmit-
ter.
Once the system is armed, any attempt to
open a door by using any other means (*)
than the keyless push start system remote
controller, the request switch, the keyless
entry system transmitter or engine hood
(for EU specification vehicle) will cause the
alarm to be triggered.
* These means include the following:
–The key
– The lock knob on a door
– The power door locking switch NOTE:
• The theft deterrent alarm system gener-
ates alarms when any of the predeter-
mined conditions is met. However, the
system does not have any function of
blocking unauthorized entry into your
vehicle.
• Always use the keyless push start sys-
tem remote controller, the request switch
or the keyless entry system transmitter
to unlock the doors when the theft deter-
rent alarm system has been armed.
Using a key instead will trigger the
alarm.
• If a person who does not know the theft deterrent alarm system is going to drive
your vehicle, we recommend you explain
the system and its operation to the per-
son, or disable the system beforehand.
Mistakenly triggering the alarm may
cause a nuisance to others.
• Even if the theft deterrent alarm system is armed, you should still be careful to
guard against theft. Do not leave money
or things of value in your vehicle.
• The theft deterrent alarm system is
maintenance-free.
(1)
NOTICE
Do not modify or remove the theft
deterrent alarm system. If modified or
removed, the system cannot be prop-
erly operated.
Page 40 of 505

2-17BEFORE DRIVING
75RM4-01E
How to arm the theft deterrent alarm
system (when enabled)
Lock all doors (including the tailgate) using
the keyless push start system remote con-
troller, the request switch or the keyless
entry system transmitter. The theft deter-
rent light (1) will start blinking, and the theft
deterrent alarm system will be armed in
about 20 seconds.
While the system is be ing armed, the indi-
cator continues to blink at intervals of
approximately 2 seconds.
75RM313
NOTE:
• To prevent the alarm from being acci- dentally triggered, avoid arming it while
anyone remains inside the vehicle. The
alarm will be triggered if any person
inside unlocks a door or engine hood (for
EU specification vehicle) by operating
the lock knob or power door locking
switch.
• The theft deterrent alarm system is not armed when all doors are locked using
the key from outside, or using the door
lock knobs or the power door locking
switch from inside.
• If any door is not operated within approx-
imately 30 seconds after the doors have
been unlocked using the keyless push
start system remote controller, the
request switch or the keyless entry sys-
tem transmitter, the doors are automati-
cally locked again. After the doors are
locked, the theft de terrent alarm system
will be armed in about 20 seconds if the
system is in the enabled state.
How to disarm the theft deterrent alarm
system
Simply unlock the doors using the keyless
push start system rem ote controller, the
request switch or the keyless entry system
transmitter. The theft deterrent light will go
out, indicating that t he theft deterrent alarm
system is disarmed. How to stop
the alarm
Should the alarm be triggered accidentally,
unlock the doors using the keyless push
start system remote c ontroller, the request
switch or the keyless entry system trans-
mitter, or press the engine switch to
change the ignition mode to ON or turn the
ignition switch to “ON” position. The alarm
will then stop.
NOTE:
• Even after the alarm has stopped, if you
lock the doors using the keyless push
start system remote controller, the
request switch or the keyless entry sys-
tem transmitter, the theft deterrent alarm
system will be rearmed with a delay of
about 20 seconds.
• If you disconnect the lead-acid battery while the theft deterrent alarm system is
in the armed condition or the alarm is
actually in operation, the alarm will be
triggered or re-triggered when the bat-
tery is then reconnected, although, in the
latter case, the alarm remains stopped
for the period between disconnection
and reconnection of the lead-acid bat-
tery.
• Even after the alarm has stopped at the
end of the predetermined operation time,
it will be triggered again if any door or
engine hood (for EU specification vehi-
cle) is opened without disarming the
theft deterrent alarm system.
(1)
EXAMPLE
Page 41 of 505
2-18
BEFORE DRIVING
75RM4-01E
Checking whether the alarm has been
triggered during parking
If the alarm was triggered due to an unau-
thorized entry into the vehicle and you then
press the engine switch to change the igni-
tion mode to ON or turn the ignition switch
to “ON” position, the theft deterrent light
will blink rapidly for about 8 seconds and a
buzzer will beep 4 times during this period.
If this happens, check whether your vehi-
cle has been broken into while you were
away from it.
Enabling and disabling the theft deter-
rent alarm system
The theft deterrent alarm system can be
either enabled or disabled.
When enabled (factory setting)
When the system is enabled, it causes the
hazard warning lights to flash for about 40
seconds if any of the alarm trigger condi-
tions is met. The system also causes the
interior buzzer to beep intermittently for
about 10 seconds, which is followed by
intermittent sounding of the horn for about
30 seconds.
The theft deterrent light continues to blink
during this time.
When disabled
When the system is disabled, it stays dis-
armed even if you perform any system
arming operation. How to switch the state of the theft
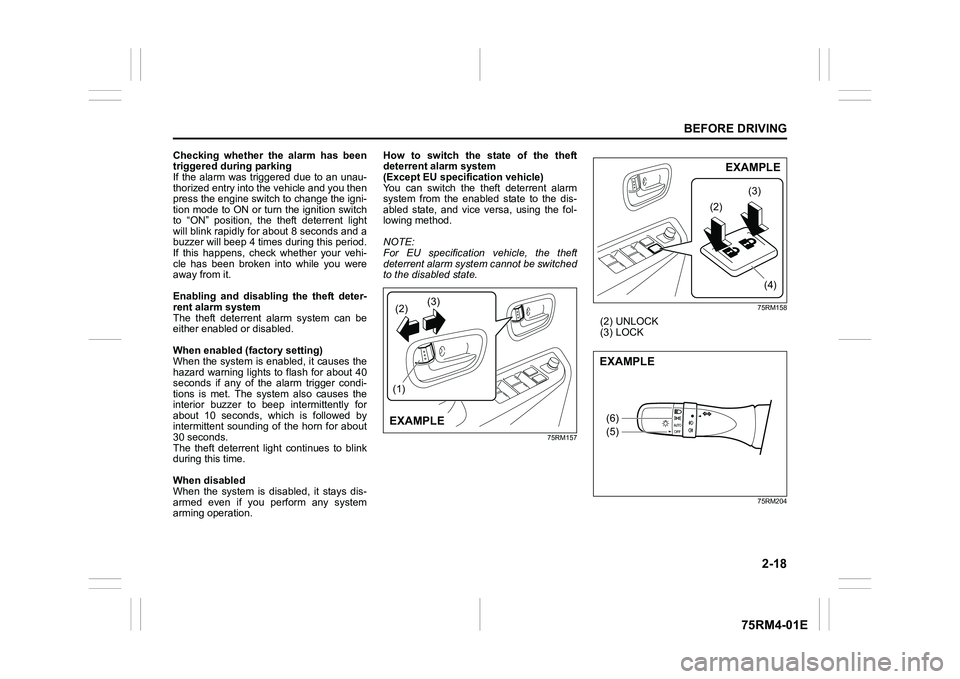
deterrent alarm system
(Except EU specification vehicle)
You can switch the theft deterrent alarm
system from the enabled
state to the dis-
abled state, and vice versa, using the fol-
lowing method.
NOTE:
For EU specification vehicle, the theft
deterrent alarm system cannot be switched
to the disabled state.
75RM157 75RM158
(2) UNLOCK
(3) LOCK
75RM204
(2)
(1) (3)EXAMPLE
(2)
(3)
(4)
EXAMPLE
(6)
(5)EXAMPLE
Page 46 of 505
2-23BEFORE DRIVING
75RM4-01E
To initialize the pinching prevention func-
tion, use the following procedure:
1) Turn the ignition switch to “ON” positionor press the engine switch to change
the ignition mode to ON.
2) Open the driver’s window fully by hold-
ing the window switch in DOWN posi-
tion.
3) Close the driver’s window by holding
the switch in UP position, and keep
holding the switch for 2 seconds after
the window is fully closed.
4) Check the driver’s window to see if the AUTO-DOWN/UP feature works.
If the AUTO-DOWN/UP feature will not
work after initialization, there might be
something wrong with the pinching preven-
tion function. Have your vehicle inspected
by an authorized SUZUKI dealer.
MirrorsInside rearview mirror
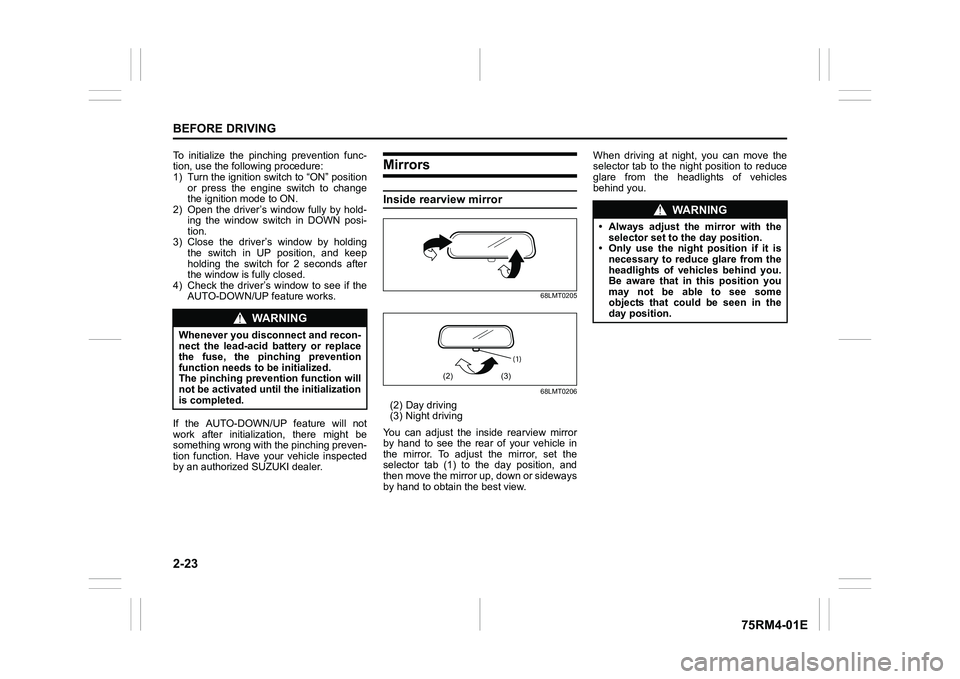
68LMT0205
68LMT0206
(2) Day driving
(3) Night driving
You can adjust the inside rearview mirror
by hand to see the rear of your vehicle in
the mirror. To adjust the mirror, set the
selector tab (1) to the day position, and
then move the mirror up, down or sideways
by hand to obtain the best view. When driving at night, you can move the
selector tab to the night position to reduce
glare from the headlights of vehicles
behind you.
WA R N I N G
Whenever you disconnect and recon-
nect the lead-acid battery or replace
the fuse, the pinching prevention
function needs to be initialized.
The pinching prevention function will
not be activated until the initialization
is completed.
(1)
(2) (3)
WA R N I N G
• Always adjust th
e mirror with the
selector set to th e day position.
• Only use the night position if it is necessary to reduce glare from the
headlights of vehicles behind you.
Be aware that in this position you
may not be able to see some
objects that could be seen in the
day position.
Page 48 of 505
2-25BEFORE DRIVING
75RM4-01E
Remote folding mirrors (if equipped)When the outside rearview mirrors folding
switch is in the unfolded position, the out-
side rearview mirrors are folded or
unfolded in conjunction with the door lock-
ing or engine switch operation.
• When you lock the doors (including the tailgate) by using the remote controller
or pushing the request switch, the mir-
rors will be folded automatically.
• To unfold the mirrors, push the engine switch to change the ignition mode to
ACC or ON.
• The factory setting is that the function is enabled. You can switch the function
from enabled to disabled, and vice
versa. To switch the function for your
preference, refer to “How to switch the
remote folding mi rrors function”. NOTE:
• If the doors are locked by using the key,
lock knob on a door or power door lock-
ing switch, the mirrors will not be folded
automatically.
• If the outside rearview mirrors folding
switch is in the folded position, the mir-
rors will not be unfolded automatically,
even when the engine switch is pushed
to change the ignition mode to ACC or
ON.
• If any of the doors is not opened within
about 30 seconds after the doors are
unlocked by using the keyless push start
system remote controller or request
switch, the doors will be locked again
and the mirrors will be folded automati-
cally. How to switch the remote folding mir-
rors function
When the ignition mode is LOCK (OFF),
you can switch the function from the
enabled state to the disabled state, and
vice versa, using the following method.
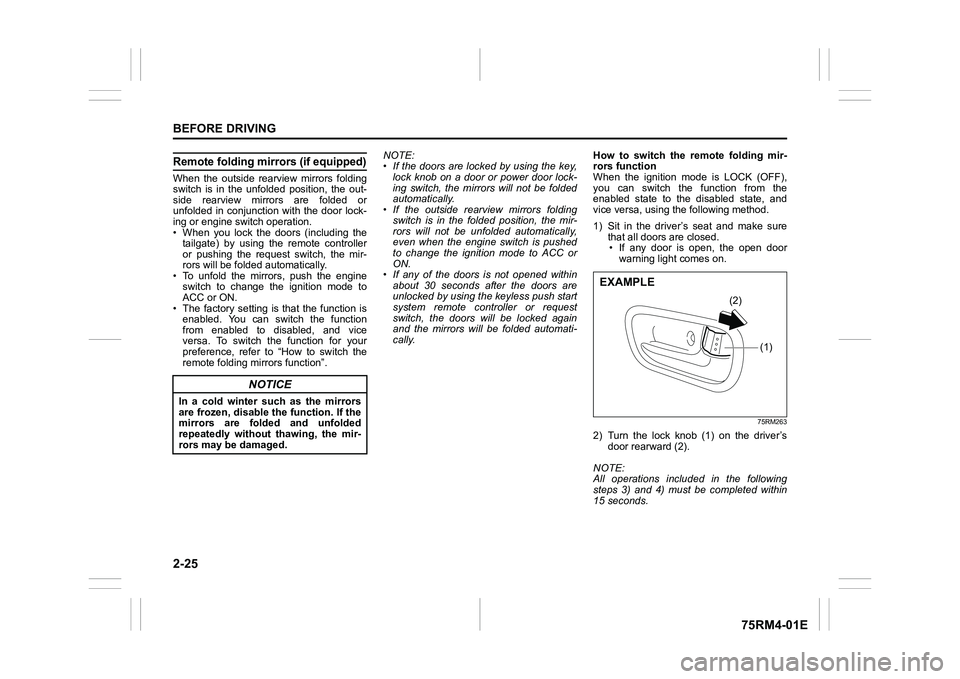
1) Sit in the driver’s seat and make sure
that all doors are closed.
• If any door is open, the open door warning light comes on.
75RM263
2) Turn the lock knob (1) on the driver’s door rearward (2).
NOTE:
All operations included in the following
steps 3) and 4) must be completed within
15 seconds.
NOTICE
In a cold winter such as the mirrors
are frozen, disable the function. If the
mirrors are folded and unfolded
repeatedly without thawing, the mir-
rors may be damaged.
(1)
(2)
EXAMPLE
Page 61 of 505
2-38
BEFORE DRIVING
75RM4-01E
When the driver and/or passenger(s)
do(does) not buckle his or her seat belt,
the seat belt reminder light will come on or
blink and a buzzer will sound as a
reminder to the driver and/or passenger(s)
to buckle his or her seat belt. For more
details, refer to the explanation below.
NOTE:
The driver’s seat belt reminder light / front
passenger’s seat belt reminder light is for
both the driver and front passenger. Driver’s seat belt reminder
If the driver’s seat belt remains unbuckled
when the ignition switch is turned to “ON”
position or the engine switch is pressed to
change the ignition mode to ON, the
reminder works as follows:
1) The seat belt reminder light will come
on.
2) After the vehicle’s speed has reached
about 15 km/h, the seat belt reminder
light will blink and a buzzer will sound
for about 95 seconds.
3) The reminder light will remain on until the driver’s seat belt is buckled.
If the driver has buckled his or her seat belt
and later unbuckles the seat belt, the
reminder system will be activated from
Step 1) or 2) according to the vehicle’s
speed. When the vehicle’s speed is less
than 15 km/h, the reminder will start from
Step 1). When the vehicle’s speed is more
than 15 km/h, the reminder will start from
Step 2).
The reminder will be automatically can-
celed when the driver’s seat belt is buckled
or the ignition switch is turned off, or the
engine switch is pressed to change the
ignition mode to LOCK (OFF). Front passenger’s seat belt reminder
(if equipped)
The front passenger’s seat belt reminder
will activate only when there is a passen-
ger sitting in the front seat. In some situa-
tions, however, such as when you place
heavy objects in the front seat, the seat
belt reminder can be activated as if a pas-
senger was present. The front passenger’s
seat belt reminder wo
rks in the same man-
ner as the driver’s seat belt reminder.
Rear passenger’s seat belt reminder
(if equipped)
If a rear seat belt is not fastened when the
engine is started, all the rear passenger’s
seat belt reminder lights will come on for
about 35 seconds and then go out.
Within this 35 seconds;
• For the instrument c luster with tachome-
ter, the corresponding reminder is high-
lighted. The reminder fades when the
seat belt is fastened.
• For the instrum ent cluster without
tachometer, the corresponding reminder
comes on with the frame. The reminder
goes off with leaving the frame when the
seat belt is fastened.
The rear passenger’s seat belt reminder
lights will also come on for about 35 sec-
onds in the following conditions.
• If a seat belt is unfastened when the vehicle speed is less than 15 km/h, the
corresponding light will come on.
WA R N I N G
It is absolutely essential that the
driver and passengers fasten their
seat belts at all times. Persons who
are not fastening seat belts have a
much greater risk of injury if an acci-
dent occurs. Make a regular habit of
buckling your seat belt before putting
the key in the ignition or pressing the
engine switch.
Page 62 of 505
2-39BEFORE DRIVING
75RM4-01E
• If a seat belt is unfastened when thevehicle speed is more than 15 km/h, the
corresponding light will come on and a
buzzer will sound.
The reminder will be automatically can-
celed when the rear seat belt is buckled or
the ignition switch is turned off, or the
engine switch is pressed to change the
ignition mode to LOCK (OFF).
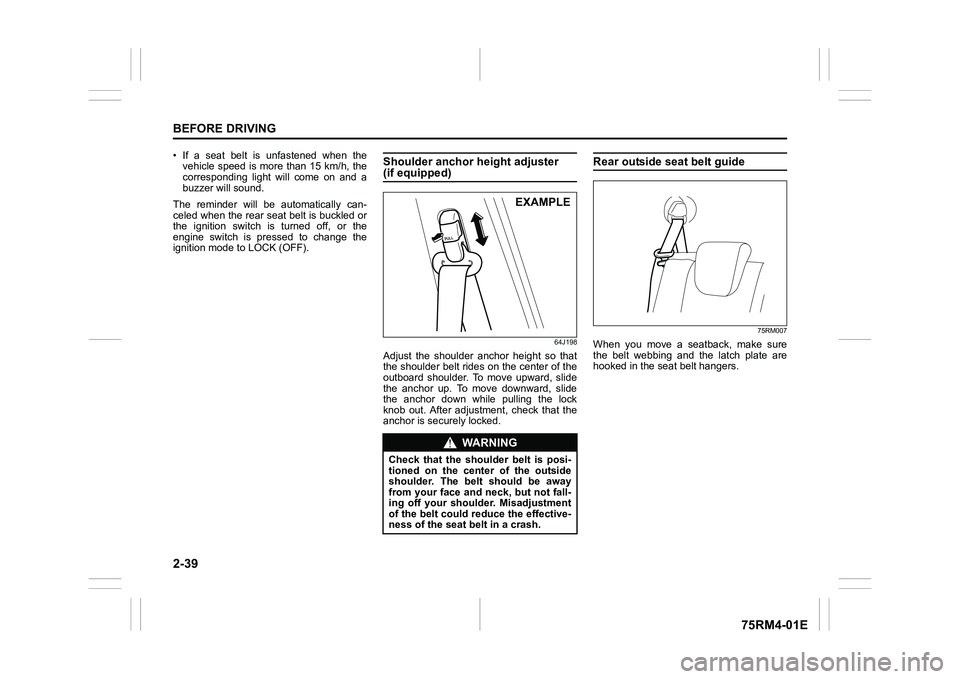
Shoulder anchor height adjuster (if equipped)
64J198
Adjust the shoulder anchor height so that
the shoulder belt rides on the center of the
outboard shoulder. To move upward, slide
the anchor up. To move downward, slide
the anchor down while pulling the lock
knob out. After adjustment, check that the
anchor is securely locked.
Rear outside seat belt guide
75RM007
When you move a seatback, make sure
the belt webbing and the latch plate are
hooked in the seat belt hangers.
WA R N I N G
Check that the shoulder belt is posi-
tioned on the cent er of the outside
shoulder. The belt should be away
from your face and neck, but not fall-
ing off your shoulder. Misadjustment
of the belt could reduce the effective-
ness of the seat belt in a crash.
EXAMPLE