engine overheat SUZUKI IGNIS 2022 User Guide
[x] Cancel search | Manufacturer: SUZUKI, Model Year: 2022, Model line: IGNIS, Model: SUZUKI IGNIS 2022Pages: 505, PDF Size: 8.36 MB
Page 252 of 505
4-5DRIVING TIPS
75RM4-01E
Tire chainsTire chains should only be used if they are
needed to increase traction or are required
by law. Check that the chains you use are
the correct size for your vehicle’s tires.
Also check that there is enough clearance
between the fenders and the chains as
installed on the tires.
Install the chains on the front tires tightly,
according to the chain manufacturer’s
instructions. Retighten the chains after
driving about 1.0 km (1/2 mile) if neces-
sary. With the chains installed, drive slowly.
Stuck vehicleIf your vehicle gets stuck in snow, mud or
sand, follow the directions below:
1) Shift the transaxle back and forthbetween a forward range (or first gear
for manual transaxle/Auto Gear Shift)
and reverse. This will create a rocking
motion which may give you enough
momentum to free the vehicle. Press
gently on the accelerator to keep wheel
spinning to a minimum wheel rpm.
Remove your foot from the accelerator
while shifting.
Do not race the engine. Excessive
wheel spin will cause the tires to dig
deeper, making it more difficult to free
the vehicle.
NOTE:
If your vehicle is equipped with the ESP
®
and/or grip control system, you may have
to turn the systems off in order to spin the
wheels. 2) If your vehicle rema
ins stuck after a few
minutes of rocking, we recommend you
to consult your SUZUKI dealer or a road-
side assistance service. If a towing ser-
vice is not available in an emergency,
your vehicle may be temporarily towed by
a towing cable or chain secured to the
towing hook either on the front of the
vehicle or on the rear of the vehicle. Refer
to “Frame hooks” in the “OTHER CON-
TROLS AND EQUIPMENT” section.
NOTICE
• If you hear the chains hitting against the vehicle body while driv-
ing, stop and tighten them.
• If your vehicle is equipped with full wheel caps, remove the wheel caps
before installing the chains or the
wheel caps can be damaged by the
chain bands.
WA R N I N G
Do not allow anyone to stand near
the vehicle when you are rocking it,
and do not spin the wheels faster
than an indicated 40 km/h (25 mph)
on the speedometer. Personal injury
and/or vehicle damage may result
from spinning the wheels too fast.
NOTICE
Do not continue rocking the vehicle
for more than a few minutes. Pro-
longed rocking can cause engine
overheating or transaxle damage.
Page 343 of 505
6-2
VEHICLE LOADING AND TOWING
75RM4-01E
To w b a r sOnly use a tow bar that is designed to
attach to the chassis of your vehicle, and a
hitch that is designed to bolt to this tow bar.
We recommend that you use a genuine
SUZUKI tow bar (available as option), or
equivalent.Safety chainsAlways attach safety chains between your
vehicle and trailer. Cross safety chains
under the nose of the trailer so that the
nose will not drop to the road if the trailer
becomes separated from the tow bar. Fol-
low the manufacturer’s recommendation
for attaching safety chains. Always leave
just enough slack to permit full turning.
Never allow safety chains to drag on the
road.
Trailer lightsCheck that your trailer is equipped with
lights which meet local requirements.
Always check for the proper operation of
all trailer lights before you start to tow.Brakes
WA R N I N G
For vehicles equipped with the dual
camera brake support, if your vehicle
is used to tow a trailer, press the dual
camera brake support OFF switch
and turn off the dual camera brake
support. If not, unexpected acci-
dents related to the system being
turned on may occur.
NOTICE
Trailer towing puts additional stress
on the engine, drive train and brakes
of your vehicle. Never tow a trailer
during the first 960 km (600 miles) of
vehicle operation.
NOTICE
When towing by a vehicle with CVT
on a long steep hill, try to take some
rest on the way to prevent overheat
or damage of the engine or transaxle.
WA R N I N G
Never use a tow bar which attaches
to the axle or the bumper of your
vehicle.
WA R N I N G
Never attach safety chains to the
bumper of your vehicle. Secure con-
nections so that they cannot come
loose.
WA R N I N G
Never connect trailer lights directly
into your vehicle’s electrical system,
or electrical system damage may
occur.
WA R N I N G
If trailer brakes are used, follow all
instructions provided by the manu-
facturer. Never connect to the brake
system of your vehicle and never
take an electrical supply directly from
the wiring harness.
Page 346 of 505
6-5VEHICLE LOADING AND TOWING
75RM4-01E
60A186
WA R N I N G
(Continued)
• Be careful when overtaking othervehicles. Allow enough room for
your trailer before changing lanes,
and use turn signal lights properly
in advance.
• Slow down and shift into a lower gear before you reach long or steep
downhill grades. It is hazardous to
attempt downshifting while you are
descending a hill.
• Do not step on the brake pedal strongly. This could cause the
brakes to over-heat resulting in
reduced braking efficiency. Use
engine braking as much as possi-
ble.
• Because of the added trailer weight, your engine may overheat
on hot days when going up long or
steep hills. Pay attention to your
engine temperature. If the high
engine coolant temperature warn-
ing light (red color) indicates over-
heating, pull off the road and stop
the vehicle in a safe place. Refer to
“Engine trouble: Overheating” in
the “EMERGENCY SERVICE” sec-
tion.
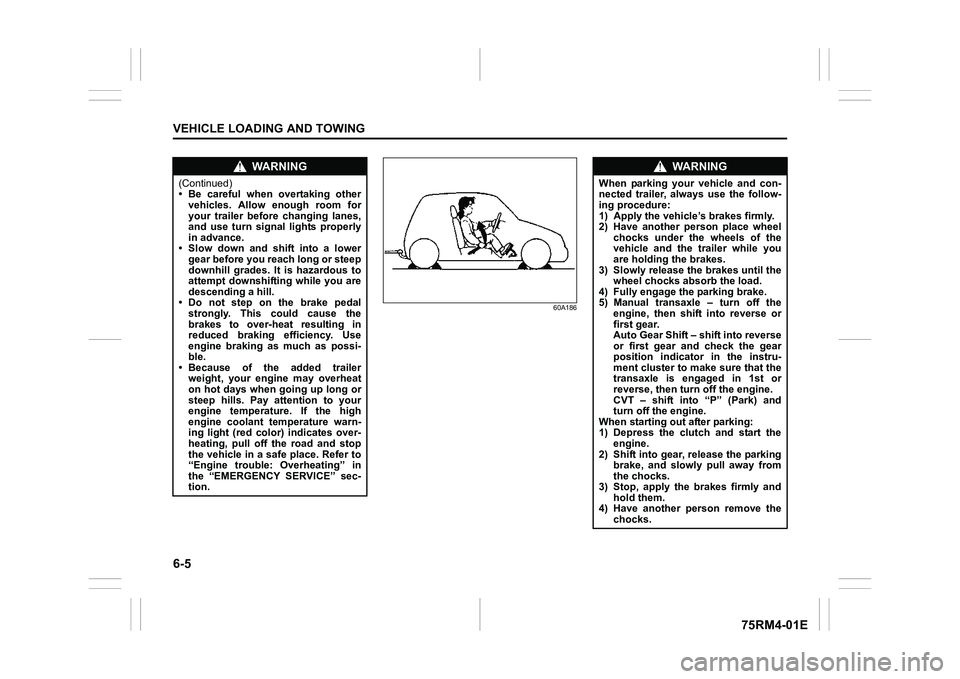
WA R N I N G
When parking your vehicle and con-
nected trailer, always use the follow-
ing procedure:
1) Apply the vehicle’s brakes firmly.
2) Have another person place wheel
chocks under the wheels of the
vehicle and the trailer while you
are holding the brakes.
3) Slowly release the brakes until the wheel chocks absorb the load.
4) Fully engage the parking brake.
5) Manual transaxle – turn off the engine, then shift into reverse or
first gear.
Auto Gear Shift – shift into reverse
or first gear and check the gear
position indicator in the instru-
ment cluster to make sure that the
transaxle is engaged in 1st or
reverse, then turn off the engine.
CVT – shift into “P” (Park) and
turn off the engine.
When starting out after parking:
1) Depress the clutch and start the engine.
2) Shift into gear, release the parking brake, and slowly pull away from
the chocks.
3) Stop, apply the brakes firmly and hold them.
4) Have another person remove the
chocks.
Page 372 of 505
7-23INSPECTION AND MAINTENANCE
75RM4-01E
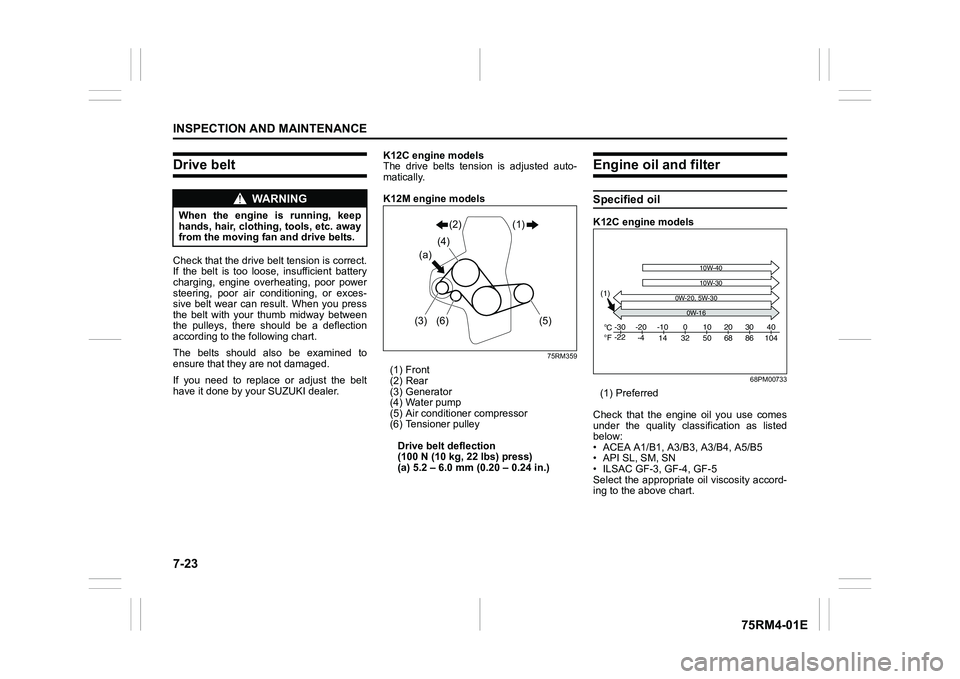
Drive beltCheck that the drive belt tension is correct.
If the belt is too loose, insufficient battery
charging, engine overheating, poor power
steering, poor air conditioning, or exces-
sive belt wear can result. When you press
the belt with your thumb midway between
the pulleys, there should be a deflection
according to the following chart.
The belts should also be examined to
ensure that they are not damaged.
If you need to replace or adjust the belt
have it done by your SUZUKI dealer.K12C engine models
The drive belts tension is adjusted auto-
matically.
K12M engine models
75RM359
(1) Front
(2) Rear
(3) Generator
(4) Water pump
(5) Air conditioner compressor
(6) Tensioner pulley
Drive belt deflection
(100 N (10 kg, 22 lbs) press)
(a) 5.2 – 6.0 mm (0.20 – 0.24 in.)
Engine oil and filterSpecified oil K12C engine models
68PM00733
(1) Preferred
Check that the engine oil you use comes
under the quality classification as listed
below:
• ACEA A1/B1, A3/ B3, A3/B4, A5/B5
• API SL, SM, SN
• ILSAC GF-3, GF-4, GF-5
Select the appropriate oil viscosity accord-
ing to the above chart.
WA R N I N G
When the engine is running, keep
hands, hair, clothing, tools, etc. away
from the moving fan and drive belts.
(a) (4)(2) (1)
(3) (6) (5)
C Fo
o-30
-22
-20
10W-40
-4-10
14 32 50 68 86 104 010203040
10W-30
(1)
0W-20, 5W-30
0W-16
Page 377 of 505
7-28
INSPECTION AND MAINTENANCE
75RM4-01E
Engine coolantSelection of coolantTo maintain optimum performance and
durability of your engine, use SUZUKI gen-
uine coolant or equivalent.
NOTE:
If you use the engine coolant other than
the SUZUKI LLC: Super (Blue) for replace-
ment, follow the schedule of SUZUKI LLC:
Standard (Green). To see the detail of the
maintenance schedule, refer to “Periodic
maintenance schedule” in this section.
This type of coolant is the best for cooling
system for the following reasons:
• The coolant helps maintain properengine temperature.
• It gives proper protection against freez- ing and boiling.
• It gives proper protection against corro- sion and rust. Failure to use the proper coolant can dam-
age your cooling system. Your authorized
SUZUKI dealer can help you select the
proper coolant.
Coolant level checkCheck the coolant le
vel at the reservoir
tank, not at the radiator. With the engine
cool, the coolant level should be between
“FULL” and “LOW” marks.Adding coolant
NOTICE
SUZUKI LLC: Super (Blue) coolant;
This coolant is already diluted to the
proper percentage. Do not dilute with
distilled water additionally. Doing so
may result in the possibility of freez-
ing and/or overheating coolant.
NOTICE
To avoid damaging your cooling sys-
tem:
• Always use a high quality ethylene
glycol base non-silicate type cool-
ant diluted with distilled water at
the correct mixture concentration.
• Check that the proper mix is 50/50
coolant to distill ed water and in no
case higher than 70/30. Concentra-
tions greater than 70/30 coolant to
distilled water will cause overheat-
ing conditions.
• Do not use straight coolant nor plain water (except SUZUKI LLC:
Super (Blue)).
• Do not add extra inhibitors or addi- tives. They may not be compatible
with your cooling system.
• Do not mix different types of base coolants. Doing so may result in
accelerated seal wear and/or the
possibility of severe overheating
and extensive engine or CVT (if
equipped) damage.
WA R N I N G
Swallowing engine coolant can cause
severe injury or death. Inhaling cool-
ant mist or vapors or getting coolant
in your eyes could result in severe
injury.
• Do not drink antifreeze or coolantsolution. If swallowed, do not
induce vomiting. Immediately con-
tact a poison control center or a
physician.
• Avoid inhaling coolant mist or hot
vapors. If inhaled, remove to a
fresh air area.
• If coolant gets in the eyes, flush
with water and seek medical atten-
tion.
• Wash thoroughly after handling
coolant.
• Keep engine coolant out of the
reach of children and pets.
Page 378 of 505
7-29INSPECTION AND MAINTENANCE
75RM4-01E
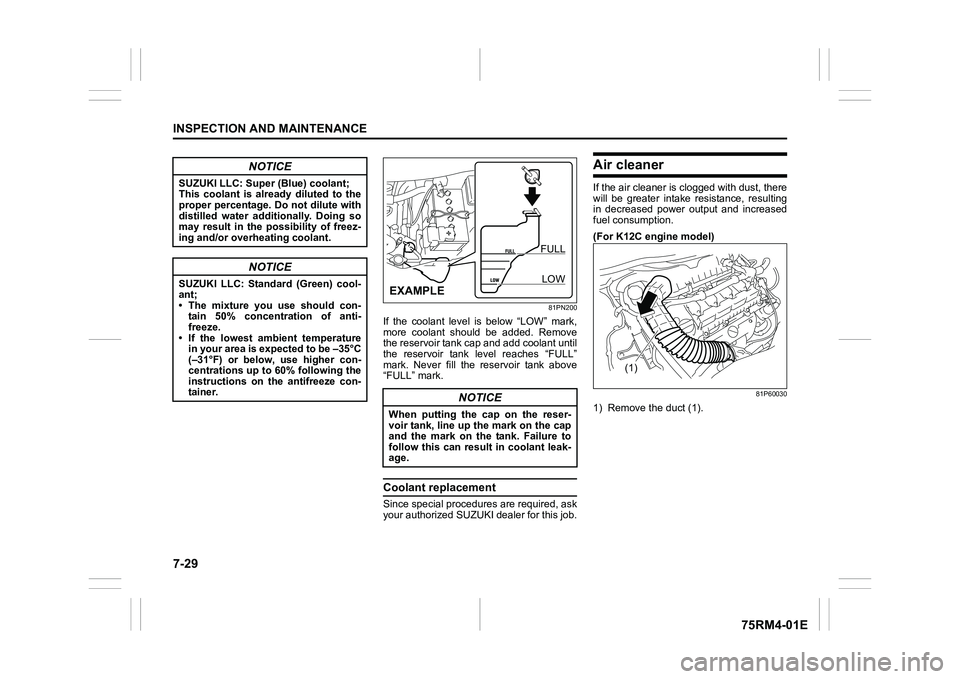
81PN200
If the coolant level is below “LOW” mark,
more coolant should be added. Remove
the reservoir tank cap and add coolant until
the reservoir tank level reaches “FULL”
mark. Never fill the reservoir tank above
“FULL” mark.Coolant replacementSince special procedures are required, ask
your authorized SUZUKI dealer for this job.
Air cleanerIf the air cleaner is clogged with dust, there
will be greater intake resistance, resulting
in decreased power output and increased
fuel consumption.
(For K12C engine model)
81P60030
1) Remove the duct (1).
NOTICE
SUZUKI LLC: Super (Blue) coolant;
This coolant is already diluted to the
proper percentage. Do not dilute with
distilled water additionally. Doing so
may result in the possibility of freez-
ing and/or overheating coolant.
NOTICE
SUZUKI LLC: Standard (Green) cool-
ant;
• The mixture you use should con-tain 50% concentration of anti-
freeze.
• If the lowest ambient temperature in your area is expected to be –35°C
(–31°F) or below, use higher con-
centrations up to 60% following the
instructions on the antifreeze con-
tainer.
NOTICE
When putting the cap on the reser-
voir tank, line up the mark on the cap
and the mark on the tank. Failure to
follow this can result in coolant leak-
age.
FULL
LOW
�(�Ο�Ν�0�3�/�(
(1)
Page 398 of 505
7-49INSPECTION AND MAINTENANCE
75RM4-01E
Bulb replacement
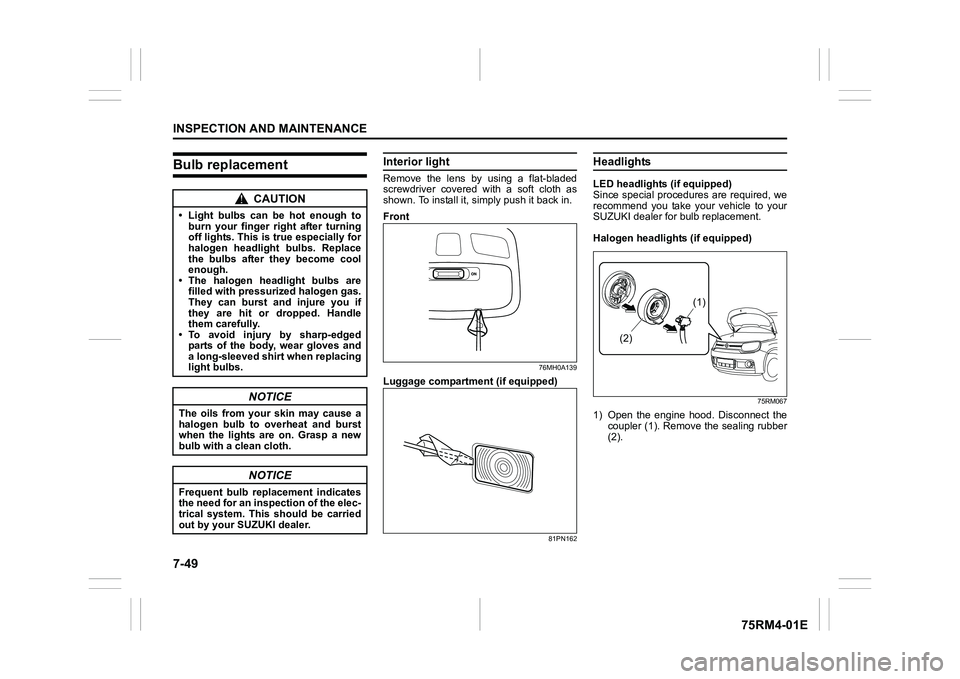
Interior lightRemove the lens by using a flat-bladed
screwdriver covered with a soft cloth as
shown. To install it, simply push it back in.
Front
76MH0A139
Luggage compartmen t (if equipped)
81PN162
HeadlightsLED headlights (if equipped)
Since special procedures are required, we
recommend you take your vehicle to your
SUZUKI dealer for bulb replacement.
Halogen headlights (if equipped)
75RM067
1) Open the engine hood. Disconnect the
coupler (1). Remove the sealing rubber
(2).
CAUTION
• Light bulbs can be hot enough to burn your finger right after turning
off lights. This is true especially for
halogen headlight bulbs. Replace
the bulbs after they become cool
enough.
• The halogen headlight bulbs are filled with pressurized halogen gas.
They can burst and injure you if
they are hit or dropped. Handle
them carefully.
• To avoid injury by sharp-edged
parts of the body, wear gloves and
a long-sleeved shirt when replacing
light bulbs.
NOTICE
The oils from your skin may cause a
halogen bulb to overheat and burst
when the lights are on. Grasp a new
bulb with a clean cloth.
NOTICE
Frequent bulb replacement indicates
the need for an inspection of the elec-
trical system. This should be carried
out by your SUZUKI dealer.
(1)
(2)
Page 409 of 505
EMERGENCY SERVICE
8
75RM4-01E
60G411
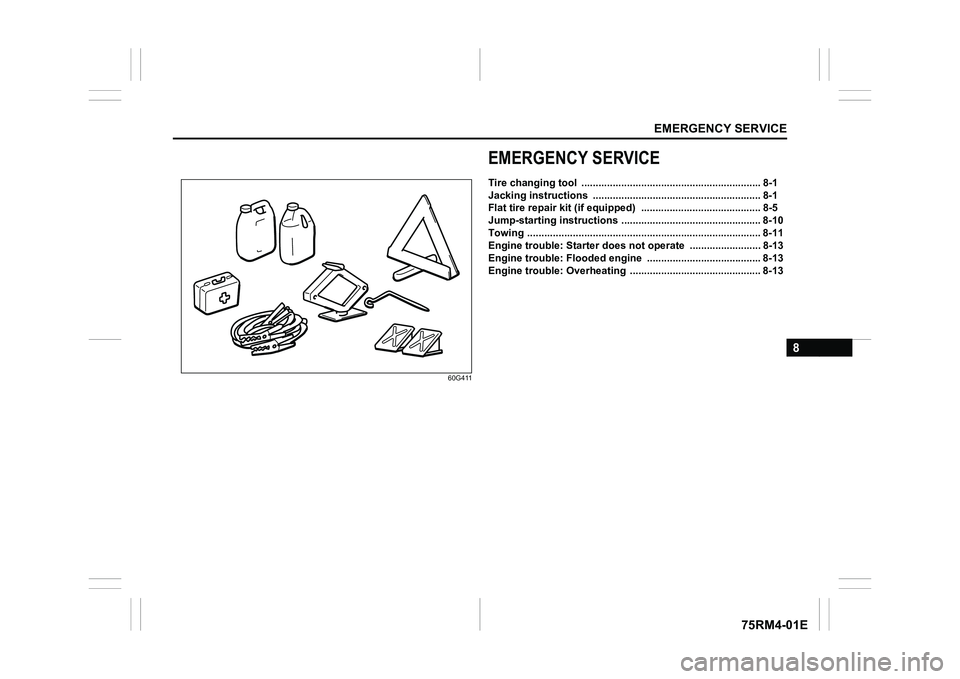
EMERGENCY SERVICETire changing tool ............................................................... 8-1
Jacking instructions .......................................... ................. 8-1
Flat tire repair kit (if equ ipped) .......................................... 8-5
Jump-starting instructions .................................... ............. 8-10
Towing ........................................................ .......................... 8-11
Engine trouble: Starter does not operate ...................... ... 8-13
Engine trouble: Flooded engine ................................ ........ 8-13
Engine trouble: Overheating ................................... ........... 8-13
Page 417 of 505
8-8
EMERGENCY SERVICE
75RM4-01E
81PN248
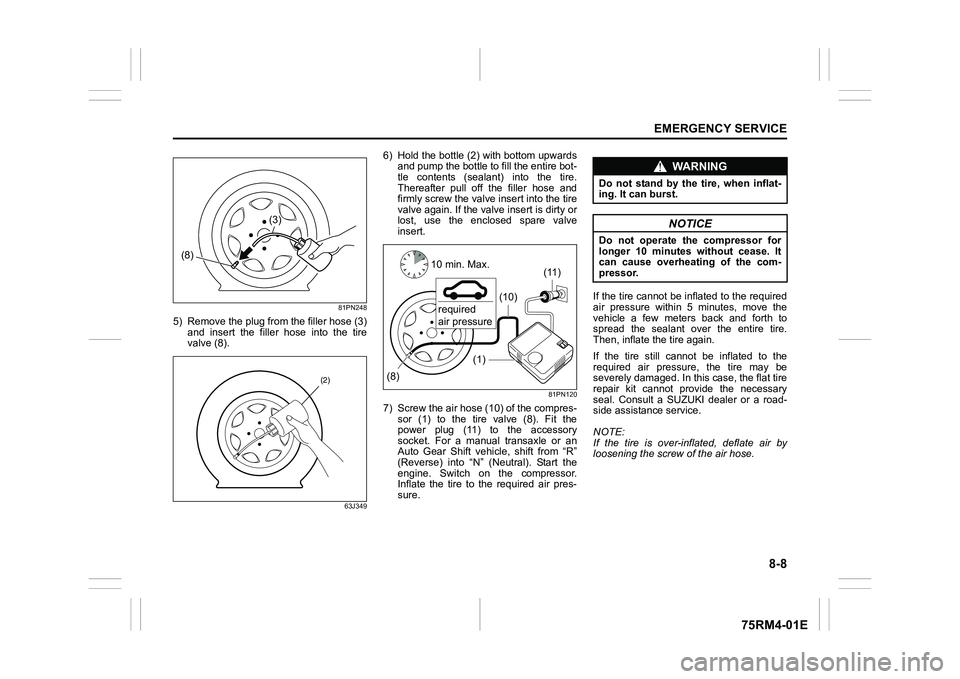
5) Remove the plug from the filler hose (3)and insert the filler hose into the tire
valve (8).
63J349
6) Hold the bottle (2) with bottom upwardsand pump the bottle to fill the entire bot-
tle contents (sealant) into the tire.
Thereafter pull off the filler hose and
firmly screw the valve insert into the tire
valve again. If the valve insert is dirty or
lost, use the enclosed spare valve
insert.
81PN120
7) Screw the air hose (10) of the compres- sor (1) to the tire valve (8). Fit the
power plug (11) to the accessory
socket. For a manual transaxle or an
Auto Gear Shift vehicle, shift from “R”
(Reverse) into “N” (Neutral). Start the
engine. Switch on the compressor.
Inflate the tire to the required air pres-
sure. If the tire cannot be inflated to the required
air pressure within 5 minutes, move the
vehicle a few meters back and forth to
spread the sealant over the entire tire.
Then, inflate the tire again.
If the tire still cannot be inflated to the
required air pressure, the tire may be
severely damaged. In this case, the flat tire
repair kit cannot provide the necessary
seal. Consult a SUZUKI dealer or a road-
side assistance service.
NOTE:
If the tire is over-inflated, deflate air by
loosening the screw of the air hose.
(3)
(8)
(2)
(1)
(8) (11)
(10)
10 min. Max.required
air pressure
WA R N I N G
Do not stand by the tire, when inflat-
ing. It can burst.
NOTICE
Do not operate the compressor for
longer 10 minutes without cease. It
can cause overheating of the com-
pressor.
Page 419 of 505
8-10
EMERGENCY SERVICE
75RM4-01E
Using compressor to inflate a tire1) Place the vehicle on level, hard ground.
Set the parking brake firmly and shift
into “P” (Park) if your vehicle has a
CVT, or shift into “R” (Reverse) if your
vehicle has a manual transaxle or Auto
Gear Shift.
2) Take out the compressor.
3) Unscrew the valve cap from the tire valve.
4) Connect the air ho se of the compressor
to the tire valve.
5) Connect the power plug of the com- pressor to the accessory socket. For a
manual transaxle or an Auto Gear Shift
vehicle, shift from “R” (Reverse) into “N”
(Neutral). Start the engine. Switch on
the compressor. Inflate the tire to the
required air pressure.
Jump-starting instructions
1) Use only a 12-volt lead-acid battery to
jump-start your vehicle. Position the
good 12-volt lead-acid battery close to
your vehicle so that the jump leads will
reach both batteries. When using a bat-
tery installed on another vehicle, check
that two vehicles do not touch each
other. Set the parking brakes fully on
both vehicles.
2) Turn off all vehicle accessories, except those necessary for safety reasons (for
example, headlights or hazard lights).
NOTICE
Do not operate the compressor for
longer than 10 minutes. It can cause
overheating of the compressor.
WA R N I N G
• Never attempt to jump-start your
vehicle if the lead-acid battery
appears to be frozen. Batteries in
this condition may explode.
• When making jump lead connec- tions, check that your hands and
the jump leads remain clear from
pulleys, belts or fans.
• Lead-acid batteries produce flam-
mable hydrogen gas. Keep flames
and sparks away from the battery
or an explosion may occur. Never
smoke when working near the bat-
tery.
• If the booster ba ttery you use for
jump-starting is installed in another
vehicle, check that the two vehicles
are not touching each other.
• If your lead-acid battery discharges repeatedly, for no apparent reason,
have your vehicle inspected by an
authorized SUZUKI dealer.
• To avoid harm to yourself or dam- age to your vehicle or battery, fol-
low the jump-starting instructions
below.
If you are in doubt, call for qualified
road service.
NOTICE
Your vehicle should not be started by
pushing or towing. This starting
method could result in permanent
damage to the catalytic converter.
Use jump leads to start a vehicle with
a weak or flat battery.