setting mode SUZUKI IGNIS 2022 User Guide
[x] Cancel search | Manufacturer: SUZUKI, Model Year: 2022, Model line: IGNIS, Model: SUZUKI IGNIS 2022Pages: 505, PDF Size: 8.36 MB
Page 99 of 505
2-76
BEFORE DRIVING
75RM4-01E
To change when the value of average fuel
consumption is reset, refer to “Setting
mode” in this section.
NOTE:
If you add only a small amount of fuel
when you select “Reset after refuel”, the
average fuel consumption value may not
be reset.
Driving range
If you selected driving range the last time
you drove the vehicle, the display indicates
“---” for a few seconds and then indicates
the current driving range when the ignition
switch is turned to “ON” position or the
engine switch is pressed to change the
ignition mode to ON.
The driving range shown in the display is
the approximate distance you can drive
until the fuel gauge indicates “E”, based on
current driving conditions.
When the low fuel warning light comes on,
the display “---” will appear.
If the low fuel warning light comes on, fill
the fuel tank immediately regardless of the
value of driving range shown in the display.
As the driving range after refueling is cal-
culated based on the most recent driving
condition, the value is different each time
you refuel. NOTE:
• If you refuel when the ignition switch is in
“ON” position or the i gnition mode is ON,
the driving range may not indicate the
correct value.
• When you reconnect the negative (–)
terminal to the lead-acid battery, the
value of driving range will be shown after
driving for a period of time.
Average Speed
If you selected average speed the last time
you drove the vehicle, the display indicates
the last value of average speed from previ-
ous driving when the ignition switch is
turned to “ON” position or the engine
switch is pressed to change the ignition
mode to ON. Unless you reset the value of
average speed, the display indicates the
value of average speed which includes
average speed during previous driving.
To reset the value of average speed, push
and hold the information switch (2) for a
while when the display indicates an aver-
age speed. The display shows “---” and
then indicates a new average speed after
driving for a short time.
NOTE:
When you reconnect the negative (–) ter-
minal to the lead-acid battery, the value of
average speed will be shown after driving
for a period of time. Driving time
The display shows the total amount of driv-
ing time since the indication was reset.
• To reset the driving time to zero, push
and hold the information switch (2) for a
while when the display shows the driving
time.
NOTE:
When you reset the indication or reconnect
the negative (–) terminal to the lead-acid
battery, the driving time will be shown after
driving for a while.
Total idling stop time (if equipped)
The display shows the total length (in
hours, minutes and seconds) of engine
stopping time by ENG A-STOP system
since the indication was reset.
• To reset the total idling stop time to zero, push and hold the information switch (2)
for a while when the display shows the
total idling stop time.
NOTE:
• The indicated maximum value of the total idling stop time is 99:59:59.
• When you reconnect the negative (–) terminal to the lead-acid battery, the
value of the total idling stop time will be
reset.
Page 102 of 505
2-79BEFORE DRIVING
75RM4-01E
Eco-driving displayWhen you turn the ignition switch to
“LOCK” position or press the engine switch
to change the ignition mode to LOCK
(OFF), the following information appears
for several seconds on the information dis-
play.
75RM406
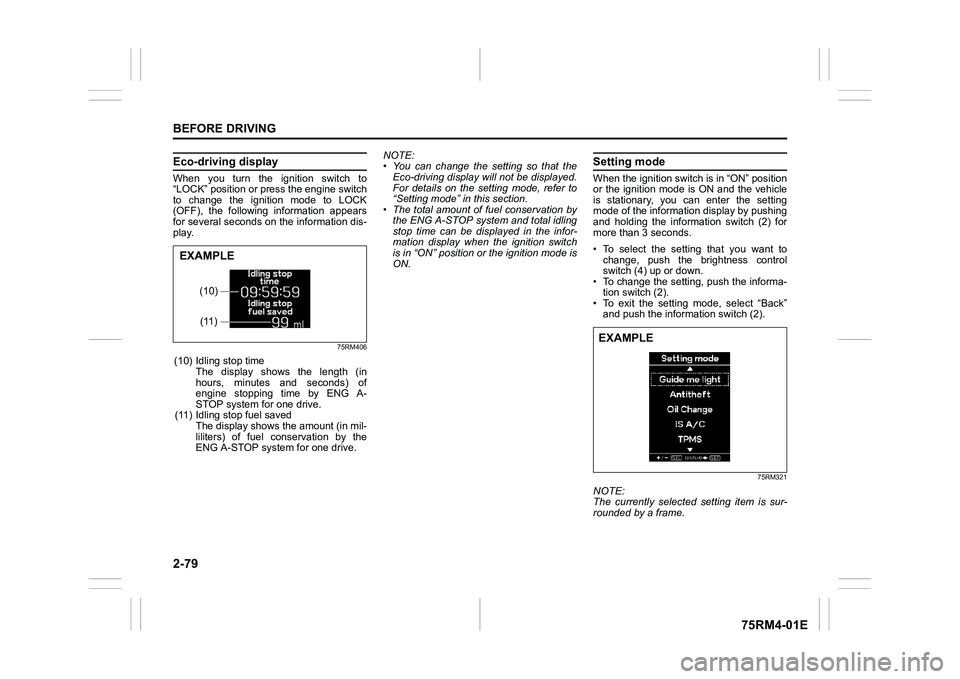
(10) Idling stop time The display shows the length (in
hours, minutes and seconds) of
engine stopping time by ENG A-
STOP system for one drive.
(11) Idling stop fuel saved The display shows the amount (in mil-
liliters) of fuel conservation by the
ENG A-STOP system for one drive. NOTE:
• You can change the setting so that the
Eco-driving display will not be displayed.
For details on the setting mode, refer to
“Setting mode” in this section.
• The total amount of fuel conservation by
the ENG A-STOP system and total idling
stop time can be displayed in the infor-
mation display when the ignition switch
is in “ON” position or the ignition mode is
ON.
Setting modeWhen the ignition switch is in “ON” position
or the ignition mode is ON and the vehicle
is stationary, you can enter the setting
mode of the information display by pushing
and holding the information switch (2) for
more than 3 seconds.
• To select the settin g that you want to
change, push the brightness control
switch (4) up or down.
• To change the setting, push the informa-
tion switch (2).
• To exit the setting mode, select “Back” and push the information switch (2).
75RM321
NOTE:
The currently selected setting item is sur-
rounded by a frame.
(10)(11)
EXAMPLE
EXAMPLE
Page 103 of 505
2-80
BEFORE DRIVING
75RM4-01E
NOTE:
• If you push and hold the informationswitch (2) to enter the setting mode
when the display (C) shows average fuel
consumption, average speed, driving
time, total idling stop time or total idling
fuel saved, the value will be reset simul-
taneously. If you do not want to reset the
value, push the information switch
quickly to switch the indication of the dis-
play.
• If you turn the ignition switch, press the
engine switch or start to move the vehi-
cle when the display is in the setting
mode, the setting mode will be canceled
automatically.
Distance unit (Odometer / trip meter distance unit setting)You can change the units in which odome-
ter / trip meter / driving range distance is
displayed.
Fuel economy
(Fuel consumption unit setting)
You can change the units that fuel con-
sumption is displayed in.
Language
You can change the language of the infor-
mation display.
Fuel reset
(Average fuel consumption reset setting)
You can change when the value of aver-
age fuel consumption is reset. Temperature (Tempera
ture unit setting)
You can change the units that temperature
is displayed in.
NOTE:
When you change the units that tempera-
ture is displayed in, the automatic heating
and air conditioning system (if equipped)
temperature display units will be changed
automatically.
Clock setting (Adjusting the clock)
• To change the hour indication, push the brightness control switch (4) up or down
repeatedly when the hour indication
appears as reversed color. To change
the hour indication quickly, push and
hold the brightness control switch (4). To
set the hour indication, push the informa-
tion switch (2) and the minute indication
appears as reversed color.
• To change the minute indication, push the brightness control switch (4) up or
down repeatedly when the minute indi-
cation appears as reversed color. To
change the minute indication quickly,
push and hold the brightness control
switch (4). To set the minute indication,
push the information switch (2).
You can also switch the time indication
between 12-hour and 24-hour format. Door lock (Door
unlock setting)
(if equipped)
You can choose either once or twice oper-
ation(s) to unlock all doors (including the
tailgate) by turning the key, or operating
the keyless entry syst em transmitter, key-
less push start system remote controller or
request switch.
If your vehicle is equip ped with the keyless
push start system, you can also turn off or
on the buzzer sound when the door(s)
is(are) locked or unlocked.
Lights (Light setting)
Lane change (Turn signal lights setting)
The turn signal and its indicator can be set
whether they flash three times even if you
return the turn signal control lever immedi-
ately after moving it.
Guide me light setting (Light setting)
(if equipped)
You can change the lighting time of “To
car” function or “To home” function.
Antitheft
(Theft deterrent alarm system setting)
(if equipped)
You can switch the theft deterrent alarm
system from the enabled state to the dis-
abled state, and vice versa.
The state of the theft deterrent alarm sys-
tem is shown on the information display as
follows:
• Mode A: Disabled state
• Mode D: Enabled state
Page 104 of 505
2-81BEFORE DRIVING
75RM4-01E
NOTE:
For the theft deterrent alarm system of
other than Australia, Israel, Germany and
Taiwan models, refer to “Theft deterrent
alarm system” in this section.
Oil change
(Oil life monitoring system reset setting)
(if equipped)
The oil life monitoring system must be
reset after changing the engine oil and oil
filter.
IS A/C (ENG A-STOP system setting)
(if equipped)
• When using the automatic heating and air conditioning system (if equipped),
you can select one of the following
engine auto stop settings.
– Standard
– Economy
–Comfort
• When “Economy” is selected, engine
auto stop condition is eased, compared
with “Standard”. Engine auto stop condi-
tion will occur more f requently, the stop
time will be longer, leading to reduction
of fuel consumption.
• When “Comfort” is sel ected, engine auto
stop condition becomes severe, com-
pared with “Standard”. Engine auto stop
condition will occur less frequently, the
stop time will be shorter, leading to more
comfortable cabin condition by air condi-
tioner. TPMS
(Tire pressure monitoring system set-
ting) (if equipped)
• You can check the current tire inflation
pressure on the information display.
• You can set one of the initial values of
tire pressure below that are indicated on
the tire information label.
– Comfort Mode
– Load Mode
Refer to “Tire pressure monitoring system
(TPMS)” in the “OPERATING YOUR VEHI-
CLE” section for details.
Display item (if equipped)
(Idling stop setting)
You can switch whether the information
display shows the engine stopping time by
the ENG A-STOP system.
(Idling disp setting)
You can switch whether the information
display shows the Eco-driving display
when the ignition switch is turned to
“LOCK” position or the ignition mode is
changed to LOCK (OFF).
(Idling warn setting)
You can switch whether the information
display shows the warning and indicator
messages related on the ENG A-STOP
system.
(Regen disp setting)
You can choose that the deceleration
energy regenerating indicator light comes
on or does not come on. Default (initialization setting)
If you select “YES” and push the informa-
tion switch (2), all settings will be reinitial-
ized.
Page 114 of 505
2-91BEFORE DRIVING
75RM4-01E
Vehicle with ENG A-STOP systemWarning and indicator message Master warning
indicator light Sound Cause and remedy
75RM269
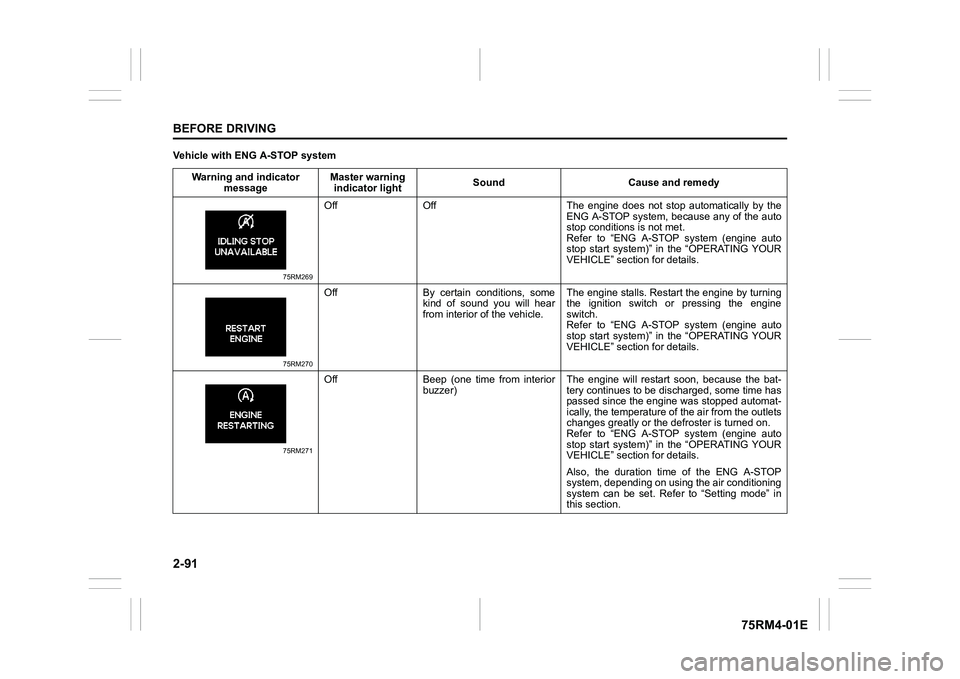
Off Off The engine does not s
top automatically by the
ENG A-STOP system, because any of the auto
stop conditions is not met.
Refer to “ENG A-STOP system (engine auto
stop start system)” in the “OPERATING YOUR
VEHICLE” section for details.
75RM270
Off By certain conditions, some kind of sound you will hear
from interior of the vehicle. The engine stalls. Restar
t the engine by turning
the ignition switch or pressing the engine
switch.
Refer to “ENG A-STOP system (engine auto
stop start system)” in the “OPERATING YOUR
VEHICLE” section for details.
75RM271
Off Beep (one time from interior buzzer) The engine will restart soon, because the bat-
tery continues to be disc
harged, some time has
passed since the engin e was stopped automat-
ically, the temperature of the air from the outlets
changes greatly or the defroster is turned on.
Refer to “ENG A-STOP system (engine auto
stop start system)” in the “OPERATING YOUR
VEHICLE” section for details.
Also, the duration time of the ENG A-STOP
system, depending on using the air conditioning
system can be set. Refer to “Setting mode” in
this section.
Page 122 of 505
2-99BEFORE DRIVING
75RM4-01E
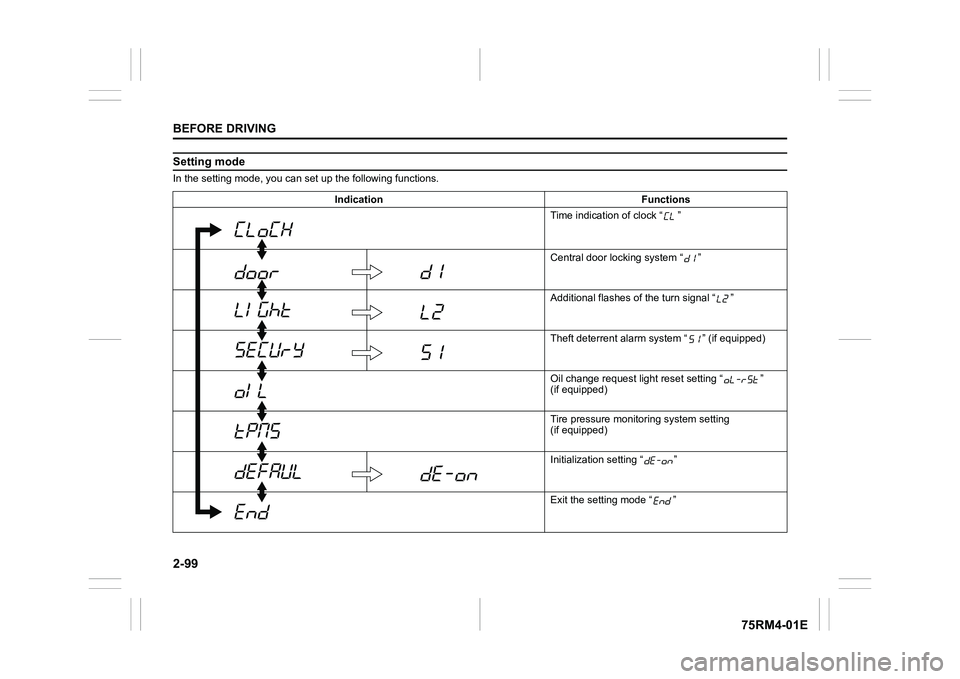
Setting modeIn the setting mode, you can set up the following functions.
Indication Functions Time indication of clock “ ”
Central door locking system “ ”
Additional flashes of the turn signal “ ”
Theft deterrent alarm system “ ” (if equipped)
Oil change request lig ht reset setting “ ”
(if equipped)
Tire pressure monito ring system setting
(if equipped)
Initialization setting “ ”
Exit the setting mode “ ”
Page 123 of 505
2-100
BEFORE DRIVING
75RM4-01E
NOTE:
Depending on vehicle’s specifications,
some items may not be displayed.
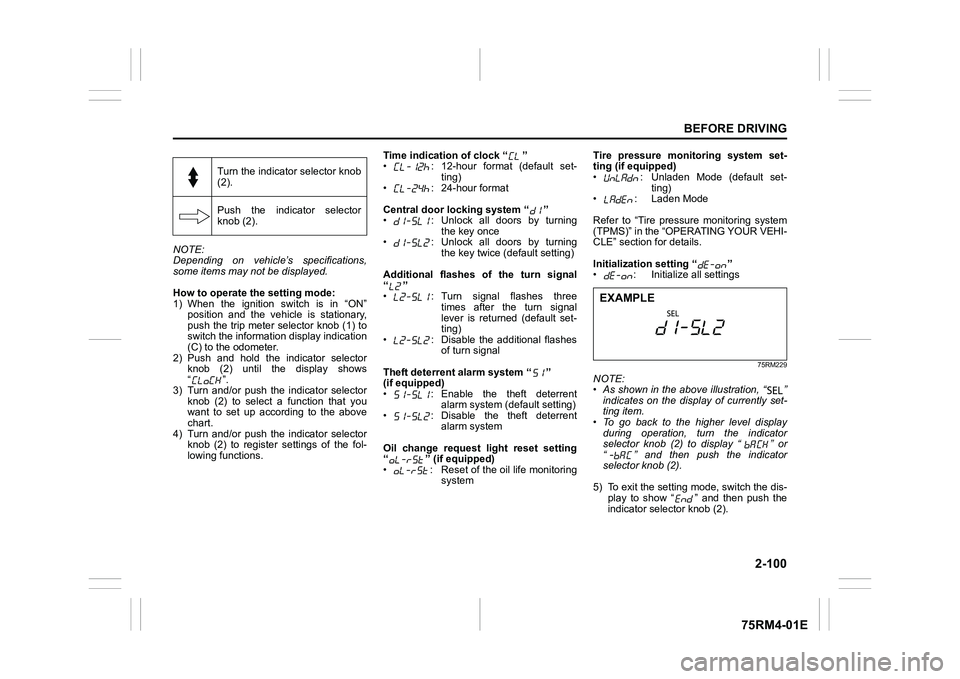
How to operate the setting mode:
1) When the ignition switch is in “ON”
position and the vehicle is stationary,
push the trip meter selector knob (1) to
switch the information display indication
(C) to the odometer.
2) Push and hold the indicator selector knob (2) until the display shows
“”.
3) Turn and/or push the indicator selector knob (2) to select a function that you
want to set up according to the above
chart.
4) Turn and/or push the indicator selector knob (2) to register settings of the fol-
lowing functions. Time indication of clock “ ”
• : 12-hour format (default set-
ting)
• : 24-hour format
Central door locking system “ ”
• : Unlock all doors by turning the key once
• : Unlock all doors by turning
the key twice (default setting)
Additional flashes of the turn signal
“”
• : Turn signal flashes three times after the turn signal
lever is returned (default set-
ting)
• : Disable the additional flashes of turn signal
Theft deterrent alarm system “ ”
(if equipped)
• : Enable the theft deterrent alarm system (default setting)
• : Disable the theft deterrent alarm system
Oil change request light reset setting
“ ” (if equipped)
• : Reset of the oil life monitoring system Tire pressure monitoring system set-
ting (if equipped)
• : Unladen Mode (default set-
ting)
• : Laden Mode
Refer to “Tire pressure monitoring system
(TPMS)” in the “OPERATING YOUR VEHI-
CLE” section for details.
Initialization setting “ ”
• : Initialize all settings
75RM229
NOTE:
• As shown in the above illustration, “ ”
indicates on the disp lay of currently set-
ting item.
• To go back to the higher level display
during operation, turn the indicator
selector knob (2) to display “ ” or
“ ” and then push the indicator
selector knob (2).
5) To exit the setting mode, switch the dis- play to show “ ” and then push the
indicator selector knob (2).
Turn the indicator selector knob
(2).
Push the indicator selector
knob (2).EXAMPLE
Page 136 of 505
2-113BEFORE DRIVING
75RM4-01E
Low engine coolant temperature light (blue color)
54G344
When the ignition switch is turned to “ON”
position or the engine switch is pressed to
change the ignition mode to ON, this light
comes on and stays on if the engine is
cold, and goes off after the engine warms
up.
If this light still stays on after the engine
warms up, there is a problem with the sys-
tem.
Have your vehicle inspected by your
SUZUKI dealer.
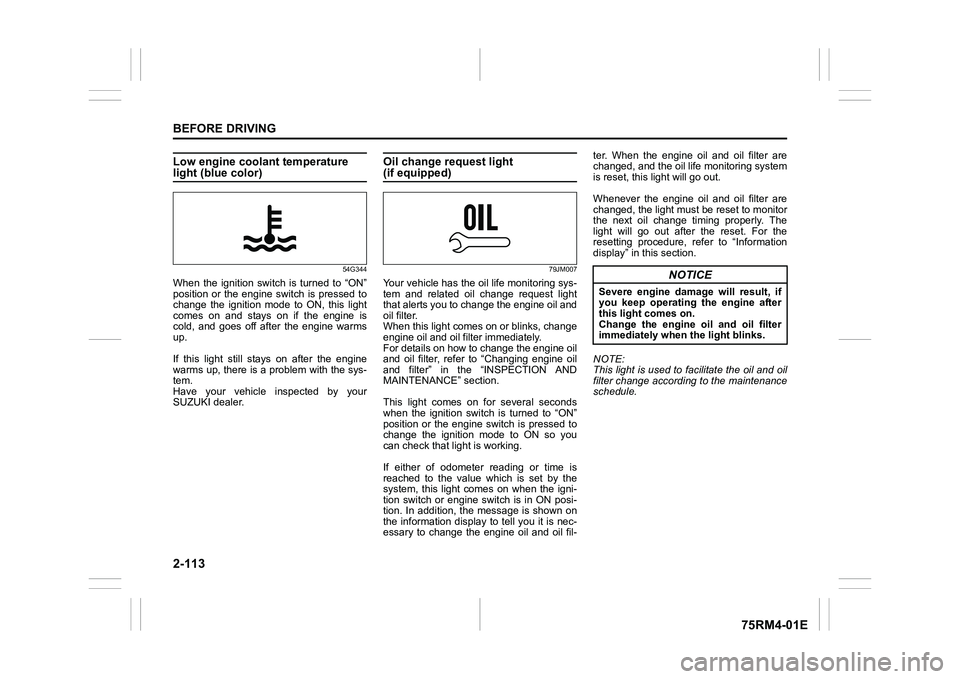
Oil change request light(if equipped)
79JM007
Your vehicle has the oil life monitoring sys-
tem and related oil change request light
that alerts you to change the engine oil and
oil filter.
When this light comes on or blinks, change
engine oil and oil filter immediately.
For details on how to change the engine oil
and oil filter, refer to “Changing engine oil
and filter” in the “INSPECTION AND
MAINTENANCE” section.
This light comes on for several seconds
when the ignition switch is turned to “ON”
position or the engine switch is pressed to
change the ignition mode to ON so you
can check that light is working.
If either of odometer reading or time is
reached to the value which is set by the
system, this light comes on when the igni-
tion switch or engine switch is in ON posi-
tion. In addition, the message is shown on
the information display to tell you it is nec-
essary to change the engine oil and oil fil-ter. When the engine oil and oil filter are
changed, and the oil life monitoring system
is reset, this light will go out.
Whenever the engine oil and oil filter are
changed, the light must be reset to monitor
the next oil change timing properly. The
light will go out after the reset. For the
resetting procedure, r
efer to “Information
display” in this section.
NOTE:
This light is used to facilitate the oil and oil
filter change according to the maintenance
schedule.
NOTICE
Severe engine damage will result, if
you keep operating the engine after
this light comes on.
Change the engine oil and oil filter
immediately when the light blinks.
Page 141 of 505
2-118
BEFORE DRIVING
75RM4-01E
Light reminder buzzerThe interior buzzer continuously beeps if
you open the driver’s door without turning
off the headlights and position lights. This
function is triggered under the following
condition:
The headlights and/or position lights are
on even after the ignition switch is turned
off, or the engine switch is pressed to
change the ignition mode to LOCK (OFF).
The buzzer stops sounding when you turn
off the headlights and position lights.
NOTE:
A message is indicated on the information
display in the instrument cluster with
tachometer while the buzzer is sounding.Daytime running light (D.R.L.) sys-tem (if equipped)When the engine is started, this system
turns on the daytime running lights.
Conditions for D.R.L. system operation
1) The engine is running.
2) Headlights and front fog light (if equipped) are off.
NOTE:
Brightness of the daytime running lights is
different from the bri ghtness of the position
lights, but it is not a malfunction.
Guide me light (if equipped)To home function
This function turns on the front position
lights and the headlights in the low beam
setting for about 10 seconds after the igni-
tion switch is turned to “LOCK” position or
the engine switch is pressed to change the
ignition mode to LOCK (OFF).
To set the function:
1) Turn the lighting switch to “AUTO” posi- tion
2) Turn the ignition switch to “LOCK” posi- tion or press the engine switch to
change the ignition mode to LOCK
(OFF).
3) Pull the lighting control lever toward you once and open the driver’s side
door within 60 seconds. Or pull the
lighting control lever toward you once
while the driver’s side door is open.
To cancel the function:
Perform any of the following operations.
• Pull the lighting control lever toward you once.
• Insert the key into the ignition switch or
change the ignition mode to ACC or ON
by pressing the engine switch.
• Turn the lighting switch to any other
position than “AUTO” position. NOTE:
• When the “To home” is functioning, the
front fog lights, rear fog lights and the
headlights (high beam) are not turned
on.
• Lighting time of the “To home” function
can be changed on the information dis-
play. Refer to “Information display” in this
section.
To car function
If UNLOCK button of the keyless push start
system remote controller or the keyless
entry system transmitter is pressed while
the lighting switch is positioned in “AUTO”,
the front position lights and the headlights
in the low beam are turned on for 10 sec-
onds.
This function will operate only when it is
dark outside the vehicle.
To cancel the function:
Perform any of the following operations.
• Lock the doors by using the keyless push start system rem ote controller, the
request switch or the keyless entry sys-
tem transmitter, or insert the key into the
driver’s door lock.
• Insert the key into the ignition switch or
change the ignition mode to ACC or ON
by pressing the engine switch.
• Turn the lighting switch to any other
position than “AUTO” position.
Page 147 of 505

2-124
BEFORE DRIVING
75RM4-01E
Turn signal operationWith the ignition switch in “ON” position or
the ignition mode ON, move the lever
upward or downward to activate the right
or left turn signals.
Normal turn signal
68PM00234
Move the lever all the way upward or
downward to signal. When the turn is com-
pleted, the signal will cancel and the lever
will return to its normal position.Lane change signal
68PM00235
Move the lever partway upward or down-
ward to turn right or left and hold the lever
in the moved position.
• The turn signal and its indicator flash
while the lever is held at the moved posi-
tion.
The turn signal and its indicator flash 3
times even if you return the lever immedi-
ately after moving it.
NOTE:
The turn signal and its indicator can be set
whether they flash 3 times after the turn
signal lever is returned via the information
display. Refer to “Information display” in
this section. NOTE:
You can customize the setting for the num-
ber of flashing times of the turn signal and
its indicator (1 to 4 times). Please ask an
authorized SUZUKI dealer for the customi-
zation.
EXAMPLE
EXAMPLE