Speed control SUZUKI IGNIS 2022 Owner's Manual
[x] Cancel search | Manufacturer: SUZUKI, Model Year: 2022, Model line: IGNIS, Model: SUZUKI IGNIS 2022Pages: 505, PDF Size: 8.36 MB
Page 203 of 505
3-50
OPERATING YOUR VEHICLE
75RM4-01E
Be careful of the following when operat-
ing with the cruise control
Even if your vehicle is equipped with the
dual camera brake support, it cannot auto-
matically adjust to the speed of the vehicle
in front of you. Turn off the cruise control
system if you cannot operate safely at a
cruising speed.
Even in the following conditions, the set
indicator (5) will not go off and the cruising
speed will not be canceled.
• When the frontal collision warning isworking. If you depress the brake pedal,
the cruise speed will be canceled tempo-
rarily.
• When the stereo camera detects dirt on
the windshield and the dual camera
brake support stops functioning. For
safety purposes, push the cruise switch
(1) to turn off the cru ise indicator (4).
If the automatic brake system is working,
the cruise indicator (4) will turn off and the
cruise control system will be canceled.
Once you have determined that the condi-
tions are once again safe, reset the cruise
speed.
Changing speed temporarilyWhen the cruising speed is maintained,
you can temporarily accelerate or deceler-
ate.
To accelerate, depre ss the accelerator
pedal. When you take your foot off the
pedal, your vehicle will return to the set
speed.
To decelerate, depress the brake pedal.
The set speed will be canceled and the set
indicator (5) or “SET” indicator light (7) will
go off.
To resume the previously set speed, push
up the “RES +/SET –” switch (3) and turn
on the set indicator (5) or “SET” indicator
light (7) again when vehicle speed is
above 45 km/h (28 mph). The vehicle will
accelerate to and maintain the previously
set speed.
NOTE:
For CVT with manual mode or Auto Gear
Shift vehicle, when the cruising speed is
maintained, you cannot decelerate by
using the engine brake even if you down-
shift from higher gear to 3rd in the manual
mode.
To decelerate while the cruise control is
on, depress the brake pedal or push down
the “RES +/SET –” switch (3).
Changing cruising speedUsing the accelerator pedal
To reset at a faster cruising speed, accel-
erate to the desired speed using the accel-
erator pedal and push down the “RES +/
SET –” switch (3). The new speed will be
maintained.
Using the brake pedal
To reset at a slower cruising speed, decel-
erate to the desired speed using the brake
pedal and push down the “RES +/SET –”
switch (3). The new speed will be main-
tained.
NOTE:
When the brake pedal is depressed, the
set indicator (5) or “ SET” indicator light (7)
goes off until the cruising speed is reset.
Using “RES +/ SET –” switch
To reset at a faster cruising speed, press
repeatedly or hold push up the “RES +/
SET –” switch (3). Vehicle speed will
steadily increase. When you release the
switch, the new speed will be maintained.
To reset at a slower cruising speed, press
repeatedly or hold push down the “RES +/
SET –” switch (3) until the vehicle has
slowed to the desired speed, and then
release the switch. The new speed will be
maintained.
Page 204 of 505
3-51OPERATING YOUR VEHICLE
75RM4-01E
NOTE:
You can adjust the set speed by approxi-
mately 1.5 km/h (0.9 mph) by pushing
“RES +/SET –” switch quickly.Canceling cruise controlThe set indicator (5) or “SET” indicator light
(7) will go off and the cruise control will be
canceled temporarily with the following
conditions:
• Push “CANCEL” switch (2).
• Depress the brake pedal.
• For manual transaxle, depress the clutch pedal.
• For CVT, downshift from 3rd to 2nd in the manual mode (if equipped).
• For Auto Gear Shift, downshift from 3rd to
2nd in the manual mode.
• The vehicle speed falls more than about 20 percent from the set speed.
• Any time the vehicle speed falls below 40 km/h (25 mph).
• When the vehicle skids and ESP
® (if
equipped) is activated.
To resume the previously set speed, push
up the “RES +/SET –” switch (3) and turn
on the set indicator (5) or “SET” indicator
light (7). The vehicle speed must be above
45 km/h (28 mph) when the vehicle is not
under the above conditions. To turn off the cruise control system, push
cruise switch (1) and check that the cruise
indicator (4) or cruise indicator light (6) is
off.
Also, if the malfunction indicator light in the
instrument cluster comes on or blinks, the
cruise control system will be turned off.
NOTE:
If you turn off the cruise control system, the
previously set speed in the memory is
cleared. Reset your cruising speed again.
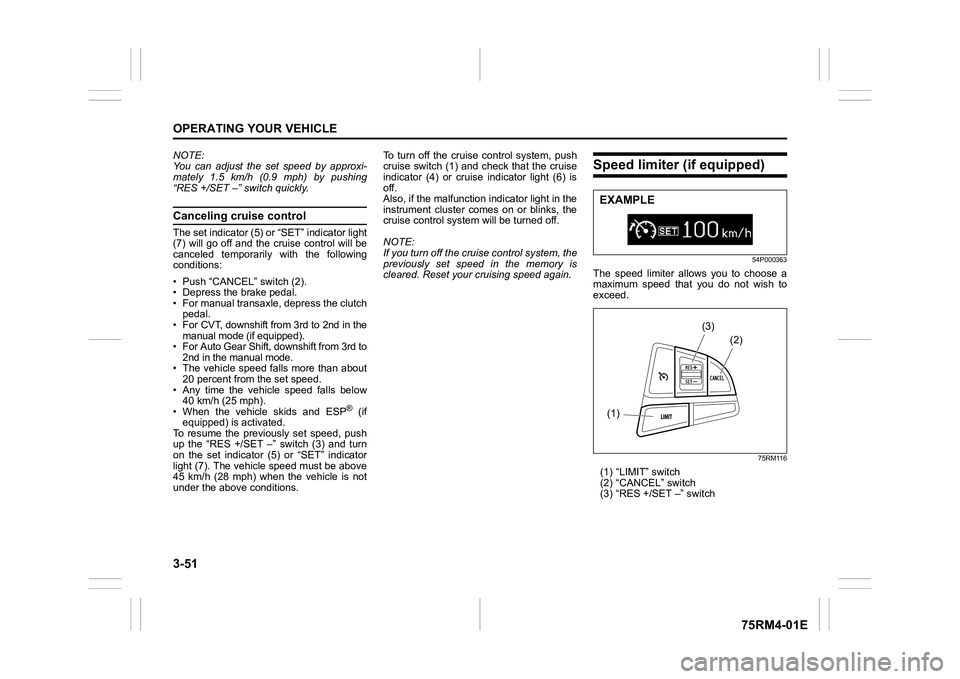
Speed limiter (if equipped)
54P000363
The speed limiter allows you to choose a
maximum speed that you do not wish to
exceed.
75RM116
(1) “LIMIT” switch
(2) “CANCEL” switch
(3) “RES +/SET –” switchEXAMPLE(1)
(2)
(3)
Page 229 of 505
3-76
OPERATING YOUR VEHICLE
75RM4-01E
Brake assist systemWhen you slam the brakes on, the brake
assist system determines it to be an emer-
gency stop and provides more powerful
braking for a driver who cannot hold down
the brake pedal firmly.
NOTE:
If you quickly and forcefully depress the
brakes, you may hear clicking sound by
the brake assist system operation. This is
normal and indicates that the brake assist
system is activated properly.
Anti-lock brake system (ABS)ABS will help you avoid skidding by elec-
tronically controlling braking pressure. It
will also help you maintain steering control
when braking on slippery surfaces or when
braking hard.
The ABS works automatically, so you do
not need any special braking technique.
Just push the brake pedal down without
pumping. The ABS will operate whenever
it senses that the wheels are locking up.
You may feel the brake pedal move a little
while the ABS is operating.
NOTE:
• The ABS will not work if vehicle speed is under about 9 km/h (6 mph).
• If the ABS system is activated, you may
hear a clunking noise and/or feel pulsat-
ing in the brake pedal. This is normal
and indicates that the brake fluid pres-
sure is being controlled properly.
• You may hear an operation sound when you start the engine or after the vehicle
begins to move. This means that the
above systems are in the self-check
mode. This sound does not indicate a
malfunction.
WA R N I N G
Even without reserve power in the
brake system, you can still stop the
vehicle by pressing the brake pedal
harder than normally required. How-
ever, the stopping distance may be
longer.
WA R N I N G
• On some types of loose surfaces (such as gravel, snow-covered
roads, etc.), the stopping distance
required for a vehicle with ABS
may be slightly greater than the
one required for a comparable vehi-
cle with a conventional brake sys-
tem. With a conventional brake
system, skidding tires are able to
plow the gravel or snow layer,
shortening the stopping distance.
ABS minimizes this resistance
effect. Allow for extra stopping dis-
tance when driving on loose sur-
faces.
• On regular paved roads, some driv-
ers may be able to obtain slightly
shorter stopping distances with
conventional brake systems than
with ABS.
• In both of the above conditions, ABS will still offer the advantage of
helping you maintain directional
control. However, remember that
ABS will not compensate for bad
road or weather conditions or poor
driver judgment. Use good judg-
ment and do not drive too fast.
Page 230 of 505
3-77OPERATING YOUR VEHICLE
75RM4-01E
54MN069
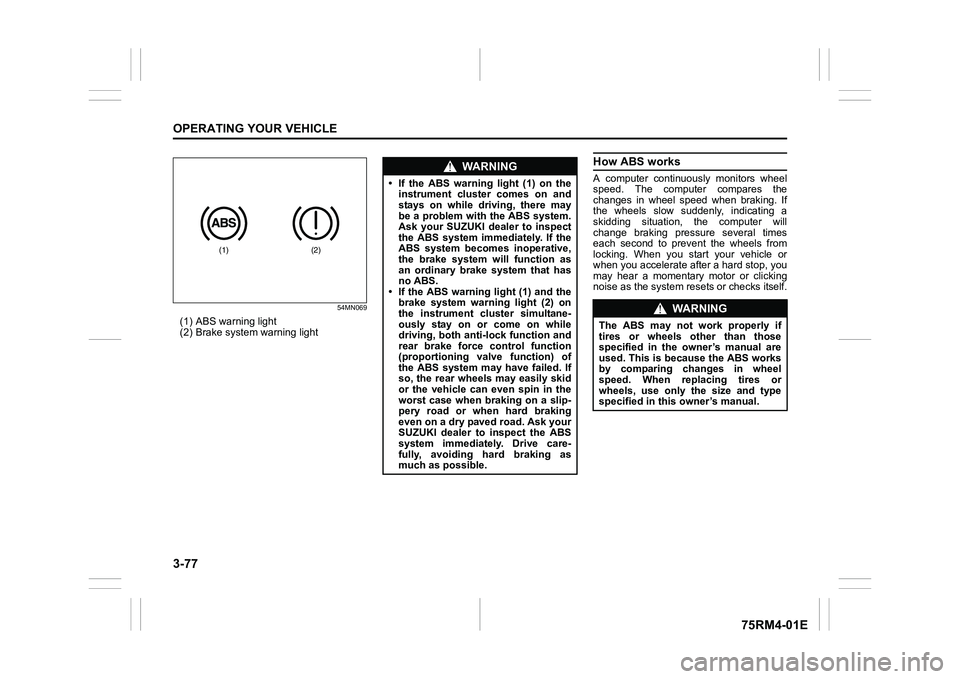
(1) ABS warning light
(2) Brake system warning light
How ABS worksA computer continuously monitors wheel
speed. The computer compares the
changes in wheel speed when braking. If
the wheels slow suddenly, indicating a
skidding situation, the computer will
change braking pressure several times
each second to prevent the wheels from
locking. When you start your vehicle or
when you accelerate after a hard stop, you
may hear a momentary motor or clicking
noise as the system resets or checks itself.
(1)
(2)
WA R N I N G
• If the ABS warning light (1) on theinstrument cluster comes on and
stays on while driving, there may
be a problem with the ABS system.
Ask your SUZUKI dealer to inspect
the ABS system immediately. If the
ABS system becomes inoperative,
the brake system will function as
an ordinary brake system that has
no ABS.
• If the ABS warning light (1) and the
brake system warning light (2) on
the instrument cluster simultane-
ously stay on or come on while
driving, both anti-lock function and
rear brake force control function
(proportioning valve function) of
the ABS system may have failed. If
so, the rear wheels may easily skid
or the vehicle can even spin in the
worst case when braking on a slip-
pery road or when hard braking
even on a dry paved road. Ask your
SUZUKI dealer to inspect the ABS
system immediately. Drive care-
fully, avoiding hard braking as
much as possible.
WA R N I N G
The ABS may not work properly if
tires or wheels other than those
specified in the owner’s manual are
used. This is because the ABS works
by comparing changes in wheel
speed. When replacing tires or
wheels, use only the size and type
specified in this owner’s manual.
Page 231 of 505
3-78
OPERATING YOUR VEHICLE
75RM4-01E
Electronic stability program (ESP
®) (if equipped)
ESP
® is a registered trademark of Daimler
AG.
The Electronic Stability Program (ESP
®)
helps to control the vehicle during corner-
ing if front wheels or rear wheels skid. It
also assists you in maintaining traction
while accelerating on loose or slippery
road surfaces. It does this by regulating
the engine’s output, and by selectively
applying the brakes. In addition, ESP®
helps to avoid skidding by controlling brak-
ing pressure. The ESP
® has the following three sys-
tems:
Stability control systemThe vehicle stability control system helps
provide integrated control of systems such
as anti-lock brakes, traction control, engine
control, etc. This system automatically
controls the brakes and engine to help pre-
vent the vehicle from skidding when cor-
nering on a slippery road surface or when
turning the steering wheel abruptly.Traction control systemThe traction control system automatically
helps prevent the spinning of wheels when
the vehicle is started or accelerated on
slippery road surfaces. The system oper-
ates only if it senses that some of the
wheels are spinning or beginning to lose
traction. When this happens, the system
operates the front or rear brakes and
reduces engine power to limit wheel spin.
Anti-lock brake system (ABS)ABS will help you avoid skidding by elec-
tronically controlling braking pressure. It
will also help you maintain steering control
when braking on slippery surfaces or when
braking hard. The ABS works automati-
cally, so you do not have to use any spe-
cial braking technique. Just push the brake
pedal down wit hout pumping. The ABS will
operate whenever it senses that wheels
are locking up. You may feel the brake
pedal pulsate while the ABS is operating.
(For more information on ABS, see “Brak-
ing” in this section.)
NOTE:
The ABS will not work if vehicle speed is
under about 9 km/h (6 mph).
WA R N I N G
The ESP
® cannot enhance the vehi-
cle’s driving stability in all situations
and does not control your vehicle’s
entire braking system. The ESP
® can-
not prevent accidents, including
those resulting from excessive speed
in turns, or hydroplaning. Only safe
and attentive drive can prevent acci-
dents. The capabilities of an ESP
®-
equipped vehicle must never be used
as a substitute for careful driving.
WA R N I N G
• The ESP
® may not work properly if
tires or wheels other than those
specified in the owner’s manual are
used. When replacing tires or
wheels, use only the size and type
specified in this owner’s manual.
• The ESP® may not work properly if
tires are not inflated to the recom-
mended tire inflation pressure.
• The ESP® may not work properly if
tires are fitted wi th tire chains.
(Continued)
Page 233 of 505
3-80
OPERATING YOUR VEHICLE
75RM4-01E
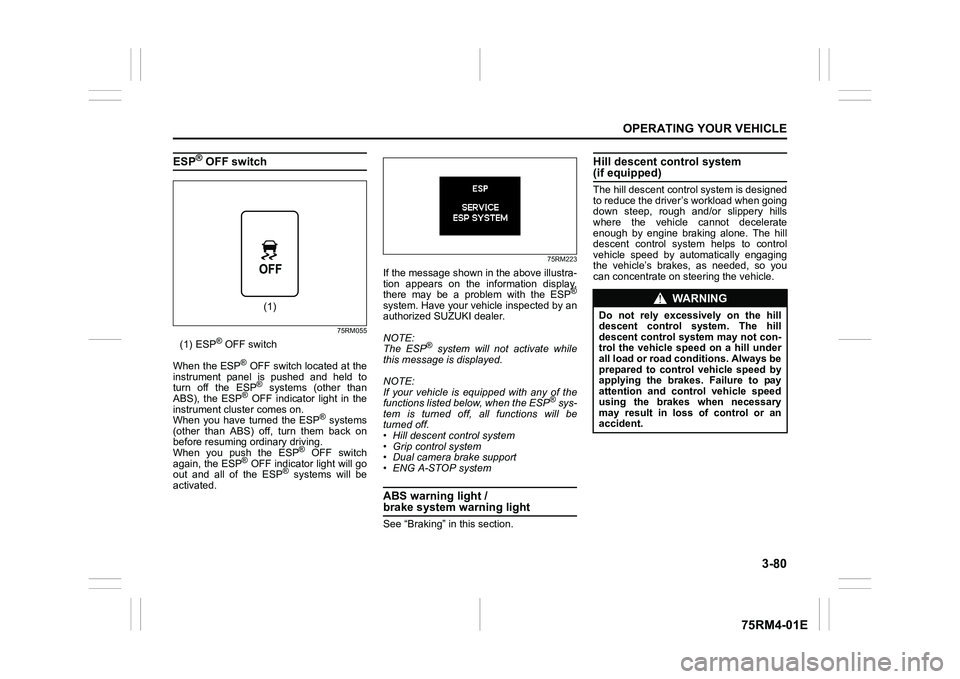
ESP
® OFF switch
75RM055
(1) ESP
® OFF switch
When the ESP
® OFF switch located at the
instrument panel is pushed and held to
turn off the ESP® systems (other than
ABS), the ESP
® OFF indicator light in the
instrument cluster comes on.
When you have turned the ESP
® systems
(other than ABS) off, turn them back on
before resuming ordinary driving.
When you push the ESP
® OFF switch
again, the ESP
® OFF indicator light will go
out and all of the ESP
® systems will be
activated.
75RM223
If the message shown in the above illustra-
tion appears on the information display,
there may be a problem with the ESP
®
system. Have your vehicle inspected by an
authorized SUZUKI dealer.
NOTE:
The ESP
® system will not activate while
this message is displayed.
NOTE:
If your vehicle is equipped with any of the
functions listed below, when the ESP
® sys-
tem is turned off, all functions will be
turned off.
• Hill descent control system
• Grip control system
• Dual camera brake support
• ENG A-STOP system
ABS warning light / brake system warning lightSee “Braking” in this section.
Hill descent control system (if equipped)The hill descent cont rol system is designed
to reduce the driver’s workload when going
down steep, rough and/or slippery hills
where the vehicle cannot decelerate
enough by engine braking alone. The hill
descent control system helps to control
vehicle speed by automatically engaging
the vehicle’s brakes, as needed, so you
can concentrate on steering the vehicle.
(1)
WA R N I N G
Do not rely excessively on the hill
descent control system. The hill
descent control system may not con-
trol the vehicle speed on a hill under
all load or road conditions. Always be
prepared to control vehicle speed by
applying the brakes. Failure to pay
attention and control vehicle speed
using the brakes when necessary
may result in loss of control or an
accident.
Page 234 of 505

3-81OPERATING YOUR VEHICLE
75RM4-01E
Hill descent control switch
75RM056
(1) Hill descent control switch
To activate the hill descent control system:
1) Shift the gearshift lever into a forward
gear or reverse gear.2) Push the hill descent control switch (1) when the vehicle speed is under 25 km/h
(15 mph). The hill descent control indica-
tor on the instrument cluster will come on
and the hill descent control system will be
activated.
When the vehicle speed exceeds about 7
km/h (4 mph) without depressing the
accelerator pedal, the hill descent control
system applies the brak es automatically to
maintain the vehicle speed at about 7 km/h
(4 mph).
• When braking, the brake/tail lights come on and the ESP
® warning light blinks.
• When the vehicle speed exceeds about
40 km/h (25 mph), the hill descent con-
trol system stops functioning and the hill
descent control indicator goes off. When
the vehicle slows down below about 25
km/h (16 mph), the hill descent control
system will be activated again and the
hill descent control indicator will come
on.
NOTE:
You may hear a sound coming from the
engine when the hill descent control sys-
tem is activated. This sound is normal and
does not indicate a malfunction.
To turn off the hill descent control system,
push the hill descent control switch and
turn off the hill descent control indicator
light.
(1)
WA R N I N G
• When the hill descent control sys- tem is used continuously for a long
time, the temperature of the brake
system may increase and the hill
descent control system may be
deactivated tempor arily to protect
the device of the brake system. The
hill descent control indicator blinks
to let you know the system is deac-
tivated. Depress the brake pedal
and stop the vehicle in a safe place.
When the temperature of the brake
system goes down, the hill descent
control indicator will come on and
the system is activated again. (Continued)
WA R N I N G
(Continued)
• The hill descent control system
may be activated when the gear-
shift lever is in “N” (Neutral) posi-
tion, but engine braking will not
work. Always use the hill descent
control system with the gearshift
lever in a forward gear or reverse
gear.
• When using the hill descent control system, push the hill descent con-
trol switch and ma ke sure that the
hill descent control indicator light
comes on and no warning message
indicates on the information dis-
play.
• While operating the hill descent control system, the dual camera
brake support (if equipped) may
not operate depending on the
accelerating.
Page 235 of 505

3-82
OPERATING YOUR VEHICLE
75RM4-01E
Hill descent control indicator light
79K050
When the ignition switch is in “ON” posi-
tion, or the ignition mode is ON, this light
comes on briefly so you can check that the
light is working.
When you push the hill descent control
switch and the hill descent control operat-
ing conditions are fulfilled, the hill descent
control indicator comes on. If the hill
descent control indicator blinks, the hill
descent control will not be activated.
If hill descent control indicator light comes
on while not operating the hill descent con-
trol switch, or the indicator light does not
come on after the switch is pushed, there
is a problem in this system. Have your
vehicle inspected by an authorized
SUZUKI dealer. NOTE:
If the hill descent control indicator blinks
when you push the hill descent control
switch, the following conditions may not be
fulfilled.
• The gearshift lever is in a forward gear
or reverse gear
• The vehicle speed is under 25 km/h (15 mph)
• The brake system is under normal oper- ating temperature
NOTE:
If any of the followin g conditions occur,
there may be a problem with the hill
descent control system or the ESP
® sys-
tem. Have your vehicle inspected by an
authorized SUZUKI dealer.
• The hill descent control indicator does not come on or blink when you push the
hill descent co ntrol switch.
• The hill descent control indicator stays on when driving without pushing the hill
descent control switch.
75RM224
For the instrument cluster with tachometer,
if the message shown in the above illustra-
tion appears on the information display,
there may be a problem with the hill
descent control system and the hill hold
control system. Ha ve your vehicle
inspected by an authorized SUZUKI
dealer.
NOTE:
You cannot activate the hill descent control
system while this me ssage is displayed.
Page 236 of 505
3-83OPERATING YOUR VEHICLE
75RM4-01E
Grip control system (if equipped)When one side of the tires is slipping on
slippery road surfaces such as a snow-cov-
ered road and it is difficult to start the vehi-
cle, the grip control system controls the
driving force and brake force through the
ESP
® system, and assists you in smooth
starting.
In such cases as when both of the tires are
slipping, the system may also assist start-
ing.
NOTE:
• When both of the tires are slipping, thegrip control system may work, however,
it works especially effective when one
side of the tires is slipping.
• You may hear an operation sound when you start the engine or after the vehicle
begins to move. This means that the grip
control system is in the self-check mode.
This sound does not indicate a malfunc-
tion.
• When the grip control system is working with high engine revolutions, you may
feel changing the engine speed or vehi-
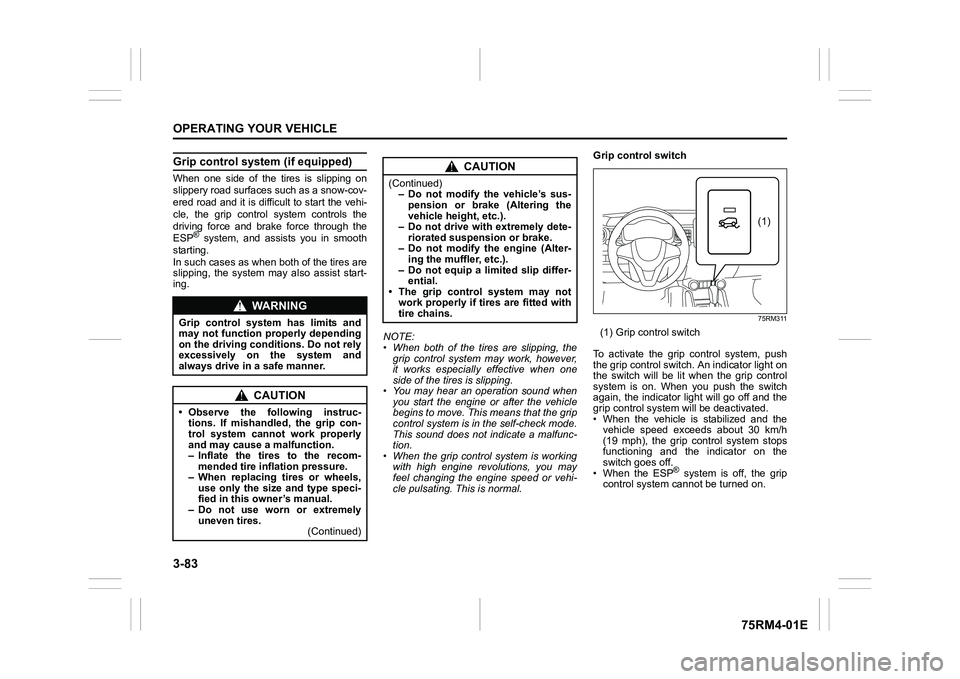
cle pulsating. This is normal. Grip control switch
75RM311
(1) Grip control switch
To activate the grip control system, push
the grip control switch. An indicator light on
the switch will be lit when the grip control
system is on. When you push the switch
again, the indicator light will go off and the
grip control system will be deactivated.
• When the vehicle is stabilized and the vehicle speed exceeds about 30 km/h
(19 mph), the grip control system stops
functioning and the indicator on the
switch goes off.
• When the ESP
® system is off, the grip
control system cannot be turned on.
WA R N I N G
Grip control system has limits and
may not function properly depending
on the driving conditions. Do not rely
excessively on the system and
always drive in a safe manner.
CAUTION
• Observe the following instruc- tions. If mishandled, the grip con-
trol system cannot work properly
and may cause a malfunction.
– Inflate the tires to the recom-mended tire inflation pressure.
– When replacing tires or wheels, use only the size and type speci-
fied in this owner’s manual.
– Do not use worn or extremely uneven tires. (Continued)
CAUTION
(Continued)– Do not modify the vehicle’s sus-
pension or brake (Altering the
vehicle heig ht, etc.).
– Do not drive with extremely dete-
riorated suspension or brake.
– Do not modify the engine (Alter- ing the muffler, etc.).
– Do not equip a limited slip differ- ential.
• The grip control system may not
work properly if tires are fitted with
tire chains.
(1)
Page 240 of 505
3-87OPERATING YOUR VEHICLE
75RM4-01E
The low tire pressure warning light can
come on due to normal causes such as
natural air leakage and pressure changes
caused by changes in temperature or
atmospheric pressure. Adjusting the air
pressure in the tires to the pressure shown
on the tire information placard should
cause the low tire pressure warning light to
turn off.
To make the low tire pressure warning light
go off, adjust the tire pressures when the
tires are cold, and drive the vehicle for
about 10 minutes.
When the adjusted tire pressure is recog-
nized, the low tire pressure warning light
will go off and the information display
shows the current tire pressure (if you
select the TPMS monitor).If the light turns on again shortly after
adjusting the pressure in your tires, you
may have a flat tire. If you have a flat tire,
replace it with the spare tire (if equipped).
Refer to “Jacking instructions” in the
“EMERGENCY SERVICE” section. Refer
to “Replacing tires and/or wheels” for
instructions on how to restore normal oper-
ation of the tire pressure monitoring sys-
tem after you have
had a flat tire.
WA R N I N G
Continuing to drive with the low tire
pressure warning light on can lead to
an accident, resulting in severe injury
or death.
If the low tire pressure warning light
comes on and stays on, reduce your
speed and avoid abrupt steering and
braking. Be aware that driving on a
significantly unde r-inflated tire can
cause the tire to overheat and can
lead to tire failure, and may affect
steering control and brake effective-
ness. Stop in a safe place as soon as
possible and check your tires.
• If you have a flat tire, replace it with the spare tire (if e quipped). Refer to
“Jacking instructions” in the
“EMERGENCY SERVICE” section
for tire replacement. Also refer to
“Replacing tires and/or wheels” for
instructions on how to restore nor-
mal operation of the TPMS after
you have had a flat tire. (Continued)
WA R N I N G
(Continued)
• If your vehicle is equipped with a
flat tire repair kit instead of a spare
tire, refer to “Flat tire repair kit” in
the “EMERGENCY SERVICE” sec-
tion for instructions on how to per-
form an emergency repair of a flat
tire.
• If one or more of your tires is under-inflated, adjust the inflation
pressure in all of your tires to the
recommended inflation pressure as
soon as possible.
NOTICE
If the low tire pressure warning light
does not go off even when you drive
for more than 10 minutes after adjust-
ing the cold tire pressure, there may
be a problem with the TPMS. Have
your vehicle inspected by an autho-
rized SUZUKI dealer.