ECU SUZUKI JIMNY 2019 User Guide
[x] Cancel search | Manufacturer: SUZUKI, Model Year: 2019, Model line: JIMNY, Model: SUZUKI JIMNY 2019Pages: 421, PDF Size: 6.35 MB
Page 52 of 421
FOR SAFE DRIVING
68LM268
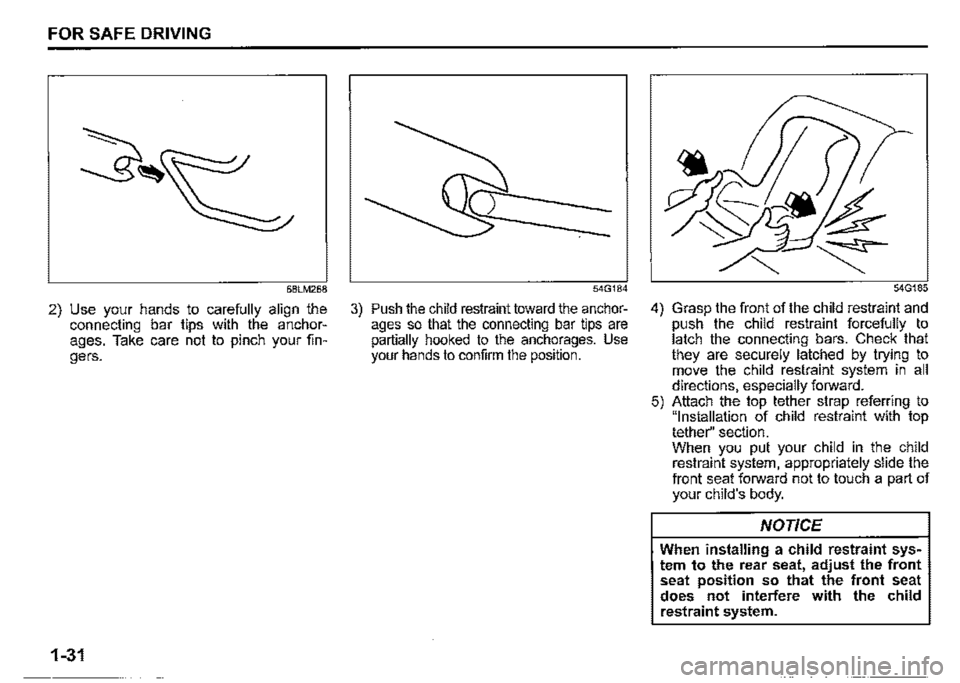
2) Use your hands to carefully align the connecting bar tips with the anchorages. Take care not to pinch your fingers.
1-31
54G184
3) Push the child restraint toward the anchorages so that the connecting bar tips are partially hooked to the anchorages. Use your hands to confirm the position.
54G185
4) Grasp the front of the child restraint and push the child restraint forcefully to latch the connecting bars. Check that they are securely latched by trying to move the child restraint system in all directions, especially forward. 5) Attach the top tether strap referring to "Installation of child restraint with top tether" section. When you put your child in the child restraint system, appropriately slide the front seat forward not to touch a part of your child's body.
NOTICE
When installing a child restraint system to the rear seat, adjust the front seat position so that the front seat does not interfere with the child restraint system.
Page 53 of 421
Installation of child restraint with
top tether
78RB02021
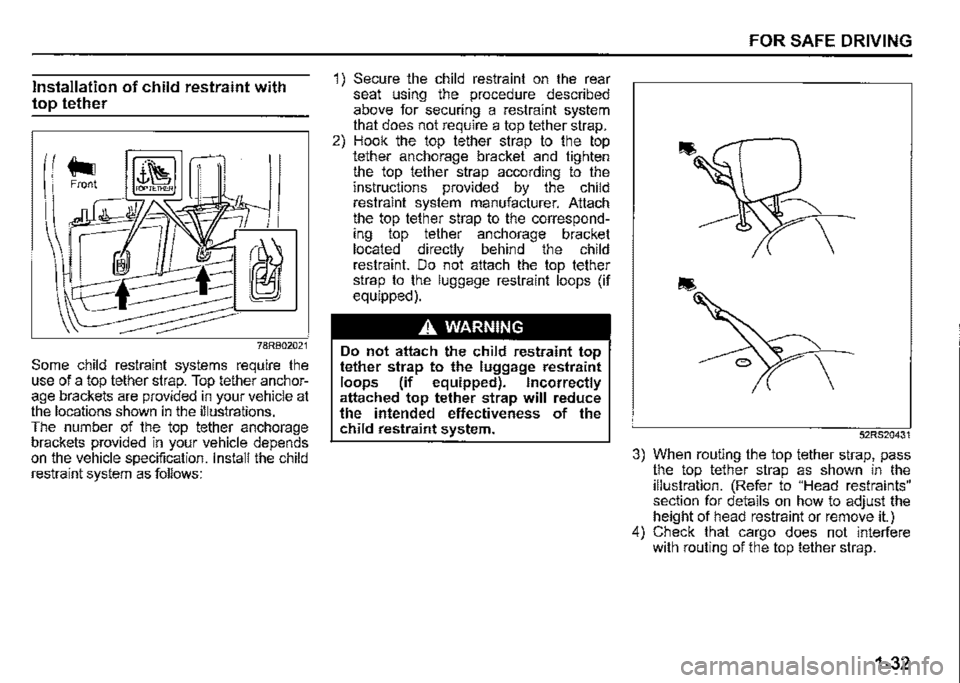
Some child restraint systems require the use of a top tether strap. Top tether anchorage brackets are provided in your vehicle at the locations shown in the illustrations. The number of the top tether anchorage brackets provided in your vehicle depends on the vehicle specification. Install the child restraint system as follows:
1) Secure the child restraint on the rear seat using the procedure described above for securing a restraint system that does not require a top tether strap. 2) Hook the top tether strap to the top tether anchorage bracket and tighten the top tether strap according to the instructions provided by the child restraint system manufacturer. Attach the top tether strap to the corresponding top tether anchorage bracket located directly behind the child restraint. Do not attach the top tether strap to the luggage restraint loops (if equipped).
A WARNING
Do not attach the child restraint top tether strap to the luggage restraint loops (if equipped). Incorrectly attached top tether strap will reduce the intended effectiveness of the child restraint system.
FOR SAFE DRIVING
52RS20431
3) When routing the top tether strap, pass the top tether strap as shown in the illustration. (Refer to "Head restraints" section for details on how to adjust the height of head restraint or remove it.) 4) Check that cargo does not interfere with routing of the top tether strap.
1-32
Page 59 of 421

58MS030
.A WARNING
(Vehicle without the front passenger airbag deactivation system) Do not install a rear-facing child restraint in the front passenger's seat. If the passenger's front airbag inflates, a child in a rear-facing child restraint could be killed or severely injured. The back of a rear-facing child restraint would be too close to the inflating airbag.
Conditions of front airbags may inflate
.A WARNING
(Vehicle with the front passenger airbag deactivation system) When using child restraint system on the front passenger's seat, the front passenger's airbag system must be deactivated; otherwise deployment of the front passenger's airbag could result in the death or serious injury of the child.
Refer to "Seat belts and child restraint systems" section for details on securing your child .
FOR SAFE DRIVING
Conditions of front airbags deployment (inflation)
80J097
Frontal collision with a fixed wall that does not move or deform at more than about 25 km/h (15 mph)
80J098E
Strong impact equivalent to frontal collision such as above at left and right angles of about 30 degrees (1) or less from the front of your vehicle
1-38
Page 81 of 421

Checking whether the alarm has been triggered during parking If the alarm was triggered due to an unauthorized entry into the vehicle and you then turn the ignition switch to "ON" position, the theft deterrent light will blink rapidly for about 8 seconds and a buzzer will beep 4 times during this period. If this happens, check whether your vehicle has been broken into while you were away from it.
Theft deterrent light
(if equipped)
This light will blink with the ignition switch in "LOCK" or "ACC" position. The blinking light is intended to deter theft by leading others to believe that the vehicle is equipped with a security system.
BEFORE DRIVING
Windows
Manual window control
(if equipped)
~
{J
60G010A
Raise or lower the door windows by turning the handle located on the door panel.
2-10
Page 141 of 421
Tilt steering lock lever
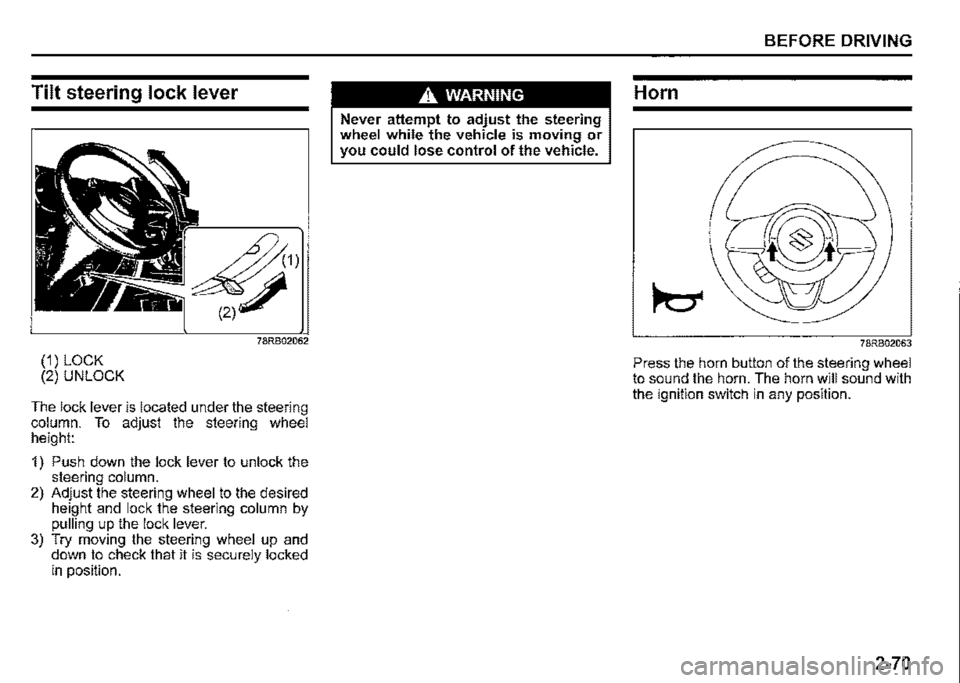
(1) LOCK (2) UNLOCK
The lock lever is located under the steering column. To adjust the steering wheel height:
1) Push down the lock lever to unlock the steering column. 2) Adjust the steering wheel to the desired height and lock the steering column by pulling up the lock lever. 3) Try moving the steering wheel up and down to check that it is securely locked in position.
A. WARNING
Never attempt to adjust the steering wheel while the vehicle is moving or you could lose control of the vehicle.
BEFORE DRIVING
Horn
~
78RB02063
Press the horn button of the steering wheel to sound the horn. The horn will sound with the ignition switch in any position.
2-70
Page 145 of 421
Tow bars
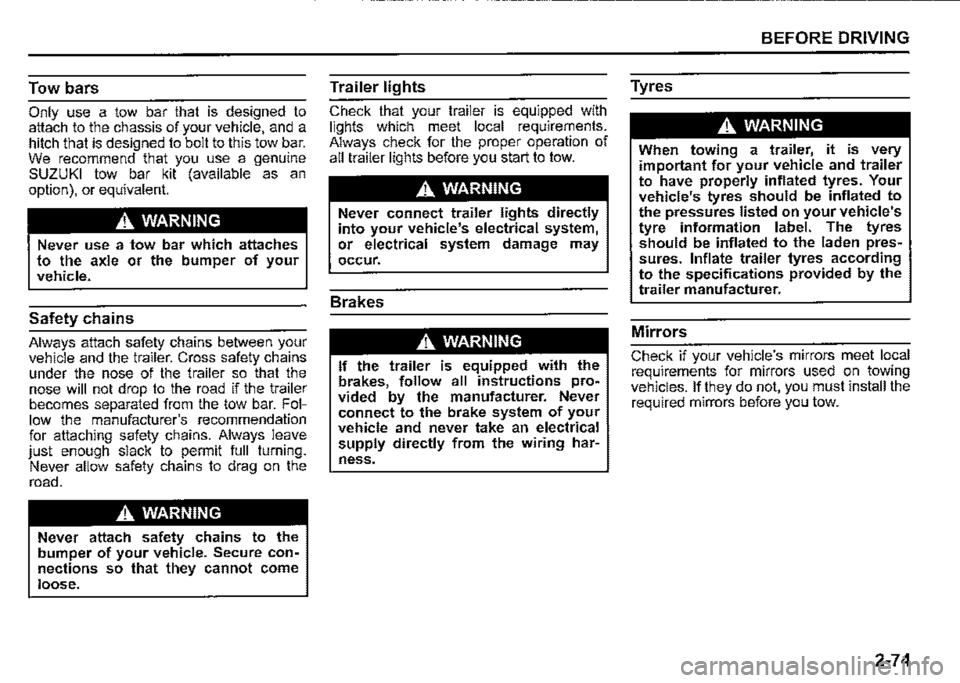
Only use a tow bar that is designed to attach to the chassis of your vehicle, and a hitch that is designed to bolt to this tow bar. We recommend that you use a genuine SUZUKI tow bar kit (available as an option), or equivalent.
A WARNING
Never use a tow bar which attaches to the axle or the bumper of your vehicle.
Safety chains
Always attach safety chains between your vehicle and the trailer. Cross safety chains under the nose of the trailer so that the nose will not drop to the road if the trailer becomes separated from the tow bar. Follow the manufacturer's recommendation for attaching safety chains. Always leave just enough slack to permit full turning. Never allow safety chains to drag on the road.
A WARNING
Never attach safety chains to the bumper of your vehicle. Secure connections so that they cannot come loose.
-----------------------
Trailer lights
Check that your trailer is equipped with lights which meet local requirements. Always check for the proper operation of all trailer lights before you start to tow.
A WARNING
Never connect trailer lights directly into your vehicle's electrical system, or electrical system damage may occur.
Brakes
A WARNING
If the trailer is equipped with the brakes, follow all instructions provided by the manufacturer. Never connect to the brake system of your vehicle and never take an electrical supply directly from the wiring har
ness.
BEFORE DRIVING
Tyres
A WARNING
When towing a trailer, it is very important for your vehicle and trailer to have properly inflated tyres. Your vehicle's tyres should be inflated to the pressures listed on your vehicle's tyre information label. The tyres should be inflated to the laden pressures. Inflate trailer tyres according to the specifications provided by the trailer manufacturer.
Mirrors
Check if your vehicle's mirrors meet local requirements for mirrors used on towing vehicles. If they do not, you must install the required mirrors before you tow.
2-74
Page 146 of 421
BEFORE DRIVING
Vehicle/trailer loading
The weight of your loaded trailer (gross trailer weight) should never exceed the towing capacity.
Distribute cargo in your trailer so that the nose weight is about 10% of gross trailer weight, but does not exceed "Maximum vertical load" of 75 kg (165 lbs), and does not fall below 25 kg (55 lbs) or 4%, whichever is heavier, on trailer hitch point. You should measure gross trailer weight and nose weight before towing to check that your load is properly distributed.
A WARNING
Improper weight distribution of your trailer may result in poor vehicle handling and swaying of the trailer. Always check that the trailer nose weight is about 10% of gross trailer weight, but does not exceed 11Maximum vertical load" of75 kg (165 lbs), and does not fall below 25 kg (55 lbs) or 4%, whichever is heavier, on trailer hitch point. Also check that the cargo is properly secured. Failure to observe this requirement may result in an accident.
2-75
A WARNING
Never overload cargo on your trailer and your vehicle. Gross trailer weight must never exceed towing capacity. Gross vehicle weight (sum of the weights of the vehicle, all the occupants, accessories including tow bars and a trailer hitch, cargo and trailer nose weight) must never exceed the Gross Vehicle Weight Rating (GVWR) listed in "SPECIFICATIONS" section, except as described in NOTE below. • It is dangerous and may be illegal to transport people in a trailer.
NOTE: Only in the case of towing a trailer, GVW can be exceeded by not more than 40 kg (88 lbs), if road traffic legislation allows it.
Connect trailer lights and hook safety chains every time you tow.
NOTICE
Because towing a trailer puts additional stress on your vehicle, more frequent maintenance will be required than under normal driving conditions. Follow the schedule in "Maintenance recommended under severe driving conditions". The additional load will affect fuel consumption, durability and performance of the vehicle as well.
Page 152 of 421
OPERATING YOUR VEHICLE
Daily inspection checklist
Before driving
60A187
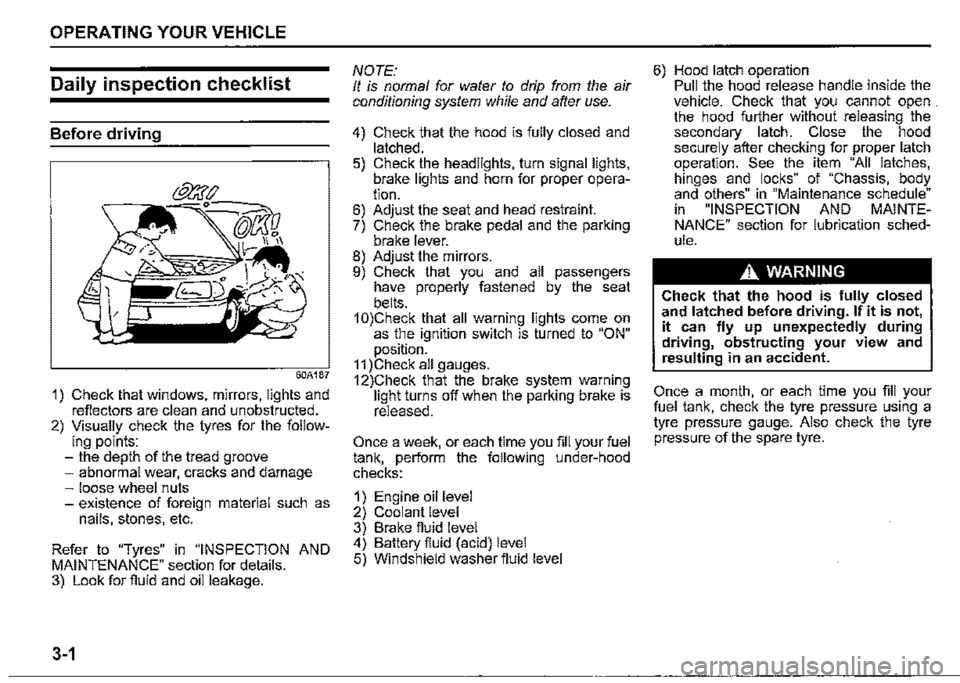
1) Check that windows, mirrors, lights and reflectors are clean and unobstructed. 2) Visually check the tyres for the follow-ing points: -the depth of the tread groove -abnormal wear, cracks and damage -loose wheel nuts -existence of foreign material such as nails, stones, etc.
Refer to "Tyres" in "INSPECTION AND MAINTENANCE" section for details. 3) Look for fluid and oil leakage.
3-1
NOTE: It is normal for water to drip from the air conditioning system while and after use.
4) Check that the hood is fully closed and latched. 5) Check the headlights, turn signal lights, brake lights and horn for proper operation. 6) Adjust the seat and head restraint. 7) Check the brake pedal and the parking brake lever. 8) Adjust the mirrors. 9) Check that you and all passengers have properly fastened by the seat belts. 1 0)Check that all warning lights come on as the ignition switch is turned to "ON" position. 11 )Check all gauges. 12)Check that the brake system warning light turns off when the parking brake is released.
Once a week, or each time you fill your fuel tank, perform the following under-hood checks:
1) Engine oil level 2) Coolant level 3) Brake fluid level 4) Battery fluid (acid) level 5) Windshield washer fluid level
6) Hood latch operation Pull the hood release handle inside the vehicle. Check that you cannot open . the hood further without releasing the secondary latch. Close the hood securely after checking for proper latch operation. See the item "All latches, hinges and locks" of "Chassis, body and others" in "Maintenance schedule" in "INSPECTION AND MAINTENANCE" section for lubrication schedule.
A WARNING
Check that the hood is fully closed and latched before driving. If it is not, it can fly up unexpectedly during driving, obstructing your view and resulting in an accident.
Once a month, or each time you fill your fuel tank, check the tyre pressure using a tyre pressure gauge. Also check the tyre pressure of the spare tyre.
Page 156 of 421
OPERATING YOUR VEHICLE
Parking brake lever
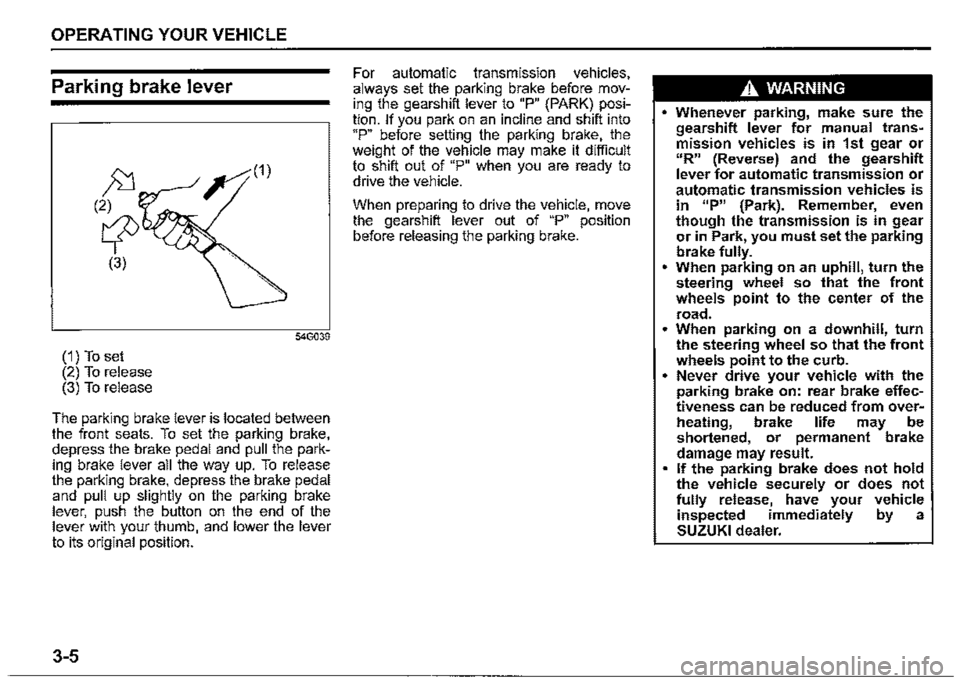
(1) To set (2) To release (3) To release
The parking brake lever is located between the front seats. To set the parking brake, depress the brake pedal and pull the parking brake lever all the way up. To release the parking brake, depress the brake pedal and pull up slightly on the parking brake lever, push the button on the end of the lever with your thumb, and lower the lever to its original position.
3-5
For automatic transmission vehicles, always set the parking brake before moving the gearshift lever to "P" (PARK) position. If you park on an incline and shift into "P" before setting the parking brake, the weight of the vehicle may make it difficult to shift out of "P" when you are ready to drive the vehicle.
When preparing to drive the vehicle, move the gearshift lever out of "P" position before releasing the parking brake.
A WARNING
• Whenever parking, make sure the gearshift lever for manual transmission vehicles is in 1st gear or "R" (Reverse) and the gearshift lever for automatic transmission or automatic transmission vehicles is in 11P" {Park). Remember, even though the transmission is in gear or in Park, you must set the parking brake fully. • When parking on an uphill, turn the steering wheel so that the front wheels point to the center of the
road. • When parking on a downhill, turn the steering wheel so that the front wheels point to the curb. • Never drive your vehicle with the parking brake on: rear brake effectiveness can be reduced from overM heating, brake life may be shortened, or permanent brake damage may result. • If the parking brake does not hold the vehicle securely or does not fully release, have your vehicle inspected immediately by a SUZUKI dealer.
Page 238 of 421

OTHER CONTROLS AND EQUIPMENT
78RB05006
3) While holding the hood, pull the prop rod out from the holding clip, and then insert the end of the rod into the designated hole.
A CAUTION
• The prop rod can be hot enough to burn your finger right after driving. Touch the rod after it becomes cool enough. Insert the end of the rod into the hole securely. If the rod slips out, you may get caught in the closing hood. • The rod may slip out when the hood is blown by wind. Be careful on windy days.
5-3
To close the engine hood: 1) Lift the hood up slightly and remove the prop rod from the hole. Put the prop rod back into the holding clip.
78RB05007
2) Lower the hood to about 20 cm above the hood latch, and then let it drop down. Check that the hood is securely latched after closing.
A WARNING
Check that the hood is fully closed and latched before driving. If it is not, it can fly up unexpectedly during driving, obstructing your view and resulting in an accident.
A CAUTION
To avoid injury, check that no part of the occupant's body such as hands or head is in the path of the hood when closing it.
NOTICE
Pushing on the hood from the top may damage it.