air condition SUZUKI JIMNY 2019 User Guide
[x] Cancel search | Manufacturer: SUZUKI, Model Year: 2019, Model line: JIMNY, Model: SUZUKI JIMNY 2019Pages: 421, PDF Size: 6.35 MB
Page 125 of 421

Master warning indicator light
(if equipped)
68PM00278
When the ignition switch is turned "ON", this light comes on briefiy so you can check that the light is working.
When the information display shows warning and indicator messages, this indicator light may also blink.
For details, refer to "Information display" in this section.
4WD indicator light
78RB02078
· This indicator light comes on when the transfer gear and the air locking hubs are switched to 4-wheel drive condition ("4H" or "4L").
When the ignition switch is turned "ON", this 4WD indicator light will come on for a while and then this light will turned on or off according to the drive condition.
If 4WD indicator light continues to blink, there may be a malfunction of the system. If so, have the system inspected by your SUZUKI dealer.
When you shift the transfer lever from "2H" position to "4H" position at a speed of 100 km/h (60 mph) or more, this indicator light blinks.
When you shift transfer lever again while changing the drive condition, this indicator blinks.
BEFORE DRIVING
NOTE: When the drive condition is 4-wheel drive condition and the engine is not running with the ignition switch turned "ON", this 4WD indicator light will come on for a while and then blink. In this situation, when you start the engine and this indicator light comes on, the system does not indicate a malfunction.
Cruise indicator light (if equipped)
81P40090
When the cruise control system is activated, this light comes on.
2-54
Page 152 of 421
OPERATING YOUR VEHICLE
Daily inspection checklist
Before driving
60A187
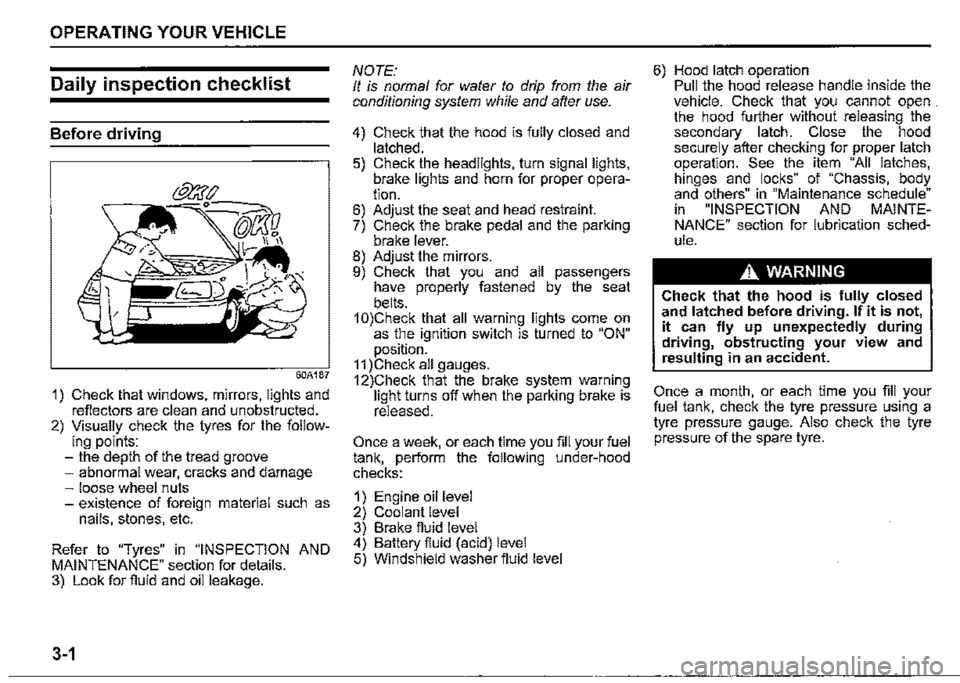
1) Check that windows, mirrors, lights and reflectors are clean and unobstructed. 2) Visually check the tyres for the follow-ing points: -the depth of the tread groove -abnormal wear, cracks and damage -loose wheel nuts -existence of foreign material such as nails, stones, etc.
Refer to "Tyres" in "INSPECTION AND MAINTENANCE" section for details. 3) Look for fluid and oil leakage.
3-1
NOTE: It is normal for water to drip from the air conditioning system while and after use.
4) Check that the hood is fully closed and latched. 5) Check the headlights, turn signal lights, brake lights and horn for proper operation. 6) Adjust the seat and head restraint. 7) Check the brake pedal and the parking brake lever. 8) Adjust the mirrors. 9) Check that you and all passengers have properly fastened by the seat belts. 1 0)Check that all warning lights come on as the ignition switch is turned to "ON" position. 11 )Check all gauges. 12)Check that the brake system warning light turns off when the parking brake is released.
Once a week, or each time you fill your fuel tank, perform the following under-hood checks:
1) Engine oil level 2) Coolant level 3) Brake fluid level 4) Battery fluid (acid) level 5) Windshield washer fluid level
6) Hood latch operation Pull the hood release handle inside the vehicle. Check that you cannot open . the hood further without releasing the secondary latch. Close the hood securely after checking for proper latch operation. See the item "All latches, hinges and locks" of "Chassis, body and others" in "Maintenance schedule" in "INSPECTION AND MAINTENANCE" section for lubrication schedule.
A WARNING
Check that the hood is fully closed and latched before driving. If it is not, it can fly up unexpectedly during driving, obstructing your view and resulting in an accident.
Once a month, or each time you fill your fuel tank, check the tyre pressure using a tyre pressure gauge. Also check the tyre pressure of the spare tyre.
Page 163 of 421
The transmission is a 4-speed (3-speed plus overdrive) automatic transmission. By operating the overdrive off switch, the transmission can be converted to a 3-speed automatic transmission that will not move to the overdrive position. To convert the transmission to the 3-speed mode, push in the overdrive off switch and release it.
To return the transmission to the 4-speed mode, push in the overdrive off switch again:
When the ignition switch is turned to the "ACC" position, the transmission in the 3-speed mode is converted to the 4-speed mode automatically. The 3-speed mode is suitable for the following driving conditions: Driving on hilly, winding roads -You can drive more smoothly with less frequent gear changing Going down a steep hill -Some engine braking is provided
If you cannot shift automatic trans
mission gearshift lever out of "P"
(PARK)
Left hand drive vehicle
(1)
□
78RB03005
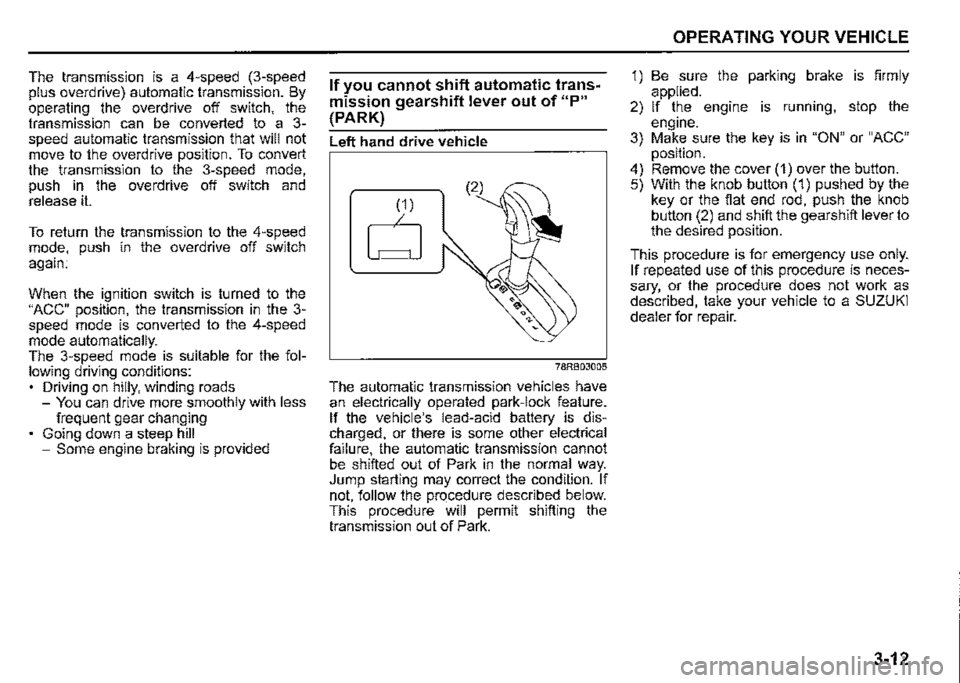
The automatic transmission vehicles have an electrically operated park-lock feature. If the vehicle's lead-acid battery is discharged, or there is some other electrical failure, the automatic transmission cannot be shifted out of Park in the normal way. Jump starting may correct the condition. If not, follow the procedure described below. This procedure will permit shifting the transmission out of Park.
OPERATING YOUR VEHICLE
1) Be sure the parking brake is firmly applied. 2) If the engine is running, stop the engine. 3) Make sure the key is in "ON" or "ACC" position. 4) Remove the cover (1) over the button. 5) With the knob button (1) pushed by the key or the flat end rod, push the knob button (2) and shift the gearshift lever to the desired position.
This procedure is for emergency use only. If repeated use of this procedure is necessary, or the procedure does not work as described, take your vehicle to a SUZUKI dealer for repair.
3-12
Page 164 of 421
OPERATING YOUR VEHICLE
Right hand drive vehicle
(2)
78RB03006
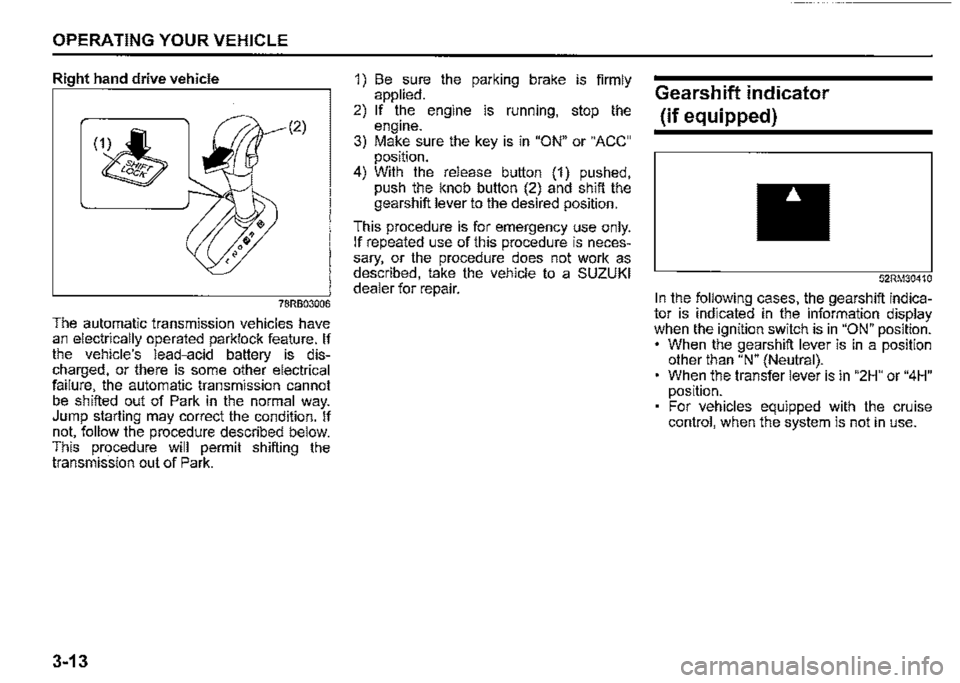
The automatic transmission vehicles have an electrically operated parklock feature. If the vehicle's lead-acid battery is discharged, or there is some other electrical failure, the automatic transmission cannot be shifted out of Park in the normal way. Jump starting may correct the condition. If not, follow the procedure described below. This procedure will permit shifting the transmission out of Park.
3-13
1) Be sure the parking brake is firmly applied. 2) If the engine is running, stop the engine. 3) Make sure the key is in "ON" or "ACC" position. 4) With the release button (1) pushed, push the knob button (2) and shift the gearshift lever to the desired position.
This procedure is for emergency use only. If repeated use of this procedure is necessary, or the procedure does not work as described, take the vehicle to a SUZUKI dealer for repair.
Gearshift indicator
(if equipped)
52RM30410
In the following cases, the gearshift indicator is indicated in the information display when the ignition switch is in "ON" position. • When the gearshift lever is in a position other than "N" (Neutral). When the transfer lever is in "2H" or "4H" position. For vehicles equipped with the cruise control, when the system is not in use.
Page 171 of 421

NOTICE
Pay attention to shifting the transfer lever safely when driving your vehicle.
NOTE: After shifting the transfer lever from "2H'" to "4H", check that the 4WD indicator
light comes on. After shifting the transfer lever from "4H" to "2H", check that the 4WD indicator goes off. ·
When 4WD indicator fight is blinking after shifting the transfer fever to "4H" position, accelerate, slow down your vehicle or stop and reverse your vehicle a little to shift the transfer lever. Pay attention to the vehicles and the circumference toward or backward your vehicle when shifting the transfer fever. When you shift the transfer fever while turning the steering wheel or depressing the accelerator pedal, shifting the transfer fever may be difficult. Operate the transfer fever while driving at low speed if it may be difficult to shift the transfer fever from "2H" position to "4H" position when the vehicle is stopped.
Shift the transfer fever again after decelerating or stopping the vehicle if it may be difficult to shift the transfer fever from "2H" position to "4H" position while driving or when the gear noise occurs. There may be a case to operate the transfer fever heavily when shifting the transfer lever from "4H" position to "2H" P_Osition while driving. In this case, position the front wheels straight ahead and drive for a while and then operate shifting the transfer fever again. When the transfer lever is shifted from 2H" position to "4H" position or from "4H" position to 2H" position and the air locking hubs are activated, the air conditioning system may not be operated for several seconds. This is not a malfunction. When the ignition switch is turned "ON" after the transfer fever is shifted from 2H" position to "4H" position or from "4H" position to 2H" position while stopping the engine, 4WD indicator light may blink. This is not a malfunction.
OPERATING YOUR VEHICLE
78RB03027
Stop the vehicle completely, place the transmission in "N" (Neutral) or depress the clutch pedal fully (if equipped), then shift the transfer lever from "4H" position to "4L" position by pressing the transfer lever.
3-20
Page 216 of 421
OPERATING YOUR VEHICLE
A WARNING
The load-carrying capacity of your tyres is reduced at lower inflation pressures. If your tyres are even moderately under-inflated, the load on the tyres may exceed the load-carrying capacity of the tyres, which could lead to tyre failure. The low tyre pressure warning light will not alert you to this condition, because it only comes on when one or more of your tyres becomes significantly underinflated.
Check and adjust your tyre pressure at least once a month. Refer to "Tyres" in "INSPECTION AND MAINTENANCE" section.
3-65
A WARNING
Continuing to drive with the low tyre pressure warning light on can lead to an accident, resulting in severe injury or death. If the low tyre pressure warning light comes on and stays on, reduce your speed and avoid abrupt steering and braking. Be aware that driving on a significantly under-inflated tyre can cause the tyre to overheat and can lead to tyre failure, and may affect steering control and brake effectiveness. Stop in a safe place as soon as possible and check your tyres. If you have a flat tyre, replace it with the spare tyre (if equipped). Refer to "Jacking instructions" in "EMERGENCY SERVICE" section for the tyre replacement method. Also refer to "Replacing tyres and/ or wheels" for instructions on how to restore normal operation of the TPMS after you have had a flat tyre. • If one or more of your tyres is under-inflated, adjust the inflation pressure in all of your tyres to the recommended inflation pressure as soon as possible.
The low tyre pressure warning light can come on due to normal causes such as natural air leakage and pressure changes caused by changes in temperature or atmospheric pressure. Adjusting the air pressure in the tyres to the pressure shown on the tyre information placard should cause the low tyre pressure warning light to turn off.
To make the low tyre pressure warning light go off, adjust the tyre pressures when the tyres are cold, and drive the vehicle for about 10 minutes. When the adjusted tyre pressure is recognized, the low tyre pressure warning light will go off and the information display shows the current tyre pressure (if you select the TPMS monitor (if equipped)).
Page 218 of 421
OPERATING YOUR VEHICLE
TPMS malfunction indicator
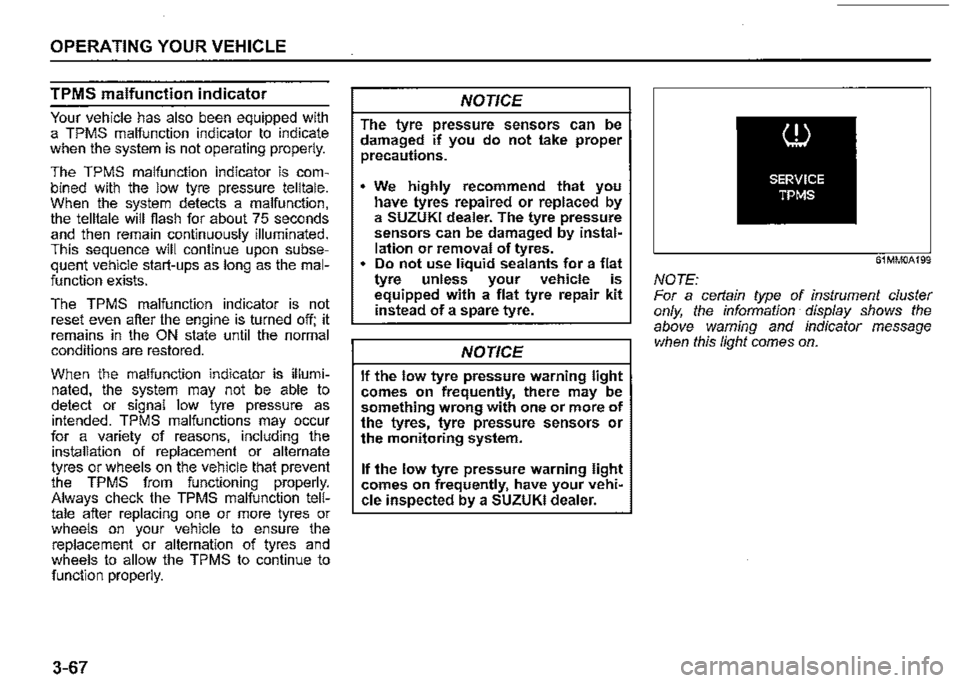
Your vehicle has also been equipped with a TPMS malfunction indicator to indicate when the system is not operating properly.
The TPMS malfunction indicator is combined with the low tyre pressure telltale. When the system detects a malfunction, the telltale will flash for about 75 seconds and then remain continuously illuminated. This sequence will continue upon subsequent vehicle start-ups as long as the malfunction exists.
The TPMS malfunction indicator is not reset even after the engine is turned off; it remains in the ON state until the normal conditions are restored.
When the malfunction indicator is illuminated, the system may not be able to detect or signal low tyre pressure as intended. TPMS malfunctions may occur for a variety of reasons, including the installation of replacement or alternate tyres or wheels on the vehicle that prevent the TPMS from functioning properly. Always check the TPMS malfunction telltale after replacing one or more tyres or wheels on your vehicle to ensure the replacement or alternation of tyres and wheels to allow the TPMS to continue to function properly.
3-67
NOTICE
The tyre pressure sensors can be damaged if you do not take proper precautions.
We highly recommend that you have tyres repaired or replaced by a SUZUKI dealer. The tyre pressure sensors can be damaged by installation or removal of tyres. • Do not use liquid sealants for a flat tyre unless your vehicle is equipped with a flat tyre repair kit instead of a spare tyre.
NOTICE
If the low tyre pressure warning light comes on frequently, there may be something wrong with one or more of the tyres, tyre pressure sensors or the monitoring system.
If the low tyre pressure warning light comes on frequently, have your vehi~ cle inspected by a SUZUKI dealer.
61MM0A199
NOTE: For a cerlain type of instrument cluster only, the information display shows the above warning and indicator message when this light comes on.
Page 224 of 421
DRIVING TIPS
52D078
A WARNING
Fasten your seat belts at all times. Even though airbags are equipped at the front seating positions, the driver and all passengers should be properly restrained at all times, using the seat belts provided. Refer to "Seat belts and child restraint systems" section for instructions on proper use of the seat belts. Never drive under the influence of alcohol or other drugs. Alcohol and drugs can seriously impair your ability to drive safely, greatly increasing the risk of injury to yourself and others. You should also avoid driving when you are tyred, sick, irritated or under stress.
4-1
Important Vehicle Design
Features to Know
A WARNING
Your multipurpose vehicle has handling characteristics that differ from those of a conventional passenger car. For the safety of you and your passengers, please read the following section very carefully.
Multipurpose vehicles such as your new SUZUKI have higher ground clearance and a narrower track than conventional passenger cars, to make them capable of performing in a wide variety of off-road applications. Specific design characteristics give them a higher center of gravity than ordinary cars. An advantage of the higher ground clearance is a better view of the road allowing you to anticipate problems. They are not designed for cornering at the same speed as conventional passenger cars any more than low-slung sports cars are designed to perform satisfactorily under off-road conditions. If at all possible, avoid sharp turns or abrupt maneuvers. As with other vehicles of this type, failure to operate this vehicle correctly may result in loss of control or vehicle rollover. Multipurpose vehicles have a significantly higher rollover rate than other types of vehicles. In a rollover collision, an
unbelted person is significantly more likely to die than a person wearing a seat belt.
Important Differences Between
Your Multipurpose Vehicle and
Ordinary Passenger Cars
Higher Ground Clearance The higher ground clearance of your vehicle enables it to clear off-road obstacles, such as rocks and tree stumps, that ordinary passenger cars cannot drive over. An unavoidable result of this higher ground clearance is that the vehicle also has a higher center of gravity. Consequently, your vehicle will handle differently than a vehicle with a lower center of gravity.
Shorter Wheelbase Along with its higher ground clearance, your vehicle has a shorter wheelbase and shorter front and rear overhangs than the typical passenger car. These features combine to allow you to drive your vehicle over hillcrests without hanging up on them or damaging the frame and chassis components. The shorter wheelbase also makes the steering of your vehicle more responsive than that of vehicles with longer wheelbases.
Page 225 of 421
Narrower Body Width and Track Your vehicle is narrower than the average passenger car so that it can pass through tight spaces. Without the essential characteristics described above: higher ground clearance, shorter wheelbase, and narrower body width and track -your vehicle could not provide you with excellent offroad driving performance. However, it is also true that on-road driving, handling, and steering will be different from what drivers experience with a conventional passenger car.
On-Paved Road Driving
The data of accidents show that most rollover accidents for multi-purpose vehicles are caused when a driver loses control of the vehicle and leaves the paved portion of the roadway striking a ditch, curb or other off-road object that causes the vehicle to overturn. The following driving practices may reduce the risk of rollover.
Vehicle Slides Off-Road
You can reduce the risk of this kind of rollover accident by always keeping the vehicle under control. Typically, drivers lose control of vehicles, often resulting in rollover accidents, when the driver is impaired because of alcohol or other drugs, falls asleep at the wheel or is otherwise inattentive, or is driving too fast for the road con
ditions.
DRIVING TIPS
Rollovers On the Roadway
If, for any reason, your vehicle slides sideways or spins out of control at highway speeds, while on the paved portion of the roadway, the risk of rollover is greatly increased. This condition can be created when two or more wheels drop off onto the shoulder and you steer sharply in an attempt to reenter the roadway. To reduce the risk of rollover in these circumstances, if conditions permit, you should hold the steering wheel firmly and slow down before pulling back into the travel lanes with controlled steering movements.
All Types of Rollover Accidents
· As with many kinds of automobile accidents, rollovers can be greatly reduced by doing what all prudent drivers should do, i.e., don't drink and drive, don't drive when tired and don't do anything behind the wheel that could cause a loss of attention to the driving task. Additional guidelines are set out below for your on-road driving.
4-2
Page 233 of 421
Improving fuel economy
The following instructions will help you improve fuel economy.
Avoid excessive idling If you park your vehicle for more than one minute, stop the engine and start it again later. When warming up a cold engine, do not allow the engine to idle or apply full throttle until the engine has reached operating temperature. Allow the engine to warm up by driving.
Avoid fast starts F~st starts away from lights or stop signs will consume fuel unnecessarily and shorten engine life. Start off slowly.
Avoid unnecessary stops Avoid unnecessary deceleration and stopping. Try to maintain a moderate, steady speed whenever possible. Slowing down and then accelerating again uses more fuel.
Keep a steady cruising speed Drive at a constant speed that road and traffic conditions will permit.
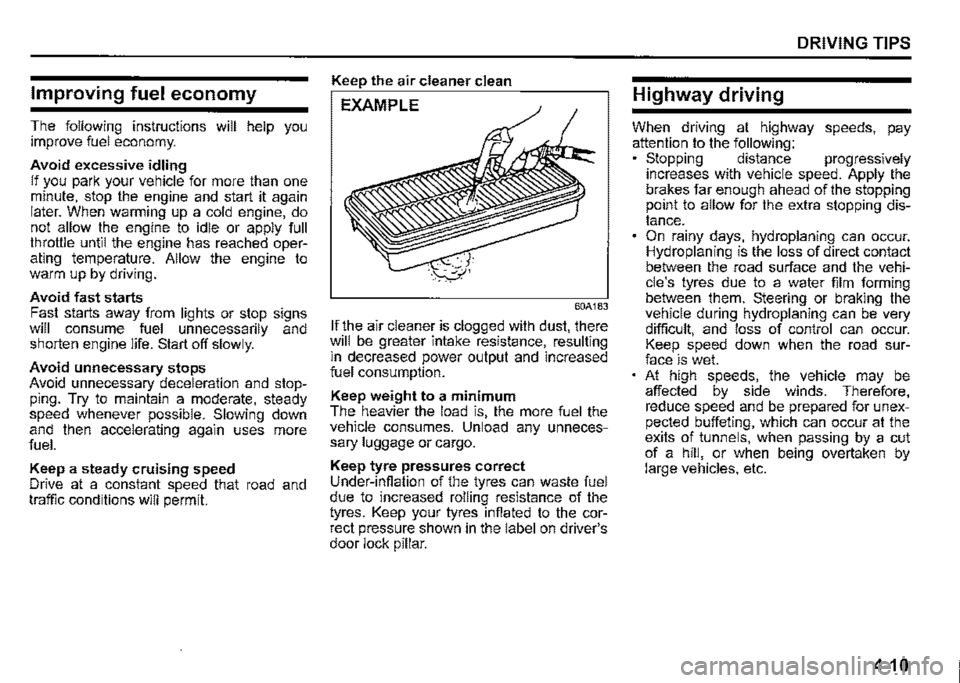
Keep the air cleaner clean
EXAMPLE
60A183
If the air cleaner is clogged with dust, there will be greater intake resistance, resulting m decreased power output and increased fuel consumption.
Keep weight to a minimum The heavier the load is, the more fuel the vehicle consumes. Unload any unnecessary luggage or cargo.
Keep tyre pressures correct Under-infiation of the tyres can waste fuel due to increased rolling resistance of the tyres. Keep your tyres infiated to the correct pressure shown in the label on driver's door lock pillar.
DRIVING TIPS
Highway driving
When driving at highway speeds, pay attention to the following: • Stopping distance progressively increases with vehicle speed. Apply the brakes far enough ahead of the stopping prnnt to allow for the extra stopping distance. On rainy days, hydroplaning can occur. Hydroplaning is the loss of direct contact between the road surface and the vehicle's tyres due to a water film forming between them. Steering or braking the vehicle during hydroplaning can be very difficult, and loss of control can occur. Keep speed down when the road surface is wet. At high speeds, the vehicle may be affected by side winds. Therefore, reduce speed and be prepared for unexpected buffeting, which can occur at the exits of tunnels, when passing by a cut of a hill, or when being overtaken by large vehicles, etc.
4-10