window SUZUKI JIMNY 2019 User Guide
[x] Cancel search | Manufacturer: SUZUKI, Model Year: 2019, Model line: JIMNY, Model: SUZUKI JIMNY 2019Pages: 421, PDF Size: 6.35 MB
Page 155 of 421

A. WARNING
Never return the ignition switch to "LOCK" position and remove the ignition key while the vehicle is moving. The steering wheel will lock and you will not be able to steer the vehicle. (Continued)
A. WARNING
(Continued) Always return the ignition switch to "LOCK" position and remove the ignition key when leaving the vehicle even only for a short time. Also do not leave children alone in a parked vehicle. Unattended children may be able to start the vehicle or shift the transmission into neutral, which could result in an accident. There is also a danger that children may injure themselves by playing with the power windows or other moving features of the vehicle. In addition, heat build-up or extremely cold temperatures inside the vehicle can be fatal to children.
OPERATING YOUR VEHICLE
NOTICE
For protection of a lead-acid battery and a starter motor, do not use the starter motor by turning the key to "START" for more than 12 seconds at a time. If the engine dose not start, turn the key to "LOCK" position and wait for more than 30 seconds before trying again. If the engine does not start after several attempts, consult a SUZUKI dealer or a qualified workshop. Do not leave the ignition switch in "ON" position if the engine is not running as the lead-acid battery will discharge.
3-4
Page 219 of 421

TPMS limitations
The tyre pressure monitoring system may not function properly under certain circumstances. In the following situations, the low tyre pressure warning light may come on and remain on or may blink. When you replace a flat tyre with the spare tyre. When you include a spare tyre during a tyre rotation. When the TPMS sensor is damaged during a tyre replacement or liquid sealants are used to repair a flat tyre. When the electronic signal of TPMS sensor is disturbed in one of the following ways: -Electric devices or facilities using similar radio wave frequencies are nearby. -A metallic film that may cause radio wave interference is attached on the window. -A lot of snow or ice covers the vehicle, in particular, around the wheels or wheel housings. -Snow tyres that are not installed with genuine TPMS sensors or snow chains are used.
When you use non-genuine SUZUKI wheels or tyres. When the pressure of any tyre is too high. When there is a problem with the receiver of the TPMS controller.
TPMS setting (For instrument cluster -Type A)
You can set one of the initial value of tyre pressure below that is indicated on the tyre information label. -Comfort Mode -Load Mode
For details on how to set the mode, refer to "Setting mode" in "BEFORE DRIVING" section.
A WARNING
If the loading weight has changed, adjust the tyre pressure according to the tyre information label and set the initial value via the information display. If the loading weight, tyre pressure and initial value do not match, the tyre pressure monitoring system will not function properly.
OPERATING YOUR VEHICLE
TPMS setting (For instrument clus
ter• Type B)
• You can check the current tyre pressure on the information display. • You can set one of the initial value of tyre pressure below that is indicated on the tyre information label. -Comfort Mode
-Load Mode
A WARNING
If the loading weight has changed, adjust the tyre pressure according to the tyre information label and set the initial value via the information display. If the loading weight, tyre pressure and initial value do not nJatch, the tyre pressure monitoring system will not function properly.
3-68
Page 236 of 421
OTHER CONTROLS AND EQUIPMENT
Fuel filler cap
78RB05001
5-1
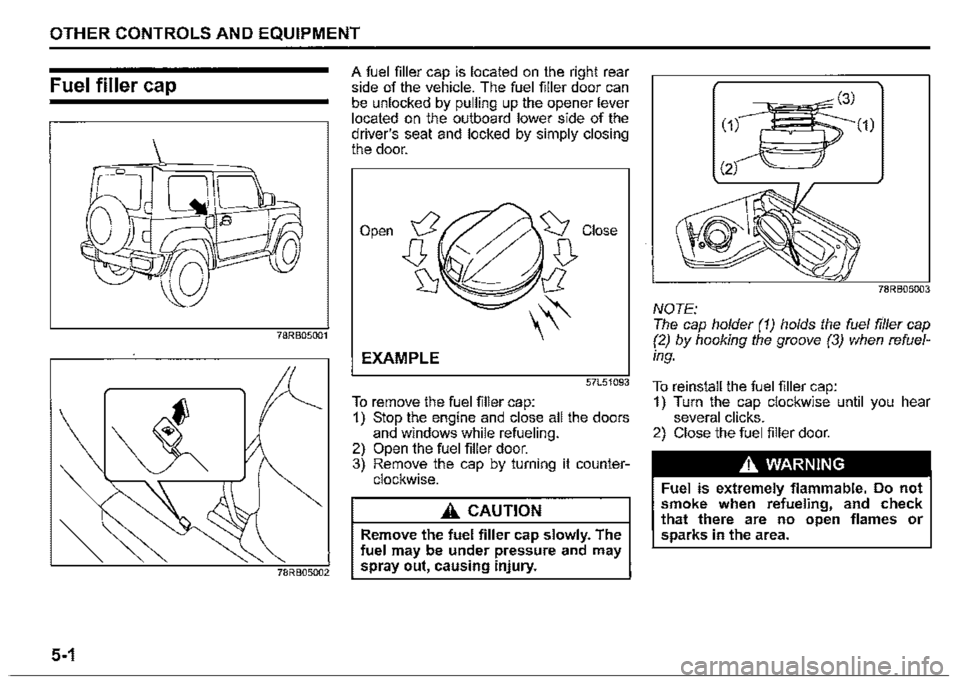
A fuel filler cap is located on the right rear side of the vehicle. The fuel filler door can be unlocked by pulling up the opener lever located on the outboard lower side of the driver's seat and locked by simply closing the door.
Open
EXAMPLE
57L51093
To remove the fuel filler cap: 1) Stop the engine and close all the doors and windows while refueling. 2) Open the fuel filler door. 3) Remove the cap by turning it counterclockwise.
A CAUTION
Remove the fuel filler cap slowly. The fuel may be under pressure and may spray out, causing injury.
78RB05003
NOTE: The cap holder (1) holds the fuel filler cap (2) by hooking the groove (3) when refuel
ing.
To reinstall the fuel filler cap: 1) Turn the cap clockwise until you hear several clicks. 2) Close the fuel filler door.
A WARNING
Fuel is extremely flammable. Do not smoke when refueling, and check that there are no open flames or sparks in the area.
Page 239 of 421

Sun visor
79J161
The sun visors can be pulled down to block glare coming through the windshield, or they can be unhooked and turned to the side to block glare coming through the side window.
NOTICE
When unhooking and hooking a sun visor, handle it by the hard plastic parts or the sun visor can be dam
aged.
OTHER CONTROLS AND EQUIPMENT
Card holder (if equipped)
(1)
(2)
78RB05008
(1) Mirror cover (2) Card holder
You can put a card in the card holder (2) on the back of the sun visor.
NOTICE
When you park your vehicle outdoors in direct sunlight or in hot weather, do not leave plastic cards in the holder. The heat may distort them.
Vanity mirror (if equipped)
(3)
78RB05009
(3) Vanity mirror
To use the vanity mirror (3) on the back of the sun visor, pull up the mirror cover (1).
A WARNING
• Do not use the mirror while driving your vehicle or you lose control of the vehicle. • When using the vanity mirror, do not move too close to a front airbag location or lean against it. If the front airbag is accidentally inflated it could hit you hard. '
5-4
Page 253 of 421

Air intake selector (3)
78RB05029
This selector is used to select the following modes.
FRESH AIR (1 . selected by moving the When this mo e 'ts_ of (a) in the above lever to the pos, ,on . illustration, outside air comes m.
RECIRCULATED AIR (b) b moving the
When this mode !~ sel~t(i) i~ the above lever to the pos, ,on air is shut out and illustration, outs1d~ t d This mode is su,t
inside air is recirc~h~iugh dusty or polluted able when dnv,nf el or when attempting air such as m adunnn ~r warm up the inteto quickly cool ow rior.
NOTE: CULATED AIR for an If you select R:c:~me the air in the vehiextended per,o o tan-:inated and the win
c/e can bec~me ir:nisted. Therefore, yo'! dows tend oFgRESH AIR whenever poss,should select ble.
OTHER CONTROLS AND EQUIPMENT
USE
WITH-
(4)
52RS50180
NOTE: WITH" (6) The mark of "USThe windshield and/or the To clear fog on . kly, set the air flow side windows ~::i~Af & DEFROST' or selector (4~. to d . ·ntake selector (3) to
"DEEFRSHOSA~R'?nTh::e' positioning will clear "FR : . Id d/or the side wmthe fogged wmdshteth a~'RECIRCULATED dows faster than e AIR".
Air flow selector (4)
52RM50250
This 1s use . . d to select one of the following
functions.
VENTILATION (c)
· omes Temperature-controlled air c the center and side air outlets.
5-18
Page 255 of 421

DEFROST (g)
78RB05034
Temperature-controlled air comes out of the windshield defroster outlets, the side defroster outlets and the side outlets.
OTHER CONTROLS AND EQUIPMENT
Air conditioning switch (5) To turn on the air conditioning system, set the blower speed selector to a position other than off and push in "NC" switch. With this "NC" switch operation, a indicator light will come on when the air conditioning system is working. To turn off the air conditioning system, push "NC" switch again.
During operation of the air conditioner, you may notice slight changes in engine speed. These changes are normal, the system is designed so that the compressor turns on or off to maintain the desired temperature.
Less operation of the compressor results in better fuel economy.
System operating instructions
Natural ventilation Select VENTILATION and FRESH AIR, the temperature selector to the desired temperature position, and the blower speed selector to off. Fresh air will flow through the vehicle during driving.
Forced ventilation The base settings are the same as for natural ventilation except you set the blower speed selector to a position other than off.
Normal heating (using outside air) Select HEAT and FRESH AIR, the temperature selector to the desired temperature position and the blower speed selector to the desired blower speed position. Setting the blower speed selector to a higher blower speed position increases heating
efficiency.
Quick heating (using recirculated air) The base settings are the same as for normal heating except you select RECIRCULATED AIR. If you use this heating method for an extended period of time, the air in the vehicle can become contaminated and the windows can become misty. Therefore, use this method only for quick heating and change to the normal heating method as soon as possible.
5-20
Page 256 of 421
OTHER CONTROLS AND EQUIPMENT
Head cooled/Feet warmed heating Select BI-LEVEL and FRESH AIR, the temperature selector to the desired temperature position, and the blower speed selector to the desired blower speed position. Unless the temperature selector is in the fully cold position or fully hot position, the air that comes out of the center and side outlets will be cooler than the air that comes out of the floor outlets.
Normal cooling Set the air flow selector to VENTILATION, the temperature selector to the desired temperature position and the blower speed selector to the desired blower speed position, and turn on "NG" switch. Setting the blower speed selector to a higher blower speed position increases cooling efficiency.
You can switch the air intake selector to either FRESH AIR or RECIRCULATED AIR as you desire. Choosing RECIRCULATED AIR increases cooling efficiency.
Quick cooling (using recirculated air) The base settings are the same as for normal cooling except you select RECIRCULATED AIR and the highest blower speed.
NOTE: If you select RECIRCULATED AIR for an extended period of time, the air in the vehicle can become contaminated and the windows tend to get misted. Therefore, you should select FRESH AIR whenever possible.
5-21
If your vehicle has been left in the sun with the windows closed, it will cool faster if you open the windows briefly while you operate the air conditioner with the air intake selector at FRESH AIR and the blower at high speed.
Dehumidifying Set the air flow selector to a desired air flow selector position, the temperature selector to the desired temperature position and the blower speed selector to the desired blower speed position. Also select FRESH AIR and turn on "NG" switch.
NOTE: Because the air conditioner dehumidifies the air, turning it on will help keep the windows clear, even when blowing heated air using DEFROST or HEAT & DEFROST functions.
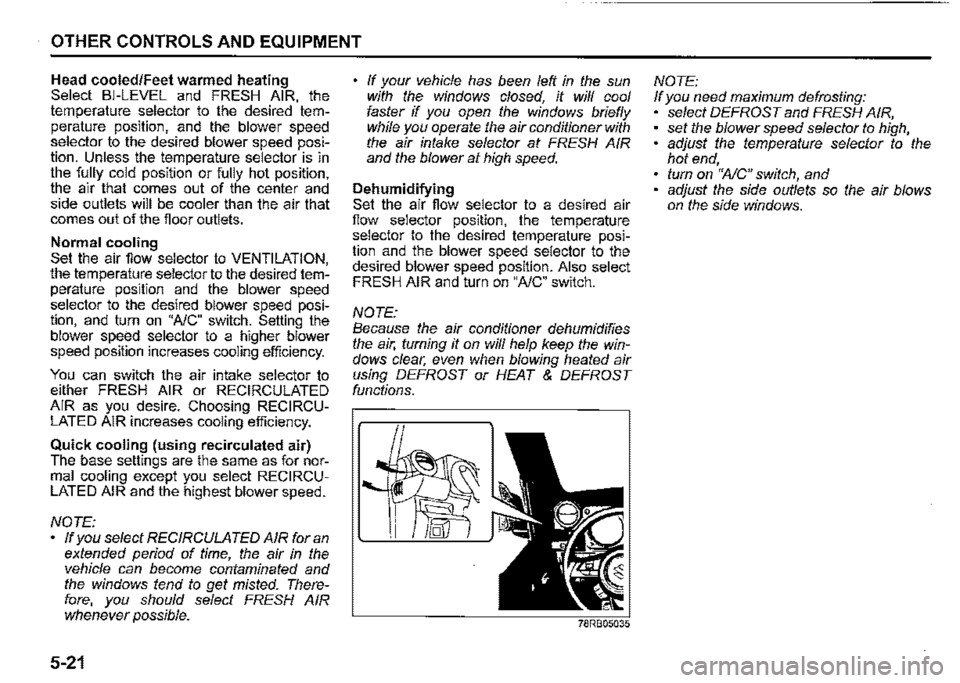
NOTE: If you need maximum defrosting: select DEFROST and FRESH AIR, set the blower speed selector to high, adjust the temperature selector to the hot end, turn on 'WC" switch, and adjust the side outlets so the air blows on the side windows.
Page 263 of 421
System operating instructions
Automatic operation
78RB05048
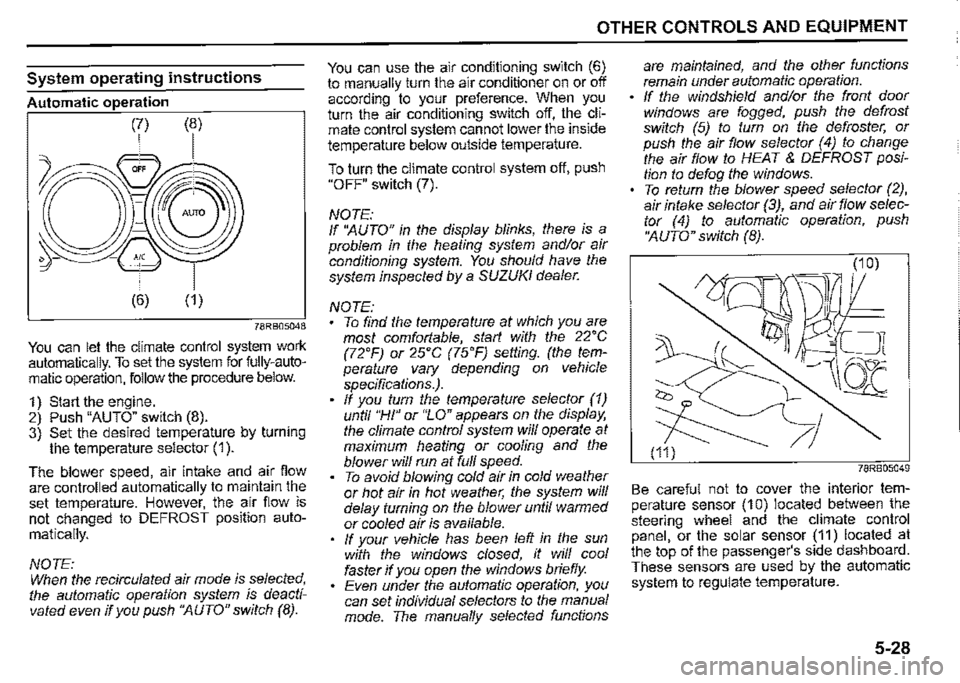
You can let the climate control system work automatically. To set the system for fully-automatic operation, follow the procedure below.
1) Start the engine. 2) Push "AUTO" switch (8). 3) Set the desired temperature by turning the temperature selector (1 ).
The blower speed, air intake and air flow are controlled automatically to maintain the set temperature. However, the air flow is not changed to DEFROST position auto
matically.
NOTE: When the recirculated air mode is selected, the automatic operation system is deactivated even if you push ''AUTO" switch (8).
OTHER CONTROLS AND EQUIPMENT
You can use the air conditioning switch (6) to manually turn the air conditioner on or off according to your preference. When you turn the air conditioning switch off, the climate control system cannot lower the inside temperature below outside temperature.
To turn the climate control system off, push "OFF" switch (7).
NOTE: If ''AUTO" in the display blinks, there is a problem in the heating system and/or air conditioning system. You should have the system inspected by a SUZUKI dealer.
NOTE: To find the temperature at which you are most comfortable, start with the 22'C (72'F) or 25'C (75'F) setting. (the temperature vary depending on vehicle specifications.). If you turn the temperature selector (1) until "HI" or "LO" appears on the display, the climate control system will operate at maximum heating or cooling and the blower will run at full speed. To avoid blowing cold air in cold weather or hot air in hot weather, the system will delay turning on the blower until warmed or cooled air is available. If your vehicle has been left in the sun with the windows closed, it will cool faster if you open the windows briefly. Even under the automatic operation, you can set individual selectors to the manual mode. The manually selected functions
are maintained, and the other functions remain under automatic operation. If the windshield and/or the front door windows are fogged, push the defrost switch (5) to turn on the defroster, or push the air flow selector (4) to change the air flow to HEAT & DEFROST position to defog the windows. To return the blower speed selector (2), air intake selector (3), and air flow selector (4) to automatic operation, push ''AUTO" switch (8).
78RB05049
Be careful not to cover the interior temperature sensor (10) located between the steering wheel and the climate control panel, or the solar sensor (11) located at the top of the passenger's side dashboard. These sensors are used by the automatic system to regulate temperature.
5-28
Page 264 of 421
OTHER CONTROLS AND EQUIPMENT
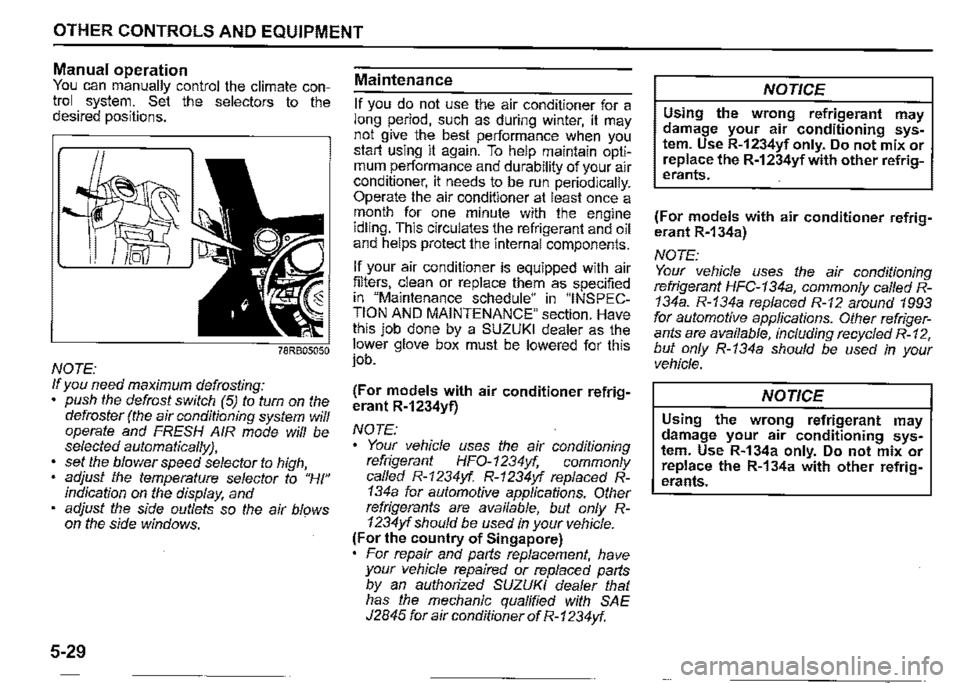
Manual operation You can manually control the climate control system. Set the selectors to the desired positions.
NOTE: If you need maximum defrosting: push the defrost switch (5) to turn on the defroster (the air conditioning system will operate and FRESH AIR mode will be selected automatically},
set the blower speed selector to high, adjust the temperature selector to "HI" indication on the display, and adjust the side outlets so the air blows on the side windows.
5-29
Maintenance
If you do not use the air conditioner for a long period, such as during winter, it may not give the best performance when you start using it again. To help maintain optimum performance and durability of your air conditioner, it needs to be run periodically. Operate the air conditioner at least once a month for one minute with the engine idling. This circulates the refrigerant and oil and helps protect the internal components.
If your air conditioner is equipped with air filters, clean or replace them as specified in "Maintenance schedule" in "INSPECTION AND MAINTENANCE" section. Have this job done by a SUZUKI dealer as the lower glove box must be lowered for this job.
(For models with air conditioner refrigerant R-1234yf)
NOTE:
Your vehicle uses the air conditioning refrigerant HFO-1234yf, commonly called R-1234yf. R-1234yf replaced R-134a for automotive applications. Other refrigerants are available, but only R-1234yf should be used in your vehicle. (For the country of Singapore) For repair and parts replacement, have your vehicle repaired or replaced parts by an authorized SUZUKI dealer that has the mechanic qualified with SAE J2845 for air conditioner of R-1234yf.
NOTICE
Using the wrong refrigerant may damage your air conditioning system. Use R-1234yf only. Do not mix or replace the R-1234yfwith other refrigerants.
(For models with air conditioner refrigerant R-134a)
NOTE: Your vehicle uses the air conditioning refrigerant HFC-134a, commonly called R-134a. R-134a replaced R-12 around 1993 for automotive applications. Other refrigerants are available, including recycled R-12, but only R-134a should be used in your vehicle.
NOTICE
Using the wrong refrigerant may damage your air conditioning system. Use R-134a only. Do not mix or replace the R-134a with other refrigerants.
Page 288 of 421
OTHER CONTROLS AND EQUIPMENT
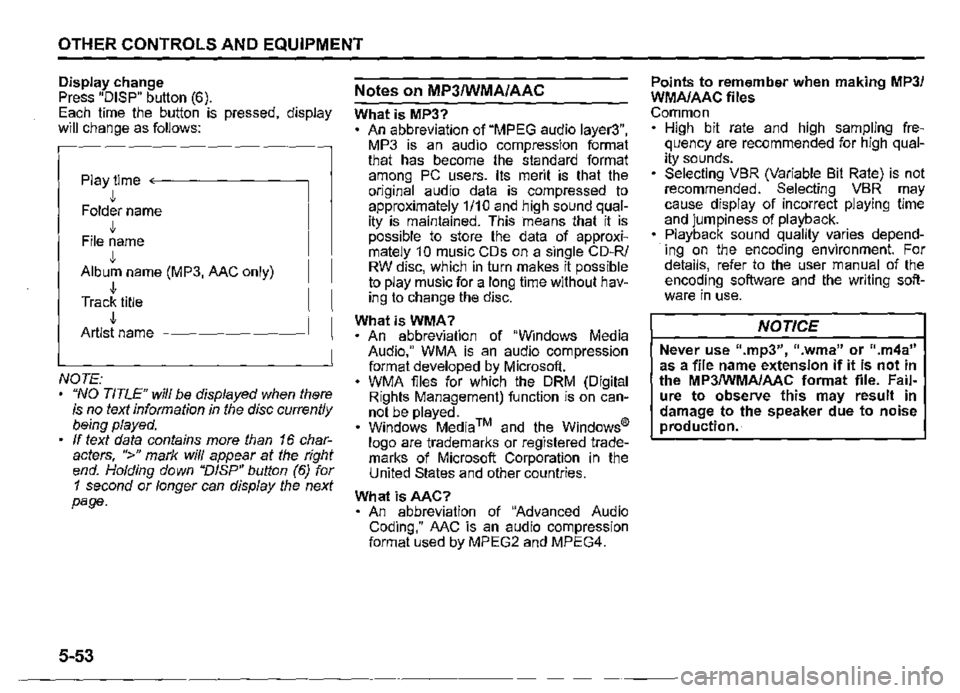
Display change Press "DISP" button (6). Each time the button is pressed, display will change as follows:
Play time <--------
• Folder name J, File name J, Album name (MP3, AAC only) J, Track title J, Artist name -------~
NOTE: "NO TITLE" will be displayed when there is no text information in the disc currently being played. If text data contains more than 16 characters, ">" mark will appear at the right end. Holding down "DISP" button (6) for 1 second or longer can display the next page.
5-53
Notes on MP3/WMA/AAC
What is MP3? An abbreviation of "MPEG audio layer3", MP3 is an audio compression format that has become the standard format among PC users. Its merit is that the original audio data is compressed to approximately 1/10 and high sound quality is maintained. This means that it is possible to store the data of approximately 1 0 music CDs on a single CD-R/ RW disc, which in turn makes it possible to play music for a long time without having to change the disc.
WhatisWMA? An abbreviation of "Windows Media Audio," WMA is an audio compression format developed by Microsoft. WMA files for which the ORM (Digital Rights Management) function is on cannot be played. Windows Media™ and the Windows® logo are trademarks or registered trademarks of Microsoft Corporation in the United States and other countries.
What isAAC? An abbreviation of "Advanced Audio Coding," AAC is an audio compression format used by MPEG2 and MPEG4.
Points to remember when making MP3/ WMA/AAC files Common High bit rate and high sampling frequency are recommended for high quality sounds. Selecting VBR (Variable Bit Rate) is not recommended. Selecting VBR may cause display of incorrect playing time and jumpiness of playback. Playback sound quality varies depending on the encoding environment. For details, refer to the user manual of the encoding software and the writing software in use.
NOTICE
Never use 11.mp3", 11 .wma" or ".m4a" as a file name extension if it is not in the MP3/WMA/AAC format file. Failure to observe this may result in damage to the speaker due to noise production.