lights SUZUKI JIMNY 2019 Owner's Manual
[x] Cancel search | Manufacturer: SUZUKI, Model Year: 2019, Model line: JIMNY, Model: SUZUKI JIMNY 2019Pages: 421, PDF Size: 6.35 MB
Page 130 of 421
BEFORE DRIVING
Guide me light (if equipped)
Guide me light has two functions of "To home" and "To car" for improving your visibility in the dark.
"To home" function Even after you leave the car, the ground will be illuminated for a short while with this function. You can turn on the front position lights and the headlights in the low beam setting for about 1 O seconds after the ignition switch is turned "LOCK".
To set the function: 1) Turn the lighting switch to "AUTO" position. 2) Turn the ignition switch to "LOCK" position. 3) Pull the lighting control lever toward you once and open the driver's side door within 60 seconds. Or pull the lighting control lever toward you once while the driver's side door is open.
2-59
To cancel the function: Perform any of the following operations. · If your vehicle is equipped with the keyless entry system (if equipped), it is necessary to insert the ignition key in the ignition switch. Pull the lighting control lever toward you once. Turn the ignition switch to "ACC" or "ON" position. Turn the lighting switch to any other position than "AUTO" position.
NOTE: When the "To home" is functioning, the front fog lights (if equipped), rear fog light and the headlights (high beam) are not turned on. Lighting time of the "To home" function can be changed on the information display. Refer to "Information display" in this section.
"To car" function Before you get in the vehicle, the ground will be illuminated for a short while to easily lead the driver to the vehicle. If "UNLOCK" button of the keyless entry system transmitter (if equipped) is pressed while the lighting switch is positioned in "AUTO", the front position lights and the headlights in the low beam are turned on for 1 O seconds. This function will operate only when it is dark outside the vehicle.
To cancel the function: Perform any of the following operations. If your vehicle is equipped with the keyless entry system (if equipped), it is necessary to insert the ignition key in the ignition switch. Lock the doors by using the keyless entry system transmitter, or the key in the driver's door lock. Turn the ignition switch to "ACC" or "ON" position. Turn the lighting switch to any other position than "AUTO" position.
NOTE: When the ''To car'' is functioning, the front fog lights (if equipped), rear fog fight and the headlights (high beam) are not turned on. Lighting time of the "To car'' function can be changed on the information display. Refer to "Information display" in this section.
Page 131 of 421

Front fog light switch
(if equipped)
68PM00232
To turn the front fog light on, twist the knob as shown in the illustration with the position lights, tail lights and/or the headlights are on. When the front fog light is on, an indicator light on the instrument cluster will come on.
NOTE: In some countries the lighting operation may be different from the above description according to local regulations.
Rear fog light switch
(if equipped)
68PM00233
To turn the rear fog light on, twist the knob as shown in the illustration with the headlights on. When the rear fog light is on, an indicator light on the instrument cluster will come on. If you twist the knob to the mark of rear fog light with the front fog light on, the rear fog light will turn on and an indicator light on the instrument cluster will come on.
BEFORE DRIVING
Adjusting headlight pattern
Headlight pattern, left hand traffic
:::OD
78RB02076
Headlight pattern, right hand traffic
I .·
::m
78RB02077
2-60
Page 132 of 421

BEFORE DRIVING
The headlight pattern must be adjusted to avoid dazzling oncoming motorists and can be set for right or left hand traffic.
LED headlights {if equipped) You do not need to adjust the light pattern.
Halogen headlights {if equipped) The light pattern may not be as good. You should readjust the light pattern by masking the headlight lens.
Left hand drive vehicle To readjust the light pattern by masking the headlight lens; 1) Copy the A and B templates as shown in the illustrations. 2) Transfer the template to a self-adhesive waterproof material and cut it out. 3) Position the self-adhesive templates at the right distance from the center mark of the headlight lens. Refer to the dimensions in the following list:
2-61
Right side headlight {A)
78RB02067
(1) Vertical line: approximately 10.0 mm (2) Vertical line: approximately 5.0 mm (3) Center mark
Left side headlight {B)
... (1)
t
78RB02068
(1) Vertical line: approximately 10.0 mm (2) Vertical line: approximately 5.0 mm (3) Center mark
Page 134 of 421

BEFORE DRIVING
Templates for halogen headlights
78RB02071
2-63
Page 136 of 421

BEFORE DRIVING
Headlight leveling switch
{if equipped)
75RM008
Level the headlight beam according to the load condition of your vehicle by turning this switch. The chart shows the appropriate switch position for different vehicle load conditions.
2-65
Vehicle Load Condition
Driver only
Driver+ 1 passenger (in front seat)
Driver+ 3 passengers, no cargo
Driver + 3 passengers,
cargo added
Driver + full cargo
Switch Position
0
0.5
2
3
4.5
Headlight washer switch
{if equipped)
-. =IQ···· = .
78RB02057
With the ignition switch in the "ON" position and the headlights are turned on, push the headlight washer switch to wash the headlight lenses. Washer fluid is sprayed for half a second. If necessary, push the switch again. Under the same conditions, if you operate the windshield washer two or more times successively at short intervals, the headlight washers also operate automatically but only once at the same time as the first windshield washer operation.
Page 138 of 421

BEFORE DRIVING
NOTE: You can customize the setting for the num-Hazard warning switch ber of flashing times of the turn signal and its indicator (1 to 4 times). Ask a SUZUKI deafer for the customization.
2-67
78RB02058
Push the hazard warning switch to activate the hazard warning lights. All turn signal lights and both turn signal indicators will flash simultaneously. To turn off the lights, push the switch again. Use the hazard warning lights to warn other drivers of possible risk of traffic hazard when you park your vehicle in case of emergency.
Windshield wiper and washer
lever
650611
A WARNING
To avoid possible injury, do not operate controls by reaching through the steering wheel.
Page 145 of 421
Tow bars
Only use a tow bar that is designed to attach to the chassis of your vehicle, and a hitch that is designed to bolt to this tow bar. We recommend that you use a genuine SUZUKI tow bar kit (available as an option), or equivalent.
A WARNING
Never use a tow bar which attaches to the axle or the bumper of your vehicle.
Safety chains
Always attach safety chains between your vehicle and the trailer. Cross safety chains under the nose of the trailer so that the nose will not drop to the road if the trailer becomes separated from the tow bar. Follow the manufacturer's recommendation for attaching safety chains. Always leave just enough slack to permit full turning. Never allow safety chains to drag on the road.
A WARNING
Never attach safety chains to the bumper of your vehicle. Secure connections so that they cannot come loose.
-----------------------
Trailer lights
Check that your trailer is equipped with lights which meet local requirements. Always check for the proper operation of all trailer lights before you start to tow.
A WARNING
Never connect trailer lights directly into your vehicle's electrical system, or electrical system damage may occur.
Brakes
A WARNING
If the trailer is equipped with the brakes, follow all instructions provided by the manufacturer. Never connect to the brake system of your vehicle and never take an electrical supply directly from the wiring har
ness.
BEFORE DRIVING
Tyres
A WARNING
When towing a trailer, it is very important for your vehicle and trailer to have properly inflated tyres. Your vehicle's tyres should be inflated to the pressures listed on your vehicle's tyre information label. The tyres should be inflated to the laden pressures. Inflate trailer tyres according to the specifications provided by the trailer manufacturer.
Mirrors
Check if your vehicle's mirrors meet local requirements for mirrors used on towing vehicles. If they do not, you must install the required mirrors before you tow.
2-74
Page 146 of 421
BEFORE DRIVING
Vehicle/trailer loading
The weight of your loaded trailer (gross trailer weight) should never exceed the towing capacity.
Distribute cargo in your trailer so that the nose weight is about 10% of gross trailer weight, but does not exceed "Maximum vertical load" of 75 kg (165 lbs), and does not fall below 25 kg (55 lbs) or 4%, whichever is heavier, on trailer hitch point. You should measure gross trailer weight and nose weight before towing to check that your load is properly distributed.
A WARNING
Improper weight distribution of your trailer may result in poor vehicle handling and swaying of the trailer. Always check that the trailer nose weight is about 10% of gross trailer weight, but does not exceed 11Maximum vertical load" of75 kg (165 lbs), and does not fall below 25 kg (55 lbs) or 4%, whichever is heavier, on trailer hitch point. Also check that the cargo is properly secured. Failure to observe this requirement may result in an accident.
2-75
A WARNING
Never overload cargo on your trailer and your vehicle. Gross trailer weight must never exceed towing capacity. Gross vehicle weight (sum of the weights of the vehicle, all the occupants, accessories including tow bars and a trailer hitch, cargo and trailer nose weight) must never exceed the Gross Vehicle Weight Rating (GVWR) listed in "SPECIFICATIONS" section, except as described in NOTE below. • It is dangerous and may be illegal to transport people in a trailer.
NOTE: Only in the case of towing a trailer, GVW can be exceeded by not more than 40 kg (88 lbs), if road traffic legislation allows it.
Connect trailer lights and hook safety chains every time you tow.
NOTICE
Because towing a trailer puts additional stress on your vehicle, more frequent maintenance will be required than under normal driving conditions. Follow the schedule in "Maintenance recommended under severe driving conditions". The additional load will affect fuel consumption, durability and performance of the vehicle as well.
Page 147 of 421
A WARNING
Your vehicle should be handled in a different way when towing a trailer. For the safety of yourself and others, observe the following precautions: Practice turning, stopping, and reversing before you begin towing a trailer in traffic. Do not tow a trailer in traffic until you are confident that you can handle the vehicle and trailer safely. Never exceed local towing speed limits or 80 km/h (50 mph), whichever is lower. Never drive at a speed that causes shaking or swaying of the trailer. If you notice even the slightest sign of shaking or swaying, slow down. • When roads are wet, slippery or rough, drive at a slower speed than you would on dry or smooth roads. Failure to slow down when road conditions are bad can result in loss of control. Always have someone guide you when reversing. (Continued)
A WARNING
(Continued) Always admit greater stopping distance. Stopping distance is increased when you tow a trailer. For each 16 km/h (10 mph) of speed, allow at least one vehicle and trailer length between you and the vehicle ahead. Allow a greater stopping distance if roads are wet or slippery. If the trailer has over-run brakes, apply the brakes gradually to avoid snatching caused by the trailer wheels locking. Slow down before corners and maintain a steady speed while cornering. Deceleration or acceleration while cornering can result in loss of control. Remember that a larger than normal turning radius is needed because the trailer wheels will go inside than vehicle's wheels. Avoid sudden acceleration and stopping of the vehicle. Do not make quick maneuvers unless they are necessary. Slow down in cross winds and be prepared for gusts of wind from large passing vehicles. (Continued)
BEFORE DRIVING
A WARNING
(Continued) Be careful when overtaking other vehicles. Allow enough room for your trailer before changing lanes, and use turn signal lights properly in advance. Slow down and shift into a lower gear for better engine braking before you reach long or steep downhill grades. It is hazardous to attempt downshifting while you are descending a hill. Do not step on the brake pedal excessively. This could cause the brakes to over-heat resulting in reduced braking efficiency. Use engine braking as much as possible. Because of the added trailer weight, your engine may overheat on hot days when going up long or steep hills. Pay attention to your engine coolant temperature. If it indicates overheating, pull off the road and stop the vehicle in a safe place. Refer to "Engine trouble: Overheating" in "EMERGENCY SERVICE" section.
2-76
Page 152 of 421
OPERATING YOUR VEHICLE
Daily inspection checklist
Before driving
60A187
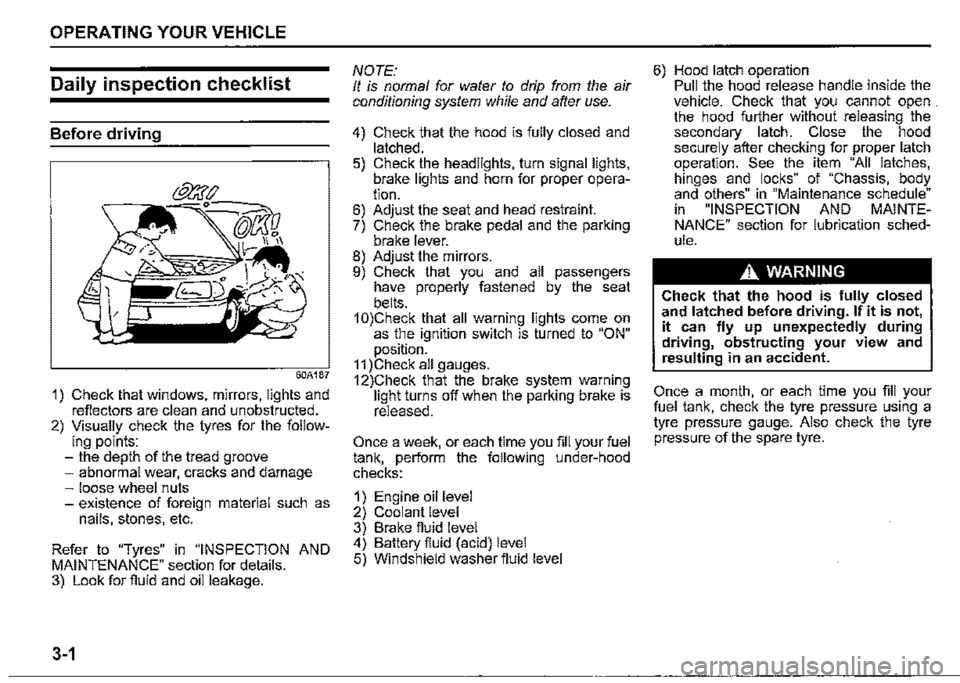
1) Check that windows, mirrors, lights and reflectors are clean and unobstructed. 2) Visually check the tyres for the follow-ing points: -the depth of the tread groove -abnormal wear, cracks and damage -loose wheel nuts -existence of foreign material such as nails, stones, etc.
Refer to "Tyres" in "INSPECTION AND MAINTENANCE" section for details. 3) Look for fluid and oil leakage.
3-1
NOTE: It is normal for water to drip from the air conditioning system while and after use.
4) Check that the hood is fully closed and latched. 5) Check the headlights, turn signal lights, brake lights and horn for proper operation. 6) Adjust the seat and head restraint. 7) Check the brake pedal and the parking brake lever. 8) Adjust the mirrors. 9) Check that you and all passengers have properly fastened by the seat belts. 1 0)Check that all warning lights come on as the ignition switch is turned to "ON" position. 11 )Check all gauges. 12)Check that the brake system warning light turns off when the parking brake is released.
Once a week, or each time you fill your fuel tank, perform the following under-hood checks:
1) Engine oil level 2) Coolant level 3) Brake fluid level 4) Battery fluid (acid) level 5) Windshield washer fluid level
6) Hood latch operation Pull the hood release handle inside the vehicle. Check that you cannot open . the hood further without releasing the secondary latch. Close the hood securely after checking for proper latch operation. See the item "All latches, hinges and locks" of "Chassis, body and others" in "Maintenance schedule" in "INSPECTION AND MAINTENANCE" section for lubrication schedule.
A WARNING
Check that the hood is fully closed and latched before driving. If it is not, it can fly up unexpectedly during driving, obstructing your view and resulting in an accident.
Once a month, or each time you fill your fuel tank, check the tyre pressure using a tyre pressure gauge. Also check the tyre pressure of the spare tyre.