service indicator SUZUKI JIMNY 2020 Owners Manual
[x] Cancel search | Manufacturer: SUZUKI, Model Year: 2020, Model line: JIMNY, Model: SUZUKI JIMNY 2020Pages: 421, PDF Size: 6.35 MB
Page 92 of 421

BEFORE DRIVING
Trip meter The trip meter can be used to measure the distance traveled on short trips or between fuel stops. You can use the trip meter A or trip meter B independently.
To reset the trip meter, push and hold the trip meter selector knob (1) until the display shows a.a.
NOTE: The indicated maximum value of the trip meter is 9999.9. When you run past the maximum value, the indicated value will return to 0. 0. ·
Odometer The odometer records the total distance the vehicle has been driven.
NOTICE
Keep track of your odometer reading and check the maintenance schedule regularly for required services. Increased wear or damage to certain parts can result from failure to perform required services at the proper mileage intervals.
2-21
Instantaneous fuel consumption The display shows the value of instantaneous fuel consumption only when the vehicle is moving.
NOTE: The display does not show the value unless the vehicle is moving. Depending on the vehicle's specification, the fuel consumption units of initial setting are indicated as U100km or km/L. For "U100km" setting, the indicated maximum value of instantaneous fuel consumption is 30. No more than 30 will be indicated on the display even if the actual instantaneous fuel consumption is higher. For "km/L" setting, the indicated maximum value of instantaneous fuel consumption is 50. No more than 50 will be indicated on the display even if the actual instantaneous fuel consumption is higher. The indication on the display may be delayed if fuel consumption is greatly affected by driving conditions. The display shows estimated values. Indications may not be the same as actual values. For "U100km" or "km/L" setting, you can change the units that instantaneous fuel consumption is displayed in. Refer to ',<\verage fuel consumption" in this section.
Average fuel consumption If you previously selected average fuel consumption setting, the display shows average fuel consumption from the last reset to the present when the ignition switch is turned "ON".
To reset the average fuel consumption, push and hold the indicator selector knob (2) for a while when the display shows the average fuel consumption.
NOTE: When you reset the indication or reconnect the terminals to the lead-acid battery, the value of average fuel consumption will be shown after driving for a while.
Page 103 of 421

NOTE: If you refuel when the ignition switch is "ON", the driving range may not indicate the correct value. When you reconnect the terminals to the lead-acid battery, the value of driving range will be shown after driving for a period of time.
Average speed If you selected average speed the last time you drove the vehicle, the display indicates the last value of average speed from previous driving when the ignition switch is turned "ON". Unless you reset the value of average speed, the display indicates the value of average speed which includes average speed during previous driving.
To reset the value of average speed, push and hold the indicator selector knob (3) for a while when the display indicates an average speed. The display shows "---" and then indicates a new average speed after driving for a short time.
NOTE: When you reconnect the terminals to the lead-acid battery, the value of average speed will be shown after driving for a period of time.
Driving time The display shows the total amount of driving time since the indication was reset. To reset the driving time, push and hold the indicator selector knob (3) for a while when the display shows the driving time.
NOTE: When you reset the indication or reconnect the terminals to the lead-acid battery, the driving time will be shown after driving for a while. The indicated maximum value of driving time is 99:59:59. No more than the maximum value will be indicated on the display until you reset the driving time.
Gearshift indicator
The display (D) shows the gearshift indicator.
Refer to "Gearshift indicator" in "OPERATING YOUR VEHICLE" section.
BEFORE DRIVING
Trip meter
The display (E) shows the trip meter.
The trip meter can be used to measure the distance traveled on short trips or between fuel stops. You can use trip meter A or trip meter B independently.
To reset the trip meter, push and hold the trip meter selector knob (2) for a while.
NOTE: The indicated maximum value of the trip meter is 9999.9. When you run past the maximum value, the indicated value will return to 0.0.
Odometer
The display (F) shows the odometer.
The odometer records the total distance the vehicle has been driven.
NOTICE
Keep track of your odometer reading and check the maintenance schedule regularly for required services. Increased wear or damage to certain parts can result from failure to perform required services at the proper mileage intervals.
2-32
Page 116 of 421

BEFORE DRIVING
Rear passenger's seat belt
reminder light (if equipped)
78RB02087
When the rear passenger does not buckle his or her seat belt, this light will come on and/or blink. For details of the seat belt reminder, refer to "Seat belts and child restraint systems" in this section.
2-45
AIRBAG light
63J030
When the ignition switch is turned "ON", this light comes on for several seconds so you can check that the light is working.
The light will come on and stay on if there is a problem in the airbag system or the seat belt pretensioner system.
A WARNING
If AIRBAG light does not blink or come on briefly when the ignition switch is turned "ON", stays on for more than 10 seconds, or comes on while driving, the airbag system or the seat belt pretensioner system may not work properly, which could result in serious injury in the event of a collision. Have both systems inspected by a SUZUKI dealer.
Malfunction indicator light
65D530
Your vehicle has a computer-controlled emission control system. A malfunction indicator light is provided on the instrument cluster to indicate when it is necessary to have the emission control system serviced. When the ignition switch is turned "ON", this light comes on. When the engine is started, the light goes out.
If the malfunction indicator light comes on or blinks when the engine is running, there is a damage in the emission control system. Bring the vehicle to a SUZUKI dealer to have the damage fixed.
Also, if this light comes on when the engine is running, there is a problem with the automatic transmission system. Ask a SUZUKI dealer to have the system inspected.
Page 119 of 421

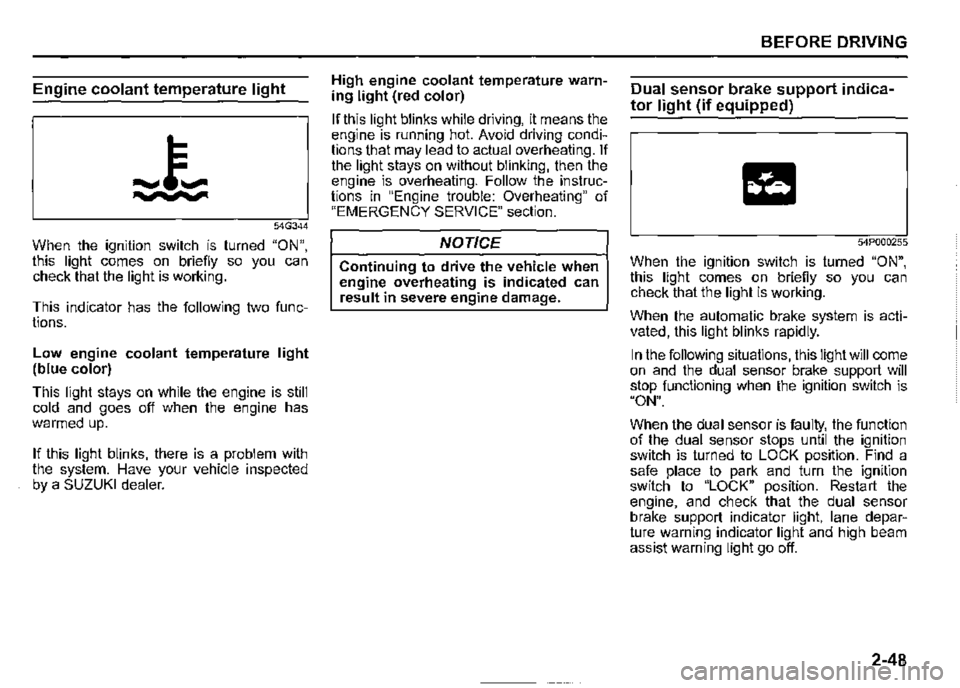
Engine coolant temperature light
54G344
When the ignition switch is turned "ON", this light comes on briefly so you can check that the light is working.
This indicator has the following two functions.
Low engine coolant temperature light (blue color)
This light stays on while the engine is still cold and goes off when the engine has warmed up.
If this light blinks, there is a problem with the system. Have your vehicle inspected by a SUZUKI dealer.
High engine coolant temperature warning light (red color)
If this light blinks while driving, it means the engine is running hot. Avoid driving conditions that may lead to actual overheating. If the light stays on without blinking, then the engine is overheating. Follow the instructions in "Engine trouble: Overheating" of "EMERGENCY SERVICE" section.
NOTICE
Continuing to drive the vehicle when engine overheating is indicated can result in severe engine damage.
BEFORE DRIVING
Dual sensor brake support indica
tor light (if equipped)
54P000255
When the ignition switch is turned "ON", this light comes on briefly so you can check that the light is working.
When the automatic brake system is activated, this light blinks rapidly.
In the following situations, this light will come on and the dual sensor brake support will stop functioning when the ignition switch is "ON".
When the dual sensor is faulty, the function of the dual sensor stops until the ignition switch is turned to LOCK position. Find a safe place to park and turn the ignition switch to "LOCK" position. Restart the engine, and check that the dual sensor brake support indicator light, lane departure warning indicator light and high beam assist warning light go off.
2-48
Page 209 of 421

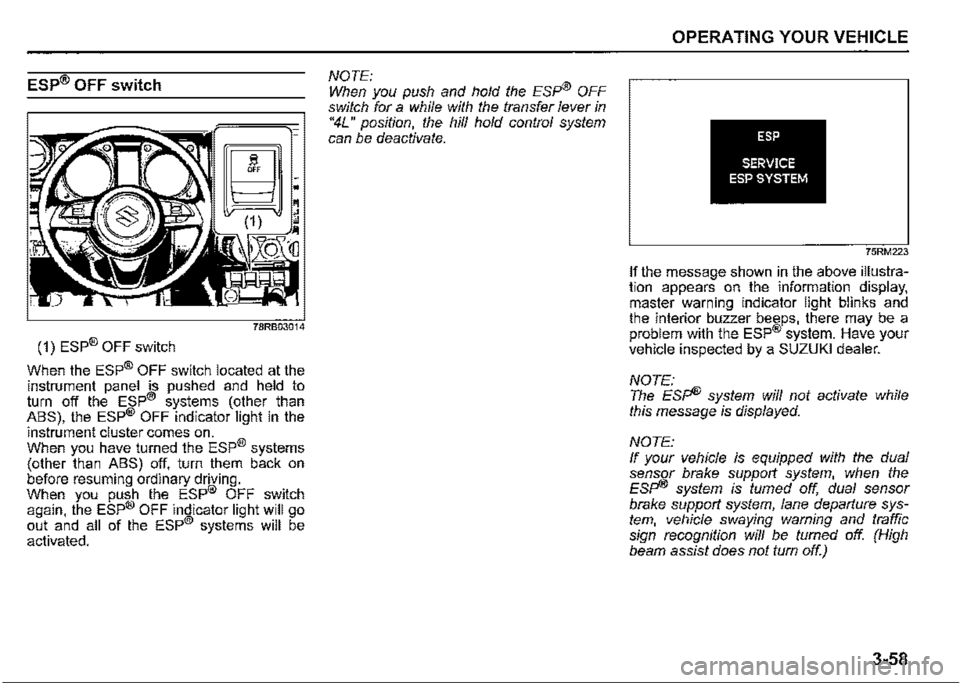
ESP® OFF switch
(1) ESP® OFF switch
When the ESP® OFF switch located at the instrument panel is pushed and held to turn off the ESP® systems (other than ABS), the ESP® OFF indicator light in the
instrument cluster comes on. When you have turned the ESP® systems (other than ABS) off, turn them back on before resuming ordinary driving. When you push the ESP® OFF switch again, the ESP® OFF indicator light will go out and all of the ESP® systems will be activated.
NOTE: When you push and hold the Esp® OFF switch for a while with the transfer lever in "4L" position, the hill hold control system can be deactivate.
OPERATING YOUR VEHICLE
ESP
SERVICE ESP SYSTEM
75RM223
If the message shown in the above illustration appears on the information display, master warning indicator light blinks and the interior buzzer beeps, there may be a problem with the ESP® system. Have your vehicle inspected by a SUZUKI dealer.
NOTE: The Esp® system will not activate while this message is displayed.
NOTE: If your vehicle is equipped with the dual sensor brake support system, when the Esp® system is turned off, dual sensor brake support system, lane departure system, vehicle swaying warning and traffic sign recognition will be fumed off. (High beam assist does not turn off.)
3-58
Page 217 of 421

NOTICE
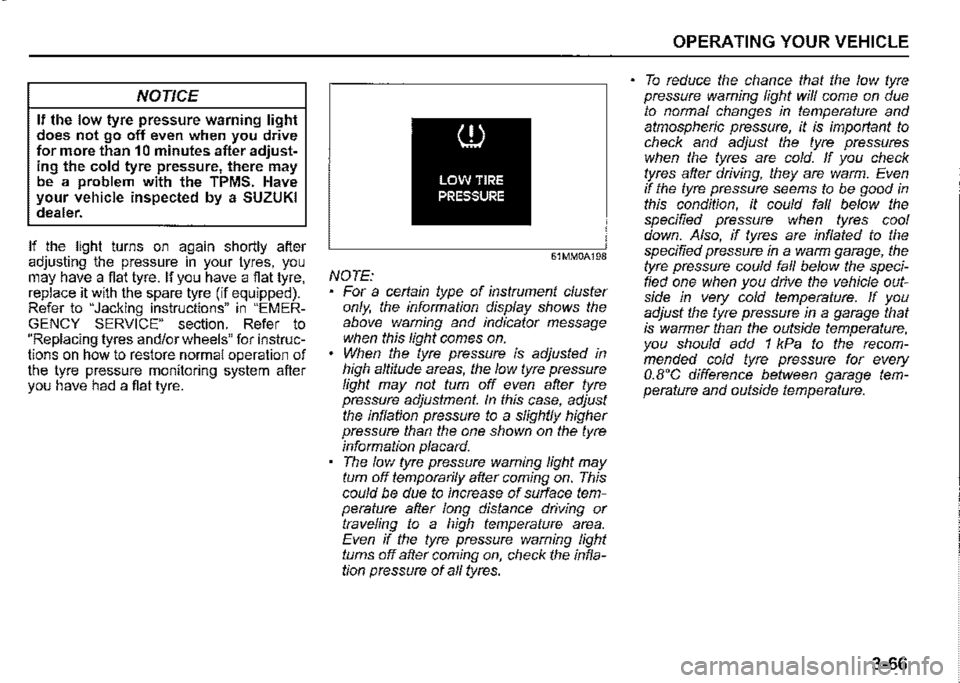
If the low tyre pressure warning light does not go off even when you drive for more than 10 minutes after adjusting the cold tyre pressure, there may be a problem with the TPMS. Have your vehicle inspected by a SUZUKI dealer.
If the light turns on again shortly after adjusting the pressure in your tyres. you may have a flat tyre. If you have a flat tyre, replace it with the spare tyre (if equipped). Refer to "Jacking instructions" in "EMERGENCY SERVICE"" section. Refer to "Replacing tyres and/or wheels" for instructions on how to restore normal operation of the tyre pressure monitoring system after you have had a flat tyre.
61MM0A198
NOTE: For a certain type of instrument cluster only, the information display shows the above warning and indicator message when this light comes on. When the tyre pressure is adjusted in high altitude areas, the low tyre pressure light may not turn off even after tyre pressure adjustment. In this case, adjust the inflation pressure to a slightly higher pressure than the one shown on the tyre informaUon placard. The low tyre pressure warning light may turn off temporarily after coming on. This could be due to increase of surface temperature after long distance driving or traveling to a high temperature area. Even if the tyre pressure warning light turns off after coming on, check the inflation pressure of all tyres.
OPERATING YOUR VEHICLE
To reduce the chance that the low tyre pressure warning light will come on due to normal changes in temperature and atmospheric pressure, it is important to check and adjust the tyre pressures when the tyres are cold. If you check tyres after driving, they are warm. Even if the tyre pressure seems to be good in this condition, it could fall below the specified pressure when tyres cool down. Also, if tyres are inflated to the specified pressure in a warm garage, the tyre pressure could fall below the specified one when you drive the vehicle outside in very cold temperature. If you adjust the tyre pressure in a garage that is warmer than the outside temperature, you should add 1 kPa to the recommended cold tyre pressure for every O.B'C difference between garage temperature and outside temperature.
3-66
Page 384 of 421

EMERGENCY SERVICE
A safety chain should always be used when you tow your vehicle.
NOTICE
Do not tow your vehicle with the rear wheels directly on the ground (and the transmission in neutral). If you do, the transmission will be damaged fatally.
7-7
--------·--··---------------
A WARNING
For vehicles equipped with the dual sensor brake support, if your vehicle is towed with the engine on, press dual sensor brake support OFF switch and turn off the dual sensor brake support. If not, accidents related to the system being turned on may occur.
NOTICE
Observe the following instructions when towing your vehicle. To help avoid damage to your vehicle during towing, proper equipment and towing procedures must be used. • Using the frame hook, tow your vehicle on paved roads for short distances at low speed.
Before towing
78RB08008
If you tow your vehicle with the front wheels on the ground, shift the transmission into Neutral and make sure the 4WD indicator on the instrument cluster comes on when you use the transfer lever to shift into 4-wheel drive high range position ("4H") and goes off when you use the transfer lever to shift into 2-wheel high drive position ("2H") with the engine running. If the 4WD indicator does not come on or it does not go off, that means, the airlocking hubs cannot be locked or unlocked, the vehicle must be towed with the front wheels lifted and the rear wheels on a dolly.
Page 386 of 421

EMERGENCY SERVICE
Rear wheels lifted (all models)
"ON"__.. "ACC"
UNLOCKED
78RB08006
7-9
Rear wheels lifted Your vehicle may be towed by a tow truck with the rear wheels lifted and the front wheels on the ground. Towing speed should not exceed 90 km/h (55 mph).
For this type of towing: 1) Shift the manual transmission to Neutral or the automatic transmission to "P" position and start the. engine. 2) Shift the transfer lever to 2WD position ("2H"). 3) Make sure the 4WD indicator on the instrument cluster is turned off.
NOTICE
If the air-locking hubs cannot be unlocked, tow the vehicle with the rear wheels lifted and a dolly under the front wheels.
4) Turn the ignition key to the "ACC" position to stop the engine and to unlock the steering wheel.
NOTICE
The steering column lock is not strong enough to withstand shocks transmitted from the front wheels during towing.
5) Make sure the front wheels are facing straight forward and secure the steering wheel with a steering wheel clamping device designed for towing service.
Page 387 of 421

Engine trouble: Starter does
not operate
1) Try turning the ignition switch to "START" position with the headlights turned on to determine the lead-acid battery condition. If the headlights go excessively dim or go off, it usually means that either the lead-acid battery is discharged or the battery terminal contact is poor. Recharge the lead-acid battery or correct battery terminal contact as necessary. 2) If the headlights remain bright, check the fuses. If the reason for failure of the starter is not obvious, there may be a major electrical problem. Have the vehicle inspected by a SUZUKI dealer.
Engine trouble: Does not start
Make sure that your vehicle has enough · fuel and battery. If the engine does not start under very cold condition, press the accelerator pedal all the way to the fioor and hold it while cranking the engine. Refer to "Starting engine" in operating your vehicle section. If the engine still does not start have your vehicle inspected at a SUZUKI dealer. Do not operate the starter motor for more than 12 seconds.
EMERGENCY SERVICE
Engine trouble: Overheating
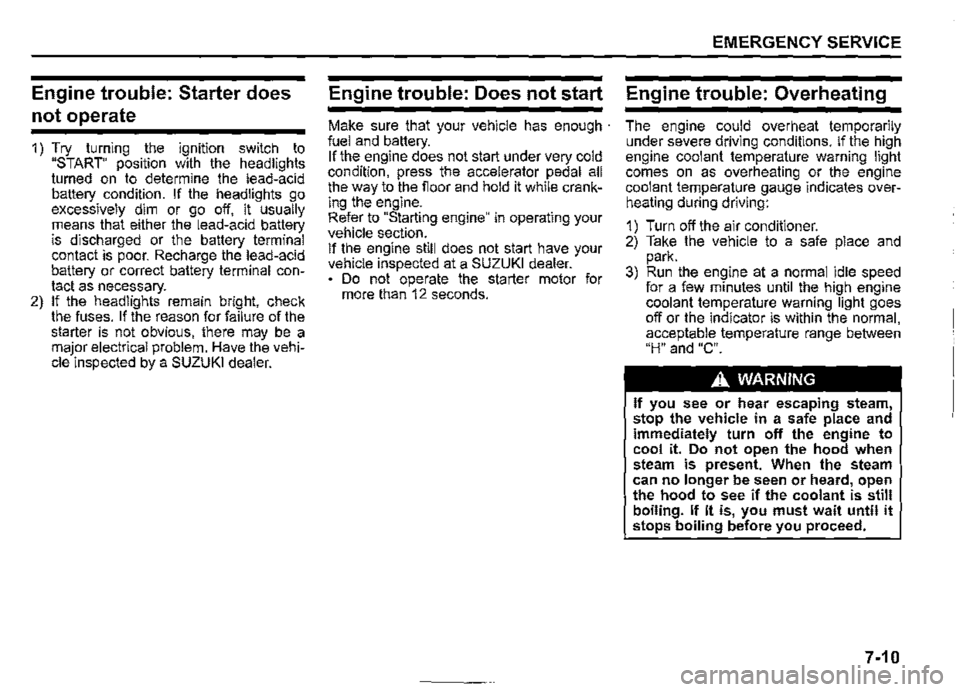
The engine could overheat temporarily under severe driving conditions. If the high engine coolant temperature warning light comes on as overheating or the engine coolant temperature gauge indicates overheating during driving:
1) Turn off the air conditioner. 2) Take the vehicle to a safe place and park. 3) Run the engine at a normal idle speed for a few minutes until the high engine coolant temperature warning light goes off or the indicator is within the normal, acceptable temperature range between "H" and "C".
A WARNING
If you see or hear escaping steam, stop the vehicle in a safe place and immediately turn off the engine to cool it. Do not open the hood when steam is present. When the steam can no longer be seen or heard, open the hood to see if the coolant is still boiling. If it is, you must wait until it stops boiling before you proceed.
7-10