Reverse light SUZUKI JIMNY 2022 Owners Manual
[x] Cancel search | Manufacturer: SUZUKI, Model Year: 2022, Model line: JIMNY, Model: SUZUKI JIMNY 2022Pages: 421, PDF Size: 6.35 MB
Page 156 of 421
OPERATING YOUR VEHICLE
Parking brake lever
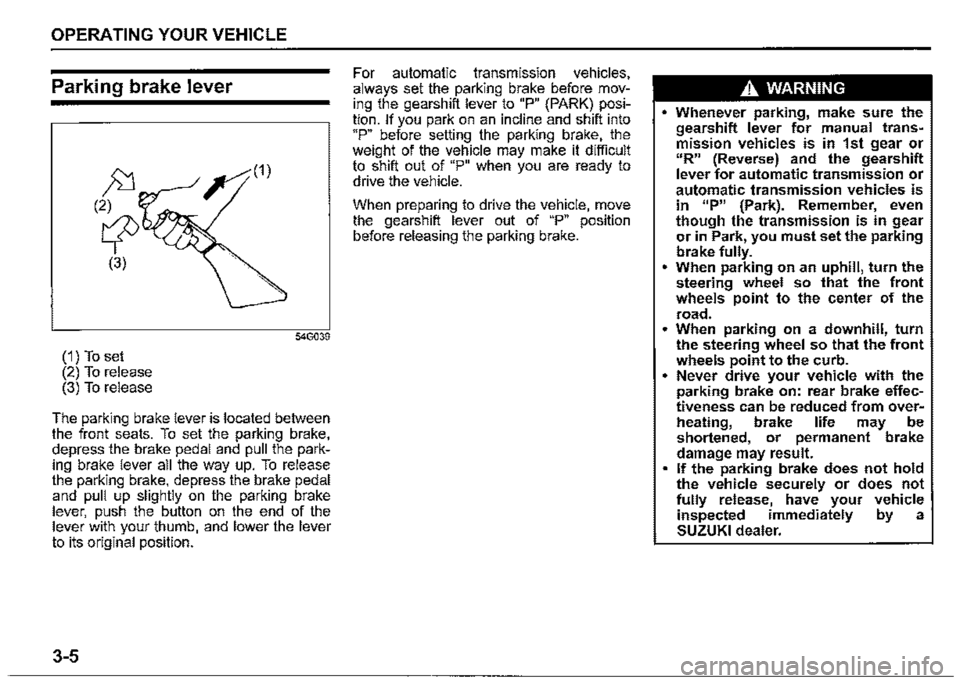
(1) To set (2) To release (3) To release
The parking brake lever is located between the front seats. To set the parking brake, depress the brake pedal and pull the parking brake lever all the way up. To release the parking brake, depress the brake pedal and pull up slightly on the parking brake lever, push the button on the end of the lever with your thumb, and lower the lever to its original position.
3-5
For automatic transmission vehicles, always set the parking brake before moving the gearshift lever to "P" (PARK) position. If you park on an incline and shift into "P" before setting the parking brake, the weight of the vehicle may make it difficult to shift out of "P" when you are ready to drive the vehicle.
When preparing to drive the vehicle, move the gearshift lever out of "P" position before releasing the parking brake.
A WARNING
• Whenever parking, make sure the gearshift lever for manual transmission vehicles is in 1st gear or "R" (Reverse) and the gearshift lever for automatic transmission or automatic transmission vehicles is in 11P" {Park). Remember, even though the transmission is in gear or in Park, you must set the parking brake fully. • When parking on an uphill, turn the steering wheel so that the front wheels point to the center of the
road. • When parking on a downhill, turn the steering wheel so that the front wheels point to the curb. • Never drive your vehicle with the parking brake on: rear brake effectiveness can be reduced from overM heating, brake life may be shortened, or permanent brake damage may result. • If the parking brake does not hold the vehicle securely or does not fully release, have your vehicle inspected immediately by a SUZUKI dealer.
Page 157 of 421

A WARNING
Always set the parking brake fully before leaving your vehicle or it may move, causing injury or damage. When parking, make sure the gearshift lever for manual transmission vehicles is in 1st gear or "R" (Reverse) and the gearshift lever for automatic transmission vehicles is in "P" (Park). Remember, even though the transmission is in gear or in Park, you must set the parking brake fully.
A WARNING
When parking the vehicle in extremely cold weather, the following procedure should be used: 1) Set the parking brake. 2) Manual transmission -turn off the engine, then shift into reverse or first gear. Automatic transmission -shift into "P" (Park) and turn off the engine. 3) Get out of the vehicle and put chocks under the wheels. 4) Release the parking brake. When you return to your vehicle, first set the parking brake, and then remove the wheel chocks.
A WARNING
Do not leave cigarette lighters, spray cans, soft drink cans or plastic arti~ cles (such as glasses, CD case, etc.) in sun-heated vehicle. The temperature inside the vehicle may cause as follows: Gas may leak from a cigarette lighter or spray can and may lead to a fire. The glasses, plastic cards or CD cases, etc. may deform or crack. Soft drink cans may fracture.
Parking brake reminder buzzer
A buzzer sounds intermittently to remind you to release the parking brake if you start the vehicle without fully releasing the parking brake. Check that the parking brake is fully released and the brake system warning light turns off.
OPERATING YOUR VEHICLE
Pedal
Manual transmission
80J2121
Automatic transmission
80J2122
3-6
Page 171 of 421

NOTICE
Pay attention to shifting the transfer lever safely when driving your vehicle.
NOTE: After shifting the transfer lever from "2H'" to "4H", check that the 4WD indicator
light comes on. After shifting the transfer lever from "4H" to "2H", check that the 4WD indicator goes off. ·
When 4WD indicator fight is blinking after shifting the transfer fever to "4H" position, accelerate, slow down your vehicle or stop and reverse your vehicle a little to shift the transfer lever. Pay attention to the vehicles and the circumference toward or backward your vehicle when shifting the transfer fever. When you shift the transfer fever while turning the steering wheel or depressing the accelerator pedal, shifting the transfer fever may be difficult. Operate the transfer fever while driving at low speed if it may be difficult to shift the transfer fever from "2H" position to "4H" position when the vehicle is stopped.
Shift the transfer fever again after decelerating or stopping the vehicle if it may be difficult to shift the transfer fever from "2H" position to "4H" position while driving or when the gear noise occurs. There may be a case to operate the transfer fever heavily when shifting the transfer lever from "4H" position to "2H" P_Osition while driving. In this case, position the front wheels straight ahead and drive for a while and then operate shifting the transfer fever again. When the transfer lever is shifted from 2H" position to "4H" position or from "4H" position to 2H" position and the air locking hubs are activated, the air conditioning system may not be operated for several seconds. This is not a malfunction. When the ignition switch is turned "ON" after the transfer fever is shifted from 2H" position to "4H" position or from "4H" position to 2H" position while stopping the engine, 4WD indicator light may blink. This is not a malfunction.
OPERATING YOUR VEHICLE
78RB03027
Stop the vehicle completely, place the transmission in "N" (Neutral) or depress the clutch pedal fully (if equipped), then shift the transfer lever from "4H" position to "4L" position by pressing the transfer lever.
3-20
Page 181 of 421
Situations where the system does not activate Under the following situations, the system does not activate. When the engine is off When dual sensor brake support indicator light and lane departure warning indicator light are initially lighting immediately after the ignition switch is turned to "ON". When the gearshift lever is in reverse gear When the ESP® system is activated (except the frontal collision warning) When the following switches are pushed and the system is turned off: -Dual sensor brake support OFF switch -ESP® OFF switch
When the dual sensor is temporarily stopped or malfunctioning
Situations where the system may not activate properly Under the following situations, the system may not activate. When the dual sensor cannot detect a vehicle or a pedestrian in front of your vehicle Refer to "Handling dual sensor" in the "OPERATING YOUR VEHICLE" section. When you take evasive action with the steering wheel or accelerator pedal
Situations where the vehicle may not decelerate properly Under the following situations, the vehicle may not decelerate properly even when the system is activated. When the outside temperature is low, or when the temperature of the brake is low such as right after starting When the brake is overheating and the brake effect is deteriorated due to continuing to travel on a downhill road When the brake effect is deteriorated due to passing over puddles or washing the vehicle When driving on the following roads -On sharp curves or extremely rough surfaces -On a steep slope When driving on the following slippery surfaces -Frozen or snow-covered surfaces -Over manholes or metal construction plates -Gravel When driving in a rainy day
OPERATING YOUR VEHICLE
Situations where the system may activate by chance Under the following situations, the dual sensor may judge that there is a vehicle or a pedestrian in front of you, and the system may activate. Drive carefully and calmly. When passing through a toll booth with more than recommended speeds Before the parking lot gates or railroad crossing gates are opened fully When operating on hills that have varying slopes When you suddenly accelerate and approach the vehicle in front of you or on neighboring lane Front visibility is poor due to that there is water vapor, sand or smoke or when the vehicle in front of you or on oncoming lane is surrounded by exhaust gas, water or snow When passing through masses of water vapor or smoke When stopping close to an obstacle in. front of you When passing through near a vehicle or obstacle
3-30
Page 210 of 421
OPERATING YOUR VEHICLE
ABS warning light/ brake system
warning light
See "Braking" in this section.
Hill descent control system
The hill descent control system is designed to reduce the driver's workload when going down steep, rough and/or slippery hills where the vehicle cannot decelerate enough by engine braking alone. The hill descent control system helps to control vehicle speed by automatically engaging the vehicle's brakes, as needed, so you can concentrate on steering the vehicle.
.A. WARNING
Do not rely excessively on the hill descent control system. The hill descent control system may not control the vehicle speed on a hill under all load or road conditions. Always be prepa!ed to control vehicle speed by applying the brakes. Failure to pay attention and control vehicle speed using the brakes when necessary may result in loss of control or an accident.
3-59
Hill descent control switch
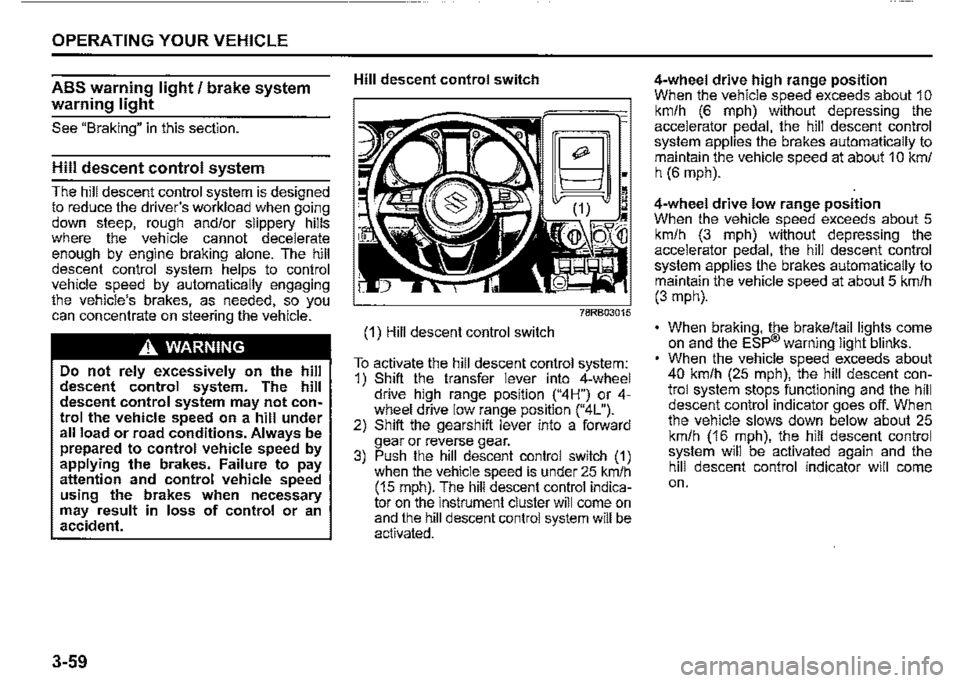
(1) Hill descent control switch
~;
~~~:~M
To activate the hill descent control system: 1) Shift the transfer lever into 4-wheel drive hiQh range position ("4H") or 4-wh!"el drive low '.ange position ("4L"). 2) Shift the gearsh1ft lever into a forward gear or reverse gear. 3) Push the hill descent control switch (1) when the vehicle speed is under 25 km/h (15 mph). The hill descent control indicator on the instrument cluster will come on and the hill descent control system will be activated.
4-wheel drive high range position When the vehicle speed exceeds about 1 o km/h (6 mph) without depressing the accelerator pedal, the hill descent control system applies the brakes automatically to maintain the vehicle speed at about 1 O km/ h (6 mph).
4-wheel drive low range position When the vehicle speed exceeds about 5 km/h (3 mph) without depressing the accelerator pedal, the hill descent control system applies the brakes automatically to maintain the vehicle speed at about 5 km/h (3 mph).
• When braking, the brake/tail lights come on and the ESP® warning light blinks. When the vehicle speed exceeds about 40 km/h (25 mph), the hill descent control system stops functioning and the hill descent control indicator goes off. When the vehicle slows down below about 25 km/h (16 mph), the hill descent control system will be activated again and the hill descent control indicator will come on.
Page 211 of 421
A WARNING
• When the hill descent control system is used continuously for a long time, the temperature of the bra~e system may increase and the hill descent control system may be deactivated temporarily to protect the device of the brake system. The hill descent control indicator blinks to let you know the system is deactivated. Depress the brake pedal and stop the vehicle in a safe place. When the temperature of the brake system goes down, the hill descent control indicator will come on and the system is activated again. • The hill descent control system may be activated when the gearshift lever is in "N" (Neutral) posi~ tion, but engine braking will not work. Always use the hill descent control system with the gearshift lever in a forward gear or reverse
gear. When using the hill descent control system, push the hill descent control switch and make sure that the hill descent control indicator light comes on and no warning message are indicated on the information display.
NOTE: You may hear a sound coming from the engine when the hill descent control system is activated. This sound is normal and does not indicate a malfunction.
To turn off the hill descent control system, push the hill descent control switch and turn off the hill descent control indicator
light.
OPERATING YOUR VEHICLE
Hill descent control indicator light
79K050
When the ignition switch is in "ON" position, this light comes on briefiy so you can check that the light is working.
When you push the hill descent control switch and the hill descent control operating conditions are fulfilled, the hill desce~t control indicator comes on. If the hill descent control indicator blinks, the hill descent control will not be activated.
If hill descent control indicator light comes on while not operating the hill descent control switch, or the indicator light does not come on after the switch is pushed, there is a problem in this system. Have your vehicle inspected by a SUZUKI dealer.
3-60
Page 212 of 421
OPERATING YOUR VEHICLE
NOTE: If the hill descent control indicator blinks when you push the hill descent control switch, check the following conditions. • The transfer lever is in 4-wheel drive high range position ("4H'? or 4-wheel drive low range position("4L '? • The gearshift lever is in a forward gear or reverse gear • The vehicle speed is under 25 km/h (15 mph) • The brake system is under normal oper-ating temperature
NOTE: If any of the following conditions occur, there may be a problem with the hill descent control system or the ESP8 system. Have your vehicle inspected by a SUZUKI dealer. The hill descent control indicator does not come on or blink when you push the hill descent control switch. The hill descent control indicator stays on when driving without pushing the hill descent control switch.
3-61
ESP
HILL HOLD DISABLE
75RM224
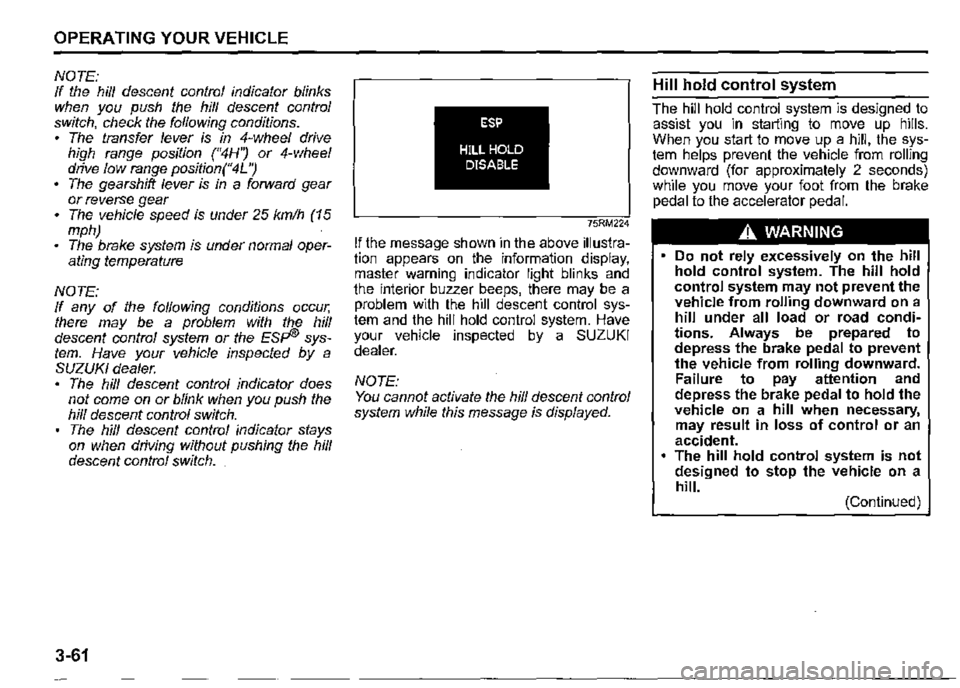
If the message shown in the above illustration appears on the information display, master warning indicator light blinks and the interior buzzer beeps, there may be a problem with the hill descent control system and the hill hold control system. Have your vehicle inspected by a SUZUKI dealer.
NOTE: You cannot activate the hill descent control system while this message is displayed.
Hill hold control system
The hill hold control system is designed to assist you in starting to move up hills. When you start to move up a hill, the system helps prevent the vehicle from rolling downward (for approximately 2 seconds) while you move your foot from the brake pedal to the accelerator pedal.
A WARNING
• Do not rely excessively on the hill hold control system. The hill hold control system may not prevent the vehicle from rolling downward on a hill under all load or road conditions. Always be prepared to depress the brake pedal to prevent the vehicle from rolling downward. Failure to pay attention and depress the brake pedal to hold the vehicle on a hill when necessary, may result in loss of control or an accident. The hill hold control system is not designed to stop the vehicle on a hill. (Continued)
Page 213 of 421
A WARNING
(Continued) After you release your foot from the brake pedal, accelerate the vehicle to move up immediately. If you release your foot from the brake pedal over 2 seconds, the hill hold control system will be canceled. If so, the vehicle may roll downward, which can result in an accident depending on the degree of slope. And, the engine may stall and the power assist for the steering and brakes will not work so steering and braking will be much harder than usual which can result in an accident or vehicle damage. If you drive on the steep slope, the gravel, the sclnow-covered road, or the muddy r I'd and the hill hold control system is activated, there may be a possibility that the wheels will be locked and then the vehicle may lose the control.
The hill hold control system activates for a maximum of about 2 seconds if your foot is moved from the brake pedal when the following conditions are all met.
1) The gearshift lever is in a forward gear or reverse gear. 2) The parking brake is released. 3) The vehicle is on an upward incline.
NOTE: When the hill hold control system is activated, the following conditions may be found, but this is not a malfunction. You may hear a sound from the engine room. As brake pedal becomes heavy, it may be difficult for you to depress it.
ESP
HILL HOLD DISABLE
75RM224
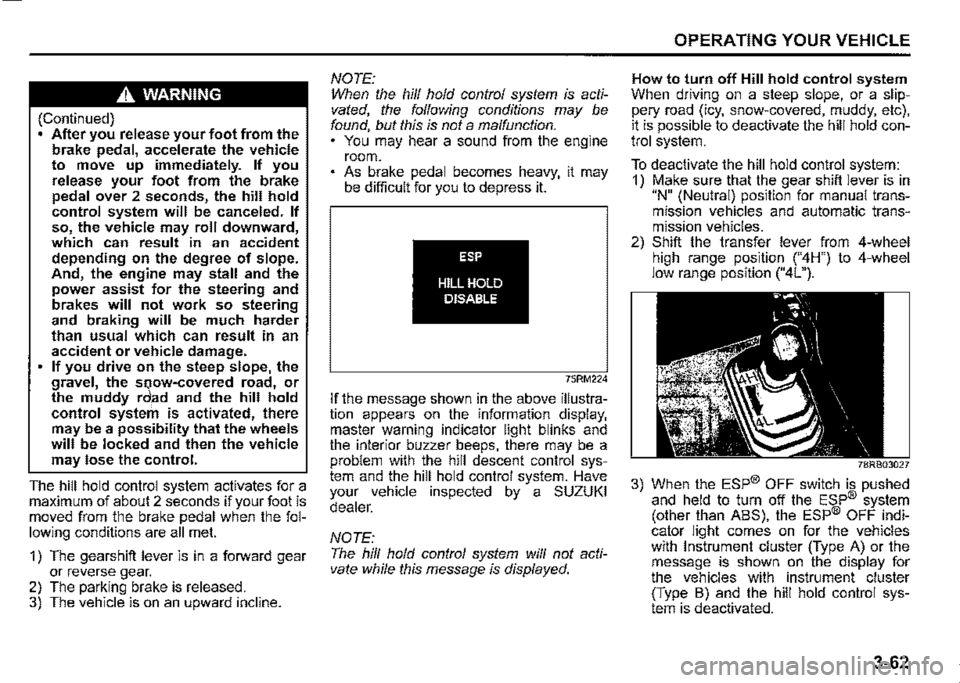
If the message shown in the above illustration appears on the information display, master warning indicator light blinks and the interior buzzer beeps, there may be a problem with the hill descent control system and the hill hold control system. Have your vehicle inspected by a SUZUKI dealer.
NOTE: The hill hold control system will not activate while this message is displayed.
OPERATING YOUR VEHICLE
How to turn off Hill hold control system When driving on a steep slope, or a slippery road (icy, snow-covered, muddy, etc), it is possible to deactivate the hill hold control system.
To deactivate the hill hold control system: 1) Make sure that the gear shift lever is in "N" (Neutral) position for manual transmission vehicles and automatic transmission vehicles. 2) Shift the transfer lever from 4-wheel high range position ("4H") to 4-wheel low range position ("4L").
78RB03027
3) When the ESP® OFF switch is pushed and held to turn off the ESP® system (other than ABS), the ESP® OFF indicator light comes on for the vehicles with Instrument cluster (Type A) or the message is shown on the display for the vehicles with instrument cluster (Type B) and the hill hold control system is deactivated.
3-62
Page 364 of 421
INSPECTION AND MAINTENANCE
Bulb replacement
_A CAUTION
Light bulbs can be hot enough to burn your finger right after turning off lights. This is true especially for halogen headlight bulbs. Replace the bulbs after they become cool enough.
The headlight bulbs are filled with pressurized halogen gas. They can burst and injure you if they are hit or dropped. Handle them carefully. To avoid injury by sharp-edged parts of the body, wear gloves and a long-sleeved shirt when replacing light bulbs.
NOTICE
The oils from your skin may cause a halogen bulb to overheat and burst when the lights are on. Grasp a new bulb with a clean cloth.
NOTICE
Frequent bulb replacement indicates the need for an inspection of the electrical system. This should be carried out by a SUZUKI dealer.
6-47
Headlights
LED type
Since special procedures are required, it is recommended that you take your vehicle to a SUZUKI dealer for light replacement.
Halogen type
78RB07025
(1) Bulb
8~'",,,
""
'\:~
(3) ~f I r-,.t:: l'1
Jlilt10or\01 ~o
"-" [l!l ,Q
78RB07026
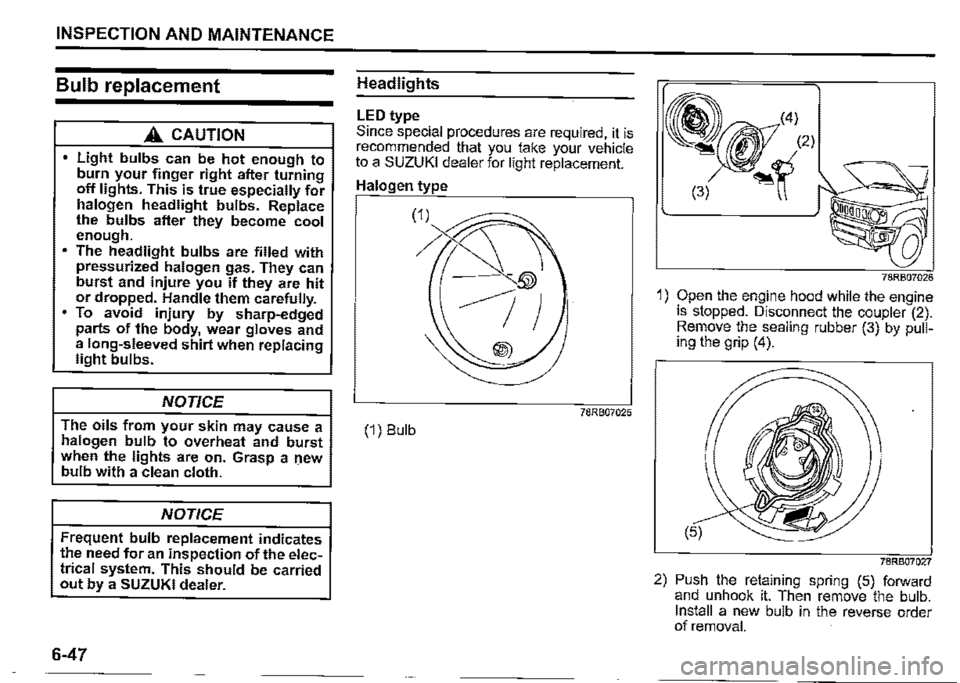
1) Open the engine hood while the engine is stopped. Disconnect the coupler (2). Remove the sealing rubber (3) by pulling the grip (4).
78RB07027
2) Push the retaining spring (5) forward and unhook it. Then remove the bulb. Install a new bulb in the reverse order of removal.
Page 383 of 421
78R808004
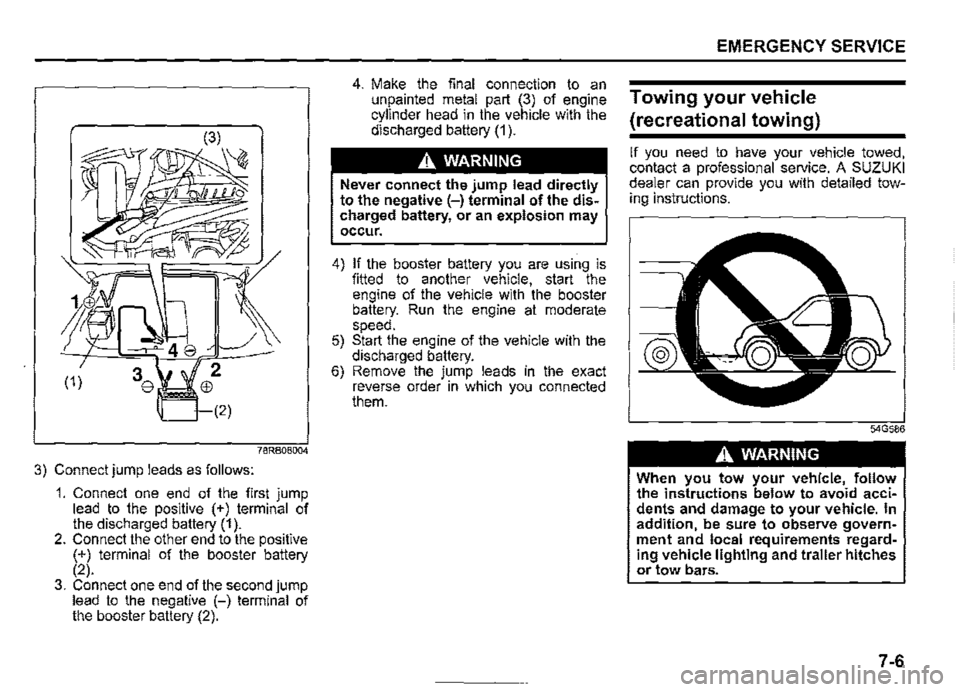
3) Connect jump leads as follows:
1. Connect one end of the first jump lead to the positive (+) terminal of the discharged battery (1 ). 2. Connect the other end to the positive (+) terminal of the booster battery (2). 3. Connect one end of the second jump lead to the negative (-) terminal of the booster battery (2).
4. Make the final connection to an unpainted metal part (3) of engine cylinder head in the vehicle with the discharged battery (1 ).
A WARNING
Never connect the jump lead directly to the negative (-) terminal of the discharged battery, or an explosion may occur.
4) If the booster battery you are using is fitted to another vehicle, start the engine of the vehicle with the booster battery. Run the engine at moderate speed. 5) Start the engine of the vehicle with the discharged battery. 6) Remove the jump leads in the exact reverse order in which you connected them.
EMERGENCY SERVICE
Towing your vehicle
(recreational towing)
If you need to have your vehicle towed, contact a professional service. A SUZUKI dealer can provide you with detailed towing instructions.
A WARNING
When you tow your vehicle, follow the instructions below to avoid accidents and damage to your vehicle. In addition, be sure to observe government and local requirements regarding vehicle lighting and trailer hitches or tow bars.
7-6