seats SUZUKI KIZASHI 2010 1.G User Guide
[x] Cancel search | Manufacturer: SUZUKI, Model Year: 2010, Model line: KIZASHI, Model: SUZUKI KIZASHI 2010 1.GPages: 388, PDF Size: 4.94 MB
Page 83 of 388
2-64
BEFORE DRIVING
57L20-03E
How the System WorksIn a frontal collision, the crash sensors will
detect rapid deceleration and send a signal
to the controller. If the controller judges
that the deceleration represents a severe
frontal crash, the controller will trigger the
inflators. The controller also judges:
Whether the front air bags should deploy
at reduced power or at full power accord-
ing to crash severity.
Whether the air bags should deploy at
reduced power or at full power according
to crash severity.
Whether the front passenger’s front air
bag should deploy or not based on clas-
sification of the occupant of the front
passenger’s seat.
Since your vehicle is equipped with front
side air bags, rear side air bags and side
curtain air bags, crash sensors will detect
a side collision, and if the controller judges
that the side collision is severe enough, it
will trigger the front side air bag, rear side
air bags and side curtain air bag inflators.
The inflators inflate the appropriate air
bags with nitrogen or argon gas. The
inflated air bags provide a cushion for your
head (front air bags and side curtain air
bags only) and upper body. The air bag
inflates and deflates so quickly that you
may not even realize that it has activated.
The air bag will neither hinder your view
nor make it harder to exit the vehicle.
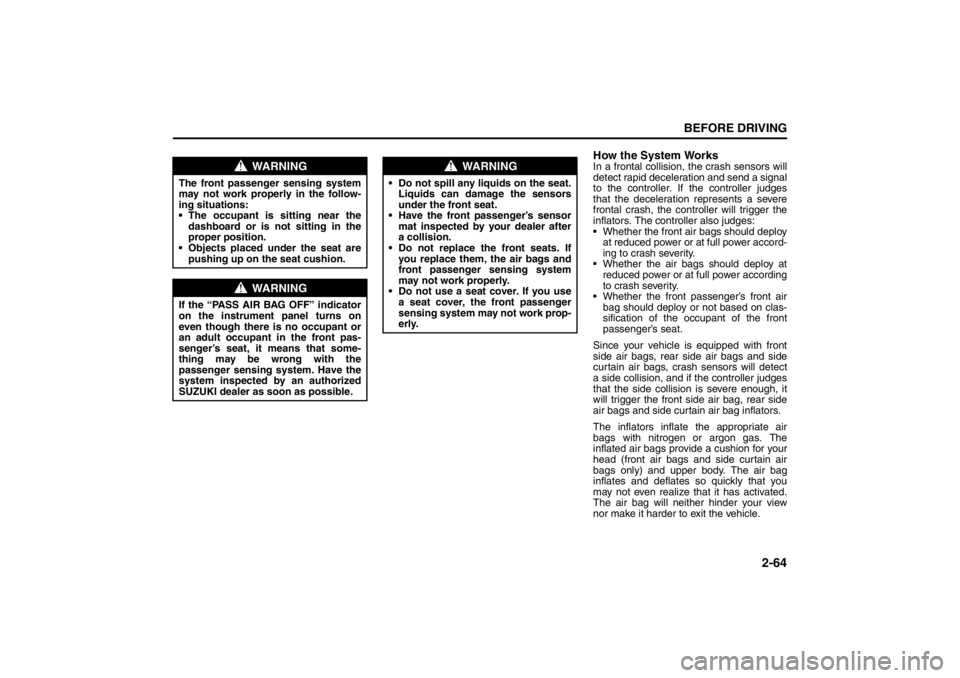
WARNING
The front passenger sensing system
may not work properly in the follow-
ing situations:
The occupant is sitting near the
dashboard or is not sitting in the
proper position.
Objects placed under the seat are
pushing up on the seat cushion.
WARNING
If the “PASS AIR BAG OFF” indicator
on the instrument panel turns on
even though there is no occupant or
an adult occupant in the front pas-
senger’s seat, it means that some-
thing may be wrong with the
passenger sensing system. Have the
system inspected by an authorized
SUZUKI dealer as soon as possible.
WARNING
Do not spill any liquids on the seat.
Liquids can damage the sensors
under the front seat.
Have the front passenger’s sensor
mat inspected by your dealer after
a collision.
Do not replace the front seats. If
you replace them, the air bags and
front passenger sensing system
may not work properly.
Do not use a seat cover. If you use
a seat cover, the front passenger
sensing system may not work prop-
erly.
Page 84 of 388

2-65BEFORE DRIVING
57L20-03E
Air bags must inflate quickly and forcefully
in order to reduce the chance of serious or
fatal injuries. However, an unavoidable
consequence of the quick inflation is that
the air bag may irritate bare skin, such as
the facial area against a front air bag. Also,
upon inflation, a loud noise will occur and
some powder and smoke will be released.
These conditions are not harmful and do
not indicate a fire in the car. Be aware,
however, that some air bag components
may be hot for a while after inflation.
A seat belt helps keep you in the proper
position for maximum protection when an
air bag inflates. Adjust your seat as far
back as possible while still maintaining
control of the vehicle. Sit fully back in your
seat; sit up straight; do not lean over the
steering wheel or dashboard. Front occu-
pants should not lean on or sleep against
the door. Please refer to the “Seat Adjust-
ment” section and the “Seat Belts and
Child Restraint Systems” section in the
“BEFORE DRIVING” section for details on
proper seat and seat belt adjustments.
65D610
54G582
WARNING
The driver should not lean over the
steering wheel. The front passen-
ger should not rest his or her body
against the dashboard, or other-
wise get too close to the dash-
board. For vehicles with side air
bags, rear side air bags and side
curtain air bags, occupants should
not lean on or sleep against the
door. In these situations, the out-of-
position occupant would be too
close to an inflating air bag, and
may suffer severe injury.
Do not attach any objects to, or
place any objects over, the steering
wheel or dashboard. Do not place
any objects between the air bag
and the driver or front passenger.
These objects may interfere with air
bag operation or may be propelled
by the air bag in the event of a
crash. Either of these conditions
may cause severe injury.
For vehicles with front side air
bags, do not place seat covers on
the front seats, because seat cov-
ers could restrict the air bag’s infla-
tion. Also, do not place any cup
holders or other objects on the
door, as these objects could be
propelled by the air bag in the event
of a crash. Either of these condi-
tions may cause severe injury.
Page 141 of 388
3-10
OPERATING YOUR VEHICLE
57L20-03E
Steering lock warning buzzer
If the steering lock fails to engage due to a
fault in the system even when you press
the engine switch to change the ignition
mode to “LOCK” (OFF), the interior buzzer
will warn you of this condition with
repeated short beeps. If this happens,
have the vehicle inspected by an autho-
rized SUZUKI dealer.
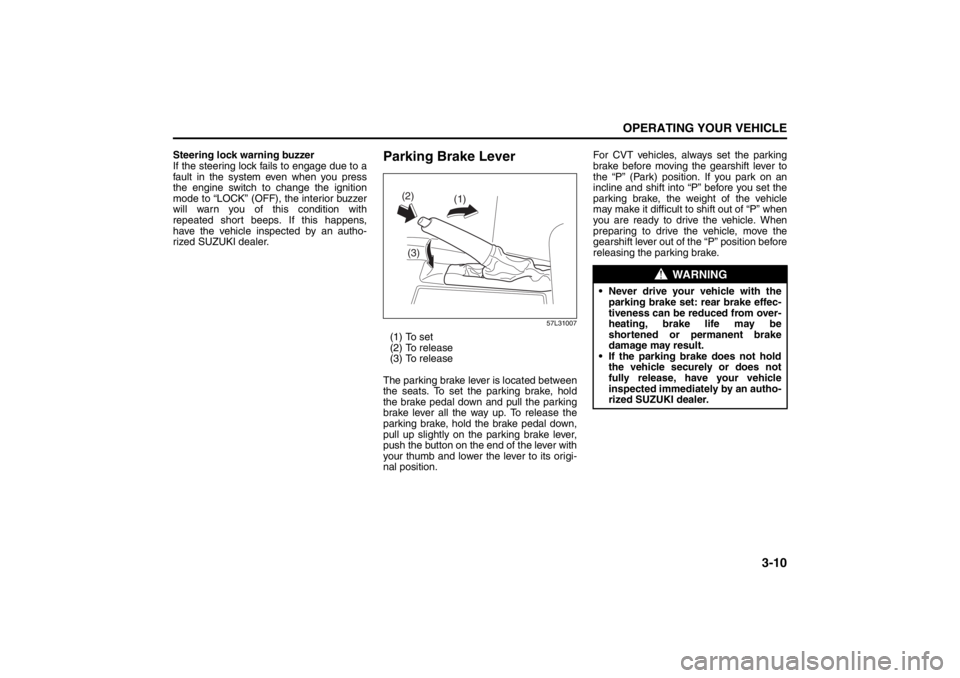
Parking Brake Lever
57L31007
(1) To set
(2) To release
(3) To release
The parking brake lever is located between
the seats. To set the parking brake, hold
the brake pedal down and pull the parking
brake lever all the way up. To release the
parking brake, hold the brake pedal down,
pull up slightly on the parking brake lever,
push the button on the end of the lever with
your thumb and lower the lever to its origi-
nal position. For CVT vehicles, always set the parking
brake before moving the gearshift lever to
the “P” (Park) position. If you park on an
incline and shift into “P” before you set the
parking brake, the weight of the vehicle
may make it difficult to
shift out of “P” when
you are ready to drive the vehicle. When
preparing to drive the vehicle, move the
gearshift lever out of the “P” position before
releasing the parking brake.
(1)
(2)
(3)
WARNING
Never drive your vehicle with the parking brake set: rear brake effec-
tiveness can be reduced from over-
heating, brake life may be
shortened or permanent brake
damage may result.
If the parking brake does not hold the vehicle securely or does not
fully release, have your vehicle
inspected immediately by an autho-
rized SUZUKI dealer.
Page 183 of 388

5-4
OTHER CONTROLS AND EQUIPMENT
57L20-03E
Driver’s temperature selector (1)/Pas-
senger’s temperature selector (2)
57L51003
Turn the temperature selector (1)/(2) to
adjust the temperature. The display (11)
shows the selected temperature.
NOTE:
If you turn the temperature selector (1)
until “HI” or “LO” appears on the display,
the climate control system will operate at
the maximum heating or cooling and the
blower will run at full speed. The tempera-
ture of the air from the outlets may change
suddenly while “LO” or “HI” is displayed,
but this is normal.“DUAL” switch (3)
Every time you press the “DUAL” switch
(3), the temperature control mode switches
between the following:
Individual control mode (indicatior ON):
The driver and passenger can make
temperature adjustments indepen-
dently from their own temperature
selectors.
Combined control mode (indicatior OFF):
If a temperature adjustment is made
from the driver’s temperature selector
(1), the same adjustment is made auto-
matically on the passenger side.
NOTE:
If the passenger’s temperature selector (2)
is turned while in the combined control
mode, the individual control mode is auto-
matically set.Blower speed selector (4)
57L51004
Air flows out at a higher rate when you
press the right switch and at a lower rate
when you press the left switch.
If the “AUTO” switch (9) is pushed, the
blower speed will vary automatically as the
climate control system maintains the
selected temperature.
(1)/(2)
(4)
(9)
Fuel Filler Cap: 5
Folding Rear Seats: 3
Page 184 of 388

5-5OTHER CONTROLS AND EQUIPMENT
57L20-03E
Air intake selector (5)
57L51005
Push the air intake selector (5) to change
between the following modes.
If the “AUTO” switch (9) is pushed, the air
intake will vary automatically as the climate
control system maintains the selected tem-
perature.
RECIRCULATED AIR (a)
When this mode is selected, outside air is
shut off and inside air is recirculated. This
mode is suitable when driving through an
area with polluted air such as a tunnel, or
when attempting to quickly cool down the
vehicle.FRESH AIR (b)
When this mode is selected, outside air is
introduced.
“FRESH AIR” and “RECIRCULATED AIR”
are selected alternately each time the air
intake selector is pushed.
NOTE:
If you select “RECIRCULATED AIR” for an
extended period of time, the air in the vehi-
cle can become contaminated. Therefore,
you should occasionally select “FRESH
AIR”.
“MODE” switch (6)
57L51006
Push the “MODE” switch (6) to change
among the following functions. The indica-
tion of the selected mode appears on the
display.If the “AUTO” switch (9) is pushed, the air
flow will vary automatically as the climate
control system maintains the selected tem-
perature.
Ventilation (c)
57L51007
Temperature-controlled air comes out of
the center, side and rear outlets.
(a)
(b)
(5)
(c)
(d)
(e)
(f)
(6)
Folding Rear Seats: 3
Page 185 of 388

5-6
OTHER CONTROLS AND EQUIPMENT
57L20-03E
Bi-level (d)
57L51008
Temperature-controlled air comes out of
the floor, center, side, rear and rear floor
outlets.
Heat (e)
57L51009
Temperature-controlled air comes out of
the floor, rear floor and the side outlets,
also comes out of the windshield defroster
outlets and also comes slightly out of the
side defroster outlets and the side outlets.
Heat & defrost (f)
57L51010
Temperature-controlled air comes out of
the floor and rear floor outlets, the wind-
shield defroster outlets, the side defroster
outlets and the side outlets.
All areas other than Mexico
NOTE:
When you select the “Heat & defrost” func-
tion, the air intake mode will automatically
switch to “FRESH AIR”.Defrost switch (7)
57L51011
Push the defrost switch (7) to turn on the
defroster.
Defrost
57L51012
(7)
Folding Rear Seats: 3
Page 186 of 388
5-7OTHER CONTROLS AND EQUIPMENT
57L20-03E
Temperature-controlled air comes out of
the windshield defroster outlets, the side
defroster outlets and the side outlets.
1. All areas other than Mexico
NOTE:
When you push the defrost switch (7), the
“FRESH AIR” mode will be automatically
selected and the air conditioning switch will
automatically turn on (“A/C” will appear on
the display). Furthermore, it is impossible
to return to the “RECIRCULATED AIR”
mode even if you push the air intake selec-
tor (5). In cold weather, air flows out of the
defroster outlets but the air conditioning
does not turn on even though the A/C indi-
cator comes on as well as the defrost indi-
cator.
2. Mexico
NOTE:
When you push the defrost switch (7), the
“FRESH AIR” mode will be automatically
selected and the air conditioning switch will
automatically turn on (“A/C” will appear on
the display). In cold weather, air flows out
of the defroster outlets but the air condi-
tioning does not turn on even though the A/
C indicator comes on as well as the defrost
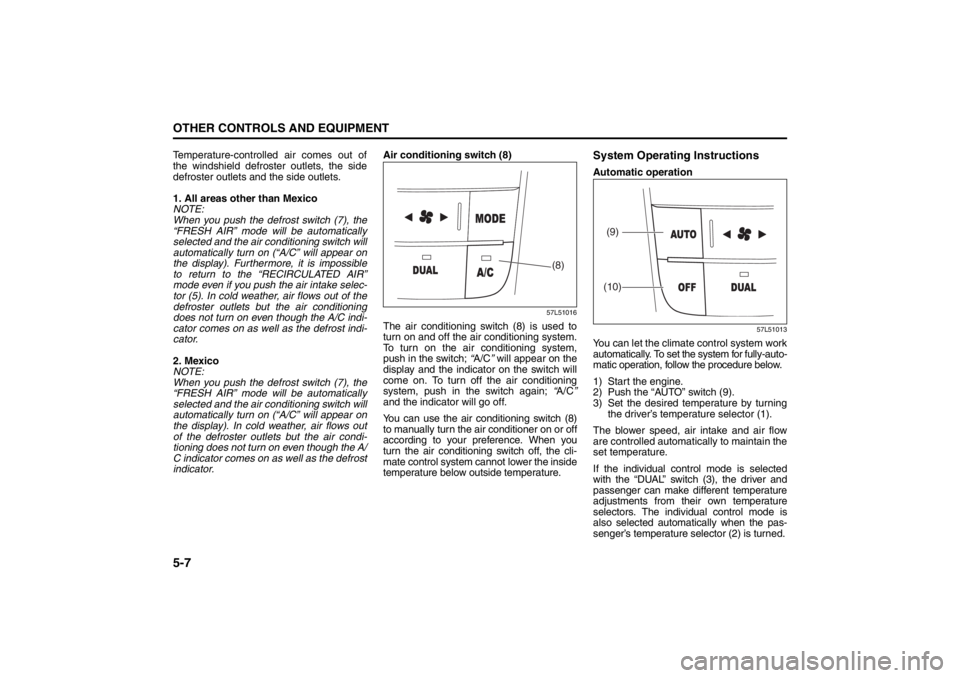
indicator.Air conditioning switch (8)
57L51016
The air conditioning switch (8) is used to
turn on and off the air conditioning system.
To turn on the air conditioning system,
push in the switch; “A/C” will appear on the
display and the indicator on the switch will
come on. To turn off the air conditioning
system, push in the switch again; “A/C”
and the indicator will go off.
You can use the air conditioning switch (8)
to manually turn the air conditioner on or off
according to your preference. When you
turn the air conditioning switch off, the cli-
mate control system cannot lower the inside
temperature below outside temperature.
System Operating InstructionsAutomatic operation
57L51013
You can let the climate control system work
automatically. To set the system for fully-auto-
matic operation, follow the procedure below.
1) Start the engine.
2) Push the “AUTO” switch (9).
3) Set the desired temperature by turning
the driver’s temperature selector (1).
The blower speed, air intake and air flow
are controlled automatically to maintain the
set temperature.
If the individual control mode is selected
with the “DUAL” switch (3), the driver and
passenger can make different temperature
adjustments from their own temperature
selectors. The individual control mode is
also selected automatically when the pas-
senger’s temperature selector (2) is turned.
(8)
(9)
(10)
Folding Rear Seats: 3
Page 187 of 388
5-8
OTHER CONTROLS AND EQUIPMENT
57L20-03E
To turn the climate control system off, push
the “OFF” switch (10).
NOTE:
If the “AUTO” on the display blinks, there is
a problem in the heating system and/or air
conditioning system. You should have the
system inspected by an authorized
SUZUKI dealer.
NOTE:
To find the temperature at which you are
most comfortable, start with the 72°F
(25°C) setting, for example.
If you turn the temperature selector (1)
until “HI” or “LO” appears on the display,
the climate control system will operate at
the maximum heating or cooling and the
blower will run at full speed.
To avoid blowing cold air in cold weather
or hot air in hot weather, the system will
delay turning on the blower until warmed
or chilled air is available.
If your vehicle has been left in the sun
with the windows closed, it will cool
faster if you open the windows briefly. Even under automatic operation, you
can set individual selectors to the man-
ual mode. The manually selected func-
tions are maintained, and the other
functions remain under automatic opera-
tion.
To return the blower speed selector (4),
air intake selector (5), and “MODE”
switch (6) to automatic operation, push
the “AUTO” switch (9).
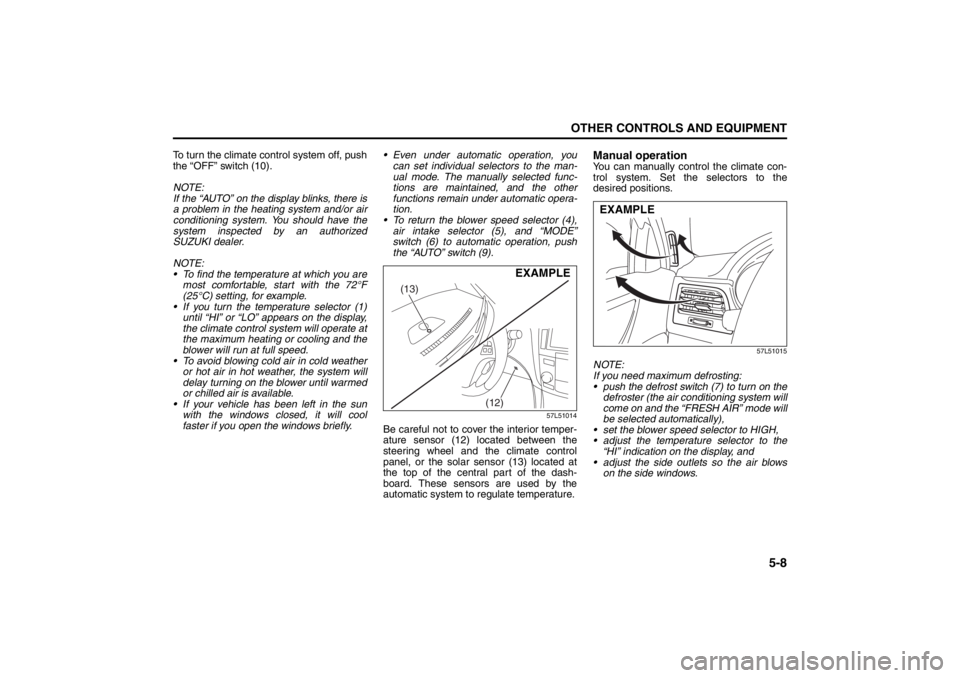
57L51014
Be careful not to cover the interior temper-
ature sensor (12) located between the
steering wheel and the climate control
panel, or the solar sensor (13) located at
the top of the central part of the dash-
board. These sensors are used by the
automatic system to regulate temperature.
Manual operationYou can manually control the climate con-
trol system. Set the selectors to the
desired positions.
57L51015
NOTE:
If you need maximum defrosting:
push the defrost switch (7) to turn on the
defroster (the air conditioning system will
come on and the “FRESH AIR” mode will
be selected automatically),
set the blower speed selector to HIGH,
adjust the temperature selector to the
“HI” indication on the display, and
adjust the side outlets so the air blows
on the side windows.
(13)
(12)
EXAMPLE
EXAMPLE
Folding Rear Seats: 3
Page 188 of 388
5-9OTHER CONTROLS AND EQUIPMENT
57L20-03E
MaintenanceIf you do not use the air conditioner for a
long period, such as during winter, it may
not give the best performance when you
start using it again. To help maintain opti-
mum performance and durability of your air
conditioner, it needs to be run periodically.
Operate the air conditioner at least once a
month for one minute with the engine
idling. This circulates the refrigerant and oil
and helps protect the internal components.
Your air conditioner is equipped with air fil-
ters. Clean or replace them as specified in
the “Maintenance Schedule” in the
“INSPECTION AND MAINTENANCE” sec-
tion. Have this job done by your SUZUKI
dealer as the lower glove box must be low-
ered for this job.
NOTE:
Your vehicle uses the air conditioning
refrigerant HFC-134a, commonly called
“R-134a”. R-134a replaced R-12 around
1993 for automotive applications. Other
refrigerants are available, including recy-
cled R-12, but only R-134a should be used
in your vehicle.
Radio AntennaPrinted antenna (if equipped)
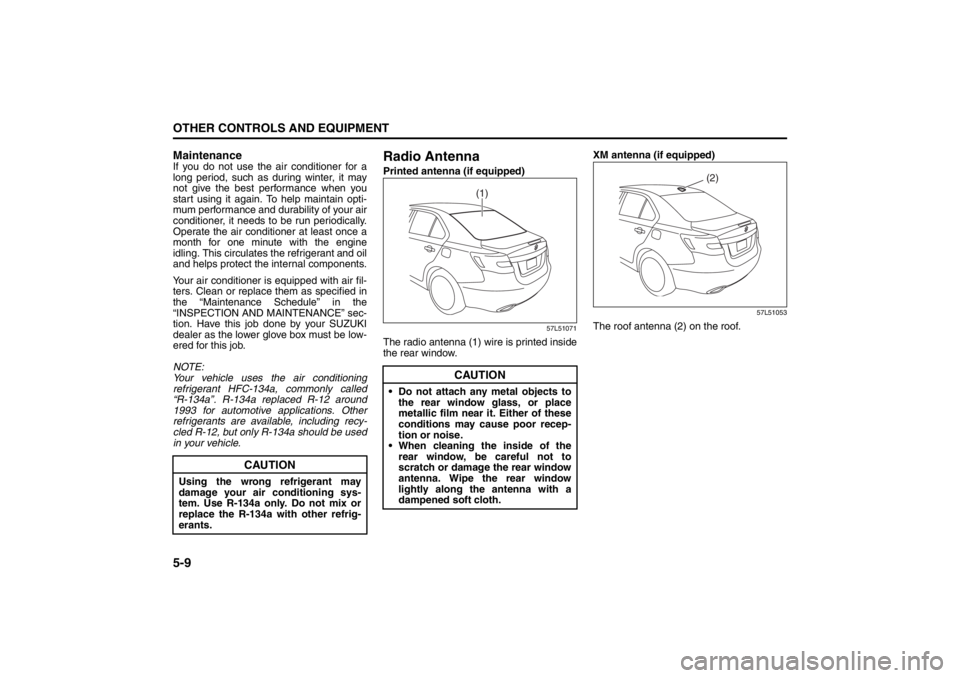
57L51071
The radio antenna (1) wire is printed inside
the rear window.XM antenna (if equipped)
57L51053
The roof antenna (2) on the roof.
CAUTION
Using the wrong refrigerant may
damage your air conditioning sys-
tem. Use R-134a only. Do not mix or
replace the R-134a with other refrig-
erants.
CAUTION
Do not attach any metal objects to
the rear window glass, or place
metallic film near it. Either of these
conditions may cause poor recep-
tion or noise.
When cleaning the inside of the
rear window, be careful not to
scratch or damage the rear window
antenna. Wipe the rear window
lightly along the antenna with a
dampened soft cloth.
(1)
(2)
Folding Rear Seats: 3
Armrest: 3
Page 310 of 388
7-25INSPECTION AND MAINTENANCE
57L20-03E
6) The handle of the CVT fluid dipstick is
colored red or orange for easy identifi-
cation.
Remove the dipstick, clean it and push
it back in until the cap seats. Pull out
the dipstick and read the fluid level.
The fluid level should be between the
two marks in the “HOT” range on the
dipstick.
7) Add just enough specified fluid through
the dipstick hole to fill the transaxle to
the proper level. It takes only 0.6 liters
(1.27 US pt) for CVT to raise the level
from “LOW” to “FULL”.Deterioration Checking or Chang-
ing FluidSince special procedures, materials and
tools are required to check the deteriora-
tion of CVT fluid or change, it is recom-
mended that you trust this job to your
authorized SUZUKI dealer.
BrakesBrake Fluid
57L71010
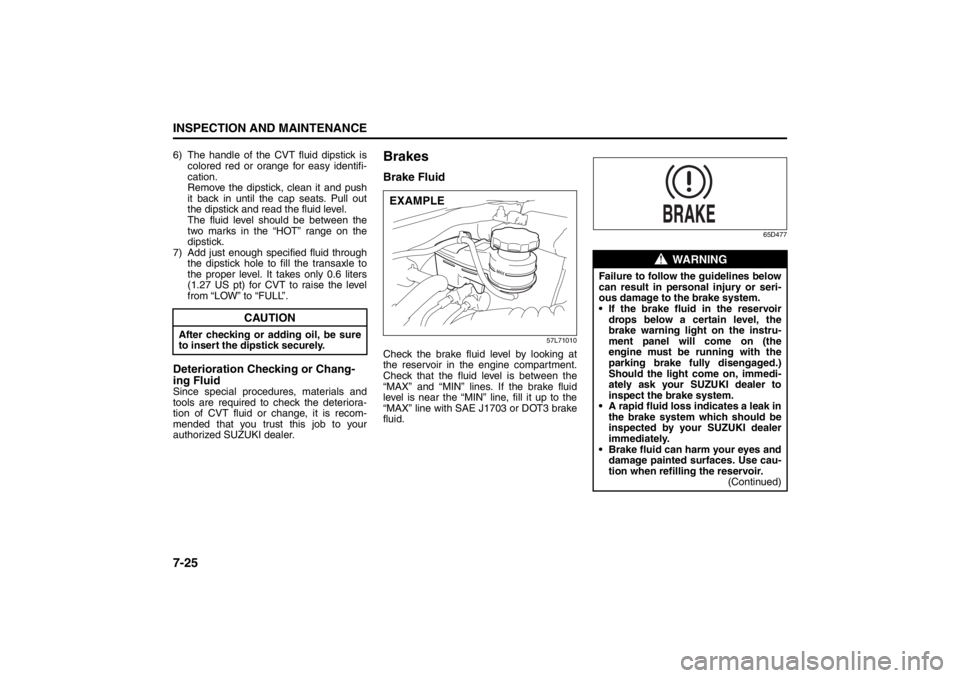
Check the brake fluid level by looking at
the reservoir in the engine compartment.
Check that the fluid level is between the
“MAX” and “MIN” lines. If the brake fluid
level is near the “MIN” line, fill it up to the
“MAX” line with SAE J1703 or DOT3 brake
fluid.
65D477
CAUTION
After checking or adding oil, be sure
to insert the dipstick securely.
EXAMPLE
WARNING
Failure to follow the guidelines below
can result in personal injury or seri-
ous damage to the brake system.
If the brake fluid in the reservoir
drops below a certain level, the
brake warning light on the instru-
ment panel will come on (the
engine must be running with the
parking brake fully disengaged.)
Should the light come on, immedi-
ately ask your SUZUKI dealer to
inspect the brake system.
A rapid fluid loss indicates a leak in
the brake system which should be
inspected by your SUZUKI dealer
immediately.
Brake fluid can harm your eyes and
damage painted surfaces. Use cau-
tion when refilling the reservoir.
(Continued)